#weaving tutorials
Explore tagged Tumblr posts
Visit Tumblr Blog
Explore Tumblr blogs with no restrictions, modern design and the best experience.
Last Seen Tumblr Blogs


Fun Fact
69% of Tumblr users are millennials.
Text
found this tutorial on how to make a 4 shaft weaving loom out of cardboard boxes, tape, glue, skewers, string, and a few other odds and ends.
it may not look pretty, but as an introduction to multi shaft weaving this could be a fun project that doesn't break the bank.
452 notes
·
View notes
Text


WE DON’T GATEKEEP WEAVING TECHNIQUES IN THIS HOUSEHOLD!
So to start this is double cloth (meaning I have two different warps, they’re threaded on 4 frames and each slot in the reed has two strings, one from each warp)

Step one: lift up the entirety of one warp (for me, pedals 2 and 4), then select the design with a pickup stick/sword/the fiber only thingy

Step 2: Go to your OTHER warp (1 and 3 for me) with the stick still in and do a back and forth of plain weave, take the stick out to beat

Step 3: Pick up the background with the stick (aka anything you didn’t pick up before, 1 and 3 for me)

Step four: Plain weave with the other warp AND a different weft (2 and 4 for me) take out the stick and beat

Step 5: Repeat! You can do this with any pixel designs, provided you have enough warp strings to have 2 per square
Fair warning, be EXTREMELY careful with your selvages (edges of the warp), they pull in the sides a lot more than regular plain weave. Happy weaving!
#shoutout to the tour that dropped by the studio while I was working#I was wearing a merch shirt that belongs to an entirely different school#free advertising?#artwork#artists on tumblr#art#fiber art#fiber crafts#dragon art#hand weaving#loom weaving#weaving#tutorial
520 notes
·
View notes
Text

Various Log Cabin Quilt Blocks
#quilting#briar rose quilts#bedding#shopping#sewing#quilters of tumblr#decor#gifts#crafts#holiday#quilt#quilt pattern#quiltblr#quilt tutorial#textile art#quilting as art#embroidery#fabric arts#art quilt#weaving#log cabin blocks#log cabin quilt#courthouse steps#courthouse steps quilt
73 notes
·
View notes
Text
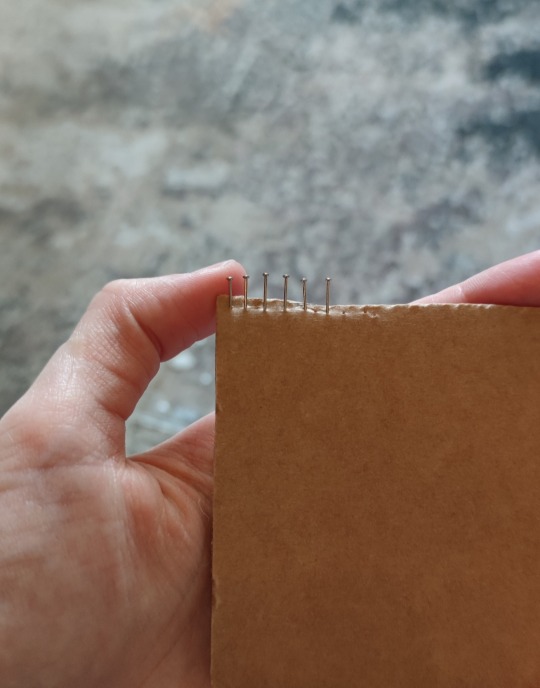
How I make myself a minx loom form test weaves
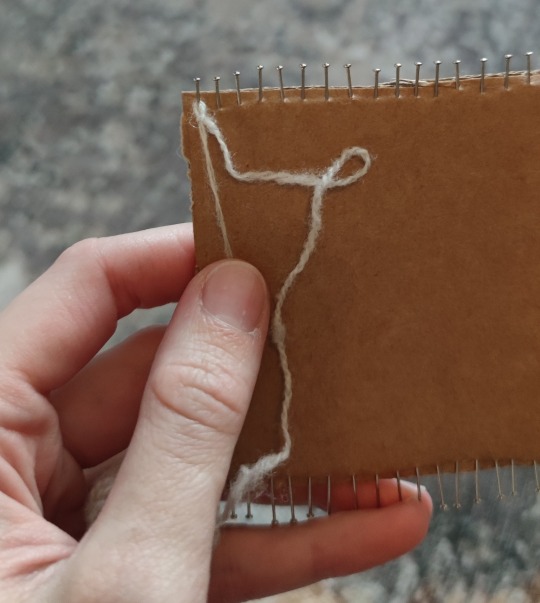
Take some cardboard box and stick some pins on both sides with desired distance
Like this for example
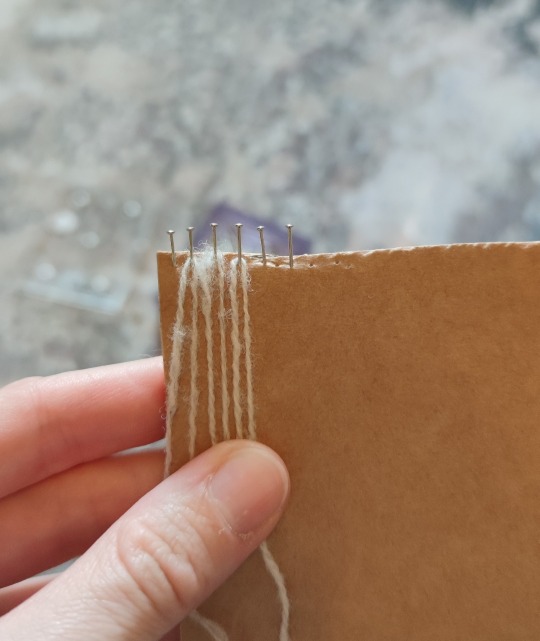
To test if you like the distance, just wrap.sime yarn around
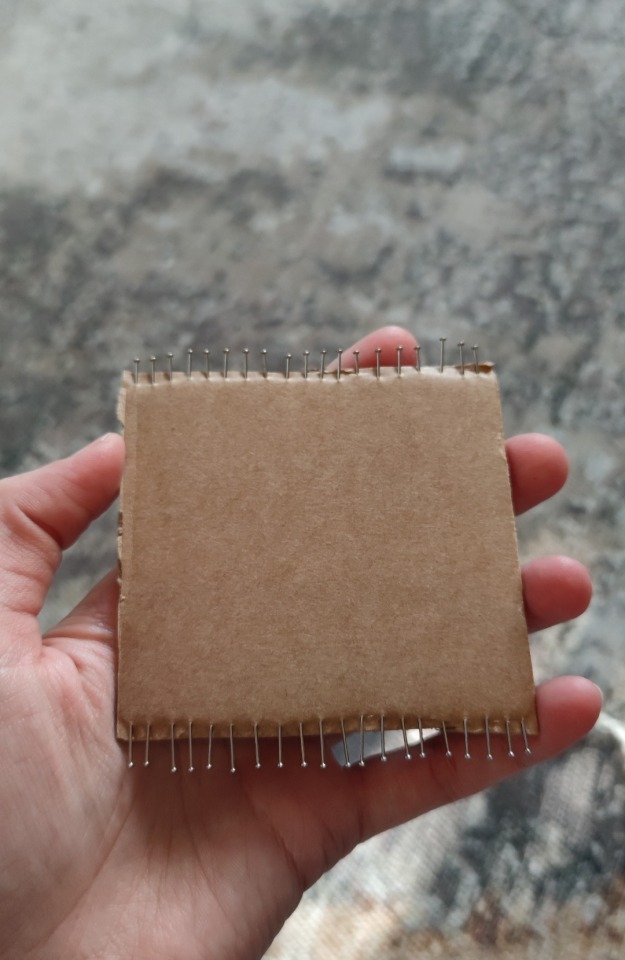
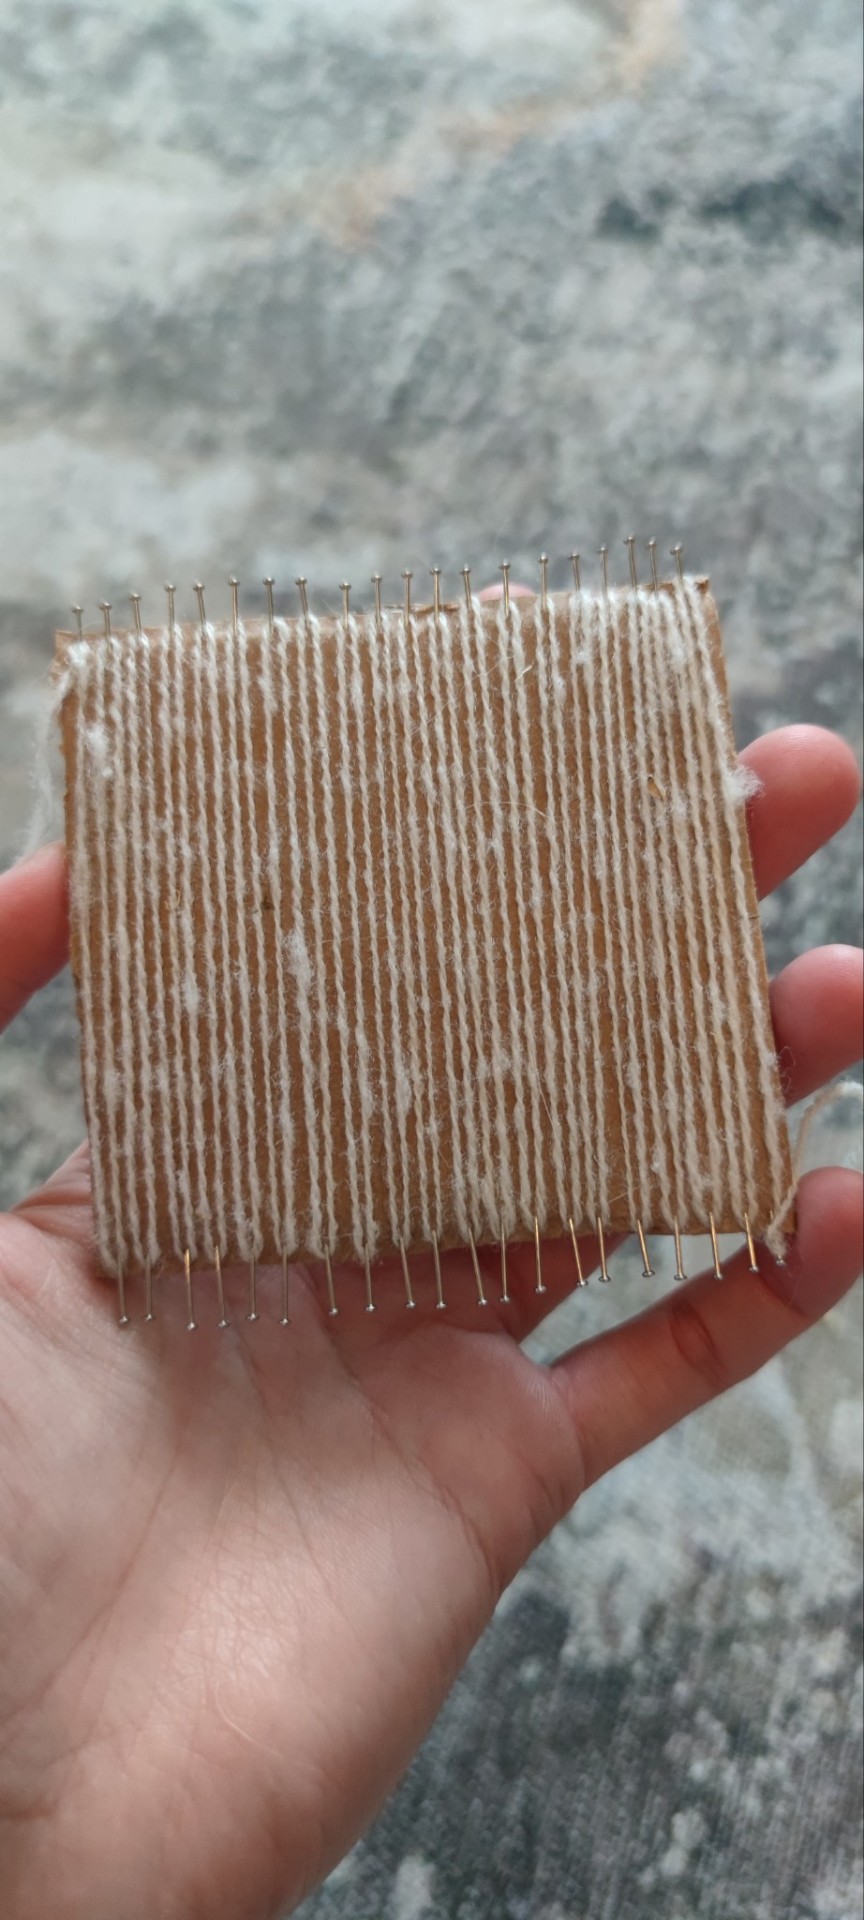
Now fill opposite sides of the cardboard with the pins
Tadaa make Shure you have the same amount of pins on both sides, stick them into the side of the "waves" so it doesn't binge when you warp it.
Each pin should have one on the opposite. Don't pin them offset
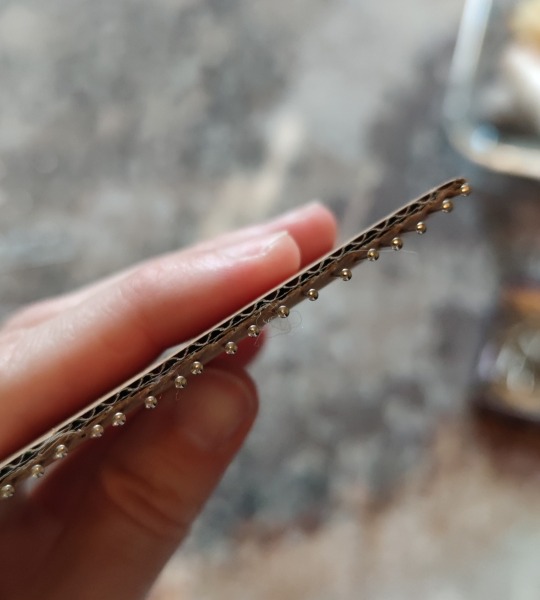
Also make Shure the pointy ends stay in the cardboard, so you don't hurt yourself
Fix your warp yarn and warp :D
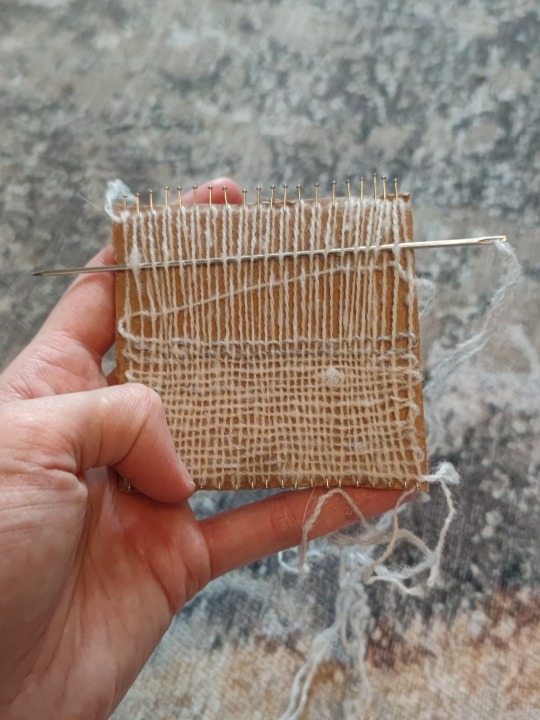
Then tread your weave yarn, and weave! (I have some needle tatting needles that make it much more easy)
If done, remove pins and finish as you want the future project to be finished
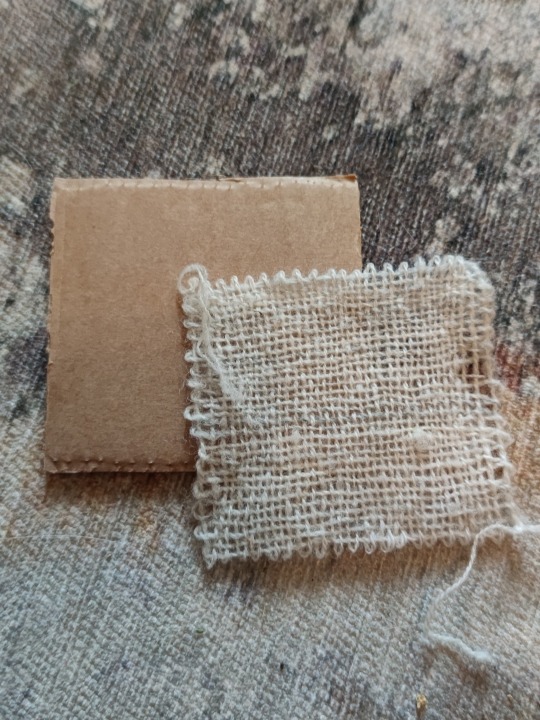
If you want a fringe elongate the cardboard :D
And now you can make yourself a mini loom for tests :3
238 notes
·
View notes
Text


~ tommy fictive
#first attempt at a web weave !! can't find any tutorials :\#web weave#web weaving#ctommy#c!tommy#tommy#c!tommyinnit#tommyinnit#c!dsmp#dsmp#dream smp#c!tommy angst#angst
164 notes
·
View notes
Text

DIY Macrame Easter Basket
15 notes
·
View notes
Text
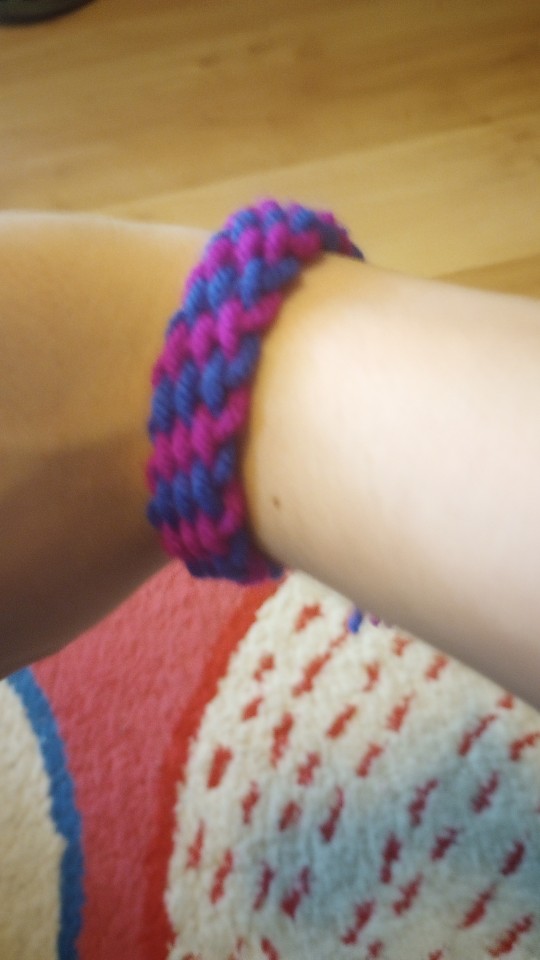
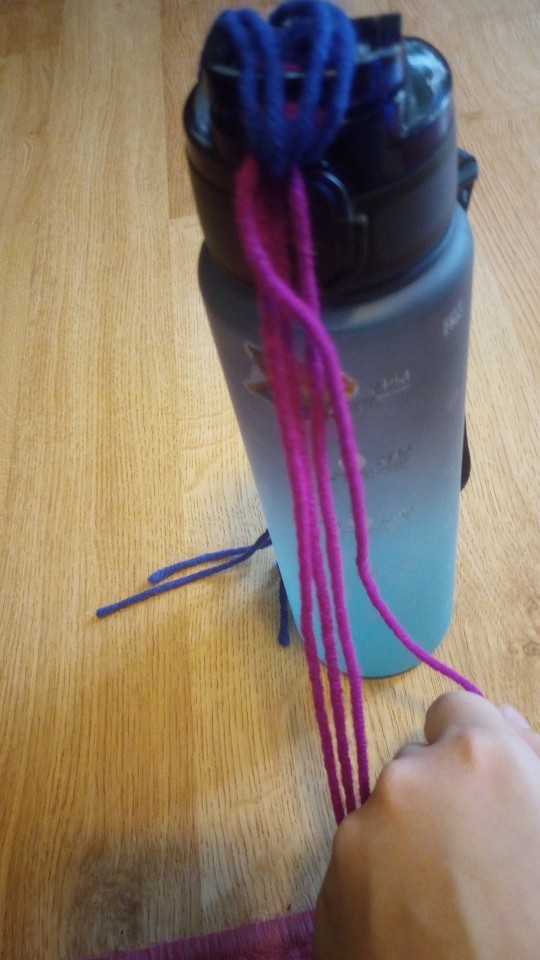
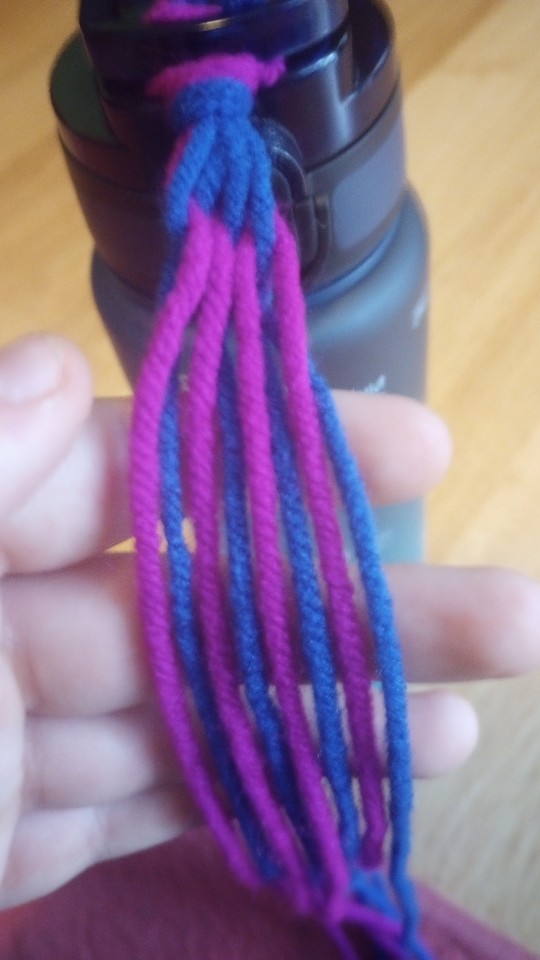
Finger-woven bracelet tutorial! (Part one)
Note: this is a very simplified version of what is originally an indigenous craft. I am learning this craft and sharing it with others with respect for its origins.
You will need:
- At least two colours of yarn/string, I recommend thicker yarn while you're learning
- Something to hold it in place
Step one:
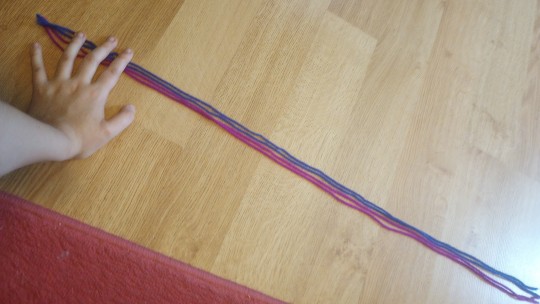
Cut yourself two lengths of yarn from each colour. We'll be folding them in half, so make them pretty long- here's what I used, for scale.
Step two:
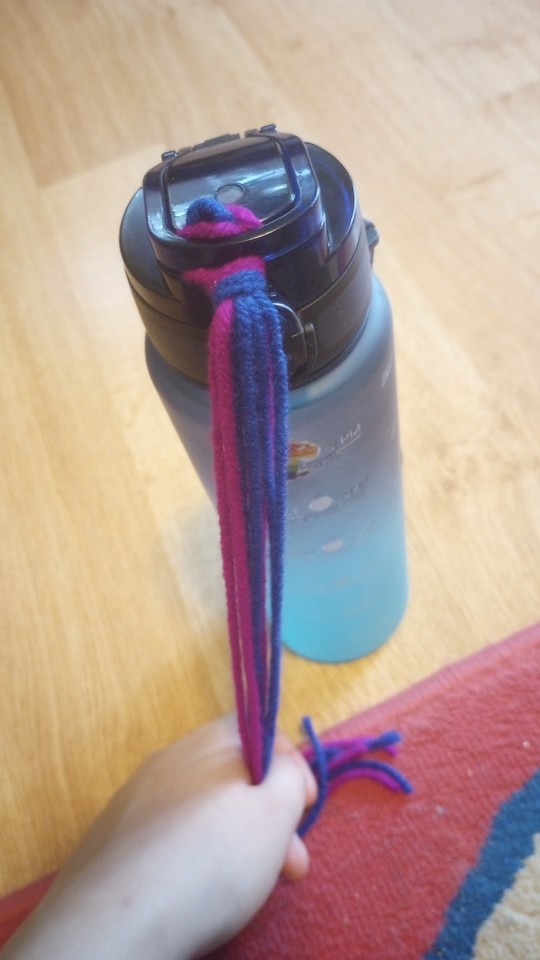
Fold the yarn in half and tie a slipknot.
Tighten it to your preference- a small slipknot will make it a little bit easier to make into a bracelet.
Step three:
Pin your yarn or thread to something to hold it in place- I use the clasp on my water bottle, but while learning I recommend taping it to a flat surface like a table.
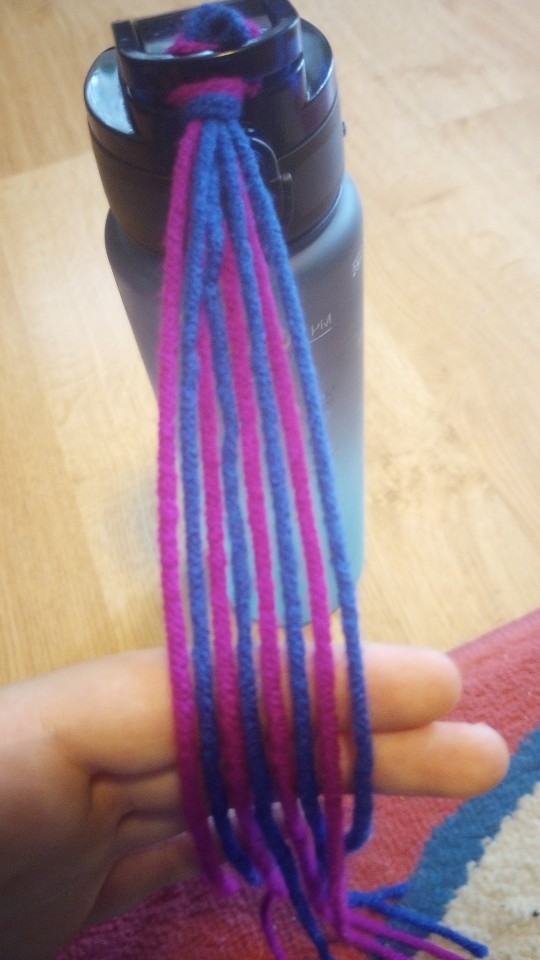
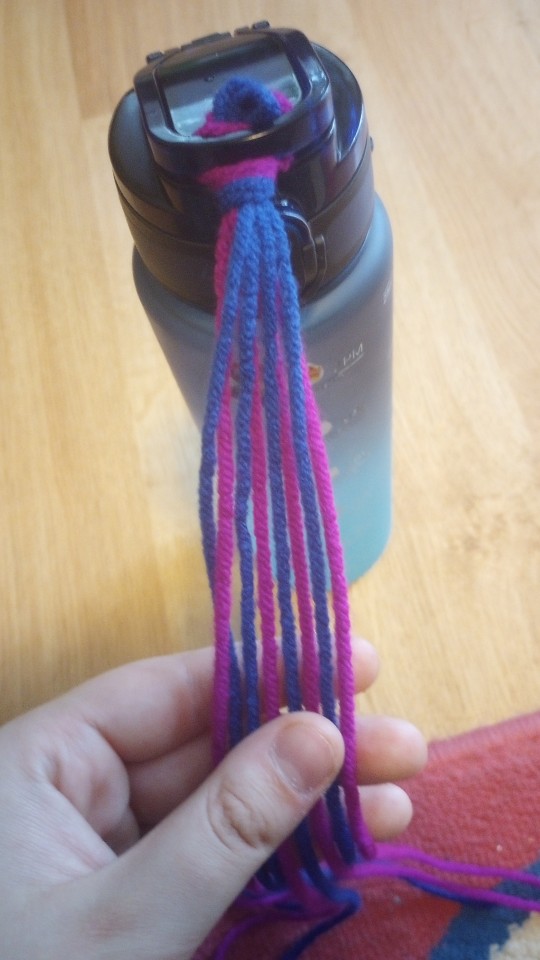
Arrange your colours so that they're alternating.
Step four:
Pick up the colour on the far right (in this case, the blue.) Whichever colour is on the far right, pick up every thread and lay them above the slipknot. This should be every other thread.
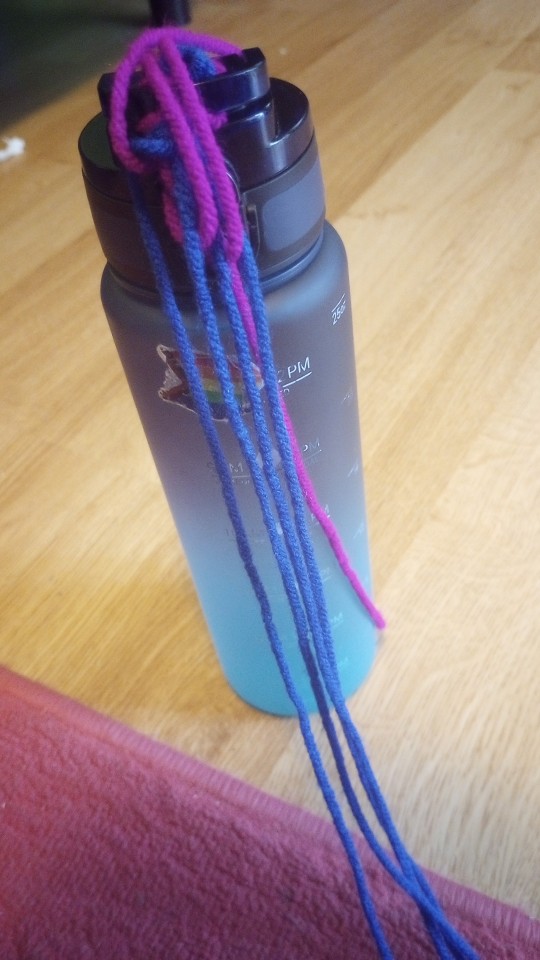
Step five:
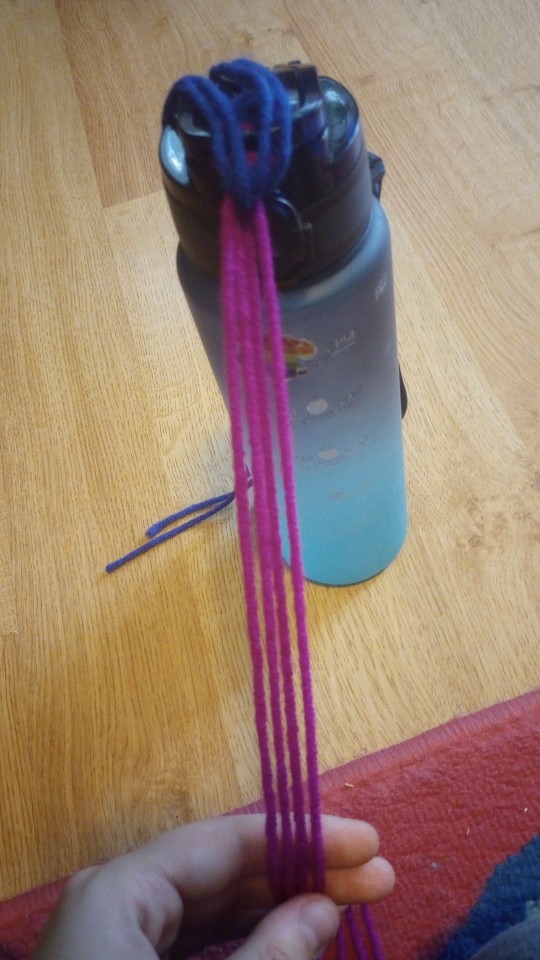
Pick up the thread that is on the far left and cross it over to the right. It should lay over the other threads of the same colour.
Step six:
Bring the threads above your slipknot back down to their original positions, returning to the alternating pattern. The thread you just crossed over should now be on the far right, and the far left thread should be of the colour you just brought back down.
Step seven:
You're going to repeat steps four to six with the new arrangement of threads. The colour you just crossed over will be lifted over the slipknot this time.
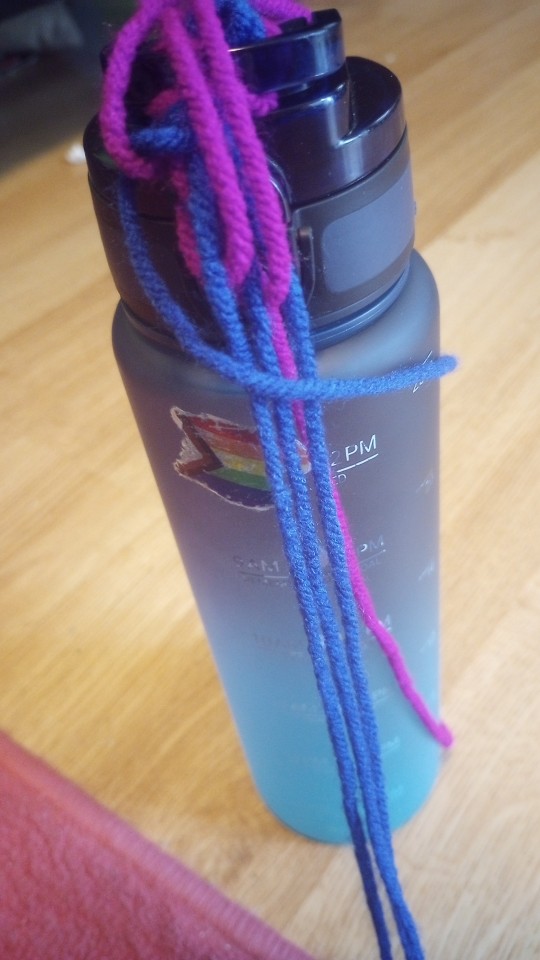
I've hit tumblr's image limit, so I'll continue the tutorial in a reblog!
26 notes
·
View notes
Text

feeling good enough again to continue warping up Delilah. I know I'm not doing this correctly. I don't care. I will not stop
#blurg#weaving#warping#with a big drink (tm)#probs should of looked up a tutorial but we be winging it lmao cant stop wont stop#ps none of the yarn will match this is the last of this color than I use random cotton from around the house
7 notes
·
View notes
Text
My desire for a mostly-accurate Ancient Greek and Roman wardrobe (and a frankly absurd degree of procrastination) has led me to seriously consider constructing my own vertical warp-weighted loom and learning to weave.
#surely it would be easier to just get my work done#but here I am. looking at weaving tutorials and shield construction#classics#ancient greece#ancient rome#ducky likes rome#tagamemnon
10 notes
·
View notes
Text
Odysseus having the ultimate storytime youtube channel dedicated to telling stories of his travels, the war, and yapping about his wife and son
#Penelope with the weaving/loom tutorials#she does 'weave with me :D ' livestreams and sometimes you can hear Odysseus and Telemachus off screen playing#when she explains the designs or patterns of her pieces you can hear the love and fondness behind the memory or inside joke its about#she's experimenting with making tapestry clothing and Odysseus wears each piece with pride in his videos#the odyssey#homers odyssey
8 notes
·
View notes
Text
For all the people excited about weaving via my earlier post
tbh you can make a loom out of just about anything. you just need something to hold the warp and something to separate the sheds, a shuttle, and something to beat the weft with (like a really long shuttle or a separate stick) Below is a picture of my great grandmother weaving a chinchorro (hammock). Wayuu weaving is a little different than what you're probably used to, but the basic thing to understand is the same. There's a bar at the top and a bar at the bottom, she's using her hands and small balls of yarn to wind the weft through, and tie warps together to make patterned gaps. No shuttle is involved. But if you wanted to you could easily add pickup bars (basically a long stick and shuttles to this type of setup and weave that way. It'd basically be a tapestry loom setup, but tbh you can weave just about anything, you just have to get creative with how you manage the sheds. I'd look up backstrap looms and translate the way the different bars are set in place for this kind of a setup. All you'd need is dowels or sticks of some sort for it. You could figure out a mini one on a box or a picture frame. Abuela had a floor to ceiling setup on one of the walls that was just basically a frame.
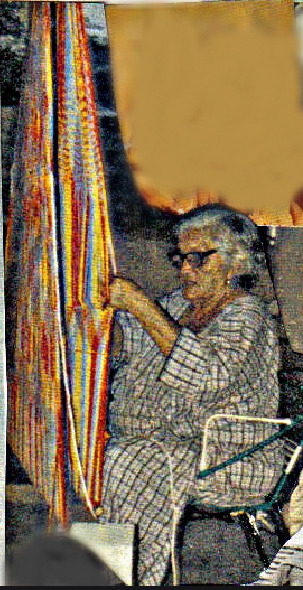
I wish I had photos of some of the chinchorros she made, they were beautiful. My uncle has a video somewhere of her weaving one with a horse on it and the artistry to it was absolutely gorgeous. I wish I'd gotten the chance to learn from her tbh, she was a brilliant artist from the work I've been able to see. I think it was cos of her that I inherited my love of weaving and textiles so much.
26 notes
·
View notes
Text

From Amy Baughman Sew and Quilt ·
No one sews exactly like you — and that’s the beauty of it. Your unique stitches, your creative choices, your personal flair… they all tell a story no one else can.
Celebrate your individuality every time you thread that needle. Whether you’re a beginner or a seasoned sewist, your work is meaningful because it’s yours.
Keep creating, keep growing, and most of all—keep being you.
#sewinginspiration #madewithpassion #CreativeJourney
#quilting#briar rose quilts#bedding#shopping#sewing#quilters of tumblr#decor#crafts#holiday#gifts#quilting as art#quilt tutorial#textile art#embroidery#quilt pattern#quiltblr#fabric arts#art quilt#weaving#quilts#seamstress#hand sewing#sew#sewist#sewblr#quilter#Amy Baughman#sew and quilt
14 notes
·
View notes
Text
only con to hand sewing r the ants in my bloodstream
#emyrs.txt#i forget to take breaks. everything i love causes carpal tunnel 😞💔#but seriously i cant hold anything w any grip strength after a bit of hand sewing it's not great#but so so worth it.#currently working on adding a lining + extra pockets to my fabbaboi bag i bought last year#i hate those men so fucking much bc that bag was like $40 and the handles r already coming apart. we sjould kill those guys i'm so serious#i dont even use it often. whatever.#anyway. adding a lining + pockets but doing it all by hand because i dont want the stitches visible#havent even started the actual sewing if i'm being honest. ive just been pinning. mostly not following any tutorial and making it up as i go#hopefully this turns out fine 👍#honestly kinda regretting my favric choice. i choose this weird linen blend w a very loose weave idk what i was thinking.#ig i wanted the black fabric contrast w the plain cotton canvas but like. why'd i do that.#i wouldve switched it w this beautiful black cotton denim i got at joanns but i had already finished sewing the zipper pocket onto the other#fabric.#planning on making maybe a little crochet star tk attatch to the zipper. might post pics 🫡#ok. bye.
2 notes
·
View notes
Text
just finished tgaa1. beautifully crafted game but it felt like an insanely long turorial
#i feel like most other aa games have like. 70% gameplay to 30% visual novel ratio#but this one had soooo many cutscenes and text outside of the actual gameplay i was like enough!!!!!! let me play the fucking game#chizitxt#i did like the tutorial case + the runaway room + the last one but every pay off took so long#i think something i appreciated a lot about older aa games was how simple + concise they were while still weaving a full compelling narrat#ive#and this game was like. the opposite
7 notes
·
View notes
Text

Peyote bracelet pattern that uses 24kt gold beads! Perfect for most occasions, you can find this pattern here https://www.etsy.com/shop/LizzieMig
#bead weaving#beading#seed bead jewelry#peyote stitch#beaded bracelet#beading tutorial#bracelet making#bracelet tutorial#diy bracelet#loom bead
8 notes
·
View notes