
Don't wanna be here? Send us removal request.
Statistics
We looked inside some of the posts by definitesolutions and here's what we found interesting.
Average Info
Notes Per Post
6
Likes Per Post
6
Reblog Per Post
0
Reply Per Post
0
Time Between Posts
3 months
Number of Posts By Type
Text
12
Link
2
Video
3
Last Seen Tumblr Blogs


Fun Fact
In 2020, 44% of users from Denmark used Tumblr daily.
Text
How to Show Only Specified Control Panel Items in Windows 10
Here's a step-by-step guide on how to show only specified Control Panel items using the Local Group Policy Editor.
Why use the Local Group Policy Editor ?
The Local Group Policy Editor is a powerful tool for managing system settings and user configurations. It allows administrators to enforce policies and restrictions without needing to dive into the Registry or install third-party software. By using this tool, you can:
Restrict access: Limit users to only necessary Control Panel items.
Simplify navigation: Make it easier for users to find and use specific settings.
Enhance security: Prevent access to certain settings that might be mis-configured.
Steps to Show Only Specified Control Panel Items
1. Open the Local Group Policy Editor
Press Win + R to open the Run dialog.
Type gpedit.msc and press Enter. This will open the Local Group Policy Editor.
2. Navigate to Control Panel Settings
In the Group Policy Editor, expand the following folders:
User Configuration
Administrative Templates
Control Panel
You should see several policies related to the Control Panel. Look for Show Only Specified Control Panel Items.
3. Configure the Policy
Double-click on Show Only Specified Control Panel Items to open its properties.
In the properties window, select Enabled to activate this policy.
Once enabled, click the Show button in the Options section. This will open the Show Contents window.
4. Specify Control Panel Items
In the Show Contents window, you need to specify which Control Panel items should be visible.
Click Add to enter the names of the Control Panel items you want to show. You need to enter the exact names for these items. For example:
Control Panel\All Control Panel Items\Network and Sharing Center
Control Panel\All Control Panel Items\System You can find these names by:
Opening Control Panel and right-clicking on an item to select Properties.
Looking at the URL in the address bar for its canonical name. After adding the desired items, click OK to close the Show Contents window.
5. Apply the Policy
Click Apply in the Show Only Specified Control Panel Items properties window.
Click OK to close the window. https://youtu.be/vP9yIUBJkhs
6. Refresh Group Policy Settings
To apply the changes immediately:
Press Win + R, type gpupdate /force, and press Enter. This command refreshes the group policy settings.
Alternatively, you can restart your computer for the changes to take effect.
Verifying Your Changes
To verify that the policy has been applied correctly:
Open the Control Panel. You should now only see the items you specified.
Attempt to access other Control Panel items to ensure they are hidden as expected.
Troubleshooting
If you don’t see the changes:
Check Policy Application: Ensure that the policy was correctly enabled and applied.
Verify Canonical Names: Double-check the names of the Control Panel items you entered.
Permissions: Ensure you have administrative rights to modify Group Policy settings.
Conclusion
Using the Local Group Policy Editor to show specified Control Panel items in Windows 10 is a straightforward way to customize your user experience. Whether for business, educational, or personal use, this method allows you to streamline access to settings and improve system management. Always remember to back up your system or relevant settings before making changes to ensure you can restore them if needed.
youtube
#control panel customization#show only specified control panel items#show control panel items#windows 10 settings#control panel visibility#manage control panel items#control panel management#control panel access#control panel restrictions#control panel filtering#Youtube
0 notes
Text
5 Alternatives to Windows Features That Microsoft Dropped
Microsoft often updates Windows 11 with new features but can also remove ones it considers outdated. If you've lost a program or app after an upgrade, don’t worry—there are plenty of alternatives available. Let’s check out nine replacements for the Windows features Microsoft has dropped.
Find a suitable replacement for WordPad
Microsoft has declared WordPad obsolete, so it will no longer be updated and will be removed in Windows 11 version 24H2. The company advises switching to Microsoft Word, which is a paid option.
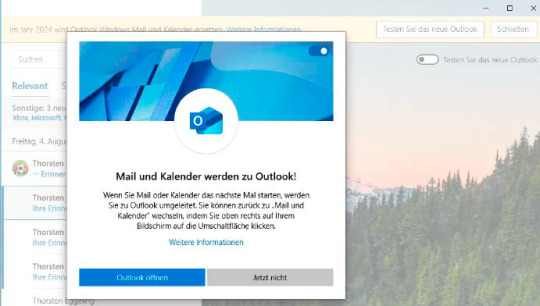
Should I switch from Windows Mail to Outlook?
The Mail and Calendar app, which replaced Outlook Express, is designed for handling IMAP and POP3 emails. Its successor, "The New Outlook," has been available to Windows 10 and 11 users for a while. The original Mail and Calendar app will be fully discontinued by the end of 2024.
Currently, users can switch back to the old Mail app from "The New Outlook," but this option only lasts for the current session. If you restart the app, it will automatically revert to "The New Outlook."
Clean up Windows quickly and thoroughly
Over time, your PC can become cluttered, which can slow it down and lead to errors. Disk Cleanup has been a part of Windows since Windows 98, but its days are numbered. Although it’s still available in Windows 11 23H2, Microsoft now recommends using the options found under System > Storage in Settings, even though these options offer fewer features than Disk Cleanup.
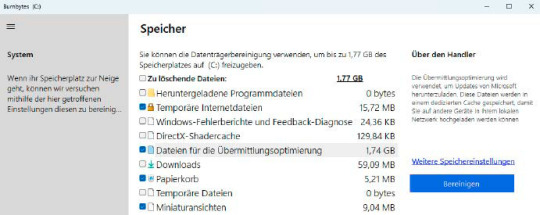
When Disk Cleanup is eventually discontinued, Cleanmgr+ will serve as its replacement.
To use Cleanmgr+, open the tool and select "Run as Administrator." The package includes two programs; choose between them at startup. After selecting Cleanmgr, the Burnbyte tool will launch, presenting a drive selection window similar to the Disk Cleanup interface.
Start by selecting the system drive C:. Once you click OK, Burnbyte will show a clear interface detailing the different areas and the space they occupy on your hard drive. Check the options you want to clean and click "Clean Up." Be sure not to check "Download" if you want to retain the files in your download folder.
Uninstall programs and apps faster
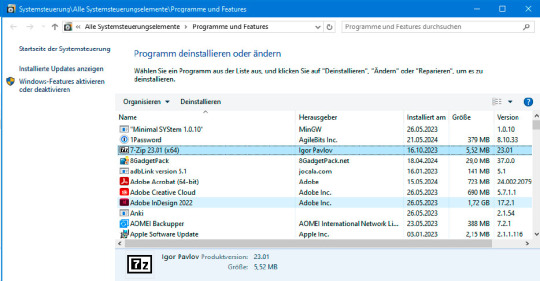
In Windows Settings, you can uninstall programs by navigating to App > Apps and features (or Apps > Installed apps in Windows 11). Unfortunately, you can’t uninstall multiple programs simultaneously, and some applications might leave residual files behind.
In Windows 10, you could also uninstall programs through the Control Panel under Programs and Features, which was more user-friendly. This option has been removed in Windows 11.
Expand or collapse the context menu
In Windows 11, right-clicking on the desktop or in Windows Explorer brings up a context menu with just a few options. While this streamlined menu helps avoid clutter when many programs are installed, it may limit quick access to certain features.
To see all available options, you need to select "Show More Options" from the context menu or hold down the Shift key while right-clicking.
#Windows Alternatives#Windows Features Alternatives#Windows 11 Tips#Windows Features Guide#Windows 11 Upgrades#Windows Feature Fixes#New Tools for Windows#how to#definite solutions#windows 10 tutorials#windows 11 tutorials
0 notes
Text
How to check BIOS version in Windows 10
In this video tutorial you will learn how to Check BIOS Version without Rebooting in Windows 10.
BIOS is the abbreviation of Basic Input / Output System, which is also known as System BIOS or PC BIOS. BIOS performs hardware initialization during login process. Usually users check BIOS version by going to BIOS at Windows startup, but actually you can also find bios version information without rebooting your PC. There are several ways to get BIOS version from Windows System. Follow the steps shown below to Check BIOS Version in Windows 10:
1. Click on Start Menu then type RUN
2. Now type regedit, then click on OK
3. Now go to below fields: HKEY_LOCAL_MACHINE == HARDWARE == DESCRIPTION == System == BIOS
4. At the right side you will find the Label as "BIOSVersion"
youtube
0 notes
Link
In this video, we show you that how to turn on Windows Defender in Windows 8 as you know that after installing any other antivirus Windows Defender turned off by itself.
Follow the below steps to Turn on Windows Defender in Windows 8:
1. First right click on My Computer then left click on Manage
2. Now go to Services and app
3. Then Double click on Services
4. Now find Security Center and Double Click on it to open
5. Set the Start up type to "Automatic" by clicking on Drop down menu
6. Then Start "Service status" from below and Hit Apply and Ok
Now after following all steps Restart your Computer / Laptop and then you will find your Windows Defender running, update Windows Defender immediately because if you have outdated antivirus running in your system it may not protect you properly.
#turn on windows defender#enable windows defender#how to turn on windows defender#how to enable windows defender
1 note
·
View note
Text
How to Remove RUN history using Command Prompt in Windows 10
In this video tutorial you will learn how to Remove Run History using CMD in Windows 10.
The Start Menu at Windows 10 is totally redesigned as compare to Previous Operating Systems of Microsoft. In the New interface of Windows 10, the search history in RUN windows doesn't get removed by itself. When you open RUN windows, and you tap on arrow to open a drop down list, the list of commands you see their, that's called RUN history. To remove the RUN history you just need to run simple command at Command Prompt.
Follow the steps shown below to Remove Run history using Command Prompt in Windows 10:
1. Open Start Menu then type cmd, right click on it then click on Run as Administrator
2. Now type below command then press Enter:
reg delete HKEY_CURRENT_USER\SOFTWARE\Microsoft\Windows\CurrentVersion\Explorer\RunMRU /va
type above command as it is
3. After press Enter, it will ask you for confirmation, so press y then press Enter to execute command.
Now command is successfully executed, then open RUN box again to check history.
youtube
#remove run history#delete run history#how to delete run history in windows 10#clear run history windows 10#how to clear run history#delete run history using cmd
0 notes
Link
Learn how to hide files and folders in Windows 10
In this tutorial we are going to show you that how to hide files and folders in Windows 10.
There may be some files or folders which you don't want to share with other users of PC, then you can simply hide your Files or folders in super easy 1 step method.
#hide files windows 10#hide folders in windows 10#how to hide files and folders#how to hide files and folders in windows 10#hide files and folders in windows 10
1 note
·
View note
Text
How to Print Multiple Pictures on One Page in Windows 10
PrintMultiplePhotos In this video tutorial you will learn how to Print Multiple Pictures on one Page in Windows 10.
Printing two or more pages on single sheet can cut off your over all cost, especially when you have a lot of pages to print. You can also see the overall formatting and layout at a glance when you Print your Document this way.
Follow the steps shown below to Print multiple Pictures on one Page in Windows 10:
1. Open Folder where your pictures located which you want to take Print
2. Now select both the images, right click on anyone then click on Print
3. Now go to right side and select the sample which has your desired design, in this case 2 images on one page
4. Now click on Print to get the Hardcopy of your Pictures on one page.
youtube
#Print Multiple Photos#how to print multiple photos#how to print multiple photos in windows 10#Print Multiple Photos on one page#Print Multiple Photos on one page in windows 10#how to print multiple photos on one page#how to print multiple photos on one page in windows 10
1 note
·
View note
Text
How to Enable Grayscale Mode in Windows 10
In this video you are going to learn how to enable grayscale mode in windows 10.
Windows 10 also has Color Filter feature along with dozens of amazing features as part of the Ease of Access system. This will improve usablity of the oeprating system for people with vision issues. You can turn your display into Grayscale without using any other third party software.
Follow the steps shown in the video to Turn on Grayscale Mode in your Windows 10 PC.
youtube
#Enable Windows Grayscale#how to enable windows grayscale#turn on grayscale mode in windows 10#windows 10 grayscale mode
1 note
·
View note
Text
How to Clear Run Dialog Box History in Windows 10
In this video tutorial you will learn how to Clear Run Dialog Box History Windows 10.
Windows' "Run Dialog box" is more you can possibly imagine, because it lets you launch programs directly from the desktop. You can also customize Windows settings according to your need. It also save commands which you use time by time like your web browser. And just like you delete browser history you also can remove history of Run dialog box.
Follow the steps shown below to Clear Run history in Windows 10:
1. Open Start Menu then regedit and click to open it
2. Now navigate to:
RUN_CURRENT_USER --) SOFTWARE --) Microsoft --) Windows --) CurrentVersion
3. Now find RunMRU and then click on it
4. Now go to right side and Delete all entries except (Default) and MRUList
5. Now close regedit window.
youtube
#clear run history windows 10#how to clear run history#remove windows 10 run history#how to delete run history in windows 10
1 note
·
View note
Text
How to Create Shortcut to Calculator in Windows 10
youtube
1 note
·
View note
Video
tumblr
Best Keyboards for Android Smartphones
0 notes
Text
How to Add Tiles in Windows 10 Start Menu
In this video tutorial you will learn how to Add Tiles in Windows 10 Start Menu.
By default Windows 10 has three columns for Tiles in Start Menu. Windows 10 also has hidden fourth column, however you can show you extra column by following few simple steps.
Follow the steps below to Add More Tiles in Windows 10 Start Menu.
1. Click on Start Menu then go to Settings
2. Now click on Personalization
3. Then click on Start
4. Now click on Show more Tiles in Start
youtube
0 notes
Text
In this video tutorial you are going to learn how to Add Program Compatibility Properties Page using gpedit.msc in Windows 10
youtube
0 notes
Video
tumblr
How to Change Birthday Settings on Facebook
#birthday settings on facebook#how to change birthday settings on facebook#change birthday settings on facebook
0 notes
Video
youtube
How to Change Birthday Settings on Facebook
0 notes
Text
How to Disable Windows Powershell in Windows 10
In this video tutorial you are going to learn that how to Disable Windows Powershell in Windows 10.
Windows 10 comes with pre-installed Windows Powershell and it has replaced with Command Prompt in Power User Menu. So, if you want don;t do use Powershell then you can Disable it by following simple steps below:
1. Open Control Panel
2. Click on Programs and Features
3. Then click on Turn Windows Features On or Off (now wait for list of features to load)
4. Now find Windows Powershell and then uncheck it
5. Now click on OK Now Windows Powershell in Disabled.
youtube
#disable powershell#how to disable powershell#disable powershell in windows 10#how to disable powershell in windows 10#disable windows 10 powershell#how to hide windows 10 powershell
0 notes
Text
How to Show Hidden Files and Folders in Windows 10
In this tutorial we are going to show you that how to show hidden files and folders in Windows 10. Some files and folders are already hidden.
Some files and folders are already hidden when you install Windows in your PC when you explore your Windows drive. This protects important files from being removed mistakenly so that Windows isn't damaged. If you want to make some tweeks and need to change these files settings then you can unhide files by following few simple steps.
youtube
#Show Hidden Files Windows 10#how to Show Hidden Files Windows 10#ShowHiddenFolers#how to Show Hidden Folders#ViewWindows10HiddenFiles#how to View Windows 10 Hidden Files
0 notes