#3D PUFF Digitizing
Text

Embroidery has been an integral part of branding and customization in various industries for decades. With advancements in technology, left chest digitizing and jacket back digitizing have become essential processes in the garment and promotional product sectors. These techniques allow for the transformation of digital designs into intricate embroidered logos or artwork, providing a professional and personalized touch to garments and accessories.
0 notes
Text
Model v Reference 3D Challenge! Amanda

‼️REPOSTS AND AI TRAINING NOT ALLOWED‼️
Reblog>Like&Comment
#amanda the adventurer#amanda#art challenge#3d artwork#3d artist#3d art#meme redraw#redraw#draw this in your style#draw this again#draw this challenge#digital drawing#horror game#horror art#low poly#amanda fanart#fanart#vroid texture#vroid studio#vroid model#vroidmodel#vroidstudio#vroid#vroid vtuber#vroid fanart#vroid art#afro puffs#afro girl#afro hair#afro
10 notes
·
View notes
Text


I make 3D guys now
#my art#digital art#trans artist#artists on tumblr#zbrush#blender#3d render#3d art#3d character#dont look at the topology on the back its Fine#i should have made the crotch puff its own object im listening and learning
7 notes
·
View notes
Text

3D take on my favorite childhood movie, Puff the Magic Dragon (1978)
#3d art#puff the magic dragon#dextervexter art#digital art#3d model#oh btw if you also loved this as a kid hows the adhd/autism going
11 notes
·
View notes
Text
#1 Agency specializes in high-quality machine embroidery digitizing services

Odd Infotech #1 Agency specializes in high-quality machine embroidery digitizing services, including logo digitizing, applique digitizing, 3D puff digitizing, and anime designs digitizing. With a team of skilled professionals, we ensure precise and detailed conversion of your designs into machine-readable formats, catering to diverse embroidery needs.
Whether you require intricate logo embroidery, unique applique designs, textured 3D puff effects, or vibrant anime-inspired artwork, our services are tailored to bring your vision to life with precision and finesse.
Choose Odd Infotech #1 Agency for top-notch embroidery digitizing solutions that elevate the aesthetics of your projects.
#digitization#digital art#logo design#digital illustration#the amazing digital circus#apparel#embroidelicious#digital painting#embroideryart#embroidery
2 notes
·
View notes
Text
Let it snow christmas snowman Embroidery Design in 6 sizes, Machine Embroidery winter snowman design instant download dst,pes,cnd,vp3,hus
https://embdst.etsy.com/uk/listing/1601314695/let-it-snow-christmas-snowman-embroidery
embroidery #embroidery #embroidelicious #embroideryart #snowman #snowmanembroidery #winterfashion #winterembroidery #winterdesign #letitsnow #snowembroidery #snowflakeembroidery #christmas #christmasdecor #christmasdesign #christmasembroidery #christmasembroiderydesigns
"Let It Snow" Christmas Snowman Embroidery is a delightful and festive handcrafted art piece that encapsulates the enchanting spirit of the holiday season. This charming embroidery features a cheerful snowman with the words "Let It Snow" beautifully stitched below or above it. The intricate details and vibrant threadwork bring the winter wonderland to life, making it a perfect addition to your seasonal decor. Whether you hang it on your wall, display it on your mantle, or give it as a thoughtful gift, this handcrafted snowman embroidery embodies the warmth and joy of Christmas, celebrating the magic of winter with every stitch.
https://embdst.etsy.com/uk/listing/1601314695/let-it-snow-christmas-snowman-embroidery
Order me:
https://www.fiverr.com/s2/13ecf497d4
My Etsy Shop:
https://embdst.etsy.com
www.sembdigitizer.com
Formats and machines:
DST - Tajima,Barudan
EXP - Melco
HUS - Viking
JEF / SEW - Janome
PES / PEC - Brother, Baby Lock, Bernina
XXX - Singer
VP3 / VIP - Pfaff
(If you need another format please contact us)
100% money-back guarantee.
If you are not satisfied with the design, please contact us.
Your happiness as a customer is always very important to us.
If you are looking for a Custom design and do not find it, contact us, we can create it for you.
We can do all types of digitizing such as:
3D PUff, Flat, chenille, cross stitch, Left chest, jacket back for products like Bags, Hats, Towels, Shirts, Jackets.
In all kind of machine formats such as DST, PES, JEF, JAN, EXP, ART, PXF, CND and any other format on your demand.
Fb.com/sembdigitizing
embroidery #embroiderydesign #embroiderydigitizing #embroiderymachine #embroideryart #embroiderydigitizingservices #embroiderywork #embroiderylove #embroiderypatches #stitching #stitch #stitcher #shirt #shirts #hoodies #hoodie #3dpuff #cap #hatch #wilcom #hat
Email: [email protected]
Whatsapp # 92-333-899-1787
2 notes
·
View notes
Note
Oh man, that last one was so good. Number 19 in the Surprise category?
Dialogue Prompt (That you're more than welcome to ask from)
(Hanji and Wheeljack just being complete dumbasses together and nearly getting each other killed.)
"So, Commandant," Wheeljack began in his bipedal mode, "How are we going to run this experiment?"
"Well, I wanted to test how well the the diluted energon crystals from Eren and raw energon would fair as a power source for the 3D gear." Hanji gestured to the 3D Gear lying on the table, "What are the risks and benefits of using both products? How easy one would be for transport? All that shit."
Hanji put on her gloves and opened the container to the gas tank. She extended her hand to the Wrecker and beckoned him forward. "Give me the diluted energon, please?"
"So tiny," Wheeljack grumbled as he picked up the energon with his digits.
"Well maybe this is why you should get a holoform," Hanji smirked.
"You know I didn't have the time." Wheeljack gently placed the energon in her hand. Hanji placed it in the gas tank and locked it without giving it a second thought. She grabbed the handle and walked a safe distance from the device bolted to the table. She pulled the trigger and locked it in place, and the device began to spew a stream of blue gas. Hanji tapped her foot before careening her head to Wheeljack.
"So...," Hanji trailed off, "What do you think about 3D gear usage? From a scientific standpoint."
"It defies all laws of physics that I'm sure it'd give Doc a headache," Wheeljack answered, "I, personally, love it. It's creative, and it reminds me of something on Earth that's super popular."
"Really? What is that?" Hanji asked.
"Something about a human in a red and blue suit," Wheeljack recalled, "Think I heard the humans talk about it once."
"Good to know," Hanji smiled, "If we ever meet, I will ask about it."
Hanji then turned her attention to the table of energon and noticed something wrong. The diluted energon pile...it wasn't touched. At all. It was in fact...the energon pile that was messed with. "Wheeljack?"
"Yep?" Wheeljack asked.
"You gave me the diluted energon, right?" Hanji asked.
"Yeah, it's the...," Wheeljack paused when he pointed to the pile, "That was the diluted energon right?"
"I'm asking you!" Hanji began to panic as she ran over to the piles, "Holy shit! You gave me the energon!"
"I did not!" Wheeljack denied.
"Clearly you did!" Hanji shouted.
"It looked the same!" Wheeljack argued, "I got it mixed up!"
"Looked the same?! Are you kidding?!" Hanji demanded, “What do you mean you got the piles mixed up?! There are tags that are very clearly labeled ENERGON and DILUTED ENERGON!! This is your fucking fuel source!"
Wheeljack and Hanji stopped arguing when they heard a high pitched noise. They snapped their heads to see the gas tank heating up to a point where the metal was clearly changing color.
"Oh fuck! Oh shit! Oh fuck! I need to shut it off!" Hanji tried to run to the switch, but Wheeljack quickly grabbed her and shielded her from the device exploding in a blue puff of smoke. The pieces of the 3D gear flew everywhere and hit the ground, some of them up in blue flames. Hanji peaked over Wheeljack's servos to see the damage done as the Wrecker set her down.
"Huh," Wheeljack could only muster, "That could've been a lot worse."
Hanji sighed as she picked up her notebook and wrote her observations down. "I can't help but agree with you. That was not the most destructive experiment I've conducted."
Hanji continued writing her observations as she stomped on the fires to put them out. "So here's what we're going to do now. You are going to get your optics checked because someone is clearly color blind!"
"They are nearly the same shade of blue!" Wheeljack shot back.
"Next." A devious smile formed on Hanji's face as she shut the notebook in her hand, "We are going to get another 3D gear equipment! Oh, this is so much fun!"
Levi observed with a telescope from afar, grimacing at the sight of the blue smoke. He folded the telescope before climbing down the tree. He needed to tell Optimus that something blew up.
#asks#send me asks#maccadam#macadam#transformers prime#tfp#wheeljack#tfp wheeljack#attack on titan#aot#snk#shingeki no kyojin#hanji zoe#levi ackerman#captain levi#attack on prime#ao3#fanfic#dialogue prompt
13 notes
·
View notes
Text
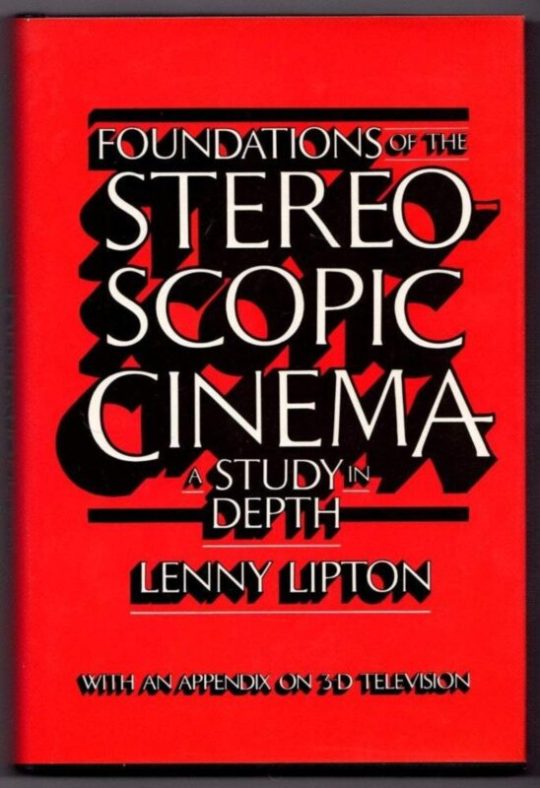
Lenny Lipton, 3D Filmmaking Pioneer, Dies.
Lenny Lipton, 3D Filmmaking Pioneer, Dies.
Lenny Lipton, who wrote the poem that became the Peter, Paul and Mary hit “Puff the Magic Dragon” and developed technology used for today’s digital 3D theatrical projection systems, has died. He was 82.
Lipton died Wednesday of brain cancer at Cedars-Sinai Medical Center in Los Angeles, his son Noah told The Hollywood Reporter.
While studying engineering as a freshman at Cornell University,…
View On WordPress
8 notes
·
View notes
Text


PETAL PUFF, digitally sculpted 3D-printed to order KEYCHAIN design by Ceci Sariol <3
#me#personal#3d model#film#3d reality#35mm#3d render#3d fashion#3d art#trinkets#designer#3d printing#3d printed#fashion
1 note
·
View note
Text
Explore our premium SVG files, perfect for crafters, DIY enthusiasts, and designers. Scalable and easy to use, our files are compatible with most cutting machines. Download today and create stunning, custom projects!
TumblerWrapPNG #BabyTumblerWrap #TumblerWrap
0 notes
Text
Particle Systems and Dynamics in Animation: A Comprehensive Overview
Particle systems and dynamics are critical tools in the realm of computer graphics and 3D animation, enabling the creation of complex, natural phenomena such as fire, smoke, water, explosions, and more. These techniques are essential for animators and visual effects artists to simulate and visualize the intricate behaviors of various elements in a scene, bringing life and realism to digital environments. At the best animation institute in Pune, students learn to master these advanced techniques, ensuring they can create stunning visual effects and realistic simulations that elevate their work to professional standards.
#### What Are Particle Systems?
Particle systems are a technique used in computer graphics to simulate fuzzy, chaotic phenomena that are difficult to represent using traditional modeling methods. A particle system is essentially a collection of many small particles, each of which can have its own properties, such as position, velocity, color, size, and lifespan. These particles are generated from a source or emitter and can move, change, and interact over time according to the rules defined by the animator or the dynamics system.
For example, when creating a fire effect, a particle system might emit particles that start as bright orange and yellow, fade to red, and then disappear as gray ash or smoke. The particles might move upwards, mimicking the behavior of flames, while their size and brightness diminish over time.
#### Components of a Particle System
A particle system is composed of several key components:
1. **Emitter:** The emitter is the source from which particles are generated. It defines the initial conditions of the particles, such as their position, direction, and initial velocity. Emitters can take various forms, such as points, lines, surfaces, or volumes, depending on the desired effect.
2. **Particles:** These are the individual elements that make up the system. Each particle has attributes such as position, velocity, color, size, and lifespan, which can change over time according to the rules set by the animator.
3. **Forces and Dynamics:** Forces such as gravity, wind, and drag can be applied to particles to simulate real-world physics. Dynamics determine how particles interact with their environment and with each other.
4. **Renderers:** Renderers are responsible for converting the particle data into visible elements in the final animation. This might involve rendering particles as points of light, tiny 3D models, or even more complex shapes like splashes or puffs of smoke.
#### Dynamics in Particle Systems
Dynamics refers to the rules and physical forces that govern the movement and behavior of particles within a system. These can include basic physics principles like gravity and inertia, as well as more complex interactions like collisions and fluid dynamics.
1. **Gravity and Wind:** These are fundamental forces that influence how particles move through space. Gravity pulls particles downward, while wind can push them in a specific direction. These forces can be adjusted to create various effects, such as falling leaves or blowing dust.
2. **Collisions:** Collisions allow particles to interact with other objects in the scene. For example, raindrops can collide with the ground and create splashes, or sparks from an explosion can bounce off surfaces.
3. **Fluid Dynamics:** Fluid dynamics is a specialized area within particle systems that deals with the simulation of liquids and gases. Techniques like smoothed-particle hydrodynamics (SPH) are used to create realistic water flows, smoke, and fire.
4. **Soft and Rigid Body Dynamics:** These dynamics are used to simulate objects that deform or maintain their shape under force. Soft body dynamics are useful for creating effects like cloth or jelly-like substances, while rigid body dynamics are used for simulating hard objects like rocks or debris.
#### Applications of Particle Systems and Dynamics
The applications of particle systems and dynamics in animation and visual effects are vast and varied. Some of the most common uses include:
1. **Environmental Effects:** Particle systems are often used to create environmental effects like rain, snow, fog, dust, and fire. These elements add realism and atmosphere to a scene, making it more immersive.
2. **Explosions and Debris:** In action sequences, particle systems are used to simulate explosions, debris, and other chaotic phenomena. These effects require precise control over particle behavior to achieve realistic results.
3. **Magical and Sci-Fi Effects:** Particle systems are also widely used in creating magical effects like glowing orbs, energy blasts, and other supernatural phenomena in fantasy and sci-fi genres.
4. **Character Effects:** Particles can be used to enhance character animations, such as creating hair or fur simulations, generating sparks from a character's movements, or simulating sweat and blood.
5. **Fluid Simulations:** Water, lava, and other fluid simulations rely heavily on particle systems and fluid dynamics to achieve realistic flows and interactions with the environment.
#### The Future of Particle Systems and Dynamics
As technology continues to advance, the capabilities of particle systems and dynamics are expanding, allowing for even more complex and realistic simulations. With the advent of real-time rendering and GPU-accelerated simulations, animators and visual effects artists can achieve high levels of detail and realism at faster speeds than ever before.
Machine learning and AI are also beginning to play a role in particle systems, helping to optimize and automate the creation of complex effects. This allows artists to focus more on the creative aspects of their work, rather than spending time on technical details.
In conclusion, particle systems and dynamics are indispensable tools in the world of 3D animation and visual effects. They provide the means to create intricate, lifelike simulations of natural phenomena, adding depth, realism, and immersion to digital worlds. At MAAC Academy, students are trained in these advanced techniques, preparing them to push the boundaries of what can be achieved in animation. As technology continues to evolve, the possibilities for what can be achieved with these techniques are virtually limitless, promising even more spectacular and innovative visual experiences in the future.
0 notes
Text
Left Chest Digitizing and Jacket Back Digitizing

Embroidery has been an integral part of branding and customization in various industries for decades. With advancements in technology, left chest digitizing and jacket back digitizing have become essential processes in the garment and promotional product sectors. These techniques allow for the transformation of digital designs into intricate embroidered logos or artwork, providing a professional and personalized touch to garments and accessories.
Introduction to Left Chest Digitizing
Left chest digitizing refers to the process of converting digital artwork into a format that embroidery machines can understand and replicate onto the left side of a garment, typically around the chest area. This technique is widely used for adding logos, emblems, or text onto apparel such as polo shirts, jackets, and uniforms. Left chest embroidery is favored for its subtlety and sophistication, making it a popular choice for corporate branding and promotional merchandise.
Understanding Left Chest Digitizing
The process of left chest digitizing begins with the selection of a high-quality digital image or artwork. This design is then translated into a stitch file using specialized software that determines the placement, stitch type, density, and color sequence for the embroidery machine to follow. Factors such as design complexity, fabric type, and intended use of the garment are carefully considered during the digitizing process to ensure optimal results.
Benefits of Left Chest Digitizing
Left chest digitizing offers several advantages, including precise replication of intricate designs, cost-effectiveness for bulk orders, and the ability to customize artwork according to specific branding requirements. Additionally, left chest embroidery provides a professional and polished appearance, enhancing the perceived value of the garment or product.
Factors to Consider in Left Chest Digitizing
When digitizing for left chest embroidery, it is crucial to consider the complexity of the design, the type and texture of the fabric, as well as the desired stitch count and density. These factors can significantly impact the quality and clarity of the final embroidered output, emphasizing the importance of meticulous planning and execution.
Techniques for Effective Left Chest Digitizing
To achieve optimal results in left chest digitizing, it is essential to use specialized digitizing software that offers advanced features for design manipulation and customization. Additionally, attention to detail in selecting appropriate file formats, stitch types, and densities is paramount for achieving crisp and durable embroidery on a variety of fabrics.
Common Mistakes to Avoid in Left Chest Digitizing
Some common pitfalls in left chest digitizing include overlooking design scalability, neglecting underlay and pull compensation, and failing to pay attention to small details such as letter spacing and line thickness. By avoiding these mistakes and focusing on precision and accuracy, embroiderers can ensure professional-quality results that meet or exceed client expectations.
Introduction to Jacket Back Digitizing
In contrast to left chest digitizing, jacket back digitizing involves the replication of larger designs or artwork onto the back of garments, such as jackets, hoodies, or vests. This technique allows for more prominent branding opportunities and creative expression, making it a popular choice for sports teams, corporate uniforms, and promotional merchandise.
Understanding Jacket Back Digitizing
The process of jacket back digitizing follows a similar workflow to left chest digitizing but with considerations for larger design dimensions and placement on the garment. Jacket back embroidery often requires specialized techniques for handling intricate details, color blending, and texture replication to achieve visually striking results on larger surfaces.
Benefits of Jacket Back Digitizing
Jacket back digitizing offers several benefits, including the ability to showcase elaborate artwork or logos on a larger scale, increased visibility for branding purposes, and enhanced garment aesthetics. Whether used for corporate branding or personalization, jacket back embroidery adds a touch of professionalism and style to any garment or accessory.
Factors to Consider in Jacket Back Digitizing
When digitizing for jacket back embroidery, factors such as design dimensions, placement on the garment, fabric compatibility, and color blending techniques must be carefully considered. Attention to detail in these areas ensures that the final embroidered output is visually appealing, durable, and aligned with the client's branding objectives.
Techniques for Effective Jacket Back Digitizing
To achieve optimal results in jacket back digitizing, embroiderers can utilize specialized techniques such as appliqué, 3D embroidery, and gradient effects to add depth and dimension to the design. Additionally, proper placement of the design on the garment and attention to stitch direction are crucial for achieving a polished and professional finish.
Common Mistakes to Avoid in Jacket Back Digitizing
Common pitfalls in jacket back digitizing include neglecting design proportionality, overlooking stitch direction on curved surfaces, and disregarding limitations imposed by garment construction or fabric texture. By avoiding these mistakes and focusing on precision and craftsmanship, embroiderers can ensure that jacket back embroidery enhances the overall quality and appeal of the garment.
Conclusion
Left chest digitizing and jacket back digitizing are essential techniques in the realm of embroidery, offering versatile solutions for branding, customization, and personalization. By understanding the intricacies of these processes and employing effective digitizing techniques, embroiderers can consistently deliver high-quality results that meet the demands of clients across various industries.
0 notes
Text
Exploring the Depth of 3D Embroidery Designs
Exploring the Depth of 3D Embroidery Designs
Introduction:
3D embroidery designs have revolutionized the world of needlework, adding a new dimension to traditional flat stitching.
These innovative designs bring texture, depth, and life to embroidered creations, making them stand out in both personal and commercial projects.
In this comprehensive guide, we'll delve into the world of 3D embroidery designs, exploring techniques, applications, and tips for creating stunning three-dimensional embroidery.
What Are 3D Embroidery Designs? 3D embroidery designs, also known as raised embroidery or puff embroidery, are techniques that create a raised, three-dimensional effect on fabric.
Unlike traditional flat embroidery, 3D designs protrude from the surface, adding depth and texture to the stitched image.
Types of 3D Embroidery Techniques:
- Puff Embroidery:
- Uses a special foam material beneath the stitches
- Creates a raised, cushioned effect
- Popular for logos and text on caps and sportswear
- Trapunto:
- Italian quilting technique adapted for machine embroidery
- Creates raised areas by stuffing from the back of the fabric
- Ideal for adding subtle dimension to designs
- Stumpwork:
- Incorporates wire-edged elements that stand away from the fabric
- Creates highly dimensional, almost sculptural effects
- Often used for floral and insect designs
- Layered Appliqué:
- Uses multiple layers of fabric to build up dimension
- Can create a relief-like effect in embroidery designs
- Great for landscapes and textured designs
- 3D Foam Technique:
- Similar to puff embroidery but with more precise control
- Uses specially designed foam that disintegrates with heat
- Allows for detailed raised designs
- Chenille:
- Creates a fuzzy, raised texture using looped stitches
- Often used for lettering and simple shapes
- Gives a towel-like texture to designs
Benefits of 3D Embroidery Designs:
- Visual Impact:
- Adds depth and interest to embroidered items
- Makes designs more eye-catching and memorable
- Tactile Appeal:
- Creates a touchable texture that engages multiple senses
- Enhances the perceived value of embroidered products
- Versatility:
- Can be applied to various items from apparel to home decor
- Suitable for both subtle enhancements and bold statements
- Unique Branding:
- Offers a distinctive way to present logos and branding elements
- Helps products stand out in competitive markets
- Artistic Expression:
- Allows for more creative freedom in embroidery design
- Enables the creation of highly detailed and realistic designs
Creating 3D Embroidery Designs:
- Design Considerations:
- Choose designs that benefit from dimensionality
- Consider the end-use of the item when selecting 3D techniques
- Ensure the design is suitable for the fabric type
- Digitizing for 3D:
- Use specialized digitizing software that supports 3D techniques
- Plan stitch direction and density to achieve the desired 3D effect
- Consider underlay stitches for stability in raised areas
- Material Selection:
- Choose appropriate stabilizers to support 3D elements
- Select threads that complement the 3D technique (e.g., metallic for shine)
- Use specialty materials like foam or wire as needed for the technique
- Machine Settings:
- Adjust tension and speed settings for 3D embroidery
- Use appropriate needles for the chosen technique and materials
- Consider using a specialized 3D embroidery foot if available
- Testing and Refinement:
- Always create test samples before final production
- Adjust design elements based on test results
- Keep notes on successful settings and techniques for future reference
Popular Applications for 3D Embroidery Designs:
- Sports and Team Wear:
- Raised logos and numbers on jerseys and caps
- Textured mascots and emblems
- Corporate Branding:
- 3D logos on company uniforms and promotional items
- Raised text for name badges and signage
- Fashion and Accessories:
- Textured embellishments on clothing
- Raised designs on handbags and shoes
- Home Decor:
- Dimensional elements on pillows and wall hangings
- Textured designs on table linens
- Craft Projects:
- 3D elements in quilting and scrapbooking
- Raised designs for greeting cards and gift items
- Educational Materials:
- Tactile learning aids for children
- Braille and raised-letter books
Tips for Successful 3D Embroidery:
- Start Simple:
- Begin with basic 3D techniques before attempting complex designs
- Practice on scrap fabric to perfect your technique
- Mind Your Fabric:
- Choose fabrics that can support the weight of 3D embroidery
- Consider using additional stabilizers for lightweight fabrics
- Balance is Key:
- Combine 3D elements with flat embroidery for visual interest
- Avoid overcrowding designs with too many raised elements
- Thread Selection:
- Use high-quality threads that can withstand the stress of 3D techniques
- Experiment with different thread types for varied effects
- Maintenance Matters:
- Clean your machine regularly to prevent buildup from 3D materials
- Use appropriate needles and change them frequently
- Consider Wearability:
- For garments, ensure 3D elements are comfortable and practical
- Think about how the item will be washed and cared for
Challenges in 3D Embroidery Design:
- Increased Complexity:
- 3D designs often require more advanced digitizing skills
- May need specialized software and training
- Time and Resource Intensive:
- 3D embroidery typically takes longer to stitch out
- May require more thread and specialty materials
- Durability Concerns:
- Raised elements can be more prone to wear and tear
- May require special care instructions for end-users
- Machine Limitations:
- Not all embroidery machines are equipped for advanced 3D techniques
- May require upgrades or specialized equipment
- Design Restrictions:
- Some designs may not translate well to 3D embroidery
- Size limitations may apply for certain 3D techniques
Future Trends in 3D Embroidery Design:
- Advanced Materials:
- Development of new foams and fibers for enhanced 3D effects
- Integration of smart materials for interactive embroidery
- Improved Software:
- More intuitive 3D digitizing tools in embroidery software
- Better simulation capabilities for previewing 3D designs
- Sustainable Practices:
- Eco-friendly materials for 3D embroidery techniques
- Waste-reduction methods in 3D embroidery production
- Customization:
- Increased demand for personalized 3D embroidery designs
- On-demand production of custom 3D embroidered items
- Cross-Technique Integration:
- Combining 3D embroidery with other textile techniques like printing or weaving
- Exploration of 3D embroidery in non-traditional applications
Case Studies: Successful 3D Embroidery Projects
- Sports Team Rebranding: A professional sports team used 3D puff embroidery for their new logo on uniforms and merchandise, resulting in increased fan engagement and merchandise sales.
- Fashion Designer Collaboration: A high-end fashion designer incorporated 3D stumpwork embroidery into a couture collection, creating buzz in the fashion industry and inspiring new trends.
- Educational Toy Line: A company developed a line of educational toys featuring 3D embroidered elements for tactile learning, receiving accolades for innovation in children's products.
Conclusion:
3D embroidery designs represent an exciting frontier in the world of needlework, offering new possibilities for creativity and expression.
By understanding the various techniques, applications, and considerations involved in 3D embroidery, crafters and businesses alike can harness this technology to create stunning, memorable designs.
As with any advanced technique, success in 3D embroidery comes with practice, experimentation, and a willingness to push the boundaries of traditional embroidery.
Whether you're looking to add a new dimension to your personal projects or elevate your brand's visual presence, 3D embroidery designs offer a world of possibilities limited only by your imagination.
Embrace the depth and texture that 3D embroidery brings to your creations, and watch as your designs literally rise above the rest. Happy stitching in three dimensions!
Read the full article
0 notes
Text
Major Dragon Quest 3 Feature Sadly Fumbled By Kotaku

Dragon Quest III is one of the most important video games to grace our history as a society of gamers. It pioneered many very important features still used in role-playing games to this day. As such, it was revolutionary from its genesis in 1989 even through today. As such, a remake for the Nintendo Switch is on the way, launching later this year. It will launch for all other major platforms as well in both digital and physical releases.
As luck would have it, this isn't even the first time the game has been remade. Over the years, Dragon Quest III had remakes for the Game Boy Color, the Super Famicom, the Wii, the PS4, the Nintendo 3DS, and even cell phones. At this point, a Switch remake was all but inevitable, and oh-so welcomed.
Many fans have been clamoring for this remake of Dragon Quest III since it was officially announced a few years ago. Since then, a few issues have arisen to affect the release schedule, including the death of beloved Dragon Quest artist Akira Toriyama. You can watch the trailer for the HD-2D remake in all its glory below:
https://www.youtube.com/watch?v=1ltsk99E-RY
On Friday, July 12th, the gaming website Kotaku published an article about the HD-2D remake of Dragon Quest III. Published by Square Enix, the remake is one of a game created in 1989. Back then, it was called Dragon Warrior III in the West due to issues with licensing the franchise name Dragon Quest. However, fans of the Dragon Quest franchise discovered and noted a major flaw in the article:

Dragon Quest III pioneered the day/night cycle for RPGs. (Source: Kotaku)
The Story So Far
According to Kotaku's article, Dragon Quest III's HD-2D remake uses a day/night cycle "taking inspiration from Octopath Traveler II". The fact is that Dragon Quest III was the progenitor of all day/night cycles in any video game ever. And, as expected, fans of the Dragon Quest franchise were understandably upset by Kotaku's blatant inaccuracy and disregard for journalistic integrity:
https://twitter.com/TheDavidVinc/status/1812268055793385586
https://twitter.com/AtelierTohka/status/1812310333257617520
https://twitter.com/MegamanRA/status/1812268704345772128
https://twitter.com/DreamLeaf5/status/1812585908891496908
Some Twitter users went as far as to accuse Kotaku of using AI to write this article:
https://twitter.com/SirGametime/status/1812279032211222897
Dragon Quest Facts?
Amid the backlash, some Twitter users quickly gave Kotaku the benefit of the doubt. They claimed that the gaming website utilized information from another tweet (from user @DragonQuestFax) that stated that the day/night cycle of DQIII's HD-2D remake was a new feature. If Kotaku did do this, it proves they didn't research the information themselves:
https://twitter.com/MDirtysoul/status/1812528743455367477
As a fellow Dragon Quest fan, I too am abhorred by this false reporting on a feature that revolutionized the way we game today. I've played plenty of games in the franchise. I was always an outlier in my friend circles (many of whom would prefer other Square Enix game series like Final Fantasy or Kingdom Hearts). So to see the Western gaming press butcher a simple piece of game history like this hurt my soul. This is especially true because of Dragon Quest's still-limited appeal outside of Japan.
Truth be told, most Western audiences prefer Final Fantasy, much like my friends across various circles. Shame on Kotaku for perpetuating the continued ignorance of Western audiences. This is not something that Akira Toriyama would've wanted. It's certainly not something that DQ franchise creator Yuji Horii wants, to be sure. Do better, not just for your numbers, but because of the years of hard work put into a game like this DQIII.
Shorten with AI
In any event, I'm waiting with bated breath for the game to release. In the meantime, I'm off to slay some Slimes in Dragon Quest VIII and see a showgirl about a Puff-Puff massage. Till next time!

This is a Puff-Puff massage, in case you were curious.
Read the full article
0 notes
Text
Embroidery Digitizing Service Tips From the Best in the Business

Embroidery digitizing is an art form, a delicate blend of creativity and precision. For those who have walked the path of transforming beautiful designs into intricate stitches, the journey is filled with passion and expertise. Here, we share the secrets of the trade, offering you a comprehensive guide to mastering embroidery digitizing.
Understanding Embroidery Digitizing
Embroidery digitizing begins with understanding the fundamental concepts. Before diving into complex embroidery designs, it’s crucial to grasp the basics. This foundation will set you up for success as you advance in your craft. This digital embroidery file, often in a format like .DST or .PES, contains the instructions for the machine to follow, ensuring that each stitch is placed with absolute precision. The process involves several key steps:
Artwork Preparation: Begin with a high-quality image. The clarity and detail of your artwork directly affect the final output.
Choosing the Right Software: Professional digitizing software is essential. Programs like Wilcom, Hatch, and Brother PE-Design offer a wide range of tools and functionalities.
Setting Up the Design: This includes deciding on the stitch type, direction, density, and order. Each decision impacts the texture and appearance of the final embroidery.
Test and Adjust: After the initial digitization, run a test stitch. This helps identify any adjustments needed to perfect the design.
Key Elements of Professional Embroidery Digitizing
1. Quality of Artwork
The foundation of exceptional embroidery digitizing lies in the quality of the artwork. A clean, high-resolution image ensures that every detail is captured accurately. Pay attention to:
Clarity: Ensure the image is free from blurs and distortions.
Detail: Fine details should be prominent. Simplify complex images to ensure they translate well into stitches.
Contrast: High contrast images help in defining the edges and details clearly.
2. Choosing the Right Stitches
Selecting the appropriate stitch types is crucial. Here are some common stitches used in embroidery digitizing:
Satin Stitches: Ideal for outlining and creating smooth, shiny surfaces.
Fill stitches: Used for filling large areas. They can be varied to create different textures.
Running stitches: best for outlining and detailing small areas.
3. Stitch Direction and Angle
The direction and angle of stitches can significantly affect the final look of the embroidery. Properly aligned stitches enhance the design's aesthetic appeal and durability. Consider the following:
Consistency: Maintain consistent stitch angles for uniformity.
Flow: Ensure the stitches follow the natural flow of the design.
Overlap: Overlapping stitches can prevent gaps and add dimension to the embroidery.
4. Stitch Density
sew viscosity refers to how nearly the aches are placed together. It impacts the texture, weight, and overall appearance of the embroidery. Key points to consider include:
Balance: Avoid overly dense stitches that can cause fabric puckering or breaking of threads.
Coverage: Ensure sufficient coverage without overcrowding.
Fabric Type: Adjust stitch density based on the fabric being used to prevent damage and ensure a smooth finish.
Advanced Techniques for Superior Digitizing
1. Applique Embroidery
Applique is a technique where pieces of fabric are stitched onto a larger piece to create patterns or images. It adds depth and color variation to the embroidery. Key steps include:
Design Planning: Outline the areas where the appliqué fabric will be placed.
Secure Stitching: Use tack-down stitches to hold the appliqué fabric in place.
Finish Edges: Apply satin or zigzag stitches along the edges to prevent fraying.
2. 3D puff embroidery
3D puff embroidery creates a raised effect, adding dimension and texture to the design. It's commonly used for hats and sports apparel. To achieve this:
Foam Selection: Use embroidery foam beneath the stitches to create the puff effect.
Stitch Coverage: Ensure the stitches completely cover the foam to prevent it from peeking through.
Edge Sealing: Apply satin stitches to seal the edges and maintain the 3D effect.
3. Blending and Gradient Effects
Blending colors and creating gradients can create a stunning visual effect in your embroidery. Techniques include:
Layering Stitches: Gradually change the stitch colors to blend from one shade to another.
Density Variation: Adjust stitch density to create smooth transitions.
Direction Change: Alter stitch angles to enhance the blending effect.
Tips from the Embroidery Businesses Experts
1. Continuous Learning
The world of embroidery digitizing is constantly evolving. Stay streamlined with the latest trends, techniques, and software updates by:
Joining Forums and Communities: Engage with other digitizers to share knowledge and experiences.
Attending workshops and webinars: Learn from industry experts and expand your skillset.
Exploring Online Tutorials: Utilize online resources to master new techniques and software tools.
2. Invest in quality equipment.
High-quality equipment can significantly improve your digitizing experience and output. Consider:
Software: Invest in professional digitizing software with advanced features.
Embroidery Machine: Choose a reliable machine with precise stitching capabilities.
Hardware Upgrades: Ensure your computer has the necessary specifications to run the software smoothly.
3. Attention to Detail
Success in embroidery digitizing lies in the details. Pay close attention to:
Stitch Placement: Ensure each stitch is accurately placed to enhance the design.
Color Choices: Select thread colors that complement the fabric and design.
Testing: Always run test stitches to identify and correct any issues before final production.
4. Customer Collaboration
Work closely with your clients to understand their vision and requirements. Effective communication can lead to better results and higher customer satisfaction. Key points include:
Design Consultation: Discuss the design details, colors, and fabric choices with your clients.
Feedback and Revisions: Encourage clients to provide feedback and be open to making necessary adjustments.
Transparency: Keep clients informed about the process and any potential challenges.
Conclusion
Embroidery digitizing is a skill that combines art and precision. By focusing on quality artwork, appropriate stitch selection, advanced techniques, and continuous learning, you can master this craft. Remember, attention to detail and effective client collaboration are key to delivering exceptional results. Embark on your digitizing journey with passion and dedication, and watch as your creations come to life, stitch by stitch.
#digitizing#embroidery pattern#embroidery#custom patches#custom embroidery#business#apparel#artwork#embroidelicious#machine embroidery#clothing#fashion trends#fashion#support services
0 notes
Text
BLOG BY EMB EXPERT
Digitizing Services
EMB Expert offers a series of online business services; however, Digitizing is the primary and key service the company started. EMB Expert is not just a name; we do have experts providing phenomenal services that maintain a customer satisfaction ratio of above 95%.
Digitizing EMB Expert, ‘s key and primary service. It can be concisely explained as giving instructions to the needles. Digitizing is a process that is far more than mandatory for doing digital embroidery through embroidery machines. There are several kinds of embroidery machines and every machine reads a particular format to the see design Digitizing is the process by which images are processed on a computer through digitizing software, which turns the image into a machine-readable format.
Numerous digitizing formats are being used; however, some of them are regularly used: WILCOM, PUSLE, and EMBIRD. So, the digitizer is the person who puts manual instructions on the to-be-embroidered image with the help of software, which is later read by machines and needles.
Types Of Digitizing
Digitizing can be further classified into a few types. The digitizing types are defined by a particular technique that is used in any logo.
Three types of techniques are used on a regular basis. The techniques that are usually used are:
1. Simple Digitizing.
2. 3d puff Digitizing
3. Applique Digitizing
The above-mentioned types are also the techniques that differentiate the digitizing types from each other.
Simple Digitizing
Simple digitizing can also be classified as one type of digitizing because no special techniques are used in this type. However, a logo can be complex, but if no special technique is used, it will be referred to as a simple form of embroidery Digitizing.
Simple Embroidery Digitizing will be found mostly in shirt logs. Simple digitizing uses basic digitizing methods; however, no other techniques like 3dPuff, twill/applique, etc. are used.
3D Puff Digitizing
3D Puff Digitizing is a very commonly used technique and type of digitizing. 3d puff Digitizing. is a technique used to give a puffy look to the cap logos. The 3D puff technique, when applied, lets the machine sew the logo accordingly, while the foam is also placed on the hat, so the needles, when the technique is applied, sew the logo, keeping the density, patterns, and stitches intact.
The 3D puff logo is usually embroidered, and the foam is stuffed on the parts of the logo that need a puffy and raised look. The logo is digitized using the 3D puff technique, and the type is called 3D puff digitizing.
Applique Digitizing
Applique digitizing is a process where you can reduce the number of stitches by adding some extra fabric pieces of your desired color and sewing them with registration and guidelines. All files will be provided with proper guidelines so you can stitch your applique part properly into your design.
This process is usually used when anyone is making patches or sewing a big logo; it can save thread too.
0 notes
Last Seen Blogs

shevyblue-blog
2019: Power Of Grace

laurenmcdonough
Lauren McDonough

illbefinealonereads
illbefinealone reads

cleaningworldparkridge
Cleaning World Park Ridge

groovyfanduckcookie-blog
MCJ. SANZ