#Carryover in Addition
Explore tagged Tumblr posts
Visit Tumblr Blog
Explore Tumblr blogs with no restrictions, modern design and the best experience.
Last Seen Tumblr Blogs


Fun Fact
Tumblr has a 66 index score for customer satisfaction in the US.
Text
Math Marvels: Adding Natural Numbers Made Easy!
Before we start solving some problems, click on the video below: Problem 1: Understanding Carryover in Addition of Natural Numbers Introduction: Addition is a fundamental mathematical operation that helps us combine numbers and find their total value. However, when adding larger numbers, a concept called “carryover” can pose challenges for learners. Problem: Consider the addition problem: 589 +…

View On WordPress
#Addends and Sum#Adding Multiple-Digit Numbers#Adding Natural Numbers#Adding Three-Digit Numbers#Adding Two-Digit Numbers#Addition of Natural Numbers#Addition Practice Exercises#Addition Skills#Addition Strategies#Addition Techniques#Additions with Carrying#Arithmetic Addition#Basic Addition Operations#Carryover in Addition#Column Addition#Importance of Addition in Mathematics#Learning Addition Concepts#Mathematical Addition#Multi-Digit Addition#Natural Number Addition#Place Value Addition#Practical Addition Applications#Regrouping in Addition#Sum of Natural Numbers#Teaching Addition to Students
1 note
·
View note
Text
Last year, I wrote an essay discussing how the Law of Cycles could be considered an Uwasa (Rumor) by Magia Record lore logic, but it wasn't until my rewatch of the MR anime that I realized the same could also be said of Walpurgisnacht. We literally have a Rumor introducing her into the narrative at the end of S2x05, "I Won't Forgive Anyone"!

"Did you see it? Did you see her? The greatest, most terrible, the most powerful Witch of them all? If summoned by the power of the Uwasa, she would turn the land to ash and the skies to empty void, and civilization would cease to exist. That's what everyone in the Wings of Magius says! All hope will die on this day, and on this day a new hope will be born. Despair itself was created for this witch. For magical girls to change their fate!"
This "Rumor of Walpurgisnacht" not only succinctly introduces Walpurgisnacht to the narrative, it also provides an additional reason why Walpurgisnacht is coming to Kamihama in this iteration beyond the witch-luring macguffin the Wings of Magius are using to draw them in. In this sense, this Rumor is an MR-only addition that doesn't exist in the context of the original series.
For those not familiar with Magia Record, Rumors/Uwasa are witch-like entities created by Nemu Hiiragi's unique magic which obey certain rules in order to function. In that sense, Walpurgisnacht is definitely not an Uwasa sensu stricto, as her existence predates Nemu's.
However, just like the Law of Cycles--a promised savior which magical girls know about via rumors--Walpurgisnacht is also known through rumors well before she arrives in the narrative. In the original anime, Mami already knows this witch coming in the first timeline, and Touka and Nemu already know about her in this particular MR timeline as well. Stories about a massively destructive witch have been passed down from magical girl to magical girl over time... just like knowledge of the Uwasa are "transmitted" in Magia Record and just like the Law of Cycles at the end of the original anime.
In addition to setting up yet another parallel between Walpurgisnacht and the Law of Cycles, this would also explain why Walpurgisnacht does not appear to drop a grief seed when defeated by Madoka in earlier timelines (which leads directly to Homura being forced to kill her in a particularly traumatic iteration). (There is a grief seed in the PSP game, which is pre-Rebellion/Magia Record, but we'll see if that particular detail ends up being retconned out in Walpurgis no Kaiten.) Walpurgisnacht as an Uwasa-like being would explain why she acts and appears differently from other witches, despite ostensibly being a witch herself.
One other interesting thing about Uwasa is that they have the ability to "possess" magical girls--as seen with Tsuruno and Mami in Magia Record, and arguably Madoka in Rebellion. It is possible to forcibly separate the two after fusing, but only if the person attempting it truly understands the heart of the one who is possessed. It's easy to see how this could potentially be a key plot point in Walpurgis no Kaiten, with a tidy bit of symmetry--just as Homura wrested Madoka from the Law of Cycles, perhaps Madoka will return the favor in the future.
Rebellion also has other instances of proto-MR mechanics, such as Mami's use of Connect magic in her joint "Tiro Duet" attack with Madoka. It's not impossible there will be other carryovers from MR in Walpurgis no Kaiten, especially since Inu Curry was heavily involved in all three productions and has been extremely consistent with their symbolism thus far. This is just a tentative theory at the moment, but file this one under the "I am watching closely" tab.
67 notes
·
View notes
Note
fangbang is keeping my vampire autism alive if you'd like can you please tell the humble readers anything fun / trivia about vampires in this au or just about vampire lottie,,,, i love vampires man,,
YEAH. so to be perfectly fucking honest i have never ever everrrr written vampires before & i'm just winging it!! i really enjoyed the aesthetics of sinners (i've seen that movie three times in theaters help) & so that is some inspiration!!
off the top of my head:
i really enjoy the concept that various cultures have come up with precautions against vampires. nat is vaguely catholic in fangbang (she doesn't really believe in god though; it's more of a passive culture thing-- like i'm into the idea that some things JUST WORK and it's not altogether clear why they do, you can adopt "religious" precautions in a reverent way or in an almost secular way if you like) & so there are some carryovers of my own hyperfixation with "the conjuring" in how she relates to vampires (crucifix as a protection against glamor, holy water, etc). however, i dig the idea that loads of different cultures have methods to deal with them so there will be different practices under a daoist belief system or a shinto one (as examples) with strategies that still work to repel vampires.
with sinners, i like the idea of the eyes being a sign. so the way i wrote it in chapter one is that vampire eyes can turn yellow (or flicker yellow) when the vampire is unregulated/excited/animated. since lottie is new, her eyes are all over the place!! however, the eyes turn RED (think sinners) when a vampire is needing to feed. i like the berserker concept where it's like... i'm good, i'm good but there's a point i can get to where I AM NOT and i lose control and need to FEED NOW.
kind of on the buffy train- vampires don't have pulses and they heal fast. it's assumed they don't have a soul but honestly a soul is difficult to quantify? and so, this almost feels like a stigma to lottie because... she feels? what do you mean she doesn't have a soul? on that note, i like the idea that the more a vampire feeds, the more they lose their humanity (draining someone dry is the ultimate step forward to this). that's why lottie being so new is sort of in an interesting position & she still has many "human" qualities. feeding is what makes them descend into your platonic ideal of an uncaring and predatory vampire (drinking from humans maybe gives them a high to chase) and they lose themselves to it.
i posted in an earlier ask but i like the idea that you can get by on animal blood but it makes you kinda feel like shit and not as strong. you eventually DO need a bit of human blood (and that's where drinking from nat every now and then) comes in.
i think vampires have different unique powers. haven't decided how this works yet but i like the concept of lottie as an innate siren. it means she has access to "glamor," which is a method of seducing and influencing a human. things can protect you against a glamor (like nat's crucifix) but if not you're susceptible. it's possible to train yourself into immunity around this (which is something nat is going to try to... kinky effect with lottie i think lmao)
sidebar: i also really love the concept that new jersey apparently has a huge and somewhat problematic whitetail population and that there's this parallel of them having a vampire population LOL (hence additional hunters like tai & van). also the whitetails give something for lottie to hunt ❤️
ALSO: my tentative thought on nat's backstory is that her mom used to be a hunter but fell into drug abuse and ended up with nat's dad (he was still an asshole). nat's dad was turned into a vampire by one of vera's old enemies and nat had to kill him (bc maybe vera was out of it) & this led to nat even learning about vampires at all. vera goes on to be like "FUCK guess i have to train you" & it's not a great relationship but it is what it is 😭
6 notes
·
View notes
Note
I see your butchpool leafpool headcannon and i would like to make an addition. Short butchpool. She also carries bandaids all the time and knows how to fix the Car
exactly leafpool representing butch short kings everywhere. she keeps advil on her carabiner (carryover from doctorhood in another life)
23 notes
·
View notes
Text
Inazuma Eleven: Victory Road Worldwide Beta Test Demo for PS5, PS4, and PC launches July 18 - Gematsu

The Inazuma Eleven: Victory Road Worldwide Beta Test Demo will launch for PlayStation 5, PlayStation 4, and PC via Steam on July 18 at 4:00 a.m. PT / 7:00 a.m. ET, developer LEVEL-5 announced.
The demo launched first for Switch on March 28 and ended distribution on June 28.
The Worldwide Beta Test Demo includes the following contents:
Single-Player Matches – Team Selection / Difficulty Selection
Online Competition – Random Matches / Private Matches / Team Selection / Character Progression / Save Function (no transfer to the main game)
Story Mode – Chapter 1 / Save Function Available (no carryover to the main game and no cross-save support)
Supported languages include English, Japanese, Traditional Chinese, Simplified Chinese, French, Italian, German, Spanish, and Brazilian Portuguese.
The PlayStation and PC release of the demo also comes with the following updates:
Adjustments for the PlayStation 5, PlayStation 4, and Steam Versions
4K support, HDR support, high frame rate support, and more.
ON / OFF setting for HQ Mode.
Changes to the title screen for certain platforms.
Additional Storyline and Gameplay Features
You will be able to experience the continuation of the main story, picking up from where Briar / Sakurazaki kicks the football.
As a new feature, the Football Chest gimmick will change based on your story progression.
Parameters Updated to the Final Release Version’s Specifications
The Training Gauge, initially planned for the final release version, will be implemented in this update ahead of time.
Improvements to Focus Squabbles
Pressing the L2 button during combat will bring up icons showing the enemies’ Rock Paper Scissors hands.
Additionally, this display will remain on the screen for a short period of time after releasing the button.
The Recovery button will flash when you’re in a pinch.
Tutorials have been added to better explain the Rock Paper Scissors and Recovery features.
The player’s cooldowns have been decreased, effectively speeding up the pace of combat.
Implementation of Training Effects
To increase motivation for Focus Squabbles, “Training Effects” originally intended to appear partway through the story will now be displayed at the start of combat.
Gradual Changes in the Focus Squabble System
With the addition of new story content, you will experience the Focus Squabble System evolving to resemble football more closely as the story progresses.
Cats Are Pettable
You will be able to pet cats. By doing so, you may gain an increase in Training parameters or obtain items.
Improvements to Football Chests
An arrow indicating the direction of the kick has been implemented for more accurate aiming.
Items dropped from Football Chests can be picked up from a more forgiving distance.
Addition of Equipment and Outfits
You will be able to obtain equipment usable in Story Mode.
You can customize the appearance of your character by equipping different outfits.
Camera Sensitivity Settings
The default camera sensitivity will be slightly increased, and the speed can be adjusted in the Options.
Improvements to the Map
A full-screen map display for close-up areas will be added.
An option to rotate the Minimap will be added, and can be turned ON/OFF in the Options.
Adjustments to the Quest Marker
The sorting priority of the UI above characters will be improved.
A marker for quest items will be displayed onscreen.
Other Bugs and UI Changes
Minor bugs and UI changes will also be addressed.
Visit the official website for the Worldwide Beta Test Demo here.
Inazuma Eleven: Victory Road is due out for PlayStation 5, PlayStation 4, Switch, PC via Steam, iOS, and Android in 2024.
Watch a new trailer below.
Trailer #6
English
youtube
Japanese
youtube
Traditional Chinese
youtube
Simplified Chinese
youtube
15 notes
·
View notes
Note
Not the same Dazai who sent in the original canon carryover ask nor the one who said "same" but a third Dazai who has wrist pain and who cosplays as himself, responding to the second Dazai:
Bandages will stay on a lot better if you wind them around the palm once. Look up how to wrap a sprained wrist. You don't need to go super heavy on the palm to get it to stay on, it'll help a lot to stop them coming off if you just have done it once and tucked in the end.
For the neck ones it works the best for security, for me to do an X shape across my chest with them where the top part loops around my neck. That uses up way more bandage than just wrapping the neck though and might not work if you have boobs. A good in-between is looping armpit to shoulder on one side, then wrapping the neck, then doing the other side and securing it there. That way if it starts coming loose you'll feel it right away and be able to fix it by your arm instead of risking other people getting a glimpse of your neck skin (if you're like me when I'm in that kinshift that would be horrendously vulnerable). That's all for cosplay and medical stuff though. If I'm not cosplaying in addition to the layers and long sleeves thing I recommend scarves. I keep a lightweight scarf in my bag just in case I get hit with severe Dazaibrain at any moment when going about my life tbh.
✉
4 notes
·
View notes
Text
ao3 wrapped [writer's edition]
1. How many words have you written this year?
266,592 so far but I'm not done yet.
2. How many works did you publish this year?
14, though I think 2 were carryovers from last year.
3. What work are you most proud of (regardless of kudos/hits)?
I'm really proud of how Way of the Mynock is turning out and it will definitely be my longest work. BUT overall, I am most proud of Permission to Come Aboard, Admiral because I was hesitant to dip my toe into the Thrawn series and it was well-regarded by that fandom and I was asked to put it into a Thrawn Rare Pairs collection. That just tickled me.
4. What work of yours has the most hits?
Way of the Mynock by far, only one to get over 2k which isn't a lot but I've only been at this two years so I'm pretty small. And it's not close to done so it'll just keep persevering.
5. What work of yours got more feedback than expected?
Dissonance and Upheaval has 40 comments and while half of them are my replies I'm tickled that something with such a wonky high concept engendered such engaged readers.
6. Favorite title you used?
Serpentes Tremens is one of which I am particularly proud. Poor little drunken snake.
7. If you use song lyrics, which artist did you pull from the most?
That's gotta be Kate Nash. Way of the Mynock wouldn't exist without Skeleton Song, though the chapter titles aren't exclusive to that.
8. Pairing you wrote most this year?
Only 4 out of 14 were not Barrissoka so I remain that bitch.
9. Favorite pairing you wrote this year?
Vampire Barriss and vampire hunter Ahsoka followed closely by Emerie Karr and Riyo Chuchi.
10. What work was the quickest to write?
I wrote I Love You, Fulcrum directly into the AO3 interface in under an hour.
11, What work took you the longest to write?
Dissonance and Upheaval took a lot of research, and I have to be in the right mood to get the vibe.
12. How many WIPs are you taking into next year with you?
I am hoping to get a few finished, but it looks like seven as well as four or five I have planned but haven't started.
13. What's your longest work of the year?
Way of the Mynock is at 82,571 and not even half done.
14. What's your shortest work of the year?
I Love You, Fulcrum is 756 words young.
15. What WIPs are you taking into next year with you?
idk how this one is different from 12. Way of the Mynock might not even be completed next year. I'm taking it into the Sequel Trilogy era and I'm still on Rebels/Andor. I am hoping Don't Get Captured, Dissonance and Upheaval, and Serpentes Tremens will get finished by the end of the month. Contrasts is giving me trouble. It will get done when it gets done. I haven't even finished the first chapter of The Convor and the Tooka Cat. Poor Operations Other than War is just lying there at the bottom of the ocean.
16. What is your most common "Additional Tags" tag.
Probably "Fusion of Star Wars Legends and Disney Canon". I'm a slut for that one.
17. Your favorite character to write this year?
Tempted to say vampire Barriss but Emerie was really fun to write since she had some standout episodes but didn't get much backstory or closure in canon. NAH, nah scratch that. It's the Seventh Sister, actually. Both versions of her.
18. The character who gave you the most trouble this year.
Post-Tales of the Jedi Barriss. Still getting to know that girl. After having this version of her in my head post TCW it was hard to connect with new canon.
19. What's one paring do you want to explore next year?
I want to get more into Anidala, if I can find the time. I find them very easy to write and I want to explore the space since they're usually background in my work.
20. Which work of yours have you read the most?
Finishing up Dissonance and Upheaval has me reading the whole series over and over so I get the tone right.
21. How many kudos did you get this year?
482 which pleases the heck out of me as a small creator. That's over half my total!
22. Which work has the most comments?
Way of the Mynock at 52 so far.
23. Did you do any collaborative works this year?
No, but I will next year.
24. Did you write any gifts this year?
Three, same as the number of licks it takes to get to the gooey center of a Tootsie Pop.
25. Did you receive any gifts this year?
Nope, but it's not over yet!
26. What is your most common category?
A tie between Explicit and General Audience, which makes sense. They're usually the short one-offs.
27. What do you listen to while writing?
I often pick either one artist or genre for a story. Dusk of a Golden Age is all Dead Can Dance, for instance.
28. Favorite work you wrote this year?
You know what, it's hard to choose but I think my words in her voice is my most personal and I am really happy with how it turned out.
29. Favorite line/passage you wrote this year?
“Why, Miss Offee. You are sopping.”
30. Biggest surprise while you were writing this year?
I didn't expect to have so much fun writing a Sith character having a philosophical debate.
3 notes
·
View notes
Text
GAMES PLAYED: January 2K25
Based on my Steam Rewind from last year, I figured that if I'm going to spend *that* much time and money on games, I should at least keep notes for myself. So yeah, see below for a list of a bunch of games and some rambling thoughts I had about them.
January 2025
CARRYOVER GAMES
UFO 50: Podcast game; though I might have played as much as I feel is necessary? I’ve at least touched every game, and I’ve certainly played to completion a bunch of the ones that I cared most about. Cherries would be nice, but aren’t necessary. X/50 beaten, X/50 cherries.
Balatro: Hey it’s Balatro. I put more time in. It’s fun. It doesn’t immediately hook me, which I am forever glad about.
Halls of Torment: Things that do forever hook me are Vampy Survivy-alikes, and while I’ve 100% Vampy Survivy (more or less, I have a bunch of the secret Castlevania achievements to do), there’s still more. I think Halls may be my favorite in the genre, and the changes since the last time I played were good. It really nails that power scale and set up in a way that I like. It’s also super derivative of Diablo, in a way that I think helps the formula with the loot drops. It’s good, though the endgame is unsatisfying (but then, Vampire Survivors Ode to Castlevania may have had my favorite ending of a Video Game last year, so it’s an unfair comparison my mind is making).
Death Must Die: The Other Vampy Survivy alike I’ve put more time in. I’m not as huge a fan of this one. The basic loop is the same as Halls of Torment, in that it’s a bullet heaven survival-style game with an emphasis on gear collection and gear based builds, like Halls of Torment. What makes it different is the power set and the fact that you get those powers through a Hades-style god gifting. And calling it Hades-style is an understatement; it’s the most derivative of Hades UI and character designs that I’ve seen. If you told me it started as a Hades fangame that suddenly changed, I would not be surprised. It’s not necessarily a bad thing, but it rubs me the wrong way in an odd way. It’s fun though, and I don’t think I’ve figured out the puzzle that it presents, so I’ll probably keep poking at it for a while.
20 Minutes to Dawn: I don’t have a lot to add to this; another vampy survivy-like, continues to be good. Action is largely focused on the character’s ability and the weapon’s ability, of which you get one that you choose at the beginning of the run and have to reload. It’s fine, I mostly started going back to it to try to clear more, making regular process.
NEW(ER) GAMES (TO ME)
Arco: So, I technically started this last year, but I didn’t have enough time or hands on experience to really count it. It’s good! A small tactical turn-based game where actions are done in stopped time and then acted out in real time. It has a really frenetic feel, which is accentuated by the morality system the game has. Pretty frequently, you get to make a choice. Choose in a way that’s “bad,” and you may get additional items or power. But, you may also accrue guilt. Guilt manifests on the battlefield as Ghosts, enemies that inexorably move towards you as you’re planning out your turn that can throw a wrench in your plans. When you’ve only got one character, ghosts aren’t *too* big of an issue, but it really adds up when you’re rolling super deep in guilt or have multiple characters to plan out. It’s a neat wrinkle to add to the game. And the story’s neat; it’s a Mesoamerican styled world with a bunch of unique tribes who are running up against encroaching colonization and the pillaging that goes along with it. The characters are interesting and the story really clips along. I really like it; but I don’t love it, and I don’t know if I can really say why. I want to say it feels slight, but I don’t know that I can back that up in any real way. It’s a weird spot for me, but I’m glad it didn’t end up breaching my goty list, thus making that a lie and waste of time to put out.
Lorelei and the Laser Eyes: One of the biggest marks of shame for games I didn’t touch last year because that thing is laser targeting me. Arthouse style, logic-based puzzle game, open ended mystery and intentionally obtuse plot, and mixed media and referential bullshit? Yeah this game was made For Me. It’s really good too. The puzzles are fantastic, and solving some of the harder ones on my own with a pad of paper was an amazing feeling. Love that eureka moment. It doesn’t breach my top 5 though; i think the final puzzle was a little bit too hard for the rest of the game, and I had some minor annoyances with the rest of the game that didn’t help it. But, fantastic game, highly recommended, A++ gold star. Love this dev.
Sprawl: Retro-style movement based FPS with a cyberpunk theme. It’s a great game, but it’s also hard. Some of the levels and later challenges require a lot of you, and I barely made it. I am Getting Older now, but I don’t get a lot of repetitive motion pain (unless I’m in an arcade for an hour plus), but this was definitely getting to me. It also doesn’t have a whole lot else to it if you don’t like retro-style or movement based shooters. But what a trip.
Marvel Rivals: Marvel Overwatch, but the characters are allowed to be unique and kind of broken. I like Marvel, I like kind of broken characters, it’s a Good Game For Free.
Awaria (No trailer apparently? Have the OST): I picked it up unexpectedly; I liked the art, and for some reason didn’t immediately twig to it being by the Helltaker guy. But it is, only instead of demon girls in suits you get ghosts in sci-fi uniforms. Which is good and fun. And the game’s surprisingly tight. It’s a puzzle action game where you have to run around a small level and drop off items with some pretty strict time limits, and I was surprised by how satisfying everything was. The soundtrack’s great, the art’s fun, and the game plays really well. I played it through on Normal, put it down for like an hour, and then was like “...but what if I did it on hard?” So I bashed my head against Hard for 3 hours and beat it. It was great, love it, so far surprise of the year.
Kinki Spritual Affairs Bureau: It’s super jank, it’s short, it looks kind of ugly. It’s *perfect*. It’s hilarious, it’s doing Wild Shit, it has an anime girl flipping the bird at her boss through a drone, it has Important Facts About the Afterlife.

Shitpost of the year, 2k24.
3 notes
·
View notes
Text
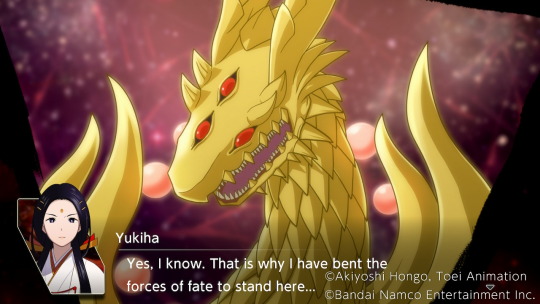
I think an interesting interpretation of Digimon Survive’s multiple endings is that of a time loop: one that the main characters are never consciously aware of, but whose echoes intrude upon the present and create ripples that can be glimpsed or felt during certain moments in the story.
Additional discussion under the cut due to spoilers for ALL OF Digimon Survive.
I don’t have many screenshots of moments in-game where you could interpret this as happening, but I’m specifically recalling Kaito’s comment to Aoi in Wrathful (about how if Miu had died, he would be going through the emotional wringer instead of her), some of Ryo’s dialogue in Truthful after his near-death experience in Part 3, Takuma waking up from his nightmare about Ryo in Truthful Part 4 (which, thanks to dialogue reuse, makes it sound worse than what actually happened in Truthful), and even this moment with Miyuki, which hints at a “bad end” for Takuma that (fortunately) we never have to witness:
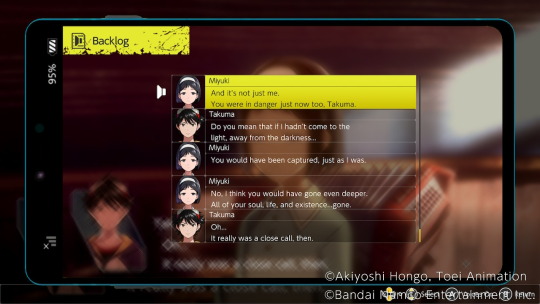
“You would have been captured, just as I was. No, I think you would have gone even deeper. All of your soul, life and existence… gone.”
I realize attributing certain dialogue to “time loop visions” may seem like it takes away some of the characters’ self-awareness and diminish the game’s message of knowing thyself and others, but I also don’t see why it can’t be both. They begin to know each other so well that it grants them a window into what is (to them) an alternate reality, in a double-edged sword sort of way. Glimpsing the what-if at the right (or wrong) time would possibly influence their decisions, add additional horror, plus it’s one more thing in this strange world to overcome. And for us as the audience, it also makes all the kids’ “if only we had done x” musings that much more impactful and full of dramatic irony, since we do actually see some of those what ifs play out in different endings of the game.
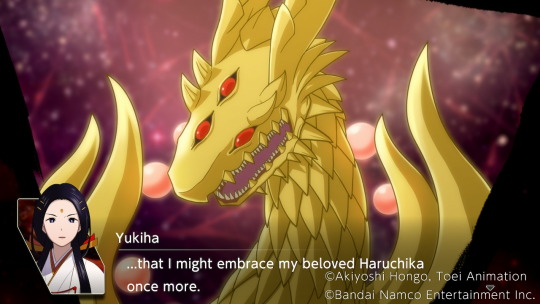
The only explanation I can think of for why a time loop could exist is some combination of the Master’s influence and Yukiha’s.
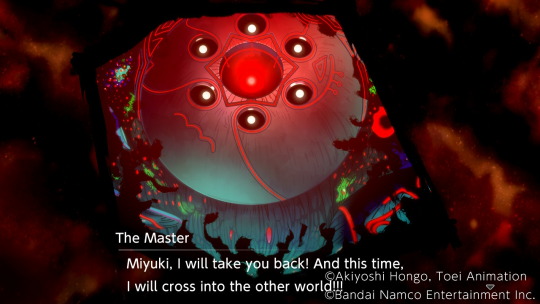
The Master greatly desires to cross over into the human world, in order to take his (Haruchika’s) revenge. In most of the endings we witness, he fails to achieve this (and we can only guess at what happens in the Bad Ending).
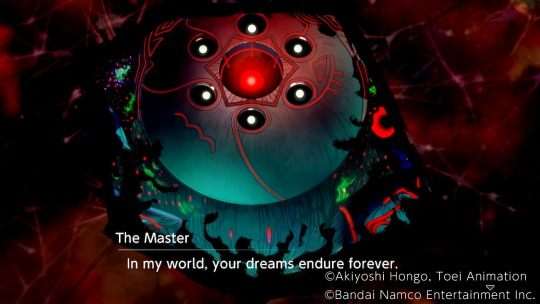
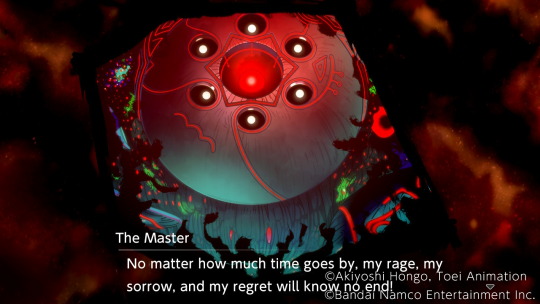
If his rage and hatred is so great, perhaps he is resetting the timeline to the point just before this most recent influx of sacrifices, hoping that they will all succumb and his true goal is achieved.
Meanwhile, the spirit of Yukiha has been trying (and failing) to reunite with Haruchika and save him. She has (canonically) moved metaphoric mountains in order to achieve her goals, and it’s possible she knows her descendants (who are still tied to the Kemonogami World) need help, and these other children are her best hope.
I do think it’s kind of a cool theory (though obviously, it’s only a theory), given the nature of the game, the carryover of digivolutions, and the fact that you HAVE to play it more than once before you can unlock the Truthful route. Witnessing multiple endings and the cumulative effect of your choices across playthroughs makes the ending of Truthful route feel all the more significant in regards to breaking the cycle of hatred and violence that existed in the Kemonogami World, and with these characters being written to exist against a backdrop of psychological horror, having more significant flaws and interpersonal issues to overcome, and overall being a bit further away from the “let’s save both worlds” idealism of other groups of chosen children, it’s an interesting thing for the game to suggest they require multiple attempts to get it “right,” while also giving them the opportunity do so. The idea that the characters are catching glimpses of past loops in which things went differently also makes some of the storytelling choices in the Truthful route feel a bit more genuine… the most significant example of this (to me) is Minoru’s reaction to Lopmon and his temporary split from Falcomon in Truthful Part 6, which plays out the same as it did when Lopmon ACTUALLY dark-digivolved in the Moral/Harmonious/Wrathful routes. Maybe Minoru’s overreaction starts to make more sense if he had an impression of one of those OTHER times when Shuuji met a much darker fate. IS Minoru fated to mistrust Falcomon, even if it’s temporary? Can THAT ever be changed…? 🤔
Anyway, I think this stuff is neat to think about.
#thinking about horror thinking about tragedy thinking about redemption and second chances and… YEAH#digimon survive#digimon survive spoilers#headcanon#the cactus speaks
20 notes
·
View notes
Text
Integrated Strategies 2: Crimson Solitaire Basics
Integrated Strategies 2 was the first permanent Integrated Strategies mode, and in a lot of ways it's a carryover/reskin of Integrated Strategies 1 (aka Ceobe's Fungimist). The theme of the mode is centered around Phantom and Shalem's history with the theater/assassination group the Crimson Troupe.
Difficulty
IS2 only has three difficulty settings:
Castle Sightseeing: This difficulty does not allow you to unlock different relics or ending, and halves the score you get at the end of a run. However, it starts you off with the Silent Squad relic, which increases your HP by 45% and your ATK/DEF by 35%. This is good if you want to get your feet wet a little bit, but it's not good overall.
Formal Investigation: This difficulty has no modifications at all, but allows you to unlock relics and gives you all of your score at the end of a run.
Calamity Faceoff: This difficulty gives you two different relics to start. The first relic will be a positive relic, but the second one will be a cursed relic that makes the run harder. This gives you a 20% bonus to your score, however. The cursed relic will be chosen from the following:
Ursus Chachek: Enemy HP/ATK/DEF are increased by 40%. Victoria Crown: Enemy HP/ATK/DEF are increased by 30%. Dreadful Foe Bosses have their HP increased by an additional 30%, and their ATK/DEF increased by an additional 15%. Leithenian Scepter: Enemy HP/ATK/DEF are increased by 30%. You will lose 1 HP whenever entering a node. Gaul Mantle: Enemy HP/ATK/DEF are increased by 25%. 4-star and higher operators cost 1 more Hope to recruit. Half-Refined Diamond: Enemy HP/ATK/DEF are increased by 25%. Command EXP gained is halved. Sigil of Tragodia: Enemy HP/ATK/DEF are increased by 30%. Unit Limit reduced by 2.
This does mean that higher difficulty runs in IS2 are essentially random in how buffs enemies and bosses are, as well as what secondary effects are present. You also are going to need to do a lot of hard mode runs if you want to get 100% of the collectible completion. I personally find this to suck and be a boring way of doing difficulty. But you might enjoy it!
Squads
It's time to discuss each squad in detail and how good I think it is in IS2.
Leader Squad: Gives you 4 bonus Life Points. These are temporary Life Points that you can't refill once they're gone, but you can stack more and more of them. This squad honestly isn't particularly good. There's no real penalty for losing Life Points in IS2 and you can't leverage Bonus Life Points in the nodes that want Life Points.
Gathering Squad: Gives you 2 Squad Limit and 2 Deployment Limit. This squad is okay, but nothing great. It's a good squad to choose if you want an early headstart on your deployment limit for an operator like Ling who appreciates the extra Deployment Limit, but the squad doesn't offer a ton of upside.
Support Squad: Gives you +20 Originium Ingots and +2 Hope. This squad is quite nice for having a cushion so you can donate money to the shop, and the extra 2 Hope can be quite advantageous early on, but this squad's benefits are very finite.
Spearhead Squad: Sets your Life Points to 1, but gives you +15% HP and ATK. This one I actually think it's quite good. It's a bit risky since you are immediately set to leak an enemy and die, but the statistical improvement is quite nice and it can be pretty easy to get extra Life Points in a run.
Tactical Squads: Each Tactical Squad has the same effect in IS2, where 4-star and higher operators of the squads two classes are recruited instantly promoted. (Guard and Vanguard for Assault; Defender and Supporter for Fortification; Medic and Sniper for Ranged; Caster and Specialist for Destruction). All of these squads are amazing, and are generally considered the most powerful squads. You save on a lot of hope overall by not needing to promote, but it also reduces the RNG needed to get access to powerful operators. Starting with an instantly promoted Thorns feels great.
Research Squad: Starts with +2 Life Points and gives +30% Command EXP. This squad isn't bad. The extra Command EXP allows you to grab earlier Command levels and get more Hope sooner. I'd rate this one about the same as the Spearhead Squad in all honestly.
First-Class Squad: Start off with an additional Elite Recruitment Voucher. This will be a voucher that gives you a guaranteed 4-star temporary recruit and personally I think this squad is the weakest of the bunch. The additional Temporary Recruitment is not a big benefit really since it can only be 4-stars. It ultimately won't amount to much.
Plays
Plays are one of the unique mechanics to IS2. Every so often a play will drop from one of the combat nodes. These will give you a one-time boon at a corresponding node. Some of these are quite powerful, while others are rather weak. Their primary purpose is to add an additional factor into deciding how to plan your route out. Since these are completely random and somewhat uncommon, you'll usually weigh them up as you please rather than worrying about getting any specific one.
Something to note briefly is that plays aren't sanity-tested. This means that it is entirely possible to get a play for a node you cannot access on that floor. This sucks, but there is nothing you can do about it.
Hallucinations
These are randomly occurring modifiers to the floor you are on. The effects range from overall positive to quite bad, and I'll list them here since they're relative simple in nature.
Bewildered: The floor is two nodes longer, and each node can have more branches, up to four. This one is almost always entirely positive, causing a floor to reap more rewards, and since more nodes will spawn, the chances of any particular node showing up on a floor is increased.
Blind: Nodes are not visible on the map until you are able to reach them. This one is annoying but can be mostly circumnavigated by simply choosing the node with the most branches.
Enraged: Combat operations spawn more often. This one is mostly positive but can be frustrating for those looking to go to the alternate endings, as the extra combat operations can take the place of encounters you need.
Solitary: Hope required to recruit operators is increased by 1, but the Hope required to promote operations is reduced by 1. This one is actually quite frustrating, as getting to benefit from the promotion hope discount is a generally rarer occurrence than needing to recruit more ops. It does make promoting 4-star operators free though.
Obsessed: Entering a node will generate one additional Originium Ingot, but all extra ingots gained this way are removed at the end of the floor. This hallucination is mostly irrelevant, since you can't guarantee you will have a way to actually use the ingots when you get them. There's no downside though.
Sensitive: Life Point loss and Life Point gain are doubled. This one is actually, in my opinion, pretty not great. It's not super consistent in IS2 that you actually gain life, and this makes leaking really rough. This can go in your favor and put you way ahead, but it also has the possibility of killing the run. Knowing where you can easily gain Life Points is vital here.
Imagined: Enemy HP/ATK/DEF are increased by 10%. This one isn't super important, and it mainly exists to make some bosses a little bit more annoying. This is at its roughest early on.
Survivalist: Enemies and allies get +50 ASPD and +50% ATK, but take True damage while deployed (50 for allies, 150 for enemies). Dreadful Foe Bosses are immune. This one has some ups and downs. Many operations early on can actually be cleared by this hallucination's True damage alone, especially if you get Civilight Eterna, but if you missed getting a Medic this can make stages extremely hard. I would say this is usually positive for you though.
Cautious: Deployment Limit -1, Squad Size +1. Overall not really impactful. Deployment limit is the less impactful of the two stats so it ends up being slightly positive usually.
Nodes
IS2 does not have any unique node types to it, having the standard set and nothing more. The one major difference in IS2 that is going to be immediately comparable to other themes though is the Boons node. This serves the same function as the Wish Fulfilled nodes in later themes, but Boons nodes are strictly worse.
There are two versions of the Boons node. The first only has one option to get a random Collectible, while the second gives you two options. The second Boon node is the better, since the first option will guarantee a Rare or Super Rare Collectible. It doesn't tell you that's how it works, but always choose the top choice.
Endings
There are four endings to IS2, and there is an order to unlocking them. To get to Ending 2, you must complete a run having seen Ending 1, and to get to Ending 3, you must complete a run having seen Ending 2. This is NOT true of Ending 4, while only requires you to have completed one run period.
Ending 1 requires you to fight Lucian, "Blood Diamond" as the final boss, and is the default ending type of IS2. There is no requirements to see this ending.
Ending 2 requires you to come across the Reprieve? encounter, and choosing to get closer to the painting at the cost of 1 Hope. This will give you the Worn-Out Puppet Collectible, and require you to fight Big Sad Lock as your final boss.
Ending 3 has multiple requirements. You must first discover the Attending a Banquet encounter, and choose to get a free outfit. This will give you the Mantle of the Wrongly Condemned Collectible, which makes your operators cost 2 more DP to deploy, but unlocks the next requirement. After beating the Floor 3 midboss, you must take the Stand-In Actor Collectible that appears over the other. It gives you a 3% HP/ATK/DEF buff and unlocks the final requirement. You must find the A Gathering of Followers encounter that will give you the Abrupt Realization relic, which reduces the DP cost of your operators by 3 and increases their Max HP/ATK/DEF by 5%.
This is one of the hardest endings in all of IS to actually get to and accomplish. You have to find two random encounters which are not guaranteed to spawn, and you have to give up a Super Rare Collectible on the midboss. Until you get Abrupt Realization, your operators will also cost more DP, and if you miss the final relic, that can impact your entire run. But doing so will allow you to fight the Troupe Mouthpiece and complete the third ending.
Ending 4 has two requirements to it. You must first come across the Don't disturb them encounter, and go into the fight it causes, Bound by Self. Winning this fight rewards you with the Dance of the Condemned Collectible, which reduces your Redeployment Time by 10%. Then, you need to find the Revenge Story encounter, beat the Observation battle that encounter causes, and get the Act I Collectible, which gives you 3 Hope.
This is another random ending and the two combat nodes can be fairly difficult if encountered too early. Doing this will allow you to fight against the Playwright as your final boss and see the final ending.
Next we're going to go into more detail on all of the nodes you can face in IS2, and I'll provide my tips on the various operations you can find.
4 notes
·
View notes
Text
Photos Show Dramatic Difference in Water Levels at Lake Oroville From 2021 to Today, Now at 100% Capacity
A record wet season has led to California's second-largest reservoir filling up.
— ByJulia Jacobo | June 19, 2023
California's Lake Oroville, one of the many important reservoirs in the West that reached critically low levels during the height of the megadrought, is now filled to the brim.
Before and after images of Enterprise Bridge offer a sharp comparison for Lake Oroville between July 22, 2021, and June 15, 2023, after the reservoir, the second-largest in the state, reached full pool for the first time since 2012 -- and only the second time in the past 15 years, according to the California Department of Water Resources.

In this before-and-after composite image, a comparison of water levels at Lake Oroville between July 22, 2021, and June 15, 2023. Justin Sullivan/Getty Images
In September 2021, water levels in Oroville dipped to their lowest ever at 628.47 feet, at just 24% capacity. As of Monday, water levels neared 900 feet -- more than 100 feet higher than this time last year. Not only are water levels at the lake currently measuring at 100% capacity, they are at 127% of where they should be around this time of year, according to the DWR.
Storage at Lake Oroville has risen more than 240 feet and gained more than 2.5 million acre-feet of water since Dec. 1, according to the DWR.
The improving drought conditions in California are "a stark difference" from the last three years, California Department of Water Resources director Karla Nemeth said.
Oroville can hold 3.5 million acre-feet of water, with the peak flow from the snowpack in the Sierra Nevada mountains occurring in April as temperatures began to rise quickly in the region. Some spots in the Sierra Nevada mountains received up to 200% more snowpack than normal due to repeated rounds of atmospheric rivers that slammed the West Coast during the winter season.

A picnic table sits partially submerged in the waters of Lake Oroville, June 15, 2023 in Oroville, California. Justin Sullivan/Getty Images
Melting snowpack continues to contribute to nearly full reservoirs in the state. Lake Shasta, California's largest reservoir located about 120 miles north of Lake Oroville, is also close to full pool, nearing 97% capacity as of last week, according to the California Department of Water Resources. The San Luis Reservoir in Merced County, the fourth-largest in the state, is currently 99% full.
"It’s refreshing to see Lake Oroville and other State Water Project (SWP) reservoirs like San Luis near or at capacity," Nemeth said.
In April, when Lake Oroville was measuring at 91% capacity, the DWR announced the State Water Project would be delivering 100% allocation for the first time since 2006.
The department is continuing to optimize operations for water storage and environmental protection for the water delivery needs to 27 million Californians and 750,000 acres of farmland, Nemeth said. These operations will also allow for carryover storage into next year, she added.

A section of Lake Oroville is seen nearly dry, Aug. 19, 2014 in Oroville, California. Justin Sullivan/Getty Images
Officials began ordering the strategic release of water as soon as the melting began, fearing the devastating flooding that would occur from the rapid warm-up in temperatures. Those releases could temporarily increase to keep up with increasing water flows and maintain safe water levels.
Earlier this month, total releases to the Feather River amounted to 8,000 cubic feet per second (cfs). An additional 4,000 cfs was released from the Thermalito Afterbay River Outlet, located 5 miles downstream from Oroville, according to the DWS.
The department is "closely" monitoring the inflow of water runoff into the lake -- as well as evaluating the lake levels and downstream needs -- to determine how much water to release at any given time, Nemeth said.
Oroville Lake sits behind the tallest dam in the country, the Oroville Dam at 770.5 feet, and provides hydroelectric power to the Edward Hyatt Power Plant, the fourth-largest in the country.

In an aerial view, houseboats sit anchored at Bidwell Canyon Marina on Lake Oroville, June 15, 2023 in Oroville, California. Justin Sullivan/Getty Images
The plant was forced to close in 2021 when the record-low water levels were too low to flow downstream. In 2017, nearly 200,000 residents living near Lake Oroville, located about 75 miles north of Sacramento, were forced to evacuate after heavy rainfall damaged the dam's spillways, which could have allowed for uncontrolled floodwaters to release downstream.
Those spillways were rebuilt "to the highest engineering design and safety standards, and continue to operate as intended and designed," Nemeth said.
4 notes
·
View notes
Text
Important Guide to Blood Draw Orders: How to Ensure Accurate Lab Tests and Smooth Phlebotomy
Essential guide to Blood Draw Orders: How to Ensure Accurate Lab Tests and Smooth Phlebotomy
Effective blood collection procedures are the backbone of reliable laboratory testing, critical for diagnosis, treatment, and ongoing patient care. Proper blood draw orders and protocols not only enhance the accuracy of lab results but also improve the overall experience for both healthcare providers and patients. In this thorough guide, we will explore the best practices for determining blood draw orders, optimizing phlebotomy procedures, and ensuring accurate, timely laboratory results.
Understanding the Importance of Blood Draw Orders
Blood draw order, also known as phlebotomy order of draw, refers to the specified sequence in which blood specimens are collected during a venipuncture. The correct order of draw minimizes the risk of cross-contamination between test tubes,prevents blood sample contamination with additives from previous tubes,and ensures the purity of the specimens for accurate laboratory analysis.
Key Benefits of Proper Blood Draw Order
Prevents cross-contamination of blood samples
Ensures accurate test results, reducing the need for repeat procedures
Facilitates smooth and efficient venipuncture procedures
Enhances patient safety and comfort
Complies with laboratory standards and accreditation requirements
Standard Blood Draw Order of Draw: An Overview
the order of blood draw is carefully designed to prevent additive carryover, which could alter test results. The most widely accepted order is based on guidelines from the Clinical and Laboratory Standards Institute (CLSI) and the centers for Disease Control and Prevention (CDC). Below is a typical order of draw, explained step-by-step:
Step
Tube Type
Common Additive
Purpose of Blood Collection
1
Sterile tube
Sodium citrate (light blue top)
Coagulation tests (PT, aPTT, INR)
2
Serum separator tube
–
Serum chemistry, serology, blood bank testing
3
Heparin tube
Heparin (green top)
Electrolytes, plasma chemistries
4
EDTA tube
EDTA (lavender or pink top)
Hematology, blood bank testing
5
Glycolytic inhibitor tube
Fluoride oxalate (gray top)
Blood glucose, lactate testing
Best Practices for Determining Blood Draw Orders
Follow Established Guidelines
Adhere to CLSI and CDC guidelines for the blood collection order. These standards offer comprehensive steps to minimize errors and contamination.
Consult Laboratory Protocols
Every laboratory may have specific protocols based on the tests they perform. Always check with the laboratory or clinical guidelines before performing blood draws.
Prioritize Patient Safety and Comfort
Ensure patients are properly identified, informed about the procedure, and kept pleasant throughout. Clear communication can reduce anxiety and improve cooperation.
Use Proper Equipment
Appropriate tourniquet placement and timing
Sterile,correctly labeled collection tubes
Proper needle size for patient’s vein and blood volume needs
Practical Tips to Ensure Accurate Lab Tests and Smooth Phlebotomy
Verify patient identity: Confirm name and date of birth before collection.
select appropriate veins: Cephalic, basilic, or median cubital veins based on accessibility.
Apply tourniquet properly: No longer than one minute to avoid hemoconcentration.
Inject collection tubes in the correct order: Follow the specified sequence to prevent additive carryover.
Mix specimens adequately: Gently invert tubes with anticoagulants promptly after collection.
Label specimens immediately: Include patient information, date, and time of collection.
Document: Record any complications or patient reactions during the procedure.
Common Challenges and how to Overcome Them
Tough Veins
If veins are hard to locate or fragile, consider using warm compresses to dilate veins or consulting with more experienced phlebotomists.
Patient Anxiety
Communicate clearly, offer reassurance, and provide comfort measures such as distraction techniques or proper positioning.
Contamination or Hemolysis
Use proper needle gauge, avoid excessive probing, and handle samples gently to prevent hemolysis or contamination.
Case Study: Improving Blood Draw Accuracy in a Busy Clinic
Background
A high-volume clinic experienced frequent repeats of blood tests due to inconsistent tube ordering and specimen contamination, delaying diagnosis and treatment.
Intervention
Training staff on the proper blood draw order based on CLSI guidelines
Implementing checklists for patient identification and tube collection
Streamlining supply inventory to ensure readiness
Results
Reduction in repeat blood draws by 30%
Faster turnaround times for lab results
Improved patient satisfaction and confidence
First-Hand Experience: My Tips for Successful Blood Collection
As a seasoned phlebotomist, I can attest that meticulous adherence to the blood draw order and proper technique greatly impact lab accuracy and patient comfort. Always double-check labels, communicate with patients, and stay updated on the latest guidelines for blood collection. Consistency and attention to detail are key to getting accurate results and ensuring a smooth process every time.
Conclusion
Proper blood draw orders are fundamental to achieving accurate laboratory results and ensuring a seamless phlebotomy process. By following established guidelines, implementing best practices, and paying close attention to detail, healthcare professionals can minimize errors, reduce the need for repeat testing, and improve patient outcomes. Remember, the goal is not just to collect blood samples but to do so with precision, care, and professionalism. Embracing these practices will enhance the reliability of lab tests, boost staff confidence, and provide better care for every patient.
https://phlebotomytrainingcenter.net/important-guide-to-blood-draw-orders-how-to-ensure-accurate-lab-tests-and-smooth-phlebotomy/
0 notes
Text
Master the Order of Draw in Phlebotomy: Essential Tips for Accuracy and Safety
Master the Order of Draw in Phlebotomy: Essential Tips for Accuracy adn Safety
Performing blood draws is a routine yet critically significant task in healthcare. Proper adherence to the order of draw in phlebotomy is essential to prevent cross-contamination of additives, ensure accurate laboratory results, and maintain patient safety. Whether you’re a seasoned phlebotomist or just starting your journey, understanding and mastering the correct sequence of blood collection is vital.In this comprehensive guide, we will explore the significance of the order of draw, share practical tips, and highlight best practices to enhance accuracy and safety in blood collection procedures.
What is the Order of Draw in phlebotomy?
The order of draw in phlebotomy refers to the specific sequence in which blood collection tubes are filled during venipuncture. This sequence is designed to prevent cross-contamination of additives and ensure the integrity of laboratory tests. Different types of blood tubes contain various anticoagulants and additives, and improper order can lead to inaccurate test results or sample compromise.
Why is the Order of Draw Critically important?
Understanding and following the correct order of draw is crucial for several reasons:
Prevents cross-contamination of additives between tubes, which could distort test results.
Maintains sample integrity by avoiding additive carryover that can interfere with chemical analyses.
Ensures safety by reducing the risk of bloodborne pathogen transmission.
compliance with standards set by organizations like CLSI, CDC, and OSHA.
Standard Order of Draw: A Detailed Guide
The standard order of draw recommended by the Clinical and Laboratory Standards Institute (CLSI) and other governing bodies is essential knowledge for all phlebotomists. Below is a simplified table outlining the typical sequence of blood collection tubes:
Order of Draw
Tube Type / Additive
Purpose
1st
Sterile tubes / Blood culture bottles
Blood cultures and sterile specimens
2nd
Yellow or yellow-gray tubes / Thixotropic gel
Blood banking, cross-matching
3rd
Light blue / Sodium citrate
Coagulation tests
4th
Serum tubes (serum separator or plain) / No additive
Serology, chemistry
5th
dark green / heparin
STAT chemistry tests
6th
Lavender or purple / EDTA
CBC, hematology tests
7th
Gray / Potassium oxalate or fluoride
Glucose testing
Note:
Some laboratories may have specific protocols or modified orders based on the tests ordered or local regulations. Always verify with your institution’s guidelines.
Practical tips for Mastering the Order of Draw
To ensure accuracy and safety in blood collection, consider these practical tips:
Check test orders carefully: Confirm which tests are requested to select appropriate tubes.
Prepare all supplies in advance: Have all tubes, needles, gloves, and antiseptics ready to avoid delays and contamination.
Follow the correct needle and tube insertion technique: Use the proper size needle and ensure secure connection to avoid hemolysis.
Fill tubes in the prescribed sequence: This prevents additive cross-contamination.
Invert tubes gently: Mix additives appropriately when required, typically by inverting tubes 8-10 times gently.
Avoid prolonged tourniquet application: Keep it on for less than 1 minute to prevent hemoconcentration.
Label samples promptly: Clearly annotate patient details and collection time to prevent mix-ups.
Dispose of sharps properly: Follow safety protocols to prevent injuries and transmission of infections.
Benefits of Mastering the Order of Draw
Enhanced Diagnostic Accuracy
Following the proper sequence helps produce reliable lab results, directly impacting patient diagnosis and care.
Increased Safety for Patients and Staff
Adherence reduces risk of contamination, infections, and accidents, ensuring a safer working habitat.
Compliance with Regulatory Standards
Proper procedures align with CLSI, OSHA, and hospital policies, minimizing legal and accreditation issues.
Case Studies: Practical Insights from the Field
Case Study 1: Misordered Draw Leading to Test Interference
A hospital observed inconsistent coagulation test results. Examination revealed that the phlebotomist skipped the correct order, leading to serum contamination with EDTA. After retraining staff on the proper sequence, test accuracy improved substantially.
Case Study 2: Safety Enhancement through Proper technique
An outpatient clinic improved safety protocols by emphasizing the order of draw and safe disposal practices. They reported fewer needlestick injuries and better patient outcomes.
First-Hand Experience: Lessons Learned
As a seasoned phlebotomist, I have seen firsthand how meticulous adherence to the order of draw can prevent costly errors. Once, a simple oversight led to borderline results in a coagulation panel, prompting retesting and unnecessary patient discomfort. After implementing strict training on the sequence, errors decreased, and confidence in sample integrity increased. Remember, attention to detail makes all the difference!
Conclusion
mastering the order of draw in phlebotomy is more than just a procedural requirement; it’s a critical component of diagnostic accuracy and patient safety. By understanding the rationale behind the sequence, adhering to best practices, and staying updated on standards, healthcare professionals can improve laboratory outcomes and ensure optimal patient care. Whether you’re performing routine draws or complex procedures, prioritizing accuracy and safety through the correct order of draw is a cornerstone of professional excellence in phlebotomy.
Stay informed, practice diligently, and always verify institutional guidelines to become a confident and competent phlebotomist. Master the order of draw today for a safer, more accurate tomorrow!
https://phlebotomytechnicianprogram.org/master-the-order-of-draw-in-phlebotomy-essential-tips-for-accuracy-and-safety/
0 notes
Text
Why Knock Out Drums Are Essential in Gas Processing Systems
What Is a Knock Out Drum?

The Role of Knock Out Drums in Gas Processing
In any gas processing facility, it is vital to maintain clean and dry gas streams. This is critical to both operational efficiency and equipment protection. This is where the knock out drum plays a key role. Installed at strategic points within the system, typically upstream of compressors or other sensitive machinery, the drum effectively separates liquid droplets from the gas flow. By capturing these contaminants early in the process, the knock out drum helps prevent corrosion, erosion, and fouling in downstream components. Its importance is further amplified when integrated with a well-designed filtration system, ensuring that only high-quality gas continues through the plant. Modern knockout drum design focuses not only on maximizing separation efficiency but also on reducing pressure drop and handling variable flow rates, making it an indispensable part of safe and reliable gas processing operations.
Key Functions: Separating Liquids from Gas Streams
We have listed the key functions of knock out drum as follows:
Removes Entrained Liquids: Captures liquid droplets (such as water, hydrocarbons, and condensates) carried within the gas stream through gravity-based separation.
Prevents Liquid Carryover: Ensures that only dry gas proceeds downstream, reducing the risk of liquid contamination in compressors, turbines, and other critical equipment.
Enhances Filtration Efficiency: Acts as a pre-separation stage to reduce the load on finer downstream filters in the overall filtration system.
Protects System Integrity: Minimizes corrosion, erosion, and fouling caused by liquid within gas processing systems.
Handles Surge Conditions: Provides temporary storage for liquid surges, helping to stabilize system performance and protect downstream units.
Supports Consistent Gas Quality: Helps maintain the required gas quality specifications by removing unwanted liquids through optimized knockout drum design.
How Knock Out Drums Improve Equipment Protection
In gas processing operations, one of the constant challenges is protecting downstream equipment from the damaging effects of liquid. A well-designed knock out drum serves as a crucial safeguard in this regard. By efficiently separating entrained liquids from the gas stream, it prevents these contaminants from reaching sensitive components such as compressors, turbines, heat exchangers, and control valves. Without this protective barrier, liquids can cause corrosion and erosion leading to blockages and premature wear. An integrated filtration system that includes an optimized knockout drum design ensures that the bulk of harmful materials are removed early. This can significantly extend the life of the equipment and reduce maintenance costs. In this way, knock out drums contribute directly to the reliability, efficiency, and safety of gas processing facilities.
Supporting Regulatory Compliance and Safety Standards
Gas processing industry is highly regulated and meeting environmental and safety standards is not an option but a fundamental requirement. In this regard, the knock out drums play an essential role. They help in achieving and maintaining compliance with these standards. They help in removing liquids from gas streams and ensure that the processed gas meets stringent quality and emission limits before it reaches pipelines or end-users. In addition to this, an effective knockout drum design can help reduce the risk of liquid carryover, which can lead to dangerous conditions like compressor surge, fires, or even explosions. By incorporating knock out drums within a broader filtration system, you can help support cleaner operations, minimize the release of pollutants and protect both the workforce and the environment. Knock out drums contribute not only to equipment performance but also to the overall safety and regulatory compliance of gas processing facilities.
Design Considerations for Optimal Performance
Achieving optimal performance from a knock out drum requires careful attention to its design. Several factors influence the efficiency of liquid in gas processing applications. First, sizing is critical — an undersized drum may lead to poor separation, while an oversized unit can increase costs unnecessarily. Proper knockout drum design takes into account factors such as gas flow rate, pressure, temperature, and the expected level of liquid contaminants. Internals like vane packs, mesh pads, or demister elements can be incorporated to enhance separation efficiency without causing excessive pressure drop. The orientation of the drum (horizontal or vertical) should also align with space constraints and process needs. Integrating the drum seamlessly with the plant’s filtration system ensures a layered approach to gas cleaning, allowing finer filtration downstream to operate more effectively. By considering these elements, operators can maximize the performance and reliability of their knock out drums in demanding gas processing environments.
Maintenance Best Practices to Maximize Drum Lifespan
Regular maintenance is key to ensuring that a knock out drum continues to deliver reliable performance throughout its service life. In any gas processing facility, adopting the right maintenance practices helps prevent efficiency losses and costly unplanned shutdowns. There must be routine inspections that focus on checking the condition of internal components such as vane packs, mesh pads, and other elements of the knockout drum design for signs of wear or fouling.
At the same time, it is also important to monitor liquid levels and verify the proper functioning of drain systems to avoid liquid carryover. Periodic cleaning of the drum and associated piping ensures that the filtration system remains effective and free of buildup. In addition to all this, tracking pressure drop across the drum can serve as an early indicator of potential blockages or internal damage. By following these best practices, operators can significantly extend the lifespan of the knock out drum and maintain optimal performance in their gas processing systems.
The location of installation of these Knockout drums are in India.
0 notes
Text
youtube
📚 Learn Dynamic Addition Using the Montessori Small Beads Frame! In this video, we demonstrate step-by-step dynamic addition using the Montessori Small Beads Frame, a hands-on math tool that helps children understand place value and carryover in addition.
🎯 Perfect for:
Montessori educators
Parents homeschooling with Montessori methods
Students learning basic math concepts through manipulatives
1 note
·
View note
Text
Lancashire boiler
Essential Guide to Boiler Water Treatment and Modern Boiler Solutions
By Apienergy.co.uk
Boilers are the backbone of industrial heating systems, power generation plants, and many commercial buildings. Whether you're operating a traditional Lancashire boiler or a modern condensing boiler, ensuring peak efficiency and safety comes down to one critical factor: proper boiler water treatment.
At Apienergy.co.uk, we understand the importance of optimizing your boiler performance while keeping costs and emissions low. This article dives deep into boiler technologies, the role of natural gas, and how advanced water treatment practices protect your system from corrosion, scaling, and inefficiency.
Understanding Boiler Systems
A boiler is a closed vessel in which water is heated to produce steam or hot water. It is used in a variety of industries including manufacturing, food processing, power generation, and building heating systems.
There are two primary types of boilers:
Steam boilers – These generate steam that can be used for driving turbines or providing heat.
Hot water boilers – These produce hot water for heating and cleaning purposes.
Boiler technology has evolved significantly, moving from coal-fired giants like the Lancashire boiler to compact and eco-friendly models like the condensing boiler.
Lancashire Boiler: The Industrial Workhorse
The Lancashire boiler is a type of fire-tube boiler developed in the 19th century. It consists of a large cylindrical shell containing two flue tubes and was commonly used for steam generation in factories and mills.
Key Features:
Large water capacity
Simple operation
High durability
Despite being an older model, many industries still operate Lancashire boiler, especially in legacy systems. However, they come with efficiency challenges, particularly when compared to modern boilers. Maintaining water purity in such boilers is vital, as the presence of scale or corrosion can severely reduce efficiency and cause breakdowns.
Importance of Boiler Water Treatment
Boiler water treatment is a critical aspect of boiler maintenance. Untreated or poorly treated water can lead to serious issues such as:
Scale formation: Minerals like calcium and magnesium precipitate on boiler surfaces, reducing heat transfer efficiency.
Corrosion: Oxygen and carbon dioxide in water can corrode metal surfaces, leading to leaks and reduced boiler lifespan.
Foaming and carryover: Poor water quality can cause steam contamination, leading to downstream equipment damage.
At Apienergy.co.uk, we emphasize a comprehensive water treatment program that includes:
Pre-treatment: Filtration, softening, and chemical dosing before water enters the boiler.
Internal treatment: Chemicals added directly to boiler water to control pH, remove oxygen, and prevent scale.
Blowdown: Periodic removal of a portion of water to reduce impurities.
Proper treatment improves heat exchange, reduces fuel consumption, and extends the life of your boiler—whether it’s a historic Lancashire model or a modern condensing unit.
Condensing Boilers: Energy-Efficient Heating
A condensing boiler is a high-efficiency water heater that uses condensing technology to extract additional heat from exhaust gases. Unlike older boilers, which waste significant energy through flue gas, condensing boilers cool these gases, causing the water vapor to condense and release latent heat.
Benefits of Condensing Boilers:
Up to 98% energy efficiency
Lower CO₂ emissions
Compact design
Ideal for residential and commercial heating
When powered by natural gas, condensing boilers become even more eco-friendly. Natural gas is a cleaner-burning fuel compared to oil or coal and emits fewer pollutants.
If you are considering an upgrade, switching to a natural gas condensing boiler can significantly reduce your operational costs while meeting modern emission standards.
Natural Gas: The Smart Fuel Choice
Natural gas is becoming the fuel of choice for boilers due to its availability, cost-effectiveness, and lower environmental impact. It is commonly used to fire:
Steam boilers in manufacturing
Hot water boilers in commercial buildings
Condensing boilers in homes and offices
Why Natural Gas?
Burns cleaner than coal and oil
Readily available in most regions
Compatible with most modern boilers
Lower maintenance and emissions
At Apienergy.co.uk, we help businesses transition to natural gas-powered boilers with energy audits, system upgrades, and installation services.
Steam Boilers and Their Modern Applications
Steam boiler continue to be essential in industries requiring process steam, sterilization, or power generation. Modern steam boilers come with improved controls, insulation, and combustion efficiency, making them far superior to older models.
However, regardless of the boiler type, one universal requirement remains—boiler water treatment.
Regular testing, monitoring, and treatment of boiler water prevent:
Pressure vessel damage
Fuel wastage
Unscheduled downtimes
Boiler Water Treatment Services by Apienergy.co.uk
At Apienergy.co.uk, we specialize in:
✅ Custom boiler water treatment plans ✅ Chemical dosing system installations ✅ Water softening and filtration solutions ✅ On-site water analysis and consultation ✅ Ongoing maintenance and performance audits Whether you operate a traditional Lancashire boiler, a high-efficiency condensing boiler, or an industrial steam boiler, we tailor our water treatment programs to meet your specific needs and ensure compliance with safety and efficiency standards.
0 notes