#DXVK
Text
How to use DXVK with The Sims 3
Have you seen this post about using DXVK by Criisolate? But felt intimidated by the sheer mass of facts and information?
@desiree-uk and I compiled a guide and the configuration file to make your life easier. It focuses on players not using the EA App, but it might work for those just the same. It’s definitely worth a try.
Adding this to your game installation will result in a better RAM usage. So your game is less likely to give you Error 12 or crash due to RAM issues. It does NOT give a huge performance boost, but more stability and allows for higher graphics settings in game.
The full guide behind the cut. Let me know if you also would like it as PDF.
Happy simming!
Disclaimer and Credits
Desiree and I are no tech experts and just wrote down how we did this. Our ability to help if you run into trouble is limited. So use at your own risk and back up your files!
We both are on Windows 10 and start the game via TS3W.exe, not the EA App. So your experience may differ.
This guide is based on our own experiments and of course criisolate’s post on tumblr: https://www.tumblr.com/criisolate/749374223346286592/ill-explain-what-i-did-below-before-making-any
This guide is brought to you by Desiree-UK and Norn.
Compatibility
Note: This will conflict with other programs that “inject” functionality into your game so they may stop working. Notably
Reshade
GShade
Nvidia Experience/Nvidia Inspector/Nvidia Shaders
RivaTuner Statistics Server
It does work seamlessly with LazyDuchess’ Smooth Patch.
LazyDuchess’ Launcher: unknown
Alder Lake patch: does conflict. One user got it working by starting the game by launching TS3.exe (also with admin rights) instead of TS3W.exe. This seemed to create the cache file for DXVK. After that, the game could be started from TS3W.exe again. That might not work for everyone though.
A word on FPS and V-Sync
With such an old game it’s crucial to cap framerate (FPS). This is done in the DXVK.conf file. Same with V-Sync.
You need
a text editor (easiest to use is Windows Notepad)
to download DXVK, version 2.3.1 from here: https://github.com/doitsujin/DXVK/releases/tag/v2.3.1
Extract the archive, you are going to need the file d3d9.dll from the x32 folder
the configuration file DXVK.conf from here: https://github.com/doitsujin/DXVK/blob/master/DXVK.conf.
Optional: download the edited version with the required changes here.
administrator rights on your PC
to know your game’s installation path (bin folder) and where to find the user folder
a tiny bit of patience :)
First Step: Backup
Backup your original Bin folder in your Sims 3 installation path! The DXVK file may overwrite some files! The path should be something like this (for retail): \Program Files (x86)\Electronic Arts\The Sims 3\Game\Bin (This is the folder where also GraphicsRule.sgr and the TS3W.exe and TS3.exe are located.)
Backup your options.ini in your game’s user folder! Making the game use the DXVK file will count as a change in GPU driver, so the options.ini will reset once you start your game after installation. The path should be something like this: \Documents\Electronic Arts\The Sims 3 (This is the folder where your Mods folder is located).
Preparations
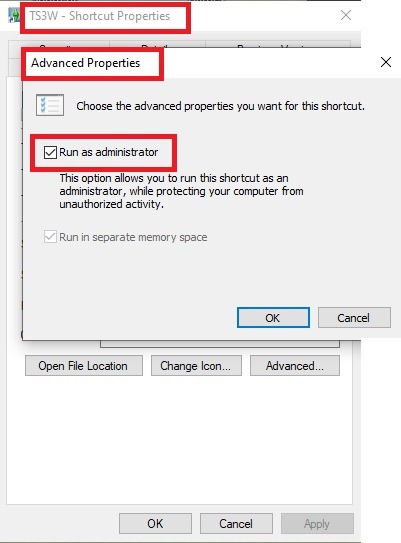
Make sure you run the game as administrator. You can check that by right-clicking on the icon that starts your game. Go to Properties > Advanced and check the box “Run as administrator”.
Note: This will result in a prompt each time you start your game, if you want to allow this application to make modifications to your system. Click “Yes” and the game will load.
2. Make sure you have the DEP settings from Windows applied to your game.
Open the Windows Control Panel.
Click System and Security > System > Advanced System Settings.
On the Advanced tab, next to the Performance heading, click Settings.
Click the Data Execution Prevention tab.
Select 'Turn on DEP for all programs and services except these”:
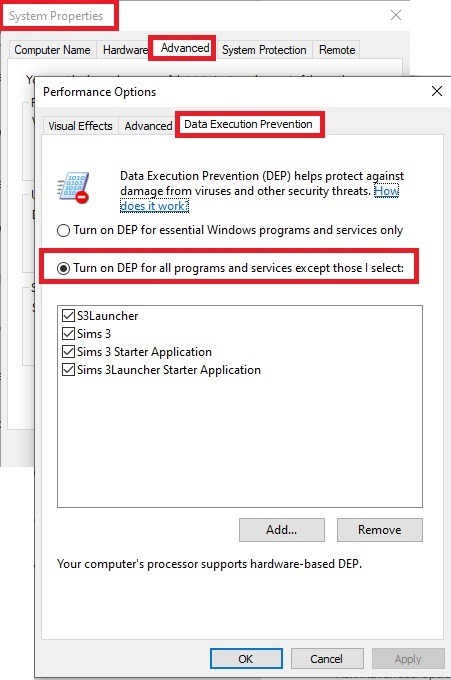
Click the Add button, a window to the file explorer opens. Navigate to your Sims 3 installation folder (the bin folder once again) and add TS3W.exe and TS3.exe.
Click OK. Then you can close all those dialog windows again.
Setting up the DXVK.conf file
Open the file with a text editor and delete everything in it. Then add these values:
d3d9.textureMemory = 1
d3d9.presentInterval = 1
d3d9.maxFrameRate = 60
d3d9.presentInterval enables V-Sync,d3d9.maxFrameRate sets the FrameRate. You can edit those values, but never change the first line (d3d9.textureMemory)!
The original DXVK.conf contains many more options in case you would like to add more settings.

A. no Reshade/GShade
Setting up DXVK
Copy the two files d3d9.dll and DXVK.conf into the Bin folder in your Sims 3 installation path. This is the folder where also GraphicsRule.sgr and the TS3W.exe and TS3.exe are located. If you are prompted to overwrite files, please choose yes (you DID backup your folder, right?)
And that’s basically all that is required to install.
Start your game now and let it run for a short while. Click around, open Buy mode or CAS, move the camera.
Now quit without saving. Once the game is closed fully, open your bin folder again and double check if a file “TS3W.DXVK-cache” was generated. If so – congrats! All done!
Things to note
Heads up, the game options will reset! So it will give you a “vanilla” start screen and options.
Don’t worry if the game seems to be frozen during loading. It may take a few minutes longer to load but it will load eventually.
The TS3W.DXVK-cache file is the actual cache DXVK is using. So don’t delete this! Just ignore it and leave it alone. When someone tells to clear cache files – this is not one of them!
Update Options.ini
Go to your user folder and open the options.ini file with a text editor like Notepad.
Find the line “lastdevice = “. It will have several values, separated by semicolons. Copy the last one, after the last semicolon, the digits only. Close the file.
Now go to your backup version of the Options.ini file, open it and find that line “lastdevice” again. Replace the last value with the one you just copied. Make sure to only replace those digits!
Save and close the file.
Copy this version of the file into your user folder, replacing the one that is there.
Things to note:
If your GPU driver is updated, you might have to do these steps again as it might reset your device ID again. Though it seems that the DXVK ID overrides the GPU ID, so it might not happen.
How do I know it’s working?
Open the task manager and look at RAM usage. Remember the game can only use 4 GB of RAM at maximum and starts crashing when usage goes up to somewhere between 3.2 – 3.8 GB (it’s a bit different for everybody).
So if you see values like 2.1456 for RAM usage in a large world and an ongoing save, it’s working. Generally the lower the value, the better for stability.
Also, DXVK will have generated its cache file called TS3W.DXVK-cache in the bin folder. The file size will grow with time as DXVK is adding stuff to it, e.g. from different worlds or savegames. Initially it might be something like 46 KB or 58 KB, so it’s really small.
Optional: changing MemCacheBudgetValue
MemCacheBudgetValue determines the size of the game's VRAM Cache. You can edit those values but the difference might not be noticeable in game. It also depends on your computer’s hardware how much you can allow here.
The two lines of seti MemCacheBudgetValue correspond to the high RAM level and low RAM level situations. Therefore, theoretically, the first line MemCacheBudgetValue should be set to a larger value, while the second line should be set to a value less than or equal to the first line.
The original values represent 200MB (209715200) and 160MB (167772160) respectively. They are calculated as 200x1024x1024=209175200 and 160x1024x1024=167772160.
Back up your GraphicsRules.sgr file! If you make a mistake here, your game won’t work anymore.
Go to your bin folder and open your GraphicsRules.sgr with a text editor.
Search and find two lines that set the variables for MemCacheBudgetValue.
Modify these two values to larger numbers. Make sure the value in the first line is higher or equals the value in the second line. Examples for values:
1073741824, which means 1GB
2147483648 which means 2 GB.
-1 (minus 1) means no limit (but is highly experimental, use at own risk)
Save and close the file. It might prompt you to save the file to a different place and not allow you to save in the Bin folder. Just save it someplace else in this case and copy/paste it to the Bin folder afterwards. If asked to overwrite the existing file, click yes.
Now start your game and see if it makes a difference in smoothness or texture loading. Make sure to check RAM and VRAM usage to see how it works.
You might need to change the values back and forth to find the “sweet spot” for your game. Mine seems to work best with setting the first value to 2147483648 and the second to 1073741824.
Uninstallation
Delete these files from your bin folder (installation path):
d3d9.dll
DXVK.conf
TS3W.DXVK-cache
And if you have it, also TS3W_d3d9.log
if you changed the values in your GraphicsRule.sgr file, too, don’t forget to change them back or to replace the file with your backed up version.
OR
delete the bin folder and add it from your backup again.
B. with Reshade/GShade
Follow the steps from part A. no Reshade/Gshade to set up DXVK.
If you are already using Reshade (RS) or GShade (GS), you will be prompted to overwrite files, so choose YES. RS and GS may stop working, so you will need to reinstall them.
Whatever version you are using, the interface shows similar options of which API you can choose from (these screenshots are from the latest versions of RS and GS).
Please note:
Each time you install and uninstall DXVK, switching the game between Vulkan and d3d9, is essentially changing the graphics card ID again, which results in the settings in your options.ini file being repeatedly reset.
ReShade interface
Choose – Vulcan
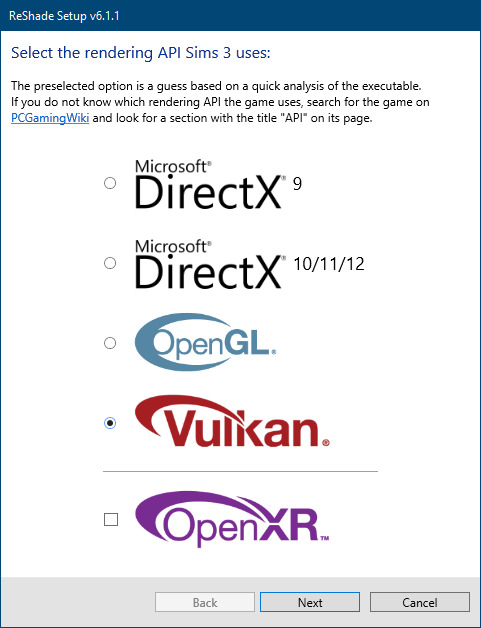
Click next and choose your preferred shaders.
Hopefully this install method works and it won't install its own d3d9.dll file.
If it doesn't work, then choose DirectX9 in RS, but you must make sure to replace the d3d9.dll file with DXVK's d3d9.dll (the one from its 32bit folder, checking its size is 3.86mb.)
GShade interface
Choose –
Executable Architecture: 32bit
Graphics API: DXVK
Hooking: Normal Mode
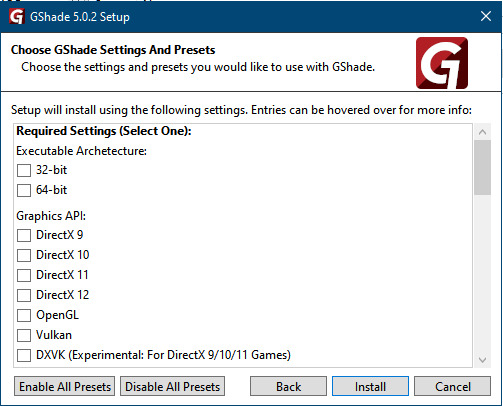
GShade is very problematic, it won't work straight out of the box and the overlay doesn't show up, which defeats the purpose of using it if you can't add or edit the shaders you want to use.
Check the game's bin folder, making sure the d3d9.dll is still there and its size is 3.86mb - that is DXVK's dll file.
If installing using the DXVK method doesn't work, you can choose the DirectX method, but there is no guarantee it works either.
The game will not run with these files in the folder:
d3d10core.dll
d3d11.dll
dxgi.dll
If you delete them, the game will start but you can't access GShade! It might be better to use ReShade.
Some Vulcan and DirectX information, if you’re interested:
Vulcan is for rather high end graphic cards but is backward compatible with some older cards. Try this method with ReShade or GShade first.
DirectX is more stable and works best with older cards and systems. Try this method if Vulcan doesn't work with ReShade/GShade in your game – remember to replace the d3d9.dll with DXVK's d3d9.dll.
For more information on the difference between Vulcan and DirectX, see this article:
https://www.howtogeek.com/884042/vulkan-vs-DirectX-12/
466 notes
·
View notes
Text

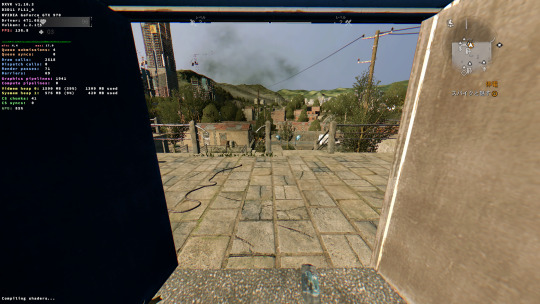
This is my game with dxvk.
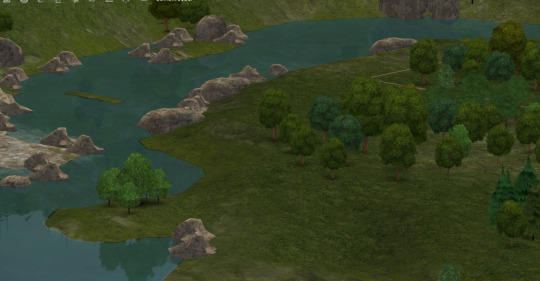
This is my game without dxvk.
It might look almost the same, but I have a noticeable performance gain, when using dxvk. Problem is, that it seems to overwrite some edits I make with Nvidia profil Inspector, so using dxvk, the game looks simultaneously better and worse. I think, it's the anti aliasing, that is affected the most. I'll test some more in the next days.
20 notes
·
View notes
Text


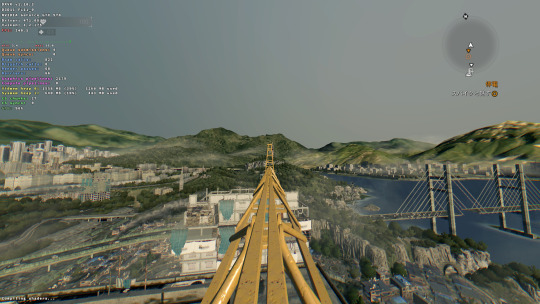
I am playing World Racing 2 for PC... partially emulated on my PC. This sounds weird, but it's running with programs that translate code from an old GPU and sound card!
I have WR2 set to 640x480 windowed at max settings, wrapped to Vulkan with DXVK to fix the game's awful flashing and frame stutter issues on modern Windows and/or GPUs.
I then used a program called Magpie to rescale the window to 4K with its Lottes-CRT scaling mode, plus some tweaks Magpie lets you do to whatever shaders you've picked (In my case, Lottes-CRT).
For audio I'm using Creative ALchemy modded with the restriction remover, so I can get the EAX effects and better positionality WR2 supports.
DXVK and ALchemy translate (recompile) calls that a program makes (to the graphics card and EAX-supported sound card respectively) into something that works properly with modern OSes and hardware. This kinda thing's very important for preservation of old PC games!
2 notes
·
View notes
Text
Симс 2 и dxvk
недавно я пр��бывала запустить Симс 2 с dxvk с пустой папкой закачек он запускается а с полной не хочет. С dxvk игра выглядит конечно по другому как будто ее только выпустили.На самом деле я хотела решить проблему с запуском интро после смены видеокарты он не сразу стартует.

Перенесла все оставив моды,дефолты и украшения города
Кстати почему то с темной темой он не дружит.
Игра не реагирует на клавишу виндоус
Использовала версию dxvk-1.10.3
Все же рекомендую использовать dxvk-2.0 .
Если у вас 64 битная система то берем d3d9.dll файл из x64
Поставив dxvk-2.0 игра стала реагировать на клавиши.
DXVK НЕ СОВМЕСТИМ С ГРАФИЧЕСКИМИ МОДАМИ ‼
7 notes
·
View notes
Text


Experimenting with DXVK a bit more on Oblivion. It's a DLL that translates Direct X 9, 10, and 11 games to run on Vulkan.
d3d9.samplerAnisotropy = 16
DXVK accepts this setting in it's CONF file to force anisotropic filtering. In Skyrim (and Fallout 3 onward for Fallout) you'd have a launcher setting for it, given it makes textures shown at an angle far less blurry. But Oblivion and earlier TES games didn't. DXVK's implementation is hardly the clearest AF I've seen, especially at a setting of 16x, but it's still a solid improvement over none at all.
You can especially tell how much sharper and clearer things are with the sidewalk textures. Side by side example:

Overall I'm pretty happy with the feature. Nvidia's control panel doesn't even work when you force AF on Oblivion for some reason, so to see DXVK letting me do this is great.
2 notes
·
View notes
Photo

Релиз DXVK 2.3.1
Выпущена версия слоя трансляции Direct3D 9/10/11 на базе Vulkan, используемого в Wine и Proton - DXVK 2.3.1. Среди нововведений более эффективная генерация шейдерного кода на графических процессорах NVIDIA.
https://www.gamebuntu.ru/news/reliz-dxvk-2-3-1/
0 notes
Text


Dying Light DXVK (Vulkan)
概要
Dying Light でDXVK (Vulkan) を使用します。
ダウンロード
dxvk-1.10.3.tar.gz
“https://github.com/doitsujin/dxvk/releases”
※グラフィックドライバーが対応しているバージョンを使用してください。
※今回は 1.10.3 を使用します。
インストール
dxvk-1.10.3.tar.gzを解凍して
\dxvk-1.10.3\x64の
d3d9.dll
dxgi.dll
をコピーします。
Dying Light のディレクトリに貼り付けます。。
(例 C:\PROGRAM FILES\EPIC GAMES\DYINGLIGHT)
dxvk.conf
Dying Light のディレクトリに新規作成でメモ帳を作ります。
"https://github.com/doitsujin/dxvk/blob/master/dxvk.conf"
URL の内容をコピーしてメモ帳に貼り付けます。
内容を変更します。
dxgi.syncInterval = 0
d3d11.samplerAnisotropy = 0
dxgi.maxFrameLatency = 0
dxvk.hud = full,scale=.8
※コメントアウト (# ) を外して下さい。
名前を dxvk.conf にして保存します。
※拡張子が .conf になってるか確認してください。
参考
"https://github.com/doitsujin/dxvk"
"https://github.com/doitsujin/dxvk/releases"
"https://github.com/doitsujin/dxvk/releases/tag/v1.10.3"
"https://github.com/doitsujin/dxvk/wiki"
"https://github.com/doitsujin/dxvk/wiki/Driver-support"
"https://github.com/doitsujin/dxvk/blob/master/dxvk.conf"
04/17/2023 00:00 a.m.
0 notes
Video
youtube
DXVK on Integrated Graphics (Intel UHD 770)
0 notes
Text
ReShade question for Simmers who use it
Simmers who use ReShade, you must be aware by now that there are some shaders that don't work in dx9 games (and TS4 is a dx9 game). You can use DXVK to convert it to Vulkan, which lets you use them. Do you think this is something worthwhile encouraging people to do?
I've avoided it for a while now because it's an extra step that might confuse people (even though it's very simple), among a user base who frequently don't even really understand what a regular ReShade installation is.
There are quite a few nice shaders people are missing out on, and development of others is being held back a bit by having to account for dx9.
For example, shadows in the latest upcoming ReLight version are a lot better in dx11+/Vulkan, and there are weird artefacts for dx9. That's a limitation of the api, not much to be done while continuing to improve the shader.
Now, not everyone uses these types of shaders, so DXVK would be largely unneeded, but I'm starting to think it's worth talking about DXVK a bit more, getting people used to the idea of using it.
Maxis seems to have no intention to update TS4 to dx11, so as shaders continue to advance and improve this is only going to become more of a problem, with people increasingly locked out of using really nice ones.
I'd appreciate hearing your thoughts.
[To be clear about what DXVK is: it's a dll file that you drop in your Bin folder that (more or less) turns TS4 into a Vulkan game (or at least makes ReShade think it's using Vulkan). Once you've put the dll in your Bin folder, you have to reinstall ReShade selecting Vulkan as the api instead of dx9. Other than that, it all works exactly the same as usual, just now you get to use all the nice shaders.]
I've also asked this over on twitter if you'd prefer to reply there.
48 notes
·
View notes
Text

random sim i made after rediscovering the townie randomiser
#ts2#portraits#💌#installed dxvk into bodyshop and i THINK i can go ham without pink flashing now#it also enabled reshade for whatever reason so i made a bodyshop reshade lol
27 notes
·
View notes
Text


#baldur's gate#baldur's gate 3#lilin duskryn#dark urge#chi's adventures in screencaps#flipping back and forth between d3d11/vulkan reshade bc the map needs dxvk to display but dof doesn't work on the dxvk compatible vulkan is#annoying.#but that sweet sweet bokeh........
5 notes
·
View notes
Note
Hallo! I use the cc magic to open my sims 3 game, would I need to do anything differently compared to your dxvk guide? Because it is not working but im not sure if it's because I'm doing something wrong or because of the program! Thank you anyway for the guide along with desiree :)
Guten Tag! All steps are included in the guide as @desiree-uk also uses CCMagic to start her game. So no hidden extra steps that are not mentioned. So it must be something else that keeps it from working correctly. How do you know it isn't?
6 notes
·
View notes
Text
Me trying to get Sims 2 to work on win10: 🤡
#I'm not even getting pink soup at this point#When I got it running last night#It crashed while I was trying to get into a subhood#The Xenos method isn't working AT ALL#I just did the asi method (which is when I couldn't load subhoods)#I'm trying not to do the dxvk fix#Because I'm worried that's what made my pink soup so bad#I guess I'm trying the RPC launcher next#Though there was a reason I couldn't use it#Can't remember what it was though#But I swear it was some kind of mod conflict??
3 notes
·
View notes
Text
Lanzamiento de DXVK 2.4: Emulación de Frecuencia de Actualización No Nativa y Soporte para Direct3D 8
DXVK 2.4, la implementación basada en Vulkan de D3D9, D3D10 y D3D11 para Linux/Wine, ya está disponible para su descarga como una actualización importante que introduce nuevas características y mejora el soporte para múltiples juegos.
Puntos Destacados de DXVK 2.4
Soporte para Direct3D 8
Una de las características más destacadas de DXVK 2.4 es el soporte para D3D8, ya que la traducción de…
0 notes
Text
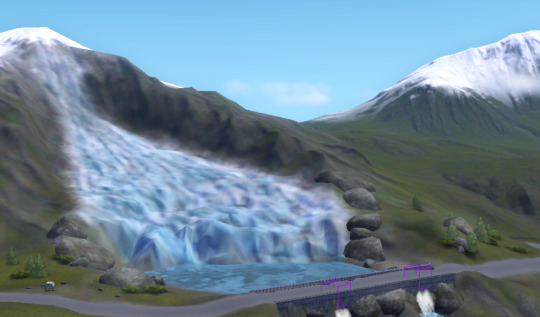
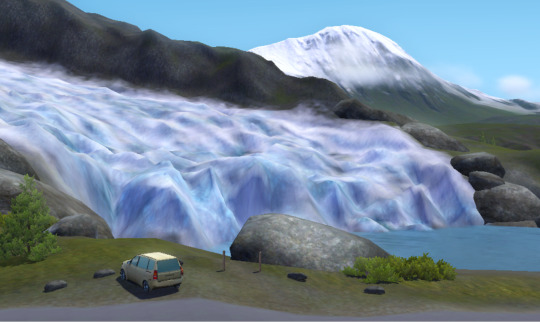
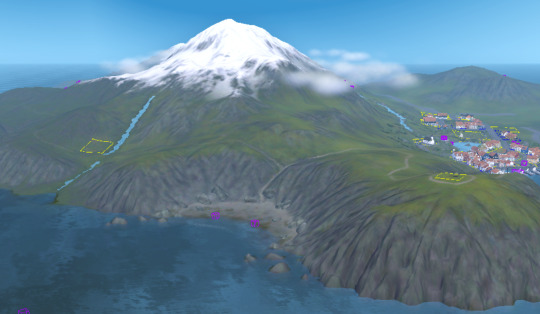
i'm very excited to be working in Tørsvall again! 🥳 Unfortunately I found out that the super cool DXVK fix doesn't play well with Create-A-World Edit in Game :(
but i'm really happy with how the glacier turned out!! on the left hand side there's gonna be an entrance to the ice caves, that will only be accessible during winter (and maybe autumn too?)
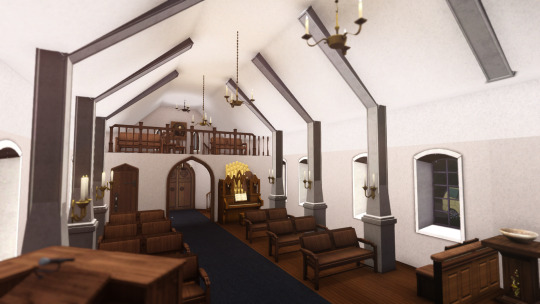
currently trying to go through all the completed lots and a) update them to use non-decrapped store cc and b) make use of my decorator mod! i redid the church interior and made a cc stained glass window of the "holy plumbbob" lol

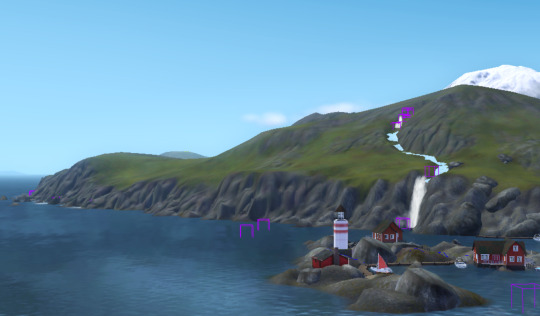
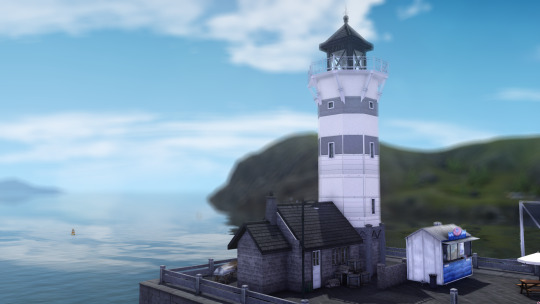
also updated the lighthouse! it;s going to be an actual residence now instead of abandoned like in it's first iteration
that's all for now! i'm hoping to hold on to this motivation for as long as possible hahah
247 notes
·
View notes
Text

so i tried out the dxvk hack to make my game run smoother and let me tell you.. i never thought it was possible to avoid the dreaded error code 12 (maxed memory) issue but i've had my game open for hours and it's been coasting on a steady 2.3MB.
the downside to this was having to update reshade to the most recent version because nothing else worked. luckily most of the legacy shaders were available and wasn't too much of a hassle to get something to my liking (still tweaking though).
#ts3#sims 3#i only crop and resized these with some sharpening#i can finally play without limits#and i only had to wait 13 years for a solution
87 notes
·
View notes
Last Seen Blogs

lovelypinkhottub
Victoria

etherealangelica
Child of mother nature 🦋

mulletmomoodboards
pngs for moodboards

bumfondle
Yeet

lgbt-in-romania
LGBT+ in Romania