#Rhino 3D Modeling Tutorials
Text
Use of Rhino 3D Modeling Tutorials
There can be circumstances where you come up with a great idea and concept about a project but do not have the right technical skills to complete it. If your imagined design is too complicated you may have no choice but to simply give it up. This is why Rhino 3D tutor for Architects is important.Rhinoceros with Grasshopper is a robust 3D modeler meant for construction, fabrication, engineering and architecture. It helps enhance the ability of a team to effectively execute creative building form. Rhino is widely used for complex structures, versatile shapes, parametric facades,repetitive components, as well as free form roofs.
If you are unable to complete a project, you lose out on opportunities. The opportunity to get the client you want, to win architectural competitions, or to even to get a better job. There are many architects with great design ideas, but are not able to effectively present it as they do not have enough knowledge to make a project in 3D in one program. Spending days simply switching programs and trying out new workflows can be a huge hassle. Moreover, even after these efforts, the result can be fairly average. To avoid these circumstances, it is prudent to try out Rhino 3D Modeling Tutorials.
Rhinoceros 3D provides you with complete design freedom in the domain of parametric architecture, complex fluid form modeling, project presentation and conceptual design. Grasshopper for Rhino is among the most powerful tool that enables architects to create parametric designs with ease. It would allow you to explore parametric modeling without having to learn how to script, as well as make use of graphical programming interface for the purpose of creating your algorithms and parametric geometry. You can easily change the input parameters and watch your geometry changing shape in an instant.
Rhino for Architects Course would help you to explore the world of parametric design with Grasshopper, understand the logic behind it and how to implement it on your own architectural projects. Details of Rhino or Grasshopper 3D tutorial can be found online.
0 notes
Text
youtube
I created this simple component for Grasshopper. This component has 3 inputs: 1- a list of numbers 2- Lower limit 3- Upper limit. The component will then compare each entry in the list of numbers and if the number falls between the Min and Max limits(bigger or equal to the Min and smaller or equal to the Max at the same time) it will output True, otherwise false. In this video, you'll see a real test case/scenario where this component might be useful.
Download Link: https://drive.google.com/file/d/15sjSzagNqwUPKp79cjR2BuUX1EiyhlXn/view?usp=sharing
#grasshopper3d#rhino grasshopper#grasshopper tutorials#grasshopper plugins#mcneel#mcneel grasshopper#mcneel rhino#parametric 3d#parametric design#parametric modeling#parametric plugins#Youtube
0 notes
Text
youtube
How To Make Pear Diamond Shape Jewelry Prong Head For Earing In Rhino 3D Tutorial.
How To Make Pear Diamond Shape Jewelry Prong Head For Earing In Rhino 3D Tutorial.
Join Live Chat For Any Questions Want To Know About Techniques Or Tutorials.
https://jewelry3dartist.locals.com/post/5009046/how-to-make-pear-diamond-shape-jewelry-prong-head-for-earing-in-rhino-3d-tutorial
Be a Member of my Community For Exclusive Jewelry 3D CAD Modeling tutorial techniques To Learn And Get experience from My Jewelry Field Journey From 1991 until now.
Benefits From My Locals Community Video Tutorials With Private Or Public Live Chat With Me For Ask Any Question Or Techniques, Same Time Share Your Works, Your Ideas, Your Experiences In Our Community.
https://jewelry3dartist.locals.com
Join Patreon for exclusive new jewelry designs per month, You can be a member and receive each month new creative designs in all file formats, for 3d print industrial use you will get STL file format, and for editing or for media use you will get 3DM Main Default file format.
https://www.patreon.com/jewelry3dstudio
Join Discord Community
Jewelry 3D Tutorials
https://discord.gg/VWf7uvfsPb
Join Discord Community
Jewelry 3D Models
https://discord.gg/mKqU8mVQQH
Join the Telegram Channel For New Topics
https://t.me/jewelry3dstudio
Website
https://jewelry3dstudio.com
https://jewelry3dshop.com
#jewelry tutorials#jewelry 3d tutorials#jewelry modeling#jewelry 3d modeling#jewelry cad tutorial#jewelry course#jewelry 3d course#jewelry training#jewelry 3d online course#online course#online tutorials#jewelry design making#jewelry students#jewelryteachers#rhino 3d#rhino 3d modeling#rhino 3d tutorials#rhino 3d software for modeling#jewelry maker#goldsmith#jewelry diamond settings#jewelry handmade#diamonds#3d print tutorials#3d print course#3d cad#3d#Youtube
0 notes
Text
3d product renderings and mockups

It seems like you're looking for information or assistance with 3D product renderings and mockups. Creating 3D product renderings and mockups is a crucial step in the design and marketing process for various industries. Here's some information to help you get started:
1. Software for 3D Rendering:
Blender: A powerful and free open-source 3D creation suite.
Autodesk Maya: Widely used in the film and video game industry.
Cinema 4D: Known for its intuitive interface and powerful capabilities.
KeyShot: A standalone 3D rendering and animation application.
2. Creating 3D Models:
CAD Software (Computer-Aided Design): Use software like AutoCAD, SolidWorks, or Rhino to create accurate 3D models.
Sculpting Software: Tools like ZBrush or Blender's sculpting features are great for organic shapes.
3. Texturing and Materials:
Apply realistic textures and materials to your 3D model using UV mapping techniques.
Software like Substance Painter or Quixel Mixer can help create detailed and realistic materials.
4. Lighting:
Proper lighting is crucial for realistic renders. Experiment with different light setups to achieve the desired look.
Consider using High Dynamic Range Imaging (HDRI) for realistic environmental lighting.
5. Rendering:
Choose the appropriate rendering engine for your needs (Cycles in Blender, Arnold, V-Ray, etc.).
Adjust rendering settings such as resolution, quality, and output format.
6. Mockup Tools:
Adobe Dimension: Allows you to create realistic 3D mockups and product visualizations.
Placeit: An online platform that lets you create mockups with your designs on various products.
Mockup World: Offers a variety of free and premium mockups for different products.
7. Tutorials and Learning Resources:
Online platforms like Udemy, Coursera, and YouTube offer tutorials on 3D modeling, rendering, and mockup creation.
Join forums and communities like Blender Artists or Polycount for support and feedback.
8. Considerations for Product Mockups:
Understand the target audience and purpose of the mockup.
Pay attention to lighting, shadows, and reflections to make the mockup realistic.
Test the mockup on different backgrounds to ensure versatility.
9. Outsourcing:
If creating 3D models and renders is outside your expertise, consider outsourcing to professional 3D artists or agencies.
Remember to practice and experiment with different techniques to refine your skills. The field of 3D rendering is vast, and continuous learning is key to staying updated with the latest trends and technologies.
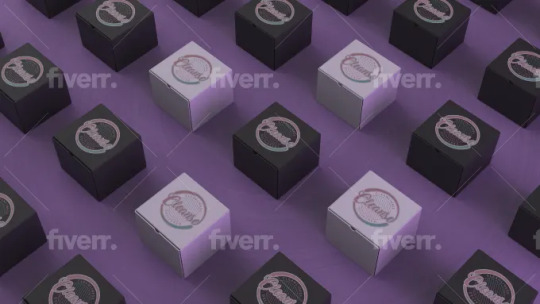
#shirts#shirt design#artist shirts#tees#tshirts#toby's beans#coffee cat#sundew farms#sunflower fox#sugarbritches#apple orchard#vintage logos#logo design#shop#merch#countrycore#farmcore#cottagecore#fashion#my art#horror#slashers#graphic design#the conjuring#the conjuring 3#the conjuring: the devil made me do it#scream#scream 1996#a nightmare on elm street#anoes
2 notes
·
View notes
Text
What's the best 3D modelling software between SketchUp and Rhinoceros?
The choice between SketchUp and Rhinoceros (Rhino) depends on your specific needs, the type of 3D modeling tasks you'll be , and your familiarity with each software. Both SketchUp and Rhino are powerful 3D modeling tools, but they have different strengths and applications. Here's a comparison to help you decide:
SketchUp:
Ease of Use: SketchUp is known for its user-friendly interface, making it accessible for beginners and those new to 3D use a push-pull method for creating 3D shapes, which is intuitive.
Workflow: SketchUp is particularly well-suited for architectural and interior design is widely used for quick conceptual modeling and sketching.
Community and Resources: SketchUp has a large and active user community. There are numerous tutorials and plugins available, making it easy to find help and resources.
Integration: SketchUp integrates well with other software, and its 3D Warehouse allows users to share and download models.
Cost: SketchUp offers a free version (SketchUp Free) with limited features. The Pro version, which has more advanced features, is available with a subscription.
Rhinoceros (Rhino):
Versatility: Rhino is known for its versatility and is used in a wide range of industries, including industrial design, automotive design, jewelry design, and architecture.it is not limited to specific design disciplines and is capable of handling complex geometric shapes.
Precision and Accuracy: Rhino is highly regarded for its precision and accuracy, making it suitable for projects that require detailed and intricate modeling.
NURBS Modeling: Rhino uses NURBS (Non-Uniform Rational B-Splines) modeling, which is well-suited for creating smooth and curved surfaces. This is especially valuable in product and industrial design.
Plug-ins and Grasshopper: Rhino has a robust set of plugins that extend its capabilities. Grasshopper, a visual scripting language plugin, allows for parametric and algorithmic design.
Learning Curve: Rhino has a steeper learning curve compared to SketchUp, especially for users new to 3D modeling. However, it offers powerful tools for those willing to invest time in learning.
Conclusion:
If you prioritize ease of use, quick conceptual modeling, and architectural design, SketchUp may be the better choice.
If you need versatility, precision, and are working on projects that involve complex geometry, Rhino may be more suitable.
Ultimately, the "best" software depends on your specific requirements and the type of projects you undertake. Many professionals use both SketchUp and Rhino in their workflows, choosing the tool that best fits the task at hand.
If you want more about learning SketchUp through videos, click here
If you want more about learning SketchUp through videos, click here
If you want more about learning SketchUp through videos, click here
#decor#drawing#bedroom#bathroom#animation#furniture#home decor#home & lifestyle#sketchup#architectural design#house design#arquitetura#architectural#modern architecture
4 notes
·
View notes
Text

FULL COURSE Rhino3d Philips Pavilion Tutorial - Le Corbusier & Lannis Xenakis - Detail Explanation
This course provides a detailed analysis and procedure of modeling the Philips Pavilion (Le Corbusier and Lannis Xenakis) in Rhino 3D. This course also goes into detail about the construction of the actual Pavilion. We will use commands in Rhino like Sweep 1, Sweep 2, Network Surface and Extract Wire Frame, among other commands.
#lecorbusier#philipspavilion#xenakis#watercolor#watercolorarchitecture#architecture#architecturediagrams#diagrams#architecturedrawing#rhino3d#3d#archtutorial#adobeillustrator#vectorart#rendering#infographic#graphicdesign#parametric#parametricarchitecture#structure#architectureplan#architecturecompetition#axon#axonometric#architecturesection#perspectivesection#perspective
0 notes
Text
Unleashing Creativity with Grasshopper for Rhino: A Guide to Parametric Design
In the world of architectural design and beyond, tools that offer flexibility and power without sacrificing usability are priceless. Grasshopper, a visual programming language integrated with Rhino3D, stands out as a remarkable tool in this domain. This blog post explores how Grasshopper Rhino revolutionizes design processes, allowing architects, engineers, and designers to explore parametric and computational designs with unprecedented ease and precision.
What is Grasshopper for Rhino?
Grasshopper is a visual programming language developed by Robert McNeel & Associates. It runs within the Rhino3D environment and is used for creating generative algorithms. Unlike traditional programming languages that require writing code, Grasshopper provides a canvas where users drag and drop components to construct complex algorithms. These components are connected to form a "script," which is essentially a visual representation of a program.
Key Features of Grasshopper
1. No Prior Programming Knowledge Required
One of Grasshopper's most compelling features is its accessibility. Design professionals who have little to no coding experience can use Grasshopper effectively because it replaces text-based coding with a visual interface.
2. Highly Flexible and Scalable
Grasshopper offers vast scalability, allowing users to start with simple structures and progressively create complex models. It can handle everything from a single residential building to the urban planning of entire cities.
3. Real-time Feedback
As you adjust parameters, Grasshopper provides immediate visual feedback, making it an excellent tool for iterative exploration. This feature allows designers to quickly experiment with variations and see the implications of their adjustments in real-time.
4. Integration with Other Tools
Grasshopper plays well with several other tools and formats, including BIM (Building Information Modelling) software and various engineering tools. This integration is crucial for a seamless design-to-production workflow.
Applications in Design and Beyond
Grasshopper is used in a multitude of fields ranging from architecture and industrial design to jewelry making. Here are some typical applications:
1. Architectural Design
Architects use Grasshopper to create complex architectural forms that would be difficult to model by traditional methods. The ability to tweak parameters and instantly see changes to the form allows for rapid exploration of design alternatives.
2. Fabrication
Grasshopper can also connect to physical construction processes by generating patterns for cutting sheets or 3D printing molds. This capability is particularly useful in custom and high-efficiency manufacturing.
3. Urban Planning
On a larger scale, urban planners employ Grasshopper to simulate pedestrian flows, optimize the placement of buildings, or analyze sunlight exposure across different seasons.
4. Interactive Art
Artists have adopted Grasshopper to create interactive installations that respond to environmental variables or viewer interactions, adding a dynamic layer to their artwork.
Learning Grasshopper
Grasshopper offers a plethora of tutorials, workshops, and online resources for beginners to advanced users. The community forums are incredibly supportive, providing help and sharing advanced scripts and solutions. For those new to Grasshopper, starting with basic tutorials to understand the interface and logic of visual programming is advisable.
Conclusion
Grasshopper for Rhino is more than just a tool; it is a gateway to exploring the vast potential of computational design. Whether you're a seasoned architect looking to push the boundaries of design or a student eager to explore the possibilities of parametric modeling, Grasshopper offers a platform that combines power, flexibility, and creativity. As the field of design continues to evolve, tools like Grasshopper will undoubtedly play a pivotal role in shaping the future of how we create, imagine, and interact with our environment.
0 notes
Text

Reflecting on my journey with Tinkercad, a powerful tool for creating 3D prototypes, I am struck by the evolution of my skills and confidence in utilizing this innovative platform. Initially, venturing into the realm of 3D design felt daunting and unfamiliar, as I grappled with the complexities of the software and navigated its myriad features. However, through perseverance and a commitment to self-directed learning, I gradually began to unravel the intricacies of Tinkercad, unlocking its potential to bring my creative visions to life.
The initial challenges I encountered served as valuable learning opportunities, prompting me to delve deeper into tutorials, guides, and online resources to enhance my proficiency with the software. With each passing day, my understanding of Tinkercad grew more nuanced, enabling me to overcome obstacles and execute increasingly complex design concepts with greater precision and finesse.
In contrast to my solo exploration of Tinkercad, I observed my colleague Giovanni utilizing Rhino, another sophisticated 3D modeling tool. While our approaches differed, I recognized the inherent value in diversifying our skill sets and exploring alternative software solutions to broaden our collective capabilities as a team.
Looking ahead, I am eager to further hone my skills in Tinkercad and leverage its capabilities to streamline my design workflow and achieve greater efficiency in prototype development. As evidenced by my successful design of the final card shape using Tinkercad, I am confident in the potential of this tool to catalyze creativity and innovation in my future endeavors.Moreover, I am mindful of the importance of continuous learning and growth, recognizing that proficiency with Tinkercad is not an endpoint but rather an ongoing journey of exploration and discovery. By remaining open to new techniques, methodologies, and best practices, I aspire to cultivate a mastery of Tinkercad that empowers me to manifest my design concepts with precision and ingenuity.In conclusion, my experience with Tinkercad has been transformative, illuminating the possibilities of 3D design and instilling within me a sense of confidence and proficiency in utilizing this powerful tool. As I continue to refine my skills and expand my creative horizons, I am excited to embrace the boundless potential of Tinkercad to realize my design aspirations and make meaningful contributions to the field of prototyping and innovation.
0 notes
Text
Embark on Your Parametric Design Journey with Grasshopper
One such tool that has revolutionized the industry is Grasshopper, a visual programming language integrated with Rhino's 3-D modeling tools. This blog post is dedicated to exploring how Grasshopper can enhance your parametric design journey, especially for those just starting out or considering enrolling in a [grasshopper class].
Understanding Parametric Design
Before delving into Grasshopper, it's essential to understand what parametric design is. Parametric design is a process based on algorithmic thinking that enables the expression of parameters and rules that, together, define, encode, and clarify the relationship between design intent and design response.
Why Choose Grasshopper?
Grasshopper's appeal lies in its intuitive visual interface, which allows designers to create complex forms and geometries without writing a single line of code. By enrolling in a [grasshopper class], you'll learn how to manipulate these visual elements, making the design process more interactive and accessible.
1. Visual Programming – No Coding Required
One of the first lessons in any [grasshopper class] is understanding that you don’t need traditional coding skills. Grasshopper uses a drag-and-drop interface where users connect components—like a visual flowchart—to create and alter their designs. This approach is especially beneficial for visual thinkers who might be intimidated by conventional programming languages.
2. Real-Time Feedback and Flexibility
Grasshopper provides real-time feedback, making it easier to experiment with designs. You can quickly adjust parameters and immediately see the results, which is a significant advantage over traditional modeling methods. This aspect of Grasshopper is often emphasized in [grasshopper classes], as it allows for a more dynamic design process.
3. Integration with Rhino 3D
Grasshopper is seamlessly integrated with Rhino 3D, one of the most powerful modeling tools in the industry. This integration allows designers to build sophisticated models with both software tools, a topic often covered in advanced [grasshopper classes].
Applications of Grasshopper in Design
Grasshopper is not limited to a single design field. Its applications are broad, ranging from architectural design to jewelry making. By joining a [grasshopper class], you can explore various case studies and projects that showcase its versatility.
1. Architectural Modeling
Architects use Grasshopper to create complex forms and structures. The tool allows for exploring parametric designs, which can lead to innovative architectural solutions.
2. Product and Industrial Design
Grasshopper can also be used in product and industrial design. Its ability to quickly iterate designs and modify parameters makes it an invaluable tool for creating consumer products, furniture, and more.
3. Art and Sculpture
Artists and sculptors find Grasshopper useful for creating intricate and complex art pieces. The software provides a new dimension to artistic expression through its algorithmic capabilities.
Learning Resources and [Grasshopper Class] Opportunities
There are numerous resources available for those interested in learning Grasshopper. Online tutorials, forums, and community platforms offer a wealth of information. However, enrolling in a dedicated [grasshopper class] can provide structured learning, expert guidance, and a deeper understanding of the software’s capabilities.
Conclusion
Grasshopper is more than just a tool; it's a gateway to a new realm of design possibilities. Whether you're an architect, designer, artist, or enthusiast, learning Grasshopper can significantly impact your work. By taking a [grasshopper class], you embark on a journey that not only enhances your design skills but also expands your creative horizons. In a world where design and technology constantly evolve, Grasshopper stands out as a beacon for innovation, creativity, and efficiency.
0 notes
Text
Rhino 7 License Key

Rhino 7 is a powerful 3D design software that is used by designers, architects, and engineers around the world. The software offers a wide range of tools and features that allow users to create intricate 3D models and designs with ease. To access all of the features of Rhino 7, users need a valid license key.
A license key is a unique code that is used to unlock the full version of the software. With a valid license key, users can access all of the software's features, including advanced rendering tools, plug-ins, and more. The license key also ensures that the software is properly registered, which can help users receive technical support and updates from the software's developer.
If you're planning to use Rhino 7 for your design projects, make sure to purchase a valid license key to ensure that you can access all of its features and get the most out of the software.Rhino 7 is a 3D modeling software commonly used in architecture, industrial design, and product design. In order to use Rhino 7 to its full potential, a license key is required.
A license key is a unique code that is needed to activate the software and unlock its full features. A Rhino 7 license key is purchased directly from the manufacturer, McNeel, and can be downloaded from their website. The license key is typically valid for one machine, meaning it can only be installed on one computer at a time. However, McNeel does offer floating licenses which allow multiple devices to use the same license key.
Rhino 7 is a powerful tool for creating 3D models and having the license key ensures that the user has full access to all its capabilities.Rhino 7 is a powerful 3D modeling software that is widely used in various industries such as architecture, product design, and engineering.
To use Rhino 7, users need to purchase a license key, which grants them access to all the features and tools available in the software. The Rhino 7 License Key is a unique code that is provided by the software developer, McNeel, to each user who purchases a license. This key ensures that only authorized users can access and use the software, and that the software is not used for illegal purposes.
The Rhino 7 License Key is a one-time purchase, meaning that once you have purchased it, you have access to the software for as long as you need it. The software also comes with a support package, which includes online tutorials, video tutorials, and a user forum, making it easy for users to learn and master the software. Overall, the Rhino 7 License Key is an essential investment for anyone who wants to use Rhino 7 for professional or personal 3D modeling projects.
READ MORE: Rhino 7 License Key
Contact us: [email protected]
0 notes
Text
An introduction to Revit and Rhino 3D software
Architectural work tends to include complex drawings and a variety of supporting documentation. If done manually, the task would require a lot of time, energy and resources. Hence, to improve their efficiency and learn new skills, most architects today pursue Advanced Revit Documentation Course and use cutting-edge software. Such a program teaches architects to master advanced 3D modelling techniques in Revit. It provides architects with the skills and knowledge needed to take their design to a whole new level, while unlocking new opportunities and increasing their earning potential. The robust BIM capabilities of Revit not only enable architects to develop detailed 3D models but even facilitate data-rich designs. It also allows for better decision-making throughout the project life cycle.
Many architects also opt to pursue Grasshopper 3D tutorial Online, in order to learn how to link Grasshopper to Revit and model structural beams and construction planes, so as to create components that are able to adapt.
For architects desiring more creative freedom than the pre-defined commands and standardized elements can provide, opting to pursue a Rhino 3D Architecture Course would be a good idea. Rhino can be considered to be a “pure” 3D modeler. It tends to be largely focused on delivering the tools required to design geometric shapes. In Rhino 3D, there is no notion of architectural elements like stairs, floor buildups, or roof tiling. Rather, everything is based on three simple geometry types: curves, surfaces, volumes. However, Rhino 3D does come with a wide range of tools and features, like parametric modeling, free form geometries, as well as complex shape capabilities. Apart from architecture, this software is also used in the fields of engineering, fashion design, and product development.
Online tutorial programs for Revit and Rhino 3D can significantly help architects stuck on a project. They can also be of use to architecture students wanting to complete a complex assignment.
0 notes
Text
youtube
In this tutorial, we will learn about the Prune Tree component. This component will let you take a tree(a list of sub-lists), where the number of elements in these sub-lists (or Branches if you like) is not the same, and then, using the Prune Tree component, you can grab only the sub-lists with a predefined minimum and maximum number of elements, and exclude the others.
#mcneel grasshopper#rhino grasshopper#grasshopper tutorial#grasshopper course#learn grasshopper#parametric 3d#parametric modeling#parametric tutorials#learn parametric#parametric plugins#grasshopper for designers#Youtube
0 notes
Text
POST 28
4.1 Technical choices
The student shows their use of digital media and the technical choices they made in the execution of their work.
For my personal project I've decided to design and sew a lounge set. First I wasn't really thinking through, I just wanted to start and make it, but I realized it requires more planning and designing than this. I asked my artist friend to create the design that I'll eventually print on the fabric. He drew it by hand with sharpers and I needed to digitalize it. I used Adobe Illustrator to vectorize the shapes and I also used this software to create a pattern out of it. I did know that with Illustrator I can make the pattern, but I didn't know how so I learned it from some tutorials on the internet. This design is not finalized, because I am now thinking of drawing the shapes on an iPad again, because I am not fully satisfied with the vectorized result. There are some 'bugs' in the pattern and I think it would be nicer if I would draw it again. But regarding the repetition of the shapes this seems to be a good medium to use. To design the shirt and the pants I decided to use Clo 3D, because this is a software is literally designed for this reason. I saw on the website, that it is possible to create something I planned. I can design the shirt and the pants, I can use my own design for the fabric, I can model it on an avatar that can be the same size as me. I already know how to use different 3D softwares, for example Rhino, Solidworks, PTC Creo, Keyshot, and I knew that although it is possible to create clothing in them they are not designed for it so it would be very difficult. I downloaded Clo and first I just tried it, how the interface works and it is very similar to all the other 3D softwares I already know. Then I started to figure out how to create the pattern and the shape of the clothes in the software, how to change the fabric, how to sew it together, how to add buttons etc. I've spent quite a long time with it, because first I like to try to figure it by myself and then if it's not working I find a tutorial video of it where they explain step by step. I decided to use this digital medium to support my analog process. It saves me from making mistakes, during the pattern creation. I can see exactly how much fabric I need so it also saves me money. I can also export the pattern which is already the size I need and I can print it and cut the fabric around it. This software helps me to visualize it, so I can see how it is exactly going to look like and if I like it or need to change some things on it. There are more designs for the print on the fabric and a lot of color combinations and once it is all modeled in the software it is very easy to change the color or the print, so I am able to see all the combinations and it makes my job easer to choose the best one.
0 notes
Text

FULL COURSE Rhino3d Philips Pavilion Tutorial - Le Corbusier & Lannis Xenakis - Detail Explanation
This course provides a detailed analysis and procedure of modeling the Philips Pavilion (Le Corbusier and Lannis Xenakis) in Rhino 3D. This course also goes into detail about the construction of the actual Pavilion. We will use commands in Rhino like Sweep 1, Sweep 2, Network Surface and Extract Wire Frame, among other commands.
#lecorbusier#philipspavilion#xenakis#watercolor#watercolorarchitecture#architecture#architecturediagrams#diagrams#architecturedrawing#rhino3d#3d#archtutorial#adobeillustrator#vectorart#rendering#infographic#graphicdesign#parametric#parametricarchitecture#structure#architectureplan#architecturecompetition#axon#axonometric#architecturesection#perspectivesection#perspective
0 notes
Text
Grasshopper Tutorial: Unleashing the Power of Parametric Design
In the ever-evolving landscape of design and architecture, staying ahead of the curve is essential. One revolutionary tool that has become a game-changer in the world of parametric design is Grasshopper. This powerful visual programming language, tightly integrated with Rhino 3D, empowers designers to create complex and intricate forms by parameterizing their designs. In this blog post, we will explore the capabilities of Grasshopper and how it can unlock the full potential of parametric design.
Understanding the Basics of Grasshopper
Before diving into the intricacies of parametric design, let's familiarize ourselves with Grasshopper. It serves as a generative design tool, allowing designers to create complex algorithms without the need for traditional coding. Through a graphical interface, users can connect various components to define and manipulate geometry, creating a seamless workflow between design and computation.
To get started, consider enrolling in a comprehensive [grasshopper course]. This will provide you with a solid foundation, covering essential concepts and functionalities that will be crucial in mastering this powerful tool.
The Power of Parametric Design
Parametric design goes beyond traditional methods by introducing parameters that define the shape and characteristics of a design. Grasshopper takes this concept to new heights, enabling designers to experiment with numerous iterations and variations quickly. This flexibility allows for the exploration of innovative solutions that might be challenging to achieve through conventional design approaches.
With Grasshopper, designers can easily control and manipulate elements such as form, scale, and density, creating a dynamic relationship between design variables. This not only facilitates the creation of unique and expressive designs but also streamlines the design process, making it more efficient and adaptable.
Design Exploration and Iteration
One of the standout features of Grasshopper is its ability to facilitate design exploration and iteration. Through parametric modeling, designers can quickly adjust parameters and observe the real-time impact on the overall design. This iterative process encourages experimentation, pushing the boundaries of creativity and allowing for the discovery of unexpected and inspiring outcomes.
By enrolling in a dedicated [grasshopper course], designers can learn advanced techniques for managing complex parametric models, ensuring a smooth and efficient workflow. From creating intricate patterns to optimizing designs for specific parameters, Grasshopper provides the tools necessary to bring innovative ideas to life.
Integration with Rhino 3D
Grasshopper seamlessly integrates with Rhino 3D, a popular 3D modeling software. This integration enhances the design process by combining the precision of Rhino with the generative power of Grasshopper. Designs created in Grasshopper can be easily transferred to Rhino, allowing for further refinement and detailing.
The synergy between Grasshopper and Rhino 3D is a testament to the effectiveness of parametric design in contemporary architecture and product design. As a designer, mastering this dynamic duo opens up new possibilities and establishes a competitive edge in the industry.
Conclusion: Empowering Designers with Grasshopper
In conclusion, the Grasshopper tutorial discussed in this blog post serves as a gateway to unlocking the power of parametric design. Whether you are an architect, product designer, or enthusiast eager to delve into the world of computational design, Grasshopper offers a versatile and intuitive platform to bring your ideas to life.
By enrolling in a dedicated [grasshopper course], you can embark on a learning journey that will empower you to harness the full potential of parametric design. Embrace the future of design by incorporating Grasshopper into your toolkit, and witness the transformative impact it can have on your creative process and the final outcome of your projects.
0 notes
Text
Rhino for mac 5.3.2 changing size tutorial

RHINO FOR MAC 5.3.2 CHANGING SIZE TUTORIAL HOW TO
RHINO FOR MAC 5.3.2 CHANGING SIZE TUTORIAL FOR MAC OS X
Here is a step-by-step guide to installing R for Microsoft Windows. Host Rich Mahan welcomes producer Mark Plati to The Rhino Podcast to discuss the recently released David Bowie Album, 'Toy'. For other operating systems users can compile the source code directly. You could use the brush size shortcut in Illustrator, as we did before, or Double-Click on the Blob Brush Icon and change the brush settings in Illustrator to fit your needs. David Bowie's Unreleased Album Toy - With Producer Mark Plati. the code changes and can be used to solve a number of software engineering problems related to commits (i.e., just-in-time defect prediction, identification. Rhinoceros is designed not only for regular users or students, but also for engineers and designers. Rhinoceros (also known as Rhino 5.3) is a powerful software for the design and modeling 3D objects.
RHINO FOR MAC 5.3.2 CHANGING SIZE TUTORIAL FOR MAC OS X
If you want to change the blob brush settings, Illustrator allows you to do it in a few ways. Rhino 5.3 Crack For Mac OS X Full Latest Version. How to Change the Blob Brush Size in Illustrator This method works well with custom brushes. Just select your stroke and change it in the top panel. How to Change the Brush Stroke in Illustrator Step 1Īnother way to adjust the brush size in Illustrator is to change the Stroke. To change the brush size in Illustrator, just press and hold to increase the size of the brush. Now we can use a brush size shortcut in Illustrator. Let's select the Brush tool in the Tools panel and create a stroke. You may also have to change the linetypes scale in the model space. and the names and the logos Mayka, Maquette Volume, Stenza. You can edit them or create new ones there. More, PICASOFT keeps the right to modify the product characteristics or the. Go to file/options and under annotate there's a tab for linetypes. How to Change the Brush Size in Illustrator Using Keyboard Shortcuts Step 1 In the layers panel, edit the lineweight of each layer.
RHINO FOR MAC 5.3.2 CHANGING SIZE TUTORIAL HOW TO
How to change the eraser brush size in Illustratorġ.
How to change the blob brush size in Illustrator.
How to change the brush stroke in Illustrator.
How to change the brush size in Illustrator using keyboard shortcuts.
What You'll Learn in This Illustrator Brush Tutorial The following assets were used during the production of this tutorial. How to Change the Brush Size in Illustrator
0 notes
Last Seen Blogs

squip-rp
An RP Blog

beelzeebuub
Life is a nightmare

kleinerpixel
Kleiner Pixel

strawbeires
* pop star !

kshujin
BlacktoWhite