#SSH configuration
Explore tagged Tumblr posts
Visit Tumblr Blog
Explore Tumblr blogs with no restrictions, modern design and the best experience.
Last Seen Tumblr Blogs


Fun Fact
Celebrities use Tumblr as well.
Text
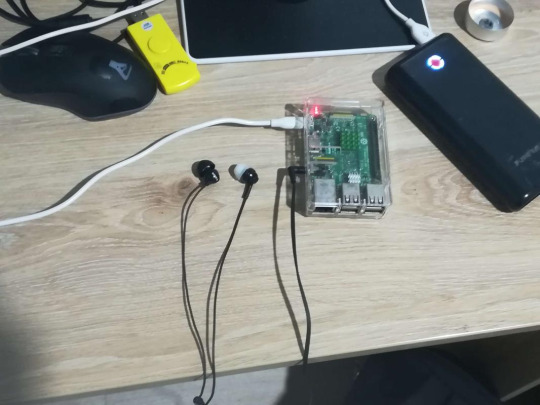
is your phone headphone jack busted? do you not want to pay for bluetooth headphones? do you have a raspberry pi collecting dust somewhere? turns out that the solution to these 3 problems is the same! :D
this world hates me and its for good reasons
i followed this guide and used a raspberry pi 3 with raspbian lite
#this was so surprisingly easy to configure#i can also put mp3s in there and ssh into it with my phone to turn it into a fucked up mp3 player#but that needs an internet connection which is a pain in the ass when you dont have a screen or a keyboard#this is so cursed im gonna walk around with this in my backpack#raspberry pi
26 notes
·
View notes
Photo

(via SSH sécurisé sans mot de passe : Guide complet)
#ssh sécurisé sans mot de passe#SSH sécurisé#configuration SSH#utilitaire ssh-keygen#connexion SSH sans mot de passe
0 notes
Text
How to Migrate WordPress to GCP Server Using WordOps and EasyEngine
Migrating a WordPress site to Google Cloud Platform (GCP) offers numerous benefits including improved performance, scalability, and reliability. In this comprehensive guide, I’ll walk you through on how to migrate WordPress to GCP using WordOps and EasyEngine, with special attention to sites created with the --wpredis flag. This guide works whether you’re migrating from a traditional hosting…
#cloud hosting#Database migration#EasyEngine#EasyEngine to WordOps#GCP#Google Cloud Platform#How to#rsync#Server migration#Server-to-server WordPress#site migration#Site migration guide#SSH key setup#SSL certificate setup#WordOps#WordOps configuration#WordPress database export#WordPress hosting#WordPress hosting migration#WordPress migration#WordPress Redis#WordPress server transfer#WordPress site transfer#WP migration tutorial#WP-CLI#wp-config
0 notes
Text
#RaspberryPi – 1st setup no monitor 📺: Wifi 📶 auto connect, SSH, rename, update, docker 🐳, rust and more! Update 2024-Apr-30
Latest version 2024-Apr-30 here Content Create SD card using Raspberry Pi Imager Configure Wireless connection (if needed) Enable SSH (if needed) Find the IP address in your network Access via SSH Change Password (if needed) Rename the device (if needed) Expand FileSystem Update the device Raspberry Pi Connect Install neofetch Install Docker Setup SSH password-less access to the…

View On WordPress
0 notes
Text
How to download and use Kitty SSH Client on Windows
Kitty is a terminal emulator that can give you protected remote access to another computer. KiTTY can be compared and has almost the same features and functions as PuTTY but has some features that do not exist in PuTTY. Some of these features and functions are an automatic login script, an automatic password, a session launcher, and a session filter. This remote access software is open-source and…

View On WordPress
#client#configuration#kitty#Microsoft Windows#PuTTY#PuTTYgen#SSH#ssh client#SSH key#SSH Key format#SSH public-private key file pair#Windows#Windows 10#Windows 11#Windows Server#Windows Server 2012#Windows Server 2016#Windows Server 2019#Windows Server 2022
0 notes
Text
btw i got the sensor to work :) it doesnt show up in the terminal, but you can address it via python just fine (which is what we need to do anyway). also wrote a complete little tutorial where my predecessor left a disjointed incomplete mess.
#tütensuppe#and i learned how to use scp :) (file transfer via ssh)#someone requested data from a machine thats not connected to the main file system and my colleague was also like idk figure it out yourself#so i did!!#also turns out ssh is turned off by default when you configure a raspi#some 'why the fuck is this not working the way it did before' was involved#yes i COULD connect the raspi to a monitor and input devices when i need to use it#but consider: its annoying as fuck
1 note
·
View note
Text
Basic Linux Security (Updated 2025)
Install Unattended Upgrades and enable the "unattended-upgrades" service.
Install ClamAV and enable "clamav-freshclam" service.
Install and run Lynis to audit your OS.
Use the "last -20" command to see the last 20 users that have been on the system.
Install UFW and enable the service.
Check your repo sources (eg; /etc/apt/).
Check the /etc/passwd and /etc/shadow lists for any unusual accounts.
User the finger command to check on activity summaries.
Check /var/logs for unusual activity.
Use "ps -aux | grep TERM" or "ps -ef | grep TERM" to check for suspicious ongoing processes.
Check for failed sudo attempts with "grep "NOT in sudoers" /var/log/auth.log.
Check journalctl for system messages.
Check to make sure rsyslog is running with "sudo systemctl status rsyslog" (or "sudo service rsyslog status") and if it's not enable with "sudo systemctl enable rsyslog".
Perform an nmap scan on your machine/network.
Use netstat to check for unusual network activity.
Use various security apps to test you machine and network.
Change your config files for various services (ssh, apache2, etc) to non-standard configurations.
Disabled guest accounts.
Double up on ssh security by requiring both keys and passwords.
Check your package manager for any install suspicious apps (keyloggers, cleaners, etc).
Use Rootkit Scanners (chkrootkit, rkhunter).
Double SSH Security (Key + Password).
Disabled Guest Accounts.
Enabled Software Limiters (Fail2Ban, AppArmor).
Verify System Integrity via fsck.
Utilize ngrep/other networking apps to monitor traffic.
Utilize common honeypot software (endlessh).
Create new system-launch subroutines via crontab or shell scripts.
Ensure System Backups are Enabled (rsnapshot).
Check for suspicious kernel modules with "lsmod"
#linux#security#linuxsecurity#computersecurity#networking#networksecurity#opensource#open source#linux security#network#ubuntu#kali#parrot#debian#gentoo#redhat
175 notes
·
View notes
Note
Hi, can you tell me about btrfs? It was a default choice for the filesystem when I installed fedora on my laptop and I read little bit about how it is different from like ext4 and what cool stuff it supports etc. But I newer, like, utilised all that stuff in it. So, if you don't mind, can you tell me what am I missing and how do I utilise it potential?
btrfs! what is btrfs? btrfs is a copy-on-write journaling filesystem with various other goodies. my experience is mostly using it on one disk on my personal machine, which seems to be what you're doing with it also. you may have heard some bad things about btrfs eating your data silently and then the mailing list being really mean about it, and all that is true but it's only true if you're using btrfs raid4 or raid5, which you aren't. for our use case there's absolutely nothing to fear- btrfs is an absolutely rock solid filesystem and i wouldn't accept any other for my daily driver
i was planning on writing this whole long thing summarizing my notes because when i was learning all this stuff i couldn't find any source that had everything i needed in one place. but that was 4 years ago, and since then fedora switched to using it by default. nowadays there are a bunch of articles explaining all the fundamental concepts and commands and such. the two linked at the bottom ive read and can vouch for, and they cover basically all the intuition for the concepts and commands and such. so im going to focus on cool things you can do with a COW filesystem
basically all the cool things you can do are snapshots. snapshots, better explained in the links, are lightweight copies of entire file trees. you can, for instance, take a snapshot of your home directory and then be able to access all your files at the time of the snapshot whenever you want, even if you change them in the "real" version. but you can do better than this. if your subvolume layout is correct (and don't worry, fedora's is), you can rollback to a previous snapshot whenever you want. with a little configuration you can make all your root snapshots bootable, so you can select in grub or whatever which version of your filesystem you want to boot into. with a little bit of doing, which im not sure is easy on fedora but certainly might be, i got my computer set up so that my boot directory is just a btrfs subvolume on my regular filesystem. if an update breaks my setup, which does happen from time to time, i can go back to exactly the state i was in, files packages kernel and all
you can and should use btrfs for your backups also. not local snapshots, those aren't very good backups, but incremental backups to an external drive or over ssh to another machine. for this i use btrbk, which is a pretty simple script that just makes use of btrfs features to make safe, fast, and reliable backups to wherever you might want them. then, because it's using native features of the filesystem, recovering from just about anything is dead simple. you can send over the subvolumes and mount them wherever. the one thing is that for most of these you need a bootable drive with btrfs and enough drivers to work on your system. whatever you used to install fedora should work fine
and with that you basically need fear no file loss event, big or small. i mean i wouldn't give up git or anything, but now you can retrieve your desktop layout, your browser settings, your /etc, whatever you want. its absolutely magic. since doing an install with this btrfs setup 4 years ago i have had absolutely nothing break in a way i couldn't fix in under 15 minutes, even running arch objectively badly. imagining life without snapshots feels barbaric now. its one of a handful of things which are just objectively better on linux for any user at any skill level. data loss is a choice, and it has been for almost a decade. take my hand
additional notes:
APFS: yeah apple has this too. time machine is a brilliant piece of software and the apple ppl are lucky to have it. however! i have needed to actually go back and use my backup like 2 times ever. most of the time i just use the snapshots locally. plus afaik you don't have the same range of options to deal with snapshot size- i dont hang onto my steam directory for very long
ZFS: if you need raid id say zfs is definitely better (zpool is awesome). but a lot of the things you can do with snapshots and subvolumes on btrfs aren't actually possible on zfs. a rollback on zfs is a very specific action which invalidates everything that came after- it's not to be done lightly. with btrfs you just move subvolumes around and they're available whenever you need them
encryption: its annoying but you should put your filesystem inside of lvm inside of LUKS and it'll work fine. its the same as using LUKS normally, and once it's open it's the same as using btrfs normally. this would probably suck for multiple disks, in which case you should use zfs
hibernation: use LVM to have a swap partition and call it a day, storage is cheap these days. ive heard swap files are improved somehow (?) but i dont use one and there really isn't any reason to
compression: imo not a showstopper or anything but it comes in handy. i wouldn't expect huge gains in space usage (storage is cheap anyway) but a lot of modern cpus are good enough at compression that it's actually faster to store everything compressed bc the bottleneck is disk IO. you can test what algorithm and level works best for you, and tune it by subvolume. on my nvme i dont notice a difference, but my server has some hard drives and compression speeds things up
9 notes
·
View notes
Text
waaa I was halfway through configuring a pc who I'd deployed just before I left home this morning and now it's no longer responding to ssh or http requests waaa
6 notes
·
View notes
Text
Pi-Hole debug log
I'm thinking about writing up a nice guide so let me know if that would be useful to anyone but in the meantime, some notes about difficulties I ran into setting up a pi-hole
First off, I do want to say that this is actually pretty technically complicated? Like it's been floating around tumblr for a while, lots of people have done it, you can too, but when OP on that viral post said they took 2 hours and don't know anything, I think they mean they don't know anything in the same way I do (I have a whole degree in computers I have used a terminal before, but I hadn't used a raspberry pi before)
Rest below the cut
Gathering Materials Good news: there's lots of viable options for a raspberry pi that works with pihole! The minimal requirements are really very minimal. You need some computer that you're willing to devote to blocking your internet. (Theoretically you could do this on a computer also used for different stuff but that would suck and make you have no ram.) In practice, unless you've got a spare working laptop floating around for some reason, you are going to want that to be a raspberry pi. Bad news: now you have to make decisions. The "official" pihole kit has been sold out for ages, so that's not an option. I said fuck it and bought kit for the raspberry pi 4 off of one of the licensed distributors linked from raspberrypi.com (because it had all the requirements) but that was ~$100 with shipping and there ARE cheaper options. It looks like the raspberry pi zero barely hits the RAM requirements and is $15 at a licensed distributor so that's likely as low as you can go. And if you're not just buying a kit you'll need at a minimum a power supply, a microsd card (the pihole requirement is 4GB but everything I was seeing was way bigger anyways), and a way to read a microsd card (either a USB microsd reader or if your laptop already has an sd card reader you'll need one of those microsd to normal sd card converters which idk where you get but a USB microsd reader is very cheap). You don't need but may want an hdmi cable that will connect to the pi
Setting Up and Using a Raspberry Pi You may notice for notes that aren't a guide (yet) this is going into Great Detail about the early parts of the setup. As someone who hadn't used a raspberry pi before, I found all the pihole guides I was looking at skipped the basics I needed and most of my setup time was trying to figure out what was going on with my raspberry pi, not actually doing the pi-hole thing. The raspberry pi getting started page actually had all the information I needed in conjunction with their pihole setup guide if I'd read it thoroughly enough but since I didn't a general overview: first you plug the sd card into your personal computer to image it; then once it's imaged you take it out and put it in your raspberry pi; then after it's blinked at you a bit you ssh to your raspberry pi while on the same wifi network you just set up in the imaging step. This is running your raspberry pi "headless" which means you don't need a monitor/hdmi cable but does make it harder to debug if you can't ssh. Also if you're on windows apparently you NEED to download a different terminal because windows command prompt for all that it's gotten better over time cannot connect to unix operating systems (which raspbian is).
AT&T hates internet configuration Now we're getting to the part that's specific to me. My internet is on AT&T, which has overall been pretty okay (and they've had great technicians for setup and repair), but AT&T fiber does not let you set your own DNS. The non-annoying backup is to make the pi-hole your DHCP server instead of your DNS server, which IS in every setup guide but is NOT very detailed. (Possibly if I wasn't on AT&T this whole paragraph would be complaining about the level of detail of guides about making your pi-hole your DNS.) To get DHCP working, I found a different, slightly outdated guide from someone else on AT&T fiber which was pretty useful but had some pitfalls because it is a bit out of date: https://otter-security.com/how-to/ht_post/28/
Key points for setting up a pihole as DHCP server:

Set up your pihole normally/following the raspberry pi guide for the prompts
You still need to allocate a static IP for your pihole. For AT&T, this is on the IP allocation of the Home Network tab of the advanced settings page. That static IP should be the same as whatever the IP the IPv4 one the pihole install configured.
Disable DHCP on the subnets & DHCP tab. THIS IS THE STEP THAT BREAKS YOUR INTERNET: without DHCP available only some sites will work. This will be fixed by enabling DHCP on the pi-hole
Disable IPv6 (more about this later)
Enable DHCP on the pi-hole admin page: this is just a checkbox under settings->DHCP. The router ip address should be the one listed on the back of your router/the one used to get to the advanced settings (probably already correct)
Let all devices connect to the pi-hole under Settings->DNS on the pi-hole admin page (this is the step that was outdated or possibly just different because it was wired on the guide)

Don't You Forget About Mesh More details about my particular internet setup: we extend our internet with a mesh network. This kept getting in my way as I was doing the setup because I treat them largely interchangeably but it's important to put the raspberry pi and your computer on the SAME internet to do a local ssh, where the mesh vs the router are different here. I wanted to put the raspberry pi ssh on the router not the mesh because my initial setup attempt did break the mesh, but I'm not sure that that matters? Also I don't think anything connected to the mesh is getting the pihole filtering right now? Possible fixes required are either changing the mesh DNS to the pi-hole IP or seeing if the mesh has DHCP enabled.
IPv6: Still Broken So in the DHCP setup step I disabled IPv6. I couldn't get my DHCP to be forced to the pi-hole on IPv6 and I'm not sure why. I did set up my pi-hole to be IPv6 enabled and try disabling just IPv6 DHCP on my router, but it didn't seem to be hitting the pihole. Reading a help thread on this has convinced me that my best option is to leave it disabled until such a time as I want to learn things about networking again (a class I liked but also worked very hard to get a B in)
Why is my computer sad?? So I've declared pihole "working" in that our internet isn't broken and it's blocking at least some ads from some computers... but my mac is now giving ominous no internet connection warnings.

This would be a Big Problem except that I definitely can in fact reach the internet just fine. I'm on the internet right now! I don't know why my mac is sad and I am struggling to google it because it's specifically a false warning and I'm only getting results about the real problem. My hazy guess is it's ipv6 related? I could test this by disabling pihole/re-enabling DHCP on my router while keeping ipv6 off... but not in the middle of the day on a Friday
Adguard vs Pi-Hole: A Mystery Pi-Hole is no longer new technology and in the ~12 hours that it's been set up here hasn't made a dramatic difference in my life, mostly because I already had adblockers on my laptop. You can add more blocked sites and I've been looking at finding more adlists, but one alternate option is instead of running pi-hole on your raspberry pi, you run a commercial network level adblocker called AdGuard Home. I haven't tried the AdGuard option but it might do more comprehensive blocking? On the downside, it's commercial, not open source, so I do worry about them switching to break your internet if you don't give them money...
#mostly notes to self#I've been writing docs for work so suddenly my personal notes got detailed but you will need to click through to a real guide to use this#what is a blog for if not just putting your technical notes on the internet#computing things#pihole
4 notes
·
View notes
Text
Petalhost: The Best Magento Hosting Provider in India
When it comes to hosting your Magento-based ecommerce website, you need a hosting provider that ensures speed, reliability, and scalability. Petalhost emerges as the most trusted Magento Hosting Provider in India, offering cutting-edge hosting solutions designed specifically for Magento-powered online stores.
Why Choose Petalhost for Magento Hosting?
Magento is a robust ecommerce platform that demands high-performance hosting to deliver a seamless shopping experience. Petalhost understands these unique requirements and provides tailored hosting solutions that guarantee optimal performance and security for your Magento website.
1. High-Speed Servers for Lightning-Fast Performance
Slow-loading websites can drive customers away, but with Petalhost’s high-speed SSD-powered servers, your Magento store will load in the blink of an eye. This not only enhances user experience but also improves search engine rankings, ensuring more visibility for your online store.
2. 99.9% Uptime Guarantee
Downtime means lost sales and damaged customer trust. Petalhost guarantees 99.9% uptime, ensuring your Magento store remains accessible around the clock. Their state-of-the-art data centers are equipped with the latest technology to ensure uninterrupted service.
3. Robust Security Features
Ecommerce websites handle sensitive customer data, making security a top priority. Petalhost provides advanced security measures such as firewalls, DDoS protection, malware scanning, and free SSL certificates to safeguard your Magento store and protect customer information.
4. Optimized for Magento
Petalhost’s servers are specifically optimized for Magento, providing pre-configured setups that reduce the need for manual adjustments. This ensures your website runs smoothly and efficiently, regardless of traffic spikes or complex integrations.
5. Scalable Hosting Plans
As your business grows, so do your hosting requirements. Petalhost offers scalable hosting plans that allow you to upgrade your resources seamlessly without any downtime. Whether you’re running a small store or managing a large ecommerce enterprise, Petalhost has the perfect hosting solution for you.
6. 24/7 Expert Support
Petalhost’s team of Magento hosting experts is available 24/7 to assist you with any issues or queries. From initial setup to ongoing maintenance, their friendly and knowledgeable support team ensures you’re never alone.
Key Features of Petalhost’s Magento Hosting Plans
SSD Storage: High-speed solid-state drives for faster data retrieval.
Free SSL Certificate: Secure your store and build customer trust.
Daily Backups: Keep your data safe with automated daily backups.
One-Click Installation: Quickly set up your Magento store with an easy installation process.
Global Data Centers: Choose from multiple data centers for optimal performance and reduced latency.
Developer-Friendly Tools: Access SSH, Git, and other developer tools for seamless store management.
Affordable Pricing for Every Budget
Petalhost believes in offering premium Magento hosting solutions at affordable prices. Their hosting plans are designed to suit businesses of all sizes, from startups to established enterprises. With transparent pricing and no hidden fees, you get the best value for your money.
Why Magento Hosting Matters
Magento is a feature-rich platform that enables businesses to create highly customizable and scalable online stores. However, its powerful features also demand a hosting environment that can handle its resource-intensive nature. A reliable Magento hosting provider like Petalhost ensures that your website runs efficiently, providing a smooth shopping experience for your customers and boosting your online sales.
How to Get Started with Petalhost
Getting started with Petalhost’s Magento hosting is quick and hassle-free. Simply visit their website, choose a hosting plan that suits your needs, and follow the easy signup process. Their team will guide you through the setup and migration process to ensure a smooth transition.
Conclusion
If you’re looking for a reliable and affordable Magento Hosting Provider in India, Petalhost is the name you can trust. With high-speed servers, robust security, and dedicated support, Petalhost provides everything you need to run a successful Magento-based ecommerce store. Don’t let subpar hosting hold your business back. Choose Petalhost and take your online store to new heights today!
2 notes
·
View notes
Text
BorgBackup suddenly stopped working. It's probably some problem with the SSH connection, although debug output from Borg is not showing anything definite. Maybe they changed the server configuration somehow.
2 notes
·
View notes
Video
youtube
Complete Hands-On Guide: Upload, Download, and Delete Files in Amazon S3 Using EC2 IAM Roles
Are you looking for a secure and efficient way to manage files in Amazon S3 using an EC2 instance? This step-by-step tutorial will teach you how to upload, download, and delete files in Amazon S3 using IAM roles for secure access. Say goodbye to hardcoding AWS credentials and embrace best practices for security and scalability.
What You'll Learn in This Video:
1. Understanding IAM Roles for EC2: - What are IAM roles? - Why should you use IAM roles instead of hardcoding access keys? - How to create and attach an IAM role with S3 permissions to your EC2 instance.
2. Configuring the EC2 Instance for S3 Access: - Launching an EC2 instance and attaching the IAM role. - Setting up the AWS CLI on your EC2 instance.
3. Uploading Files to S3: - Step-by-step commands to upload files to an S3 bucket. - Use cases for uploading files, such as backups or log storage.
4. Downloading Files from S3: - Retrieving objects stored in your S3 bucket using AWS CLI. - How to test and verify successful downloads.
5. Deleting Files in S3: - Securely deleting files from an S3 bucket. - Use cases like removing outdated logs or freeing up storage.
6. Best Practices for S3 Operations: - Using least privilege policies in IAM roles. - Encrypting files in transit and at rest. - Monitoring and logging using AWS CloudTrail and S3 access logs.
Why IAM Roles Are Essential for S3 Operations: - Secure Access: IAM roles provide temporary credentials, eliminating the risk of hardcoding secrets in your scripts. - Automation-Friendly: Simplify file operations for DevOps workflows and automation scripts. - Centralized Management: Control and modify permissions from a single IAM role without touching your instance.
Real-World Applications of This Tutorial: - Automating log uploads from EC2 to S3 for centralized storage. - Downloading data files or software packages hosted in S3 for application use. - Removing outdated or unnecessary files to optimize your S3 bucket storage.
AWS Services and Tools Covered in This Tutorial: - Amazon S3: Scalable object storage for uploading, downloading, and deleting files. - Amazon EC2: Virtual servers in the cloud for running scripts and applications. - AWS IAM Roles: Secure and temporary permissions for accessing S3. - AWS CLI: Command-line tool for managing AWS services.
Hands-On Process: 1. Step 1: Create an S3 Bucket - Navigate to the S3 console and create a new bucket with a unique name. - Configure bucket permissions for private or public access as needed.
2. Step 2: Configure IAM Role - Create an IAM role with an S3 access policy. - Attach the role to your EC2 instance to avoid hardcoding credentials.
3. Step 3: Launch and Connect to an EC2 Instance - Launch an EC2 instance with the IAM role attached. - Connect to the instance using SSH.
4. Step 4: Install AWS CLI and Configure - Install AWS CLI on the EC2 instance if not pre-installed. - Verify access by running `aws s3 ls` to list available buckets.
5. Step 5: Perform File Operations - Upload files: Use `aws s3 cp` to upload a file from EC2 to S3. - Download files: Use `aws s3 cp` to download files from S3 to EC2. - Delete files: Use `aws s3 rm` to delete a file from the S3 bucket.
6. Step 6: Cleanup - Delete test files and terminate resources to avoid unnecessary charges.
Why Watch This Video? This tutorial is designed for AWS beginners and cloud engineers who want to master secure file management in the AWS cloud. Whether you're automating tasks, integrating EC2 and S3, or simply learning the basics, this guide has everything you need to get started.
Don’t forget to like, share, and subscribe to the channel for more AWS hands-on guides, cloud engineering tips, and DevOps tutorials.
#youtube#aws iamiam role awsawsaws permissionaws iam rolesaws cloudaws s3identity & access managementaws iam policyDownloadand Delete Files in Amazon#IAMrole#AWS#cloudolus#S3#EC2
2 notes
·
View notes
Text
#RaspberryPi – 1st setup no monitor 📺: Wifi 📶 auto connect, SSH, rename, update, docker 🐳, rust and more! Update 2023-Jan-04
Latest version 2024-Apr-30 here Content Create SD card using Raspberry Pi Imager Configure Wireless connection (if needed) Enable SSH (if needed) Find the IP address in your network Access via SSH Change Password (if needed) Rename the device (if needed) Expand FileSystem Update the device Install neofetch Install Docker Setup SSH password-less access to the Raspberry Pi Setup…

View On WordPress
0 notes
Text
my steamdeck is on my vpn so all i have to do to configure something on it is boot it up, plug it in (so it doesn't sleep), sit down on my laptop and ssh in
how clean it is so configure emulators with a real shell from a real computer :3
6 notes
·
View notes
Link
Come la porta SSH è diventata 22
La porta SSH predefinita è 22. Non è una coincidenza. Questa è la storia di come ha ottenuto quel porto.
Quando io ( Tatu Ylonen) ho pubblicato per la prima volta questa storia nell'aprile 2017, è diventata virale e ha ottenuto circa 120.000 lettori in tre giorni.
La storia di come ottenere la porta SSH 22
Ho scritto la versione iniziale di SSH (Secure Shell) nella primavera del 1995. Era un periodo in cui telnet e FTP erano ampiamente utilizzati.
Ad ogni modo, ho progettato SSH per sostituire sia telnet(porta 23) che ftp(porta 21). La porta 22 era libera. Era convenientemente tra i porti per telnete ftp. Ho pensato che avere quel numero di porta potesse essere una di quelle piccole cose che avrebbero dato un'aura di credibilità. Ma come potrei ottenere quel numero di porta? Non ne avevo mai assegnato uno, ma conoscevo qualcuno che aveva assegnato un porto.
A quel tempo il processo di base per l’assegnazione delle porte era abbastanza semplice. Internet era più piccolo ed eravamo nelle primissime fasi del boom di Internet. I numeri di porta sono stati assegnati dalla IANA (Internet Assigned Numbers Authority). All'epoca, ciò significava uno stimato pioniere di Internet chiamato Jon Postel e Joyce K. Reynolds . Tra le altre cose, Jon era stato l'editore di standard di protocollo minori come IP (RFC 791), ICMP (RFC 792) e TCP (RFC 793). Alcuni di voi potrebbero averne sentito parlare.
Per me Jon era assolutamente spaventoso, essendo l'autore di tutte le principali RFC di Internet!
Ad ogni modo, poco prima dell'annuncio, ssh-1.0nel luglio 1995, ho inviato questa e-mail alla IANA:
From ylo Mon Jul 10 11:45:48 +0300 1995 From: Tatu Ylonen <[email protected]> To: Internet Assigned Numbers Authority <[email protected]> Subject: request for port number Organization: Helsinki University of Technology, Finland Dear Sir, I have written a program to securely log from one machine into another over an insecure network. It provides major improvements in security and functionality over existing telnet and rlogin protocols and implementations. In particular, it prevents IP, DNS and outing spoofing. My plan is to distribute the software freely on the Internet and to get it into as wide use as possible. I would like to get a registered privileged port number for the software. The number should preferably be in the range 1-255 so that it can be used in the WKS field in name servers. I'll enclose the draft RFC for the protocol below. The software has been in local use for several months, and is ready for publication except for the port number. If the port number assignment can be arranged in time, I'd like to publish the software already this week. I am currently using port number 22 in the beta test. It would be great if this number could be used (it is currently shown as Unassigned in the lists). The service name for the software is "ssh" (for Secure Shell). Yours sincerely, Tatu Ylonen <[email protected]> ... followed by protocol specification for ssh-1.0
Il giorno successivo, avevo un'e-mail di Joyce nella mia casella di posta:
Date: Mon, 10 Jul 1995 15:35:33 -0700 From: [email protected] To: [email protected] Subject: Re: request for port number Cc: [email protected] Tatu, We have assigned port number 22 to ssh, with you as the point of contact. Joyce
Eccoci lì! La porta SSH era 22!!!
Il 12 luglio 1995, alle 2:32, ho annunciato una versione beta finale ai miei beta tester presso l'Università di Tecnologia di Helsinki. Alle 17:23 ho annunciato i pacchetti ssh-1.0.0 ai miei beta tester. Alle 17:51 del 12 luglio 1995 ho inviato un annuncio su SSH (Secure Shell) alla [email protected] list. L'ho anche pubblicato in alcuni newsgroup, mailing list e direttamente a persone selezionate che avevano discusso argomenti correlati su Internet.
2 notes
·
View notes