#Vintage Amplifier
Text
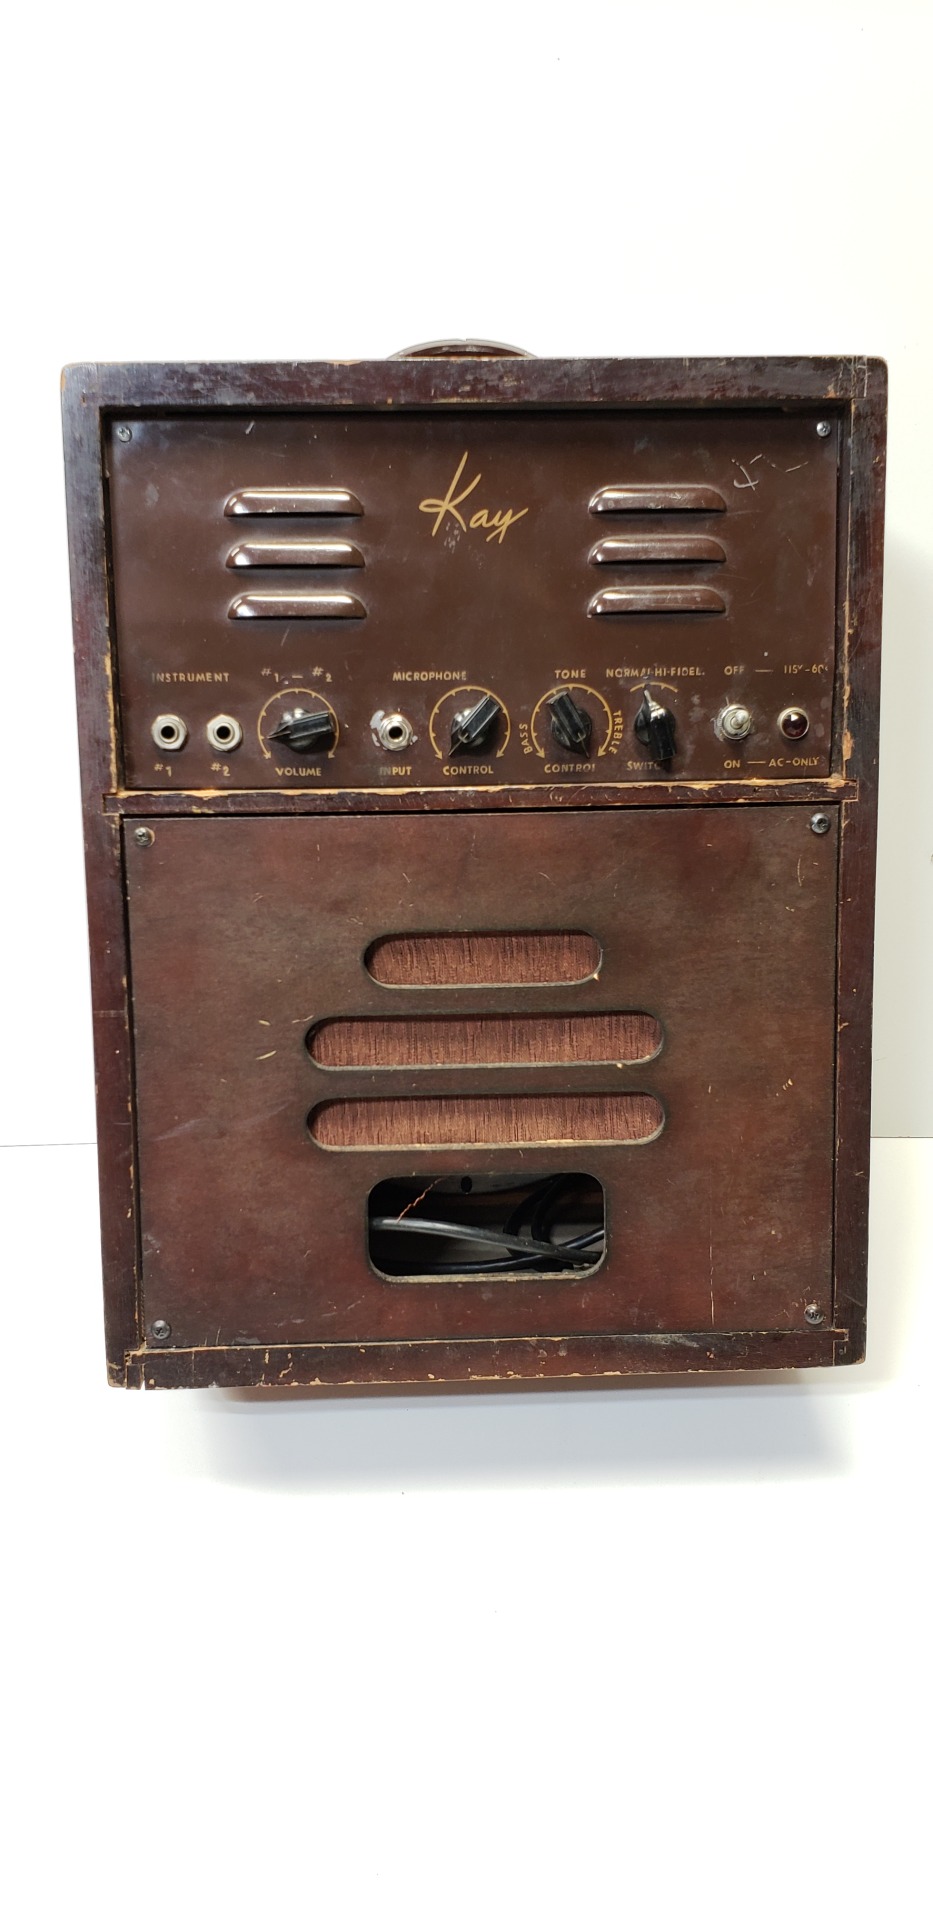
1945 Kay by John Meck
Beautiful Art Deco amp features 2 6V6, 6SL7, 6SJ7 into a 12″ Utah. 2 instrument inputs, 1 mic input, separate volumes, 1 tone control. Throwing in a photo that will be familiar to most, makes me wonder if Pirates of the Caribbean makers saw one of these.


#kay#Kay Amp#Kay Amplifier#Vintage Kay Amplifier#Vintage Kay Amp#Backline#Detroit#Studio#Rental#Studio Rental#John Meck#Vintage amp#Vintage Amplifier#Vintage Guitar Amp#Vintage Guitar Amplifier#Amplifierrs#1940s
2 notes
·
View notes
Text
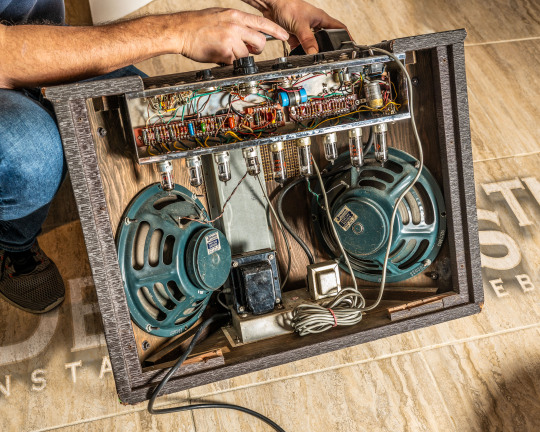
Vintage Amplifier Service for Restoration
In the world of audio fans, vintage audio equipment has a certain charm that exceeds the boundaries of time. Vintage amplifiers have a unique appeal that lies in their classic aesthetics, warm sound, and the nostalgia they evoke. These amplifiers often require tender love to bring them back to their former glory. In this article, we explore the captivating world of vintage amplifiers and restoring them to their original splendor.
The Need for Restoration
The passage of time can take its toll on vintage amplifiers. Capacitors can dry out, tubes can weaken, and the overall performance may degrade. This is where restoration services become crucial. Vintage amplifier service for restoration is crucial due to the historical significance and unique qualities of these audio devices. Amplifiers from past decades often possess distinct features and craftsmanship no longer replicated in modern counterparts. Restoring these vintage amplifiers involves preserving their original character, ensuring they function optimally while maintaining their authentic sound quality. Additionally, older amplifiers may suffer from wear and tear over time, impacting their performance. Professional restoration services address issues like faulty wiring, worn-out components, or degraded circuitry, reviving these amplifiers to their former glory.
Preserving the integrity of vintage amplifiers requires specialized expertise and a deep understanding of their intricate design. Restorations involve meticulous attention to detail, which includes sourcing original parts or using high-quality replacements to maintain the amplifier's authenticity. By entrusting these amplifiers to skilled professionals, owners can enjoy the nostalgia audio experience
The Restoration Process
Assessment
The first step in restoring a vintage amplifier is to assess its condition. An experienced technician will carefully examine the amplifier's components, looking for signs of wear, damage, or deterioration. They'll also take note of the original specifications to ensure the restoration process stays true to the amplifier's original design.
Cleaning
Vintage amplifiers are often covered in years of dust and grime. Cleaning is a vital part of the restoration process. The amplifier's exterior is carefully cleaned, and the interior is dusted and vacuumed to remove any accumulated debris.
Component Replacement
Many vintage amplifiers require the replacement of critical components like capacitors and resistors. Old capacitors, in particular, can leak or dry out over time, leading to poor performance. New, high-quality ingredients are carefully selected to match the amplifier's original specifications.
Tube Testing and Replacement
If the vintage amplifier is tube-based, the tubes are tested to ensure they function correctly. Tubes have a limited lifespan, and their performance can degrade over time. Faulty tubes are replaced with new, matched ones to maintain the amplifier's original sound.
Power Supply Restoration
The power supply is critical to any amplifier. It provides the necessary voltage and current to the amplifier's components. Restoring the power supply may involve replacing capacitors, diodes, and other details to ensure stable and clean power delivery.
Resistor Checks and Adjustments
Resistors can drift from their original values, affecting the amplifier's performance. Technicians check and adjust resistors as needed to maintain the amplifier's accuracy.
Testing and Burn-In
The restored amplifier is subjected to rigorous testing to ensure it functions flawlessly. It's often left to "burn in" for a period to stabilize its performance further.
Cosmetic Restoration
If necessary, the exterior of the amplifier is refurbished, including replacing missing knobs, switches, and faceplates. Wooden cabinets may be refinished to restore their original luster.
Conclusion
Vintage amplifiers have a particular unique sound that people love and enjoy. But with time, it can be damaged and does not work well. It is essential to fix them, which is done by skilled people. If you get professional help, the above process is helpful for you. Vintage amplifiers are prized for their unique sound and classic design. However, over time, they can start to show their age and require service or restoration. If you have a vintage amplifier that needs to be serviced or restored, it is essential to entrust it to a qualified professional.
A qualified technician will have the knowledge and experience to diagnose and repair any problems with your amplifier correctly. They will also be able to source any necessary replacement parts. In addition, a qualified technician can perform various maintenance tasks, such as cleaning and lubricating the amplifier's components, to help ensure that it continues to perform at its best for many years to come.
Disclaimer: This is generic Information & post; content about the services can be changed from time to time as per your requirements and contract. To get the latest and updated information, contact us today or visit our website.
0 notes
Text
JVC RX-1001V (1989) as shown in Posy new video
#jvc#vintage hifi#posy#vintage tech#audio stereo#receiver#amplifier#1980s#80's tech#lcd display#80's#old tech#ero tech#hi fi#equalizer#display
835 notes
·
View notes
Text
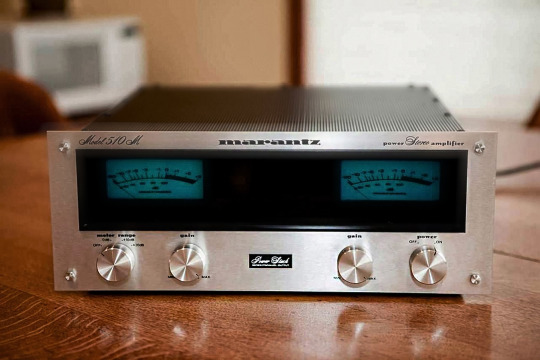
From the classic audio files: the Marantz 510M stereo power amplifier - 1975.
#marantz 510m#vintage stereo#vintage hifi#marantz power amplifiers#power amplifiers#stereo equipment#audiophile#stereo systems#marantz#vintage amplifiers#stereo amplifiers
49 notes
·
View notes
Text
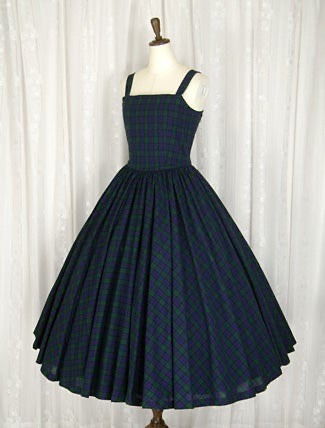

Juliette et Justine - Amplifier Illimité JSK (2004)
#juliette et justine#classic lolita#elegant gothic aristocrat#elegant gothic lolita#egl#egl fashion#egl community#academia fashion#alt fashion#vintage inspired#kawaii fashion#jfashion#harajuku fashion#classy fashion#plaid#amplifier illimité jsk#my post tag
85 notes
·
View notes
Text


I'M IN LOVE - yeah I'm a believer!
1963 #Gibson#GA79 RVT Stereo amplifier (with 1972 #ES355 Stereo guitar).
If you are like me you never paid much attention to these vaguely funny-looking mid 60s Gibson stereo amps. To me they never looked like "real" rock n roll amplifiers, they looked more like the console record player my parents had in their wood-paneled mid mod living room back in the 60s. Part music box...but mostly furniture. I keep wanting to flip up the top and throw on a Neil Diamond LP!
But, I was dropping off some amps for servicing with my amp tech @marshalllespaulfan yesterday, and he had this one in his shop, in from another customer, and we tried it out with my Stereo 355...and all of a sudden EVERYTHING in my life made perfect sense!
This amp was MADE for this guitar...and I mean that quite literally. You plug it in using a special stereo "TRS" cable, switch the amp to "stereo" mode (although you can also use it in "mono" mode with a regular guitar and cable) and it's wired to give you the neck pickup in the left channel and the bridge pickup in the right channel. So you can set different volume, EQs, and effects for each pickup! Once each channel is dialed in, you can just flip your pickup selector between a grungy dark rhythm sound and a bright overdriven lead sound. OR...play them both at the same time on the center position, and have reverb and trem on the underlying bassy tone, but a crisp, clear, un-effected bright tone cutting through at the same time! It's GENIUS.
Because of its funky stereo wiring, my 355 has never been very heavily played 'round 'ere. The best you can do with it on a "regular" amp is plug its stereo cable into the two inputs of the same amp and even then it just sounds like a "normal" guitar. Without a TRS cable, only the neck pickup works on a "normal" guitar cable. So it's essentially useless. But with an amp like this, you can make it do SO MUCH!
I think I have found my next amp acquisition "quest"! 😉
#gibson#ga79#amp#amplifier#guitar amp#tube amp#vintage amp#gibson amp#vintage gibson#es355#gibson es355#es335#gibson es335#vintage guitar#guitar#guitars#guitar photography
68 notes
·
View notes
Text


Music = Home
48 notes
·
View notes
Text
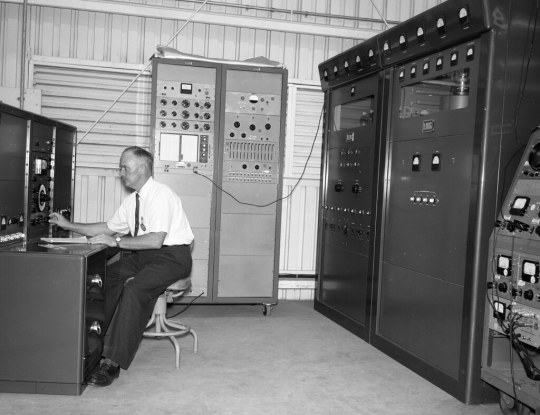
Convair employee using 30dB amplifier 08/01/1961
88 notes
·
View notes
Text
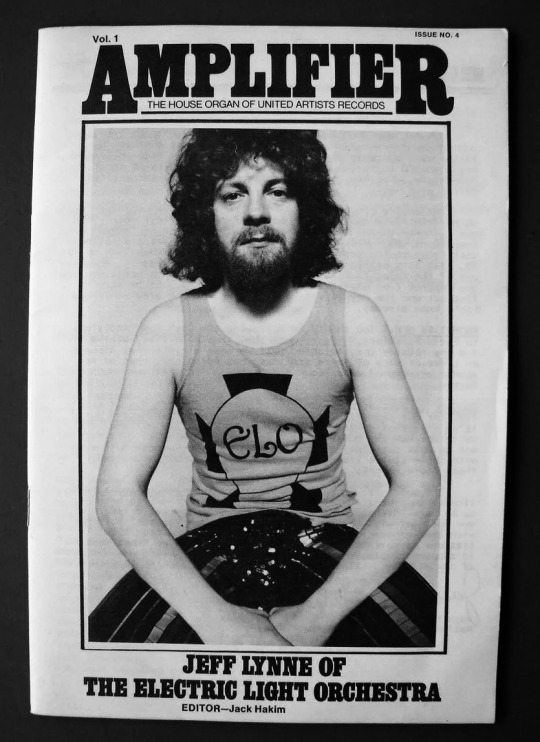
#jeff lynne#electric light orchestra#elo#vintage magazine#amplifier#b&w#rock and roll hall of fame#1970s
23 notes
·
View notes
Text
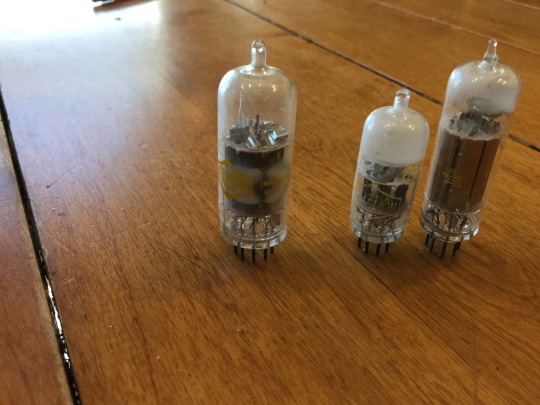
Spotting dead vacuum tubes!
These tubes have all suffered a loss of Vacuum, which can be seen visually by the milk white color then have turned. In a functioning tube all those white patches are silver or black.
Without vacuum a tube will arc internally, and any device it is placed into will blow fuses, and not function.
This is the most common type of tube failure I see, and is caused by mechanical damage to the tubes. The damage is often around the pins, and may be cause by shock, or extended periods of extreme vibration (IE, normal use in a combo amp). Often the damage itself is not viable, because loss of vacuum occurs before the tiny cracks become viable to the naked eye
Never turn on OR try and use an amp with white tubes! Attempting to do so may cause serious damage, or Injury!
BUT, If you noticed the tubes have changed color and have not yet blown a fuse, you can probably avoid a repair! Simply replace all white tubes before trying to power the amp.
#electric guitar#guitar#guitar amplifier#tube amp#vintage electronics#vintage hifi#vacuum tubes#electronic valves#rock music
35 notes
·
View notes
Photo
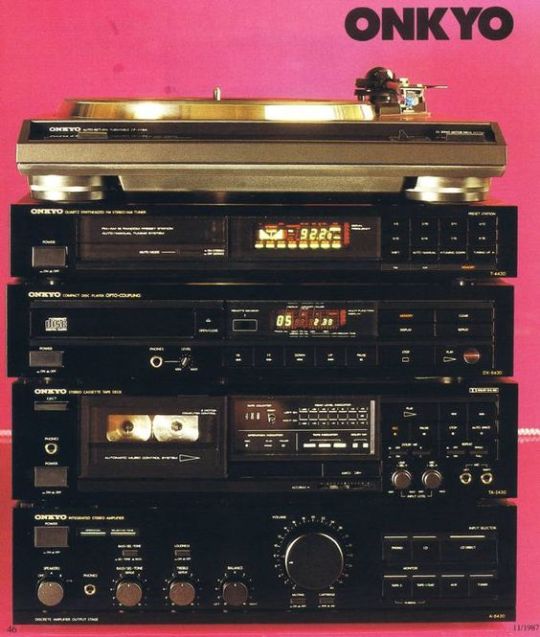
#Onkyo#speakers#cassette deck#amplifiers#stereo#vinyl player#record player#tech#80's#80's tech#vintage tech#heaven#sound system
313 notes
·
View notes
Text

Do you have a vintage amplifier that needs servicing in Sydney? Don't let a malfunctioning amplifier ruin your sound quality, contact us today for professional vintage amplifier service in Sydney. Contact us: https://www.speakerhospital.com.au/
0 notes
Text

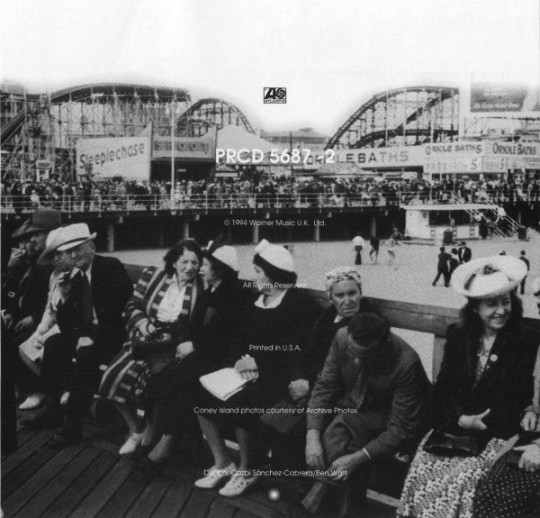

everything but the girl rollercoaster 1994 cd
#everything but the girl#tracey thorn#ben watt#amplified heart#90s#1990s#90s music#1990s music#folk#folk music#folk pop#sophisti pop#jazz pop#ebtg#british musicians#britpop#90s era#british music#90s britpop#trip hop#cd cover#cds#computer disc#archaic#vintage tech#y2k tech
8 notes
·
View notes
Text

Univox amplifiers ad - 1973.
#vintage illustration#vintage advertising#typography#vintage typography#hand lettering#univox#univox amplifiers#amplifiers#guitar amplifiers#vintage amplifiers#vintage guitar amplifiers#led zeppelin#the doors#jeff beck#the chambers brothers#rock music#classic rock#musicians#guitarists#rock guitar#rock guitarists#musical equipment#univox guitar amplifiers#univox guitar amps#the 70s#the 1970s#1973
10 notes
·
View notes
Text
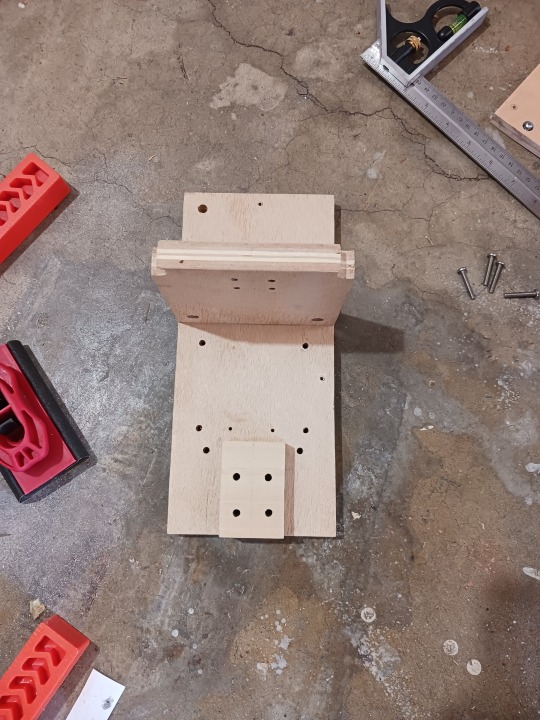
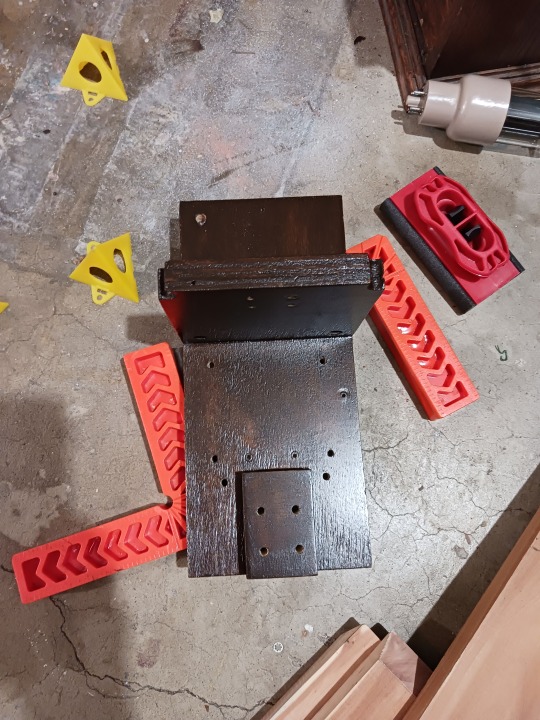


Progress on the Heathkit amplifier project!
This sequence shows the progress of the power supply unit I'm building to power both Heathkit amplifiers. Since the inside of the power supply is just plywood, I used a dark gel stain to unify the wood and make it look a little nicer. Then put on a few coats of satin poly.
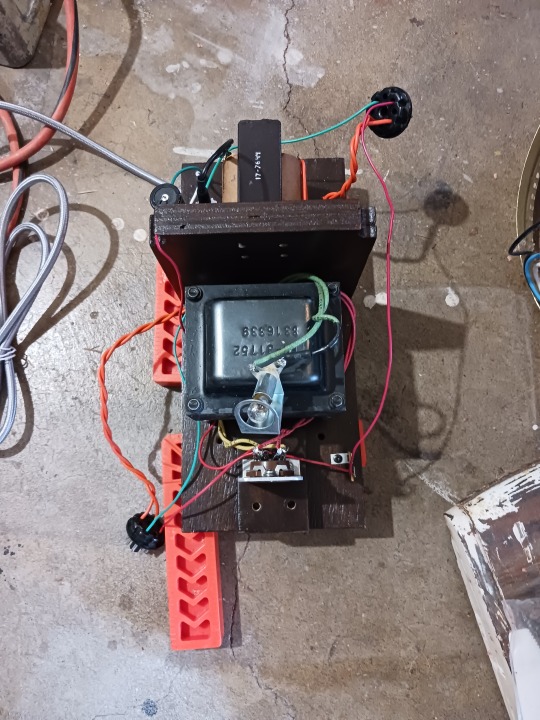
Next I added the internals. There's a power transformer which supplies 5 volts for the rectifier tube as well as B+ voltage for the plates, then there's a secondary filament transformer which provides 12.3 volts for the tubes in each amplifier.
Pictures 5 and 6 show the decorative cedar enclosure which will fit over the power supply. I'm particularly pleased with how the power light looks when lit!
Last picture shows one of the amplifiers plugged into the side of the PSU. The other amp will plug in on the other side.
I have a little issue right now where my B+ voltage is low under full load. It's supposed to be 390V, but I'm getting more like 360V. Right now debating whether to swap out the power transformer or just run it on lower voltage than the schematic calls for.
Will keep you posted, stay tuned!
21 notes
·
View notes
Text
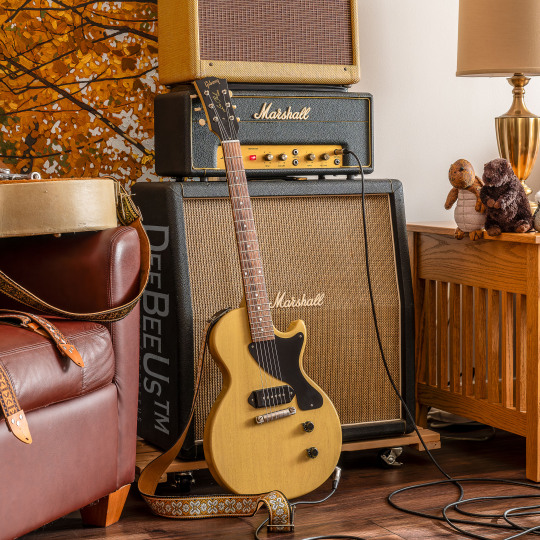

I have not posted in a while...very negligent! Here are a few recent shots:
2018 Custom Shop 1957 LP Junior TV Model Reissue with 1970 Marshall Lead 20
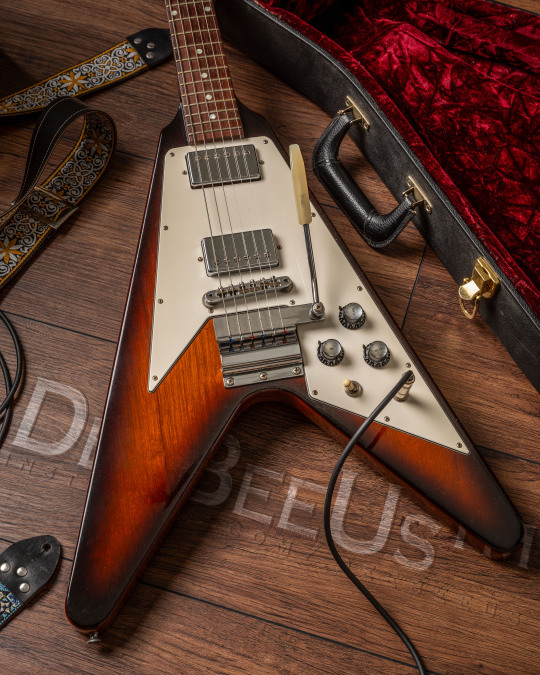
2002 Historic 1967 Flying V Reissue
1965 Duo Sonic with 1968 Traynor TR1 Reverb, 1969 Traynor YGM1 GuitarMate Reverb, and 1966 Traynor YGA1B Signature amp.
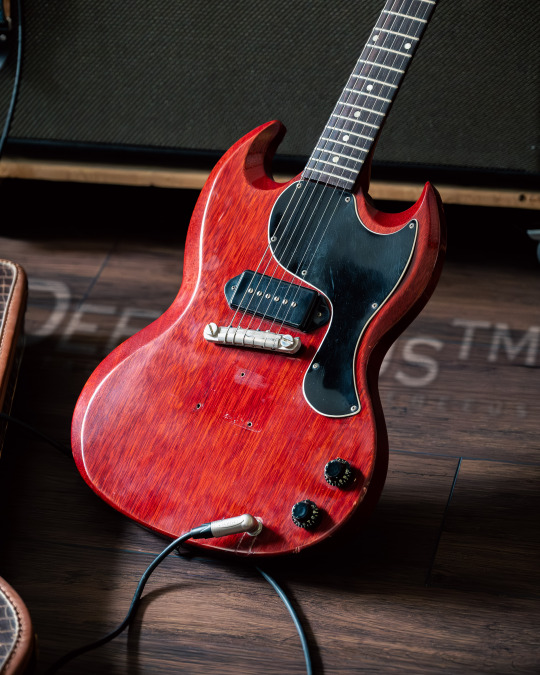
1961 Les Paul SG Junior
#gibson#traynor#fender#marshall#guitar#amplifier#amp#amps#vintage amp#vintage guitar#vintage fender#vintage marshall#vintage gibson#guitar collection#guitar photography#amp collection#guitar amp#tube amp#amp photography#les paul#duo sonic#les paul junior#sg junior#flying v#gibson custom#custom shop#tv yellow#toronto#traynor amp
56 notes
·
View notes
Last Seen Blogs

kawaiibags
My Novelty Kawaii Bag & Purse Collection!

brattyswitchslutgf
Switchy Succubus

mattoidmeerkat
¯\_(ツ)_/¯

