#all-purpose microcontrollers
Explore tagged Tumblr posts
Visit Tumblr Blog
Explore Tumblr blogs with no restrictions, modern design and the best experience.
Last Seen Tumblr Blogs


Fun Fact
Tumblr was acquired by Yahoo for $1.1B in 2013.
Text
youtube
NXP: MCX N Series Launch Video
https://www.futureelectronics.com/resources/featured-products/nxp-mcx-n-mcx-a-microcontrollers. The MCX N Series are high performance, low power microcontrollers with smart peripherals and accelerators providing the ultimate balance of performance and power consumption. The low power cache enhances system performance and the dual bank Flash and full ECC RAM supports system safety offering an extra layer of protection and assurance. https://youtu.be/jIOBKkh0y_4
#nxp#MCX#MCX A#Series Launch#all-purpose microcontrollers#MCU#future#tech#technology#electronics#electric#parts#microchip#MCX N#Youtube
0 notes
Text
Ha ha ha. Mister Shitpants was my dad. You can call me Doctor Shitpants. Are things not-so-fresh down there? Does it take you a long time to get off the john when you go to poop? Do you start dropping the kids off at the pool, only to gradually forget why you were there during the passage of time, becoming a new person in the process, untethered from personal responsibility as a result of your harrowing journey?
There is news, and that news is good. Friends, I have been called to a purpose higher than any on Earth. That purpose is to have a good, high-speed shit. Before I go into my sales spiel, I just want to give you a couple of facts to sit with. Fact number one: fully one-twelfth of a human being's lifetime is spent taking a dump. That's absolutely true. And fact number two: we got better things to be doing with our time than pooping.
Have you ever wondered why, in this time of automation and high technology, where robots do our menial tasks such as writing poetry and drawing grotesque pornography, we still have to strain so hard to use the toilet? That's where the Shitpants 9000 fecal vacuum comes in. It's patented, so don't go sniffing around under those covers, boys. I know you're really here from Toto's espionage department.
Don't worry: this isn't like the old fecal vacuums, like the McDonnell-Douglas nightmare of the 1960s that turned all those senior citizens inside out. Microcontrollers and adaptive suction engines are used to ensure that the pressure is gentle, even, but insistent. You'll be done your business in less than half the time you used to spend, which means more time for what's really important: using your phone on the john in order to avoid going back to work.
73 notes
·
View notes
Text
For future reference (my own and others), if your TI SilverLink USB cable stops working and starts showing up as "TUSB3410 Boot Device" or similar under device manager (AKA this issue on TI's help page), this is how you can fix it:
Download the TUSB3x10 EEPROM Burner. This is a Windows-only program, but to my knowledge will work on basically any windows machine from XP on -- so long as it's got USB ports. No clue if it'll work in a VM. (You might want to consult this user's manual.)
Download the SilverLink firmware. I got it from here, and compiled it from their de-compilation. It's just a standard 'make' to build. The output file you're looking for is called "ti_graph_link_silver.eep".
Rename "ti_graph_link_silver.eep" to "ti_graph_link_silver.bin".
Open the TUSB3x10 EEPROM Burner, click on the options dropdown and click "Show the 'Program Full Binary Image' button". (page 7 of the manual).
Select the entry under "Computer" labeled "TUSB3410 EEPROM Burner Instance (1.00)".
Set EEPROM size to "64Kb".
Set "File Path" to point to "ti_graph_link_silver.bin". (The renamed .eep, not the original .bin)
I don't know if the VID, PID, Manufacturer string, Product string and Serial # need to be set manually or not with a 'Full Binary Image' burn. Just to be safe, I set VID to 0451, PID to e001, Manufacturer to "Texas Instruments", Product to "TI-GRAPH LINK USB", and checked "Not Serialized"*.
Click the "Program Full Binary Image" button (yellow triangle with the exclamation point), and proceed with the write.
Unplug and re-plug your cable, and it should show up as a SilverLink again!
Additional notes:
The reason that this happens is because the SilverLink cable (revision b, at least) is based on the TUSB3410 microcontroller. That microcontroller's boot process involves checking for an I2C EEPROM containing program code. If it finds that EEPROM and its contents are properly formatted, it'll copy that code into internal RAM and start executing it. If it can't find the EEPROM, or its contents aren't properly formatted, it'll fall back to looking for boot code over USB. Thus: "TUSB3410 Boot Device". Your cable has, in essence, forgotten who it is and and is begging for you to give it a purpose.
The default page-write buffer size (32 bytes) and I2C bus speed (400 KHz) in the burner app are already correct, so no need to change them.
*I don't remember exactly what the Manufacturer string, Product string, or serial number fields were set to pre-corruption. Likewise, no idea about the advanced descriptor options. If someone wants to send the output of lsusb -v -s [whatever their silverlink's bus/id numbers are], I'd really appreciate it!
You might be able to skip the header rigamarole by taking the ti_graph_link_silver.bin file directly ("directly coming from the compiler") -- but I again I don't know exactly what information is in the .eep file and what isn't. Are the PID and VID encoded somewhere in there? I peeked with a hex editor but have no clue. If someone has hardware lying around they're willing to experiment with/potentially brick, I'd love to hear your results!
If you mess up and accidentally forget to do a "Full Binary Image" write, or otherwise brick the firmware, you can force the TUSB3410 to fall back to USB boot mode by opening the plastic shell around the PCB (one Torx screw under the sticker, then just normal plastic tabs) and shorting the right-bottom (Vss) and right-top (SDA), or right-bottom (Vss) and center right-top (SCL) pins of the EEPROM (the chip labeled "24LC64") as you plug it into the USB port. You may need multiple attempts. This works because it temporarily convinces the TUSB3410 that the EEPROM is missing/corrupt, and thus it decides to fall back into USB boot mode -- until you reset it. It might be better to do this with a ~1k resistor instead of a jumper wire, but IDK I'm not an electrical engineer. All I know is that shorting Vss and SDA worked for me. Again, would love feedback.
No clue what causes the corruption in the first place, or how long this fix will last. It might be because the EEPROM's write protect pin is set to "write enable"? It could also just be degrading hardware, for all I know, so no idea how long the fix will last. All I do know is that everything seems nominal right now (immediately after performing this procedure).
10 notes
·
View notes
Note
WARNING: LONG ASK INCOMING
For hobby electronics there’s two major kinds of processors: Microcomputers and Microcontrollers. Microcomputers are small full computer systems like the Raspberry Pi, they typically run a general-purpose OS (typically some flavor of Linux) and are useful for the kinds of projects that require basically a full computer to function, but not necessarily individual sensors. They’re a great place to start for people who don’t know a whole ton about programming or working with individual components because they typically can output a true GUI to a screen and have the capabilities of a regular desktop computer. They have a main processor, true RAM, and either large on-board storage space or a way to read a storage device, like an SD card.
Microcontrollers are less complicated (component wise) than microcomputers, but as a result are more difficult for total beginners to begin working with. They’re typically primarily a SoC (System on a Chip) processor without discrete RAM modules and a very small EEPROM (on-ship storage space) and need to have components wired and configured to them to be able to do much more than being a fancy calculator. They’re used for when you need something to carry out electronic functions or get sensor readings, but not necessarily a full operating system, so they’re best suited for small/integrated applications. Your helmet uses a microcontroller to control the LEDs you used in the Cunt Machine post.
I build high-power model rockets as a hobby and with my university team, so I work with both kinds of processor as part of designing payload systems. I typically prefer microcontrollers in these as most of what we do doesn’t need an actual OS to run, and they’re smaller/lighter than microcomputers. One of the advantages of a microcontroller is that it runs a Real-Time OS (RTOS) which forgoes all the user-friendliness of things like windows and linux to instead be the bare minimum backend necessary to run code uploaded into the processor.
The main advantage of using a microcontroller is really that they’re typically a lot cheaper than microcomputers are and are plenty powerful for really embedded applications. They also make other parts of whatever system is being built cheaper/easier to integrate because they require less overhead to function - the raspberry pi needs a minimum of 5 volts of power to work, while a chip like an ESP32-PICO can run at 1.8V.
The main way you make sensors/buttons/peripherals work with a microcontroller is via digital communication busses. There’s a few protocols, the most common being I2C, SPI, and UART. I’ll talk about I2C since that’s generally the most common. With I2C each component is assigned a 2-byte “address” that they’re identified by. When the controller sends a request signal on the I2C data bus, every sensor along the line will return their own signal, marked with their address so that they can be identified. It allows for a large number of devices to be put on the same lines and you can daisy-chain them through each other to the microcontroller.
I’ll be honest I really can’t think of a good way to say much more on the subject as like a starting message because I’ve been working with computers so long all the tech stuff for me is second nature, but if you have any questions ask away I can probably answer them or google them.
.
#AAAAAAAAAAAAAAAAAAAA TY INFORMATION#no yeah this is either really beginner friendly or. friendly to how much i have learned so far#tysm!!!! your insight is consistently so helpful <3#ask#lobsterbitches
27 notes
·
View notes
Text
Embedded Systems Course Online – Learn with Technoscripts
Embedded systems are the silent force behind many of the machines & devices we rely on every day. From a simple digital watch to complex automotive control units, embedded systems are quietly doing their job. With the world becoming more tech-driven, learning embedded systems is no longer just an option, it's a necessity for those aiming to work in core electronics & automation.
Technoscripts has created an online embedded systems course tailored for learners who want to build skills from scratch or enhance what they already know. The course is structured with a balance of core theory & hands-on experience, aiming to develop practical skills that actually work in real-world applications.
Why Learn Embedded Systems?
Everywhere you look in industries, homes, vehicles there’s some form of embedded technology at work. These systems are built to carry out specific tasks efficiently. Unlike general-purpose computers, they’re programmed to do one job, & do it well.
Industries such as automotive, telecommunications, healthcare, robotics, & agriculture are using embedded systems in their daily operations. These industries grow, so does the need for professionals who can design, program, & maintain such advanced embedded systems & technologies. If you understand how these small computers operate within machines, you open up a wide range of job and placement opportunities across various sectors.
What This Course Offers
This course is built for learners at all levels. Whether you’re a student from an engineering background or a working professional looking to switch fields, you’ll find the modules easy to follow yet detailed enough to build real skills with our embedded systems course online.
The course includes:
Programming with microcontrollers like 8051, PIC, & ARM
Basics of embedded C & real-time operating systems
Sensor & peripheral interfacing
Understanding & using communication protocols like UART, I2C, SPI
Debugging techniques & h&s-on project development
Each module is created for practical exercises so learners don’t just understand the theory they apply it for industrial use.
Flexible Learning, Expert Guidance
One of the biggest advantages of our course is flexibility. You can attend classes from anywhere, revisit recorded lectures anytime, & ask questions during live sessions. Our trainers are experienced engineers with actual industry exposure. This ensures that you are not just learning concepts but also how they’re used in professional life and career in future.
Who Can Join?
This program is ideal for:
Final-year engineering students
Diploma holders in electronics or related fields
Professionals in IT or electronics wanting to upskill
Anyone interested in electronics & embedded technology
What You’ll Walk Away With
After completing the course, you’ll be able to build embedded projects on your own, & understand how various components work together, & write programs that run on microcontrollers. You’ll also receive a certificate, project experience, & most importantly, the skills that companies actually look for.
Technoscripts also offers placement support for eligible candidates through a dedicated placement cell that connects you with hiring companies in embedded development & R&D roles.
Why Choose Technoscripts?
Courses shaped by real industry needs
Live project work during training
Personal mentorship & doubt-solving
Flexible class timings for working professionals
Certification & job assistance after course completion
Start Learning Today
If embedded systems excite you, & you’re ready to begin your learning journey, now is the time. With Technoscripts’ online embedded systems course, you don’t need to be in a classroom to gain valuable knowledge, you just need the right platform.
For more details or to enroll, visit our website or connect with our admissions team today.
0 notes
Text
The Evolution of Embedded Hardware: From Simple Circuits to Smart Devices
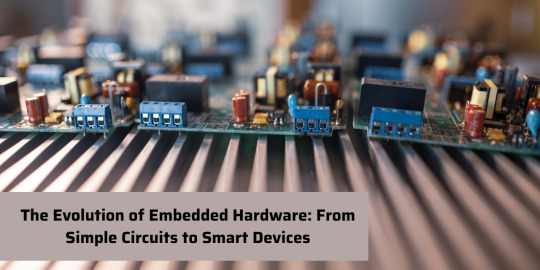
Embedded systems are all around us in today's hyperconnected world, from the sophisticated electronics controlling your car's engine to the smart thermostat that regulates the temperature in your house. One of the most amazing changes in technology is the progression from simple circuits to the advanced smart devices of today. This evolution, which has been fuelled by necessity and creativity, has been an intriguing one that has taken place over many decades. Understanding this history is essential for developers and businesses traversing this terrain, particularly when thinking about an embedded hardware design service that could help them realise their next big idea.
The Pioneer Days: Early Embedded Systems

The 1960s and 1970s marked the dawn of embedded computing, though it looked nothing like what we recognize today:
The Apollo Guidance Computer, which helped navigate astronauts to the moon, represented one of the first mission-critical embedded systems
Early embedded systems relied on discrete components rather than integrated circuits
These systems were enormous by today’s standards—filling entire cabinets
Programming was done through hard-wired logic or assembly language
Each system was custom-designed for a specific purpose with little flexibility
These primitive beginnings laid groundwork for what would become a technological revolution, yet the limitations were substantial. Memory was measured in kilobytes, processing power was minimal, and development required specialized expertise that few possessed.
The Microprocessor Revolution
Everything changed in the early 1970s with the introduction of the microprocessor:
Intel’s 4004, introduced in 1971, became the first commercially available microprocessor
For the first time, computing power could fit on a single chip
Development costs dropped dramatically, making embedded systems accessible to more industries
Early applications included calculators, cash registers, and industrial controllers
The 8-bit microcontroller era began, with chips like the Intel 8051 becoming industry standards
This miniaturization represented the first major leap toward modern embedded systems. Suddenly, intelligence could be added to previously “dumb” devices, creating new possibilities across industries from manufacturing to consumer electronics.
From Industrial to Consumer Applications
The 1980s and 1990s witnessed embedded systems transitioning from purely industrial uses to consumer products:
Video game consoles like the Nintendo Entertainment System introduced millions to embedded technology
Household appliances began incorporating microcontrollers for improved functionality
Automotive applications expanded rapidly, with engine control units becoming standard
Personal digital assistants (PDAs) showcased the potential for portable computing
Cell phones emerged as perhaps the most transformative embedded systems of the era
At this time, there started to appear specialized embedded hardware design service providers which assists businesses with intricate hardware designs. These services helped translate creative concepts into functioning products, allowing companies without internal capabilities to join the growing competition in the electronics industry.
The Networking Revolution and Embedded Connectivity
By the late 1990s and early 2000s, embedded systems gained a critical new capability—connectivity:
First-generation embedded networks often used proprietary protocols
Industry standards like CAN bus revolutionized automotive electronics
TCP/IP implementation in embedded devices paved the way for Internet connectivity
Wireless technologies like Bluetooth and later Wi-Fi liberated devices from physical connections
Remote monitoring and management became possible, changing service models forever
This networking capability transformed embedded systems from standalone devices to interconnected nodes, creating new possibilities for data collection and device management. Industries from healthcare to manufacturing began reimagining their processes around these newly connected devices.
The Rise of the Internet of Things (IoT)

The 2010s saw embedded systems become truly ubiquitous through the Internet of Things:
Consumer IoT products like smart thermostats, lighting, and speakers entered millions of homes
Industrial IoT revolutionized manufacturing through predictive maintenance and asset tracking
Agriculture embraced precision farming techniques using embedded sensor networks
Healthcare innovations included remote patient monitoring and smart medical devices
Urban infrastructure began incorporating embedded systems for “smart city” initiatives
With this explosion in applications came increasing complexity. An embedded hardware design service became essential for many companies looking to enter the IoT market, providing expertise in not just hardware but the integration of sensors, connectivity, and power management that modern IoT devices require.
Read Also: The Role of Embedded Hardware in IoT Devices
The Miniaturization Miracle
Throughout this evolution, one trend has remained constant—the drive toward smaller, more efficient devices:
Component sizes shrank from through-hole to surface-mount to microscopic
Power consumption decreased dramatically, enabling battery-operated portable devices
Wearable technology emerged as components became small enough to integrate into clothing and accessories
Medical implants shrank to minimize invasiveness while increasing capability
Sensors became small and inexpensive enough to deploy in massive numbers
This miniaturization has opened new frontiers in what’s possible with embedded systems. Today’s embedded hardware design services often specialize in extreme miniaturization, developing sophisticated systems that fit into spaces previously thought impossible.
The Processing Power Explosion
Modern embedded systems bear little resemblance to their ancestors in processing capability:
32-bit and 64-bit processors have replaced 8-bit chips in many applications
Multi-core processors enable complex real-time processing
Specialized hardware accelerators handle tasks like AI inference and video processing
For specific applications, field-programmable gate arrays (FPGAs) offer hardware that can be reconfigured.
System-on-Chip (SoC) designs combine peripherals, memory, and CPUs into one unit.
With this processing capability, embedded systems can now perform tasks like computer vision and natural language processing that were previously only possible with general-purpose computers, all while retaining the dependability and deterministic behaviour that embedded systems need.
The Future: AI at the Edge and Beyond
Looking ahead, embedded systems continue evolving at a breathtaking pace:
Edge AI is pushing intelligence to embedded devices rather than relying on cloud processing
New materials and manufacturing techniques are enabling flexible and biodegradable electronics
Energy harvesting is reducing or eliminating battery dependencies
Quantum computing principles may eventually transform embedded processing
Neuromorphic computing aims to make embedded systems think more like biological brains
These frontiers represent both challenge and opportunity. Companies seeking to navigate this complexity increasingly turn to specialized embedded hardware design services that can transform cutting-edge concepts into viable products.
The evolution of embedded hardware marks one of the most remarkable journeys of technology, progressing from circuits to devices that think for us and are a part of our lives. This journey continues to accelerate as we enter the following decades which promise even more astonishing innovations. For companies that want to take part in the ongoing revolution, collaborating with specialized embedded hardware design services is crucial for changing futuristic concepts into reality.
0 notes
Text
#element14#microcontrollers#MCUs#IoT#EmbeddedSystems#powerelectronics#powermanagement#powersemiconductor#NXP Semiconductors
0 notes
Text
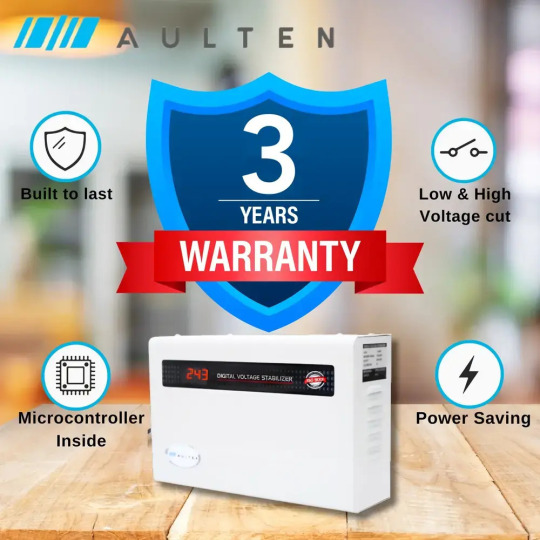
Shield Your AC: The Most Innovative Stabilizers for Peak Performance in 2025
As summer heat intensifies in India, air conditioners (ACs) become essential for comfort. However, voltage fluctuations, common in many Indian households, can damage your AC, disrupt cooling, and lead to expensive repairs. An AC stabilizer is the perfect solution to protect your appliance, and Aulten offers some of the best AC stabilizers for home use. Let’s dive into why Aulten is a top choice and how it ensures your AC runs smoothly.
Why an AC Stabilizer is a Must-Have
ACs are sensitive to power surges and drops, which can harm critical components like the compressor, reduce efficiency, and spike electricity bills. A stabilizer regulates voltage, delivering a consistent power supply to your AC. This not only extends your AC’s lifespan but also optimizes its performance, keeping your home cool and your wallet happy.
Aulten: The Go-To Brand for AC Stabilizers
Aulten has earned a stellar reputation for its reliable and innovative AC stabilizers. Designed specifically for Indian homes, Aulten stabilizers tackle erratic power conditions with ease. Here’s why Aulten is the best AC stabilizer brand:
Wide Voltage Range: Aulten stabilizers, such as the 4 KVA and 5 KVA models, handle voltage swings from 90V to 300V. This makes them perfect for areas with frequent power fluctuations, ensuring your AC operates without hiccups.
Energy-Saving Technology: Aulten’s stabilizers use advanced microcontrollers to minimize energy loss, helping you save on electricity bills while maintaining optimal AC performance.
Smart and Safe Features: Equipped with a digital display, Aulten stabilizers let you monitor input and output voltage in real-time. Features like high/low voltage cut-off, overload protection, and a time-delay system safeguard your AC from sudden power surges or outages.
Robust Build Quality: Aulten stabilizers are housed in durable, high-tensile metal cabinets, ensuring long-term reliability. Their compact, wall-mountable design saves space and adds convenience to any home setup.
Tailored for Indian Homes: Proudly made in India, Aulten stabilizers are built to handle the country’s unique power challenges. They come with free shipping, a 3-year replacement warranty, and responsive customer support.
Top Aulten Models for Your AC
Aulten offers a range of stabilizers to suit different AC types and capacities. For instance:
AULTEN Digital Voltage Stabilizer (AD008): Priced around Rs. 2,799, this model is ideal for 1.5-ton split or window ACs. It’s budget-friendly and packed with smart features.
AULTEN 5 KVA Stabilizer: Perfect for 2-ton inverter ACs, this model supports heavy-duty performance in areas with extreme voltage issues.
These stabilizers are compatible with all AC types—split, window, or inverter—making them versatile for any household.
Why Users Love Aulten
Aulten stabilizers strike a perfect balance between affordability and quality. Priced competitively, they cater to budget-conscious buyers without compromising on performance. Customers praise their ease of installation, low maintenance, and ability to protect ACs even in rural areas with unstable power. Online reviews highlight Aulten’s durability and excellent after-sales service, making it a trusted choice
Additional Benefits
Eco-Friendly: Aulten stabilizers are designed to reduce energy consumption, contributing to a greener environment.
Versatile Use: Beyond ACs, some Aulten models can support other appliances like refrigerators, making them a multi-purpose investment.
Peace of Mind: With Aulten, you can enjoy uninterrupted cooling without worrying about voltage spikes damaging your AC.
How to Choose the Right Stabilizer
When selecting an AC stabilizer for home, consider:
AC Capacity: Match the stabilizer’s KVA rating to your AC’s tonnage (e.g., 4 KVA for 1.5-ton ACs, 5 KVA for 2-ton ACs).
Voltage Range: Ensure the stabilizer supports the voltage fluctuations in your area.
Features: Look for digital displays, cut-off protection, and warranties for added reliability.
Aulten range covers all these needs, making it easy to find the perfect fit.
Final Thoughts
An AC stabilizer is a small investment that delivers big returns by protecting your air conditioner and ensuring consistent cooling. Aulten stands out as the best AC stabilizer brand, offering cutting-edge technology, durability, and affordability tailored for Indian homes. Don’t let voltage fluctuations spoil your comfort—choose Aulten and keep your AC running efficiently for years to come.
0 notes
Text
youtube
NXP: MCX A Series Launch Video
https://www.futureelectronics.com/resources/featured-products/nxp-mcx-n-mcx-a-microcontrollers . MCX A Series all-purpose microcontrollers (MCUs) address a wide range of applications with scalable device options, low power and intelligent peripherals. Designed to allow engineers to do more, the new MCX A series is optimized with the essential features, innovative power architecture and software compatibility required by many embedded applications. https://youtu.be/fjNG2t4TBXQ
#nxp#MCX#MCX A#all-purpose microcontrollers#MCU#MCX A series#microchip#small-footprint MCU#software compatibility#embedded applications#industrial sensors#motor control#power system#controllers#IoT devices#Youtube
0 notes
Text
How to Choose the Right Electronics Starter Kit for Your Needs

Getting started in electronics can be exciting, but picking the right electronics starter kit is essential for a smooth and enjoyable learning experience. Whether you’re just beginning or already have some experience, the right kit can help you understand the basics and dive deeper into more advanced projects. But with so many options available, how do you choose the one that’s right for you? In this article, we’ll walk you through how to select the perfect electronics starter kit based on your needs.
1. Understand Your Skill Level
Before you buy a kit, think about your current knowledge of electronics. Are you completely new to it, or do you have some experience? This will help you decide which kit is best for you.
If you’re a beginner, you’ll want a kit that focuses on the basics, such as learning how circuits work. A good starter kit will include:
Breadboard: A simple tool to build circuits without soldering.
Basic components: Items like resistors, capacitors, and diodes that are easy to work with.
LEDs and transistors: Basic components to help you understand how electrical signals flow.
If you already know a bit about electronics, you might want a more advanced kit with items like microcontrollers (Arduino or Raspberry Pi), sensors, and motors. These kits are for creating projects like robots or smart home devices, which can be more complex and interactive.
2. Think About What You Want to Build
Next, think about the types of projects you want to create. Your goals will help you choose the right kit. There are many different types of kits designed for different purposes. Here are some examples:
Basic Electronics Learning: If your goal is to understand how electronics work, look for a kit that teaches you the fundamentals of building circuits. These kits should have easy-to-follow guides for simple projects.
Arduino or Raspberry Pi Projects: If you want to build interactive projects, look for kits that include an Arduino or Raspberry Pi. These kits often come with microcontrollers, sensors, and other parts for creating cool projects like robots or home automation systems.
Robotics: If you’re interested in building robots, look for a robotics starter kit. These kits usually include motors, sensors, and sometimes even wheels and servos to help you create a robot.
Home Automation: Some kits are designed for smart home projects, such as controlling lights, locks, or even your thermostat. These kits typically include sensors, microcontrollers, and other components that connect to your home devices.
Wireless Projects: If you want to work on wireless electronics like Bluetooth or Wi-Fi, look for kits that include components for these kinds of projects. Wireless communication is becoming more popular, and you can use these kits to build things like remote-controlled gadgets.
Knowing what you want to build will help you choose a kit that gives you the right components and instructions for your projects.
3. Consider the Complexity of the Kit
Some kits are simple and easy for beginners, while others are made for people who already know a lot about electronics. Make sure the kit matches your skill level.
If you're new to electronics, choose a kit that includes basic components and clear instructions. A beginner kit should come with:
Easy-to-follow project guides: These will explain how to build simple circuits and understand basic concepts.
Basic components: Things like resistors, capacitors, and LEDs that you can easily experiment with.
If you’re more experienced, you might prefer a kit with more complex projects. These could involve soldering, using microcontrollers, or designing advanced circuits. More advanced kits allow you to create unique projects and experiment with a variety of components.
4. Check for Quality and Compatibility
Not all electronics kits are the same. Some kits may include low-quality components that break easily or don’t work as expected. To avoid frustration, make sure you choose a kit that has good reviews and is made with quality parts.
Also, make sure the components in the kit are compatible with each other. For example, if the kit includes an Arduino board, make sure the sensors and other parts work well with it. Check the product description and reviews to ensure everything in the kit is easy to use together.
5. Look for Good Documentation and Support
When you’re learning about electronics, good instructions can make a big difference. A high-quality starter kit should include clear guides that explain how to build and troubleshoot your projects. Look for kits that offer:
Step-by-step guides: These will help you understand how to build circuits and what each component does.
Troubleshooting tips: These can be especially helpful if something goes wrong in your project.
Online support or communities: Some kits come with online resources or communities where you can ask questions and get help from others.
For kits that involve programming, like those with Arduino or Raspberry Pi, make sure the kit includes software and guides for coding.
6. Consider Your Budget
Electronics kits come in a range of prices. While it might be tempting to choose the cheapest option, it’s important to remember that you often get what you pay for. Very inexpensive kits might have lower-quality components, or they might be missing key parts.
That said, you don’t have to spend a lot to get a good kit. Many affordable options offer solid components and instructions for beginners. Make sure to balance cost with quality so you can get the most value for your money.
7. Choose a Well-Known Brand
When selecting a kit, consider the brand. Some companies, like Arduino, SparkFun, and Adafruit, are known for making reliable kits with excellent support. These brands offer kits for beginners and more advanced users, and they often have large communities where you can get help, find tutorials, and share projects.
Choosing a well-known brand can also ensure that the components in your kit are high-quality and will work well together. Plus, these brands often provide lots of resources to help you get the most out of your kit.
Conclusion
Choosing the right electronics starter kit is an important step toward learning and exploring electronics. By understanding your skill level, defining your goals, and considering the complexity, quality, support, and price of the kit, you can select one that fits your needs. Whether you’re a beginner or already have some experience, the right electronics starter kit can set you up for success and inspire you to create amazing projects. Take your time, do some research, and pick the kit that will help you build your knowledge and skills in electronics. Happy building!
0 notes
Text
Driving the Future: Why Automotive Embedded Systems Matter More Than Ever
The auto world has undergone a revolutionary change in the last decade. Those days are long gone when a vehicle used to be a mechanical contraption with some electronic accessories here and there. Now, your car is a sophisticated computer on wheels. But the question remains — what is behind this digital revolution? The answer is automotive embedded systems. Ever wondered how your car knows when to deploy airbags, regulate engine operations, or park itself? Is it magic, or is there a rational system to this?
Automotive embedded systems are purpose-built computer systems that take on limited tasks in a car. They’re “embedded” because they’re part of bigger mechanical or electrical systems used to run functions like braking, navigation, infotainment, and even autonomous driving. They’re the quiet behind-the-scenes workers that make your drive safer, smarter, and more efficient. Did you know that a single luxury vehicle these days can contain more than 100 microcontrollers managing these features?
Why Should You Care About Automotive Embedded Systems?
Think it’s just about electronics in a car? Think again. These systems do all the following:
Advanced Driver-Assistance Systems (ADAS) such as lane departure warnings and adaptive cruise control.
Infotainment systems provide real-time navigation, connectivity, and entertainment.
Powertrain control, which maximizes fuel efficiency and engine performance.
Safety mechanisms, such as automatic emergency braking and electronic stability control.
Doesn’t it sound like a combination of mechanical brilliance and computing excellence? Would you feel secure driving a new car without such systems installed?
A Booming Career Path: Why Learn Automotive Embedded Systems
If you’re a car nut who loves technology, a career in automotive embedded systems awaits. With the drive to electric vehicles (EVs), autonomous driving, and connected cars, the need for qualified engineers is on the rise. Industry reports say that it is becoming increasingly difficult for companies to source professionals with knowledge of both automotive concepts and embedded technology. Could you be the solution to that problem?
Do you possess electronics, computer science, or mechanical engineering background? Are you familiar with C programming as well as real-time operating systems? Yes, then you’re already halfway towards becoming an automotive embedded developer. Is that thrilling?
What Do You Learn from an Automotive Embedded Course in Pune with Placement?
An embedded car course is not a coding crash course. It’s a well-structured industry-relevant course that fills the gap between theoretical learning and practical application. Curious about what such a course may provide?
Microcontroller programming: Understand how to program in-demand MCUs like ARM Cortex or Infineon Tricore.
CAN protocol: Learn about the communication backbone of vehicle electronics. Did you ever wonder how modules in your vehicle communicate with each other?
Real-Time Operating Systems (RTOS): Know how to handle timing-critical programs.
Automotive standards: Familiarize yourself with AUTOSAR, ISO 26262 (functional safety), and ASPICE.
Would you like to learn by doing instead of theory lectures? Good courses usually provide lab simulation, real-time debugging practices, and project-based testing to make sure you know how to design and test systems that would be put in a car in real life.
Who Should Enroll?
Can’t decide if you should take this course? Ask yourself:
Are you a graduate or student in engineering wanting to specialize in a niche skill?
Are you an embedded working professional seeking specialization?
Are you excited about future mobility and automotive innovations?
If the answer is yes to any of these, then you are the ideal candidate for this experience. Why delay when the mobility of the future is being created today?
What’s the Career Outlook?
Based on industry analysis, the global market for automotive embedded systems is projected to exceed $17 billion by 2027. Bosch, Continental, Tesla, and Toyota are just a few of the companies actively recruiting embedded developers. Do you want to contribute to the next generation of electric or autonomous cars? Can you envision helping create the safety system that saves lives daily?
You might be:
Embedded Software Developer
Automotive System Engineer
ADAS Engineer
Firmware Developer And these positions are not exclusive to OEMs. Tier-1 suppliers, technology majors, and even startups are always on the lookout for automotive embedded talent.
The world of car embedded systems is not only about vehicles — it’s about innovation, influence, and endless possibilities. With the right program, focus, and interest, you can drive the future of mobility. Wouldn’t it be exciting to witness your efforts materialize in a vehicle on the road?
So, are you prepared to change gears and propel your career with Embedded Courses in Pune with Placement.
0 notes
Link
[ad_1] In this article, we have listed Interview Questions and Answers for Embedded c developer Job opportunities. These Embedded c developer Interview Question Answers are divided into various categories which will help you crack Interviews and secure your job. All the categories and questions are listed below, click and explore the l/topic -Interview Questions for Embedded c developer Categories:1. Basic C Programming Questions:Q1: What is the difference between C and Embedded C?C is a general-purpose programming language used for applications running on operating systems.Embedded C is a subset of C optimized for programming microcontrollers and embedded systems, often requiring direct hardware interaction.Q2: What is the difference between a macro and a function?Macro is defined using #define and perform inline code substitution at compile-time.Function is compiled separately, supports type checking, and allows recursion.#define SQUARE(x) (x * x) // Macroint square(int x) return x * x; // FunctionQ3: What is the difference between volatile and const in C?volatile: Prevents compiler optimizations, ensuring that a variable is always read from memory.const: Specifies that a variable’s value cannot be modified after initialization.volatile int sensor_value; // Value may change outside program scopeconst int max_limit = 100; // Cannot be modifiedQ4: What is the size of integer data types in Embedded C?A: The size depends on the microcontroller and compiler, but typically:Q5: What are function pointers? How are they used in Embedded C?A: Function pointers store the address of a function and allow dynamic function calls. They are used in ISR (Interrupt Service Routines), callbacks, and state machines.void (*ptr_func)(void); // Function pointer declarationvoid LED_ON() /* Turn LED ON */ ptr_func = &LED_ON; // Assign function addressptr_func(); // Call function via pointerQ6: What is the difference between malloc() and static memory allocation?malloc(): Allocates memory dynamically from the heap, requiring free() for deallocation. Not commonly used in embedded systems due to limited RAM.Static allocation: Memory is allocated at compile-time and does not require manual deallocation.Q7: What are the different storage classes in C?auto: Default local variable storage in stack.static: Retains value across function calls.register: Requests CPU register storage for faster access.extern: Used for global variable sharing across files.static int counter = 0; // Retains value across function callsQ8: What is the role of volatile in embedded systems?A:volatile ensures that the compiler does not optimize away a variable that may change outside the program's control (e.g., hardware registers, sensor values, ISR flags).volatile int flag; // Prevents compiler optimization of flag updatesQ9: How do you write an ISR (Interrupt Service Routine) in Embedded C?A:An ISR is a function executed when a specific interrupt occurs.Example (AVR microcontroller): // Code to handle timer overflow interrupt Q10: How do you interface an LED with a microcontroller?A:An LED is connected to a GPIO pin, and it is controlled using HIGH (ON) or LOW (OFF) signals.void setup() = (1 [ad_2] Source link
0 notes
Text
Notes on Self-Studying STM32F10x Microcontroller Interrupts
Having previously used PIC and 8051 microcontrollers, I had never encountered the STM32 series of chips. Recently, I began delving into the STM32F10xseries.
During my studies, I found the STM32's interrupt system to be quite distinctive compared to those of the PIC and 8051, particularly in its response mechanism. Despite going through manuals and video tutorials multiple times, I still felt somewhat confused. However, as I began coding to configure the chip, I gradually started to understand it better. This led me to document my experiences as summary notes. I acknowledge that there may be some inaccuracies or gaps in my descriptions, and I encourage feedback and corrections.
The STM32 is built on the ARM Cortex-M3 core, which supports up to 256 interrupt sources. Out of these, 16 are core-specific, while up to 240 can be attributed to external devices. Each interrupt source has an independent priority control register, which is an 8-bit register. In theory, this means each interrupt source within a complete Cortex-M3 core could have 256 levels of priority. However, this vast architecture pertains to the entire Cortex-M3 core.
In the case of STM32 chips, not all possible interrupt sources or priority levels are used. Specifically, our STM32 model has the core's 16 interrupt sources and 68 additional sources from external devices. Since the STM32 doesn’t exploit all the interrupt sources available with the Cortex-M3, it also doesn't offer the full spectrum of 256 priority levels for configuration. Instead, the priority setting registers for each interrupt source in the STM32 use only the upper 4 bits of the 8-bit register. Details can be seen in the diagram below:↓
In STM32 microcontrollers, interrupt priorities are set using a priority register where each interrupt source has 4 bits allocated for this purpose. These 4 bits are divided into two groups: the "preemptive priority" (higher bits) and the "subpriority" (lower bits). The preemptive priority determines if an interrupt can interrupt currently executing interrupts, while the subpriority resolves conflicts between interrupts with the same preemptive priority.
The configuration of these priorities is managed by the Application Interrupt and Reset Control Register (AIRCR), specifically using bits 10, 9, and 8, known as the "PRIGROUP" bits. These bits define how the 4-bit priority is split between preemptive priority and subpriority, establishing different grouping schemes. For example, setting PRIGROUP to 101 configures the system to use 2 bits for both preemptive and subpriority levels, allowing values from 0 to 3 for each.
According to Cortex-M3 specifications, regardless of how many bits are used for priorities, the lower bits of the priority register are truncated when defining priorities. This means that when configuring priority groupings, at least one bit must be reserved for subpriority, ensuring that even if all bits are dedicated to subpriority, no nesting will occur, only sequential processing. In the STM32 priority register, typically the upper 4 bits define the priority, but during grouping, the lower 4 bits may influence the grouping scheme, such as in Group 4 where all 4 bits are assigned to preemption priority, leaving none for subpriority.
The difference between "preemption priority" and "subpriority" can be understood as follows: If multiple interrupts happen at the same time, the CPU prioritizes based on preemption priority. New interrupts with a higher preemption level can preempt ongoing ones, leading to interrupt nesting. However, if interrupts have the same preemption priority, they are processed sequentially according to their subpriority, with the lowest subpriority being handled last. If both preemption and subpriority are identical, STM32 processes the interrupt with the lower vector address first.
Interrupts in STM32 can also be in a "pending" state, which occurs when an interrupt request is made but cannot be executed immediately due to an active interrupt with equal or higher preemption priority. The pending state can be manually set using the ISPR[2] (Interrupt Set-Pending Register) and cleared using the ICPR[2] (Interrupt Clear-Pending Register). When conditions allow, a pending interrupt will be processed based on its configured priority.
TAG: STM32F10x; Electronic Components; Register
0 notes
Text
Cutting edge processors and all the latest and greatest additional computational hardware were fantastic assets to have when in environments where any malfunctioning or broken parts could be replaced more or less immediately.
Space was not one of those places. Being tens or hundreds of thousands of kilometers from the nearest resupply point wasn't a good place to have the fanciest gizmos going kaput with no spares on hand. This was on top of the considerations that anything you carried with you as backups meant less payload and more burnt fuel, and wherever you were going might not have whatever it was you needed for maintenance anyway if you didn't bring your own.
The driving logic behind designing dedicated space hardware, at least for manned use, had thus been quickly and firmly established as reliability first, maintainability second, and efficiency third. Putting it another way: nothing else mattered if you were dead; it was best that things could be readily fixed or at least replaced when possible, with a reasonable number of backups; and finally it was best if everything was as small, light, and energy efficient as possible given those prior two concerns.
As a result, hardware tended to have exactly the level of computational power and sophistication it needed, and nothing more. Parts were usually ruggedized, especially when they were milspec or for actual dedicated military applications, and accordingly could often seem downright primitive. While one might encounter distributed constellations of multiple redundant system-on-chips or microcontrollers around a cockpit or computer core in a spaceborne vehicle, in more peripheral areas one might find only simple rad-hard integrated circuit chips, merely transistor-transistor logic arrays, or (rarely) sometimes even just vacuum tubes.
Computational architecture thus often wasn't really so different from a biological nervous system in the end. Most of it was intended to be able to be repaired with the most rudimentary components and tools by even the most barely qualified personnel. Anyone could be trained to solder components into racked PCBs, and almost everyone who worked more than a service job in space was. Experience in assembly language programming, while less commonly mandatory, was also often de rigueur, with higher-level languages being optional. Mobile Suit pilots usually learned both necessities as part of their training curriculum. Whether they stayed any good at them or not was a different question.
Circumstances had forced Yoruichi to retain her skills at both. She wasn't an aerospace engineer, but she could diagnose and maintain, if not fix, just about any electronic or near-electronic hardware she encountered that could facilitate such repairs. She could also assemble her own rudimentary devices out of basic parts if necessary—and often had, from purpose-built hardware to simple drones.

Presently, she was slotting PCBs into a rudimentary case and hooking them together with cables, thereby apparently putting the finishing touches on some kind of basic, custom, purpose-built computer...
#In Character#Character: YORUICHI#Verse: SPACE ACE#Open Starter#[ kicking this out of drafts after 2 months ]#[ idc I liked the establishing vibe ]
1 note
·
View note
Text

Top 10 Skills You’ll Learn in an Embedded System Development Course in India
Today, with advanced technology in every field, the world has taken a big step toward creating new industries and innovations. It is one of the most challenging and exciting fields, and it's worth investing in by enrolling in an embedded system development course in India. The knowledge and skills gained are useful for outstanding performance in various domains such as IoT, robotics, and automotive technology. Here, we look at the top 10 skills you would learn in an embedded system development course, including a fascinating project initiative, TechnosCOE.
1. Familiarity with Microcontrollers and Microprocessors
Microcontrollers and microprocessors are the foundation base for embedded systems. Courses include architecture, functioning, and programming, with hands-on experience in popular controllers such as Arduino, PIC, and ARM, which form the backbone of most embedded applications.
2. Programming Languages
One of the main emphases of an embedded system development course in India is acquiring skills in programming languages such as C and C++. These skills are essential to writing firmware and developing applications for embedded systems. It also makes some courses introduce Python for scripting and debugging purposes to improve a student's versatility.
3. Real-Time Operating Systems (RTOS)
The creation of efficient and reliable systems is based on the understanding of how RTOS works. These courses cover the principles of multitasking, scheduling, and inter-process communication. By mastering RTOS concepts, students can develop systems for industries such as telecommunications and healthcare.
4. Circuit Design and PCB Development
These contain custom circuitry designs and a printed circuit board (PCB). The knowledge gained from developing circuitry robust and efficient within Eagle and Altium Designer gives immense value toward the prototyping and product development phase.
5. Sensor integration and data acquisition
Modern embedded systems interact with the physical world through sensors. Courses teach students how to integrate sensors, process their data, and use it in meaningful ways. Applications include temperature monitoring, motion detection, and environmental sensing, among others.
6. IoT (Internet of Things) Development
IoT has changed the face of industries, and at the center of this change is the concept of embedded systems. Students are taught to design devices that are internet-enabled, which can talk to other devices, and perform analytics in real-time data. The same skill can be applied to smart home automation and industrial applications.
7. Embedded Linux
Training on Embedded Linux is generally a part of an embedded system development course in India. It is a highly versatile and widely used open-source software in the world of embedded systems. A student learns how to develop applications, configure the kernel, and build custom distributions for different types of devices.
8. Debugging and Testing Techniques
Debugging is a key tool in embedded system development. Students become experts in using tools like JTAG debuggers and oscilloscopes to identify and debug those issues. Techniques on testing address all the requirements for the performance and safety of the system.
9. Communication Protocols
Understanding communication protocols is very important to the embedded engineers. The curriculum covers some popular protocols such as I2C, SPI, UART, CAN, and Ethernet, which are usually used in applications such as car systems and automation in industrial places.
10. Project Management and Documentation
Beyond technical skills, students also learn project management techniques and documentation practices. These soft skills ensure that they can efficiently collaborate with teams, manage timelines, and maintain accurate records of their work.
Role of TechnosCOE in Embedded Learning
Most embedded system courses include real-world projects that allow students to apply their skills practically. TechnosCOE is one such project, an initiative designed to bridge the gap between theoretical knowledge and practical application. TechnosCOE offers students opportunities to work on cutting-edge projects involving IoT, robotics, and smart devices.
This initiative focuses on teamwork, innovation, and problem-solving, ensuring learners are industry-ready. Through the TechnosCOE, students are exposed to real-world challenges and learn how to apply embedded system principles to develop effective solutions.
Why Choose an Embedded System Development Course in India?
India is turning out to be a fast-growing hub for embedded technology. Industries like automotive, healthcare, and consumer electronics will have a vast number of opportunities. Embedded system development courses offered in India will ensure expert faculty members, state-of-the-art labs, and industrial collaborations. They also offer internship and placement support, which proves to be perfect for career growth.
Conclusion
The course on embedded system development course in India not only gives the students technical expertise but also prepares them for dynamic and rewarding careers. Mastering microcontrollers to developing IoT solutions, these skills are invaluable in today's technology-driven world. Initiatives like TechnosCOE further enhance the learning experience, making these courses a worthwhile investment for aspiring engineers.
0 notes
Text
Methods of Implementing DC PLC Protocols
DC PLC communication mainly controls and monitors the condition of solar panels and energy storage systems. Additionally, DC PLC technologies are applied in industrial settings to supply power to electric motors and control them using a single pair of wires. All these applications suggest that the units responsible for communication over the power line are typically integrated into the corresponding devices (solar panel controllers, machines, and robots). Therefore, many automation system developers must understand how PLC protocols over DC power lines are implemented.
G3-PLC
The G3-PLC protocol is maintained by the international organization G3-Alliance.
Chipsets for this protocol generally comprise two microchips: an analog device for interfacing with the transmission line and a specialized microcontroller (SoC). In addition to signal processing, the microcontroller also handles encryption of the data transmitted over the line. The chipset may include a third chip responsible for converting the G3-PLC signal to one of the wireless protocols and back. Typically, this is the G3-Hybrid protocol designed for wireless networks to work alongside PLC. This protocol uses the 868 and 915 MHz frequency bands (which are not allowed for use in all countries).
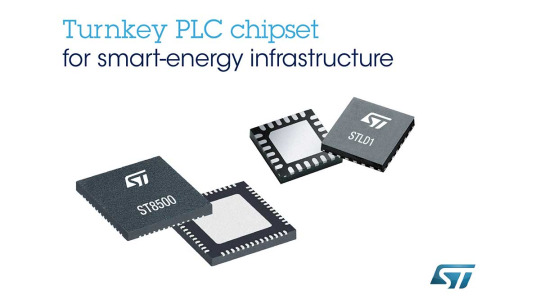
This is an example of a G3-PLC chipset from STMicroelectronics: on the left is the microcontroller, and on the right is the analog interface chip.
The chipsets and their firmware must be certified by the G3-Alliance to bear the G3-PLC label. However, such certification does not negate the need to certify G3-PLC solutions with national communications authorities if required by local regulations.
At least three manufacturers of G3-PLC chipsets are known: Maxim Integrated (a division of the US-based Analog Devices), STMicroelectronics (a European company headquartered in the Netherlands), and Vertexcom Technologies (China).
PLC-Lite
The implementation of this protocol is governed by TI's internal documents. The TMS320F28035 universal signal processor is used for signal processing. In addition, the receiver and transmitter must include the AFE031 line interface chip. The chipset also includes execution devices LM34910 and TPS62170.
IEEE 2847-2021
At the time of writing, a South Korean startup was producing devices supporting IEEE 2847-2021 (HPDS-PLC); the protocol is used in an LED lighting controller and a servo drive. Information about the components used for their development is not publicly available.
Data Transmission from Vehicle Batteries Sensors
A new technology that optimizes electric vehicle charging based on the battery's parameters and its wear level. Wireless sensors are installed on the battery. The wires inside the vehicle through which the charging current flows act as antennas. The signal passes through the electric vehicle charging connector. It continues to propagate along the charging cable as a guided medium. This solves the problem caused by the inability of radio waves to pass through the vehicle's metal body. A transceiver is connected to the cable at the charging station.
This solution uses one of the wireless protocols from the IEEE 802.15.4 family. The most widespread and cost-effective in this family is the Zigbee protocol. Therefore, it makes sense to use a chipset specifically for this protocol. Zigbee uses the 2.4 GHz band, and the frequency data transmission occurs along the charging station's cable. It should be noted that this solution is only possible for DC charging because, in this mode, the wires from the charging connector go directly to the battery.
Is software implementation of PLC algorithms possible?
For G3-PLC, using a general-purpose processor instead of a specialized microcontroller would require more chips than just two. Large production volumes and significant market competition produce relatively low prices for G3-PLC chipsets. These chips are manufactured across different regions—America, Europe, and Asia—ensuring a diversified supply. Therefore, developing a custom G3-PLC solution using general-purpose chips is not economically viable.
In PLC-Lite, a different company's signal processor can be used instead of TI's. However, new firmware would need to be written for it, which is quite costly. The TMS320F28035 is well protected from reverse engineering, so third parties cannot read the firmware stored in its memory.
No specialized chips are being produced yet for the IEEE 2847-2021 protocol, so its signal-processing algorithms must be implemented through the software on general-purpose microcontrollers.
It is more cost-effective to use specialized chips for creating PLC solutions.
The Zigbee protocol is implemented with a single chip that includes a microcontroller and a transceiver operating in the 2.4 GHz band. Using a general-purpose microcontroller would require a separate radio module, and interfacing these two units would be a highly complex task.
In conclusion, specialized chipsets are more cost-effective for PLC systems (except those using the IEEE 2847-2021 protocol).
0 notes