#and if I draw on procreate I’m using a pixel brush as well… if you google pixel brush a bardot brush set should show up!
Note
Heyy i wanted to know which brush do you use for your art?? BTW I LOVE YOUR ARTSTYLE SO MUCHHHH
#thank you!#and if I draw on procreate I’m using a pixel brush as well… if you google pixel brush a bardot brush set should show up!#I draw on each program interchangeably… but it’s mostly js paint 🎨 on my google browser#I’m so sorry If you asked this way way earlier! my tumblr is hell to navigate ! 💢
17 notes
·
View notes
Note
If you don't want to answer, please don't feel pressured, I'm just curious what brushes/settings you use on your iPad (I'm guessing in procreate?)! I have a lot of trouble finding settings that work well for me, but I love your art style and it inspires me to try doing digital art again (I've pretty much gone back to only traditional drawing at this point because fussing with settings frustrates me so much). Also congrats on graduating!
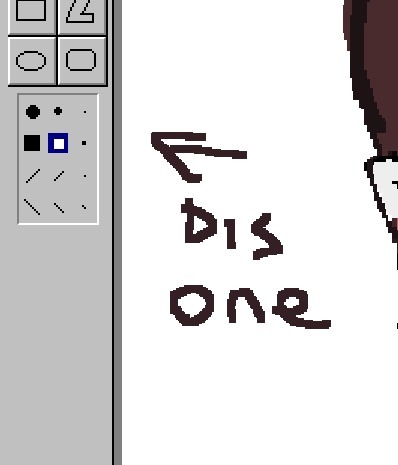
No problem! I draw in procreate, and I use almost exclusively this pixel brush pack, which has 4 sizes. Pretty much no adjustments to the settings on them, either.


These brushes are super hard brushes, which I like using for this interesting pixel texture, and I basically only ever cell shade, since they don’t lend themselves to any blending at all.

If you zoom in you can see my real pixelly edges

Hers basically what they look like. I’m a big fan of real thick chunky lineart, so over time I’ve gradually moved up in brush size for my lines lol.
Also, changing the size of the brush on the sidebar for these does basically nothing. They’re kind of set at the size they’re at. Hope this helps!
16 notes
·
View notes
Text
-Full Procreate Dreams review-
firstly, i am by no means an animator, i’ve done a few short animations but nothing big or frequent, so if you don’t think i have the authority to judge an animation based app, then that’s totally fine
(also i’m sorry it’s super long, i added a TLDR as compensation)
outline:
🔺Overview of Procreate Dreams
i will judge it on:
🔺Bare minimum (does it do the bare minimum as an animation app)
🔺Features (are the features it has good, are there enough, does it need any more, etc.)
🔺User-friendliness (can it be easily understood without using tutorials)
🔺Functionality (do the features function, in its current state are there any frequent glitches or errors)
🔺Money worth (is it worth the $20 USD spent on it)
🔺Final conclusion
🔺TLDR
review under cut:
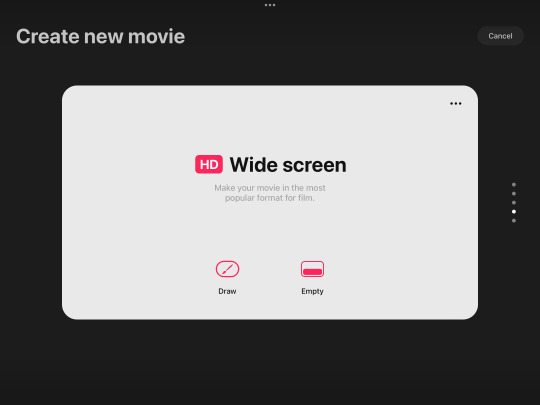
-Overview of Procreate Dreams-
The UI is similar to Procreate but not exactly the same

once you click + to make a canvas you get this screen showing various presets of canvas sizes (if you press the … you can choose frame rate, a note to add is that you can’t choose the exact number, only from presets, and the lowest is 12 fps)
this is the main workspace UI with the animation timeline down at bottom and drawing on top
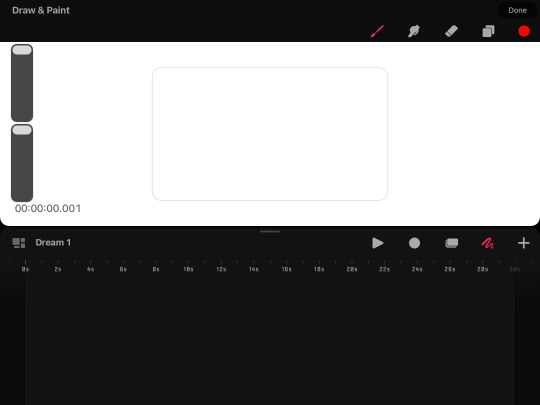
the drawing part works roughly the same as procreate (if you haven’t used procreate, well uh L i don’t have time to do an overview of that too) but some notable absences are no brush editing, no transform tool, no select tool, no flip canvas tool, and no liquify tool
the app is based primarily in gesture controls, so much so that there isn’t even an undo or redo button, to undo you have to click with 2 fingers and redo is click with 3 fingers
it also has 2 main forms of animation, one in which it favors
frame by frame, or as procreate dreams calls it “flipbook” and animation mainly by editing parts of existing art (such as tweening, blurring, warping, etc.)
this is what the flipbook looks like, you cannot x out of the flipbook without it going back to the split timeline/drawing screen (previous screenshot) you can move the flipbook around the screen but cannot enlarge or shrink it

in the alternative animation style you can set key frames and click and hold to open easing options, the default is ease in & out
along with key frames for move and scale, there’s also distort, warp, opacity, gaussian blur, noise, sharpen, and HSB (adjustment of hue, value, and saturation)

general notes:
procreate dreams has a “perform” button, which basically means that if you click it and press play, you can move a part of a drawing (or multiple parts if you select multiple or put them in a group on the timeline) and it will record how you move it and automatically add the keyframes which you can adjust afterward
you can adjust the canvas size by typing the exact pixel size, but unlike procreate it does not allow for as large of a size (it couldn’t reach 2000x2000)
-Bare minimum-
can you actually use it to animate??
i would say absolute bare minimum for frame by frame is have onion skins, able to choose fps, have it flip through the frames so it’s you know like an actual animation, have functioning, and preferably have layers
and bare minimum for the other style is have basic scaling options, have functioning export, and tweening with optional easing
procreate dreams passes bare minimum ✅ (wow what an accomplishment /s)
-Features-
it has the basic features such as onion skins, keyframes, etc.
it does allow for import of video, audio, photo, and text
the “perform” feature (explained in overview) is unique to procreate dreams from what i know
oddly enough the foreground and background feature that was in procreate animation was not added to procreate dreams
clipping mask, layer mask, and blending modes are there
BUT there is an extreme lacking of certain vital features
in frame by frame animation you can use many layers, but cannot re order them, and re ordering the actual frames is possible but rather difficult and i’m not actually sure how to do it intentionally and deleting frames is also a nuisance in the same way
you can also not re arrange the gallery images, i’m guessing this is because unlike procreate which stores art in the app, procreate dreams stores it in the files
there is no select tool and transform can only be done in the timeline which is just inconvenient, but to do any rotation you have to manually type a number of degrees it should rotate, you CANNOT rotate it normally
there is no physical undo/redo button, only the gesture for it, there is no brush editing, there is no physical import button for brushes (you can still import brushes but it is less convenient)
original procreate had a feature to hold down the pen after drawing a shape, and it would automatically make the shape but perfect and you could adjust points of it, procreate dreams does not have this
(there are of course more features but these are the major things i thought should be mentioned)
in features, procreate dreams is lacking, it has many good features but really important ones are missing ❌
-User-Friendliness-
i am a bit biased in this category because the UI and way it functions is many times very similar to procreate which i have been using for 4 years so take what i say here with a grain of salt
most everything in the app i figured out on my own without tutorials, and i did it rather quickly
i find it to be very easy to understand even for someone who has never seen the app ✅
-Functionality-
most of the features do function, but there are a few issues i should mention
occasionally on the gallery screen it just froze, but closing and opening the app again fixed it, and that didnt happen much
the brushes also look a bit more pixelated and not as smooth as procreate’s(??)
the import video and audio feature issues however, did happen much
i don’t know if this would be an issue for a newer ipad but any time i tried importing a video (even as short as 2 seconds) it said “this video exceeds your device’s capabilities” or if i tried importing too long a video it just crashed
purely audio files are a similar issue, except it COULD import a 2 second audio, but crashed at a 30 second one
in its current state, functionality is mostly passing, but audio is oftentimes such an important part of animation that i cannot truthfully give this a pass, but i won’t give it a fail either ❓
-Money worth-
in terms of money,
No.
$20 is an outrageous amount for an app that fails to import longer than a 2 second audio, having no select tool, an annoying transform tool, and many other missing features that even FLIPACLIP can do without even paying ❌
-Final conclusion-
i have full faith in the procreate team, i truly believe they can make this an absolutely amazing app, but right now, i would highly advise against buying it
i was really excited for it because i’ve been a loyal procreate fan for 4 years and go on about how amazing procreate is, but this is just disappointing
i will update you all on if it receives any major updates that fixes or adds features, until then, my conclusion is that procreate dreams is not currently worth your money ❌
-TLDR-
Procreate Dreams is missing a lot of really important features like a select tool, rotation, and the transform tool which it has but is inconvenient to use, and the audio import barely even works
i have full hope that the procreate dreams devs can and will fix it and make it a great app, but as it is now, you’d have better luck using flipaclip for free
it is actually painful for me to say that you shouldn’t get procreate dreams cause i love procreate so much, but i know that this is just BAD
go buy procreate instead, i have literally no complaints about that one it’s the best and i love it
also i’ve got art going up tomorrow!! so you get that at least
-updates-
-clipping mask added
-custom frame rates added
-drag and drop layer organization added
10 notes
·
View notes
Note
ok firstly, i love your art style. its just so amazing to look at! the smtiv art is awesome and i love that you draw walter with top surgery scars, and i completely adore the p5xsoul eater au, two of my favourite things in one lol. but i do have a question, I'm not sure if anyone else has asked this but would you be okay with explaining your creative/art/drawing process? kinda wanted to know for a class I've got, i gotta analyse artists' drawing processes. hope that's okay!
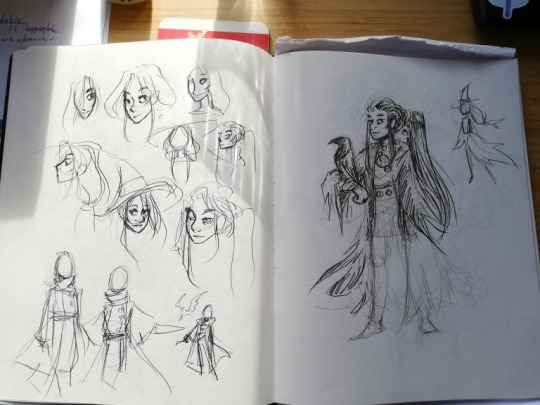
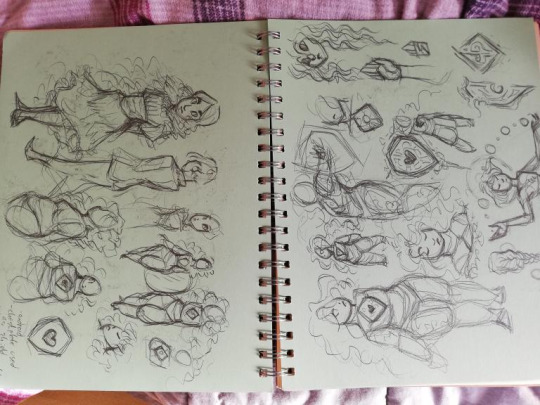
hi hi tysm for this ask! trans walter canon (real) & also im glad u like the p5 soul eater!! as for my drawing process it kinda varies but for the majority of my drawings nowadays, i start with a really rough sketch, lay down flat colors under it, and then start rendering in another layer on top of that one. it looks very chunky (cuz i sketch & color with the same blocky pixel brush) and i try to use many diff shades of colors to give it more variety. here’s a qifrey sketch from a while back as an example vv

the flat colors here are his skin tone and the inside of his cape, which is a somewhat washed-out green. but for the top rendering layer, i put in like a billion different colors of green, as well as using shades of yellow and blue (what i’m trying to say w this long ass explanation is i usually tend to go with rendering using the colors that r on either side of the base color on the color wheel.) if i really don’t like the colors i used, i’ll probably do some color adjustments in procreate by copying the entire canvas into a new layer and then putting a gradient map over it or upping the saturation or something, but for the most part i think that’s pretty much it. so uh. yeah! hopefully this helped!
17 notes
·
View notes
Text
August Newsletter - Artist of Nothing 002
So far this month
Brushes


I’m still in the process of finalizing the design of the image, but I want to share Ibis Paint custom brushes. A lot art tutorials and resources lean heavily into Procreate and Clip Studio Paint; not too many focus on Ibis Paint X, which is the drawing app I use. So, in addition to brushes, I hope I can also share tutorials as well.
Worked on Website
I worked a bit on my website, which has been up and running for awhile now. I am one of those people who can never stick with a single design. I think my old Synaptic Misfiring website went through 5 redesigns, and I barely drew that webcomic for 5 years.
Art I’ve done


I finished pieces of art, all in Ibis Paint. The pixel art was inspired by Pokémon and the work of Brandon James Greer.
July Recap
Took a social media break
About mid-July I was realizing that I wasn’t really spending work on a lot of the stuff I had wanted to. And in fact, most of 2024 I hadn’t spent working on things. I thought it was The Funk (which it was) but I was also spending a lot of time on social media. And with social media being as broken as it is nowadays, I was putting more hours in to get the same sort of enjoyment that I was getting back in 2019.
So I deleted apps off my phone and just…existed. I didn’t try to force myself draw or work on art, or get into a productivity fugue state. I really put a lot of thought into how I was using social media, both in my personal life and with my semi-pro art life.
A lot of my social media use was due to habit; I would go to Tumblr, then Instagram, and then back to Tumblr, etc. None of it was fulfilling. None of it gave me anything of substance. I can’t tell you any of the posts I’ve actually liked. Or why I follow an artist. I just did things.
And this lead me to look how I was using social media for my art. I wasn’t getting engagement, whether it was comments, shares or likes. So why was I making art FOR social media. Why was I making a piece of art specifically for Instagram if it wasn’t going to perform well? Why appease an algorithm that doesn’t care about me.
So I ended up changing my whole approach not to just social media, but also my art life. It’s about making art first, and then making content from that art, rather than making art as content. It’s the difference between recording myself drawing and making a short form video instead of recording myself making art specifically from a short video.
It also means I don’t need to worry about posting 5 days a week in order to get engagement. Social media is broken, so why try and use it as a central part of my workflow
I’m hoping that this will help me feel better not just about making art, but also sharing it through social media.
Rest of August
Exploring other platforms
I’m looking at Cara, Telegram, Snapchat and other non-algorithmic platforms, while at the same time not being platform-dependent. Platforms aren’t safe anymore; look what happened to Patreon in the last few days.
Store
I’m in the process of finalizing my products. All print-on-demand for now, and starting small. I definitely will be trying some digital downloads.
Find me elsewhere on the web, including Substack! See you next month.
#tonytylerdraws#artist of nothing newsletter#artists on tumblr#ibis paint x#pixel art#social media artist#ibispen
1 note
·
View note
Text
Free Apps/Assets that help me as an Indie Game Developer [Megapost]
Hi! I’m an indie gamedev who’s also in University, needless to say that I’m on a budget when it comes to my game creation. I’m making this post to organize my favourite free resources that helped me out.
Also, please note that I’m only commenting on the programs themselves, not the companies/individuals that run them.
For Pixel Art, I use/recommend Dotpict.It’s completely free, you can resize canvases and input custom sizes. It has the essential tools for pixel art creation, and is great to use on small screens with the default point-and-click system. It can also be used on larger touch screens with in “Pen mode”. It also supports animation! Alternatives include Pixquare and Resprite, which function similar to Aseprite for computer. (Resprite does have limited exports in the free version.)
I was recommended Notion by a fellow gamedev friend for organizing ideas/stories. It’s essentially a files-within-files organizer where you can make groups, add pages to the groups, and link other pages. I now use it for my concepts, and am really enjoying it so far.
My go-to for fonts is DaFont. The website allows you to sort and filter in order to only show 100% free fonts to use in your projects. I’ve been using this site for years, and from my experience each download was completely safe.
I’m an RPGMaker user, and rpgmakerweb is a great resource for finding free plugins. Yanfly is also one of the most popular picks for plugins as well. Galv and SRDude are amazing creators with some of the best plugins I've personally ever used.
Launchpad is a beat-mixer app with a literal labyrinth of samples. You can get a free trial to have access to all of them, and I’d recommend it for people looking to explore different genres for in—game music. It’s super fun to just mess around in. You can record and export as well.
FireAlpaca is my personal recommendation for a free digital art software for computer. I’ve used it in the past, and it’s truly a great free alternative to expensive art programs. Krita is also a great free option!
Cymatics is a great resource for free-to-use royalty-free samples/loops. I have a huge sound library thanks to them, and I haven’t paid a cent. Joining their email list also gets you more free packs & the occasional free giftcard.
YoutubeDL is a free and open-source program on Github that allows the safe (speaking on personal experience) download of Youtube videos, as well as audio format. I use this to download royalty-free samples/SFX that are posted on Youtube for anyone to use. You can also download a .exe from their website with the YTDL program directly in it (my personal choice).
Online-Convert is a free online file converter. I've personally relied on it to convert my music into OGG format, and I haven't had any problems with it so far. There are many other converters for lots of different needs and formats as well.
BFXR is a free downloadable program that is great for making digital sound effects for your games. I was actually recommend this program by my prof in first year. You can use all FX in any use for free!
Ibis Paint X is a free drawing app for Apple devices/other mobile devices that support pen pressure. You can upgrade to the full version, but the free version has a lot of options.
Fortelling is great for planning out stories and worldbuilding. It’s optimized for writers to keep track of their projects. You can make timelines, add characters with customizable traits & avatars, create locations, specify items/languages/species, and a lot more. There is a premium subscription version, but I’m perfectly content with the features that come with the default.
Design Cuts is a website for lots of artistic resources, including Procreate brushes, graphic design assets, and more. They give out weekly freebies, as well as an extended commercial license included with every purchase. There’s frequent sales too, and you get so support independent artists.
Feel free to reblog/add your own favourite free resources to share with other devs/artists! I’ll update this post as needed.
Website / Discord Server / Patreon
#game development#game developers#gaming#indie dev#game dev#indie games#indie developer#indie game#indie rpg#pixel art#rpgmaker mv#rpgmaker#art#free apps#game dev blog#artists on tumblr#pixel sprite#indie gamedev#pixel game#artist resources#artist help
471 notes
·
View notes
Note
I've been really into graphic design lately and I want to start! do you have any tips?
Hey, thanks for asking, I guess I do have some tips
• For absolute beginners I'd recommend first looking into graphic programs and finding the best fit for what you want to create - the adobe cloud is great but to start out there are many free alternatives. If you're into drawing as well I'd recommend checking out Procreate.
• Study the basics - e.g. look at the difference between vectors and pixel graphics, file formats (jpg vs png vs tiff etc.), look up different methods to cut out images as it's something you'll probably need at some point, and maybe also have a look at recent design or color trends (that's always fun, too). Also advisable as a beginner is to study general do's and don'ts (for example working with text, website design or layouting have some clear rules for what works and what doesn't - most people already have a sense of aesthetic but it's always a good idea to prevent creating some graphic design is my passion meme stuff, see r/crappydesign or the likes).
• If you want to create with the intention of publishing your works effectively on certain platforms (like Instagram) it's always clever to look up which formats work best (1080x1080 is standard square for Instagram for example). If you want to create wallpapers look up common sizes and set up your canvas accordingly.
• Find inspiration and ideas - of course you need at least a rough idea about what you want to create. I for example love all things 80s, so for inspiration I look up 80s media, technology, fashion etc. to find things I could incorporate in my designs (e.g. patterns, color schemes, shapes, fonts etc.). An amazing platform for this is Pinterest of course, but I also frequently use unsplash.com (free to use gorgeous photography that you can use right away for your designs), youtube (for tutorials mainly) and lots of tumblr blogs.
• If you want to use photos make sure you know about copyright and fair use - platforms like Pinterest mostly feature copyrighted images, so never just use an image without considering this. Always ask first and give credit.
• Watch lots of tutorials - in the beginning I had no idea about the capabilities of graphic programs and was often wondering how artists were able to create certain things. So of course you need to learn somehow and watching tutorials on youtube is a great way to do so. It’s also fun to just look through random design tutorials until the algorythm shows you something you really like and want to recreate or use for your own works. Like this I also learned lots of basics (advanced working with layers, clipping masks, transparency, layer styles, filters and all kinds of photoshop tools).
• Familiarize yourself with the graphic program of your choice. Check out which tools are available and try to use them. Experiment with shapes, brushes, text, gradients, etc. Set up your workplace according to your needs and look through all options, settings and tabs to see what your possibilities are. Play around with a photo and try to edit the hell out of it. Like this you’ll probably already find some tools or settings that inspire you and ways you might want to incorporate them into your designs.
• Recreate and adopt. Recreating artworks that inspire you or designing along tutorials is the best way to learn in my opinion, as it is with drawing as well. As you learn new techniques you can begin to incorporate more and more of them into your own artworks, your drafting process will change as you’re able to consider more ways to reach your design goal, and you will also gain lots of new inspiration as well. When I discovered the possibilities of layer mixing I began designing with them in mind and just playing around yielded some amazing results; I made note of my favourite styles and now am frequently using them in my designs.
• Draft and save inspiration. I always carry my sketchbook around and doodle things when I have a few minutes of time or when inspiration hits me. You often see things in the real world that strike you as interesting, so make sure you don’t forget about them later when you want to design. This can be posters, flyers or other design works but also nature, people, clothes, etc. Taking written notes also works great for me. For collecting inspiration online I mostly use Pinterest (create artboards for specific aesthetics and pin all images that fit and inspire you in some way so you can look them up later as reference), but I also have lots of bookmarks neatly organized to save images that aren’t on pinterest. I never just copy and save on my computer because I might not know who to credit later.
• Refine your own aesthetic, polish your artworks and take challenges. Try to design outside of your comfort zone (I’m really not a fan of working with Adobe Illustrator for example but need it a lot for my job so I decided to use it more at home for my own art and am now quite fond of some of the tools) and challenge yourself - e.g. you can try to design within a certain decade’s aesthetic, participate in online design challenges, ask for requests from friends or followers, etc. Keep up with design trends (especially if you’re planning to sell your artworks in some way at some point).
• Less is more. Edit edit edit. Something I still struggle with given that the 80s aesthetic I love always screams more is more. Train your abstraction ability (making pixel art or super minimalist things is a great way to practice). Learn what an artwork / layout / website etc. really needs and what can be scrapped. Don't be afraid of blank spaces. Never bedazzle just for the sake of filling space.
That’s all I can think of right now, hope this helps ♡ if you have questions about specific things you can always hit me up.

39 notes
·
View notes
Note
Hey! I'm the one who asked the poorly worded art process question. I'm here to give it another try by being more specific. The problem is . . . that's hard. Because that was about a specific as I can get, since I kind of want to know everything about how your art works.
Big things, like how you come up with ideas, or how you design characters. But small things, too, like what tools you use for drawing, how you balance between traditional and digital art, and how you decide what color to use for your unique and beautiful line art.
I want to be more specific so you can answer, but the question in my head is too vague and broad for me to be specific about it. So . . . here are some subquestions of my question, I guess! Maybe that helps?
Sorry this is so weird, and thank you, your art is amazing
first of all, thank you so much <3
and yes, this is far more answerable! i hope i can satiate some of your hunger for insight without writing a whole book.
HOW DO I COME UP WITH IDEAS?
this is obviously going to be very different for everyone. i very rarely have to dig for ideas or sit down and brainstorm, unless of course i am trying to achieve something very specific, like fulfill art contest criteria or working on a commission. my brain is very visually wired, so a lot of my ideas literally just pop up in my head (i know of several artists with aphantasia - some people don't have any visuals in their head at all and I HAVE NO IDEA WHAT THAT'S LIKE AND I AM IN AWE OF THESE ARTISTS), sometimes i see a character or character design and im like HNNNG i need to draw them, or i just... have a concept i really want to Exist and i'm going to figure out how.
my biggest problem is that often, when i get an idea i want to DRAW IT, NOW NOW NOWNOWNOW, and that's just Not Feasible. sometimes because i'm Literally In Bed, sometimes because i have too many things i need to do or draw first... but i need to clear up space in my head, because my Urge To Draw will be like, beeping and whirring until i satisfy it... so i write it down on my TO DRAW-list! it's a real list that exists on my phone and i have to use it frequently. if i keep scrolling down i start finding weird notes that i have NO idea are supposed to mean anymore, but that's fine. i can't satisfy every Art Urge. sometimes i need to let them pass.

HOW DO I DESIGN CHARACTERS?
this one might vary a bit, but it can often be boiled down to "i sketch around until i figure something that Works." many of my characters, especially my older characters, became characters by accident when i kept drawing them over and over and i was like Ah I Like Drawing You... You Exist Now. that's how sparrow spellcaster happened, at the very least. this could happen because i had school and i would focus in school by doodling/sketching while listening to class. since i no longer go to school, pretty much all of my new characters are far more intentional. Timian and Vinta specifically exist as a result of a "favourite character fusion" challenge, and a lot of iphimery characters started with a Purpose rather than just harnessing the vibe of something i drew multiple times without thinking.
it helps to write down elements or tropes i want to include, like "sturdy-looking" or "VILLAIN OF EVIL SCARY MAGICS but it's a little girl and the dark magic is bright lightning and not shadows" or something. it can vary from a tiny visual detail to their role in the story. whatever i want to Achieve. my Intent. because my brain works so visually, i just really need to sketch somethign repeatedly until i nail it and can be like Yes That's It.
sketchbooks look a little messy but that’s what they’re for.
WHAT TOOLS DO I USE
for digital art, i’m currently using an ipad pro and procreate. i use a lot of the brushes that came installed, like Mercury is my primary lineart brush, and Moorilla is my primary sketching brush, but i also buy a lot of custom brushes on the hunt for More Delicious Textures (DAUB has a lot of good ones, especially if you want some that imitate traditional art). i have also used Huion and XP-pen tablets and generally recommend them, as well as clip studio paint as an art program (i love it very much and if it wasn’t subscription-based on ipad i would still be using it).
for traditional art, mostly just whatever sketchbook i have + my trusty mechanical pencil. i mean i have two: one with softer lead (it comes out darker) and 0,7 mm thickness, and one that’s 0,5 and harder lead for more light sketching, or if i’m going to line it with ink.
i also have a trusty pentel brush pen that i love DEARLY and feel bad for not having used in a while for reasons i will get to.
when i work on calendar pieces traditionally, i like to draw lines with ink - i use a dip pen with exchangeable nibs - and then color with watercolors. i have several sets because they’re all slightly different and i want the Range.
i sometimes travel with a little sketchbook in my bag and an assortment of pens, so that i can sketch Anytime, Anywhere. i think doodling with a pen can be very useful because you gotta become comfortable with the mistakes and imperfections and keep going anyway. if i doodle at work that’s the tools i have - regular ball pens and a bunch of paper lying around.
HOW DO I BALANCE BETWEEN DIGITAL AND TRADITIONAL ART?
currently, i... don’t, really. it was easier when i had school, and i would just doodle freely and then maybe use some of my sketches as thumbnails or concept ideas. it’s harder now that i need to intentionally sit down with my sketchbook, and tbh... the ipad works very well for sketching. it’s so CONVENIENT and i have WORK all the time and my time to create art has become much more limited than it was. i miss going to my weirdo art high school where we would try out a whole bunch of different tools and methods. sure, yes, i had to paint with Acrylics My Beloathed, but getting to play around in different mediums is VERY valuable.
i genuinely want to be able to make more time and space for non-digital art again, but i just don’t have the ability to right now. it’s also different now that i’ve moved away from my parent’s place - i used to have an enormous desk and my mother has a large collection of art tools and there was a lot more storage space for whatever i created. digital art is very convenient and very accessible. ah well!
HOW DO I DECIDE ON THE COLOR FOR MY LINEART?
i usually line in black or a very dark color, and when i’m done coloring + shading i might play around with the colors and see what works. if you lock the layer you can just throw all the spaghetti at the wall you want. i decide on whatever fits the piece. i tend to be pretty fast and loose about it too, sometimes you can probably spot parts of my lineart that have slightly mismatchy color, but it’s like... done is better than perfect! i don’t have the energy to overlook every single pixel of my piece or else i would drive myself utterly mad.
HOPE THIS ANSWERS ANYTHING AT ALL!! THANKS FOR ASKING!!!
#art advice#(tag for archival purposes not to imply my methods are gospel)#everyone has their own ways!!!
40 notes
·
View notes
Note
6, 15, and 17 for the ask game!
6. warm colors or cold colors
Warm of course 🔪
15. if digital, what program do you use
Paint tool sai on my drawing tablet, though I rotate depending on what I’m doing and stuff, like I’ll use medi bang for the pixel brush, ps for editing, krita/ps for effect brushes n junk. Been using procreate on my iPad for most of my recent stuff though (just more convenient :’) )
17. what do you love getting compliments about
Specific stuff about the way I draw things/style instead of just subject matter,,, like I get a lot of oh you’re art is so soft and it feels like that’s just cause all I draw is snuggles and hugs lmao, but when someone’s like “I love the way you draw x thing” I’m like yay I can actually draw something well haha
#king of posting ask game/questions and forgetting to respond lol#also I felt like it’s obvious I like warm colours but then I scrolled through my blog and maybe it’s not haha
3 notes
·
View notes
Note
Hi love your work you really inspire me💕 if it's not a bother do you have tips to start digital art and a app😖👉👈
hey there !!! im so sorry for the late reply, but im here now !! thank you so much for your kind words 🥺🥺🥺💖💖💖
tips for digital art! hoo boy, there is a lot to say, i don't think i'm gonna remember everything, but first of all; i know digital art can seem super overwhelming just because of how many options you got! you just can do so much to refine your work the way you wanna, but often art programs got so many tools and things to offer, it's just??? confusing.
what i'd recommend is to slowly work your way through it? you don't have to understand every thing right, just try out a few tools! that's what i did when i first started using clip studio paint. i just played around with the pens and brushes, so i could get a feeling for them as well as an idea on how they work. and usually, some programs offer official tutorials and guides themselves - if not, the internet is ur friend! take it easy, i'd say - i think that's smth that applies to several aspects of digital art.
in general though, there are plenty of digital art tutorials online, that suggest to you how you can draw smth - but ! don't feel like it's "the only right way". everyone has their own way of rendering illustrations or doing sketches, with which pencils or tools and all that.
furthermore, this also applies to the app/program question: you do not need any expensive drawing tablets or softwares. it doesn't have to be a brand like wacom with their fancy display tablets. there are plenty cheaper tablets out there, with no display but still plenty effective! hell, u can even use an ipad if u already got one. and if you're just starting out with digital art and testing the waters, i would avoid spending too much money on products you may end up not needing :(
other than that, make sure to stretch a lot, especially your wrists. god knows i don't do it as often as i should (which i genuinely regret), so please make sure to take frequent breaks to give your body a rest. not only will it help you avoid carpal tunnel syndrome, but it's also good for your eyes to take them away from the screen for a bit and come back to your work with a little fresher perspective! in general, don't feel like you have to finish the drawing in one go. it can be so helpful to take a break from the screen.
also !! try to get a hang of the shortcuts!! they're gonna be SUCH a great help, i promise you. every art program has different shortcuts settings, but you can always customize them to your liking. i'd also try to get an idea of how big your canvas should be and as what kind of file you should save your drawings. e.g. resizing a canvas that used to be large can make the drawing look more "pixel-ish", y'know? so keep that in mind while drawing! i usually work with 1500px to 2000px.
as for art programs: if you're on the pc, i'd wholeheartedly recommend clip studio paint and sai2 ! both cost money, but clip studio paint usually has sales that sell the program around 20 bucks (ur advantages are that it offers you plenty of tools that are a blessing if u want an anime-like art style, also offering u various patterns and tools, even some by the artist community! it has a whole shop, offering u free but also chargeable patterns, brushes and all that good jazz) and sai2 is a classic and relatively easy to understand program, really (which u can easily pirate if u rlly can't afford it, but u didn't hear that from me).
if ur on the ipad: i know procreate is the way to go ! i tried it out myself several times and it was so much fun!
on the phone? i heard ibis should be rlly good, i know plenty of moots and friends are using it!
personally though, i'd recommend you to stay away from adobe/photoshop. in my experience it's kinda hard to get the hang of it, if ur inexperienced with digital art + the monthly fees ain't worth it.
i hope i was able to answer your question! if you wanna know more, feel free to hit me up, i hope i didn't entirely miss what u wanted to hear 🥺 happy drawing and good luck!!! 💖
4 notes
·
View notes
Note
Hi! I've been following this blog for a while, and I've been thinking of making my own palette blog! I was wondering if you had any tips? Also, how exactly you make those palettes (with those perfect congruent rectangles)? Is there a specific website?
I do all of my editing and palette creation on my IPad Pro (2018) so some apps I use might be unavailable to you if you are staunchly anti-apple or are restricted to Android or PC.
For palette formatting and testing swatches, I use Procreate. It has a guidelines feature that allows for the creation of the perfectly straight lines that divide the canvas into a grid. I made a solid square brush for my palettes using their fantastic brush creation engine/resource library (along with some stock images). It also has some very basic palette creation tools like a color relationship guide (complementary, monochrome, triadic, etc). It does cost money, however, it’s $10US the version for phones is cheaper at $8US I believe. I don’t know what features are included in the pocket version so definitely check out their website first.
I also highly recommend it in general for artists and people wanting to get into digital art at a low price with a decent brush engine. If you are on a budget, any program that lets you see color values/hex codes, draw straight lines, and have a fill/paint bucket tool will do the trick. Some free art apps/programs include similar functions are Krita, Gimp, Medibang Paint (this is the best free option for all mobile devices imho)
I use Pixlr for isolating colors from a reference photo using the pixelate brush. Pixlr is free and is available on both Android and Apple devices. It’s a decent photo editing app. Not a necessity but, it's part of my plethora of resources. It's useful for creating my Procreate Palettes because I can bring in photos I've taken and make mood/inspiration boards with it.
Coolors is an Apple exclusive app that a lot of other palette blogs use. It is good for beginners as it is very intuitive and simple to use and you can directly export to image files. I've played around with it a bit, but I prefer my somewhat involved method better. I do believe it costs money though I'm not sure how much.
Pigments is a good app for Android, and very similar to Coolors. They have a free version and a premium version. Premium has live color picking from your camera as well as removed ads.
I also have some non-tech related resources that while aren't necessities were important for my process of learning about creating effective palettes for art. If you are interested I can drop them as well but they are more in-depth or are resources for professional designers. Color is one of my longest-lasting hyper-fixation interests and so I have been collecting this kind of stuff for years and years.
If I didn’t answer your question properly please let me know. I’m really bad at explaining any sort of process regardless of how used to it I am.
8 notes
·
View notes
Note
Hi, I love your art! I saw you mention that you use Procreate, and that’s what I use too! Do you have any general tips for using it? The main problem I have is canvas size and pixelation. Any tip would be very appreciated! 💛💛
Thanks a lot! Here’s what i coud come up with but i’m no master at this program as well and just go with the flow:
- I always use the standard screen size canvas for drawing and then scale down the finished art for uploading
- you can use split screen on the ipad for references
- the dried ink brush (idk the actual english name) is the best lineart brush
- i also abuse the auto-shape function where it automatically draws straight lines and circles when you keep the pen pressed down
13 notes
·
View notes
Text
David Ostow.
Bio: I'm a cartoonist and stay-at-home dad, not necessarily in that order. I came late to cartooning, because I thought I wanted to be an architect. In grad school, my professors were always hung up on the fact that I was more interested in drawing pretty pictures than in designing interesting spaces. Anyway, they graduated me, and should really answer for the disservice they did to the design industry.
Find this print here!
I came to cartooning by way of illustrating some books for my sister who's an author. To date, my work has also appeared in and on a combination of print publications and websites, including The New Yorker, Mcsweeney's Internet Tendency, The American Bystander, Buzzfeed, and The Weekly Humorist. My work and I were also featured in a New York Times piece about artists addressing gentrification in their work. I don't know if that counts. Does that count?
I live in New York City with my son and my wife, whose support is the reason I'm not drawing on grocery bags in my parents' basement, and raking their yard for allowance.
Tools of choice: Where to begin? I got an iPad Pro earlier this year, and I've been using it pretty exclusively since. But finding and experimenting with tools has been an odyssey unto itself for me, and I'd be remiss not to give a bit of history.
I started out employing a lot of the tools that I learned about in the architecture world. I went to UVA, and when I was there my sketching professor [fun fact: he was also the mayor!*] encouraged us to draw with Micron pens using a very loose hand. Check out the sketches of Michael Graves, and you'll see what we were emulating. My hand was naturally pretty shaky. Years of drawing have rendered it less so, but at the time, my peers teased me (in good fun) for being a teacher's pet with my wobbly broken lines. That introduction to sketching was definitely formative to the style I would eventually develop for cartooning. Sometimes I find myself trying to force my hand to be as wobbly as it used to be.
Architecture school was also where I first began using Photoshop as a diagramming tool, and I became more facile with it when I moved into the professional world, where it's a common tool for rendering presentation drawings. Since then, Photoshop has been my go-to for applying washes and colors to my drawings, although now that I have an iPad and I'm experimenting with Procreate, the Photoshop era may be coming to a close.

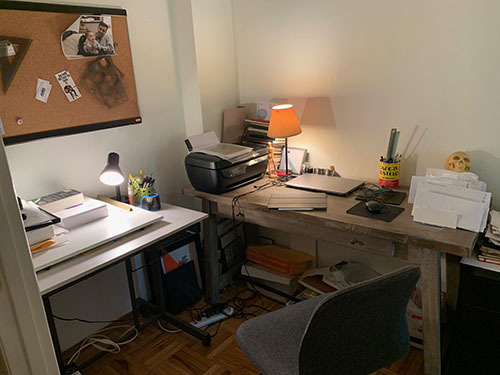
After taking a class on comics creation at The New School in Manhattan, I got up the nerve to add some ink and brushes into my toolkit, and while it was an adjustment, it was also fun to have a brand new way of making varied and expressive lines. At the height of my "pre-digital" period, I was using a combination of ink and technical pens. The accompanying photo shows my spread in more detail. All the tools pictured are easy to find, and easy to use, and I recommend them for anyone looking to take a stab at drawing cartoons or comics.
From there, I waded slowly and awkwardly into the world of digital drawing. I had a hybrid moment when I was roughing my drawings in pencil, scanning them, using a Wacom tablet to ink in a program called Clip Studio, and then adding colors / washes in Photoshop. It was an incredible time suck, but, for what it's worth, the cartoons I produced that way were some of the first I sold to The New Yorker. So there's that.
Since getting my iPad I've been drawing with Procreate, which seems to be the preferred drawing application among my iPad savvy colleagues, and which I enjoy, but I feel like I'm still getting comfortable with it. When it comes to new technology, I have a habit of doing the bare minimum to educate myself, and every time I need clarity on a finer point I'll do a tad more research. It's called the "Dave Ostow Kicking and Screaming Method" and I recommend it to no one.
Tool I wish I could use better: I've never had any formal fine arts training, so I lack the kind of mastery of many traditional tools that some of my peers have attained as a matter of course. One time I tried to use a dip pen, and was so overwhelmed by how hard it was to draw a single line that I put it in my drawer and just kind of forgot about it.
I also used to own a set of Koh-i-noor Rapidograph pens, which make amazing lines, but require saintlike patience to maintain. The nibs are super delicate and If you're not careful, they'll break and leak (or — worse — explode) all over your drawing.
In an ideal world, I would have the patience and time to master some of these more traditional and delicate tools, and I think I'd be a better artist for it. Maybe some day, but right now my schedule doesn't allow for much extracurricular activity.
Tool I wish existed: Kind of a no-brainer: an iPad / digital tablet that felt almost indistinguishable from real pen and paper. Think the Beyond Meat burger of digital drawing tools.
The iPad is great, and of course it's wonderful to have digital editing capabilities, but there's simply no hiding the fact that you're drawing on a screen that lacks the kind of tooth you'd get from dragging a pen across paper. Also, when I zoom in to do detail work, I'm always thrown by the pixelation.
I'm sure the more I use the iPad, the better I'll get at tweaking the settings to my liking. Like I said, when change is involved, I sometimes drag my feet. But that's okay. As a good friend who's also really my therapist said, "Maybe that's just the way you work."

Tricks: Not a trick so much as a suggestion: If you're drawing on an iPad or some other sort of tablet, get a matte protective cover. It will reduce glare, and soften the feel of the screen against your stylus, so you get an experience more like drawing on paper, albeit only slightly so.
Misc: Yes, that is a Dan Smith Will Teach You Guitar flyer on my bulletin board. I found it on the subway and it just seemed like a fun authentic New York artifact that was calling to be preserved. I look at it every now and again, and find it oddly inspiring. That picture of Dan Smith has been circulating around the city for God knows how many decades. What does Dan Smith look like today and would he still teach me guitar?
Website, etc.
Website
Instagram
New Yorker Link
Conde Nast Store
*Editor’s note: I went to Charlottesville High School with Mayor Cox’s son! I also went to UVA, though not at the same time as David. Small world!
Also, I happily do this blog for free, though there are a lot of hidden expenses that I take care of myself. If you enjoy this blog, and would like to help defray labor and maintenance costs, there is a Patreon! Or if you’d prefer to buy me a cup of coffee, there is a Ko-Fi account as well (which is essentially a PayPal donation)! Your support means a lot, and I'm grateful to everyone who has donated!
You can also find more posts about art supplies on Case’s Instagram and Twitter! Thank you!
#David ostow#how to draw New Yorker cartoons#cartoons#how to draw cartoons#art supplies#artists on tumblr#art process
11 notes
·
View notes
Text
Vector vs Raster - What Is The Basic Difference and Which One Choose for Your Artwork
If you are a photographer or designer, you probably know what you are dealing with. For the others who are just starting, it can be a little bit overwhelming – raster, vector, bitmap, pixel. I’m expecting that everybody knows .jpeg, .jpg, but what about .svg? What is the difference between .png and .jpeg? Well, if don’t know about .jpeg, probably you have never downloaded a wallpaper then but do not worry, everyone has to start somewhere, someday!
What is actually the difference between vector and raster?
Which formats are used for each of them?
For which projects I should use vector or raster?
For a digital artist, it is very important to understand the difference between vector and pixel art. Each of them has special software and needs, each of them is used for different purpose. Also, every single file format is giving you different options. Today we will look at the basics of these to get a better understanding.
Raster (bitmap, pixel)
Raster images are often called bitmaps. They consist of millions of tiny little squares which we call pixels. Pixel stands for “picture element”. It’s the smallest physical element of a digital display device. It’s pretty easy to recognize it by yourself. Try to open any photo you have and zoom in. Closer you look, more blurry the image becomes and in the end you will be able to see the little pixels. Bitmaps are created with pixel-based programs, captured with a camera or scanner. Usually, almost every drawing/painting app is raster oriented. Creating such artwork is pretty similar to traditional painting or drawing. You have many brushes to choose from, you can blend colors easily to soften the transition, you can apply many filters, gradients, undefined lines and shapes, and complex composition.
Raster format is resolution specific – that means that the photo you just took is displayed in one specific resolution. If you will try to resize the picture, bigger without changing the number of pixels, it will get blurry and not nice to look at anymore. Scaling down its not such a big problem, but the smaller version could be less crisp or softer than the original. There is a possibility to change the number of pixels but the pixels will be added randomly, rarely producing a good outcome.
We have two main names using raster images. PPI and DPI. They are both describing the resolution or clarity of an image, but they are not the same thing.
PPI (pixel per inch) means how many pixels will fit into one inch. A 72 PPI image will have 72 pixels per inch. PPI describes the number of pixels for the digital screen. PPI can be modified with photo/painting editing software.
DPI (dots per inch) means how many dots per inch my printer will print on the paper. Printers are not printing little squares. So how do they do it with raster images? They reproduce the image by spitting out tiny dots consisting of a mix of colors – Cyan, Magenta, Yellow, and Key (black) per the pixel of your image. DPI is set by the printer itself and cannot be manipulated.
That’s why we as digital artists can work with two different color schemes CMYK and RGB. Today we are not going so deep into this, so just put it simply – CMYK is for printing method, RGB is for electronic displays – monitors, phones, tablets etc.
Almost all the pictures you will find on the websites are raster images (even though they could be vector images before). Photographs and pictures in books or magazines are usually also pixel images, but these images are saved with very high resolution what is making them very big files in the end.
Formats of raster images
.jpg, .jpeg, .gif, .png, .tiff or .tif, .psd (Photoshop)
Popular programs used with raster images
Adobe Photoshop, Procreate, Affinity Designer (pixel persona), AutoDesk, Corel and many others
In which hobbies or jobs I can use pixel graphic
Photography, digital painting
Vector
Total opposite from pixel images, vector images are created with a mathematical formula that’s defining lines, curves and primitive shapes like polygons, circles, and rectangles known as paths. Vector graphics have to be created in software that is designed to create lines includes node position, locations, lengths, and curves. Because vector graphics are composed of geometrical primitives, it is very best to use it for more structured images like logos, line art, illustrations with flat, uniform colors, letterheads, and fonts.
Vector images are more flexible and versatile. You can scale them down, up easily and perfectly. They have also no resolution restriction and therefore they are not depended on the output device. And because vector images don’t have to handle millions of tiny pixels, these files are usually smaller than their raster sibling. You can easily recognize vector by looking at the edges, doesn’t matter how much you scale, they will always stay crystal clear and smooth.
One of the biggest disadvantages is the compatibility. They are often saved as native files from the programs they have been created in. Like Adobe Illustrator and their native .ai file. If I will use Affinity Designer to open .ai file, good, I will succeed. But if I will save a file with Affinity, I will not be able to open it with Illustrator. Another disadvantage is the limitation of effects. Vector will be never as a natural painting. It is just not possible. The best to print vector is PDF or EPS, which are producing the sharpest result.
THEREFORE MANY ARTISTS ARE COMBINING THESE TWO TOGETHER AS WELL.
Formats of vector images
.ai, .ait, .art, .svg, .pdf, .eps and many more
Popular programs used with vector vector graphics
Adobe Illustrator, Affinity Designer, Corel Draw, Sketch, Inkscape etc.,
In which hobbies or jobs I can use pixel graphic
Graphic designer, illustrator, printing publications design and others
Conclusion vector vs raster
It all depends on your project. Vectors are best for logos and illustrations. Raster images are classic for digital photography and are very often used for all graphic once they have been published digitally. If you want to repaint Mona Lisa on your iPad, you will not use vector unless you would like to look it as Picasso style Mona Lisa.
Raster images should be used if you require high lever detail (photos) and you don’t care much about by enlarging the image by a great amount. On the other hand vector you will use on images what requires tiny details and might be resized in the future.
1 note
·
View note
Note
Switcheroo!
Send me “Switcheroo!” and I’ll redesign your muse as if they were from my muse’s universe
SUMMARY: In an alternate universe, perky graphics designer intern Mary Really Long Name Sue gets hired by the up and coming VRMMO company Flirt♡Fantasy and starts sparks with its most talented and reclusive programmer, a man so buried in the annals of corporate paperwork that he’s only known by his online handle “B-52.”
Will romance bloom between the vectors and pings of Procreate and cyberspace? Or will a catastrophic bug invasion launched by a rival company spell the doom to their pitter-patter-pixel romance?
INTRO:
“But you know, I’ve heard really weird rumors about that programmer!”
“Huhhh?” New intern extraordinaire Mary Sue leans in with interest to listen to Nondescript Friend #1. “Like what?”
“Yeah, tell us!” Bubbly Friend #2 pipes up to helpfully advance the plot.
“Well, they say he rarely talks and emotes like a robot! Actually, some people think he is a robot! All he does is sit at his computer all day and design weapons for the game.”
“That’s good, isn’t it? Flirt♡Fantasy was able to take top place in MMOs this year precisely because of our advanced combat mechanics despite being a dating sim aimed at females!”
“So his work can’t be faulted, but he’s really, really obsessed you know? It’s kind of creepy. I heard he doesn’t eat anything except vodka and brownies.”
“Is alcohol allowed at the workplace?”
“It is if you practically live here 24/7.”
“Now that doesn’t sound right,” Mary Sue pipes up with a frown. “I’m sure I saw him order some fried calamari takeout last night.”
“Really?”
“I’m not sure about that…”
“Why don’t we ask him ourselves?” Mary Sue suggests.
“No way!”
“Mary, keep away from him! He’s cute and talented, but also moody with weird connections with the CEO. If you piss him off, he’ll definitely get you fired!”
FRIENDZONE:
“I knew it, you do like fried calamari!”
The man pauses in the middle of reaching for the takeout bag in Mary Sue’s hands and stares at her expressionlessly.
“Hey, so what’s your name?” Undaunted, Mary Sue scoots closer and waves the bag in her hand. The tantalizing scent of hot, cooked seafood fills the empty office corridors.
Again the man just stares. Mary Sue stares back, before she lets out an affected sigh. “Well, that’s a pity. I guess I’ll just have to throw this out.” After all, fried goods made her fat! But she’d hardly turned when a hand flew out to grab her wrist.
“Don’t.”
Mary Sue beams. “You talk!”
“I…never said I couldn’t.”
“So you like calamari, right?”
“Yes. Don’t throw it out.”
“But if you’re not going to talk to me, why should I bother sharing this with you~?”
For the first time ever, she sees a flicker of expression on the man’s face as he knits his brows. “You can’t.”
“Why not?”
“Because foods…have souls…”
“Huh?”
“The time the chef took into preparing the ingredients, and then cooking them…it’s enough to harbor their spirit,” he seems hesitant with his words, as if he’d never spoken so much out loud before. “That’s why…you shouldn’t waste their efforts.”
(5 More Calamari Meals Later)
“Weapons…also have souls,” the man mutters, brushing his fingers over the drawing tablet laced with sniper rifle mechanics.
Mary Sue hides a blush. Her stylus had touched that very same screen! “So…do you think we could program this into the next update?”
The programmer in question stares at the drawing–Mary Sue’s own creation, that of a fantastical Calamari Spewing Cannon with the specs to knock out a mid-level boss from 100 feet away in game. He’s silent for so long that Mary Sue’s sure he’s rejected her, before he suddenly moves to grab her hand.
“Ah–!” she exclaims, but he’s only there to guide her hand over the tablet and fiddle with a detail in the drawing.
“The trigger,” he murmurs softly. “You need to include a safety mechanism too, for the new players.”
“R-right..”
“But it’ll pass.”
“Really?!”
“Mm.”
“Hey, did I do it?” Mary Sue suddenly perks up and looks at him with a hopeful smile. “You said weapons have souls. Do you think I gave a little of mine to her too?” She brushes her fingers lovingly over the tablet screen, tracing the places where he’d touched before.
Once again, the programmer regards her with silence. She thinks she’s gotten used to reading them, these thoughtful pauses of blank space between coherent speech. He’s thinking now, she guesses by the set of his brows. Deliberating on his answer, properly, though she never understood why anyone needed to think so much before making casual conversation.
“…B-52,” he finally says after a while.
“Huh?” He was always surprising her with non sequiturs too.
“My character name. I use him to test new code,” the programmer finally admits. “Add me to your friend list. When this weapon launches, I want to show you how to use it in game.”
Mary Sue can feel her face flush. She tries to tell herself it’s not a date, even as she nods and laughs at the same time in delight.
“Okay! I’ll add you right after work. Mine is Marry4Love!”
ROMANCE:
It’s windy today. Mary Sue holds onto her hat as she scrambles to the top of a hill, then waves back at her lover.
“Banff!”

“Come up already, the view up here is beautiful!”
“Mary…” the man formerly known as B-52 sighs from the foot of the slope. He’s still sitting astride his motorcycle, clinging to it as the last vestige of logic and order in a wholly wild world. “I’m not the best at physical exercise…”
“You say that, but you’re the one who stays up for weeks to finish coding before the deadline!” she huffs with a laugh. “Aren’t these rolling meadows something? You have to see the way the grasses capture the light up here–it’s not something I can render, even in Photoshop!”
“Light…” the man murmurs thoughtfully. “Optic interference. If we end up putting that into the next weapon design–”
“Are you trying to make everything into a weapon now?” Mary shouts, hands on hips. “Now hurry up and stand next to me, or else I’ll return your engagement ring!”
Without a word, Banff starts the trek up the hill. Mary Sue watches him with a satisfied smile. He eats better now too, touching all the food groups instead of just alcohol, dessert, and squid. After this, we should try another restaurant. Maybe Mexican for dinner?
“What do you think?” she asks, moments after he stops by her side to catch his breath.
Banff inhales. Then he stands up straight, and peers into the distance with thoughtful hands. The stray breeze tousles his snow-white locks, forcing Mary Sue to resist the urge to ruffle her hair himself.
“The sun,” he mutters at last. “It shines on everything and gives them life.”
“Isn’t that just photosynthesis?” she asks him teasingly.
“Maybe,’ he turns to look at her. “Do you think the sun has a soul, too?”
“Hmm.” Mary Sue steps closer and rests a hand over his chest. “Not as much as the man who shared a piece of his heart with everything he loves.”
He reaches a hand to clasps her then, quiet eyes resting on her face. She smiles at him, then stands on tiptoes to give him a kiss.
“Thank you for letting me steal yours.”
BAD END:
“Where is she?” B-52 grips the familiar stylus in his hands, ever so careful not to snap it in half.
“Overseas by now.” the CEO of Flirt♡Fantasy looms before him in silence. As always, his figure is shrouded in shadow. “Don’t worry, I gave her ample compensation. She’ll find a fresh new job as soon as her plane lands at the airport.”
“She didn’t want to leave.”
“I fired her, so she had no choice.”
“Why?!”
“On attempts to sell information to our competitors.”
“That never happened, and you know i–”
“She was distracting you from your projects, B-52.”
“I was doing fine meeting my deadlines, president.”
“Your efficiency fell 1.4% ever since you let her into your life. She’s been banned from all our games and servers indefinitely, so just forget about her and get back to work.” A pause, and there’s the clack of a heel on linoleum as figure takes a step forward, just far enough to rest a hand on the programmer’s shoulders. “After all, that’s where they need you most, isn’t it, B-52?”
The CEO smiles and digs a nail into the programmer’s neck. There’s a small click before the skin shifts to reveal a small slot, perfect for insertion of a small thumb drive.
“You–!” Abruptly, B-52 falls slack as the thumb drive enters his system. Minutes later, a robotic voice announces the verdicts.
「Manual Override Successful」
“It’s time to get back to work, B-52.”
“Yes, Mr. President. Right…away.”
–
3,000 miles away, the specially commissioned private jet containing a heartbroken graphics design intern bursts into flames at high altitude before hurtling into the seas, its passenger never to be seen again.
–
30 years later, Flirt♡Fantasy and its parent company TIERRA rises to dominate the charts in not just MMOs, but every technological aspect of life. Their monopoly around the world is unrivaled, making them all but perfect for a hostile takeover of all the major world powers. The convenience and comfort brought about by their long line of appliances and electronics turn deadly as a single switch renders them into efficient killing machines under the control of its megalomaniac CEO.
“B-52,” the programmer responsible for designing all the weapons, eventually goes underground to lead a secret team of resistance members against his former employer turned international tyrant. He’s nearly caught and killed during his escape, but manages to flee by the skin of his teeth with help from the universal test dummy he designed 30 years prior, codenamed E U S Y R A M. Once the recipient of every major test run for TIERRA’s disguised weapons, it now holds invaluable intel and data on their major strengths and weakness.
Eventually, he re-engineers it to create the flawless, most indestructible android capable of fighting back against their enemies. As the second model performs completely opposite functions to the prototype, he reverses its name and calls it by its true identity, the M A R Y S U E.
No one quite understands some of his design choices, especially the robot’s main weapon: a gun that shoots fried calamari-shaped missiles that melts electronic circuits on contact. But it can’t be denied that B-52 is a weapons genius and M A R Y S U E the perfect opponent for their foe. As it’s been precisely calibrated to sync only with the commands of its creator, B-52 and M A R Y S U E ends up participating in most of the most important battles and ultimately win the war.
Victory comes at a price–using M A R Y S U E takes a great mental strain and the toil eventually causes B-52, who was never very healthy physically, to collapse from a stroke. However, he dies in her arms with a smile on his face, finally breathing the air of a free world. M A R Y S U E herself shuts down voluntarily 214 seconds after B-52′s vital signs come to an end.
the end.
SPOILER NOTES:
man the CEO was supposed to be an expy of B-52′s crappy Master Attendant in canon
Flirt Fantasy Food Fantasy lolol
b-52 isn’t fully robot, but his brain has been partially replaced with artificial A.I. controlled by the CEO; he later hacks himself to overcome the program restrictions
the major conflict in the series is the virus from the rival video game company that invades the systems of FF
in the (false) good end, mary sue and b-52 overcomes it together and retire to a cottage by the sea (but with excellent wifi). the CEO conveniently dies of a heart attack for plot purposes.
in the bad end, mary sue fails to find a lead on the virus infiltrating their company and gets scapegoated by the CEO, who drives B-52 to work to the bone until they take over the world
the twist in the story is that the competitor are the Good Guys >o> le gasp and allying with them is key to saving the world
completion of the bad end is required to unlock parameters for the true end and foil the world takeover plot by the big bad controlling Flirt Fantasy behind the scenes
#commoncocktail#long post#fanfic#this started out as cutesy online romance and devolved into who knows what from there lol oops#I hope they won't all end up this long holy crap#inbox#doodle
3 notes
·
View notes
Text


First Character tutorial.
I really liked the concept and development of the cop bird, hence I decided to stem my line work practice off of the original ideas the creator had. What particular drew me to it was how different the initial and final designs turned out. This is something I particularly need to work on as I often mess around trying to think of the perfect idea, while all my average ideas could have come together on paper, creating something I would be pretty happy with.
I started this project by sketching out his original two drawings. I enjoyed this as I didn’t have to be too perfect and it was the first time I had actually drawn something on paper in a while so it was very refreshing. For the next idea I took into account what the creator had thought about when moving to this step, and then transferred those ideas to some things I was keen to experiment with, hoping to make the character look like an intimidating cop rather than the goofy/good guy cop character the creator intended.
Line work
I decided to practice line work. It is the foundation and very first step in creating a clean, impactful character. I feel the same way about line work as I do about the saying “tidy room, tidy mind”. Before watching the video on line work in class, I would not have gone into the task with the quick fire mentality of repeating yourself over and over until you get it correct, so this was nice to hear that this is all part of the process and much preferred it over trying to erase and fix the inevitable mistakes. Because Procreate is a pixel based app, it is easy to get annoyed with your line work. I have a bad habit of fixing this with the calligraphy brush, short term it can actually be really effective and satisfying to use on simple designs, but I soon found out it would lead me into some other issues which I will elaborate on soon.
Values
I liked the idea of incorporating values into my first character as it is something I haven’t thought about before. In the sense that you should apply darker colours to the areas you want to be more dominant etc. It seems very simple and obvious that that is how you would do it now that I write it, but previous to this I would have just selected colours that I liked without much thought or connection to what I’m creating. Although I have not experimented with the colour pellets for either set of values yet, I like the left image because I think portraying his massive beak and powerful arms to be dominant over his weapons is cool.... yea just cool.
Colour
When going to colour the character I discovered a problem that I would not have acknowledged if I hadn’t failed this first time. First I was lazy and mindless so i did not plan our my different layers let alone have my design organised into structured components. Then because I used the calligraphy brush as well, it meant I wasn’t able to fill my values with colour as it would distribute the colour out to the all the different values. I’m not entirely sure what’s going on and I think it has something to do with the calligraphy brush not actually connecting even though it looks to have done. Even though I was sloppy with my layers tab this should have still allowed me to colour fill my character. This is defiantly a flaw with the ipad, as it would have been an easier fix on illustrator. In saying that I thoroughly enjoy using the Ipad and procreate so I am treating it as something to prioritise in the future if I want to produce work at a Adobe standard.
0 notes
Last Seen Blogs
caught-between-worlds
Raag main, tu raagini hai

nurulhasanahsilalahi
Untitled

brooklynphotos
S.K.Brooklyn Photos

nikolaevnadestiny-blog
❛ ——— { I will write your name up in the stars } ❜

nuderiot
NUDE guerilla blog