#animationsoftware
Text
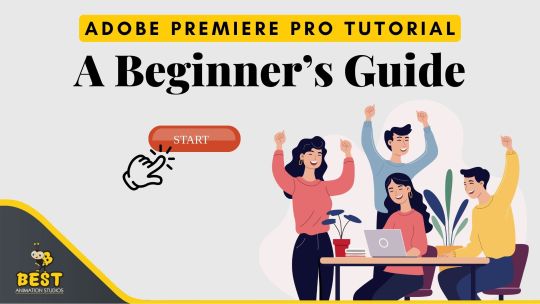
Adobe Premiere Pro Tutorial: A Beginner’s Guide
Adobe Premiere Pro is a crucial tool for both professional and beginner video editors, whether you're working on a straightforward vlog or a complex cinematic project. While the software might seem daunting if you're new to digital audio workstations (DAWs), don't worry—this beginner's guide will walk you through the essentials to help you get started smoothly.
Getting Started: Understanding the Interface
When you first open Adobe Premiere Pro, the interface can seem a bit overwhelming with its multitude of panels, tools, and options. However, once you understand what each section does, it will become much less intimidating.
⦁ Project Panel: File browser for all your media files, into your project panel sequences & more As long as your workstation filing cabinet.
⦁ Timeline:This is where you put together all of your clips in order for them to appear on screen. Welcome to your editing playground.
⦁ Source Monitor: To check and trim your raw footage before bringing it into the timeline.
⦁ Program Monitor: Displays how your sequence will appear after it is edited and exported.
Importing Your Media
You need to import your media files into Premiere Pro before you can start editing. This includes video clips, audio and images as well even graphics.
⦁ Click on the Project Panel.
⦁ Select "Import" by right-clicking against the mouse. OR Press Ctrl + I if you are on Windows and Cmd + I for mac.
⦁ Go to media files and then select those. Click "Open."
Your media files has now shown on the Project Panel ready for you to drag and drop into your timeline.
Creating a New Sequence
A sequence is where your editing takes place. Think of it as the canvas where you arrange and manipulate your clips.
⦁ In the Project Panel, right-click and choose "New Item" -> "Sequence."
⦁ Select a preset that matches your footage’s resolution and frame rate. If you're unsure, choose a standard like 1080p at 30fps.
⦁ Name your sequence and click "OK."
Now you’re ready to start assembling your video!
Basic Editing Techniques
Here’s where the magic happens. Let’s dive into some basic editing techniques to start shaping your video.
Cutting and Trimming:
⦁ To cut a clip, move the playhead to where you want to make the cut and select the Razor Tool (shortcut C). Click on the clip where you want the cut to be.
⦁ To trim the beginning or end of a clip, hover over the edge of the clip until you see a red bracket, then drag to trim.
Arranging Clips:
⦁ Drag clips from the Project Panel to the Timeline. You can move them around to rearrange their order.
Adding Transitions:
⦁ To add a transition between two clips, go to the "Effects" panel, search for "Cross Dissolve" (a common transition), and drag it onto the edit point between two clips.
Adding Titles and Text
Adding text is a simple way to enhance your video, whether you’re creating titles, captions, or credits.
⦁ Go to the "Graphics" workspace.
⦁ Click on "New Layer" -> "Text." A text box will appear on your Program Monitor.
⦁ Type your text and use the "Essential Graphics" panel to adjust font, size, color, and position.
Basic Color Correction
Color correction can drastically change the mood and feel of your video. Premiere Pro’s Lumetri Color panel offers a range of tools to tweak your footage.
⦁ Select the clip you want to color correct.
⦁ Go to the "Color" workspace.
⦁ Use the Basic Correction panel to adjust exposure, contrast, highlights, shadows, and more.
For more advanced color grading, explore the "Creative" and "Curves" sections within the Lumetri Color panel.
Adding and Adjusting Audio
Good audio can make or break your video. Premiere Pro makes it easy to add and adjust audio levels to ensure your project sounds as good as it looks.
⦁ Import your audio files just like you did with video clips.
⦁ Drag your audio files into the timeline, placing them on the audio tracks below your video.
⦁ To adjust the volume, click on the audio clip in the timeline, then go to the "Audio Clip Mixer" or "Effect Controls" panel and adjust the volume slider.
Exporting Your Finished Video
Once you're happy with your edit, it’s time to export your video.
⦁ Go to "File" -> "Export" -> "Media."
⦁ Choose a format (H.264 is a good option for most uses).
⦁ Click "Match Source" to ensure your export settings match your sequence settings.
⦁ Select the destination where you want to save your video.
⦁ Click "Export."
Congratulations, you’ve just created your first video in Adobe Premiere Pro!
Conclusion
Adobe Premiere Pro is an incredibly versatile and robust editing software that, while initially challenging, becomes more intuitive with hands-on experience. Embrace the learning curve and take the time to explore its wide range of tools and features. Each project you tackle is an opportunity to refine your skills and discover new techniques. The more you experiment and practice, the more comfortable and proficient you'll become. Remember, every edit, cut, and effect contributes to your growth as an editor. So dive in, get creative, and enjoy the journey of mastering this powerful tool. Happy editing!
Don't forget to share this post!
#animation#adobe#premiere#premiere pro#animationsoftware#video editing#blog#animators on tumblr#animationstudios#bestanimationstudios
0 notes
Text
Unlock your creative potential with the best animation software! Whether you're a beginner or a pro, discover top tools for 2D and 3D animation, Flash animation, character animation, and VFX. Dive into our latest blog post to find the perfect software for your next project! 🎨✨
#AnimationSoftware#2DAnimation#FlashAnimation#CharacterAnimation#VFX#DigitalArt#MotionGraphics#CreativeTools#AnimationTips#AnimatorsLife
0 notes
Text
Here in this article you get top 10 best animation software.
0 notes
Photo

Maya Vs Blender: Which is Better in 2023? Both Maya and Blender are great 3D computer graphics programs. Choosing the right tool for game art creation in 2023 can be a puzzling experience.
#MayaVsBlender#3Dsoftware#ComputerGraphicsPrograms#GameArtCreationTools#AnimationSoftware#3Dmodeling
0 notes
Text
Animators & developers get ready for testing!
🚨With a new version closing in, there's a lot that could go wrong...
That's why Pencil2D 0.7.0 Release Candidate is ready for testing right now❗️
Visit our blog now for more info to help testing!✏️⤵️
#opensource #2danimation #foss #animationsoftware
7 notes
·
View notes
Text
instagram
Introducing Live Portrait, the AI tool that breathes life into any still image using a video reference with incredible precision! 🌟 From detailed eye and lip movements to animating animals, Live Portrait is a game-changer in the world of animation. Whether you're in entertainment, education, or marketing, bring your visuals to life effortlessly. Check out how Live Portrait is revolutionizing animation and making every picture tell a dynamic story.
📲 For more AI advancements, follow @arcitech.ai
#ai#animation#techinnovation#artificialintelligence#visualeffects#digitalart#creativetech#animallovers#animationsoftware#videotechnology#techtrends#aitechnology#creativeai#digitaltransformation#technews#futuretech#innovation#aiart#techcommunity#arcitech
1 note
·
View note
Video
Dojo Cat - Say So (Animated Music Short) #music #animationsoftware #shor...
0 notes
Link
CreateStudio is a video-making tool for social media marketers, YouTubers, and video creators that want to make live-action, explanatory, and animation videos. Administrators can generate images in a variety of forms and sizes, includin square, landscape, vertical, and more, depending on the website and social media marketing channels’ needs.
#createstudio#createstudiopricing#createstudiofeatures#createstudioreview#createstudiosoftware#animationsoftware#animationvideo#cloudfindr
0 notes
Photo

Advanced Program in Gaming is one of the most demanded courses at MAAC. It trains you in the latest VFX software and techniques that are widely used in gaming. In this course, you will also learn about the fundamentals that go behind the making of a game. Join the course now and get guidance from our expert mentors. To know more about our offerings, visit us at https://maacdilsukhnagar.com/ or give us a call - 7799902800.#maac #hyderabad #animation #3d #3danimation #animationsoftware #animationvideo #animationdesign #graphicdesign #professional #design #webdesign #vfx #gamedesign #bestinstitute #courses #registernow#guess #game #gamer #gaming #comment #students #joincourse #creativity
#maac#hyderabad#animation#3d#3danimation#animationsoftware#animationvideo#animationdesign#graphicdesign#proffesional#design#webdesign#vfx#gamedesign#bestinstitute#courses#registernow#guess#game#gamer#gaming#comment#student#joincourse#creativity
0 notes
Link
3d animation software is beneficial to make the information attractive. You can see what features you can get from the best 3d animation software.
0 notes
Photo

Rate this one 1-10!
Fananimation of MickeyMouse from Mickey Mouse Shorts!
So far one of the best animated series if we’re talking about character animation. I love it so much!
Have a great day!
Stay Awesome!
Follow me on:
Facebook | Instagram | Youtube | Twitter | Vimeo
Haven’t tried ToonBoom yet? Well, Today is a great day to do that!
#2d#2danimation#animation#animated#animating#animationstudent#disneyxd#cartoon#toon#toonboom#toonbooming#harmony14#animationsoftware#face#expressions#mickeymouse#mickey mouse shorts#mickey#disney#gif#animatedgif
10 notes
·
View notes
Video
youtube
Viddyoze Review⚠️CAUTION⚠️MY BONUSES WORKS BEST WITH VIDDYOZE ANIMATION ... Viddyoze Is A Web Based 3D Animation Platform That Allows
Users To Create High Quality, Studio Grade Video Animations In
Just a Few Clicks
0 notes
Text
If you are looking for the best animation software then this article is helpful for you in this article you get the Top 10 best animation software.
0 notes
Link
Viddyoze is introduced by David Chamberlain, Joey Xoto, and Jamie Garside. This is a huge collection of animations, live-action animation, lower thirds, outros, logo stingers, and social media call-to-action.
We can select designs that we like, upload our own logos, do edit our own wordings. As your animation is ready to display then we can download it as a GIF file or in MP4 file format. This is very easy to make it and it is extraordinary than a normal intro maker on YouTube.
0 notes
Link
0 notes
Last Seen Blogs

fireteam-valiant
Eyes Up

egagets
Untitled

247locks-blog
247Locks

jimmyc999
Untitled

deathxproof
I DON'T HAVE TIME TO DIE !