#auto selector
Explore tagged Tumblr posts
Visit Tumblr Blog
Explore Tumblr blogs with no restrictions, modern design and the best experience.
Last Seen Tumblr Blogs


Fun Fact
Tumblr was created by web developers David Karp and Marco Arment.
Text
Oh Bianca.. the woman you ARE.

😍😍😍😍😍😍😍😍😍
#punishing gray raven#pgr#loweky might change my plans with going for selena and might just skip her banner and then pull for on the next patch bcs my pulls are#so fucking horrendous holy shit#i only have like 8k pulls and 2300 bc tickets so this calls for me to speak selena unfortunately#until the next patch comes and Im able to pull for her on the free selector banner#im so sorry selena I wasn't able to live up to my title as your no.1 wife so I'll have to love it up as the fourth😭😔#kuuyoooo..orwtv#spoilers pgr#pgr spoilers#holy yap omg#*skip not speak oops#wtf is up with the auto correct holy fuck#*LIVE NOT LOVE.
8 notes
·
View notes
Text
45th Anniversary Ford Mustang

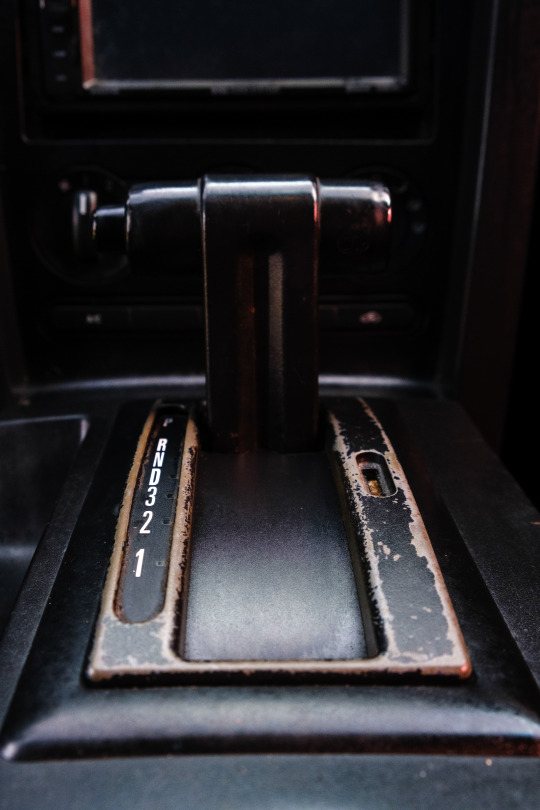

Old and reliable, vintage but functional. 2009 Ford Mustang S197
#interior#automotive#ford mustang#mustang#auto interiors#auto interior#car interior#cabin#auto cabin#auto cab#inside car#gear selector#photography#classic cars#classic automobiles#classsics
1 note
·
View note
Note
Could make a tutorial for creating subtitles on Photoshop for beginners! Thank you so much, continue the amazing work!
thank you nonny! i'm glad my tutorials are helping at least one person.
creating subtitles is quick and easy. i'll go over simple subtitles, and also making subtitles appear partway through a gif. once you know how to make them i recommend saving an action for it, for your most common gif sizes, that way you can just press one button and then type in your subtitles.
Font Overview
it's good to have a go-to font. i use Calibri Bold Italic, but any clean, simple print font can work
these are my font settings below. quick rundown of each option
A- this your font family B- this is the specific font; light, regular, bold, italic etc. C- this is the font size D- this is the spacing between each row of text; it's default setting is [auto], which uses the built-in font spacing, but all fonts have different spacing and you could end up with a huge gap between rows. the spacing pt's also don't necessarily match up with the font size, so experiment to get the spacing you want E- this is the space between letters; if you think the letters are too close together then increase the number into the positives, if you think they're too far apart then decrease the number into the negatives F- this will "stretch" the letters sideways; not really used for basic subtitles G- this will stretch the letters up and down; not really used for basic subtitles H- this is your font colour

the setting above are my go-to for 540px gifs, though i occasionally adjust the font size between 18-22, and then also adjust the row spacing to match. for 268px gifs, i'll usually use a font size of 16px
Basic Subtitles
to make the subtitles, select the text tool the left hand toolbar, the icon that looks like a "T", and your cursor will turn to a text selector line in a dotted square. put your cursor at the bottom left of the gif; it doesn't have to be exactly on the corner, but so long as it's close the the edge of the canvas it will "lock on" to the corner.
click and drag to the right side of the gif, and up as big as you want the "text box". there will be a pop-up tell you the width and height of the box you're making. width should be the full width of the gif, and for the height i've set it to 40. the top of the text box will be the very top of the letters on the top row.
the size of the text box can always be adjusted later by clicking a side and dragging.
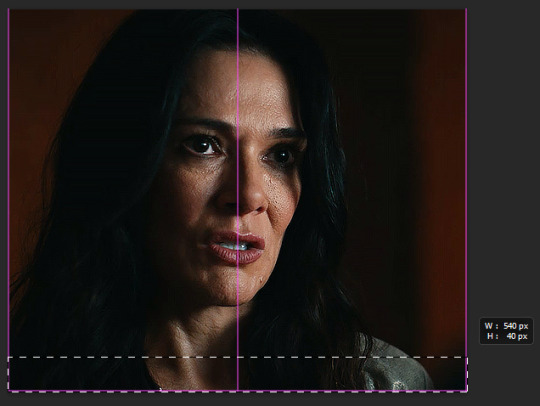
type your subtitle into the new text box, and then click anywhere outside the workspace (the canvas and the grey area behind it) to "exit" the text layer
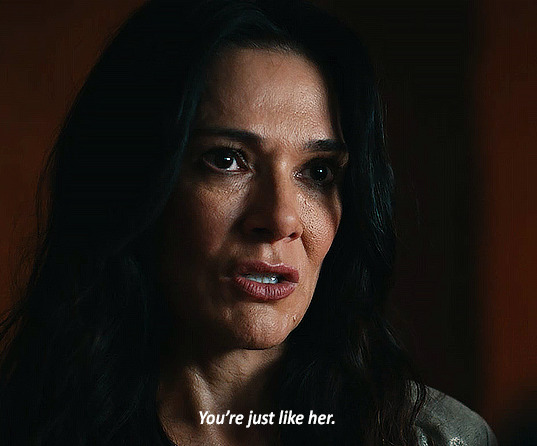
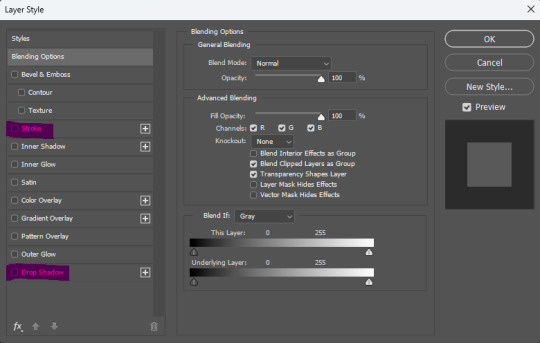
now the text looks pretty good here, because the parts of the gif under it are dark. but a different gif might be lighter, or you might be using a different text colour. to make sure the subtitle is visible and readable on any gif, you're going to go to the menu on the bottom right, with the text layer selected, and click the fx button. any option in the menu that appears will open the same box, just on a different option, i always just click blending options

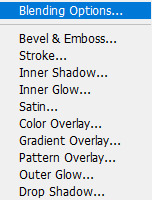
the layer style box will open. all the options on the side are various effects that can be applied to the text. the ones with a plus sign will allow you to add multiple instances of that effect on the same text. the 2 we'll be using on the subtitles are stroke and drop shadow, so one at a time click on the row for both and a check-mark will appear in the box. you'll also see that effect labelled under the text layer
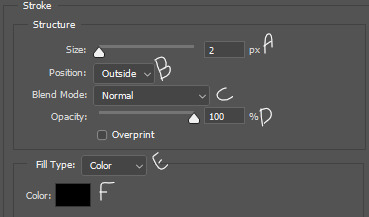
this is the menu for stroke. stroke is simply an outline of the text/object
A- this is the size of the stroke, the width of it B- position can be outside, inside, or centre. for subtitles it should always be on outside C- this changes the blend mode of the stroke, which will have essentially no effect if the stroke is black or white D- the opacity of the stroke E- you can have a stroke made of a solid colour, a gradient, or a pattern F- the colour of the stroke
this is the menu for drop shadow.
A- blend mode, again, doesn't do anything if the colour is black or white B- colour of the drop shadow C- the opacity of the drop shadow D- the angle of the shadow E- make sure this in unchecked, otherwise it can screw with the angle F- this is how far from the text the shadow will be G- this makes the edges of the shadow sharper or harder H- this makes the overall shadow sharper or harder
the options under "quality" i never adjust

click ok on the layer style box and you have your basic subtitles!

Fade In Subtitles
now maybe you have a slightly longer gif, where the character isn't speaking at the beginning of it and you want to time the subtitles with the speech. so we're going to use keyframes!
keyframes do various things, by setting two (or more) points on the gif, and the gif will automatically change between those two points, depending on which keyframe you use. (hopefully this will make more sense a little further down)
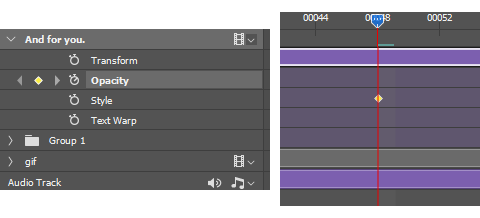
first play the gif a few times in the export preview window to see when the talking starts and then move the frame tracker (the red line) to 2-3 frames before the speaking begins, in this gif the character starts speaking at frame 50, so move the frame tracker to frame 48

when you click the arrow at the start of the layer, it opens a dropdown of the layer and gives various options to use keyframes on, depending on what kind of layer it is. clicking the little stopwatch will create the first keyframe
transform- this lets you change the size/orientation of the text opacity- this lets you change the opacity of the text style- this lets you change the layer style of the text text warp- this lets you animate the warping of the text

when you click the stopwatch, a keyframe will appear on the timeline on the frame selected, and next to the stopwatch two arrows with a keyframe point between them will appear. the arrows move you from one keyframe to the next, and the point between the arrows will add a keyframe on the selected layer, or remove the keyframe if there is already one there. if you click the stopwatch button again, it will remove all keyframes
while the tracker is on a frame that has a keyframe attached, anything you do that falls under that type of affect while on that frame will be recorded by the keyframe. on opacity there's only the one thing that will be recorded—opacity.
since we want the text layer to be invisible when the gif starts, turn the opacity down to 0, while on the frame with the first keyframe. now move the tracker to the frame where the speaking begins. add a new keyframe on frame 60 using the new keyframe button. then turn the opacity on the text layer back up to 100
now the text layer will go from 0 opacity to 100 opacity over between the 2 keyframe points, and gradually appear as the character begins talking. if the timing isn't quite right, you can click and drag the keyframe points along the timeline.

A Few Random Notes
some people use white for an entire gifset, even if more than one person is speaking, and some people use different colours to show who is speaking. you can have set colours for speaker #2, #3, etc. but when possible, i like to use the eyedropper to select a pixel colour for the other speaker that is already in the gif, but not prominent where the subtitles will show, so i don't add a colour that wasn't already present, and reduce the number of colours in the gif itself
if the subtitle is long enough to go on two lines (or more) try and cut it to be somewhat even i.e. don't have the top line stretch from side to side, and the bottom line only had 1 or 2 words; if there's a comma or semi-colon in the text, splitting it there as a natural gap/pause
if there are two people speaking in 1 gif, and you want to show their dialogue at the same time, you can put the two different speakers on separate lines of the same text box, highlight one of them, and change only that colour
#cleo gets mail#anonymous#tutorial#gif tutorial#typography tutorial#photoshop tutorial#gifmakerresource#completeresources#*tutorials
48 notes
·
View notes
Text
TOSHIBA RT-SW7 SUGAR [Japan 1985]
An HIGH-END portable with automatic tape selector (normal, chrome and metal) and auto reverse play. A very stylish player for that year!
Portrait: TOMOYO HARADA

#japan#retrotech#retrojapan#cassette#hifi#1980s#showa#analogue#stereo#toshiba#vintagejapan#musiclover#audiophile#HaradaTomoyo#原田知世
113 notes
·
View notes
Text

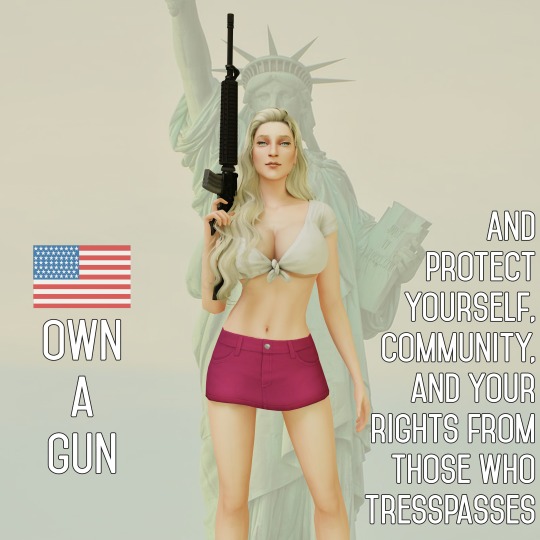
ArmaLite AR-15 and Derivatives
(This is Actually Serves for My Remastered CC I Made back in 2022. It Supposed to post on 2nd February but hell got delayed for a Week and glad I Finally Having Chance to upload it. Enjoy! Anyway in this thread The CC Models are Mostly Remastered into Great Quality and Got Fixed. So In Case you already Downloading My Stuff. You may Need to Redownload it again since this gonna be A Final Version)
💥DOWNLOAD💥
In the mid-1950s, the U.S. Department of Defense sought a new assault rifle for its infantry, influenced by the adoption of the AK-47 and the U.S. withdrawal from the FAL program. The Springfield Armory's M14, a derivative of the M1 Garand chambered in 7.62×51mm NATO, was adopted in 1958 but soon proved inadequate in Vietnam.
Around the same time, Eugene Stoner developed the AR-10, a 7.62×51mm rifle, but its design struggled with the cartridge's recoil. When the U.S. military switched to 5.56×45mm, Stoner adapted the AR-10 into the AR-15, which ArmaLite proposed to the Army in 1959 but was initially rejected. In 1960, the Air Force, led by Gen. Curtis LeMay, ordered 6,000 AR-15s. By 1965, after proving reliable in combat, the Army adopted it as the M16, with the M16A1 in service until 1984. Before That.. Some Screenshoot I Made Thank you For @chloegamesbroficial For Inspiration! Nice Work Sis!

✨ORIGINAL M16 FAMILY
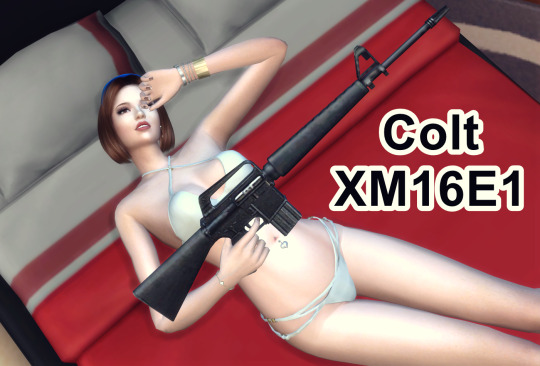
COLT XM16E1
The Progenitor Of M16 Rifle Series. The one who started it all. The XM16E1 was the first true military-issued M16 variant and played a key role in transitioning the U.S. Army from the M14 Battle Rifle to a lightweight, high-rate-of-fire assault rifle. Despite its early flaws, the refinements made in the M16A1 helped solidify the M16 family as a standard U.S. service rifle for decades. (Thank you for @honeyssims4 For Adorable Pose!)
Key Features of the XM16E1:
Forward Assist: Unlike the initial AR-15 and early M16 models, the XM16E1 introduced a forward assist on the right side of the receiver to manually ensure the bolt was fully locked. This was a response to reliability concerns, though Stoner himself opposed its necessity.
Three-Prong Flash Hider: It retained the three-prong flash suppressor, which was later replaced with a birdcage-style suppressor on the M16A1 due to durability issues (the prongs could snag on vegetation).
Chrome-Lined Chamber Issue: Early XM16E1 rifles lacked chrome-lined chambers, leading to frequent malfunctions when used in Vietnam's humid jungle conditions. Fouling and corrosion contributed to "failure to extract" malfunctions, which were later addressed in the M16A1 by adding a chrome-lined chamber and barrel.
Full Auto & Semi-Auto Selector: The rifle featured a selector switch for semi-automatic and fully automatic firing modes.
Early Vietnam Deployment: The XM16E1 was issued to U.S. troops in Vietnam around 1965 and was the first Army-standardized version of the M16 before being officially designated the M16A1 in 1967.
Problems & Fixes:
Ammunition Issue: The original 5.56×45mm M193 rounds used ball powder instead of extruded powder (as originally intended), leading to excessive fouling and jamming.
Cleaning Kits & Training: Many soldiers were not initially issued cleaning kits or proper maintenance instructions, worsening the reliability issues.
M16A1 Upgrade: The XM16E1 was formally redesignated as the M16A1 in 1967, incorporating a chrome-lined chamber and barrel, improved buffer system, and closed-end flash suppressor to resolve its issues.
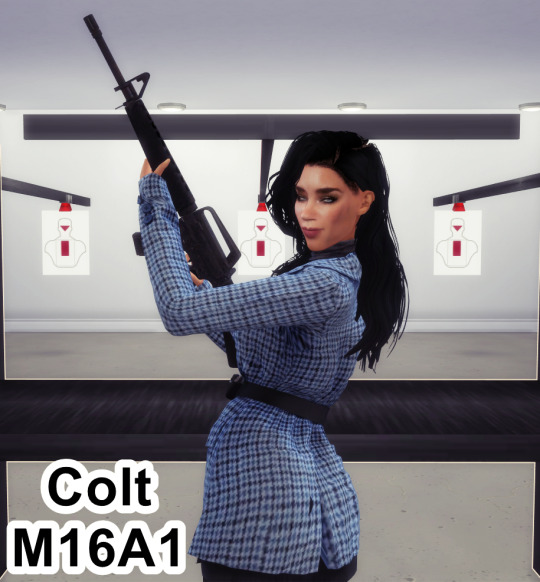
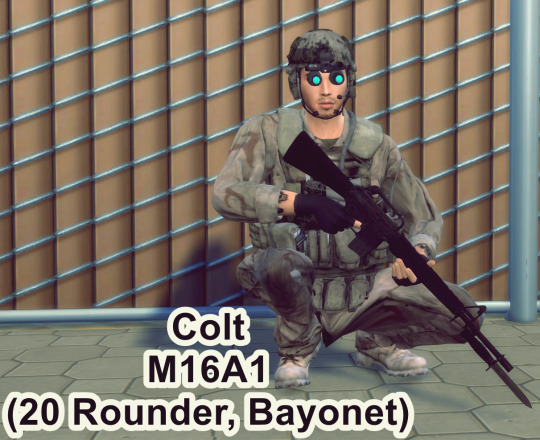
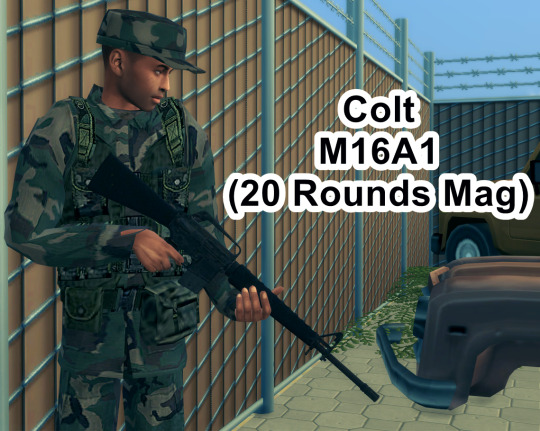
COLT M16A1
The M16A1 was the first fully standardized M16 variant adopted by the U.S. military in 1967, replacing the XM16E1 and improving upon its shortcomings. It became the primary service rifle for U.S. forces during the Vietnam War and remained in widespread use until the 1980s. (Thank you For @plazasims For "Cliff Unger" Uniform!)
Key Features & Improvements Over XM16E1:
Chrome-Lined Chamber & Barrel – Addressed the fouling and corrosion issues that plagued the XM16E1 in Vietnam's humid environment.
Birdcage Flash Hider – Replaced the three-prong flash suppressor, which was prone to bending and snagging on vegetation.
Forward Assist – Retained from the XM16E1, allowing soldiers to manually close the bolt if needed.
Reinforced Buttstock & Pistol Grip – Made from stronger polymer to prevent cracking.
New Buffer System – Helped reduce felt recoil and improve reliability in automatic fire.
30-Round Magazine Compatibility – Originally issued with 20-round magazines, but later compatible with the more practical 30-round STANAG magazines.
Weight & Length – Weighed around 3.9 kg (8.6 lbs) loaded and measured 986 mm (39 inches) in length, making it much lighter than the M14 it replaced.
Combat Use:
Vietnam War (1967–1975) – Saw extensive use, replacing the heavier M14. Soldiers appreciated its lighter weight and high fire rate, though early reliability issues due to poor maintenance training and improper ammunition caused setbacks.
Post-Vietnam Conflicts – Used in Operation Just Cause (Panama, 1989) and by allied forces worldwide into the 1990s.
Foreign Military Use – Many U.S. allies adopted surplus M16A1s, with some still in limited use today.
Replacement & Legacy:
By the mid-1980s, the M16A2 replaced the M16A1, introducing a heavier barrel, burst-fire mode, and improved sights. However, the M16A1 remains one of the most widely produced and battle-proven rifles in U.S. history, influencing modern designs like the M4A1 and civilian AR-15 variants.
COLT M16A2/M16A3
The M16A2 is an upgraded version of the M16A1, featuring a longer stock, improved pistol grip, reinforced carry handle, and a more durable round handguard. It introduced a three-round burst mode instead of full-auto M16A3, Variant that Issued for United States Navy Having A Full Auto Configuration like Old M16A1. The rifle also had a heavier barrel for increased durability and accuracy.
The M16A2 saw combat in Operation Just Cause (Panama), the Gulf War, and the Bosnian War. It later served as a reserve rifle in Afghanistan and Iraq and remains a popular service weapon for military and police forces worldwide.
M16A2 (1983 – Standard Issue Upgrade)
Key Features & Improvements Over M16A1:
Stronger Barrel – Heavier profile for improved accuracy and heat resistance.
3-Round Burst Mode – Replaced full-auto with safe-semi-burst to conserve ammo.
New Rear Sight – Adjustable for windage and elevation, improving long-range accuracy.
Longer Stock & Reinforced Grip – More ergonomic design for stability.
Round Handguards – More durable and symmetrical, easier to grip.
Flash Hider Change – Birdcage closed at the bottom to prevent dust kick-up.
Improved Ammunition – Designed for the 5.56×45mm M855 "Green Tip" round, offering better penetration.
Combat History:
First issued in 1983 and widely used in Operation Just Cause (Panama, 1989) and Desert Storm (1991).
Phased out in the 2000s as the M16A4 and M4 Carbine became standard.
M16A3 (1990s – Full-Auto Navy Variant)
How It Differs from the M16A2:
Retains Full-Auto – Uses safe-semi-full auto, unlike the M16A2’s 3-round burst.
Used by U.S. Navy and SEALs – Needed for maritime operations and boarding teams.
Physically Similar to the M16A2 – No other major differences besides the fire control group.
Limited Use & Replacement:
Never widely adopted outside of Navy units and special forces.
Eventually replaced by the M16A4 and M4A1 due to modularity and compact size needs.

COLT M16A4
The M16A4 is the final standard-issue variant of the M16 rifle family, introduced in the late 1990s to replace the M16A2. It was widely used by the U.S. Marine Corps and some Army units, particularly during the Iraq and Afghanistan wars. The M16A4 was the last major evolution of the M16 series, transitioning the rifle into a more modular, optics-friendly platform.
Key Features & Improvements Over M16A2:
Flat-Top Receiver with Picatinny Rail – Allowed for easy mounting of optics, scopes, and accessories, unlike the fixed carry handle of the M16A2.
Removable Carry Handle – Featured adjustable iron sights but could be detached for mounting optics like the ACOG (widely used by U.S. Marines).
Three-Round Burst Mode – Retained the safe-semi-burst firing modes from the M16A2 (no full-auto, unlike the M16A3).
Knight’s Armament M5 RAS (Rail Adapter System) – Allowed attachment of foregrips, lasers, flashlights, and grenade launchers (M203/M320).
Heavy Barrel – Improved accuracy and heat resistance for sustained fire.
30-Round STANAG Magazine – Standardized across NATO forces.
Combat Use & Replacement:
Widely used in the Iraq War (2003–2011) and Afghanistan War (2001–2021) by U.S. Marines.
Phased out in favor of the M4A1 carbine, which offered greater mobility in urban warfare.
Still in use by Marine reserves and allied forces worldwide.
🎈CARBINE FAMILY
The AR-15 carbine family includes a wide range of compact, lightweight rifles derived from the original AR-15/M16 platform. Carbines typically have shorter barrels (14.5 inches or less) and are designed for mobility, versatility, and close-quarters combat (CQC).they has evolved into one of the most widely used and modular weapon platforms worldwide, serving military, law enforcement, and civilian shooters.
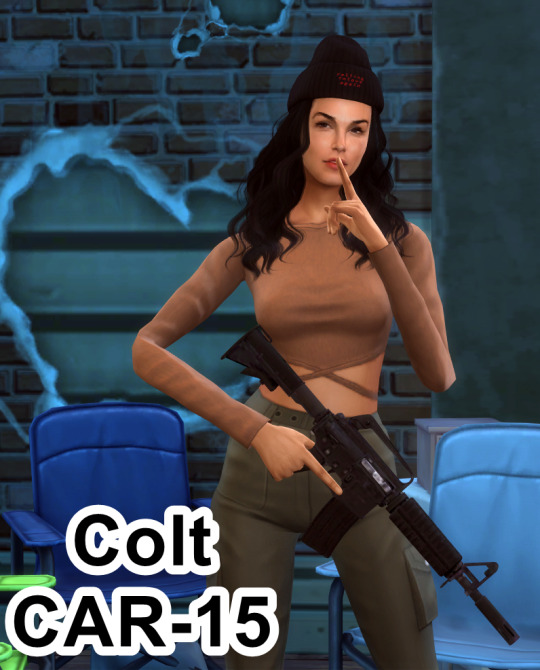
COLT CAR-15 (XM177E2 Model)
The First Of The Family The Colt CAR-15 was a family of compact, lightweight rifles and carbines developed in the 1960s as shortened versions of the M16/AR-15 platform. The name CAR-15 ("Colt Automatic Rifle-15") was originally an umbrella term for Colt’s modular rifle system, but it later became associated specifically with short-barreled carbines.
Key Features of XM177E2 ("Colt Commando")
Most famous CAR-15 carbines Variant, issued to MACV-SOG, Navy SEALs, and Green Berets in Vietnam.
11.5-inch barrel for better velocity and reliability.
Iconic Moderator (flash and sound suppressor) to reduce muzzle flash and noise.
Used extensively in close-quarters jungle warfare.
Legacy & Evolution
The CAR-15 series evolved into the M4 Carbine, which became the U.S. military's standard rifle.
Though retired, CAR-15 remain iconic for their role in Vietnam and special operations history.

Colt M733 ("Commando")
The Colt Model 733, commonly known as the Colt M733 Commando, is a compact carbine developed in the 1980s as part of the CAR-15 / M16 family. It was designed for special operations, law enforcement, and close-quarters combat (CQC). (Thank you for @r-jayden For the Pose!)
Key Features of the Colt M733:
Short Barrel (11.5 inches)
More compact than the M16A2 (20 inches) and M4 (14.5 inches).
Balances maneuverability and effective range.
Fixed Carry Handle & A2 Sights
Uses M16A2-style rear sights, improving long-range accuracy.
Full-Auto or 3-Round Burst
Available in safe-semi-burst (like the M16A2) or safe-semi-full auto (like the M16A3).
A1 Lower Receiver & A2 Upper Receiver
Mixed features from M16A1 (simpler controls) and M16A2 (better sights & barrel twist).
Flash Hider & Handguards
Uses an A2-style flash suppressor to reduce muzzle flash.
Short round handguards, unlike the triangular ones on early CAR-15 models.
Combat Use & Operators
Used by U.S. Special Forces, including Delta Force, Navy SEALs, and Army Rangers.
Deployed in conflicts like:
Operation Just Cause (Panama, 1989)
Gulf War (1991)
Somali Civil War (1993, Battle of Mogadishu)
Popular among law enforcement SWAT teams.
Legacy & Influence
The M733 inspired the M4 Carbine, which became the U.S. military’s standard service rifle.
Still used by law enforcement, private security, and some military units.
Its compact size, reliability, and firepower made it a favorite for close-quarters combat (CQC).

COLT M4A1 Carbine
The Colt M4A1 is a fully automatic, compact, and modular carbine developed as an improvement over the M4 Carbine. It has been the standard-issue rifle for U.S. Special Operations Forces (SOF) since the early 2000s, and it is widely used by military and law enforcement worldwide. (Thank you for @plazasims For Unique Costume!)
Key Features of the Colt M4A1
1. Barrel & Accuracy
14.5-inch barrel (shorter than the M16A4’s 20-inch barrel).
Heavy barrel profile (since 2015) for better durability and accuracy.
1:7 rifling twist, optimized for 5.56×45mm NATO M855A1 Enhanced Performance Rounds.
2. Full-Auto Fire Mode
Unlike the M4 (which has a 3-round burst mode), the M4A1 features full-auto capability.
This makes it preferred for special operations where rapid fire is needed.
3. Modular Rail System
Uses the Knight’s Armament RAS (Rail Adapter System) or Daniel Defense RIS II (used in SOPMOD Block upgrades).
Supports optics, grips, PEQ laser designators, suppressors, and grenade launchers (M203/M320).
4. Flat-Top Upper Receiver
Picatinny rail instead of a fixed carry handle, allowing ACOGs, EOTechs, Aimpoints, and NVGs.
The backup iron sights (BUIS) are removable.
5. Telescoping Stock
6-position collapsible stock, making it adjustable for different users and gear setups.
More maneuverable than the fixed stock of the M16A4.
Combat History & Use
The M4A1 has been the primary weapon of U.S. Special Operations Forces (SOF) since the Global War on Terror (GWOT), replacing the CAR-15, M16A2/A4, and early M4s. It has seen combat in:
Afghanistan War (2001–2021)
Iraq War (2003–2011)
Operation Neptune Spear (Bin Laden Raid, 2011)
Syrian Civil War (2014–Present)
Users:
U.S. Army Special Forces (Green Berets), Navy SEALs, Delta Force, Army Rangers, and Marine Raiders.
Standard issue for U.S. Army and Marines (replacing M16A4 in infantry units).
Used by NATO and allied forces worldwide.
Modernization & Future
The M4A1+ program introduced features like free-floating handguards and ambidextrous controls.
Being replaced in some roles by the Sig Sauer XM7 (NGSW Program), but still widely used.
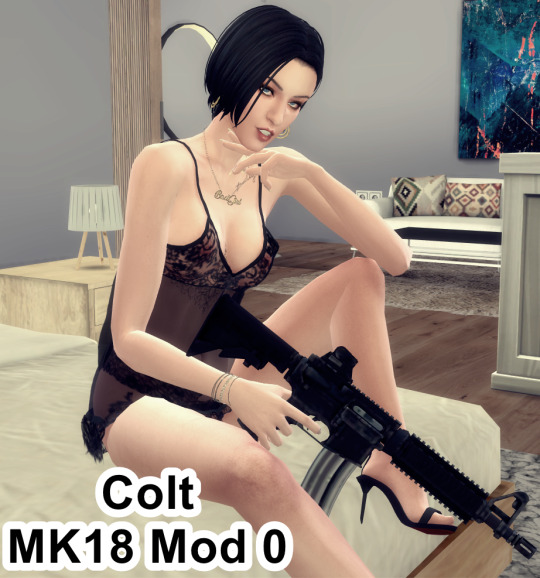
COLT MK18 MOD 0/M4 CQBR
The Colt Mk18 Mod 0 is a compact and highly modular 5.56×45mm NATO carbine, designed for close-quarters battle (CQB), special operations, and maritime missions. Developed as part of the U.S. Navy's SOPMOD program, it is essentially a short-barreled version of the M4A1, optimized for special forces, vehicle crews, and hostage rescue units.
Key Features of the Colt Mk18 Mod 0
1. Ultra-Compact 10.3-Inch Barrel
Shorter than the M4A1’s 14.5-inch barrel, making it ideal for CQB and vehicle operations.
Uses a heavy barrel profile for durability.
Often paired with a suppressor (e.g., Knights Armament NT4 or SureFire SOCOM556-RC) to reduce noise and flash.
2. Flat-Top Upper Receiver (Picatinny Rail)
Unlike earlier Colt carbines with fixed carry handles, the Mk18 Mod 0 has a flat-top rail, allowing optics like:
EOTech EXPS-3 / Aimpoint T2
ACOG TA31 (for mid-range engagements)
PEQ-15 / MAWL Lasers (for night ops with NVGs).
3. Rail Interface System (RIS)
Uses the Knights Armament RAS handguard for mounting:
Foregrips (TangoDown, BCM, Magpul)
Weapon lights (SureFire M600 Scout)
Suppressors and lasers (PEQ-15, DBAL, MAWL)
This early version (Mod 0) still used the KAC RAS, while later Mk18 Mod 1 versions switched to the Daniel Defense RIS II.
4. Full-Auto Fire Mode (Unlike M4)
The Mk18 Mod 0 is select-fire (safe/semi/full-auto), making it more effective in high-intensity CQB situations.
Later models were built with Colt’s M4A1 lower receiver, which shares the same fire control system.
5. SOPMOD Block 1 Compatibility
Issued with SOCOM’s Special Operations Peculiar MODification (SOPMOD) kit, including:
Suppressors (Knight’s Armament NT4, later SureFire SOCOM)
Optics (EOTechs, Aimpoints, ACOGs)
PEQ-15 / AN/PEQ-16 laser/IR systems
Enhanced stocks (LMT Crane SOPMOD Stock, B5 Systems, Magpul CTR)
Combat History & Operators
The Mk18 Mod 0 became the go-to CQB weapon for U.S. Special Forces, particularly Navy SEALs, Delta Force, Army Rangers, and Marine Raiders. It has been widely used in:
Iraq War (2003–2011)
Afghanistan War (2001–2021)
Operation Neptune Spear (Bin Laden Raid, 2011)
Syria & Anti-ISIS Operations (2014–Present)
Other users include:
FBI HRT (Hostage Rescue Team)
DEA FAST Teams
British SAS & SBS
Various European and Middle Eastern special forces
Legacy & Influence
The Mk18 Mod 0 set the standard for modern CQB rifles, inspiring later models like the Mk18 Mod 1 and civilian AR pistols (Colt 6933, Daniel Defense DDM4 PDW, BCM CQB-10).
Even as the U.S. shifts to the XM7 (Sig MCX Spear), the Mk18 remains a favorite in SOF circles due to its compact size, reliability, and versatility.
SPECIALIZED VARIANTS
This Part Will covered the Unconventional Layout Of AR-15 Rifle something that Slightly Deviated with Their Original Mainstream M16 Or M4 Guidelines.
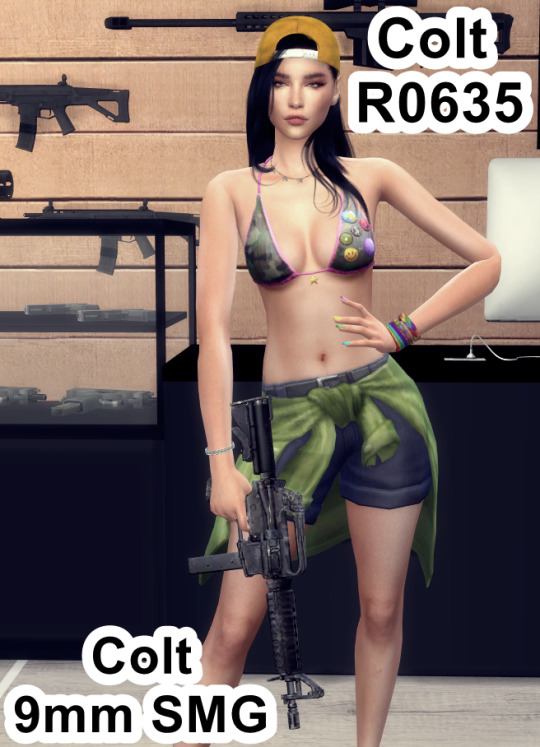
Colt 9mm SMG (Colt RO635)
The Colt 9mm SMG, also known as the Colt Model 635, is a submachine gun (SMG) chambered in 9×19mm Parabellum, designed as a pistol-caliber variant of the M16/AR-15 platform. It was developed in the 1980s for law enforcement, special forces, and security personnel who needed a compact, controllable firearm for close-quarters combat (CQC).
Key Features of the Colt 9mm SMG (Model 635)
1. 9mm Blowback Operation (No Gas System)
Unlike the M4/M16’s gas-operated system, the Colt 9mm SMG uses a simple blowback mechanism.
Lacks a gas tube, gas block, or forward assist, making it simpler and more reliable with 9mm ammo.
2. Shorter 10.5-Inch Barrel
More compact than the M16 (20 inches) or M4 (14.5 inches).
Perfect for CQB, SWAT, and VIP protection.
Often fitted with a threaded barrel for suppressors.
3. 32-Round Stick Magazine
Uses a curved 32-round magazine, similar in appearance to Uzi magazines, but modified for the AR platform.
Feeds from Colt’s proprietary SMG lower receiver, not interchangeable with standard AR-15/M4 lowers.
4. Fixed Carry Handle (A1-Style)
Standard M16A1-style upper receiver, with integrated iron sights and no Picatinny rail (early versions).
Some later versions feature flat-top Picatinny rails for optics.
5. Fire Selector: Safe-Semi-Full Auto (Model 635)
Model 635 (Standard SMG): Full-auto (Safe/Semi/Auto)
Later law enforcement models (RO995, RO699, etc.) have semi-auto configurations.
Combat Use & Operators
Though not widely adopted by the military, the Colt 9mm SMG became popular among:
FBI SWAT & HRT (Hostage Rescue Team)
DEA, ATF, and Secret Service
U.S. Navy SEALs (limited use in the 1980s–1990s before transitioning to MP5s & HK416s)
Foreign law enforcement agencies (e.g., Colombia, Mexico, Middle Eastern special units)

Colt CM901 (Colt Modular Carbine 901)
The Colt CM901 (Colt Modular Carbine 901) is a multi-caliber, modular battle rifle, designed to bridge the gap between 5.56×45mm NATO (M4/M16) and 7.62×51mm NATO (.308 Winchester) rifles. Developed by Colt Defense, it was unveiled in 2010 as a highly adaptable AR-platform weapon for special forces, designated marksmen, and infantry roles.
Key Features of the Colt CM901
1. Multi-Caliber Compatibility (7.62 NATO & 5.56 NATO)
Primary caliber: 7.62×51mm NATO (battle rifle performance, extended range).
Can quickly convert to 5.56×45mm NATO by swapping the upper receiver and using a magazine adapter.
Compatible with standard AR-15/M4 uppers, making it one of the most versatile battle rifles on the market.
2. Monolithic Upper Receiver
The CM901 features a one-piece, free-floating monolithic upper receiver, improving:
Accuracy (more rigid than two-piece designs).
Optic mounting (full-length Picatinny rail).
Accessory attachment (foregrips, lasers, bipods).
Provides a seamless rail system similar to the LMT MWS and KAC SR-25.
3. Shorter 16-Inch Barrel (Battle Rifle in a Carbine Package)
Compact for a 7.62 NATO rifle, giving it more maneuverability than traditional battle rifles like the M14 or SCAR-H.
Available in various barrel lengths (13”, 16”, and 20”) for different mission needs.
4. Ambidextrous Controls
Features ambidextrous safety selector, magazine release, and bolt catch, making it ideal for left-handed shooters.
A big improvement over standard AR-10 platforms, which typically lack full ambidextrous controls.
5. Battle-Proven Reliability
Uses a reinforced lower receiver to handle the power of 7.62 NATO rounds, while still functioning smoothly with 5.56 NATO conversions.
Built to military durability standards, making it rugged and reliable for combat use.
Why the CM901 Didn't Fully Replace the M4/M16
Heavier than standard M4 carbines (even with a 5.56 upper).
7.62 NATO recoil & ammo weight limit its role in CQB settings.
SCAR-H and HK417 were preferred for SOF battle rifle roles.
Military demand for a dedicated 7.62 platform (SR-25, M110) outweighed the need for a modular hybrid.
#the sims 4#the sims 4 custom content#ts4#ts4 cc#the sims 4 military#the sims 4 cc#ts4cc#sims 4#the sims 4 gun#ts4 gun#life is strange#life is strange rachel#life is strange chloe#chloe price life is strange#life is strange max#ts4 military#ts4 download#ts4 cas#m16#m16a2#m16a1#colt#ts4 screenshots#ts4 custom content#the sims cc#american#assault rifle#the sims 4 weapon
20 notes
·
View notes
Note
Have you got any opinions about the forced reset triggers/super safety devices? I’ve been looking into them, especially one by Atrius that basically a super safety with a traditional AR selector.
fun factor: 10/10 honestly so fun. just like a full auto.
practicality: 6/10 it's the same use as a full auto. high ROF suppression is great if you have a team. Precise suppression is better as a single fighter. if you have a team, someone with an ARPK/Civilian IAR and all the mags is a great. otherwise it's just a way to burn through all your combat load.
I think a binary is better for individual high ROF fire, because it's a doubletap generator. but I will say- the FRT is easier to shoot than a binary.
5 notes
·
View notes
Text
Devlog #1
Ok, I've been working super hard on my game this week, and I have something to show off. Generally, I did not want to start doing Devlogs until I had what I considered a working prototype, and that's what this is. I think I'm at the point where a lot of basic things work, and I will be able to focus on building it out, which will make for more interesting regular updates.
So, what we're seeing in this clip is:
SPLASH SCREEN - just a test of animation and the flow of booting up the game, it will not be in there for long, I just threw random assets in.
SAVING & LOADING - The title screen is plain, the "Settings" option doesn't do anything yet, but the "New Game" and "Load Game" do! They currently go off of one filepath and save games are stored as JSON so I can edit them easily for testing, and they don't yet prompt "are you sure?", they just do it, and the functions work. I can save my game and all the party and player stats and values load in properly. [Not shown: there is a save button in the Pause menu, but that menu is very basic]
BATTLE UI - All is placeholder, and ugly, but I focused down on getting it to work. That means, while I was throwing buttons in there for testing early on, I spent major time reworking menus to work with controller instead. I may do KB&M support later, once the UIs are actually fully designed, but doing them in parallel while I'm changing things would not be nice. We can attack, you don't have to click "Confirm" anymore, just a controller button, we have spells/skill and items which can target either enemies or allies, and both single-target an multitarget skills exist and flash up corresponding selector arrows, after which you can confirm your target. Party members have an HP/MP display and the character whose turn it is will be highlighted on their turn
MESSAGE OVERLAY - As you can see, I've worked out the system to have messages give the player feedback in-battle which can also be used for dialogue out-of-battle. It works off of a queue containing both messages that auto-play and messages that you have to confirm before moving on, so I can mix-and-match as appropriate. I wanted to have this in place so I can soon implement NPCs and shops, and the battles make sense to both me and the player as I add more features to it.
When we load into this test dungeon, we see the old sprite for a demon, I redrew them, as you can see in the first random encounter. None of this is final though, these were also pretty quick I just wanted to discard the really lazy MS Paint-looking sprites If I'm going to be showing the game off more, I want it to be in a better light. I'm not even sure Demons and Bats will be common enemy types in the game, it's just for testing. Nothing that you're seeing is final, or even really fits the vibe in my, mind yet, but it's approaching something that looks like it has the potential to be a game.
After all all of this I haven't added any new enemy types, items, or skills yet, the assets aren't anywhere near what they will be like, no levels have been created yet, but I think what I have is a lot of the "structure" of a basic RPG. I ate my vegetables, the boring parts are functional, and it opens up a lot of doors for what I can develop next.
NEXT GOALS -
NPCs in the overworld (+Shops, need to have a way to acquire items, currently the inventory is hardcoded into a New Game)
Implement a method to recruit and dismiss new Party Members, they are also currently hardcoded for testing purposes
There are still lingering menu navigation bugs, but nothing that can't be fixed relatively quickly
Move the starting area to a safe-zone that can be built out as the main hub and create multiple dungeon rooms with different testing conditions
More visual feedback. Having enemies flash on taking damage and displaying damage numbers would be a good start, more complex animations can come later, including spell animations.
#slugdragoondevlog#slugdragoongame#gamedev#solodev#indiedev#rpg#drpg#game development#indiegamedev#indie games
21 notes
·
View notes
Text
Whew, back from a work trip and took a day off to catch up on my gachas lol (and also sleep). So, a recap.
Genshin main: Not much going on here. I've reached 280 wishes, so I should have 300 by 5.3. That's roughly what I was aiming for to feel confident about getting the three characters I want before Snezhnaya: Arlecchino, Xianyun, and Childe C4. Arlecchino is supposed to rerun in 5.3, so it'll be great to finally get rid of my pity (50 into a guarantee).
I'm almost hoping they'll put Xianyun on some special Lantern Rite banner just so that I can get that out of the way, but they'll probably save her for when they release Madame Ping as our yearly Liyue 5 star (whom I will skip because she'll use Natlan materials, and I'm refusing to enter there on my main because reasons). Aside from that, I guess I'll get Yaoyao C2 from the selector. What else is there?
Mostly, I'm just waiting for Snezhnaya. I wonder what weird gimmick they'll come with up for its characters.
Genshin alt: An hour before heading to the airport, I got Newville Neuvillete C2. Finally cleared the high guarantee on this account. I had to skip Ororon because of that (tried a ten pull, didn't get him, didn't dare to keep going), and it's looking like Ifa will also be a 4 star. And that'll be the two mandated tall men of Natlan. I have 250 wishes saved now, and if we assume only two more men in Snezhnaya (which I'm assuming, given the trend toward more waifus in Natlan), then by end of 6.x, I might actually catch up on all tall men in Genshin. Nice.
Incidentally, the Natlan leaks are currently forecasting like this: 5.3 is Lantern Rite, the last Natlan AQ act, banners Mavuika/Clorinde and Arlecchino/Citlali. 5.4 seems like it'll be a low key patch with an Inazuma 5 star ("Mizuki") who is going into Standard, currently said to be Anemo. It should also be the Venti rerun, and I think if we're getting the supposed Dragonspine/Wanderer event, it would probably be here? 5.5 will probably be the last Natlan clan, with "Varesa" as the 5 star and Iansan as the 4 star. And then Ifa should be after that, as well as a 5 star who is not from Natlan (I assume Madame Ping). That'll leave 5.7-5.8 as big unknowns.
Wuwa: I got Stringmaster for Encore, though I ran out of credits, so it's still level 88 for now, haha. Fortunately, this is the last 5 star weapon I wanted to get, so I'm done pulling until Brant. I also managed to finish almost everything in Illusive Realm, just need a couple more runs to max out the bonus tree and clear out the last parts of the shop. Now, I'm just farming mats to max out everyone's skills, but actually doing so is gated by weekly boss drops anyway. Basically just in the Rinascita waiting room. 2.0 banners will be a skip, but there will be new map, hopefully Baizhi S3 in the shop, and also Sanhua skin.
HSR: Since my pulls panned out, I'm just farming trace mats. Once I hit 55 world level, I'll go back to relics (urgh). Not really much going on, though once the second half banners start, I'll fish for Gallagher and farm his stuff, since it should be on early access for Firefly. I did try doing the higher threshold levels in Unknowable Domain (total fail) and DU (passed threshold 2, failed 3). Eh...
tbh HSR is kinda... I dunno about it. It's quite a hassle to play and there doesn't seem to be much going on most of the time. Fortunately, I can finally auto-play at least some of the grinding, but... not sure how much I'll keep playing in the long term.
3 notes
·
View notes
Text
"i remember moments of happiness; endless summer, acoustic guitars" - SRXT, bloc party
hello again!
today we're gonna talk about my guitars for the new ep! buckle up, this is gonna be a long one.
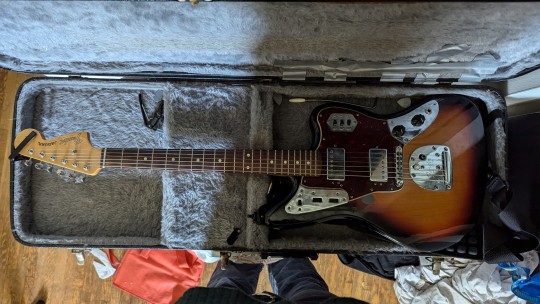
first off, i've done a about half of this ep on my stock fender classic player jaguar special hh. it's a 24" scale and it's actually tuned b to b and it sounds SO good. like. it's kind of unreal how well it holds a baritone tuning. generally, i have the neck pickup rolled off to coil split (i generally don't love a neck humbucker, honestly) and the bridge is whatever it needs to be, song by song. i don't really use the tremolo arm ever unless i'm just messing around - i try to put this thing out of tune as little as possible during a show. this guitar can do ANYTHING. it's so tonally versatile it's fucking stupid, truly. i am a lucky girl to own this.
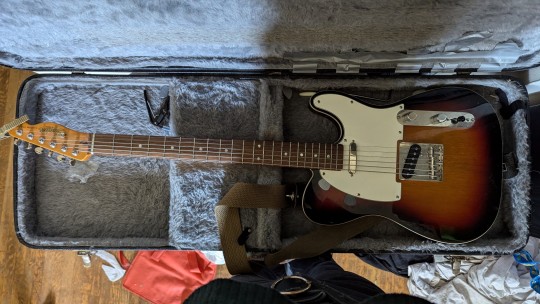
next up is the other half: my squier classic vibe baritone custom telecaster! this is also tuned b to b, but it's got a 27" scale, so it's got a much more traditional baritone sound. i have always always ALWAYS loved the versatility of a telecaster and when they put out an affordable baritone version, it was an absolute no-brainer for me. i love the range and the tonal differences that a baritone brings to indie music - thrice is one of my favourite bands of all time, and their use of baritones (and their gear in general [duh, for those in the know]) REALLY inspired me. i've been using this on a lot of the really wet stuff and the really clean stuff, but also just for some stereo guitars to lean into some tonal differences or just because it flat out feels right. i love this thing, too. it really is so flexible and fun to play (and it weighs NOTHING, which is kind of unique for a tele lol). i've replaced the output jack and jack plate and i've flipped the control panel because i'm notorious for punching my pickup selector while playing.
both guitars are strung with d'addario medium baritone strings (.14-.68).

finally, for amps and pedals... well. the future is here and i, for one, welcome our modeller overlords.
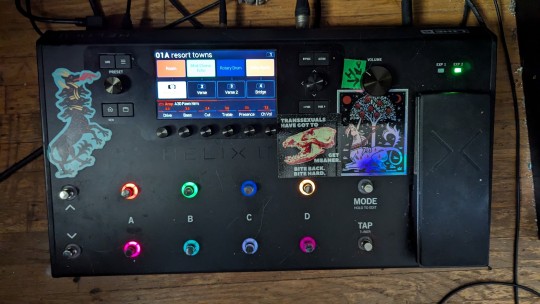
this is gonna seem like a lie based on what you're looking at here, but i'm really pretty simple with my setups - i am a set it and forget it kind of woman.
for rhythm parts, i am using a fawn vox ac30 (blue alnico) and a fender deluxe reverb (oxford) in tandem, generally being pushed by an earthquaker pillars and an xotic ep booster (bruises uses a klon, just depends on the kind of push i need). little bit of compression with the xotic sp compressor, then, as necessary for wetter parts: line 6 echo park, line 6 space chorus, a boss ce-1, a boss ac-2 and a fender vibratone (lol). in terms of helix-only effects, i'm using the line 6 heliosphere delay and hot springs reverb.
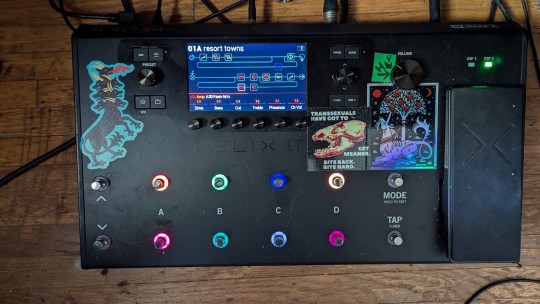
for LEADS however, we're all over the place. all kinds of shit. i generally run a higher gain amp, like a bogner shiva (uberkab t75) or a marshall jcm-800 (jensen p12q [grammatico amp]/marshall basketweave g12 m25). I was actually really pleased with how good the shiva is for lead work in our sad queer indie rock songs - this is an amp that like alice and chains and korn use and it really adds the right amount of twinkle and beautiful bummer to our songs about autism and queerness and millennial disillusionment and i just think that's such a funny juxtaposition. anyways.
for taurus, i'm using the bogner and running the xotic ep booster again, way huge red llama, dunlop mxr timmy, mxr phase 90, and auto-volume echo from the line 6 dl4. simple stuff.
for re-run, i'm using the jcm-800 and pushing it with a tube screamer when it gets huge. boss tr-2, boss dm-2 with adrian mod, tc electronic 2290, tape eater from the line 6 mm4, simple tube comp, and the line 6 feedbacker. i also have a looper set up so I can include some post-rock tremolo picked yumminess without it taking up all my focus. this is definitely my most complex rig in the helix, but even still - not too wild. like i said. set it and forget it.
so yeah! that's pretty much it for my guitars this time around. i'm gonna guess that we'll do mj's guitars next but who knows! life is a mystery and it is for living! see y'all soon.
~ elizabeth
#transgender#indie rock#trans artist#trans music#vancouver music#wearehouseguest#houseguest#houseguestband#alt rock#post rock#studio diary#updates#emo#pacific northwest emo#post hardcore#post punk#punk rock
3 notes
·
View notes
Text
CSS One-Liners to Improve (Almost) Every Project
CSS One-Liners to Improve (Almost) Every Project
#css#webdev#listicle
Most of these one-liners will be one declaration inside the CSS rule. In some cases, the selector will be more than just a simple element; in others, I will add extra declarations as recommendations for a better experience, thus making them more than a one-liner —my apologies in advance for those cases.
Some of these one-liners are more of a personal choice and won't apply to all websites (not everyone uses tables or forms). I will briefly describe each of them, what they do (with sample images), and why I like using them. Notice that the sample images may build on top of previous examples.
Here's a summary of what the one-liners do:
Limit the content width within the viewport
Increase the body text size
Increase the line between rows of text
Limit the width of images
Limit the width of text within the content
Wrap headings in a more balanced way
Form control colors to match page styles
Easy-to-follow table rows
Spacing in table cells and headings
Reduce animations and movement
Limit the content width in the viewport
body { max-width: clamp(320px, 90%, 1000px); /* additional recommendation */ margin: auto; }
Adding this one-liner will reduce the content size to occupy 90% of the viewport, limiting its width between 320 and 1000 pixels (feel free to update the minimum and maximum values).
This change will automatically make your content look much nicer. It will no longer be a vast text block but something that looks more structured and organized. And if you also add margin: auto; to the body, the content will be centered on the page. Two lines of code make the content look so much better.
Aligned and contained text looks better than a giant wall of text
Increase the text size
body { font-size: 1.25rem; }
Let's face reality: browsers' default 16px font size is small. Although that may be a personal opinion based on me getting old 😅
One quick solution is to increase the font size in the body. Thanks to the cascade and em units browsers use, all the text on a web page will automatically increase.
Larger text size makes things easier to read.
Increase the space among lines
body { line-height: 1.5; }
Another preference for improving readability and breaking the dreaded wall of text is increasing the space between lines in paragraphs and content. We can easily do it with the line-height property.
Spaces between lines break the wall of text and the rivers of white.
This choice (with the previous two) will considerably increase our page's vertical size, but I assure you the text will be more readable and friendlier for all users.
Limit the size of images
img { max-width: 100%; }
Images should be approximately the size of the space they will occupy, but sometimes, we end up with really long pictures that cause the content to shift and create horizontal scrolling.
One way to avoid this is by setting a maximum width of 100%. While this is not a fool-proof solution (margins and paddings may impact the width), it will work in most cases.
Prevent horizontal scrolling and make images flow better with the text
Limit the width of text within the content
p { max-width: 65ch; }
Another tactic to avoid the dreaded wall of text and rivers of space is to apply this style even in conjunction with the max width in the body. It may look unnecessary and sometimes weird, as paragraphs will be narrower than other elements. But I like the contrast and the shorter lines.
A value of 60ch or 65ch has worked for me in the past, but you can use a different value and adjust the max width to match your needs. Play and explore how it looks on your web page.
Break the bigger chunks of text into smaller blocks for readability
Wrap headings in a more balanced way
h1, h2, h3, h4, h5, h6 { text-wrap: balance; }
Headings are an essential part of the web structure, but due to their larger size and short(-er) content, they may look weird. Especially when they occupy more than one line. A solution that will help is balancing the headings with text-wrap.
Although balance seems to be the most popular value for text-wrap, it is not the only one. We could also use pretty, which moves an extra word to the last row if needed instead of balancing all the content. Unfortunately, pretty has yet to count on broad support.
Balanced wrapping can improve visibility and readability
Form control colors to match page styles
body { accent-color: #080; /* use your favorite color */ }
Another small change that does not have a significant impact but that makes things look better. Until recently, we could not style native form controls with CSS and were stuck with the browser display. But things have changed.
Developing a whole component can be a pain, but setting a color that is more similar to the rest of the site and the design system is possible and straightforward with this one-liner.
It's the small details (and colors) that bring the page together
Easy-to-follow table rows
:is(tbody, table) > tr:nth-child(odd) { background: #0001; /* or #fff1 for dark themes */ }
We must use tables to display data, not for layout. But tables are ugly by default, and we don't want data to look ugly. In particular, one thing that helps organize the data and make it more readable is having a zebra table with alternating dark/light rows.
The one-liner displayed above makes achieving that style easy. It can be simplified to be only tr without considering the tbody or table parent, but it would also apply to the table header, which we may not want. It's a matter of taste.
Easier to follow the data horizontally (by row)
Spacing in table cells and headings
td, th { padding: 0.5em; /* or 0.5em 1em... or any value different from 0 */ }
One last change to make tables more accessible and easier to read is to space the content slightly by adding padding to the table cells and headers. By default, most browsers don't have any padding, and the text of different cells touches, making it confusing to differentiate where one begins and the other ends.
We can change the padding value to adjust it to our favorite size. However, avoid overdoing it to avoid unnecessary scrolling or too much blank space.
Easier to follow data horizontally and vertically
Reduce animations and movement
@media (prefers-reduced-motion) { *, *::before, *::after { animation-duration: 0s !important; /* additional recommendation */ transition: none !important; scroll-behavior: auto !important; } }
Okay, okay. This code is way more than a one-liner. It has a one-liner version (removing animations by setting their duration to zero seconds), but other things on a web page make elements move.
By setting these declarations inside the prefers-reduced-motion media query, we will respect the person's choice to have less movement. This approach is somewhat radical because it removes all movement, which may not necessarily be the user's intent -it is "reduced motion" and not "no motion." We can still preserve movement on a case-by-case basis if appropriate.
No animations? No problem!
2 notes
·
View notes
Text
DaVinci Resolve subtitle editing is magic
I recently switched my video editor to DaVinci Resolve free and I'm slowly learning how things work. Today I discovered that they handle subtitles the way I've been fantasizing about.
Subtitles are put on a subtitle track like the video and audio tracks. You can move the start or end of a specific subtitle and they'll snap to the current frame marker. This beans you can hear and see where the exact right frame it and easily start a new subtitle or adjust the end to there. It's actually easier and has more control than YouTube, and certainly more than the editor I was using that kept the subtitle editor very separate.
You can load or save to an SRT file and it will fill everything in on the timings. You can also slice, copy, and paste sections of subtitle crack along with the other tracks. This means all the timings will be adjusted for you at a simple drag and drop. This is so revolutionary.
So for Critical Role clips I can take the video, save or extract the SRT, and then add the video and subtitle to the same track. Now I can make cuts in the video and I'll be able to see the subtitles for it right there. My current plan is to make cuts and copy them to tracks for each scene. That should make it really easy to keep everything lined up.
My disabilities make me really struggle with captioning and doing timings, and it's been a big barrier to me making clips. This is exactly the system I needed to overcome those barriers. You can also merge clips and that works with subtitles.
If Auto Track Selector is on (on by default; it's the [<>] icon under the subtitle track title), then the Last/Next edit buttons will treat each subtitle as an edit mark. Which messes you up if you're trying to find the video edits. But if you turn that off it will ignore the subtitles. But when it is on you can find the existing perfect cut instead of looking for it yourself. So I think I'll be using this on and off as the work suits me.
If you select the Track you can change the style and position for captions. You can also set these for each caption if you need a change for some reason.
To export the subtitles, right click the track and select Export Subtitle... This defaults to SRT, and also has an option for SRT without formatting, which is what you want for YouTube (Subtitle Files Without Formatting).
If you buy DaVinci Resolve it has an auto-captioner, but I can't speak to how useful it is.
Even with my limitations, DaVinci Resolve's setup makes it easy to add or edit captions. It's a game changer for editing videos with existing subtitle files and makes it virtually as easy to modify the subtitles as the video.
11 notes
·
View notes
Text
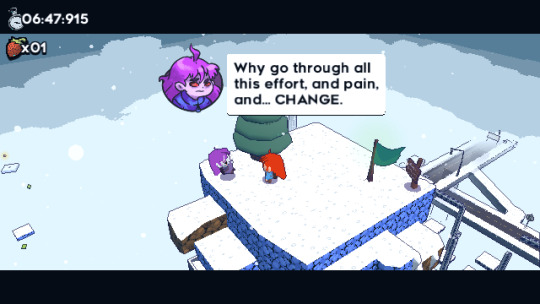
Me he pasado Celeste 64

Celeste 64 es una secuela corta y gratuita del conocido juego Celeste, esta vez en un 3D basado en la antigua Nintendo 64, y es que su gameplay se basa bastante en plataformas de esa época, convirtiendo el plataformeo lineal de Celeste en un collectathon en 3D adaptando las mecánicas de su antecesor al 3D de manera magistral.

Basándose en Super Mario 64 y usando elementos del juego anterior en este mapa que el juego trae tendremos que recoger las fresas como si de las estrellas de Mario se tratase, aunque ese no es nuestro objetivo al final del día...

Madeline en este caso ha venido a la montaña Celeste buscando a su contraparte Badeline para poder hablar con ella de "un paso importante que tienen que dar para ser felices y que les da miedo". Si, hablan de algún punto de su transición de género, pero hablaremos de esto más adelante. El caso con esto es que el "final" del juego será cuanto encontremos a Badeline y hablemos con ella, quien tiene al lado una señal que nos indica el "final" del juego... Pero para esto no requerimos de ninguna fresa, ¿que no era un collectathon?

Aquí viene la chicha del juego, el mapa es grande y contiene 30 fresas. Muchas a simple vista, otras escondidas, pero está en nuestra mano si conseguirlas o no, yo las encontré todas... Algunas incluso están en las cintas, que en este juego nos transportan a un mini nivel con un reto plataformero super jodido pero muy gratificante cuando consigues pasarlos.

Voy a hablar de uno de los elefantes en la habitación: esto parece una demo más que un juego. Desde el hecho de que algunos controles no se sienten del todo finos (hay veces que el salto parece procedural), el hecho de que esto tiene muchas mecánicas en un solo nivel como si fuese una prueba técnica o un nivel tutorial y el hecho de que hay un selector de niveles cuando solo hay un nivel... ¿Para que me pones ese selector de niveles si solo hay uno?

Si esto es una demo encubierta, que ojalá, me veréis a mi dándole el dinero que necesite a esta gente para sacar esto adelante, incluso con los controles no tan pulidos esto ha sido la hostia y le he echado dos horas y media de mi vida de las cuales no me arrepiento ni un ápice.
Se viene chapa y spoilers, por si queréis no leer a partir de aquí, la review está hecha.

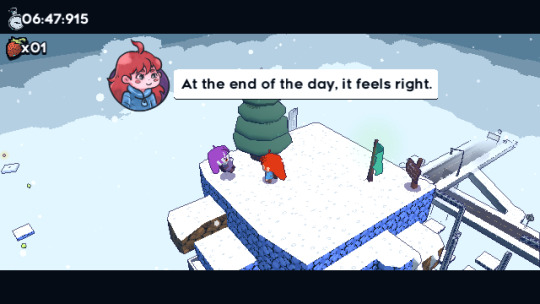
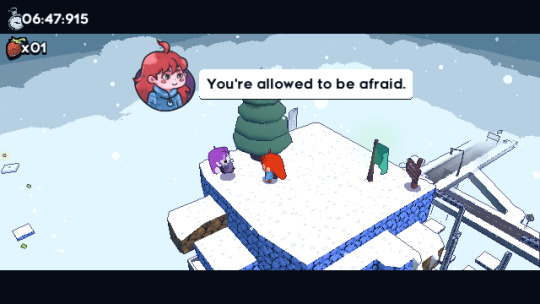
Ahora vengo a hablar de algo más personal, como persona trans recién salida del armario y empezando a afrontar temas como el tratamiento hormonal y demás... Este diálogo me ha calado hondo, esto lo he vivido yo. Me da pánico y terror todo lo que conlleva la transición y al mismo tiempo estoy ansiosa por hacerlo... En mi también hay una Madeline y una Badeline discutiendo cada día, preguntando continuamente: ¿Valdrá la pena? ¿Y si me estoy auto engañando? ¿Y si me convierto en un problema para todos por esto?


Pero no he parado, no me he rendido, estoy empezando a perder peso en serio para poder hacer las cosas bien, por que me siento mejor conmigo misma y por que cada vez que pienso en tener un cuerpo femenino se siente correcto... Como si siempre debería haber sido así.


Cuando pienso en si me estoy engañando a mi misma pienso en mi pasado, en como siempre ha estado ahí, el como sin darme cuenta siempre he tenido este sentimiento, solo que no he sido capaz de dar ese paso... Siempre he sido una mujer, pero nunca he sido capaz de aceptarlo.


Ahora tengo apoyo, tengo información y, lo más importante, tengo convicción sobre este paso. ¿Me aterra? Mucho ¿Pienso en rendirme muchas veces? Muchísimas, pero aquí sigo. Este juego ha plasmado literalmente todos estos pensamientos en un diálogo, haciendo que no me sienta sola en esto... Es igual a cuando hablo con alguna amiga trans, leo algún foro o escucho algún podcast de alguna persona trans, Han vuelto a reflejar todo esto en un juego, por pequeño que sea, por mucho que para ver este diálogo puedas tardar 6 minutos o incluso menos... Puede parecer una tontería pero he llegado a soltar una lágrima ante esto.
PD: las imágenes de la conver están pilladas de una partida en mi PC por que la Steam Deck ha hecho algo raro con mis capturas, he tenido potra de tener las de cuando he pillado la última fresa y del menú y tal al 100%, mirad esta captura para que veáis que digo.

En conclusión, jugad esto, no solo es divertido y muy bueno si no que igual si lo juga la suficiente gente lo sacan como juego completo y yo no podría estar más feliz.
3 notes
·
View notes
Text
Camera Showcase
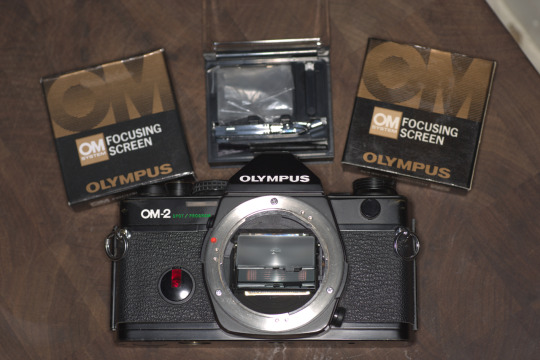
Olympus OM2 Spot Program
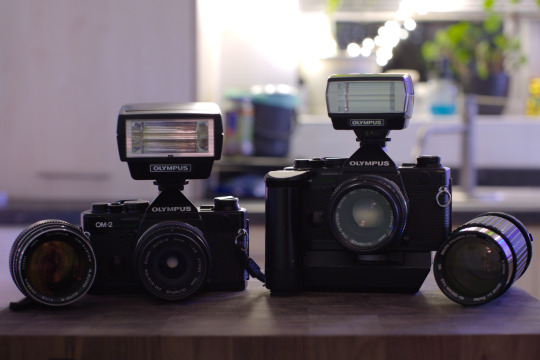
Pictured: Olympus OM2 Spot Programs with all owned OM specific lenses, flash units and motor winder
In the OM series of cameras, double digits such as the OM10 were consumer grade, whereas single digits were professional grade. First manufactured in 1984, the OM2 Spot Program (OM2S in the US) was a thorough overhaul of the OM2 to make it more competitive, meaning it's internals have more in common with the OM4 than it's predecessor.
Personally speaking, this is the most feature-rich, reliable 35mm film camera I have owned, making it my go-to workhorse for 35mm work. It’s compact design was very well-thought out and lightweight compared to other cameras before it.
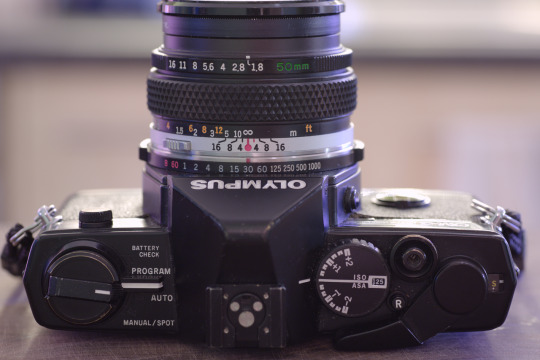
Pictured: Top view of the OM2 Spot Program highlighting camera controls
One of the really well-thought out designs of this camera is how the shutter speed, aperture and depth of field preview controls are all in the same area on or next to the lens, meaning with one hand you can set all the main exposure controls without looking away from the viewfinder. Instead of a shutter speed selector on top, it’s a combined ISO speed/exposure compensation dial.
The OM2 Spot Program has 3 shooting modes: Program, Auto and Manual/Spot. In Program, the lens is set to the highest/tightest aperture and the camera will set both the aperture and shutter speed according to the light levels. In Auto, the camera shoots in an aperture priority mode where the user sets the aperture and the camera deals with the rest. In both Program and Auto modes, the camera meters centre weighted but in the full manual mode the camera switches to spot metering. This is an extremely useful feature when shooting high contrast images and with light sources behind the subject matter.
Another great thing versus it's predecessors is that it has a mechanical 1/60th shutter speed option, meaning if the batteries are depleted mid-shoot there's still a way to take photos depending on light levels.

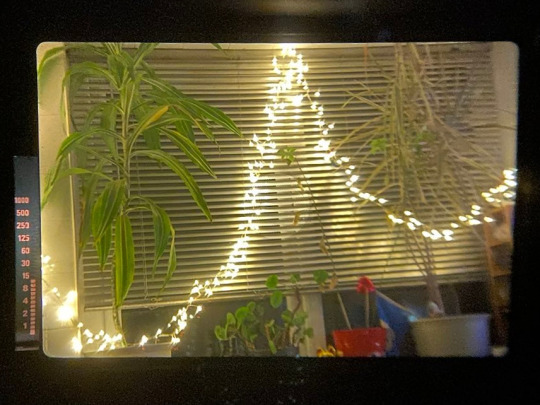
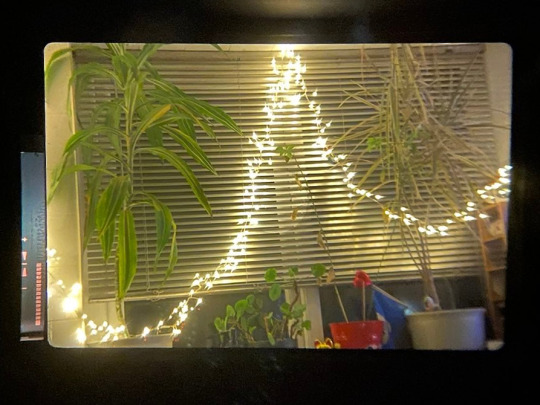
Pictured: 3 shots through the viewfinder showing the current focus screen's split centre and microprism centre, the Program/Auto mode metering and the Spot/Manual's digital match needle meter
The viewfinder's light meter is a LCD style display which can be illuminated for 90 seconds for better viewing in low light scenes. In Manual/Spot mode it switches from a bar depicting the shutter speed to a match needle style display. The viewfinder itself (dependant on chosen focus screen) is very clear and bright making composition a lot easier.
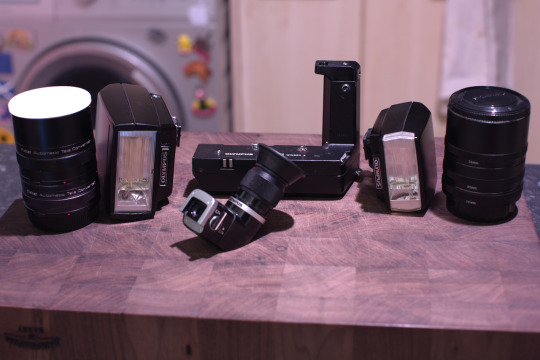
Pictured: A selection of various attachments for the OM series of cameras. teleconverters, extension tubes, right-angle viewfinder, motor winder and flash units
The OM series of cameras have a wide range of accessories to further extend the capabilities of this camera. The motor winder allows for shooting up to 3.5 frames a second in continuous mode. The right angle viewfinder is especially useful when shooting at awkward angles or with telephoto lenses on a tripod, and has a toggle switch to add a 2.5x magnification to it for really dialling in the focus. I have a T20 and T32 flash for my cameras, and although the more lightweight and smaller T20 is more portable and uses half the amount of batteries, I prefer the T32 as it allows for bounce flash photography. Both flash units have 3 modes: TTL camera auto, flash unit auto and full manual. I have only really used the TTL camera auto mode but with the lens set to f4 I haven't had any photos with blown out highlights or muddy shadows.
Pictured: three different focus screens and an OM2 Spot Program with no lens and the current focus screen unclipped from the camera
A great thing about the OM2 Spot Program and other single digit OM cameras is the ability to fairly easily switch focus screens. Different lenses and scenarios work better with different screens and the ability to change really increases the versatility of the camera. For example, for general use I tend to use a split centre with microprism focus screen to give me 3 ways to focus, but with a telephoto (especially with teleconverters) the split centre goes black due to the low light levels. At that point, I have the option to switch to a microprism only or ground glass screen to make it easier to focus.
All in all, a fantastic camera with a solid design, accurate light meter and a wide selection of lenses and attachments which if in good condition will be a fantastic addition to any vintage camera collection.
#photography#film photography#ishootfilm#analog photography#filmisnotdead#vintage cameras#camera review#35mm film#35mm format#reviews#retro camera#olympus camera#olympus om2sp#olympuscamera#35mm camera#analog camera#old camera#camera#om2sp
3 notes
·
View notes
Note
How do I make a tag/title/author or any link I click on remain the same color as if I haven't clicked on it? My OCD is going crazy over this, thank you in advance :DD
Btw: I'm using this skin, love it so much as someone who is light sensitive :))
hello! I found that removing all instances of the :visited css selector in your skin to work for this! edited skin below
#outer .region, #footer .group, .post fieldset fieldset, fieldset fieldset { background: none; }
body, .group, .group .group, .region, .flash, fieldset, fieldset fieldset ul, form dl, textarea, #main .verbose legend, .verbose fieldset, .notice, ul.notes, input, textarea, table, th, td:hover, tr:hover, .symbol .question:hover, #modal, .ui-sortable li, .required .autocomplete, .autocomplete .notice, .system .intro, .comment_error, .kudos_error, div.dynamic, .dynamic form, #ui-datepicker-div, .ui-datepicker table { background: #131517; color: #eee; border-color: #131517; outline: #111; box-shadow: none; }
form .notice, form ul.notes { box-shadow: none; }
#workskin { font-size: 1.2em; margin: auto; padding: 0 0.25em; max-width: 60em; overflow-x: auto; overflow-y: hidden; position: relative; }
.actions a, .actions a:link, .action, .action:link, .actions input, input[type="submit"], button, .current, .actions label { border-radius: 0; }
#header ul.primary, #outer #footer, .toggled form { background: #131517; }
#header .primary { background: none; padding: 10px 0; width: 100%; box-shadow: none; }
fieldset, form dl, fieldset dl dl, fieldset fieldset fieldset, fieldset fieldset dl dl, dd.hideme, form blockquote.userstuff { background: #1a1c1e !important; }
.user.navigation.actions>li { margin-top: 0.3em!important; }
#header .menu, #small_login { border:1px solid #1f2126; box-shadow: none; padding: 0 }
.tags.group, .more.group { margin-top: 0.6em; }
#header .actions a:hover, #header .actions a:focus, #header .dropdown:hover a, #header .open a, #header .menu, #small_login, .group.listbox, fieldset fieldset.listbox, form blockquote.userstuff, input:focus, textarea:focus, li.relationships a, .group.listbox .index, .dashboard fieldset fieldset.listbox .index, #dashboard a:hover, th, #dashboard .secondary, .secondary, .thread .even, .system .tweet_list li, .ui-datepicker tr:hover { background: #131517; }
.userstuff p { text-align: justify; margin: 1.286em auto; padding: 0; line-height: 1.5; }
.tags.commas { margin: 1.5em auto; }
.tweets { display: none; }
#header .dropdown .menu a:hover, #header .dropdown .menu a:focus, .splash .favorite li:nth-of-type(odd) a, .ui-datepicker td:hover, #tos_prompt .heading, #tos_prompt [disabled] { background: #22262a; }
#outer, .javascript, .statistics .index li:nth-of-type(even), #tos_prompt, .announcement input[type="submit"] { background: #131517; }
.filters .submit input { border: 1px solid #131517; background-color: #131517; height: 110%; margin: 1em 0; min-height: 2.286em; padding-left: 0; padding-right: 0; text-align: center; white-space: normal; }
#header ul.primary, #footer, #dashboard ul, dl.meta, .group.listbox, fieldset fieldset.listbox, #main li.blurb, form blockquote.userstuff, div.comment, li.comment, .toggled form, form dl dt, form.single fieldset, #inner .module .heading, .bookmark .status span, .splash .news li, .filters .group dt.bookmarker { border-color: #1a1c1e; background: #1a1c1e; }
.news, .readings { display: none; }
.work.navigation.actions { width: 100%; }
dl.meta { border: none; }
.splash .news li { padding: 1em; }
fieldset, form dl, fieldset dl dl, fieldset fieldset fieldset, fieldset fieldset dl dl, dd.hideme, form blockquote.userstuff { padding: 1.643em; }
li.blurb, fieldset, form dl { border: none; }
li.blurb, .blurb .blurb { display: block; position: relative; clear: left; padding: 1em 1.4em; overflow: visible; }
.logged-in .splash>.module { width: 100% !important; }
dl.meta { max-width: 75em; margin: auto; clear: right; padding: 2em 1.75em; position: relative; overflow: hidden; }
.group.listbox, fieldset fieldset.listbox, #main li.blurb, .wrapper, #dashboard .secondary, .secondary, form blockquote.userstuff, .thread .comment, .toggled form { box-shadow: none; }
#dashboard .current, .actions a:active, span.unread, .replied, span.claimed, dl.index dd, .own, .draft, .draft .unread, .child, .unwrangled, .unreviewed, .ui-sortable li:hover { background: #131517; border-color: #1f2126; }
#greeting .menu { right: 0; border: 1px solid #1f2126; box-shadow: none; }
select { background-color: #131517; color: #fff; border: 1px solid #131517; min-height: 2.4em; border-radius: 0; }
input:focus, select:focus, textarea:focus { background: #131517; }
input, textarea { min-height: 1.8em; box-shadow: none; }
#footer a:hover, #footer a:focus, .autocomplete .dropdown ul li:hover, .autocomplete .dropdown li.selected, a.tag:hover, .symbol .question, .qtip-content { background: #a7a7a7; color: #111; }
.splash .favorite li:nth-of-type(odd) a:hover, .splash .favorite li:nth-of-type(odd) a:focus { background: #a7a7a7; color: #111; }
#header #greeting img, #header .heading a, #header .user a:hover, #header .user a:focus, #header fieldset, #header form, #header p, #dashboard a:hover, .actions a:hover, .actions input:hover, .delete a, span.delete, span.unread, .replied, span.claimed, .draggable, .droppable, span.requested, a.work, .blurb h4 a:link, .blurb h4 img, .splash .module h3, .splash .browse li a:before, .required, .error, .comment_error, .kudos_error, a.cloud7, a.cloud8, #tos_prompt .heading { color: #a7a7a7; }
#header .menu li { border-bottom: 1px solid #2c2c2c; margin: 0; text-align: left; }
#greeting .icon, #dashboard, #dashboard.own, .error, .comment_error, .kudos_error, .LV_invalid, .LV_invalid_field, input.LV_invalid_field:hover, input.LV_invalid_field:active, textarea.LV_invalid_field:hover, textarea.LV_invalid_field:active, .qtip-content { border-color: #131517; }
#dashboard.own { border: none; }
form.filters dl { margin-left: 0; margin-right: 0; }
.filters .expander:focus { outline: none; }
.filters .expander { padding: 0.45em 0 0.45em 14px; }
.filters .group dt.search, .filters .range dt { padding: 1.25em 0 0.4em 0; }
a.tag { border-bottom: 1px dotted !important; }
a, a:link, a.tag, #header a, #header .primary .open a, #header .primary .dropdown:hover a, #header .primary .dropdown a:focus, #header #search input:focus, #header #search input:hover, #dashboard a, #dashboard span, #dashboard .current, .heading, .group .heading, .filters dt a:hover { color: #fff; }
#header .dropdown .menu a { padding: .75em .5em .75em; }
#header #search .text { background: #131517 !important; border-radius: 0; margin: 0.2857em 0.429em; }
.action a:link, span.series .divider { color: #999; }
a:active, a:focus, button:focus { outline: none; }
.actions a, .actions a:link, .action, .action:link, .actions input, input[type="submit"], button, .current, .actions label, #header .actions a { background: #1a1c1e; border-color: #1a1c1e; color: #eee; box-shadow: none; text-shadow: none; }
.actions a:hover, .actions input:hover, #dashboard a:hover, .actions a:focus, .actions input:focus, #dashboard a:focus { color: #fff; border-color: #101214; box-shadow: none; background-color: #101214; }
.actions a:active, .current, a.current { color: #fff; background: #101214; border-color: #101214; box-shadow: none; }
.delete a, span.delete { box-shadow: -1px -1px 2px rgba(255,255,255.25); }
ul.required-tags, .bookmark .status span, .blurb .icon { opacity: 0.9; border: 0; }
#outer .group .heading, #header .actions a, fieldset.listbox .heading, .userstuff .heading, .heading, .userstuff h2 { text-shadow: none; color: #fff; background: none; }
#header .actions a, fieldset fieldset, .mce-container button, .filters .expander { box-shadow: none; }
fieldset fieldset.listbox { outline: none; }
form dd.required { color: #eee; }
.mce-container input:focus { background: #F3EFEC; }
.announcement .userstuff a, .announcement .userstuff a:link { color: #fff; }
a, a:link { color: #fff; text-decoration: none; }
.announcement .userstuff a:hover, .announcement .userstuff a:focus { color: #999; }
.event.announcement .userstuff a, .filters .expander { color: #eee; }
8 notes
·
View notes
Text

Tactical Machine Pistol + Pose Pack
DOWNLOAD
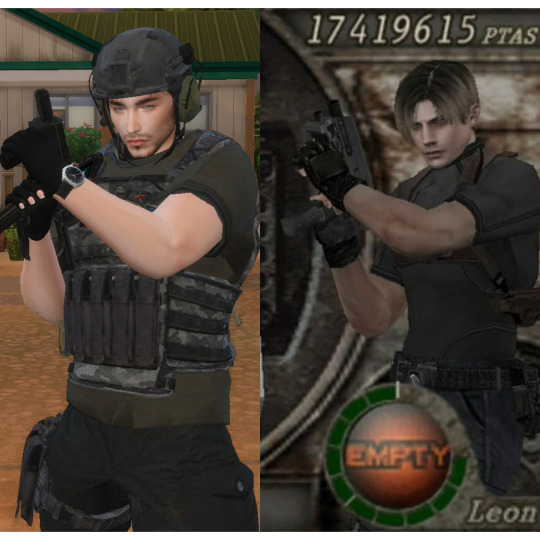
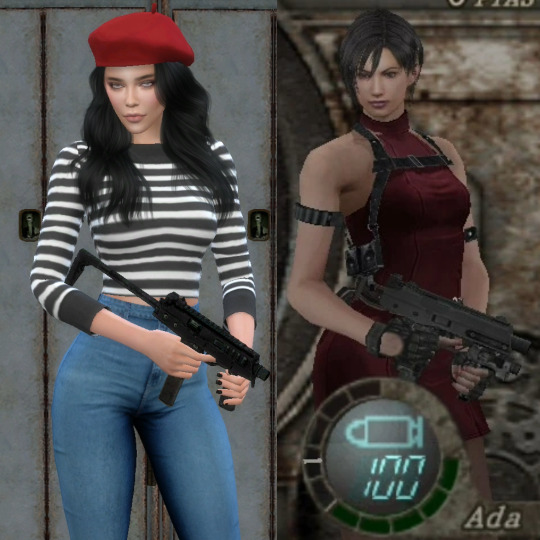
Greetings, Customer! In this beautiful day before Christmas I'd like to Presenting you some Good Old Machine Pistol that you folks might Recognized it From Resident Evil 4!! Yay! this also Include The Pose Pack For these Guns :D Yay You Guys Gonna Love this @melbrewer367, @helenofsimblr @bdangkingfish & @igglemouse @exzentra-reblog
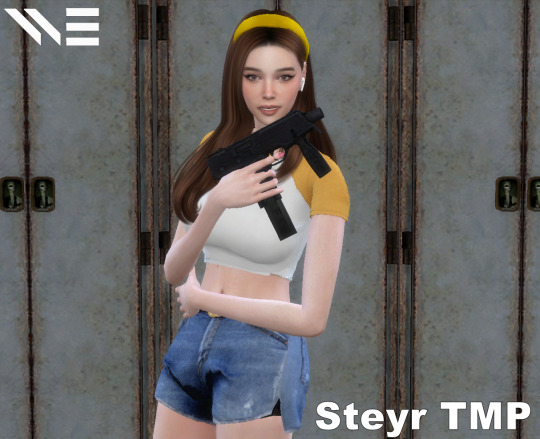
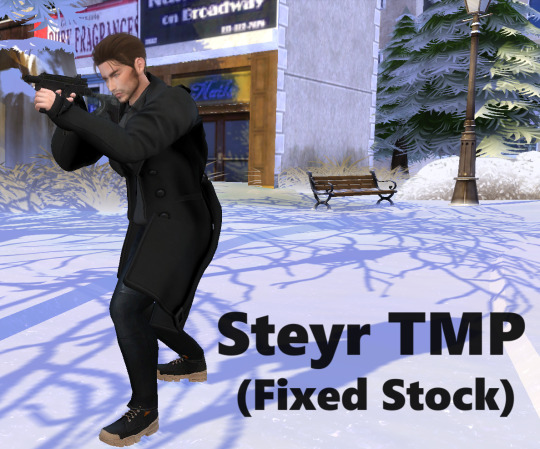

Steyr TMP
The Steyr TMP (Taktische Maschinenpistole/Tactical Machine Pistol) is a 9×19mm Parabellum caliber machine pistol manufactured by Steyr Mannlicher of Austria. The magazines come in 15 or 30 round detachable box types. A suppressor can also be fitted. Though originally intended to be used without a shoulder stock, an optional fixed stock was made available later.
Picture this: it's compact, it's sleek, and it's made by Steyr Mannlicher – those Austrians sure know how to craft some serious firepower. The mags? You've got options, my friend – choose between the 15-round or the 30-round detachable box types. More bullets, more fun, right?
Now, here's the cool part – you can throw a suppressor on this bad boy. Yeah, you heard me right. Stealth mode engaged! Take out the trash without waking up the whole neighborhood.
And get this, it was originally meant to be a hip-firing, no-shoulder-stock-needed kind of deal. But hey, if you're feeling fancy, they later dropped an optional fixed stock. So, whether you're going for the "I'm a secret agent" look or just want a compact powerhouse, the Steyr TMP has your back.
In summary, it's Austrian, it's 9mm, it's got optional Rambo vibes with that stock, and it's perfect for when you need to make a statement – quietly or not, your choice!
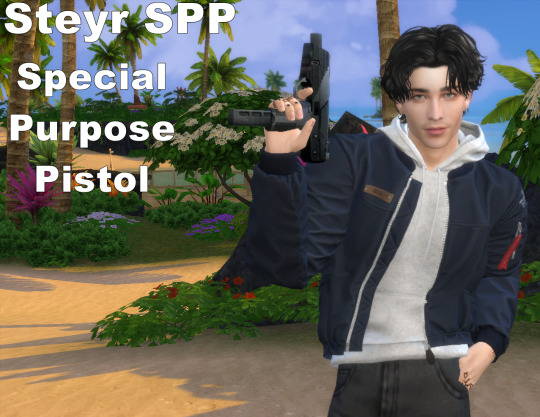
Steyr SPP
The Steyr SPP (Special Purpose Pistol) is a semi-automatic variant of the TMP intended for civilian Markets. The TMP's barrel and barrel jacket lengths were increased slightly so there is a greater length of protruding jacket and barrel. The forward tactical pistol grip was also removed. It is large for a pistol and is constructed mainly from Polyamide 66. Now, they didn't just slap on an "SPP" and call it a day. The SPP got a bit of a makeover. They tweaked the barrel and barrel jacket, making them a bit longer for that extra oomph. It's all about that protruding jacket and barrel, giving it a distinctive look. So, whether you're in the market for a semi-auto powerhouse or just want to feel like you're wielding the future of pistols, the Steyr SPP is your go-to. It's Austrian, it's purposeful, and it's packing some Polyamide 66 coolness. What more could you ask for in a Special Purpose Pistol?
Brügger & Thomet MP9


in 2001, Steyr decided to pass the torch, or in this case, the design, to none other than Brügger & Thomet. It's like a handoff in the world of guns – a bit like passing the baton in a relay race, but with more firepower.
So, Steyr handed over the blueprints, and Brügger & Thomet took the reins, turning that design into what we now know as the Brügger & Thomet MP9. It's like the TMP's legacy lives on, but with a Swiss twist.
Now, the MP9 isn't your average Joe submachine gun – it's got some serious selective-fire mojo going on. You can choose your flavor of firepower with 15, 20, 25, or 30 round transparent polymer magazines. It's like a buffet of bullets.
Safety first, right? The MP9 takes that seriously with not one, not two, but three safeties. You've got an ambidextrous safety/fire mode selector switch button for manual safety, a trigger safety, and a drop safety. They've basically built a fortress of safety around this thing.
And here's the kicker – it's the lovechild of the Steyr TMP. Brügger & Thomet took that TMP design, shook things up a bit, and voila, the MP9 was born. They made it even cooler with a folding stock that tucks away to the right, an integrated Picatinny rail for all your accessory needs, and a snazzy new trigger safety. Evolution at its finest, right?
So, whether you're into Swiss precision, sleek designs, or just want a submachine gun that's as safe as a bank vault, the MP9 is here to deliver the goods – with a little help from its TMP roots.
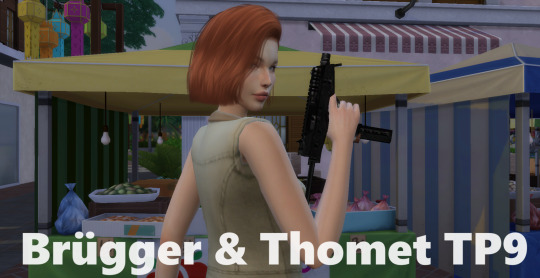
Brügger & Thomet TP9
So, check this out: the TP9, a semi-auto civilian version of the MP9, decided to play by the rules to cozy up with US firearm import laws. They did a little swap dance – out with the forward grip, in with a snazzy underbarrel MIL-STD-1913 Picatinny Rail, right in front of the trigger guard. It's like the gun got a tactical makeover to fit in.
Imagine it's the rebel cousin – looks like the Steyr SPP but with a twist. No more forward grip, just a slick rail. Gotta hand it to them for adapting and keeping it stylish. Guns with a touch of strategy, right?
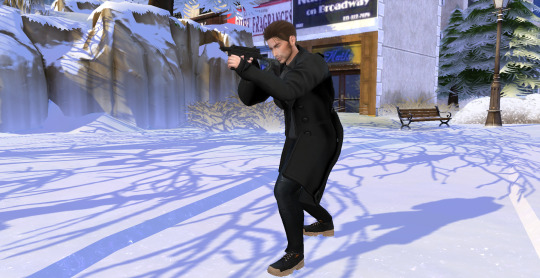
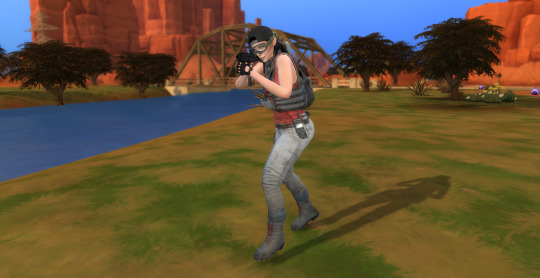
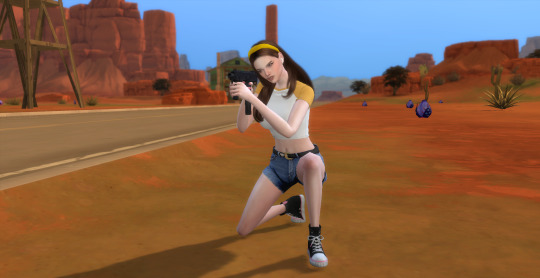
Now The Best Part.. The Pose Pack!!! well It Contain 10 Poses 5 For Males And 5 Males 3 of them inspired from Resident Evil Thingy and Stockless Variants are Compactible with regular Pistols poses that scattered around tumblrs.. like @pandorassims4cc or @alunedesires (deactivated) and Well It also Included For Left Hand in Case You guys need dual Wield Weapons
Thank You @ts4-poses @littyfinds @cctreasuretrove @exzentra-reblog@sparkiekongreblogsstuff


#the sims 4#the sims#the sims 4 custom content#ts4#ts4 cc#the sims 4 military#ts4military#the sim#the sims 4 cc#ts4cc#the sims 4 gun#ts4 gun#ts4 custom content#ts4 download#ts4 military#resident evil 4#re4 remake#resident evil 4 remake#re4#re4make#ada wong#leon kennedy#leon s kennedy#merchant services#the sims 4 pose#ts4 poses
70 notes
·
View notes
Text

1965 Alvis TD21

dash mounted gear selector for the Borg Warner 35 auto transmission
1 note
·
View note