#bookbinding tutorials
Explore tagged Tumblr posts
Visit Tumblr Blog
Explore Tumblr blogs with no restrictions, modern design and the best experience.
Last Seen Tumblr Blogs


Fun Fact
69% of Tumblr users are millennials.
Text
6 notes
·
View notes
Text

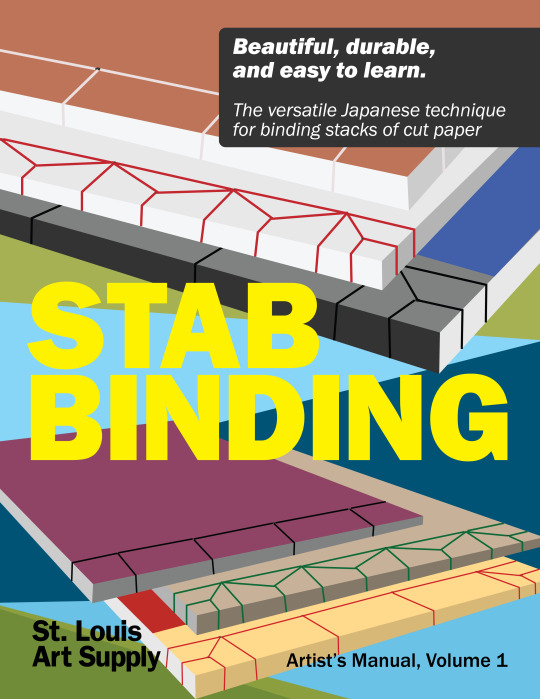

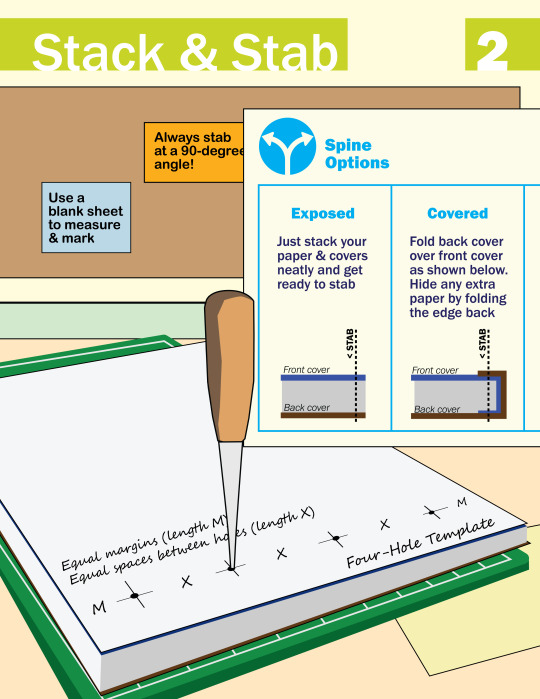

I made this zine last year to teach Japanese stab binding. It's a technique that every artist should know—with just a few tools, it's so easy to bind your own sketchbook or to make a physical version of your art/writing/etc. Download the PDF version (with bonus photos & tips!)
8K notes
·
View notes
Text
Book binding 101: Materials
I’ve decided to do a series of posts on how to book-bind since I talk about it a lot, and I think it’s a really fun process. This post will include various inexpensive alternatives to “professional” supplies, many of which you will have at home. Not everyone can afford a cricut and that’s ok! I will also be listing more expensive materials for people who want to invest a bit more into the craft, but they absolutely are not a must.
This first post will focus on a list of supplies you can use to make books, but will not yet get into the instructional part of it. That will come later!
Anyway…
Bookbinding Materials: Essentials
These are items you need to bind, but many you can find around your house!
Sewing thread: Any thread will work for bookbinding, though waxed threads can help reduce tangles. You can also double up thread as another way to prevent tangling if you so choose. Waxed thread is definitely more expensive, so it can be good to use what you have starting out. Here’s a link to the waxed thread I used for those that are interested. You can buy it in a lot of different colors! (White is good if want an “invisible” thread).
Sewing needle: A lot of people say to use a curved needle for binding, but I’ve never found it to be much different from using a regular needle. If you have one, I would recommend a larger needle, however, since it’s better for piercing through signatures (aka the stacks of pages you bind together). In other words: there’s no special needle you need to bind books.
Ruler: I’d recommend any metal ruler since it’s better to use as a straight edge for cutting. There’s a good chance you already have one. It’s just used for measuring and being a straight edge. Nothing fancy.
Paper: Any paper will work. What you wanna use depends on your project really: if you’re binding together a work of text you’ll want to use some kind of printer paper (of course). If you’re making a sketchbook, you can fold up some sketching paper. I like to get sketchbooks with perforated edges so I can tear them out easily if I want to use a blank page for bookbinding. You can also buy large sheets of paper made for any medium. For example, if you want a sheet of water color paper, just search “large watercolor paper sheet”.
Awl (or all alternative): An awl is a tool used to poke sewing holes. It’s nice because it’s sharp and ergonomic, but you can totally also use a pushpin or even a sewing needle.
Bone folder (or a bone folder alternative): A bone folder creates sharp creases when you fold your pages, making them lay flatter. It also helps define the hinge gap on finished books, making it open easier. You can use a ruler if you don’t have one.
PVA glue: PVA glue is what to look out for when it comes to binding glue. There are some designed specifically for bookbinding, which spread out a bit faster than ones that aren’t. You can also use tacky glue which IS a PVA glue.
Book board: Also sometimes called chip board, Davey board, or mat board. This is what you’ll use for hard cover books. It is important to use book board specially, as cardboard will warp. You can buy book board directly, or you can cut the covers off of old textbooks or binders, unwrap the paper/plastic around the board, and use that!
Box cutter or utility knife: for cutting the board
Decorative paper and book cloth: For wrapping around cover boards and for endpapers. Book cloth can also be used to cover boards. You can also draw your own designs on Bristol paper if you want (or any paper with a similar thickness/durability). When it comes to decorative paper I like to either get scrapbook paper or rolls of fancy handmade paper (you can get those on Etsy, through paper source, or through bookbinding websites).
Bookbinding materials: Optional (and not crazy expensive)
These are supplies that you don’t need for binding but that can make the process easier and/or help with the decorative elements of your books. I’d recommend these things for when you’ve been binding for a while and feel these things could be helpful!
Paper trimmer: can cut a few sheets of paper evenly—I find it really helpful for endpapers
Stencils: Super helpful if you want to add text on the covers
Stamps: Good for adding text and also great for adding illustrations if you’re not able to draw them on your own. You can buy ink pads for them or use markers by coloring over the stamp lightly and using the stamp immediately so it doesn’t dry (I’ve tested this with alcohol markers and it works very well)
Paint markers: great for drawing directly on the cover. Since they’re opaque they can imitate the look of vinyl. You can also get them super painterly if you want. The internet usually talks about poscas but there are tons of different brands. Do some research, figure out what you like & can afford.
Hot foil pen & heat transfer foil: Perfect if you want to add foil to your covers but don’t want to spend a ton of money on a cricut. A lot of binders uses the foil quill brand, but there are ones that cost less and work the same (I have both a cheaper one & an actual foil quill because I wanted some nib variation. As long as the pen has good reviews that aren’t from bots you should be good). Also remember: don’t use foil designed for going through laminators (I.e. decofoil) . It doesn’t work the same way.
Bookbinding Materials—Expensive
These are materials I’d recommend for people who have been bookbinding for a while & feel that it’s something they really want to invest in. To be fully transparent, I’m a college student and don’t own these and have little personal experience with them. However, I know a lot of binders who love them!
Cricut machine—Cricuts are cutting machines that can make precise cuts into paper, wood, bookboard, or vinyl. A lot of binders will cut designs out of vinyl and apply them to the covers using a heat press.
Book press—What it sounds like. The pressure helps the pages lay flat and stay even. That being said you can stack heavy books on top of your projects, it just may not have the same even pressure. I also know some people will DIY these, so if you’re skilled with power tools you can give it a go!
Paper guillotine—like a paper trimmer but bigger and can cut more sheets of paper at once. I believe really good ones can also be used to cut bookboard!
Those are all the materials I can think of! Hope this can work as a good starting point for those interested in the craft. I’ll definitely be posting more info about bookbinding for people who are interested :)
-Zoë💗
#bookbinding#book binding#fan binding#craftblr#information#tutorial#book binding resource#resource#book binding 101
875 notes
·
View notes
Text
Bookbinding: The New Deal by Closer


Moar bookbinding! This one is a Suits fanfic that I bound for @brambleberrycottage's birthday (pictures shared with the author's permission).
[Same disclaimer as always applies: I do this for fun; no money has been made from this project!]
Notes on the binding: This was my third leather book, but my first time sewing on cords (my previous leather books were both split boards). The actual sewing process was definitely...something. Sewing is usually my favorite step of a bind, but not this time. (Possibly because I was sitting on the floor at the base of the stairs sewing the book on a shelf under my desk, as that was the easiest sewing frame hack I could come up with - once I rig something that will allow me to sit up like a human being and not be scrunched up like a hermit crab, I am sure I will enjoy the process more.)
So the sewing itself was a bit painful, but I did really love how the board attachment played out in the end, with the cords laced into the boards. It is SO satisfying not to be doing case bindings anymore! It's the same feeling of relief I had when I first learned how to do split board bindings - you have so much more control over the placement of the cover boards, so much less opportunity for skew, so much more stability. No more casing-in anxiety necessary. (You do acquire all-new steps to be anxious about, but for me, it's worth it).
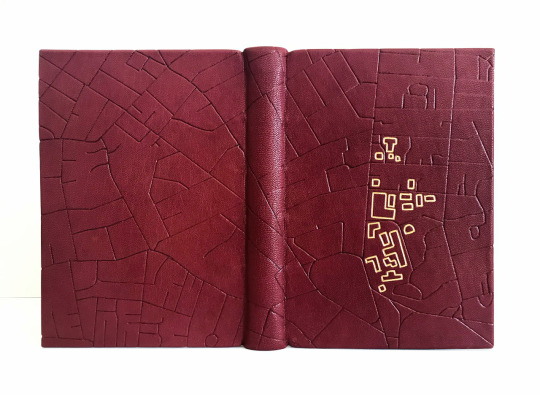
Notes on the design: I've never actually watched Suits, but the fic itself takes place in and around Harvard Law, so I used that as my inspiration for the book's design. The book is covered in crimson leather from Siegel. Endbands are handsewn with metallic red and gold threads. The blind tooling on the cover is a street map of Cambridge, MA, which I drew onto tracing film and then tooled through the film onto the leather. (So far I've only used a foil quill heat pen to do this, because brass tools are expensive. I'm taking a class on traditional tooling soon and I'm VERY excited for it, but for now, this is what I have access to.)
The gold outlines in the design highlight the buildings of Harvard Law. (These lines are also not actual gold tooling - paint pen for now.)
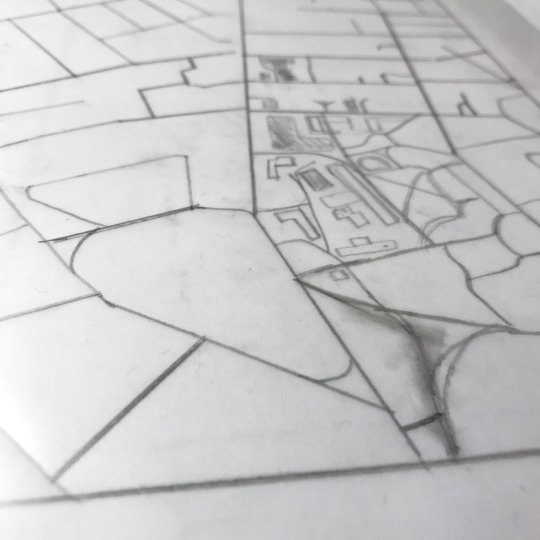
^ early design work, featuring unsightly eraser smudges.
I followed a similar theme/color scheme for the interior. For the endpapers, I used acrylic paints and a dry sponge to make a crimson and gold pattern:

For the title page, I modified an image of Harvard's Veritas shield to display the fic's title and author.

The chapter headers may not immediately ping an association for anyone who doesn't live here/spend a lot of time on the T, but they were the first thing I came up with - they're designed to look like the signage for the Red Line, which is the subway route that serves Harvard Square.


Notes for future me: The one thing that went "wrong" with this bind was that the endpapers ended up being short at the foreedge. I knew this was going to happen before I pasted them down, but I had to make a choice between two undesirable results - the boards were already VERY slightly curved inwards after doing the fill-in, and if I used paste on the endpapers (so they would stretch), I was worried it would pull too hard as it dried and make the boards curve too much. But if I used PVA, the endpapers wouldn't stretch enough and would end up being short. I decided I would rather have short endpapers than warped boards, so that's what I went with, but next time I might try doing one less lining inside the boards and hope that the pastedown will handle more of the counterpull.
Despite little things like that, I had a great time with this! Every time I make something I learn new things, and every time something goes "wrong" it's good to look back and be like "ten years ago I was duct taping the spines of loose pages that I covered in cardstock! i'm doing fine, actually." Lots of progress has happened and lots of fun has been had, which is ultimately the point.
Big thank yous are owed to @brambleberrycottage for letting me send her all my bookbinding experiments, and also to Closer for a) writing this fic in the first place and b) okay'ing the sharing of photos! Much appreciation goes out to both of you :)
#i love how much i've been able to learn with the resources that are out there now#it has helped me so much!#wild to look back and remember that these things did not exist when i started doing this#there was no discord#there was no das (imagine...what a world)#every time i look at my older stuff and want to be like 'this looks it was made by a toddler' i have to check myself like#'ok but back then there was no incredibly endearing australian guy making in-depth tutorials for free' XD#bookbinding
88 notes
·
View notes
Text
as per a request in my local renegade server: here is my process (such as it is) for the stenciled covers i've done for my binds. obviously, huge thanks to everyone in the renegade discord for teaching me most of what i know about bookbinding. this tutorial only exists thanks to the resources they've made available and the conversations i've had there.
material list
vinyl cutter (i have a silhouette portrait 3) + mat + blade
stencil vinyl (i have this one, but have had some adherence troubles with it. unclear whether this is just The Nature Of Stencil Vinyl or whether there's a better brand out there. adhesive vinyl can also be a viable option, although i haven't personally experimented with it yet.)
transfer tape (i have this stuff. it's fine.)
weeding tools (i have this hook and a very fine tip pair of tweezers. i highly recommend getting a hook, especially if you—like me—are haunted by the specter of carpal tunnel. get an off-brand one or get one on sale, though. i only have the silhouette brand one because it was on clearance.)
acrylic medium (i have this one because it was on sale at the time i was buying acrylic medium. when i replace it, i will be replacing it with a matte one. the gloss definitely has a noticeable sheen that i don't love.)
acrylic paint (literally any paint will do. i've been mostly using the decoart extreme sheen because it's $4 at michaels. you may be noticing a theme here.)
stiff stenciling brushes (the ones i have are similar to these but cost even less. again, there's a theme here.)
an iron and some parchment paper (jury is still out on whether using heat to "set" the pattern is necessary, but i do feel like it melts the paint a bit into the bookcloth and lessens the extent to which the pattern sits above the bookcloth.)
your trusty bone folder
instructions and a truly hideous number of words under the cut.
step 0.5: discern what will make a good stencil and what will make you hate yourself, your life, and the art of bookbinding
there are a LOT of different ways to put titling on a book. you could do a paper cover with a printed design or paste paper labels onto bookcloth or foil your title onto your cover with heat activated foil. the best method depends on what kind of design you have in mind, what tools you have available to you, and what materials you're working with (for example, i've had very bad luck getting acrylic paint to adhere to Allure bookcloth, but Allure does foil like a dream).
as far as stencils are concerned, you can kind of sort cover designs into three categories:
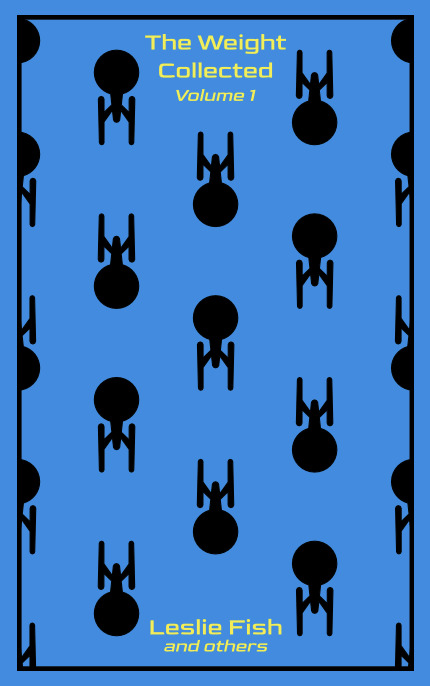
BEST for stencils: big, bold shapes on larger format books (think letter folio or letter/legal quarto)
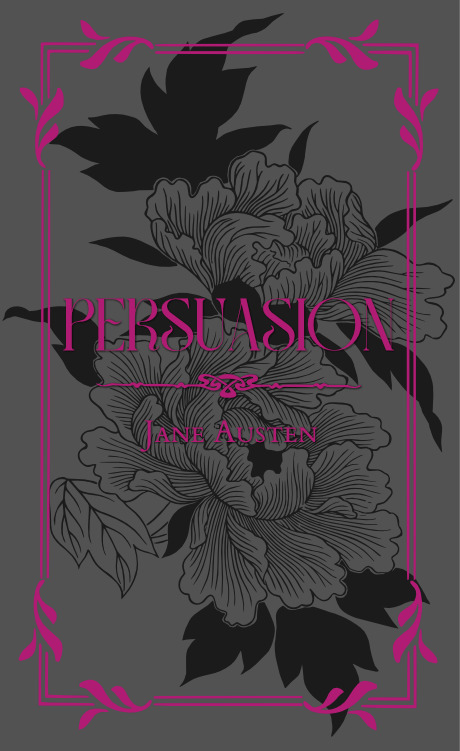
OKAY for stencils, but you might hate yourself: intricate detail at a large enough form factor for it to be cut well by your vinyl cutter
BAD for stencils, you will die and it will hurt the entire time you are dying: lots of intricate detail and lots of fine lines
below are examples of category 1, 2, and 3 (all designed for letter folio). to be clear, category 3 can technically be possible, depending on the design. but only undertake it with the awareness that you will die, and it will hurt the entire time you are dying.

step 1: design a thing to put on your cover
i'm not going to go too in depth on this because cover design is a HUGE can of worms. a few pointers, though:
i never start designing my cover until my text block is done. this allows me to design my cover at "full size" based on the measured size of my text block and cover boards.
i fully lay out my cover in a separate program before exporting a transparent PNG to silhouette studio (or whichever proprietary software you have to use to communicate with your particular vinyl cutter). i use affinity designer. some free options would be inkscape (if you want to work with vectors) or gimp.
i design my cover on a document with dimensions of (HEIGHT of boards + 20 mm) x (WIDTH of boards or spine + 20 mm) and 10 mm margins. the area within the margins represents the actual dimensions of the thing i'm designing, while the area outside of the margins creates a mask that prevents me from getting paint on things i don't want paint on (like the covers, if i'm creating a spine stencil).
i always outline my document with a 3 or 4pt black line. this creates the outer edge of my stencil and provides my vinyl cutter with a cut line. if you're working with a smaller vinyl cutter (like the cricut joy) there are ways to jigsaw designs together from smaller pieces of vinyl, but i'm not the person to ask about that. i specifically bought a portrait so that i didn't have to worry about that.
here's an example of one of my affinity files from a recent cover. i've exaggerated my outline to make it clearer. you can also see that i use affinity to experiment with color combinations. before i export, i turn all my elements black and make any backgrounds transparent, meaning that the PNG i import into silhouette studio looks like the one on the right.

step 2: cut and weed your stencil
again, not going to go terribly in depth here. there is a veritable army of youtubers out there with tutorials about how to use [insert propriety vinyl cutter software here]. but, again, a few pointers:
with my particular vinyl cutter and stencil vinyl, i usually cut my stencils with the material set to "washi," depth at 1, force at 13, and speed at 4. google, experiment, see what works. also, you want to put your stencil vinyl on the mat with the blue vinyl facing UP, and you don't want to mirror your design. with stencils, what you see is what you get.
i cut my vinyl a bit bigger than necessary because i'd rather waste a bit of vinyl than have to worry about a stencil falling off the edge of my vinyl because i misaligned it on the mat.
unlike HTV, you will be weeding out all the black parts of your original image. be prepared to hate the letters "e" and "a" forever, because you will have to somehow keep the little eye of them in place while you pry out the rest of it.
step 3: apply your stencil to your case
alright, now let's get into the meat of it. i always stencil after my case is finished but before i case in my book. this means that if i totally fuck it up, i can trash the case instead of the entire book.
additionally, i completely stencil my spine first (as in lay down stencil, paint, remove stencil) and then stencil my covers. i've found that it's easier when you don't have stencils overlapping and sticking to each other.
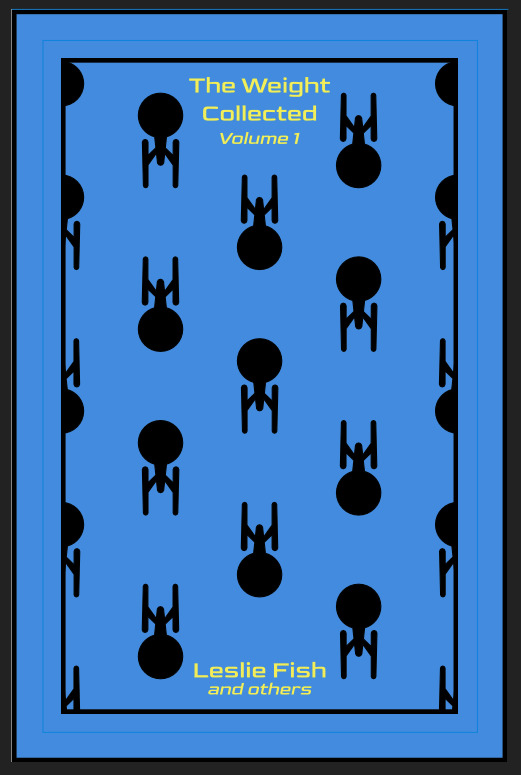
OPTIONAL STEP: mark guides onto your cover to help you position your stencil. whether or not i do this step depends on the design. a lot of the time, i just eyeball it. but for some designs, precision is key. for those projects, i use my ruler to mark out guides in white chalk for where i need certain elements of the stencil to fall. (i used guide marks for the "penguin clothbound" copies of the The Weight Collected that i've been using as an example in this post—the black rectangular boarder would've made uneven placement REALLY obvious.)
use transfer tape to remove your vinyl from its slick backing. what i've found is that you really, really don't want your transfer tape to be too sticky. you want it just barely sticky enough to pick up the stencil if you rub it down with a bone folder or your fingernail. i have a piece of transfer tape that i stuck to my jeans a bunch of times and then proceeded to use for 8 books in a row. it is, frankly, still a little bit too sticky. i have rolled it up so that i can use it for the next 8 books, at which point it will presumably be the right level of stickiness.
position your stencil. when you're happy with it, rub it firmly down with your bone folder. then do it again. then use your fingernail to score down over the titling text. then pray. in my experience, stencils prefer to stick to transfer tape rather than bookcloth. ymmv.
start at one corner of your stencil. carefully begin peeling back the transfer tape. i've found that essentially folding back the transfer tape (like, the corner that's been freed from the stencil being folded back away from the stencil) helps the tape to release. go slowly, rubbing down with the bone fold as necessary.
after you've finally manage to pry the tape off, go back and smooth down the stencil and firmly rub it down to get it to adhere to the bookcloth as thoroughly as possible with as few ripples or air bubbles as possible.
step 4: paint time!
here is a secret that the renegade discord taught me that i am now passing on to all of you: before you put any paint on your stencil, put down a layer of clear acrylic medium. the medium will finish the job of pasting down the stencil to your cover, and any leaks that happen in the process will be clear medium instead of colored paint (and will therefore be basically unnoticeable). ergo:
stipple a thin coat of acrylic medium over your stencil. you want to use an up-and-down daubing motion, not a brushing motion. brushing will get paint under your stencil. let dry.
after your medium is dry, stipple a few thin coats of your colored acrylic paint onto your stencil. let dry between coats. (i usually find that two coats is enough.) again, try to keep your coats thin. you don't want a thick layer of paint because that will create a raised surface above your bookcloth.
let your paint fully dry. i usually leave it overnight, but if i'm feeling especially impatient, i still make sure to at least give it a good three or four hours.
peel up your stencil. your weeding tools will once again come into play here to pry up little bits and pieces of stencil (like the stupid eyes of the "a"s and "e"s that were so annoying during the initial weeding stage).
step 5: optional setting stage
again, jury is still out on whether or not this is necessary, and the effects are pretty subtle. but i do it every time anyway. some tips:
use an iron on very low heat (i keep mine at the low end of the synthetic setting) and with steam turned OFF
keep a piece of parchment paper (NOT waxed paper. you want the slick paper that you put under cookies to keep them from sticking to the pan.) between the iron and your cover.
press the iron down, don't rub it like you're ironing a shirt. it's possible to smear your paint doing that (ask me how i know).
i usually lay the iron down on a section for 10-15 seconds at a time, then lift it and move it to another section.
start with less of everything (less heat, less time) and build up. always better to be conservative with this.
i usually continue until the paint is warm to the touch, then move onto another section. after it's cooled, i evaluate if i feel like it's melted into the cloth enough. if not, i repeat the process.
step 6: BOOK
congrats, you have put a design on a book cover. the world is your oyster. go forth and make books. become ungovernable.


58 notes
·
View notes
Text
Multi-pamphlet book tutorial
Last week, I showed you how to make a mini pamphlet book.
And that's GREAT, but what I really need for my purposes is multiple types of paper in their own separate booklets bound together into one thicker book.
Guess what! I've already shown you the hard part. The rest is easy.
You will need:
Several pamphlet booklets, tutorial here
Scissors
Xacto knife
Thick cardstock or thin cardboard
Something heavy and flat
Glue
So you have made a pamphlet book.
Now make more of them!
I am using a different pamphlet for each type of paper: blank sketch paper, graph paper, watercolor paper, tissue paper (for pressing flowers, duh), and one that's literally an empty cover with no papers in it. (I'll show you what that's about later.)


Take all the evenly-sized pamphlets and stack them on top of each other. These are also called 'signatures' in the fancy world of book making.
Glue their covers together.
For best results, spread the glue evenly. The easiest way to spread glue evenly is by using the edge of a piece of cardboard to swirl the glue around until it's thin.

Stick something heavy and flat on to and let dry.
This is Harold, who is not flat, but he is a heavy object. So I stick a book under him. It's just easier to illustrate that the booklets go under this way.


Once it is dry, we cut the cover.
Lay the book stack on your cover paper, mark the width, the height, and the spine, so that the paper wraps around the whole thing like a taco.
Cut the excess. Crease the folds where you marked the spine so that the stack of booklets fits nicely. If your cardboard is very dense (more like chipboard), then use an exact knife to score the fold*.
*'scoring' means making a shallow cut that doesn't go all the way through so that the thick piece is easier to fold.


Glue the crap out of the inside, lots of glue on the interior of the spine. Spread evenly with the edge of spare cardboard.
Set the papers inside, make sure the spines on the pamphlets sit snug in the cover spine.
Put Harold back on it. Wait for it to dry.
Once it's dry, you have a book! This is not tge most elegant way of binding a book together, I know, but it is a simple way to do it using skills that most people know.
Maybe one day I'll get into coptic stitches and hard backs and all that, but today? Today you know how to make a book that makes the brain go brrrr.
"But Lee! What's the thing you were gonna do with the empty spot in the back?"
Great question!
When you make your own stuff, that means you can do whatever you want with it. So I am taking that back panel and I am gluing an envelope to it.
Why?

SO I CAN KEEP STICKERS IN IT!
Now slap a sticker on the cover and you're done!

Nice.
Cheddar Bay Biscuits approved.
I thought the safety icons on the box I made this with were cool, so I cut the repeat of them out and made them part of the cover. I especially like the one that says 'fear rain.'
Anyhow, now you know how to make something out of garbage!
72 notes
·
View notes
Text
Typesetting in One Click: Microsoft Word Macros 101!
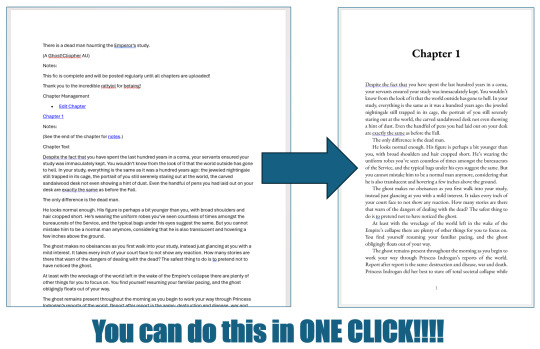
For @renegadepublishing's Binderary month, I gave a talk about how you can use Microsoft Word Macros to automate the typesetting process!! This talk was aimed for beginners, and covered how to install and use the Blak Books Bindery Macros (which can typeset an Ao3 fanfic in a single click!), how to customize Macros, some very basic VBA syntax, how to understand VBA documentation, use debugging tools, and more! If you're a total beginner to bookbinding, using Macros is one of the easiest ways to get started typesetting! You can watch the recording of the talk here. And the slides for the talk can be viewed here! Hope this is helpful, and happy binding! 😊
#bookbinding#typesetting#fanbinding#binderary2025#fanfic binding#ficbinding#bookbinding tutorial#rosa binds#rosa macros#renegade bookbinding guild
66 notes
·
View notes
Text
Make a pamphlet
Tons of people are realizing that you can make books at home, a fact that totally floored me two years ago when I found out about it. Is that you? You should make a pamphlet!
Sometimes, people show up to the bookbinding community and ask something like, “I would like to bind a 100,000-word fan fiction into an heirloom object/gift. Where do I start?” You should start by making a pamphlet.
I think some of them don’t like hearing that, and I think I understand why. They are not approaching bookbinding as a hobby to learn and explore; they want a DIY project that will result in An Object. But this isn’t like when I painted my shutters, and all I needed was a paint sprayer, some fasteners, a chisel, and YouTube to get me going. For most folks, it’s more like if you wanted to design and build a shed from scratch, and you’d never held a saw. Why not draw up and make a little firewood shelter out of cheap lumber first?
Why not make a pamphlet?
Now, if you are coming from a strong crafter background, and especially if you already do a lot of papercraft or chipboard box-making, you can admittedly skip the pamphlet phase. But should you?
Pamphlets are cheap! Quick! Fun! Pamphlets and other simple bindings let you play with tools, materials, and techniques without expending excessive time or precious materials. You probably have everything you need already. Bookbinding is a craft with dozens of best practices and rules of thumb and recommended materials, and each one is negotiable. If you truly understand the importance of a given recommendation or standard, you can decide how much it’s worth to you and your projects. If you’re a novice crafter, you’ll quickly figure out if this fussy paper-bending nonsense is enjoyable for you at all–without buying a bunch of tools you may not use again. If you’re experienced, you’ll have a quick win, get to play with new kinds of paper, and see how different materials work together.
And you can explore how to decorate books!
So please, if you’re even curious about bookbinding, make a pamphlet.
I’ll even tell you how. With pictures!

101 notes
·
View notes
Note
Hello! I saw that you offered to someone to send your favorite bookbinding tutorials and I'd love to see those if you're willing to share! Your covers in particular are just GORGEOUS so I'd love to know a bit about how you get that kind of result :)
Absolutely! The tutorials that helped me the MOST were from Das Bookbinding on YouTube! I’ll link his profile here: https://youtube.com/@dasbookbinding?si=1hnMaJhQc2IWNO_i
His playsets of “Getting Started in Bookbinding” and “Rounded and Backed Cased Book” were the absolute most helpful.
Tome.Turner on Instagram has a recently put together a wonderful walkthrough of how she does paperbacks. I’ve developed a similar process when doing mine. https://www.instagram.com/reel/DItLbHKzjqR/?igsh=bzh0dzNhYTViNDI3
I’ve also just dropped into binders DMs and asked about specific parts of binding when I’m stuck.
As for cover design 😅 go with your heart! Haha that’s terrible advice I know. I use the paid version of Canva. Usually when I read a fic I have imagery or main themes that come to mind. I then try to throw all of those onto some paper and refine from there. Unfortunately I can’t help much in the way of creative process there.
Hope these resources help!
24 notes
·
View notes
Text
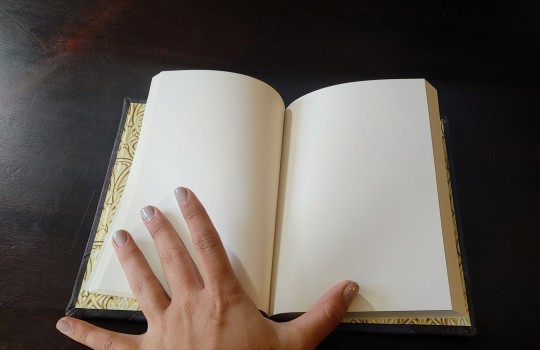
finished the rebinding!!! i’m really happy with how this turned out, very excited to give it to my partner 🗣️🗣️🗣️‼️‼️‼️ original drawing + progress pictures below

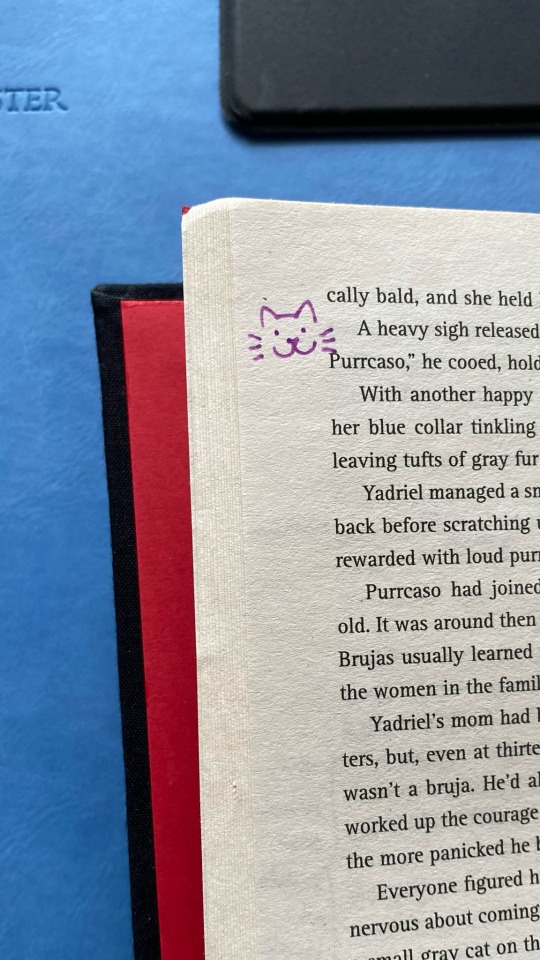
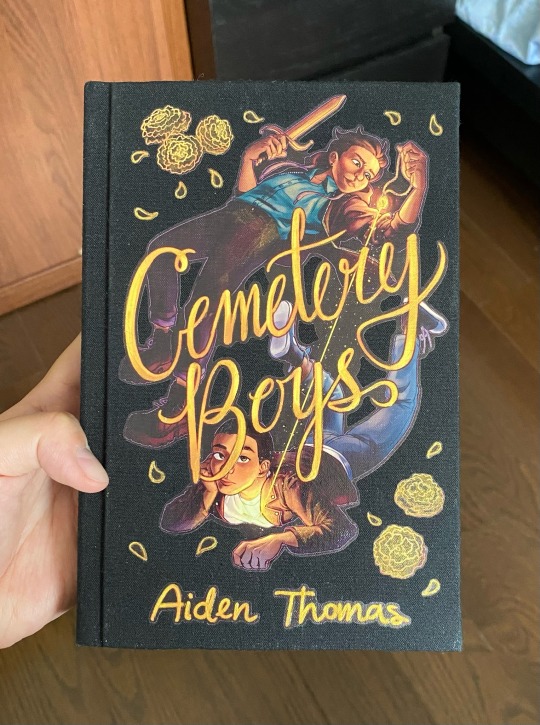
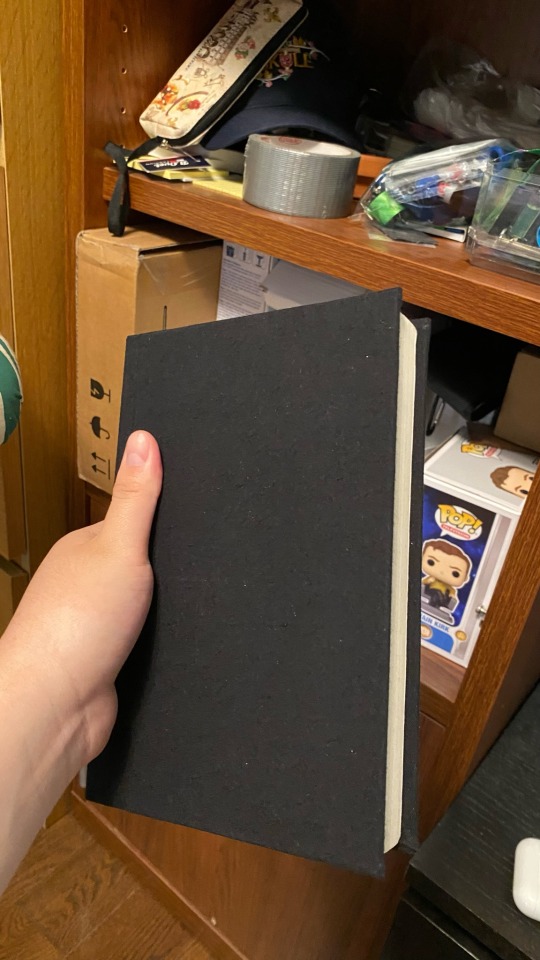
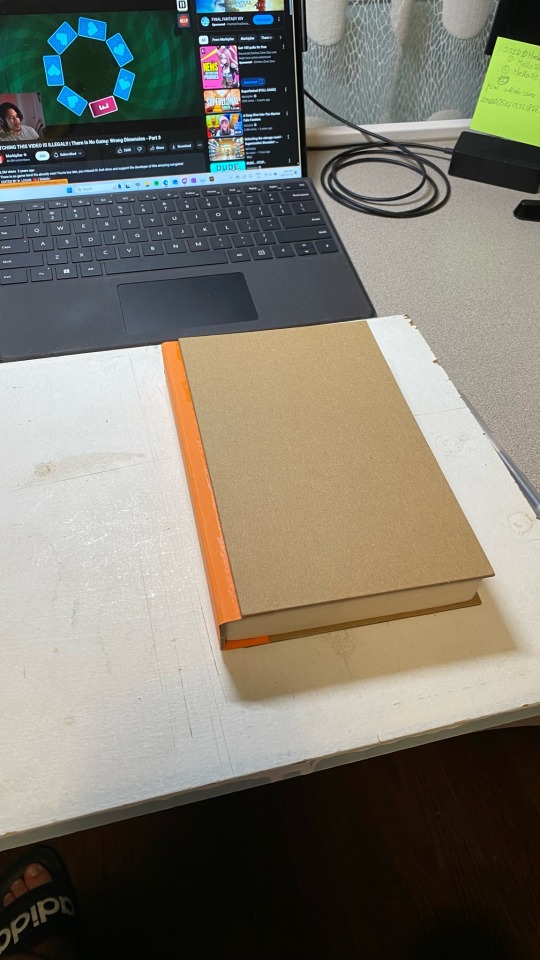
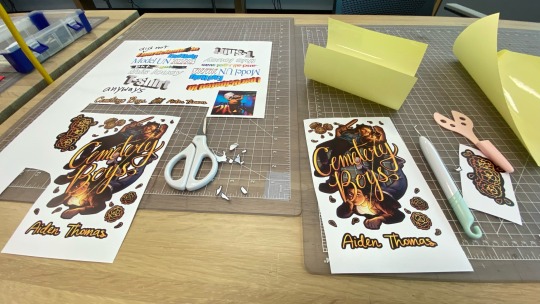
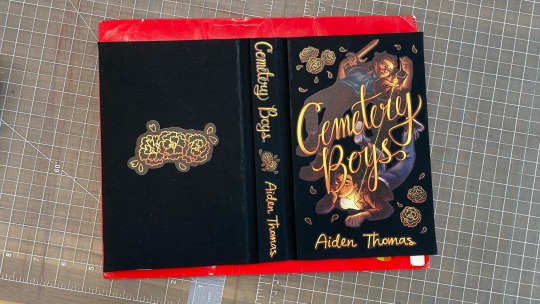
#wherefore art thou#cemetery boys#yadriel vélez flores#julian diaz#ignore the house md playing in the background#had to double check the spelling of ‘Cemetery’ multiple times#mostly followed Abound Bindery’s bookbinding tutorial on youtube! also learned a lot from Nik the Booksmith and DAS Bookbinding#also i can’t remember what channel came up with the idea but i used a glue stick on the back of the cotton cloth. poor man’s bookcloth.
99 notes
·
View notes
Text
328 notes
·
View notes
Text
instagram
25 notes
·
View notes
Text
Another guestbook! I've never done one before just recently, but there were two on the line for this fall, haha. This one just went in the mail this morning, so I can now receive the blessed dopamine rush of posting!
This is a case where the couple wanted to create their own interior for the book. The title on it comes straight from them, and the volume begins with a fairy tale retelling of their relationship, which I think is just the SWEETEST idea. The guests will be able to sign after that, and then the rest of the space is for the couple to leave each other notes in the future.

I finally did made endpapers to beef this book up to make sure the endpapers were nice and sturdy, and it worked beautifully! I don't know why I struggled and gave up every other time I tried them, haha. This is another k118 for opening flat reasons, and ahh, even paper vellum feels delicious to handle, but vellum vellum is REALLY next tier. The endcaps are leather, matching the spine, and I'm stoked about how well I was able to shape the endcaps around them! Oh, and the cover is blue-black color shift duo bookcloth. I'm really pleased with how this whole project turned out!


#crafts#bookbinding#k118#i might try to write a tutorial soon#but i am about to enter the wedding + work deadline + home ownership hell blender#im going to Die#might try to cram an indulgent cnovel in just to soothe my nerves
131 notes
·
View notes
Text


Square antiprism box
Part I
(many thanks @queercus-books for finding out what that shape is called XD)
Over a year ago I saw this particular kind of box on the bookbinders fair in Leiden (NL). After having been recently reminded of them, I decided to give it a go and try to reverse engineer them from the pictures I found here (check out her other boxes, they are gorgeous!).
After staring at the original boxes for a bit, it was obvious they were not covered on the inside after gathering them. The pattern was visible in one consecutive pattern. It told me that a) the board was laminate with the patterned paper while still flat and b) the box was made from one piece, not single pieces glued together. For that the corners and edges needed to be scratched, but not cut through.

What stumped me in the beginning was what angle to pick for the walls. Naturally the base of each triangle had to be as long as the sides of the squares it connected to, but a too pointy angle at the tip resulted in long boxes that looked rather twisted than having that bulbous look I was looking for.
The solution (after some more staring and a few more paper models) was 'right angles'! Any square piece of board can be made into this box by marking out the center square and have the walls point away in right angles.

Next I cut away the parts that won't be needed (to make sure I don't cut one of the side walls off, I crossed them out). The net of polyhedrons for this box could look different than this and still give me this shape, but with the way the paper pattern is was not visibly interrupted I'm confident this is the net the Dutch bookbinder has used. (It also wastes the least material)

Now it was scratching the other lines just enough so they would bend nicely, but not get too weak to hold the structure and test assemble. Shallow cuts and test bending every now and then helps to get there (also a metal ruler to keep carving the same line)


Cutting the board half way through ended me up with those gaps though. I''m not sure how much they would show if I dressed them just like that, but I decided to not take the risk and reinforced them with a white paper just in case.


The white paper is really just a white strip of paper long enough to go all around the box and a bit wider than one of the triangles is high so I could have an overlap and reinforcement to the bottom too. Part of why I did this was also to see if covering the body would work as I thought it would. With the angled planes the strip of paper bends up and and down, but in the end it's still one straight strip of paper.
I let it dry a bit before adding another layer, this time with the patterned paper and turn in's on top and bottom. In hindsight I could have cut the turn ins to the inside at an wider angle to avoid them reaching onto the better visible part, but then. this is the first time I made this box so I take that as a lesson learned.


Now all it needs is a base and a lid and I'm done.
60 notes
·
View notes
Text
youtube
Hello, I uploaded a tutorial on the basics of how I typeset fanfictions if you'd like to check it out. I am not a professional, and this is all personal preference. There is not a set way to typeset, but this is a way it can be done if you're interested in learning.
To see/use my typesets, I have a Google classroom (code: inqub5c). Everything I make is for personal use only with no intent to sell.
The fic I'm typesetting is Foxkill by boomturkey if you're interested in reading it!
9 notes
·
View notes
Video
youtube
@omfgreylo Show how to print, fold, and make holes for #fanficbookbinding
#youtube#omfgreylo#fanficbookbinding#fanfic bookbinding#ficbinding#fan art#book binding#bookbinding#diy bookbinding#tutorial#ficbind tutorial
61 notes
·
View notes