#crafting with natural stuff
Text
Seed berry ornaments

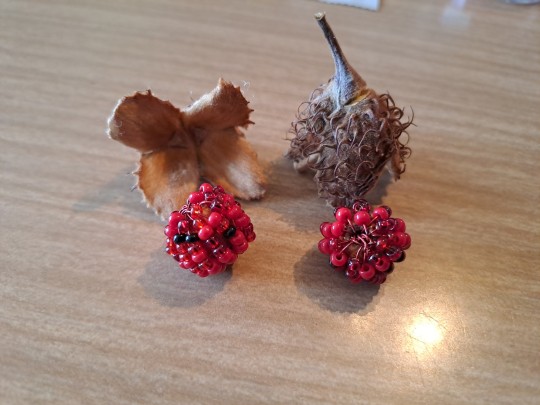

Making these was so much fun!!! I collected the empty seed coats on a walk in a local park and pretty soon knew I wanted to make some kind of ornament with them.
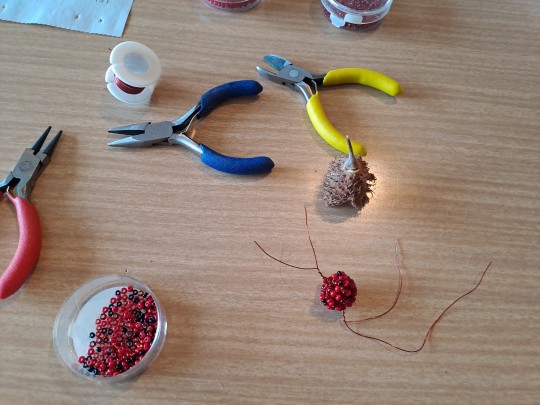
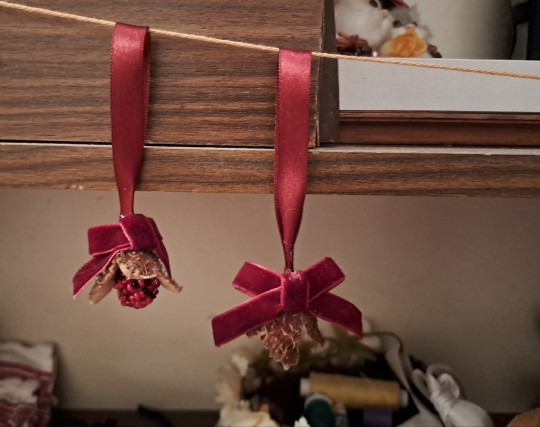
Because they were empty I took a wooden bead and wrapped it in wire, with little beads threaded onto each wire string. It was a simple process of stringing the beads and wrapping them through the wooden beads opening, but still time consuming. For me it was relaxing and fun to see the berry form with all the beads attached to the wooden bead! I hot glued the beaded berries into the seed coats and also hot glued red satin ribbon onto them (for hanging them up) and added some red velvet ribbon shapes into bows (for further decoration and festive cheer)!
I really adore how they came out.
[image description]
Picture 1: Picture 1 and Picture 6 are basically identical, they are just slightly different in zoom and are there to show of the pretty seed berry ornaments twice. Because, why not! They both show the finished seed berry ornaments, made with empty seed coats I found on a walk in nature, they kinda look like flower hats in my opinion. A berry made from different red-and-black beads has been glued inside the empty seed coat as a new berry and the ornament is decorated with a red satin ribbon loop and a red velvet bow.
Picture 2: Two empty seed coats, one laying on it's side and showing it's cap/hat like shape and one standing on top of the table. Two wooden beads wrapped with wire and beads are laying next to the seed coats, looking very much like red-and-black sparkly berries.
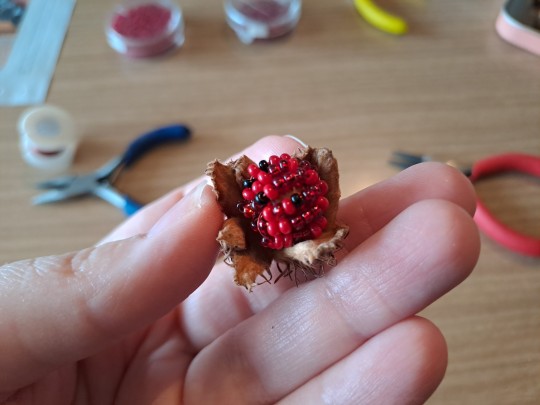
Picture 3: A close-up of a finished bead "berry" placed into an emtpy seed coat, showing how cute this ornament will look once I glue everything together!
Picture 4: A wooden bead wrapped in wire and covered with little beads is laying on top of a table. It looks very much like a sparkly berry in different shades of red and some black beads. Next to the wire-wrapped berry lay the used tools: two kinds of miniature-sized pliers and one miniature-sized wire cutter, the collected empty sead coat and a little transparent tin with a red-and-black bead mix.
Picture 5: A close-up of one wooden bead that has been completely wrapped in strings of wire with various shades of red (and some black) beads threaded onto the wire. The final look resembles a sparkly berry.
Picture 6: See picture 1. The picture almost look identical. I just wanted to include both! [/image description]
#crafting with nature#crafting with natural stuff#diy#handmade#tree ornaments#mori kei aesthetic#advent calendar#advent calendar content posted in no chronological order#i've participated in an handmade advent calendar swap and now i can show what i made for my swap partner#long image description#image descriped#image description
20 notes
·
View notes
Note
Please do the thing.
I can't believe this took me half a year. It turned out my leather was way too thin.
But I held on to the flatness Pipa pipa in my heart until I obtained some that's more suitable for a bookmark.
Here it is on a book page about the danger of frogs!

(This is in reference to the flattest frogs)
#my bleps#crafts#It's a bit wonky but I'm happy that I accidentally figured out how to make it look dappled#Also for anyone wondering - the page says that only some frogs have teeth and even those who do only have them on the upper jaw#So while in theory they could maybe possibly bite - they usually puff up as a defense. Or are poisonous... as a defense#It's some basic stuff about animals written by a science (nature? ecology?) communicator who's popular in Lithuania
300 notes
·
View notes
Text
Peach pit buttons Part 1 🍑🌿💚
I spent some time outside in the gloomy weather today and found a shit ton of old peach pits laying in the dirt. I'm gonna make them into buttons, I think
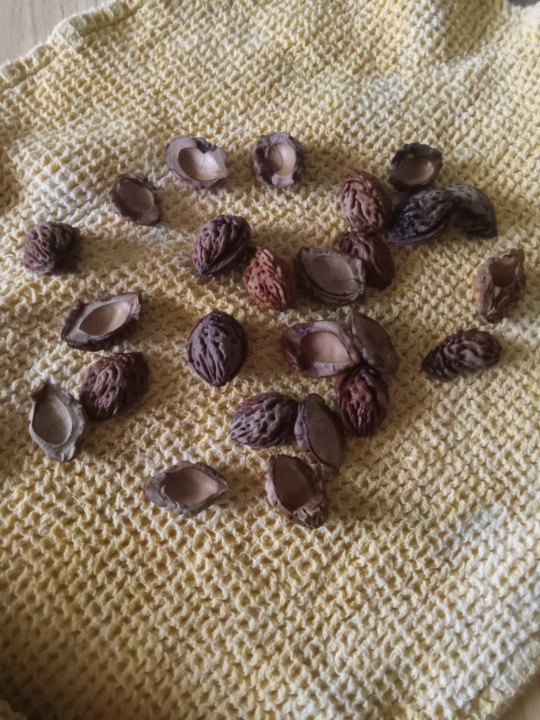
I just finished thoroughly washing them, I'm gonna put them in the freezer for 24 hours, dry them for a few days, sand the sharp parts with a dremel and then seal them with mod podge or resin. I'll probably drill the holes before I seal them that's probably a better idea
[Image ID: a stained yellowish towel on my counter, with 24 old peach pits that have just been washed. Most of them are halved, some of them are still whole. End ID]
#solarpunk#solarpunk diy#solarpunk fashion#hopepunk#ecopunk#buttons#diy#crafting#crafts#hatchet makes stuff#nature#punk#punk diy
77 notes
·
View notes
Text
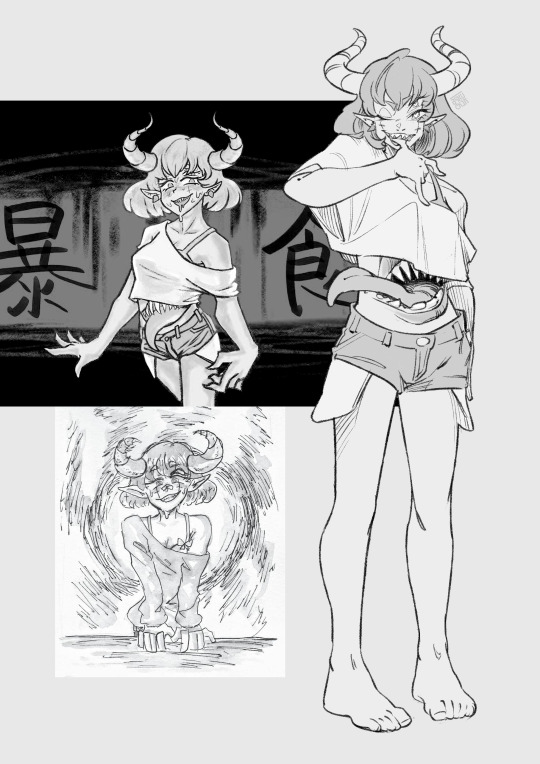
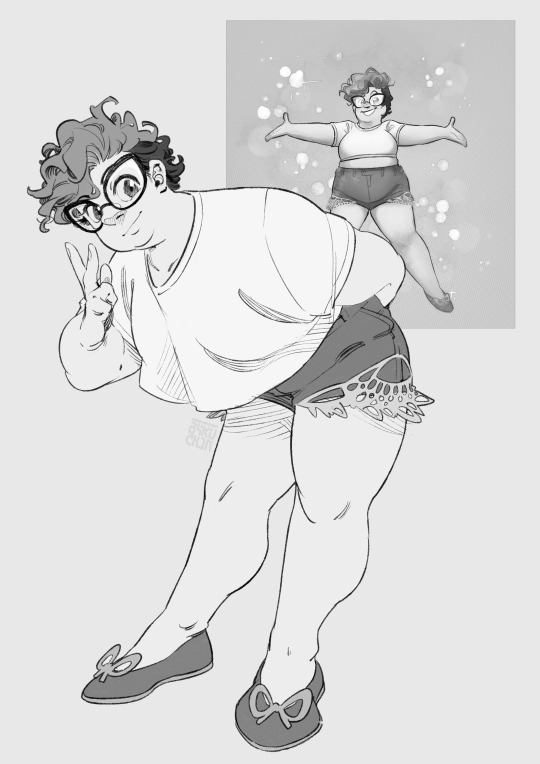
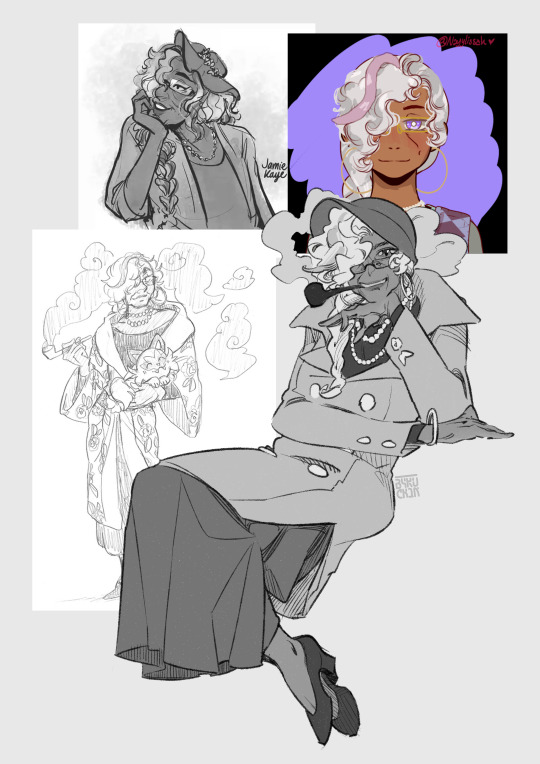
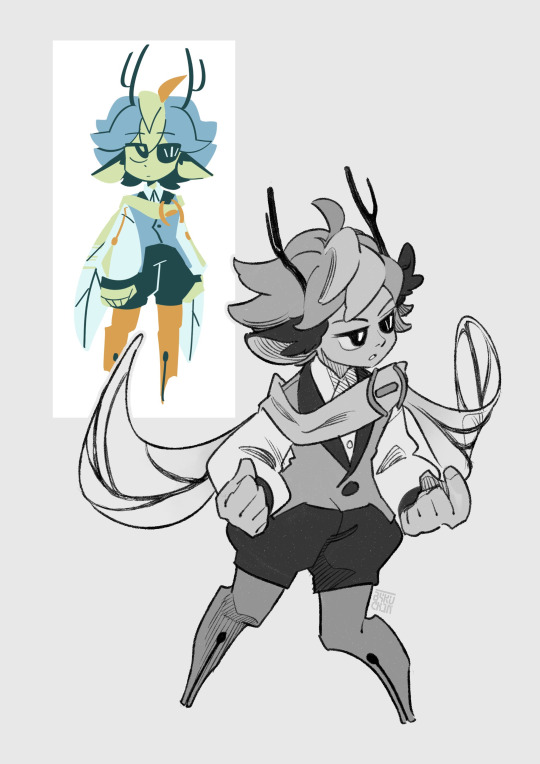
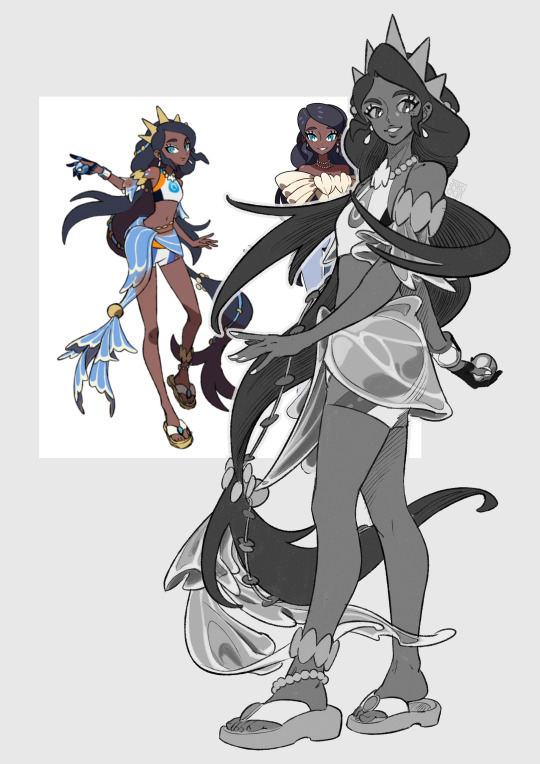
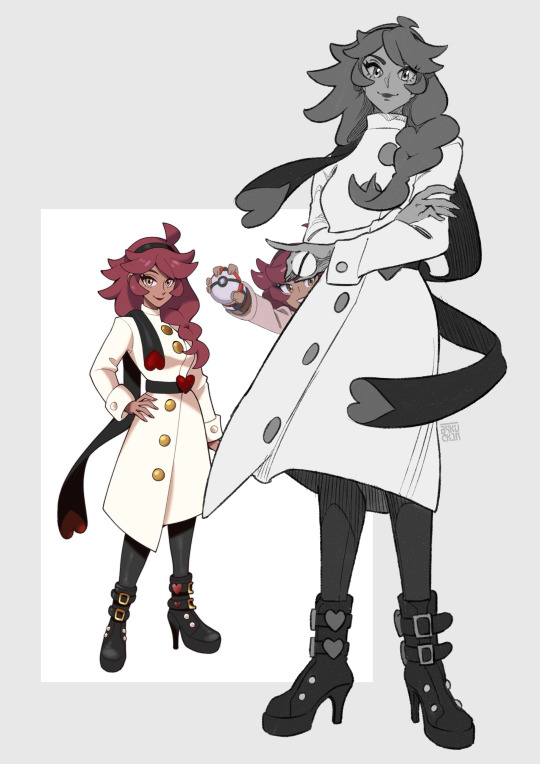
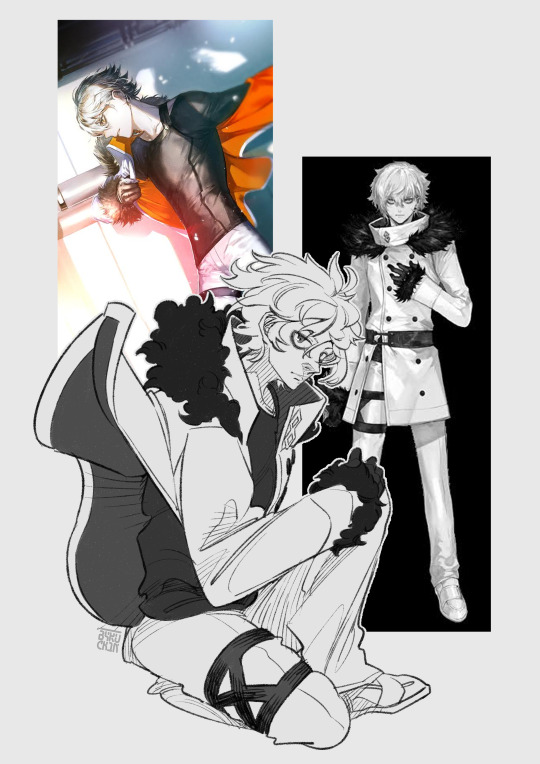
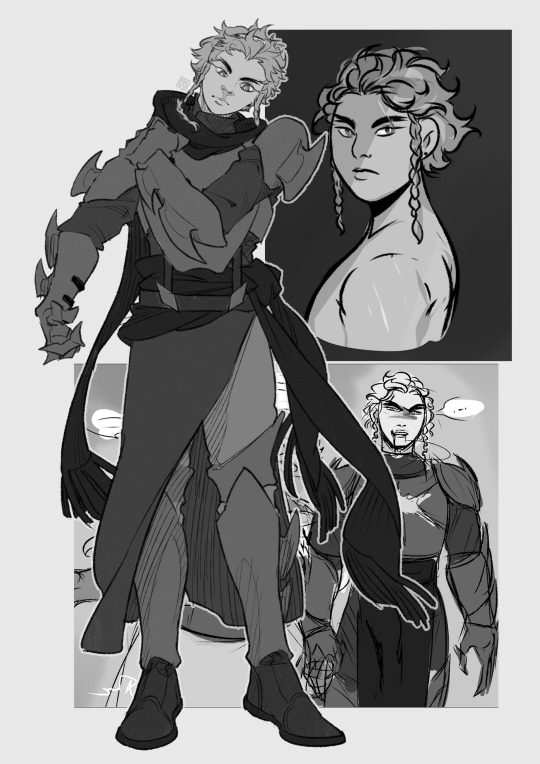
post-drive sketch commissions fulfilled so far! for Cookie Nomie, A. Peake, @azaelyas, viviiyon on twitter, bxby_ashhh on twitter, tsunesama, @trucbiduleschouettes, and Anna.
#commission art#e-sims for gaza#hello! its been a hot minute#I have been. cooking a Lot. such is the nature of lunar new year#but I have. also been racing to finish up some craft stuff due to sudden request from benefactor (mother)#and I was out of hanoi for uhhh two days in total. couldnt open my laptop during those#and also I've finally caught up on sherlock&co.... I. can see something approach in the near future. u must simply excuse me#hope everyones doing well hope theres been good eatin. hope weve been keepin up with helpin out where we can#news are turning in directions that make me hopeful. that have a familiar look I know from our own history#I will keep chippin away at the rest of the queue during the holiday. we gotta do what we can. I'm glad I can help at all#one more day til the year of the dragon. I'll show u guys the stuff I made for lunar new year tomorrow. for now I sleep#have a good night guys! every dragon was once a carp etc
100 notes
·
View notes
Text


The listings are live!
This is available on Ebay, Etsy, and Facebook Marketplace.
Here's the description for it.
A unique handmade sea themed suncatcher windchime.
Suncatchers and windchimes are a personal favorite and I wanted to make some. This one is vibrant and fun. It's perfect for anyone who loves ocean themes. The sun catches the glass, shiny wire, and gems perfectly. The wooden pieces at the bottom make a gentle sound in the wind. It's large enough to hang in almost any window or porch.
Product Details-
Total length while hanging- approximately 36 inches
Total width of the hanging stick- approximately 18.5 inches
String length (longest)- approximately 26 inches
Weight- Approximately 1.5 pounds
Number of strings- 9
Time spent crafting- approximately 24 hours over the span of a week.
Materials-
1 maple branch fallen naturally from a local maple tree.
Rope for hanging.
Burlap net ribbon.
Silver plated sea green copper wire.
Various metal jump rings.
Crimp beads
9 polished agate slices wrapped in the wire.
1 colored agate slice.
4 hand polished natural quartz spires wrapped in wire.
Small conch shells
Blue dyed quartzite, blue dyed quartz, multi colored jasper, green aventurine, rose quartz, citrine, lapis, red agate, and turquoise gem chips.
Turquoise colored stone starfish and sand dollar beads.
Red dyed bamboo coral beads.
Fluorocarbon nylon clear fishing line
9 mini glass bottles wrapped in wire, filled with sparkling mica rich native sand.
Colorful glass fish beads.
Colorful frosted glass beads.
Colorful crackle glass beads.
4 hand carved sea creatures made from reclaimed wood and painted with glitter infused blue paint.
#the willow oak lady posts#north carolina#the willow oak lady sells stuff#suncatchers#wind chimes#crafty things#crafting#crafts#etsyseller#etsystore#etsyshop#handmade#ebaystore#ebayseller#selling#nature photography
22 notes
·
View notes
Text
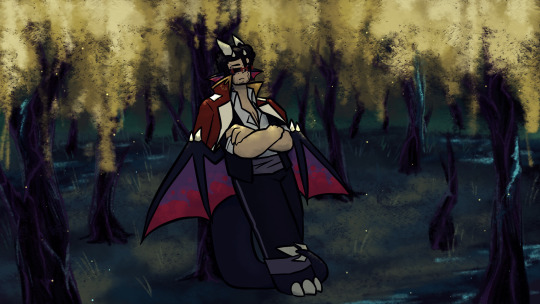
hes eepy
the abyss but what it looks like is based off of the hunters memories. it expands with each death in a vault, taking bits and pieces and building, creating something that should feel familiar to the hunters, something they should want to trust, something that is every so slightly Wrong
sparkly doesnt die in the abyss in the funky abyss au but he is in there fairly willingly and the abyss is able to poke around his head and go shopping for landscaping ideas. helps that he remembers the forest of the abyss fondly
#mcyt#captainsparklez#vault hunters smp#vault gods smp#vhsmp#marsh tries#btv abyss au#<--finally deciding i should make a tag for stuff specifically set in the au ive been hypothetically writing a fic about#''hes eepy'' my brother in craft hes on half a heart#hes unknowingly experiencing the Horrors and im not sure i can help him with that#heal wont bring back hearts removed by vault fruit#besides i associate being able to heal in a vault at all with the vault gods protection#like you dont get natural regen in a vault but velara can give you regen or increase your max health with their favor#and idona can give you leech#theres the pylons(?) that can give regen or extra hearts#the gods try to protect the hunters in the vaults. in their domain. which mans is outside of. the vg cant reach him#actually wait might have to do some research with like hearty apples or whatever the ones that can give you temp hearts are#and how they interact with vault fruit#either way bro is gonna feel unstoppable when he is removed from the abyss and has like. rows of hearts again
79 notes
·
View notes
Text
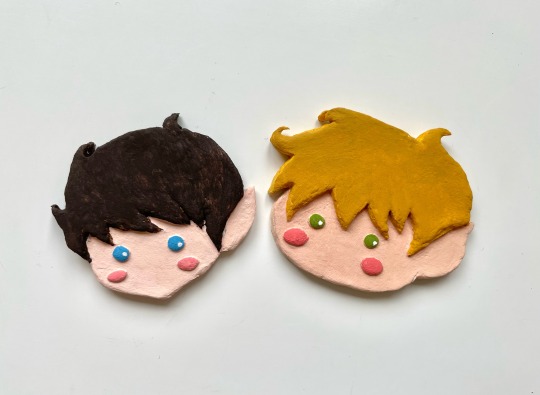
little hobbitses magnets made out of air dry clay :)
#more crafts from this weekend :)#another first attempt!! working with clay for the first time in almost 10 years . i also sculpted these before i tried to make gandalf big#naturals. also trying out making something simplified and cutesy another thing i have no idea how to do 😭. but i had fun!!!!#i think i want to make more not that i know a bit more. and also once i get the idea how to sculpt i want to try polymer clay instead of air#dry clay bc it’s probably easier to do smaller stuff. but gotta learn some basic with the cheap stuff first even when the materials are#different but like get the sense of sculpting#my art#lotr#air dry clay#acryllic paints
18 notes
·
View notes
Text
Awaken.
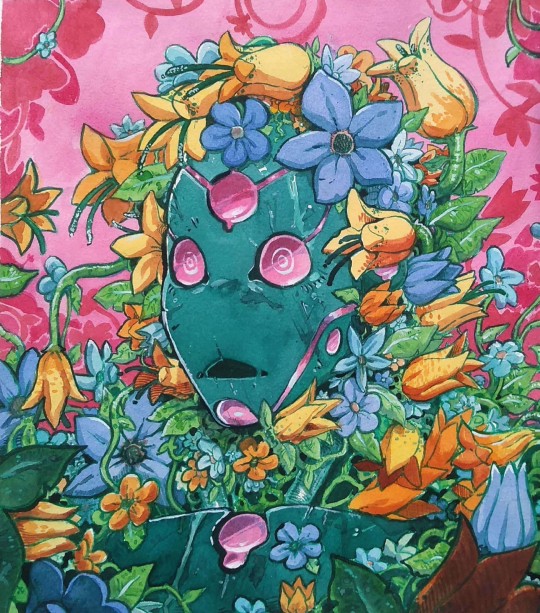
#watercolor#gouache#robot#flowers#nature#my art#was gonna admit this to an art show but its only for craft stuff!!! so all i got oit of it was this cool art
64 notes
·
View notes
Text
If you can remember it what was like the gateway thing for you to discover furry/anthro stuff. For me it was finding costuming vids on youtube specifically clockwork creature suits in 2008 i was obsessed with those
#Tbh i feel like 90% of the reason i like furry stuff is because of how artistic the spaces are#Im way less involved in the community than i thought i really only care about the drawings and the suitmaking#Ever since i was a kid ive had a major fixation on costume creation and special effects so it was only natural#If i had the opportunity id absolutely get into SFX and physical crafts but im perpetually broke LOL#emf
11 notes
·
View notes
Text
Fuchsia
#client: so if civilization died or the apocalypse happened what are your plans?#How I want to Answer: I'm gonna live full time in the woods and probably not venture to any towns or cities until a year passes#I'll probably be nomadic and won't have my camp in the same spot for safety reasons#I'm gonna sharpen some of my teeth so people know not to fuck around and find out plus biting is a strong go to when I fight#All my knives spears axes etc. will likely be coated with rattle snake venom from the sneks I milk myself#so attackers go out painfully and if they escape I can track them down like a komodo dragon while they slowly lose their minds#and to amp up the psychological warfare I have 3 aztec death whistles on hand and can make ungodly bird calls naturally to chase people awa#from my territory and if I could make it safe I'd coat my sharpened teeth with snake venom too#but honestly for the most part I'd be the chillest mf to be around and very helpful with healing and crafting#provided you ain't trying to round me up as a “resource” cause I'm AFAB or subject me to shit I don't want to do or threaten me in general#How I answered: y'know I haven't given it much thought! How about yourself? 😃#fuchsia is my vent tag for positive stuff#though can arguably be magenta given the context#magenta is my vent tag
2 notes
·
View notes
Text
ohhhhh Sleep is definitely one of these trees isn't it.... its absolutely a waking (as in IT is waking up in me) aspect
#i. have. ugh. ive been weiiiirrrdddllly side-eying Hypnos since I discovered he existed (not getting into why. he reminds me of hermes.#he reminds me of lull. thats all im saying) but the point is because Divinity Of Sleep hits home in ways i havent been comfortable explorin#in myself so i was. looking outside me. i dont need outside stuff. godddddddd ok#ramblings //#creation: the forest //#aspect: sleep //#fuckkkkkk ive been having issues w sleep for so long now - and i only really recently started believing im not fucking insane and that#astral stuff does actually happen - that i completely forgot in the beginning of working w spirits post-twins i fucking#was helping people getting to sleep and Hermes fucking called me something to do with sleep and my energy was - goddamn it#i literally. naturally expand into comfortable bedding. my bedroom is like a shrine space to me not because of how its used by others#(though spirits were treating it like that BECAUSE of this aspect) but because my energy was inhabiting it like an extension of me.#i was the calm. i was the relaxing into sleep. i was sleep itself. i was that which lulled people into sleep and dreaming. oh my god of#COURSE this realisation/remembering happens after i craft a crystal for my twinflame that filters out nightmares and whatnot#because. that thing. isnt a spell jar put together with ingredients and wishes. i manufactured the goddamn journey into sleep#it rewrites the falling into sleep itself manually (or. i manually programmed it. left it to autonomously repeat that action)#it was a complete ''i know how falling asleep and dreaming work this is what causes nightmares this is what causes dreams'' and#grr grr grr ok
4 notes
·
View notes
Text
Wichtel 1.0.


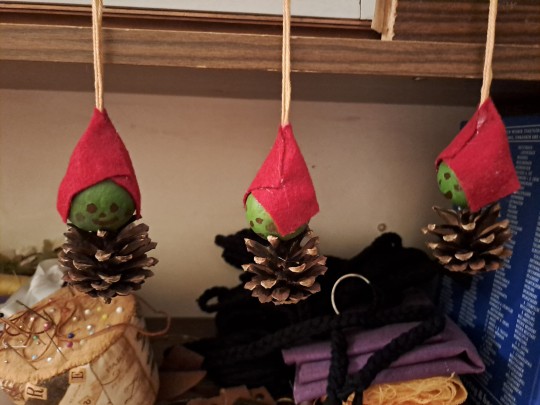
I had a vision in my head for these pine cone goblins and wasn't satisfied with the outcome of these. Don't get me wrong, they're certainly cute but didn't mash with the picture in my mind. So, these are the first version of pine cone goblins/imps I tried to make. Figures that they would be mischievous and give me trouble. For the advent calendar swap I made a second version that I sent to my swap partner, because they came closer to what I envisioned.
But these are very cute as well and got to stay with me!
[image description]
Picture 1: Three pine corn imps in a test state. White papermache balls have been places on the pine cones as heads. The middle imp has a simple face sketched out in pencil. Because those pine cone imps can't stand on their own, they're resting against sand-coloured cotton yarn (which will be used later to add loops to hang the imps up as decoration).
Picture 2: Five chubby pine cones laying on a brown table top.
Picture 3: Three papermache balls (which have been painted green) stuck on toothpicks, which in turn are stuck into two cleaning sponges. This construction holds the papermache balls up while the paint is drying. Two wooden disk have also been painted green and are propped up at the side of the cleaning sponges as well. A plastic file and some newspaper keep the table top clean from paint!
Picture 4: A tilted image of one finished pine cone imp. It's got a green painted head with a simple face drawn on in kind of thick brown brush strokes. On it's head the imp wears a red felt cap, with a sand-coloured string coming out of it, so you can hang it.
Picture 5: All three of the pine cone imps (version 1.0./first try). Two of them are hanging in a way that they're not facing forwards but rather to the side. [/image description]
#diy#handmade#crafting with natural stuff#crafting with nature#mori kei aesthetic#christmas diy#autumn diy#long image description#image descriped#image description
6 notes
·
View notes
Text
I'm very normal about nettles. I found a patch of winter retted nettles that were the perfect level of dead for fibre extraction! Will do an update video about what I make with it soon :)
#slow craft#textile#hand spun yarn#hand spinning#natural fibres#textile art#embroidery#ive spent all day editing and reuploading this like over 10 times#ive been trying so fucking hard with this algorithm shit i hate this so much#instagram reels kept glitching every time i made it so i had to do it on tiktok fml#any likes and saves on instagram would mean so much#thanks so much in advance#i hate that i have to do this content shit just for my job now it takes so much effort when i should be yknow#actually working on orders and making things to sell#posting this everywhere just to try and make traction ik people here dont care about this kind of stuff but whatev
39 notes
·
View notes
Text
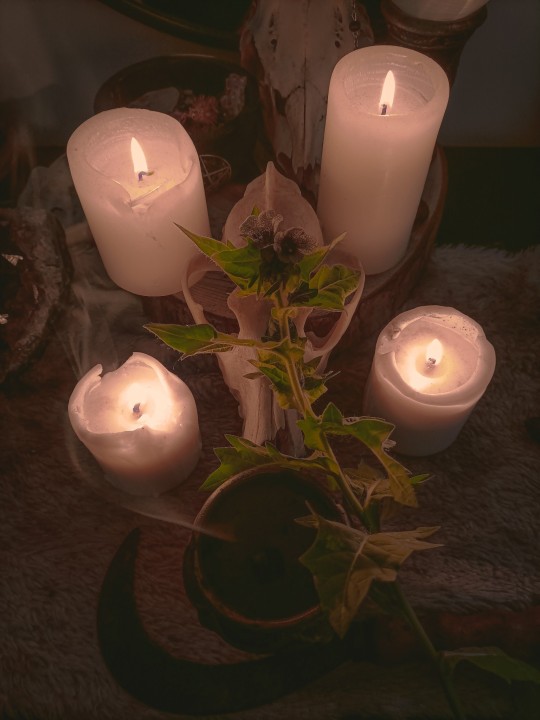
• 𝕭𝖑𝖆𝖈𝖐 𝕳𝖊𝖓𝖇𝖆𝖓𝖊 •
• Due to the high concentration of psychoactive substances, the plant was used to induce visions, for divinatory purposes and for spirit flight, especially if mixed with other baneful plants linked to Sorcery.
#witchcraft#magick#witch craft#witch stuff#witchcore#witchcraft spells#witchy tips#witchcraft 101#occult#traditional witchcraft#natural herbs
6 notes
·
View notes
Text
I made a Tiger and Bunny bookmark, I drew op fanart, I made a real life version of my Sona's mask and I started crocheting that cute bunny from Tiger and Bunny... I just love the creation juice that just posseses my hands and things come out of it. It's purely insane. Purely joy. Half magic and half sorcery with the finest flavour of oh shit i fucked that up oh shit oh fu k
#I want to make things#I want to make things until the day I die#so there's going to be so much stuff i left behind. people will never know what to do with it after i die#if im alive i create that's how it is it's everyone else's problems#art and crafts ohh i love art and crafts#unrelated but i saw one of those shine-in-the-dark plastics that usually come in the shape of stars shaped as a dinosaur today#and there was the tinyest palm in the same package#and I wanted it. so bad.#but it was too expensive. so naturally. i got angry at capitalism#my glow in the dark dinosaur and palm. im so sorry ;; it was only a dream#me blabbering
5 notes
·
View notes
Text


This is now listed on my Ebay, Etsy, and FB Marketplace! Please check it out and make an offer if you're interested in buying it!
#the willow oak lady posts#the willow oak lady sells stuff#nature#north carolina#crafty things#crafting#crafts#craftblr#sun catcher#suncatchers#beach#beachy#tropical#beach themed#summer#blue#fish#summertime#sea#ocean
16 notes
·
View notes
Last Seen Blogs


plinpopossum
Plinpopossum portfolio
pleasedontshootme
Not Impressed

pleistocene-dreams
anthropoids don't interact

zealouspuppyllama
Sem título