#css editors
Explore tagged Tumblr posts
Visit Tumblr Blog
Explore Tumblr blogs with no restrictions, modern design and the best experience.
Last Seen Tumblr Blogs


Fun Fact
Celebrities use Tumblr as well.
Text
anyway I've definitely posted something like this before but at some point I think we started making a list of ways to communicate over long distances, with some being silly ones and other being a little more reasonable, so here's a selection:
shared google doc or spreadsheet depending on preference
some kind of online notes app like Trello
those websites like walloftext where you can just leave text on a blank page for your friend to look at
HAM radio
carrier pigeon
fax machine
minecraft realm/server where you leave signs or books with messages for your friends to see when they're online
any browser based game that has an instant messaging feature
email newsletters
leaving messages on each other's wikipedia user talk pages (although presumably these are supposed to be relevant to stuff on Wikipedia? idk)
feel free to add to the list
#personal#thoughts#🍬 post#this is apparently how I'm dealing with my anxiety I guess#but also I added that last item to the list then got distracted for over an hour editing my wikipedia user page#I somehow ended up in a position where I was having an easier time with the source code editor than the visual editor#which is baffling because I do not understand CSS but somehow I managed to do what I wanted with it at least
20 notes
·
View notes
Text

So you have a Tumblr account for a long time (or not), but probably you may have a theme that is not supported anymore by its developer, or they just vanished from the face of this earth.
That means that you might be having problems with the new Neue Post Format (NPF) and how is handling new post types.
For more on what went into creating the Neue Post Format, check out Tumblr's Engineering blog post.
I know some-what about coding and even made some themes for Tumblr, though those were for a client so I can share them here.
The goal of this blog is to help:
Fix an old theme that's not behaving well with the new format.
Update some JavaScript knowledge that's breaking your theme.
Update outdated code to better display your theme.
And whatever, if I can help, I will.
AND if you'd like to give me a tip for helping out, that'd be awesome but not require for me to help you. [Ko-Fi not ready yet!]
Please check the READ.ME
⬇️ Versão Português 🇧🇷🇵🇹

Então você tem uma conta no Tumblr há muito tempo (ou não), mas provavelmente você tem um tema que não é mais suportado pelo seu desenvolvedor, ou o dito cujo simplesmente desapareceu da face da Terra.
Isso significa que você pode estar tendo problemas com o novo Neue Post Format (NPF) e como ele lida com novos tipos de postagem.
Para saber mais sobre o que foi necessário para criar o Neue Post Format, confira a postagem do blog de engenharia do Tumblr (em inglês).
O objetivo deste blog é ajudar:
Corrigir um tema antigo que não está se comportando bem com o novo formato.
Atualizar algum conhecimento de JavaScript que esteja quebrando seu tema.
Atualizar o código desatualizado para exibir melhor seu tema.
E tanto faz, se eu puder ajudar, é nóis.
E se você quiser me dar uma gorjeta para ajudar, isso seria ótimo, mas não é necessário para que eu o ajude. [Ko-Fi ainda não tá pronto!]
Por favor, verifique o READ.MEediting
#tumblr theme#tumblr themes#blog theme#blog themes#tumblr glitch#tumblr layouts#theme resources#theme makeover#theme makeovers#tumblr codes#editor#theme#themes#help#pls help#free content#theme change#brblr#html css#theme commissions#tutorial#tumblr issues#editing#layout
7 notes
·
View notes
Note
where did you learn css?
Unfortunately, I have not learned CSS 😎👍 it’s one of the things I need to figure out. I believe the wiki’s CSS code was done by the person who designed the wiki. Their username’s Ggeorgelys - they'd be a better person to talk about it than me
#asks#my two cents (which are probably less valuable than the average two cents) ->#i learned wikicode through looking at pages in source editor and putting what i saw there into practice elsewhere#so i don't really know HTML but i do know most wikicode from observing it wherever i could find it#as much as i want to do the same for CSS it's a lot more complicated to study#but i believe i can learn it!! and i believe you can too anon!!
3 notes
·
View notes
Text
slowly losing my sanity bc the old tumblr stylus thingy is pretty neat except the buttons are in the wrong order and whoever wrote the tumblr code hates themselves bc good god why is everything labeled Like That
4 notes
·
View notes
Text
hey all. I deleted it from my custom theme but I want to archive it, so here is css code to make all your posts sway around really sickeningly:
.post-wrapper { animation: spinny 2s infinite ease-in-out; animation-direction: alternate; } @keyframes spinny { 0% {translate: 0px -10px; transform: rotateX(-10deg);} 100% {translate: 0px 10px; transform: rotateX(10deg);} }
very simple but very fun, unless you get seasick.
#css effects#css#custom theme#I hate the tumblr css editor god why are there two scrollbars why ?????
5 notes
·
View notes
Text
If you use Firefox, you can use the Stylus add-on to add custom CSS rules to any website, including Tumblr. Just open the add-on menu, select the domain:

...then paste the CSS in here, then hit “Save”:

If you want to use the adblocker method, use uBlock Origin’s dashboard:

And paste the blocking script into My Filters, then hit “Apply Changes”:

New Mature Content Warning Overlay (And How to Get Rid of It)
More fun community label "features"! Unlike the new mandatory label for #NSFW, this one is a bigger deal to me because it affects my entire blog and it can't be avoided by just using a different tag.
Apparently on custom blog layouts, if you happen to post or reblog even a SINGLE post that's been flagged with the mature content community label, a full-page warning overlay will appear blurring out your entire blog that must be manually clicked through every single time the page is refreshed. At first I thought this was just a bug due to my older layout but I've come to realize it's not. It's a feature (as confirmed by this recent changes post) that affects all custom themes. The formatting will vary based on your own theme but here's what it looks like on my blog:

I don't know about you but I find this is stupid and annoying. If it could be dismissed once and never seen again that might be one thing, but that's not the case. The vast majority of my blog is not "mature" enough to warrant such an aggressive and invasive warning. I also think pop-ups are obnoxious in general and I'll be damned if tumblr's going to force me to have one on MY blog.
After some desperate googling for a known workaround and being unable to find even a single mention of it, I decided to take on the challenge myself. I'm not a theme coder, so apologies if there's a better way to do this, but luckily it only took me like 10 minutes to figure out a simple fix, which I'm now sharing with anyone else who may want it:
.community-label-cover__wrapper {display: none}
Just copypaste that somewhere in your CSS and goodbye pop-up!
If you're not sure how to access your theme code, check out this help article. You can also add the code via the Advanced Options menu, which is actually even better (if you can get it to work, it depends on how your theme was coded), because it will then automatically be reapplied to a lot of themes without having to remember to manually add it every time if you change your theme in the future.
Obviously this will only remove it from your own blog for anyone who may visit it. If you never want to see this warning again on other people's blogs you can also add this custom filter to your ad block:
tumblr.com##.community-label-cover__wrapper
Unfortunately I do not have an easy tutorial on hand for this one as the method will depend on your specific ad block app or extension.
Some additional notes:
After adding the theme code and saving the changes, give it a minute to update as it sometimes takes a little while for the page to refresh.
The warning overlay only seems to appear if a "mature" post is on the FIRST page of your blog, which is still annoying and makes the whole thing even more pointless and stupid because what if someone visits any other page of your blog, and oh no, happens to see "mature" content they weren't warned about?!
The warning also appears on direct links to "mature" posts.
This hack has NOTHING to do with entire blogs that have been flagged as NSFW. It only works for non-flagged blogs with custom themes that happen to have individual "mature" posts.
#how-to#how to be less annoyed by web design#Both of these tools are great for zapping annoyances on modern websites#Stylus can also import styles from sites like Stylish#which is an absolute hellsite and you don't want to use their own CSS editor it's very bad#but if you don't do your own CSS you can sometimes find what you're looking for there
17K notes
·
View notes
Text
Powering Search With Astro Actions and Fuse.js
New Post has been published on https://thedigitalinsider.com/powering-search-with-astro-actions-and-fuse-js/
Powering Search With Astro Actions and Fuse.js
Static sites are wonderful. I’m a big fan.
They also have their issues. Namely, static sites either are purely static or the frameworks that generate them completely lose out on true static generation when you just dip your toes in the direction of server routes.
Astro has been watching the front-end ecosystem and is trying to keep one foot firmly embedded in pure static generation, and the other in a powerful set of server-side functionality.
With Astro Actions, Astro brings a lot of the power of the server to a site that is almost entirely static. A good example of this sort of functionality is dealing with search. If you have a content-based site that can be purely generated, adding search is either going to be something handled entirely on the front end, via a software-as-a-service solution, or, in other frameworks, converting your entire site to a server-side application.
With Astro, we can generate most of our site during our build, but have a small bit of server-side code that can handle our search functionality using something like Fuse.js.
In this demo, we’ll use Fuse to search through a set of personal “bookmarks” that are generated at build time, but return proper results from a server call.
Starting the project
To get started, we’ll just set up a very basic Astro project. In your terminal, run the following command:
npm create astro@latest
Astro’s adorable mascot Houston is going to ask you a few questions in your terminal. Here are the basic responses, you’ll need:
Where should we create your new project? Wherever you’d like, but I’ll be calling my directory ./astro-search
How would you like to start your new project? Choose the basic minimalist starter.
Install dependencies? Yes, please!
Initialize a new git repository? I’d recommend it, personally!
This will create a directory in the location specified and install everything you need to start an Astro project. Open the directory in your code editor of choice and run npm run dev in your terminal in the directory.
When you run your project, you’ll see the default Astro project homepage.
We’re ready to get our project rolling!
Basic setup
To get started, let’s remove the default content from the homepage. Open the /src/pages/index.astro file.
This is a fairly barebones homepage, but we want it to be even more basic. Remove the <Welcome /> component, and we’ll have a nice blank page.
For styling, let’s add Tailwind and some very basic markup to the homepage to contain our site.
npx astro add tailwind
The astro add command will install Tailwind and attempt to set up all the boilerplate code for you (handy!). The CLI will ask you if you want it to add the various components, I recommend letting it, but if anything fails, you can copy the code needed from each of the steps in the process. As the last step for getting to work with Tailwind, the CLI will tell you to import the styles into a shared layout. Follow those instructions, and we can get to work.
Let’s add some very basic markup to our new homepage.
--- // ./src/pages/index.astro import Layout from '../layouts/Layout.astro'; --- <Layout> <div class="max-w-3xl mx-auto my-10"> <h1 class="text-3xl text-center">My latest bookmarks</h1> <p class="text-xl text-center mb-5">This is only 10 of A LARGE NUMBER THAT WE'LL CHANGE LATER</p> </div> </Layout>
Your site should now look like this.
Not exactly winning any awards yet! That’s alright. Let’s get our bookmarks loaded in.
Adding bookmark data with Astro Content Layer
Since not everyone runs their own application for bookmarking interesting items, you can borrow my data. Here’s a small subset of my bookmarks, or you can go get 110 items from this link on GitHub. Add this data as a file in your project. I like to group data in a data directory, so my file lives in /src/data/bookmarks.json.
Open code
[ King Arthur Baking", "url": "<https://www.kingarthurbaking.com/recipes/our-favorite-sandwich-bread-recipe>", "description": "Classic American sandwich loaf, perfect for French toast and sandwiches.", "id": "007y8pmEOvhwldfT3wx1MW" , "pageTitle": "Chris Coyier's discussion of Automatic Social Share Images , "pageTitle": "Automatic Social Share Images , "pageTitle": "Emma Wedekind: Foundations of Design Systems / React Boston 2019 - YouTube", "url": "<https://m.youtube.com/watch?v=pXb2jA43A6k>", "description": "Emma Wedekind: Foundations of Design Systems / React Boston 2019 Presented by: Emma Wedekind – LogMeIn Design systems are in the world around us, from street...", "id": "0d56d03e-aba4-4ebd-9db8-644bcc185e33" , "pageTitle": "Editorial Design Patterns With CSS Grid And Named Columns — Smashing Magazine", "url": "<https://www.smashingmagazine.com/2019/10/editorial-design-patterns-css-grid-subgrid-naming/>", "description": "By naming lines when setting up our CSS Grid layouts, we can tap into some interesting and useful features of Grid — features that become even more powerful when we introduce subgrids.", "id": "13ac1043-1b7d-4a5b-a3d8-b6f5ec34cf1c" , "pageTitle": "Netlify pro tip: Using Split Testing to power private beta releases - DEV Community 👩💻👨💻", "url": "<https://dev.to/philhawksworth/netlify-pro-tip-using-split-testing-to-power-private-beta-releases-a7l>", "description": "Giving users ways to opt in and out of your private betas. Video and tutorial.", "id": "1fbabbf9-2952-47f2-9005-25af90b0229e" , "pageTitle": "Netlify Public Folder, Part I: What? Recreating the Dropbox Public Folder With Netlify , "pageTitle": "Why Is CSS So Weird? - YouTube", "url": "<https://m.youtube.com/watch?v=aHUtMbJw8iA&feature=youtu.be>", "description": "Love it or hate it, CSS is weird! It doesn't work like most programming languages, and it doesn't work like a design tool either. But CSS is also solving a v...", "id": "2e29aa3b-45b8-4ce4-85b7-fd8bc50daccd" , "pageTitle": "Internet world despairs as non-profit .org sold for $$$$ to private equity firm, price caps axed • The Register", "url": "<https://www.theregister.co.uk/2019/11/20/org_registry_sale_shambles/>", "id": "33406b33-c453-44d3-8b18-2d2ae83ee73f" , "pageTitle": "Netlify Identity for paid subscriptions - Access Control / Identity - Netlify Community", "url": "<https://community.netlify.com/t/netlify-identity-for-paid-subscriptions/1947/2>", "description": "I want to limit certain functionality on my website to paying users. Now I’m using a payment provider (Mollie) similar to Stripe. My idea was to use the webhook fired by this service to call a Netlify function and give…", "id": "34d6341c-18eb-4744-88e1-cfbf6c1cfa6c" , "pageTitle": "SmashingConf Freiburg 2019: Videos And Photos — Smashing Magazine", "url": "<https://www.smashingmagazine.com/2019/10/smashingconf-freiburg-2019/>", "description": "We had a lovely time at SmashingConf Freiburg. This post wraps up the event and also shares the video of all of the Freiburg presentations.", "id": "354cbb34-b24a-47f1-8973-8553ed1d809d" , "pageTitle": "Adding Google Calendar to your JAMStack", "url": "<https://www.raymondcamden.com/2019/11/18/adding-google-calendar-to-your-jamstack>", "description": "A look at using Google APIs to add events to your static site.", "id": "361b20c4-75ce-46b3-b6d9-38139e03f2ca" , "pageTitle": "How to Contribute to an Open Source Project , Netlify", "url": "<https://www.netlify.com/docs/functions/>", "description": "Netlify builds, deploys, and hosts your front end. Learn how to get started, see examples, and view documentation for the modern web platform.", "id": "3bf9e31b-5288-4b3b-89f2-97034603dbf6" , "pageTitle": "Serverless Can Help You To Focus - By Simona Cotin", "url": "<https://hackernoon.com/serverless-can-do-that-7nw32mk>", "id": "43b1ee63-c2f8-4e14-8700-1e21c2e0a8b1" , "pageTitle": "Nuxt, Next, Nest?! My Head Hurts. - DEV Community 👩💻👨💻", "url": "<https://dev.to/laurieontech/nuxt-next-nest-my-head-hurts-5h98>", "description": "I clearly know what all of these things are. Their names are not at all similar. But let's review, just to make sure we know...", "id": "456b7d6d-7efa-408a-9eca-0325d996b69c" , "pageTitle": "Consuming a headless CMS GraphQL API with Eleventy - Webstoemp", "url": "<https://www.webstoemp.com/blog/headless-cms-graphql-api-eleventy/>", "description": "With Eleventy, consuming data coming from a GraphQL API to generate static pages is as easy as using Markdown files.", "id": "4606b168-21a6-49df-8536-a2a00750d659" , ]
Now that the data is in the project, we need for Astro to incorporate the data into its build process. To do this, we can use Astro’s new(ish) Content Layer API. The Content Layer API adds a content configuration file to your src directory that allows you to run and collect any number of content pieces from data in your project or external APIs. Create the file /src/content.config.ts (the name of this file matters, as this is what Astro is looking for in your project).
import defineCollection, z from "astro:content"; import file from 'astro/loaders'; const bookmarks = defineCollection( schema: z.object( pageTitle: z.string(), url: z.string(), description: z.string().optional() ), loader: file("src/data/bookmarks.json"), ); export const collections = bookmarks ;
In this file, we import a few helpers from Astro. We can use defineCollection to create the collection, z as Zod, to help define our types, and file is a specific content loader meant to read data files.
The defineCollection method takes an object as its argument with a required loader and optional schema. The schema will help make our content type-safe and make sure our data is always what we expect it to be. In this case, we’ll define the three data properties each of our bookmarks has. It’s important to define all your data in your schema, otherwise it won’t be available to your templates.
We provide the loader property with a content loader. In this case, we’ll use the file loader that Astro provides and give it the path to our JSON.
Finally, we need to export the collections variable as an object containing all the collections that we’ve defined (just bookmarks in our project). You’ll want to restart the local server by re-running npm run dev in your terminal to pick up the new data.
Using the new bookmarks content collection
Now that we have data, we can use it in our homepage to show the most recent bookmarks that have been added. To get the data, we need to access the content collection with the getCollection method from astro:content. Add the following code to the frontmatter for ./src/pages/index.astro .
--- import Layout from '../layouts/Layout.astro'; import getCollection from 'astro:content'; const bookmarks = await getCollection('bookmarks'); ---
This code imports the getCollection method and uses it to create a new variable that contains the data in our bookmarkscollection. The bookmarks variable is an array of data, as defined by the collection, which we can use to loop through in our template.
--- import Layout from '../layouts/Layout.astro'; import getCollection from 'astro:content'; const bookmarks = await getCollection('bookmarks'); --- <Layout> <div class="max-w-3xl mx-auto my-10"> <h1 class="text-3xl text-center">My latest bookmarks</h1> <p class="text-xl text-center mb-5"> This is only 10 of bookmarks.length </p> <h2 class="text-2xl mb-3">Latest bookmarks</h2> <ul class="grid gap-4"> bookmarks.slice(0, 10).map((item) => ( <li> <a href=item.data?.url class="block p-6 bg-white border border-gray-200 rounded-lg shadow-sm hover:bg-gray-100 dark:bg-gray-800 dark:border-gray-700 dark:hover:bg-gray-700"> <h3 class="mb-2 text-2xl font-bold tracking-tight text-gray-900 dark:text-white"> item.data?.pageTitle </h3> <p class="font-normal text-gray-700 dark:text-gray-400"> item.data?.description </p> </a> </li> )) </ul> </div> </Layout>
This should pull the most recent 10 items from the array and display them on the homepage with some Tailwind styles. The main thing to note here is that the data structure has changed a little. The actual data for each item in our array actually resides in the data property of the item. This allows Astro to put additional data on the object without colliding with any details we provide in our database. Your project should now look something like this.
Now that we have data and display, let’s get to work on our search functionality.
Building search with actions and vanilla JavaScript
To start, we’ll want to scaffold out a new Astro component. In our example, we’re going to use vanilla JavaScript, but if you’re familiar with React or other frameworks that Astro supports, you can opt for client Islands to build out your search. The Astro actions will work the same.
Setting up the component
We need to make a new component to house a bit of JavaScript and the HTML for the search field and results. Create the component in a ./src/components/Search.astro file.
<form id="searchForm" class="flex mb-6 items-center max-w-sm mx-auto"> <label for="simple-search" class="sr-only">Search</label> <div class="relative w-full"> <input type="text" id="search" class="bg-gray-50 border border-gray-300 text-gray-900 text-sm rounded-lg focus:ring-blue-500 focus:border-blue-500 block w-full p-2.5 dark:bg-gray-700 dark:border-gray-600 dark:placeholder-gray-400 dark:text-white dark:focus:ring-blue-500 dark:focus:border-blue-500" placeholder="Search Bookmarks" required /> </div> <button type="submit" class="p-2.5 ms-2 text-sm font-medium text-white bg-blue-700 rounded-lg border border-blue-700 hover:bg-blue-800 focus:ring-4 focus:outline-none focus:ring-blue-300 dark:bg-blue-600 dark:hover:bg-blue-700 dark:focus:ring-blue-800"> <svg class="w-4 h-4" aria-hidden="true" xmlns="<http://www.w3.org/2000/svg>" fill="none" viewBox="0 0 20 20"> <path stroke="currentColor" stroke-linecap="round" stroke-linejoin="round" stroke-width="2" d="m19 19-4-4m0-7A7 7 0 1 1 1 8a7 7 0 0 1 14 0Z"></path> </svg> <span class="sr-only">Search</span> </button> </form> <div class="grid gap-4 mb-10 hidden" id="results"> <h2 class="text-xl font-bold mb-2">Search Results</h2> </div> <script> const form = document.getElementById("searchForm"); const search = document.getElementById("search"); const results = document.getElementById("results"); form?.addEventListener("submit", async (e) => e.preventDefault(); console.log("SEARCH WILL HAPPEN"); ); </script>
The basic HTML is setting up a search form, input, and results area with IDs that we’ll use in JavaScript. The basic JavaScript finds those elements, and for the form, adds an event listener that fires when the form is submitted. The event listener is where a lot of our magic is going to happen, but for now, a console log will do to make sure everything is set up properly.
Setting up an Astro Action for search
In order for Actions to work, we need our project to allow for Astro to work in server or hybrid mode. These modes allow for all or some pages to be rendered in serverless functions instead of pre-generated as HTML during the build. In this project, this will be used for the Action and nothing else, so we’ll opt for hybrid mode.
To be able to run Astro in this way, we need to add a server integration. Astro has integrations for most of the major cloud providers, as well as a basic Node implementation. I typically host on Netlify, so we’ll install their integration. Much like with Tailwind, we’ll use the CLI to add the package and it will build out the boilerplate we need.
npx astro add netlify
Once this is added, Astro is running in Hybrid mode. Most of our site is pre-generated with HTML, but when the Action gets used, it will run as a serverless function.
Setting up a very basic search Action
Next, we need an Astro Action to handle our search functionality. To create the action, we need to create a new file at ./src/actions/index.js. All our Actions live in this file. You can write the code for each one in separate files and import them into this file, but in this example, we only have one Action, and that feels like premature optimization.
In this file, we’ll set up our search Action. Much like setting up our content collections, we’ll use a method called defineAction and give it a schema and in this case a handler. The schema will validate the data it’s getting from our JavaScript is typed correctly, and the handler will define what happens when the Action runs.
import defineAction from "astro:actions"; import z from "astro:schema"; import getCollection from "astro:content"; export const server = search: defineAction( schema: z.object( query: z.string(), ), handler: async (query) => const bookmarks = await getCollection("bookmarks"); const results = await bookmarks.filter((bookmark) => return bookmark.data.pageTitle.includes(query); ); return results; , ), ;
For our Action, we’ll name it search and expect a schema of an object with a single property named query which is a string. The handler function will get all of our bookmarks from the content collection and use a native JavaScript .filter() method to check if the query is included in any bookmark titles. This basic functionality is ready to test with our front-end.
Using the Astro Action in the search form event
When the user submits the form, we need to send the query to our new Action. Instead of figuring out where to send our fetch request, Astro gives us access to all of our server Actions with the actions object in astro:actions. This means that any Action we create is accessible from our client-side JavaScript.
In our Search component, we can now import our Action directly into the JavaScript and then use the search action when the user submits the form.
<script> import actions from "astro:actions"; const form = document.getElementById("searchForm"); const search = document.getElementById("search"); const results = document.getElementById("results"); form?.addEventListener("submit", async (e) => e.preventDefault(); results.innerHTML = ""; const query = search.value; const data, error = await actions.search(query); if (error) results.innerHTML = `<p>$error.message</p>`; return; // create a div for each search result data.forEach(( item ) => const div = document.createElement("div"); div.innerHTML = ` <a href="$item.data?.url" class="block p-6 bg-white border border-gray-200 rounded-lg shadow-sm hover:bg-gray-100 dark:bg-gray-800 dark:border-gray-700 dark:hover:bg-gray-700"> <h3 class="mb-2 text-2xl font-bold tracking-tight text-gray-900 dark:text-white"> $item.data?.pageTitle </h3> <p class="font-normal text-gray-700 dark:text-gray-400"> $item.data?.description </p> </a>`; // append the div to the results container results.appendChild(div); ); // show the results container results.classList.remove("hidden"); ); </script>
When results are returned, we can now get search results!
Though, they’re highly problematic. This is just a simple JavaScript filter, after all. You can search for “Favorite” and get my favorite bread recipe, but if you search for “favorite” (no caps), you’ll get an error… Not ideal.
That’s why we should use a package like Fuse.js.
Adding Fuse.js for fuzzy search
Fuse.js is a JavaScript package that has utilities to make “fuzzy” search much easier for developers. Fuse will accept a string and based on a number of criteria (and a number of sets of data) provide responses that closely match even when the match isn’t perfect. Depending on the settings, Fuse can match “Favorite”, “favorite”, and even misspellings like “favrite” all to the right results.
Is Fuse as powerful as something like Algolia or ElasticSearch? No. Is it free and pretty darned good? Absolutely! To get Fuse moving, we need to install it into our project.
npm install fuse.js
From there, we can use it in our Action by importing it in the file and creating a new instance of Fuse based on our bookmarks collection.
import defineAction from "astro:actions"; import z from "astro:schema"; import getCollection from "astro:content"; import Fuse from "fuse.js"; export const server = search: defineAction( schema: z.object( query: z.string(), ), handler: async (query) => const bookmarks = await getCollection("bookmarks"); const fuse = new Fuse(bookmarks, threshold: 0.3, keys: [ name: "data.pageTitle", weight: 1.0 , name: "data.description", weight: 0.7 , name: "data.url", weight: 0.3 , ], ); const results = await fuse.search(query); return results; , ), ;
In this case, we create the Fuse instance with a few options. We give it a threshold value between 0 and 1 to decide how “fuzzy” to make the search. Fuzziness is definitely something that depends on use case and the dataset. In our dataset, I’ve found 0.3 to be a great threshold.
The keys array allows you to specify which data should be searched. In this case, I want all the data to be searched, but I want to allow for different weighting for each item. The title should be most important, followed by the description, and the URL should be last. This way, I can search for keywords in all these areas.
Once there’s a new Fuse instance, we run fuse.search(query) to have Fuse check the data, and return an array of results.
When we run this with our front-end, we find we have one more issue to tackle.
The structure of the data returned is not quite what it was with our simple JavaScript. Each result now has a refIndex and an item. All our data lives on the item, so we need to destructure the item off of each returned result.
To do that, adjust the front-end forEach.
// create a div for each search result data.forEach(( item ) => const div = document.createElement("div"); div.innerHTML = ` <a href="$item.data?.url" class="block p-6 bg-white border border-gray-200 rounded-lg shadow-sm hover:bg-gray-100 dark:bg-gray-800 dark:border-gray-700 dark:hover:bg-gray-700"> <h3 class="mb-2 text-2xl font-bold tracking-tight text-gray-900 dark:text-white"> $item.data?.pageTitle </h3> <p class="font-normal text-gray-700 dark:text-gray-400"> $item.data?.description </p> </a>`; // append the div to the results container results.appendChild(div); );
Now, we have a fully working search for our bookmarks.
Next steps
This just scratches the surface of what you can do with Astro Actions. For instance, we should probably add additional error handling based on the error we get back. You can also experiment with handling this at the page-level and letting there be a Search page where the Action is used as a form action and handles it all as a server request instead of with front-end JavaScript code. You could also refactor the JavaScript from the admittedly low-tech vanilla JS to something a bit more robust with React, Svelte, or Vue.
One thing is for sure, Astro keeps looking at the front-end landscape and learning from the mistakes and best practices of all the other frameworks. Actions, Content Layer, and more are just the beginning for a truly compelling front-end framework.
#access control#ADD#American#amp#API#APIs#aria#Articles#astro#Blog#Blue#bread#Building#Calendar#change#Cloud#cloud providers#CMS#code#Code Editor#Collections#columns#command#Community#container#content#CSS#CSS Grid#css-tricks#Dark
0 notes
Text
I don't have adhd (autism and adhd tendancies but not fr adhd) but I'm convinced that this must be what hyperfixation feels like. or at least looks like from an outside perspective.

#⋆˚ my posts ˖°#I'm using the rich text editor for tumblr but I almost tried to use <i></i> for the italics 💀#I need some silly webmaster moots 😞#also I need to learn more stuff so I can contribute to things#github#github accounts#hyperfixation#htmlcoding#html#html css#coding#websites#personal website#indie web#neocities#nekoweb
0 notes
Text
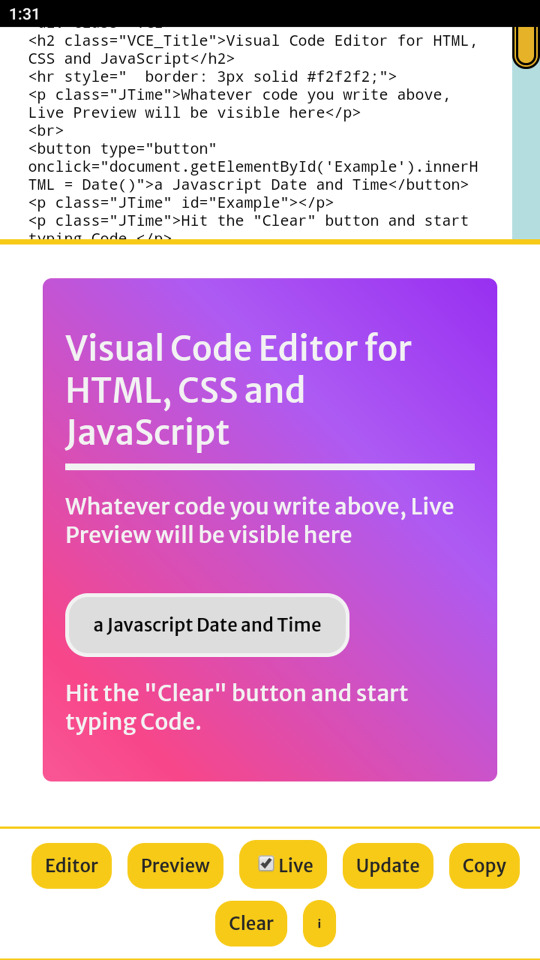
Visual Code Editor
https://play.google.com/store/apps/details?id=com.whiteflower10001.Live_Code_Editor_and_Tester
It's handy. Install this Visual Code Editor in your Android Phone or Tab and test HTML, CSS, JavaScript when you are on the way.
0 notes
Text
Best free simple online HTML Javascript editor code tool
Best free simple online editor code tool for HTML5, CSS, JAVA text by AR3Tools HTML editor on blogger with preview HTML creator online The best place to build, test, and discover front-end code training for beginners responsively with all devices PC and mobile.
0 notes
Text
((I got onto tumblr to rp but then spent several hours working on a new tumblr theme instead. It’s not even done))
#I’m using a code base#I spent way too long trying to find a way to alternate colors between diff people’s replies but I don’t believe it can be done just with css#making the posts alternate colors was ez tho turns out#wish there were a way to edit it in a code editor instead of on tumblr itself cuz the html wysiwyg situation is not the best#ooc#it’s about to be the weekend I should be able to get to replies soon enough
0 notes
Text
[solved] WordPress FSE - Problems with passing CSS variable to Site Editor
[solved] WordPress FSE - Problems with passing CSS variable to Site Editor
WordPress FSE or Full Site Editing is an upcoming feature of WordPress, which enables users to edit all aspects of their site directly from the site editor. However, there are certain issues that need to be addressed in this feature, including problems with passing CSS variables to the Site Editor. CSS variables are an essential tool for web developers, as they allow for easy customization of…
View On WordPress
0 notes
Text
2 notes
·
View notes
Text
HTML Editors Tips And Tricks Free Guide Top 5 Tips
MASTERING HTML EDITORS: A COMPREHENSIVE GUIDE TO UNLOCKING YOUR WEBSITE’S POTENTIAL

1 note
·
View note
Text

8 Best HTML & CSS Code Editors for 2023
Boost efficiency & precision in web development with top HTML & CSS code editors. Discover 2023's best tools for seamless coding
0 notes