#found this on yt comment section
Text
The masculine urge to randomly grind and improve your life, get more social, start to read more, get educated and work out like hell to look like a greek god
#the key word is “randomly”#and damn do i relate to this#found this on yt comment section#just spiced it up a bit#masculine urge#mine
23 notes
·
View notes
Text
this is such a random thought to be posting on here but it's hella sus when grown adults talk about how stranger danger isn't real and we shouldn't be teaching kids not to talk to strangers
#i was watching a yt video and the whole comment section was like that + everyone kept bringing up low stranger abduction rates#and like first of all let's say for the sake of the argument that the 1% statistics is true that's still 4.6k kids/year#which idk seems high enough to me considering they're unlikely to be found alive#and second of all the reason the rates are lower now is BECAUSE everyone born in the 90s and later was taught not to be getting into cars#with strangers so what do you think will happen if kids are taught that strangers are actually okay and you shouldn't be afraid of them#more harm then good that's for sure#and the biggest question here is why you a whole ass adult want kids to be less vigilant 🤨 what are you getting out of it#anyway definitely a tbd kind of post but much to think about#^ us statistics that is#xenia.txt
3 notes
·
View notes
Text
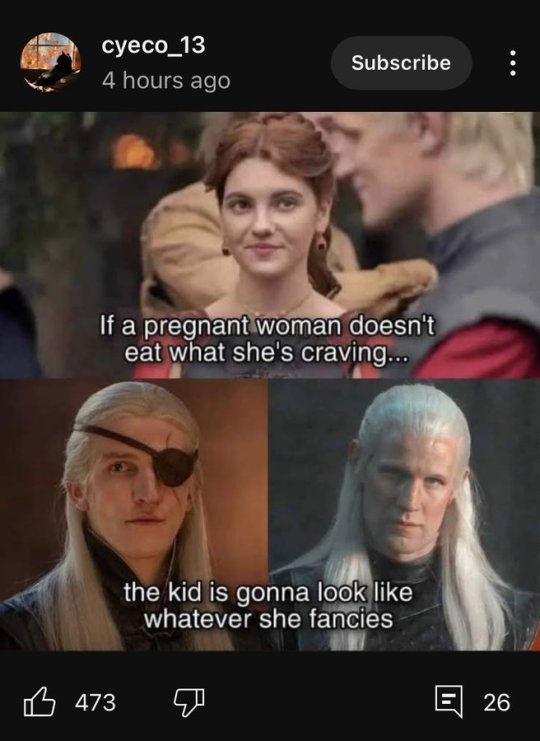
actually so curious what made the eddsworld fandom Like That. why do u guys hate tomtord
#i dont have any opinions on eddsworld shipping out of all things i dont really care#but like i watched this one dumb meme i found on yt and. hey comments section what made u be like that#this is a fully neutral question im not trying to be negative i just cant word myself. im so curious why are you people like that#voidcore.txt
3 notes
·
View notes
Text
Some thoughts on Steven's new show, and the hate that's been directed at him lately
spoiler alert: the tl;dr is that people's assumptions about the new food show being expensive meals aren't in the trailer and I'm happily subscribed to Watcher TV now!
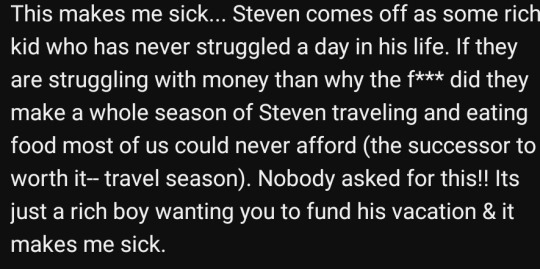
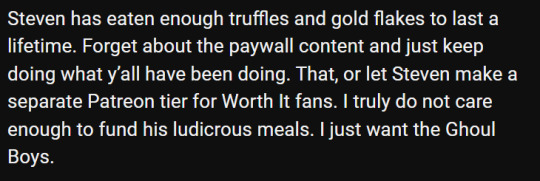
One of the most awful things about this announcement has been seeing people attacking Steven specifically, and making a lot of assumptions about him. I (probably unwisely) spent a couple hours in the yt comment section and found things like this:


And then I saw this tumblr comment that do a wtf face irl:
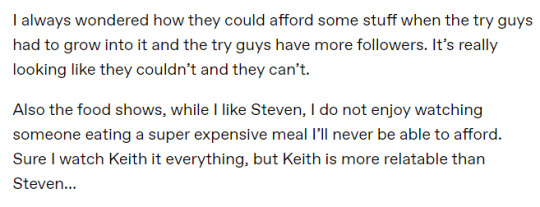
Keith's new eating show is at Michelin star restaurants... to call that relatable and Steven not? Honey, that's either racism or some implicit bias you need to examine (I watch some TG content, it's fine to like Keith, but damn this take isn't it y'all)
But my main point is: No one said Steven and Andrew are going to be having expensive meals on the new show.
(yeah, remember Andrew is on the show too? but all hate is directed at Steven? isn't that interesting...)
That was Buzzfeed. This is Watcher. They aren't going to repeat themselves. Also, Worth It was about showing food across ALL price points, especially in later seasons once they had a more stable platform at BF. It was about giving chefs across cultures (especially Asian communities) a voice.
I re-watched the teaser for Travel Season, and I also signed up for Watcher TV (it was about $3.50/month with the annual discount promo) and I watched the full trailer for Travel Season. Guess what wasn't mentioned? Food at expensive price points.
Travel Season is going to be six episodes per season, all in one location, focusing on food and experiences that place has to offer. This is more economical from a production standpoint, because the team can travel to a location and shoot episodes in a batch. Similar to how they can get four episodes of TMS filmed in one night. Sounds like they are approaching Travel Season in a smart and efficient way.


stills from the trailer on WatcherTV.com
Sure, maybe they'll try some higher priced dishes at some point, but Travel Season is about culture and food - not about clickbait titles for Buzzfeed where they need to have $1,000 ice cream. If you've seen the food content Steven's made at Watcher (Homemade, Grocery Run, Eat Like Me) you know he cares about highlighting the connections between people and food, to share cultures and ideas with the viewers.
I am supporting Watcher's new endeavor, and hope they can make it work for more of their audience over time. Some people choose to pay $4.99/month for a Twitch sub to support one creator - which is their right. I am spending $5.99/month (but actually much cheaper for this first year) to support an entire company. If this works, Watcher could bring on other creators, as they've wanted to all along, and hopefully usher in an era of entertainment from a diverse group of independent creators.
Yes, Steven Lim took on the role of CEO of Watcher Entertainment recently, but the other founders still have an active role in the company. Like it or not, they all had a vote in making the switch to a streaming service. Singling out Steven in comments like those above isn't a good look for anyone.
#Watcher#Watcher TV#Travel Season#Steven Lim#Andrew Ilnyckyj#Adam Bianchi#normally I wouldn't use main tags for a rant like this but I need people to see the other side of things#my defensive genes have been activated like the winter soldier#I saw a yt comment literally calling the team at watcher the 1%#BABES#that's not what that means#like at all#feel free to reblog this#but if you complain about Steven's tesla I will block you#watchergate#vi rants
209 notes
·
View notes
Text
Is Sukuna the original cursed womb or human/curse hybrid?
Just found this theory in YT comment section

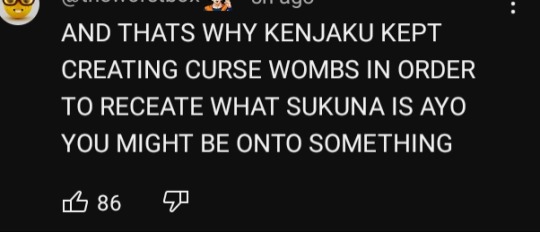

I mean all of them are really good theories and very interesting too!
145 notes
·
View notes
Text

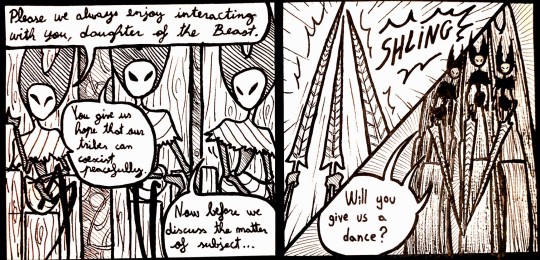

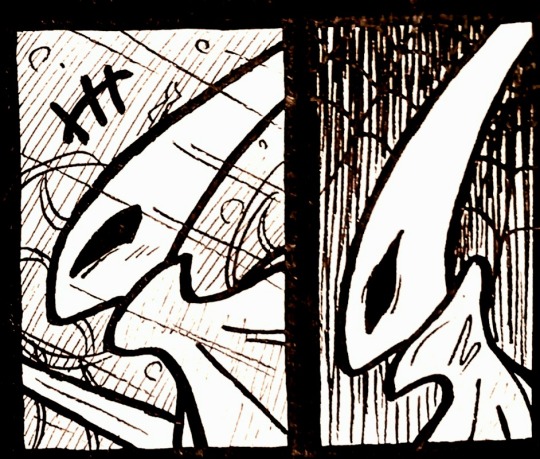
Hornet and her new found aunties the Mantis lords. They just HAVE to know each other there's no way. But lil hornet seems sad at the last panel, oh no. Wonder why.
Dialog by red_ruby4881 from this yt video's comment section.
Part 1, Part 2, part 3
74 notes
·
View notes
Text
stim gifs in photopea
[PT: Stim gifs in photopea /End PT]
Hello! This is my (lengthy) tutorial for how I make GIFs for stimblr using Photopea. It's not going to be as extensive as how I make for shows, celebrities, etc, because I have different processes for both, however I'm still aiming to cover everything I think necessary!
It'll be split into multiple sections with headers, so feel free to skip whatever you want if you don't find it necessary :•] Reblogs appreciated if you found it useful, but no pressure obviously!
Sections:
Getting your video
Importing into Photopea
Making the GIF
Sharpening the GIF
Coloring
Exporting & Optimization (in EZGIF)
End results, and misc tips and comments
1. Getting your video
[PT: 1. Getting your video /End PT]
Short section! These are the ways I download and source videos for use
Youtube - yt-dlp (installation instructions)
Instagram
Tiktok (Allows without watermark)
Pexels
For yt-dlp, check out this basic list of commands I made solely for downloading material to GIF! If you have further questions, either send me an ask or refer to the github page.
2. Importing into Photopea
[PT: 2. Importing into Photopea /End PT]
There are two ways to import into Photopea, the first is importing footage directly, and the second is screencapping (which I won't cover in detail, but this tutorial is for installing the program I use on mac & how to use it, and this is for installing on windows)
Option 1: Importing footage directly (see end for comments)
On the home page of Photopea, you'll want to click "Open from computer", and select your clip, upon selecting you'll be presented with a popup like below

All that really matters here is where you see "30 FPS", that's the videos native frame rate. I always put whatever that number is as my frame rate because I find it to be the best, but you can use different presets (Like ezgif, which gives you 12, 20, etc). The less frames you have, the chopper it will be. If you plan to slow it down later, I'd also recommend having more frames so it looks smoother after slowing.
Now you just have to wait for it to load all the frames, then you're set!
Option 2: Importing screencaps
This is my personal way of doing things, so this is assuming you've installed a screencapping program and already have your frames ready.
For this, when you click "open from computer", select the first frame and open it by itself. Once that's loaded, look in the top left at the "File" tab, select "Open & Place", then ctrl + shift to select the rest of your frames. Once they've all loaded in, you can either rasterize them now, or wait until after cropping and resizing (goes faster then).
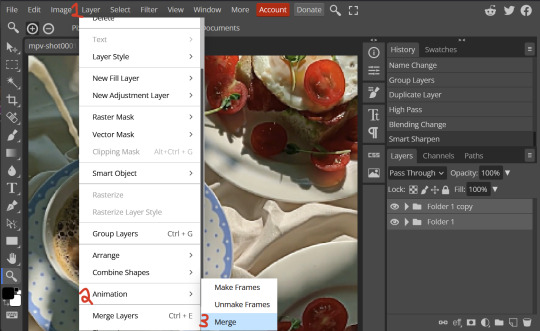
What's important though, is ctrl + shift to select all your layers, in the top left open the "Layer" tab, hover over "Animation" at the bottom to expand it, and select "Make frames". With your frames still selected, hit the folder button in the bottom left.

Without this, Photopea won't recognize this as an animation, therefore you'll be unable to export it as a GIF.
3. Making the GIF
[PT: 3. Making the GIF /End PT]
3A. Cropping
To begin with cropping, select the crop tool, which is the fifth one down on the left bar (if you hover over, it will say the name), or the "C" key on the keyboard.
Along the top now, you should have some new options. The dropdown menu that says "Free" is going to be how you select an aspect ratio or fixed size, and I always set to 1:1 since most people on stimblr use square GIFs, but you can do whatever works for you! Make sure to leave "Delete uncropped pixels" unchecked, because that lets you move stuff around later without having to recrop.
Crop your animation down as you see fit, then either hit the enter key, or the check button along the top bar. If you're unhappy with the placement, you can undo it OR, select all your layers, then use the move tool (First icon on the left, or the "V" key) and drag it around as you see fit.
3B. Resizing
With all your layers selected still, open the "Image" tab in the top left, towards the bottom select "Image Size", then select what you want to resize to.
Tumblr's exact GIF sizing
1 per row: 540px
2 per row: 268px
3 per row: 177px
HOWEVER. For stim GIFs, I find the quality difference so negligible, you can resize to what you want. It's also better for it to be bigger and scale down, then smaller and scale up. For this reason, I typically do 268px no matter what, or 300px.
As far as resampling goes, leave it turned on, and I personally leave it on bilinear, but the different options vary slightly, so experiment and see what works for you!
If you're happy at this step, go ahead and skip down to exporting! But when doing this way, I do recommend sharpening for better quality at smaller size.
4. Sharpening the GIF
[PT: 4. Sharpening the GIF /End PT]
The fun thing about this section is you get to experiment and find what works for you! I'll give you my personal method, but you can play around, add and remove bits, etc until you get something you're happy with!
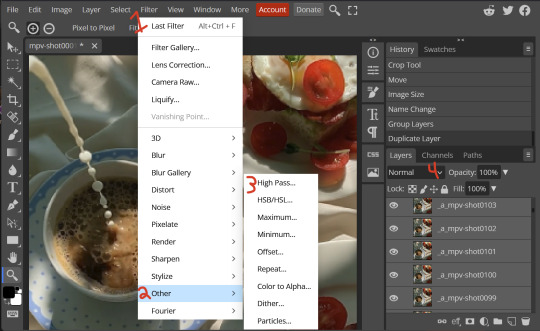
4A. High pass
High pass is my personal favorite way to sharpen GIFs, and for stim GIFs I'll often use only this.
(Steps 1-3 in image) To do, start by right clicking the *Folder* all your frames are in, and select "Duplicate Layer". Select all the frames in Only the folder on top, then go to the "Filter" tab along the top left, hover over "Other", and select "High Pass". The grey look is entirely normal! I normally set my high pass at 2-4, but play around with this step and find something you like!
Select the *Folder* all your high pass frames are in, and change the blending mode (fourth step in image) to "Soft Light", it should be on "Pass Through" initially. With that done, you've used high pass on your GIFs! If you're content here, skip the next section about smart sharpening, and see about merging animation folders under it.
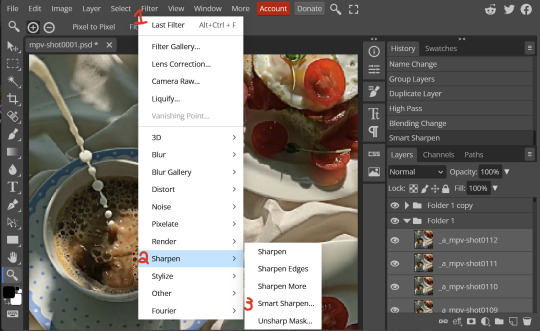
4B. Smart Sharpen
Note: I recommend testing your sharpening settings on one layer BEFORE applying them to all layers, as it will be easier on your computer.
I utilize this in addition to high pass usually, but you can do it all by itself as well! To begin, select all the frames in your folder (if you used high pass, select the frames in the *Bottom* folder). Open the "Filter" tab on the top left, hover over "Sharpen", and select "Smart Sharpen". Now find what you like!
For stim GIFs, if I used high pass, I'll go for 75-110% amount, and a .1 radius. I personally don't like the look of an over sharpened GIF, so I only use smart sharpen if I want to enhance some small details high pass didn't touch enough, which is why I use so little. If you don't like high pass, you might use more here!
4C. Combining animation folders
If you used high pass, you'll notice you have two animation folders. To fix this, select both folders using ctrl + shift, open the "Layer" tab, hover over "Animation", and select "Merge". It will give you a popup to confirm, and you can go ahead and accept!
If you don't merge these, Photopea will think they're two GIFs in one document, rather than only one, which is why this step is so important.
As a note, once you merge these folders, you can no longer shift the frames around to change where they are in the crop like you could earlier.
5. Coloring (Image Heavy)
[PT: 5. Coloring (Image Heavy) /End PT]
This section is going to be less of a tutorial and more a basic rundown of the adjustment layers and what they do. Coloring will change from GIF to GIF, and you can do light or intense coloring, so this is just a guide to begin with, but really just play around and find what you like!
To access the adjustment layer menu, in the bottom right where "New Folder" was, the one directly next to it that looks like a circle made of two half-circles, will bring up your adjustment layers.
As a note, I always group my adjustment layers in a folder above my animation, for ease of hiding to compare with and without.
5A. Levels
Levels is one I almost *Always* use on a GIF because it makes it look cleaner to me. In the first box, sliding the black square on the left *increases* the blacks, sliding the white square on the right *increases* the whites, and the one in the center changes the general brightness up or down.
Sliding the black box on the bottom bar *decreases* the blacks, sliding the white box *decreases* the whites.
If you change the channel from RGB to another option, you can change the balance of reds/cyans, greens/magentas, or blue/yellows, I personally don't touch this for stim GIFs. In the RGB channel, I set the top black box at ~10, and the top white box at ~245 usually.

5B. Curves
This is another way of adjusting brightness, blacks and whites, or color balance. By adjusting the dot in the bottom corner you adjust blacks, the top corner adjusts whites, and if you make a dot in the center, it adjusts general brightness! You can also make multiple dots to separately adjust some values. By changing the channels, you adjust color channels rather than white/black.

5C. Exposure
This is another way of adjusting the lights and darks of the GIF. Sliding the exposure up and down will add/take away light from the lighter parts of your images. Adjusting the gamma correction up and down will add/take away shadow from the darker parts of your image. Offset increases/decreases the brightness of the whole thing but I almost never use it.

5D. Vibrance
Vibrance is what I like to think of as a "softer" way to increase intensity of colors, instead of using a Hue/Saturation layer. It affects warmer colours more intensely than cooler colours, whether you use the vibrance or saturation slider. The saturation slider here is more intense than the vibrance one, but less intense than saturation in a Hue/Saturation layer.

5E. Hue/Saturation
This one is simple! Sliding the hue slider changes the colour, sliding the saturation slider increases/decreases saturation, and sliding the lightness is basically like directly adding black/white to a color. I use lightness only sparingly.
What's cool here, is you can adjust the range to target a specific batch of colours! If you find your reds are too bright compared to everything else, you can target the saturation of them specifically.

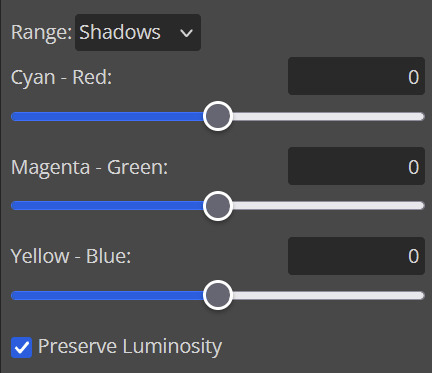
5F. Color balance
This is a simple way to adjust the base colors of an image, by changing it to be more cyan or red, magenta or green, or yellow and blue. This can be useful for making a GIF appear warmer or cooler!
I almost only touch the shadows & midtones, and highlights sparingly. "Preserve Luminosity" preserves the highlights and shadows of the image, so by unchecking it, you can achieve some more intense results.
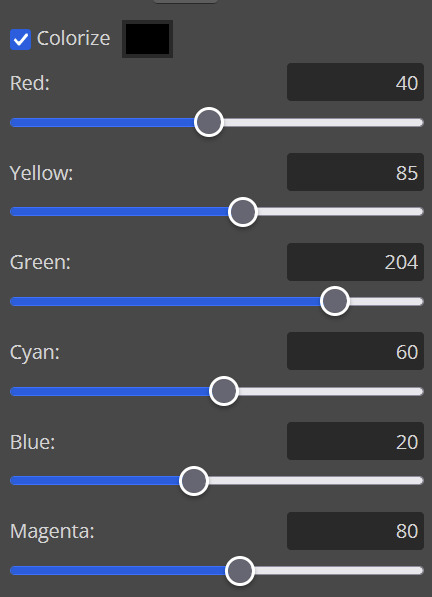
5G. Black & White
The black and white layer is useful because you can change exactly how light or dark a color appears after making it black and white. For that reason, I prefer it over a gradient map if I need to make something black and white.
5H. Photo filter
Photo filter is a simple way to add a color filter over the entire image, and adjust how strong or weak it is. "Preserve luminosity" once again just keeps the darks and whites of the original GIF.

5I. Channel mixer
I couldn’t even begin to cover channel mixer here, but this is for very intense color edits (I typically use it when I'm trying to make a GIF fit a board). However, here's another tutorial solely about channel mixer if you're interested in taking a crack at it!
5J. Selective color
Finally, selective color allows you to adjust the amounts of color or lightness/darkness of a specific batch of color.
By changing the color channel, you can affect different batches of color. The cyan slider controls cyan/red, the magenta slider controls magenta/green, the yellow slider controls yellow/blue, and the black slider controls black/white.
Checking the "absolute" is essentially like "Preserve Luminosity" in the other layers. With absolute, it's like shifting the color one way or the other, and without absolute, it's like adding to the pre-existing color.

6. Exporting and Optimization
[PT: Exporting and Optimization /End PT]
6A. Exporting
With all that done, we're ready to finish it up! To finish your GIF, open the "File" tab in the top left, go to "Export As", and select GIF!
Here you can rename, adjust the size (WILL ruin the sharpening you did), the quality (I leave at 100%), and the speed.
Another important thing to note is the "Dither". If you leave dither off, you can potentially encounter color banding, which is where (typically gradients) with look like strips of color, rather than smooth. This is because GIFs only have 256 colors they can render, so if something has too many, it bands.
By checking dither, it can get rid of color banding, at the cost of dots on the image (around where the worst color banding is usually). Sometimes the dots aren't noticeable and this is the better option, however it will Also increase your file size. It's up to you if you want to use it!

6B. Optimization
This is technically an optional step, as tumblr's GIF size limit is 10mb, so as long as you're under that, you can post, however, smaller GIFs load faster and I personally find are better for use in stimboards where you're loading a lot of GIFs! So to help this, let's head on over to the optimize section of ezgif. My personal goal is UNDER 4.5MB, ideally under 4MB.
The two main things I recommend are Lossy GIF, or removing frames, and I always start with Lossy GIF. I do anywhere from 5-15, and usually this will bring down GIFs a lot if you made them in Photopea! My example GIF was 6.7 MB to begin with, and afterwards it was 4.2MB.
However if you find that to be not enough, you can remove frames. When you remove frames, it speeds the GIF up, so I also recommend slowing it down (this is why I set my frames high in the beginning as well). I typically do "Remove every 4th frame" and slow it down to 75%-85%.
7. End results, and misc tips and comments
[PT: 7. End results, and misc tips and comments /End PT]


(source) The first GIF is without sharpening/colouring, the second is with sharpening but no colouring, and the third is with sharpening and colouring. I didn't color it much besides making it slightly warmer, but I hardly ever do much anyways!
As for misc comments:
In firefox, when you import footage directly, sometimes it glitches and tries to load 4000 blank frames, which is extremely resource intensive on a computer. The solution is import the footage in chrome, save as PSD, then open the PSD in firefox. (Or work in chrome but why do that /half silly). The other solution is screencap which I do since I do this often, but both work fine.
In firefox, sometimes you're unable to slow the GIF down upon export and it will export faster than it actually is. Slowing the video down to 50% restores it to native speed I've found, and you can do this in ezgif before other optimization.
When colouring, my number one tip is slide something all the way up first, then adjust down! By seeing it at max, you have a better idea of what's getting adjusted.
If you have any questions, drop me an ask :•]
And that concludes our tutorial! My apologies for the length, but I wanted to cover every possible thing here. It definitely seems like a lot, much more than working in ezgif, but when you get used to what you're doing, it goes extremely fast (even if you spend extra time screencapping). I personally find it worth it for the ability to sharpen GIFs alone, but as well as more detailed coloring opportunities.
Thank you for reading, I hope this has been useful!
#i did it :•]#not stim#stimblr#gif tutorial#photopea#big thanks to talos for proofreading this :3 🖤💚🖤💚🖤💚🖤
51 notes
·
View notes
Note
Speaking from my (admittedly vast) experience with fandoms (sweeps some dust off of myself). I'm fairly confident that the reason more people have been speaking out lately about their appreciation for Atreus and Angrboda's natural and healthy relationship development (which is vanishingly rare in popular media as far as romantic arcs go) or their enjoyment of Angrboda individually (recently stumbled across a YT comment which echoed almost everything I said before about how refreshing it is to see a female character with self expression, who isn't afraid to be vulnerable and caring in front of a male lead and let him know she wants and needs him around instead of being a yet another girlboss stereotype or a hardened woman with Walls TM; the comment was posted about half a year before I joined the fandom so neither of us inspired the other) - is because people are seeing a support system for this ship and character building up in the fandom. They're witnessing others coming up with their open and confident analysis of how outstanding and unique a character Angrboda is and how well written and meaningful her interactions with Atreus are.
Reading those, more people are gaining courage to join those discussions. And voice a similar viewpoint which they hesitated to express before, out of fear they'll have to deal with a vocal minority of trolls. Because trolls always operate using the method of wearing down the opponent. They *know* they're a minority so they are creating an illusion of importance and prevalence of their opinion by suppressing another viewpoint (which often dominates among the audience/consumers but because of trolls' well organized harassment many people withdraw from discussion boards and comment sections altogether; because one only has so much time and energy and cannot go up against consistent group attacks).
But once people see the vector changing, analytical approach becoming more mainstream and their response to a character and storyline being reflected in other posters' comments they resume - or start - expressing a similar view more confidently, knowing that trolls no longer dominate the spaces. Not to brag, but to illustrate how it works in practice: in my other fandom several people told me they didn't have the guts to speak out before they read my posts and before other people left me positive feedback and started breaking down storylines and characters from various angles (not necessarily matching mine but still important to be talked about). Fandom environment thus changed from trolls having a presumed "exclusive right to speak out" to a space where a massive number of people felt comfortable talking about the story and characters, not being afraid it would inevitably end in harassment and verbal abuse on part of self appointed wardens. This way trolls lost the ability to execute their "wear down the opponent" tactic.
Similar thing that currently happens to Angrboda and Atreboda happened in the fandom earlier, when GowR had just been released, only it was in regards to Freya. Back when Gow18 came out, every first post in YT comment section and on various discussion boards was how Freya is "a biatch who nEedz to DYI!!11!!" Once in the blue moon there could be found a logical comment pointing out that Freya can still work though the Baldur issue&heal from it. That if Kratos, a ruthless killed, was able to overcome his past and move towards a healthier existence so could Freya (especially since even at her worst she never reached old Kratos's level). But those rare displays of intelligent thought were immediately and brutally silenced by dog piling trolls. Then GowR came out and the narrative itself vindicated the aforementioned, logical point of view which naturally gave Freya fans a safe space to speak out and have discussions. That didn't mean creating an echo chamber but providing people with an opportunity to talk about complex characters at length instead of bending to trolls pressure.
Thus, the more we openly talk about Atreboda/Angrboda, the more we let the developers know how many of us enjoys this storyline and the deviation from pseudo-"feminist" (actually utterly misogynistic) mainstream cliches in GowR, the more we point out that Angrboda's arc has to be the first in over 10 years that allowed a female character a full measure of self expression, the more people are going to join in.
YESSS i have noticed this in the recent months and truthfully, you are one of the reasons for this newer confidence in them! youve helped reassure me and realize that its really just a vocal minority that acts like this 😭i knew before i came here that it was gonna pass but ofc things happen and i get bummed out. but im glad im getting over that 😭 Im really happy more people are coming out of the shell even after the initial hype has died down (which is where the ‘true’ fans shine) and im glad its been getting so much better🥹 Im not shocked abt the freya one unfortunately. Theres too many people that want to stay in that negative state just because and after a while, you have to ignore it alot of times. Freya hate makes no sense alongside angrboda/atreus and anyone else from this game. No, the game isnt perfect and has its flaws and i understand critiques and whatnot but i will never understand the hate LOL
#What i need to do is stop being so scared and be active on twitter so i can share my love for them there LOL#😂 One day one day#Freya#Angrboda#Atreus#God of war#god of war ragnarok#gow#gowr#Asks
23 notes
·
View notes
Note
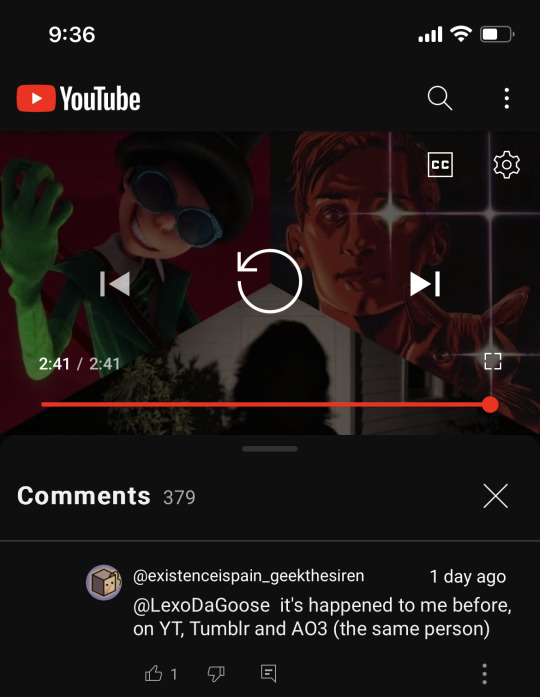
This is completely unrelated to the current life-changing events happening on this stream but look at these comments about Aleksa ("the assistant") I found underneath the cold ones podcast they were on


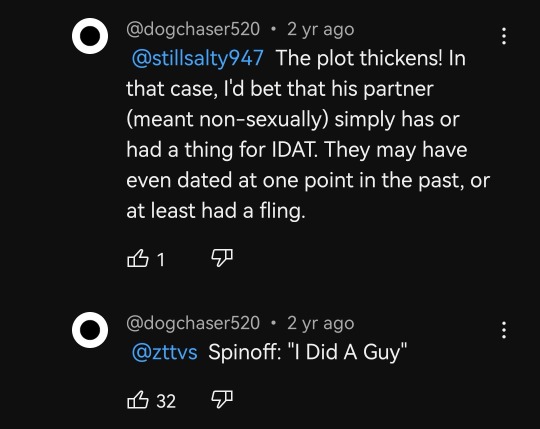
They're doing rpf in the yt comments... As they should
Im gonna go insane crazy i was legitimately just about to post these exact comments like the day before hasangate happened i think about them every single waking minute of my life i was going to make like a whole post saying that no one in the world understands me more than the aleksa bottom truther in the cold ones comments section....literally doing textual analysis of boy boy videos the third screenshot is kind of like poetry to me honestly. also the ratios are so heartbreaking ppl are just so unwilling to open their hearts to the truth
#thank you for reminding me of these genuinely!!!!!!!!!!!!!!!!!!!!!!!!!#asks#also of course their url is dogchaser520......what else would it be
17 notes
·
View notes
Note
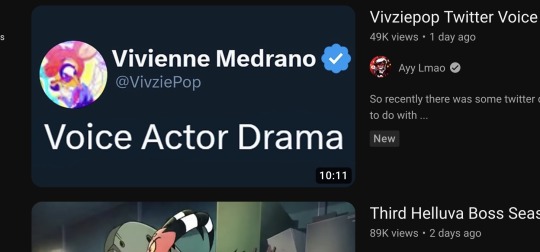
Hey Uni I hope I didn’t Meant to Bother you or anything But apparently I came across this Ayy Lmao Video on YT while watching a favorite anime of mine not to remind you the video was about the situation that happened on August-the-15th and I have nothing to say or word about this since I already Talked about it but I can say there’s like 1 or 2-3 Comments defending her but I found one that said “Vivizepop:Breathes Internet: So you’ve chosen Death” since Idk there could be more than that since those type of comments are very far in the comment section But That’s all I have to say for now at the moment cause I didn’t wanna sound like I’m over exaggerating This or anything but at the end of the video with the the time-stamps “Thoughts” I think he was defending Viv but I barely watched video cause it interrupted what I was interested watching Aside from that I would like to hear you’re thoughts/Opinions about this
Hey, so to be honest I don't really watch eyy lmao's videos. He's shown to be an unreliable narrator for any related to Vivienne and is quite bias. But I did watch this video of and 1st time ever I agree with Ayy. His thoughts were basically the whole situation didn't need to happen at all, it was no need to address this situation as Eagan had said they're re-dubbing the short and regrets using AI, Viv tweeted her thoughts untimely and Ayy said Viv was in the wrong in this whole situation (shocker but 👍). He's right to say Viv should only use her Twitter for announcements and light personal stuff because making tweets like this will draw trolls, haters, antis ect to her account its inevitably that will happen heck I even comment on Viv's tweets because my soul her tweets were bad, she really should keep her account strictly PR or make an alt account for her rants.
The comments on eyy's video also surprised me, seems like the fans are also sick and tired of Viv's twitter ramblings.
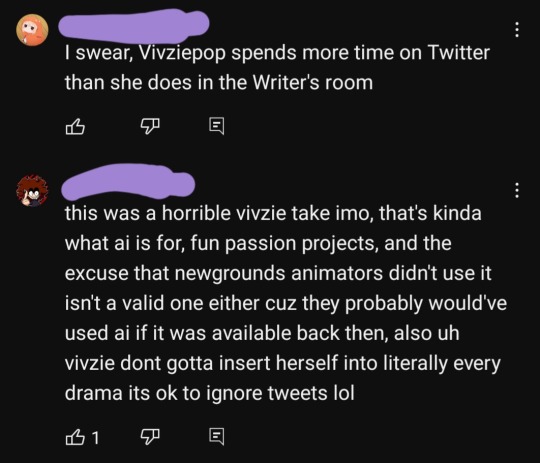

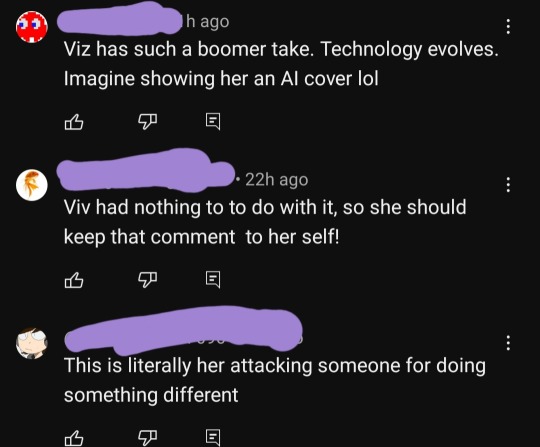
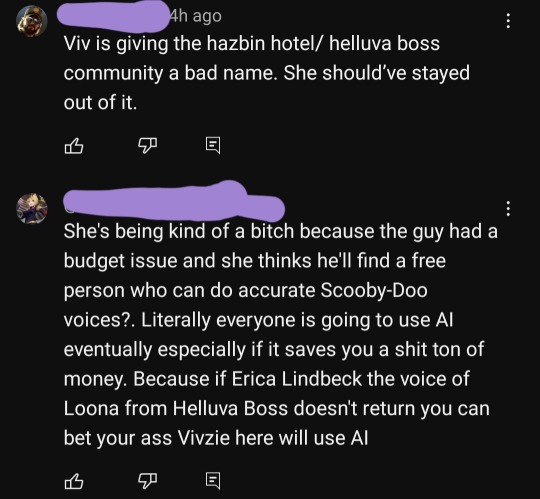
In all a really avoidable situation, hope Viv FINALLY learns from this situation that her personal opinions do stir up trouble for her but I'd doubt this is the last time we'll see tweets like this from Viv.
40 notes
·
View notes
Note
What's with the influx of Cloud crying over Aerith's death comments? Not just here but on Dutch, Max, and even on other people's YT comment sections? Genuinely curious, is this the new doki doki or koibito where CA's hold onto something for dear life. I mean almost everyone on the team was crying too? And teenage infantry grunt Cloud literally went postal and killed Sephiroth when he found Tifa at the reactor.
Obviously people only cry because they're deeply deeply forever and ever totally completely and utterly in romantical love!! There is no other reason ever!! No!! Not ever!! Tears are always romantic!!!!!!!
Fact is because the ding dong bitch is dead, they now have to come up with some new bullshit about love after death to keep deluding the entire fandom, even though Cloud's only feelings for her are guilt that a friend got killed on his watch. He literally calls her a friend, so we know how he feels about her. They finally got the answer to that question after nearly three decades, but that doesn't work for them, so for the next 3/4 years they'll continue lying their asses off, and even when they see Cloud tell Tifa he loves her, kisses her and they literally fuck under the highwind before starting a new life together, they'll continue to insist they're right. They'll never stop, so idky anyone should listen to them.
In fact, it's highly likely they'll claim Cloud only fucked Tifa because he didn't want to die a virgin 🤦♀️
9 notes
·
View notes
Note
bruh I found you in a yt comment section under one of those tiktok art comp vids... I was like hey that's the tumblr genshin guy. whats he doing here
THATS AWESOME OMG im so honored to be known as tumblr genshin guy <3
8 notes
·
View notes
Text
rant ahead
Sorry..i really need to let it all out.
Today i wake up on a ss tweet about my channel posting this meme:
in context, i have channel and have a mix audience, both in team black and green.I repost memes from fb and reddit so my subscribers will have a place to discuss their takes..ive been doing this since Oct 2022 along side of me posting ewan edits and crumbs.
As the channel grew, i also receive a ton of hate from yt people.Most accusing me of being creep and obsessed with ewan, some hating me for deleting their comments which is not true btw.Yt algorithm deleted offensive words and phrases but they blame me for that..i let it slide.
Recently i found out a person reupload my yt shorts and long form video on tiktok 40+ and counting.I reached out and be decent a person but i never got a reply.I let it go coz what can i do, hbo owned those clips.My tt friends also called her out to no avail.
Im also catching some tweets with ss of my channels and some people commenting on my fanart to start a fight.im a quiet person in real life and i have no energy to start an argument so i just apologize.
Back to this recent tweet, idk why this affects me so much.Maybe because i followed the OP and i love her takes..maybe because i see familiar people on the comment sections and mutuals and people i followed that quote retweet and likes the mean comments..idk..part of me feel betrayed but then again, i have no right to.
I know I cant change people's perspective and opinion and they have all the rights to say what they have to say and its twitter.I apologize and then delete the meme and site the link source since i think they assume i made this one.But idk, its just breaks my heart.They care so much about the character they are defending other than the real person behind the channel.
Harsh truth i guess, im just an afterthought.They might forgot what they posted, but to a person like me who lose so much in the past years, this will linger more that i ever wanted it to be.
Im a creature of habit so i cant stop creating or i'll go crazy but i'll be more active in here from now on..if i have fresh crumb, i will post it here first..This day is just an eye opening for me.
Thank you for listening 🫶💚
26 notes
·
View notes
Text
this fucking comment
i was just scrolling through my yt recommendations, then I found this
I watched it, and went into the comment section, and somebody said this

and a small voice in my head was sobbing very very loudly
And someone replied with

I'M GONNA- 💥💥💥😭😭💥😭😭😭💥😭😭😭
the tags describe what is going on in my brain
#angst#pizza tower#I DON'T WANNA IMAGINE IT#BUT NOW I AM AND I JUST- 😭😭😭😭😭😭#*SLAMS FISTS ONTO TABLE*#see- now I'm going to draw it- maybe...probably#*PLUCKS ALL OF MY FUCKING HAIR OUT WITH A TWEEZER*#not cool bro 😭👎#I am now very sad#Im imagining a whole 22 page fan fiction with everything#before Gustavos death#his final words#his death (ofc)#the funeral- EVERYTHING#even like - years in the future after he died😭😭#I'm staying up all night thinking about it I swear
13 notes
·
View notes
Note
Hello! I just found out about hanyu yuzuru, so I guess that makes me a baby fanyu now haha, and I was wondering if you know any videos or sites of where to start to get to know about him more , thank you!!
Hi! I'm so happy you found out about Yuzu. It's unusual for skaters to gain new fans after they've gone pro. So, that's your first indication that Yuzu is a very unique skater and person.
(I strongly encourage people who see this post and have more resources to add, to either reblog or comment!)
Here's how I started to learn more about him:
1. Planet Hanyu - it's a forum that has a huge video archive (accessible if you sign up). There's a section called Yuzuru's journey with documentaries and interviews and competition footage + the new content after he retired. It's the most complete thing I can think of. There are also sections by year, competitions and ice shows.
However, the first step I took when learning about Yuzu was by reading this page from the forum: The Great Glittering Glossary. It's a comperehensive break down of lingo about Yuzu and it also helps you understand more about him.
I would also add Planet Hanyu's Twitter account - they make regular posts - and their #OnThisDay tag is very helpful to find vids and links with Yuzu content
2. The Yuzuru Hanyu wikipedia page. Yes. It's a very good, detailed resource, constantly updated, and very reliable. His page has the status of Good Article (see here what it means)
3. For more recent stuff (starting with 2019), I highly recommend the Axel with Wings blog. It's a team which works on providing subtitles and they also have some articles translated.
4. Frankly, the most important part for me, it's watching his competition programs - I watched on YouTube all his competitive programs at all competitions he participated. And what I could not freely find on YT because of geo-blocking, I found in the video archive of Planet Hanyu. The best way to understand his excelence, also, is to watch full competitions (or at least the group he participated in competitions). He will definitely stand out. But you can't gather info about him like this, except about his skating and how he expressed himself through it.
5. Google a lot. You find something in the Glossary that's unclear or a reference about an interview or something not linked, look it up. Chances are Google will spit out a Tumblr link that has fan-translations of content not available on the Planet.
6. His various ice show performances. Different from competitive programs (sometimes) and they allow Yuzu the freedom to express his artistry much more than competitions did.
I hope this helps. Learning about Yuzu is an on-going process, it never really ends. I began learning about him in February (shortly before the Beijing Olympics). Up until March/April, I was still finding "new" info. Even now, from time to time, there's old stuff about him that I find out - like yesterday I learnt he sometimes ate at McDonald's.
Keep an eye out on these Twitter accounts for fast translations of Yuzu content - this is not an easy way to learn about Yuzu since Twitter is a pretty messy place for archiving. Nevertheless, if you plan on keeping up with current content about Yuzu/featuring Yuzu, these accounts are great.
1) Marika
2) Lae
3) LGeorgin
4) SweetYuzu
5) Tsukiyomi
6) Sarah
7) This one is a bit more organized and recent: YuzuruHanyu_Eng
Update: ^YuzuruHanyu_Eng have set up a DaikyMotion acc to post from now on. Check their twt page for more info about the change.
(Also, curate your timeline very well - there are a lot of antis and sometimes drama that's better left out).
Of course, don't forget about Yuzu's YouTube Channel, opened on 7th August and also give him a follow on Twitter & Insta. News about his first self-produced solo ice show, Prologue, will be shared on those platforms (you can find the links on my pinned post).
I truly hope this helps and that you enjoy your journey as a Fanyu.
68 notes
·
View notes
Note
Found you
(lol i did Not expect to find you in a yt comment section)
that's ironic
4 notes
·
View notes
Last Seen Blogs

rosesofbeauty
plus ultra
valentinamarie
girlblogger

evilgoof
goofy

petricol
PETRICOL

uselessh3rt
but the sight of the Stars makes me dream