#git large file hosting
Explore tagged Tumblr posts
Visit Tumblr Blog
Explore Tumblr blogs with no restrictions, modern design and the best experience.
Last Seen Tumblr Blogs


Fun Fact
The Tumblr app for Google Glass was released on May 16, 2013.
Link
https://codesnippetsandtutorials.com/2023/09/02/a-collection-of-git-software-libraries-plugins-and-tools-for-very-large-repositories-and-large-file-hosting-in-git/
0 notes
Text
Today was a good day. I wrote my first Python script to automate a task that would have taken hours to do manually.
Let's just ignore the fact that it was ~10 lines to download pdfs and firmware blobs that the manufacturer decided to upload publicly on github without any revisions or even making them easily available when you contact support.
Also, ignore the wasted time and avoidable emails if I'd known about this earlier.
And forget the insanity that is hosting all these large binary files in >200 git repositories because damn it, my code did useful work today, and my boss did tell me to download it all.
I shouldn't neglect to include that getting the environment set up and actually running the script took longer than writing it, which is a win on its own in my book. I can't even imagine how long it would have taken to do so manually.
3 notes
·
View notes
Text
Top 10 Tools Every Web Developer Should Know
Web development in 2025 is fast, collaborative, and constantly evolving. Whether you're a beginner or a professional, using the right tools can make or break your development workflow. From writing clean code to deploying powerful applications, having a smart toolkit helps you stay productive, efficient, and competitive.
At Web Era Solutions, we believe that staying ahead in the web development game starts with mastering the essentials. In this blog, we’ll share the top 10 tools every web developer should know — and why they matter.
1. Visual Studio Code (VS Code)
One of the most widely used code editors for web developers is Visual Studio Code. It's lightweight, fast, and highly customizable with thousands of extensions. It supports HTML, CSS, JavaScript, PHP, Python, and more.
Why It’s Great:
IntelliSense for smart code suggestions
Git integration
Extensions for everything from React to Tailwind CSS
Perfect for front-end and full-stack development projects.
2. Git & GitHub
Version control is a must for any developer. Git helps you track changes in your code, while GitHub allows collaboration, storage, and deployment.
Why It’s Great:
Manage code history easily
Work with teams on the same codebase
Deploy projects using GitHub Pages
Essential for modern collaborative web development.
3. Chrome DevTools
Built right into Google Chrome, Chrome DevTools helps you inspect code, debug JavaScript, analyze page load speed, and test responsive design.
Why It’s Great:
Real-time DOM editing
CSS debugging
Network activity analysis
Crucial for performance optimization and debugging.
4. Node.js & NPM
Node.js allows developers to run JavaScript on the server-side, while NPM (Node Package Manager) provides access to thousands of libraries and tools.
Why It’s Great:
Build full-stack web apps using JavaScript
Access to powerful development packages
Efficient and scalable
Ideal for back-end development and building fast APIs.
5. Figma
While not a coding tool, Figma is widely used for UI/UX design and prototyping. It allows developers and designers to collaborate in real-time.
Why It’s Great:
Cloud-based interface
Easy developer handoff
Responsive design previews
smoothly connects the design and development phases.
6. Bootstrap
Bootstrap is a front-end framework that helps you build responsive, mobile-first websites quickly using pre-designed components and a 12-column grid system.
Why It’s Great:
Saves time with ready-to-use elements
Built-in responsiveness
Well-documented and easy to learn
Perfect for developers who want to speed up the front-end process.
7. Postman
Postman is a tool for testing and developing APIs (Application Programming Interfaces). It’s especially useful for back-end developers and full-stack devs.
Why It’s Great:
Easy API testing interface
Supports REST, GraphQL, and SOAP
Automation and collaboration features
Critical for building and testing web services.
8. Webpack
Webpack is a powerful module bundler that compiles JavaScript modules into a single file and optimizes assets like images, CSS, and HTML.
Why It’s Great:
Speeds up page load time
Optimizes resource management
Integrates with most modern frameworks
Essential for large-scale projects with complex codebases.
9. Tailwind CSS
Tailwind CSS is a utility-first CSS framework that lets you style directly in your markup. It's becoming increasingly popular for its flexibility and speed.
Why It’s Great:
Eliminates custom CSS files
Makes design consistent and scalable
Works great with React, Vue, and other JS frameworks
Favored by developers for clean and fast front-end styling.
10. Netlify
A cutting-edge platform for front-end apps and static websites is Netlify. It facilitates continuous integration and streamlines the deployment procedure.
Why It’s Great:
One-click deployments
Free hosting for small projects
Built-in CI/CD and custom domain setup
Great for deploying portfolio websites and client projects.
Final Thoughts
Mastering these tools gives you a strong foundation as a web developer in 2025. Whether you're coding solo, working in a team, or launching your startup, these tools can dramatically improve your development process and help deliver better results faster.
At Web Era Solutions, we use these tools daily to build high-performance websites, scalable web applications, and full-stack solutions for businesses of all sizes. If you're looking to build a powerful digital presence, we’re here to help.
Ready to Build Something Amazing?
Whether you're a business owner, entrepreneur, or aspiring developer, Web Era Solutions offers professional web development services in Delhi and across India.
Contact us today to discuss your project or learn more about the tools we use to build modern, high-performance websites.
For a free consultation, give us a call right now or send us a mail!
0 notes
Text
Data Build Tool Training in Ameerpet | DBT Classes Online
Best Practices for Managing a DBT Project Repository
Managing a DBT (Data Build Tool) project repository effectively is essential for ensuring scalability, maintainability, and collaboration within your data engineering team. A well-structured DBT repository not only simplifies workflows but also minimizes errors, making it easier for teams to build and maintain data pipelines. Below are some best practices to follow for managing a DBT project repository. DBT Online Training

1. Structure Your Repository Effectively
A clean and logical repository structure ensures that your team can easily navigate and understand the project. Follow these guidelines:
Organize models into folders: Use the model's directory to categorize models by domain, functional area, or team, e.g., models/finance, models/marketing.
Separate staging and core models: Create subdirectories for staging (models/staging) and core transformations (models/core) to clearly distinguish raw data transformations from business logic.
Follow naming conventions: Use consistent, descriptive, and lowercase names for folders and files, such as dim_customers.sql for dimension tables and fact_orders.sql for fact tables.
2. Adopt Version Control Practices
Using a version control system like Git is crucial for managing changes and enabling collaboration. DBT Classes Online
Branching strategy: Use a branching model like GitFlow or trunk-based development. Create feature branches for new changes and merge them into the main branch only after review.
Commit messages: Write clear and descriptive commit messages, e.g., "Add staging model for customer orders."
Pull requests: Use pull requests to review code before merging. This ensures quality and allows for team collaboration.
3. Document Your Project
Documentation is key to helping your team and stakeholders understand the project’s purpose and structure.
Model documentation: Use dbt’s schema.yml files to document models, columns, and tests. Include descriptions of tables, fields, and their purpose.
Project README: Write a comprehensive README.md file that explains the project’s objectives, directory structure, and setup instructions.
Auto-generate docs: Use dbt docs generated to create an interactive documentation site, and host it on platforms like dbt Cloud or internal servers.
4. Implement Testing and Quality Assurance
Testing ensures that your data models are reliable and meet business requirements. DBT Training
Use built-in tests: Leverage dbt’s built-in tests for uniqueness, not-null, and referential integrity.
Write custom tests: Create custom SQL-based tests for more complex validation logic.
Continuous Integration (CI): Integrate dbt tests into a CI pipeline to automatically validate changes before merging.
5. Leverage Modularity and Reusability
Avoid redundancy by reusing code wherever possible.
Use Jinja macros: Write reusable Jinja macros for common transformations or calculations.
Refactor shared logic: Break down complex models into smaller, modular SQL files that can be reused across the project.
Parameterize models: Use variables to create flexible and reusable models.
6. Maintain Data Governance
Ensuring compliance and data security is a critical part of managing a dbt project. DBT Certification Training Online
Access control: Limit access to production datasets by following the principle of least privilege.
Version-controlled credentials: Avoid hardcoding sensitive information in your repository. Use environment variables and a secure profiles.yml file for database credentials.
Auditing: Keep a log of model changes and reviews for traceability.
7. Optimize for Performance
Performance optimization ensures that your dbt models run efficiently
Use incremental models: For large datasets, use DBT’s incremental materializations to process only new or updated data.
Avoid unnecessary transformations: Write SQL that is optimized for your database engine, avoiding overly complex queries.
Profile and debug: Use dbt’s --profile option to monitor query performance and identify bottlenecks.
8. Foster Collaboration and Training
Finally, ensure that your team is aligned and well-trained on dbt practices.
Code reviews: Encourage regular code reviews to share knowledge and ensure high-quality code.
Training sessions: Conduct training sessions to onboard new team members and keep everyone updated on best practices.
Knowledge sharing: Use internal documentation or wikis to share tips, tricks, and troubleshooting guides.
Conclusion
A well-managed DBT repository is the foundation of a successful data engineering project. By structuring your repository effectively, implementing robust version control, fostering collaboration, and prioritizing testing and performance, you can create a scalable and maintainable data pipeline. By following these best practices, your team will be better equipped to deliver accurate, reliable, and actionable insights from your data. Start implementing these practices today to unlock the full potential of your dbt projects.
Visualpath is the Best Software Online Training Institute in Hyderabad. Avail complete Data Build Tool worldwide. You will get the best course at an affordable cost.
Attend Free Demo
Call on - +91-9989971070.
Visit: https://www.visualpath.in/online-data-build-tool-training.html
WhatsApp: https://www.whatsapp.com/catalog/919989971070/
Visit Blog: https://databuildtool1.blogspot.com/
#DBT Training#DBT Online Training#DBT Classes Online#DBT Training Courses#Best Online DBT Courses#DBT Certification Training Online#Data Build Tool Training in Hyderabad#Best DBT Course in Hyderabad#Data Build Tool Training in Ameerpet
0 notes
Text
Top 5 Must-Use Vs Code Extensions For Developers In 2025

Right tools can make a lot of difference, and in the world of software development, it’s absolutely true. VS Code, with its rich ecosystem of extensions, has become the go-to code editor for developers worldwide. As of 2025, here are the five must-have VS Code extensions that every developer should consider adding to their toolkit. These tools not only save time but also enhance our coding experience, ensuring that you can focus on what truly matters: building amazing software. So, let’s dive in and explore about them a bit!
Tabnine - AI Code Completion
Key Features:
Supports over 30 programming languages, including Python, Java, and JavaScript.
Learns and adapts to your coding style over time, offering personalized suggestions.
Integrates seamlessly with other VS Code extensions.
Helps prevent common syntax errors and reduces debugging time.
Why Use It? Tabnine speeds up development, reduces boilerplate, and helps you focus on the logic rather than syntax. Its AI-powered capabilities make it ideal for developers juggling multiple projects or languages.
Keploy - Simplify Testing and Debugging
Key Features:
Record and replay API requests for efficient debugging.
Auto-generate unit tests to save time and reduce manual effort.
Seamless integration with your existing CI/CD pipelines for continuous testing.
Identifies discrepancies in API behavior across environments.
Why Use It? Keploy’s ability to reduce manual testing efforts makes it invaluable for developers working on backend services and APIs. It boosts productivity by allowing developers to focus on building features rather than debugging.
Docker - Streamline Container Development
Key Features:
Manage Docker containers, images, and volumes directly from VS Code.
Build and deploy containerized applications seamlessly.
Debug inside containers with ease, making troubleshooting much faster.
Provides visual tools to inspect and manage your container setup.
Pro Tip: Combine the Docker extension with Kubernetes tools for end-to-end container orchestration. This duo is perfect for developers managing large-scale, distributed applications.
GitLens - Supercharge Git
Key Features:
View blame annotations directly in the code to understand who made changes and why.
Explore the history and contributors of a file or block of code.
Integrates with GitHub and other Git hosting services for enhanced collaboration.
Visualize branch histories and compare different versions effortlessly.
Why Use It?: GitLens makes collaboration seamless and ensures you’re always aware of the history behind your codebase. It’s especially useful for onboarding new team members or revisiting old projects.
Prettier - Code Formatter

Key Features:
Automatic code formatting on save.
Supports a wide variety of languages and frameworks.
Configurable options to suit your coding style.
Simplifies code reviews by maintaining consistent styles across files and projects.
Pro Tip: Pair Prettier with ESLint for seamless linting and formatting. This combination not only enforces best practices but also keeps your codebase error-free.
Honorable Mentions
While the five extensions above are must-haves, there are several others worth checking out:
Live Server: Instantly reload your web pages during development, offering a smooth frontend workflow.
ESLint: Enforce coding standards and catch errors early, ensuring a high-quality codebase.
REST Client: Test APIs directly within VS Code, saving time by eliminating the need for external tools.
Path Intellisense: Autocomplete filenames in your project, speeding up navigation.
Markdown Preview Enhanced: A robust tool for previewing and editing Markdown files.
Conclusion
VS Code’s true magic lies in its extensions, and these five (plus a few honorable mentions) are game-changers for developers in 2025. Whether you're automating tedious tasks, simplifying collaboration, or just making your code look chef’s kiss perfect, these tools have got you covered.
Think of them as your development Avengers: Tabnine is your Tony Stark with AI smarts, Keploy is your Hulk smashing bugs, Docker keeps everything contained like Black Widow, GitLens is Captain America leading your version control, and Prettier is Thor—bringing the thunder of clean, polished code!
So, grab these extensions, level up your coding superpowers, and crush your development goals like a pro. With the right tools at your side, you'll breeze through any project and maybe even have some fun along the way. 🚀
FAQ’s
How do I install VS Code extensions?
To install extensions in VS Code, open the Extensions view by clicking on the Extensions icon in the Activity Bar on the side of the window. Search for the desired extension, click "Install," and it will be added to your setup.
Are these extensions free to use?
Most VS Code extensions, including the ones listed in this article, are free or have free tiers. However, some, like Tabnine, offer premium versions with additional features.
Can I use these extensions with other code editors?
Many extensions, such as Docker and Prettier, are also available for other editors or IDEs, but their specific VS Code integrations make them particularly powerful in this environment.
How can I ensure extensions don’t slow down VS Code?
To prevent extensions from affecting performance, disable those you aren’t using actively. You can also monitor the Extensions view to see if any extensions are causing delays.
What’s the best way to keep my extensions updated?
Extensions can be updated automatically if you enable auto-update in VS Code settings. Alternatively, you can manually check for updates in the Extensions view.
0 notes
Text
What is GitHub and GitLab?
GitLab is more suitable for enterprise-level use, and builds a GitLab software version management server for enterprises. GitLab: https://about.gitlab.com/ GitHub: https://github.com/
What is GitLab? An open source application developed using Ruby on Rail to implement a self-hosted Git project repository that can access public or private projects through a web interface. Ruby on Rail is a framework that makes it easy for you to develop, deploy, and maintain web applications. GitLab has similar functionality to GitHub, being able to browse source code, manage bugs and comments, manage team access to repositories, it is very easy to browse committed versions and provides a file history repository, it provides a code snippet feature that can be easily implemented Code reuse, easy to find when needed in the future
What is GitHub? It is a hosting platform for open source and private software projects, because it only supports git as the only repository format for hosting, hence the name GitHub.
Same point: Both are web-based Git repositories. To a large extent, GitLab is imitated by GitHub. They both provide platforms for sharing open source projects, and provide development teams with centralized storage, sharing, publishing and collaborative development projects. A place for cloud storage.
Difference: 1. If GitHub uses a private repository, you need to pay for it. GitLab can build a private free repository on it. 2. GitLab gives development teams more control over their code repositories. Compared to GitHub, it has many features: (1) Allows to set warehouse permissions for free (2) Allow users to choose to share part of the code of a project (3) Allow users to set project access permissions to further improve security (4) It can be set to obtain the overall improvement progress of the team (5) Through innersourcing, people who are not within the scope of authority cannot access the resource
0 notes
Text
Web Scraping 101: Understanding the Basics
Data Analytics, also known as the Science of Data, has various types of analytical methodologies, But the very interesting part of all the analytical process is collecting data from different sources. It is challenging to collect data while keeping the ACID terms in mind. I'll be sharing a few points in this article which I think is useful while learning the concept of Web Scrapping.
The very first thing to note is not every website allows you to scrape their data.
Before we get into the details, though, let’s start with the simple stuff…

What is web scraping?
Web scraping (or data scraping) is a technique used to collect content and data from the internet. This data is usually saved in a local file so that it can be manipulated and analyzed as needed. If you’ve ever copied and pasted content from a website into an Excel spreadsheet, this is essentially what web scraping is, but on a very small scale.
However, when people refer to ‘web scrapers,’ they’re usually talking about software applications. Web scraping applications (or ‘bots’) are programmed to visit websites, grab the relevant pages and extract useful information.
Suppose you want some information from a website. Let’s say a paragraph on Weather Forecasting! What do you do? Well, you can copy and paste the information from Wikipedia into your file. But what if you want to get large amounts of information from a website as quickly as possible? Such as large amounts of data from a website to train a Machine Learning algorithm? In such a situation, copying and pasting will not work! And that’s when you’ll need to use Web Scraping. Unlike the long and mind-numbing process of manually getting data, Web scraping uses intelligence automation methods to get thousands or even millions of data sets in a smaller amount of time.
As an entry-level web scraper, getting familiar with the following tools will be valuable:
1. Web Scraping Libraries/Frameworks:
Familiarize yourself with beginner-friendly libraries or frameworks designed for web scraping. Some popular ones include: BeautifulSoup (Python): A Python library for parsing HTML and XML documents. Requests (Python): A simple HTTP library for making requests and retrieving web pages. Cheerio (JavaScript): A fast, flexible, and lightweight jQuery-like library for Node.js for parsing HTML. Scrapy (Python): A powerful and popular web crawling and scraping framework for Python.
2. IDEs or Text Editors:
Use Integrated Development Environments (IDEs) or text editors to write and execute your scraping scripts efficiently. Some commonly used ones are: PyCharm, Visual Studio Code, or Sublime Text for Python. Visual Studio Code, Atom, or Sublime Text for JavaScript.
3. Browser Developer Tools:
Familiarize yourself with browser developer tools (e.g., Chrome DevTools, Firefox Developer Tools) for inspecting HTML elements, testing CSS selectors, and understanding network requests. These tools are invaluable for understanding website structure and debugging scraping scripts.
4. Version Control Systems:
Learn the basics of version control systems like Git, which help manage your codebase, track changes, and collaborate with others. Platforms like GitHub and GitLab provide repositories for hosting your projects and sharing code with the community.
5. Command-Line Interface (CLI):
Develop proficiency in using the command-line interface for navigating file systems, running scripts, and managing dependencies. This skill is crucial for executing scraping scripts and managing project environments.
6. Web Browsers:
Understand how to use web browsers effectively for browsing, testing, and validating your scraping targets. Familiarity with different browsers like Chrome, Firefox, and Safari can be advantageous, as they may behave differently when interacting with websites.
7.Documentation and Online Resources:
Make use of official documentation, tutorials, and online resources to learn and troubleshoot web scraping techniques. Websites like Stack Overflow, GitHub, and official documentation for libraries/frameworks provide valuable insights and solutions to common scraping challenges.
By becoming familiar with these tools, you'll be equipped to start your journey into web scraping and gradually build upon your skills as you gain experience.
learn more
Some good Python web scraping tutorials are:
"Web Scraping with Python" by Alex The Analyst - This comprehensive tutorial covers the basics of web scraping using Python libraries like BeautifulSoup and Requests.
These tutorials cover a range of web scraping techniques, libraries, and use cases, allowing you to choose the one that best fits your specific project requirements. They provide step-by-step guidance and practical examples to help you get started with web scraping using Python
1 note
·
View note
Text
Introduction
Git and GitHub are at the heart of modern software development, enabling developers to track changes, collaborate on projects, and manage code versions with ease. Whether you're new to version control or looking to refine your skills, this masterclass will guide you through the essentials of Git and GitHub, from basic commands to advanced workflows. By the end, you'll have the knowledge and confidence to use these powerful tools in your projects.
What is Git?
Definition and Core Functions
Git is a distributed version control system designed to handle everything from small to very large projects with speed and efficiency. It allows developers to track changes to files, collaborate with others, and revert back to previous versions of the code if necessary. Unlike other version control systems, Git stores snapshots of the entire project at each commit, rather than tracking changes line by line.
How Git Works: Snapshots vs. Deltas
Git’s unique approach to version control is based on snapshots. Every time you commit changes in Git, it takes a snapshot of the current state of your project and stores a reference to that snapshot. If files haven’t changed, Git doesn’t store the file again—just a link to the previous identical file. This makes Git extremely efficient in terms of storage and speed.
Benefits of Using Git
Using Git offers several benefits, including:
Version Control: Track every change made to the codebase and revert to earlier versions if needed.
Collaboration: Multiple developers can work on the same project simultaneously without overwriting each other’s work.
Branching: Easily create branches for new features, fixes, or experiments without affecting the main codebase.
Understanding GitHub
What is GitHub?
GitHub is a cloud-based hosting service that lets you manage Git repositories. It provides a web-based interface that makes it easy to share your repositories with others, collaborate on projects, and manage issues and pull requests. GitHub is widely used for open-source projects, but it’s also popular in enterprise environments.
GitHub vs. Git: Key Differences
While Git is a version control system, GitHub is a platform for hosting and collaborating on Git repositories. GitHub provides additional features like issue tracking, project management tools, and integrations with other services, making it an essential tool for modern development.
Why GitHub is Essential for Collaboration
GitHub’s collaborative features, such as pull requests, code reviews, and team management, make it an indispensable tool for any team working on software projects. It also fosters a strong community around open-source software, allowing developers to contribute to projects they’re passionate about.
Setting Up Git
Installing Git on Different Operating Systems
Installing Git is straightforward and can be done on various operating systems:
Windows: Download the Git installer from the official Git website and follow the installation prompts.
macOS: Install Git using Homebrew with the command brew install git.
Linux: Use your distribution’s package manager, such as apt-get for Debian-based systems or yum for Red Hat-based systems, to install Git.
Git Workflow Explained
The Basic Git Workflow
The basic Git workflow consists of three main stages:
Working Directory: Where you modify files.
Staging Area: Where you prepare changes to be committed.
Repository: Where committed changes are stored.
A typical workflow involves modifying files, staging the changes with git add, and then committing them to the repository with git commit.
Advanced Git Commands and Techniques
Stashing Changes with git stash
Sometimes you need to switch branches but have uncommitted changes. git stash temporarily saves those changes so you can return to them later.
Undoing Changes with git reset and git revert
git reset: Reverts changes in your working directory and staging area to a previous commit.
git revert: Creates a new commit that undoes the changes introduced by a previous commit.
Cherry-picking Commits with git cherry-pick
git cherry-pick allows you to apply specific commits from one branch onto another. This is useful for applying bug fixes or features without merging entire branches.
Tagging Releases with git tag
Tags are used to mark specific points in your project’s history, such as releases. Use git tag <tag-name> to create a new tag.
Working with GitHub
Creating and Managing GitHub Repositories
To create a new repository on GitHub, click the "New" button on your GitHub dashboard and follow the prompts. You can then push your local repository to GitHub using:
bash
Copy code
git remote add origin <repository-url> git push -u origin main
Forking and Pull Requests Explained
Forking: Creating your own copy of someone else’s repository on GitHub. This is often the first step in contributing to open-source projects.
Pull Requests: Allow you to propose changes to a repository. After reviewing your changes, the repository owner can merge them into the main codebase.
Collaborating with Teams on GitHub
GitHub’s collaborative features, such as issues, projects, and pull requests, make it easy for teams to manage tasks, track progress, and review code.
Git Branching Strategies
The Feature Branch Workflow
In the feature branch workflow, each new feature or fix is developed in its own branch. This keeps the main branch stable and free from incomplete code.
Git Flow vs. GitHub Flow
Git Flow: A robust branching model that uses long-lived branches for development, release, and hotfixes.
GitHub Flow: A simpler model that uses short-lived feature branches and continuous integration.
Best Practices for Managing Branches
Keep branch names descriptive and consistent.
Regularly merge or rebase feature branches with the main branch to avoid conflicts.
Delete branches after they have been merged to keep the repository clean.
Handling Merge Conflicts
What Causes Merge Conflicts?
Merge conflicts occur when two branches have changes in the same part of a file. Git can’t automatically determine which changes to keep, so it flags the conflict for you to resolve manually.
Steps to Resolve Merge Conflicts
Open the conflicted file in your text editor.
Look for conflict markers (e.g., <<<<<<< HEAD).
Decide which changes to keep and remove the conflict markers.
Stage and commit the resolved file.
Tips to Avoid Merge Conflicts
Regularly merge changes from the main branch into your feature branch.
Communicate with your team to avoid working on the same files simultaneously.
Collaborating with Git and GitHub
Forking Repositories and Contributing to Open Source
Fork a repository to create your own copy, make your changes, and submit a pull request to contribute to the original project. This is how most open-source contributions are made.
Reviewing and Merging Pull Requests
Pull requests should be reviewed carefully to ensure code quality and consistency. Use GitHub’s built-in review tools to discuss changes, request modifications, and approve the final version.
Best Practices for Team Collaboration
Use meaningful commit messages to communicate changes.
Review code in pull requests before merging.
Maintain a clear and organized branching strategy.
GitHub Actions and Automation
Introduction to GitHub Actions
GitHub Actions allow you to automate tasks within your GitHub repository, such as running tests, deploying code, or sending notifications. Actions are defined in YAML files stored in your repository.
Setting Up CI/CD Pipelines
Continuous Integration/Continuous Deployment (CI/CD) pipelines can be set up using GitHub Actions to automatically build, test, and deploy your code whenever changes are pushed to the repository.
Automating Workflows with GitHub Actions
GitHub Actions can be used to automate repetitive tasks, such as merging dependabot updates, generating release notes, or tagging versions.
Git Security Best Practices
Managing SSH Keys and Credentials
Use SSH keys for secure access to your GitHub repositories. Never share your keys or credentials publicly, and consider using a credential manager to store them securely.
Keeping Your Repositories Secure
Use .gitignore to prevent sensitive files from being tracked by Git.
Regularly audit your repository for sensitive information.
Enable two-factor authentication on your GitHub account.
Using GitHub's Security Features
GitHub provides several security features, including Dependabot for automatic dependency updates and security alerts for vulnerable dependencies.
Common Git and GitHub Mistakes
Forgetting to Pull Before Pushing
Always pull the latest changes from the remote repository before pushing your own changes. This helps avoid merge conflicts and ensures you’re working with the most up-to-date code.
Overcomplicating the Branch Structure
Keep your branch structure simple and avoid creating unnecessary branches. This makes it easier to manage and reduces the risk of merge conflicts.
Ignoring Documentation and Commit Messages
Clear documentation and meaningful commit messages are crucial for maintaining a project’s history and making it easier for others to understand your changes.
0 notes
Text
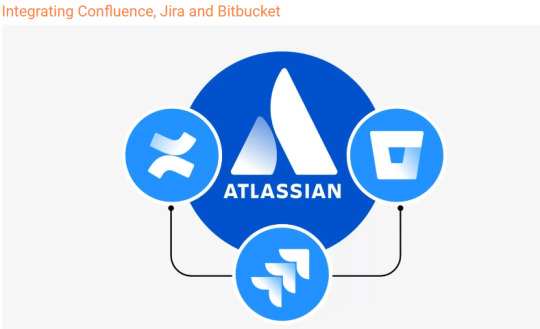
Maximizing Team Collaboration with Atlassian Tools

Atlassian power horses, Confluence, Jira and Bitbucket, offer a thriving ecosystem when used in conundrum with one another. Maximize your team’s collaboration or that on an inter-team level, smoothen project management and work on high-quality deliverables with this super trio! Let’s dive into what they individually have up their sleeve.
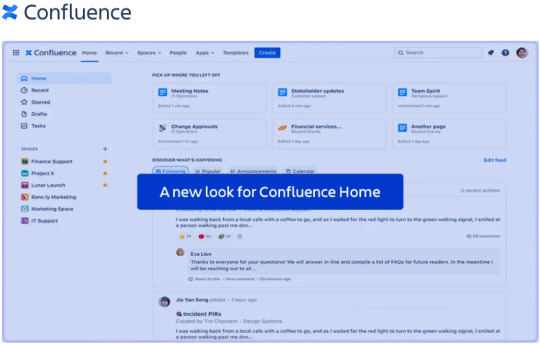
Create a macro-level database and documentation using Confluence. Load it all up on this interface together with other information on meetings, updates, project progress and knowledge banks gathered during the project run.
Teams can create their own spaces so that content management and sharing becomes feasible.
Real-time collaboration is super easy with each player viewing the progress or updates from everyone else.
Collate, update and view Jira issues in Confluence. JTable and Jcreate, super micro-tools that let you easy link your content with Jira issues are a savior.
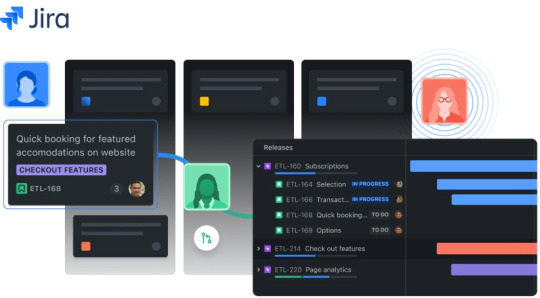
Jira’s impressive agile boards (Scrum and Kanban) assist agile teams in breaking complex projects into micro teamwork. Dedicated teams for dedicated tasks function way faster. These boards help view workflows, and categories (To-Do, In progress, In review, Done etc.) ensure efficiency in deliverables
Collaboration across various players is super easy in Jira. Updates are easier to communicate and you can ensure that all team members stay on the same page at all times.
Complement with Confluence! Collate your team’s thoughts, POA and knowledge bank in Confluence and storm right ahead by tracking issues in Jira.
Integrate with Bitbucket to instantly view coding and deployment status. Get real-time updates on features (about to release, in progress etc.) or incorporate an issue key straight from Bitbucket. Get a bird’s eye view into the development status of any issue from the development panel.
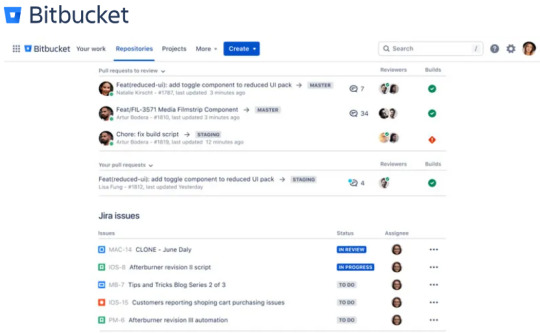
Bitbucket is a Git based repository for hosting and management of code. Meant for entire teams at large, Bitbucket provides an end-to-end solution from coding to conceptualization.
Code collaboration has never been easier with Bitbucket’s pull requests and reviewing process. Make the most of inline commenting to solve relevant issues and seamlessly track project progress.
It helps run checks before hand to prevent disasters later. Rest assured, your code is bucketed well! Additionally, you can use continuous integration and continuous deployment (CI/CD) for automating delivery process.
Its super smooth integration with Jira lets you link code changes with Jira issues from Your Work dashboard. Get updates at glance and go on marking tasks off your To do list without having to switch between tools. You can view and make edits to comments or update or reassign a Jira issue for Quality Analysis, right from within Bitbucket.
Embed files, pull requests, branches, tags etc. from Bitbucket onto Confluence. Just copy paste the URL and you are good to go.
Integrate Confluence with Jira to view project database, minutes of the meetings and all other knowledge bank that will come of use when synced with respective Jira issues. In turn, embed Jira issues, boards etc. onto Confluence interface to tackle them faster and flawlessly.
Cinch Bitbucket with Jira to provide a hawk’s eye view into the coding process. When integrated with Jira issues, there is a sync that happens at the development and the implementation stage. At a macro level, when coordinated with project progress reporting from Confluence, all 3 of them work beautifully from coding to development to collaboration to execution stage!
Additionally, workflows can be automated across all 3 tools. A simple inward-outward graph can be a starting point into understanding this tri-model.
An inward-outward-inward collaborative model between these 3 tools is the key to streamline project management and can prove to be the driving force behind project success. Foster collaboration, have a synchronized approach towards communication between several players, resolve issues and bugs instantly and reassign priorities based on the project flow using these super tools. High quality product delivery is just a smooth integration away!
Amrut Software enhances team collaboration by leveraging Atlassian tools to maximize efficiency and productivity. Check Out for the same Amrut Software.
0 notes
Text
Unlocking the Power of Ansible Automation: Best Practices and Performance Optimization
Introduction
In the fast-paced world of IT, automation has become a critical component for managing and scaling infrastructure efficiently. Among the many automation tools available, Ansible stands out for its simplicity, powerful features, and wide adoption. This blog post will dive into the best practices for using Ansible, along with tips on optimizing its performance, especially in large environments.
Why Ansible?
Ansible is an open-source automation tool that automates software provisioning, configuration management, and application deployment. Its agentless architecture, using SSH for communication, makes it easy to set up and use. With a declarative language, playbooks written in YAML, and a rich set of modules, Ansible simplifies complex automation tasks.
Getting Started with Ansible
Installation: Begin by installing Ansible on a control node. For RHEL-based systems, use:
sudo yum install ansible
For Debian-based systems, use:
sudo apt-get install ansible
2. Inventory Setup: Ansible manages hosts through an inventory file, which can be a simple text file or dynamic inventory scripts.
[webservers]
web1.example.com
web2.example.com
[dbservers]
db1.example.com
3.Writing Playbooks: Playbooks are the heart of Ansible, defining tasks to be executed on remote hosts.
---
- hosts: webservers
tasks:
- name: Install Nginx
yum:
name: nginx
state: present
Best Practices for Ansible
Modular Playbooks: Break down large playbooks into smaller, reusable roles. This promotes reusability and easier management.
---
- name: Setup web server
hosts: webservers
roles:
- nginx
- php
- firewall
2.Idempotency: Ensure that your playbooks are idempotent, meaning running the same playbook multiple times should not produce different results. Use the state parameter effectively to manage resource states
3.Version Control: Store your playbooks in a version control system like Git. This allows for tracking changes, collaboration, and rollback if needed
4.Use Variables and Templates: Leverage Ansible variables and Jinja2 templates to create flexible and dynamic configurations.
---
- hosts: webservers
vars:
server_name: "example.com"
tasks:
- name: Configure Nginx
template:
src: templates/nginx.conf.j2
dest: /etc/nginx/nginx.conf
Optimizing Ansible Performance
Parallel Execution: Increase the number of forks (parallel tasks) to speed up execution. Edit the ansible.cfg file:
[defaults]
forks = 10
2. Reduce SSH Overhead: Use persistent SSH connections to minimize the overhead of establishing new connections.
[ssh_connection]
ssh_args = -o ControlMaster=auto -o ControlPersist=60s
3. Limit Fact Gathering: Disable fact gathering if not needed or limit it to specific tasks to reduce execution time.
---
- hosts: webservers
gather_facts: no
tasks:
- name: Setup Nginx
yum:
name: nginx
state: present
4. Optimize Inventory: Use a dynamic inventory script to manage large environments efficiently. This can help scale Ansible to manage thousands of hosts.
Conclusion
Ansible automation is a powerful tool for managing IT infrastructure. By following best practices and optimizing performance, you can harness its full potential, ensuring efficient and scalable automation. Whether you're managing a small set of servers or a large, complex environment, Ansible's flexibility and simplicity make it an indispensable tool in your DevOps toolkit.
For more details click www.hawkstack.com
#redhatcourses#information technology#container#docker#containerorchestration#kubernetes#linux#containersecurity#dockerswarm#aws
1 note
·
View note
Text
Installing DevOpsGPT Locally: Harnessing Fully Autonomous AI Agents to Create Powerful Software!

How to Install Devout CBT and Create Your Own Software Applications Introduction Hey there, it's Ben Mellor, and in today's video, I'll be showing you how to install Devout CBT locally on your computer and create your own software applications. But before we dive in, let's have a quick recap on what Devout CBT is. Devout CBT is a self AI-driven software development solution that allows you to create high-quality software autonomously. With the help of AI agents, it combines large language models with devop tools to convert natural language requirements into working software. What is Devout CBT? Devout CBT is an innovative GBT model and a new approach to developing efficient, effective, and cost-reduced software with AI. It revolutionizes the software development process by enabling the creation of software without the need for manual coding. You can see the power of Devout CBT in action in this clip, where someone develops a game from scratch in under two minutes. As you can see, the developer enters the requirements for a snake game, and the AI guides them to clarify the details of the game's functionality. In just two minutes, the AI creates a fully functional snake-like game where you have to chase the points. This example demonstrates the incredible potential of Devout CBT beyond just game development. You can use it to create templates for websites, develop data entry forms, and much more. Installing Devout CBT Locally Now let's get into the nitty-gritty of how you can install Devout CBT on your computer. To start, there are a few things you'll need: Git, Visual Studio Code, and Python. Git is an application that helps you clone the Devout CBT repository, Visual Studio Code is used to edit and enter your Open AI API key, and Python is your code editor of choice. Once you have these tools ready, follow these steps to install Devout CBT: Step 1: Clone the Devout CBT Repository Go to the GitHub repository of Devout CBT and click on the green button to copy the repository's link. Open your command prompt and type in "git clone" followed by the copied link. Press enter, and it will start cloning the repository onto your computer. Step 2: Open Visual Studio Code and Enter Your API Key Open Visual Studio Code and navigate to the Devout CBT folder you cloned in the previous step. Inside the folder, locate the "m.eml.tpl" file. Rename the file by removing the ".tpl" extension. Open the file and input your Open AI API key. This key allows Devout CBT to utilize the Open AI API for generating software. Step 3: Configure the Interface Information Scroll down in the file until you find the section to configure the interface information of Open AI. Enter your API key in the appropriate field. Optionally, if you have other APIs you want to use with Devout CBT, you can input their keys as well. Save the changes. Step 4: Run the Devout CBT Application Open the command prompt again and navigate to the Devout CBT folder using the command "cd devops-gbt". Once in the folder, paste the command for running the application, which may be "run.bat" for Windows users. This command will install any missing dependencies and load the necessary files for Devout CBT to function. Step 5: Access the Devout CBT Application After the installation is complete, you can access the Devout CBT application through your web browser by opening the local host. The application will primarily be in English, with some portions potentially in Chinese. From here, you can input your requirements and start creating software. Creating Your Own Software Applications Now that you have Devout CBT up and running, let's explore how you can use it to create your own software applications. To demonstrate, I'll walk you through the process of creating a simple snakes and ladders game. 1. Start a Development Task Click on the button to start a development task. You can choose from various presets or select "Any Development Needs" for a broader scope. 2. Input Your Requirements Input your requirements for the game. For example, you can specify the design preferences, whether it should support single or multiple players, and any other specific functionalities you desire. 3. Submit Your Requirements Once you've entered your requirements, click submit to allow Devout CBT to analyze and generate the necessary code for your game. 4. Review the Generated Documentation Devout CBT will present you with a documentation interface that outlines the requirements it has generated. Review the documentation and make any necessary modifications or clarifications. 5. Analyze and Modify the Code Devout CBT will then analyze how to modify the code based on your requirements. It may take a few minutes to generate the modified code that aligns with your desired functionalities. 6. Review and Self-Check the Code Once the code has been generated, you can review it and make any additional changes or improvements. You can also choose to input your own code or implement specific features if desired. 7. Submit the Code to GitHub If you're satisfied with the generated code, you can submit it to a GitHub repository for version control and collaboration purposes. Connect your GitHub account and specify the repository where the code will be cloned. Conclusion And there you have it! You've successfully installed Devout CBT and learned how to create your own software applications. Devout CBT is a game-changer in the field of software development, empowering developers to create high-quality software autonomously with the help of AI. Remember, you can use this powerful tool to develop more than just games – the possibilities are endless. Give it a try and see what amazing software you can create. Thank you for watching, and have an amazing day! Thank you for taking the time to read this article! If you found it interesting and want to stay updated with more similar content, make sure to follow our blog via email or by following our Facebook fan page. Additionally, you can also subscribe to our YouTube channel for video updates. We appreciate your support and look forward to bringing you more insightful articles in the future! 1. What is DeVos GPT and how does it work? Answer: DeVos GPT is a self AI-driven software development solution that allows you to create high-quality software autonomously. It combines large language models with devop tools to convert natural language requirements into working software. 2. How can I install DeVos CBT locally on my computer? Answer: To install DeVos CBT locally, you will need to have Git, Visual Studio Code, and Python as your code editor. You can find step-by-step instructions in the video description. 3. Can DeVos GPT be used to create other types of software besides games? Answer: Yes, DeVos GPT can be used to create a variety of software applications. It can be used to create templates for websites, type forms for data entry, and much more. 4. How do I input my API keys into DeVos GPT? Answer: In the application folder, there is an m.dotEML.TPL file where you can input your API keys. Rename the file to remove the .TPL extension, open it, and paste your API keys into the appropriate places. 5. What happens after I input my requirements and submit them in DeVos GPT? Answer: After submitting your requirements, DeVos GPT will analyze them and generate the code necessary to meet the requirements. It will provide you with an interface documentation and modified code. You can review and modify the code if necessary, and then submit it to a GitHub repository if desired. Read the full article
0 notes
Text
Master Web Development with a MERN Full Stack Development Course

In today’s tech-driven world, web development is no longer just a niche skill—it’s a career-defining asset. As businesses transition to digital platforms, the demand for full stack developers has skyrocketed. One of the most efficient and popular stacks used by developers worldwide is the MERN stack. If you're aiming to become a proficient web developer, enrolling in a MERN full stack development course is a smart and future-proof investment.
What is the MERN Stack?
MERN stands for MongoDB, Express.js, React.js, and Node.js—a powerful combination of technologies used to build high-performing, scalable, and dynamic web applications. Here’s a quick breakdown:
MongoDB: A flexible, document-based NoSQL database that stores data in JSON format.
Express.js: A minimalist web framework for Node.js used for building APIs and server-side applications.
React.js: A front-end JavaScript library for creating interactive user interfaces with reusable components.
Node.js: A JavaScript runtime environment that enables server-side execution of code.
Together, these technologies allow developers to build modern web applications entirely in JavaScript—from the front-end UI to the back-end database.
Why Choose a MERN Full Stack Development Course?
Opting for a MERN full stack development course offers several key benefits:
1. Learn the Most In-Demand Technologies
The MERN stack is widely adopted by startups, tech companies, and large enterprises. Learning these tools ensures you're equipped with skills that are relevant in the job market.
2. Work with Real-World Projects
Most courses are project-based, meaning you’ll build applications like e-commerce platforms, social networks, blog sites, and more. These projects help you build a strong portfolio to showcase to potential employers.
3. Master End-to-End Development
With the MERN stack, you learn both client-side and server-side development. You'll be able to create full-featured apps—handling everything from UI design to server logic and database integration.
4. Career Growth and Salary Potential
MERN developers are among the highest-paid web developers. Companies prefer hiring full stack developers who can handle both front-end and back-end tasks, saving them time and resources.
What Will You Learn in a MERN Full Stack Development Course?
A well-structured course generally includes:
✅ Front-End Development
HTML5, CSS3, JavaScript (ES6+)
React.js with Hooks, Context API, Redux
Component-based UI development
Responsive design and user experience
✅ Back-End Development
Node.js fundamentals
Building APIs with Express.js
Authentication using JWT or OAuth
File handling, middleware, routing
✅ Database Integration
MongoDB basics and advanced features
Mongoose for schema modeling
Data validation, relationships, and queries
✅ DevOps and Deployment
Git & GitHub for version control
Hosting on platforms like Heroku, Vercel, Netlify
Environment variables and production readiness
Continuous Integration & Deployment (CI/CD)
Additional Benefits of a MERN Full Stack Development Course
Community Support: Join Discord groups, forums, and alumni networks for peer-to-peer learning.
Mentorship: Access to experienced instructors who guide you through concepts and project work.
Career Services: Resume reviews, mock interviews, and job placement support in premium courses.
Certification: Earn a certificate to showcase your skills to employers and clients.
Who is This Course For?
Beginners looking to start a career in web development
Computer Science students who want to build a strong portfolio
Software developers transitioning into full stack roles
Freelancers and entrepreneurs aiming to build complete web apps on their own
Final Thoughts
A mern full stack development course is more than just a learning program—it’s your entry point into the thriving world of full stack web development. Whether you're aiming to land your first tech job, build your own startup, or freelance with confidence, mastering the MERN stack equips you with the tools to succeed.
Start building real-world applications, gain hands-on experience, and unlock exciting career opportunities today with a mern full stack development course
0 notes
Text
git is a version control program (with lots of other programs wrapping around it, but not reimplementing it), it manages your text (usually code but really any structured text) using the concepts "repository" (repo for short), "branch", and "commit". A repo is a set of commits organized into branches. A commit is a set of changes among files, multiple commits are a "[commit] history". The way the version control works is that while youre working in a repo, you can switch between branches and commits. Moving between branches is spatial while moving between commits is temporal. Usually there is a branch called "master" or "main", which contains the canonical version of the program, usually one that at least works. To use git you generally use it as a commandline tool, get it from your OS' package manager.
A typical workflow in an existing git repo (created with the command "git init") is as follows (note: all these commands have little manuals embedded into git or provided as manpages, i recommend at least skimming those):
use "git checkout" to switch to the branch you want to work on, or create a new branch if you work on a new thing (like a feature or such)
edit your code
use "git add" to add all the files you want to commit
use "git commit" to create a commit with all the changes made to those files since the last commit, generally do this whenever you are done with some large changes that are usable, if incomplete (i.e. dont commit code with syntax errors or compile time errors unless you are about to clock out)
if your feature is done and the branch passed testing, you can merge it into master, which you use the "git merge" command for
if you are working with a "remote" (a thing that hosts your repo offsite, usually for multiple developers cooperating accross devices) you use "git push" to upload your changes and "git pull" to download changes (note: pull with the --rebase option to keep the commit history clean). If you want to use a remote youll have to set up ssh access, check the guide provided by your specific host
when you run into issues, git usually gives good error messages telling you exactly whats wrong and giving hints for fixing it, if you dont understand them people on the internet will understand them for you.
Further topics you can read up on that are out of the scope of a basic explanation: "pull requests" (changes that are requested to be put into a repo), "merge conflicts" (sometimes branches are incompatible and cant be automatically merged), "cherrypicking" (tbh i dont really get this), "squashing" (turning multiple commits into a single commit)
ask questions if anything remains unclear
Can someone explain to me in like five seconds how to use git, assuming that I know basic shit about coding/command line/whatever but don't know any of the specific terminology related to git. Like every tutorial online is at the same time both over my head and also vastly too basic. Just like. Tell me what it is.
Uh. First tell me its ontology. Is it a program, a standard, a language...? I know that it's for version control. Suppose I wanted to do version control at a piece of code. What do I do. What buttons do I press, on my computer? Tell me these things.
476 notes
·
View notes
Text

So, you guys probably know what VSTS and What Azure DevOps are, as you are in this article. I suppose you have a little idea about that. No? Let me tell you in short what is VSTS and What is Azure DevOps?
What is VSTS?
VSTS (Visual Studio Team Services) was a cloud-hosted extension that was run by Microsoft and assisted development teams with special tools and services. These services were for software programmers, tester and IT project developers. Now let’s move to the next part,
What is Azure DevOps?
Azure DevOps is VSTS. Confusing, Huh? Not at all. Let me tell you, In 2018 Microsoft realized that VSTS is a very large platform where users might get confused with different tools. So they developed Azure DevOps. So now you have an idea that azure DevOps and VSTS are somewhat the same not fully but in some cases they are. According to Abel Wang, VSTS was one monolithic tool that did everything for the development of software They break VSTS into different tools, and now instead of just one monolithic tool, Microsoft has Azure Pipelines, Azure Repos, Azure Boards, Azure Artifacts, and Azure Test Plans. Now let me tell you how this works, Let’s say you have your code in GitHub and you are building it in Jenkins so won’t it be better if you use azure Pipeline? Like to release pipeline nothing will be better than Azure Pipelines. You can make your Test plans using Azure Test Plans, To track all of your work through the project you can use Azure Boards. So with the help of Azure DevOps, you can use whatever tool you want without using the Monolithic VSTS application. Also Read | Importance of Data Science in the Insurance Industry
What Differences Do They Make In Azure DevOps?
Azure DevOps is an evolution of VSTS. In 2018 Microsoft launched Azure DevOps and with that, they said that Development Operations are difficult to do and it is getting critical to a team’s success. They provided specific services to us and assured us that these tools will provide software faster and that too with higher quality. Let’s get to know these changes one by one.
Azure Pipelines
Azure Pipelines is Basically a CI/CD which works with any programming language, platform, or even a cloud. It connects with GitHub and deploys continuously.
Azure Boards
Azure Boards uses Kanban Boards, Backlogs, Team Dashboards custom reporting, and with the help of all of this Azure boards give you the exact tracking of your work.
Azure Artifacts
It gives you package feeds for different public and private sources.
Azure Repos
It is a private Git Repos for your project. By its name, it is identical that it provides a good repo to your business through Advanced file management and collaborative pull requests.
Azure Test Plans
With Azure Test Plans you will be able to do any kind of test, your one-stop solution for your Tests. All these Azure DevOps Services are open and also extensible. If you are working with a Framework, Platform, or even a cloud application, this software works smoothly for all of these. Also, it is possible that you use them separately or combined for all kinds of development solutions. As Azure supports both private and public cloud configurations, you will be able to run your data in your data center or their cloud too. It is possible and it is amazing. Also Read | Banks in the Metaverse: Why to Get In Early and 3 Ways to Start
What Kind Of Changes Will Be There In Azure DevOps?
Azure DevOps is nothing but the evolution of VSTS. The former VSTS users will get upgraded into Azure DevOps Automatically. Azure DevOps will give more choices and functions to existing users, so it is 0 loss and 100% gain for former users. The URL is changed from abc.visualstudio.com to dev.azure.com/abc. They have also made this easier for new users who just search visualstudio.com, they redirected this link to Azure DevOps.
As a part of this, the user will get an updated experience. Users of the Team Foundation Server will get updates based on features live in Azure DevOps. The Next version of TFS will be called DevOps Server and will get continue the enhanced updates and Services.
Conclusion
The change is necessary, But with Care. With this motive, Microsoft has perfectly relaunched VSTS with a new name which is Azure DevOps. Azure DevOps is a one-stop solution for every kind of Software Development. With Azure’s Pipelines, Boards, Artifacts, Repos and Test Plans you can design your application or website with ease. You can also use all of these tools in Azure DevOps simatenoiusly but you won’t be calling it VSTS. If you are building a website from a scratch you must use all of these application. It will really help your business.
Also Read
How is Google Search Implementing Artificial Intelligence?
7 Roles of Data Analytics in Video Games Development
How Artificial Intelligence can Enhance the Education Industry in 2022
Top 10 Keys Benefits of Cloud Automation in The Healthcare Industry
How Can Big Data Analytics Help Businesses to Become Data-Driven?
Original Source : Azure DevOps Is New VSTS - HData Systems
#azure#azure devops#data science#big data#visual studio#business#startups#entrepreneur#artificial intelligence#business intelligence#data analytics#data mining
6 notes
·
View notes
Text
A Comprehensive Guide to Bitbucket: Features, Integrations, and Best Practices

Introduction to Bitbucket
Bitbucket is a Git-based source code repository hosting service owned by Atlassian, known for its powerful integration capabilities and robust collaboration features. It caters to teams of all sizes, offering solutions that streamline development workflows, enhance productivity, and ensure secure code management. Whether you’re a small team or part of a large enterprise, Bitbucket provides the tools you need to succeed in today’s fast-paced development environment.
Key Features of Bitbucket
Bitbucket offers a range of features that make it a top choice for developers and teams, including built-in CI/CD, pull requests, and branch permissions.
Git Repository Management
With Bitbucket, managing Git repositories is streamlined, offering both private and public repositories with scalable storage options. The platform supports unlimited private repositories, making it ideal for teams that prioritize privacy and security. Additionally, Bitbucket’s interface is intuitive, allowing developers to manage their code with ease.
Continuous Integration/Continuous Delivery (CI/CD)
Bitbucket Pipelines is an integrated CI/CD service that automates your code from test to production with ease. By using Pipelines, you can define your build, test, and deployment steps in a YAML file stored in your repository. This integration allows for faster feedback, reducing the time between writing code and deploying it to production.
Pull Requests and Code Review
Pull requests in Bitbucket are designed to foster collaboration, enabling seamless code review and discussions. Developers can create pull requests, solicit feedback, and merge changes with confidence. The code review process is further enhanced with inline comments, making it easier to discuss specific lines of code and ensure quality before merging.
Branch Permissions and Workflow
Bitbucket provides detailed branch permissions to enforce code quality and protect key branches from unauthorized changes. By configuring branch permissions, you can control who can write to a branch, ensuring that only authorized team members can make changes to critical parts of the codebase.
Bitbucket vs. Competitors
When compared to other repository hosting services like GitHub and GitLab, Bitbucket stands out due to its deep integration with other Atlassian products and enterprise-focused features.
Bitbucket vs. GitHub
Although GitHub is widely popular, Bitbucket offers unique advantages, especially for teams using Atlassian tools. Bitbucket’s native integration with Jira and Confluence makes it an excellent choice for teams already invested in the Atlassian ecosystem. Additionally, Bitbucket’s pricing model is more favorable for teams that need private repositories.
Bitbucket vs. GitLab
While GitLab offers similar features, Bitbucket’s integration with Jira and Confluence gives it a competitive edge in enterprise environments. GitLab may appeal to those seeking a fully open-source solution, but Bitbucket’s focus on collaboration and integration makes it a superior choice for many organizations.
Integrations and Ecosystem
Bitbucket’s seamless integration with Atlassian’s ecosystem, including Jira, Confluence, and Trello, enhances productivity across the software development lifecycle.
Integration with Jira
Linking Bitbucket with Jira brings your source code and project management together, enabling better tracking of development progress. Developers can easily associate Jira issues with Bitbucket commits, branches, and pull requests, providing full visibility into the development process.
Integration with Confluence
Confluence integration allows for enhanced documentation and knowledge sharing directly from your codebase. Teams can create, share, and collaborate on documentation that stays up to date with the code, ensuring that everyone has access to the latest information.
Integration with Trello
Using Bitbucket with Trello simplifies task management and tracking within your development workflow. Developers can link Trello cards to Bitbucket branches, commits, and pull requests, ensuring that tasks and code changes stay in sync.
Security Features
Bitbucket prioritizes security, offering features like two-factor authentication, IP whitelisting, and SOC2 compliance to protect your code.
Two-Factor Authentication
Enabling two-factor authentication (2FA) in Bitbucket adds an extra layer of security to your account. By requiring a second form of verification, 2FA helps prevent unauthorized access even if your password is compromised.
IP Whitelisting
Bitbucket allows administrators to restrict access to repositories based on IP addresses, providing an added layer of protection. This feature is especially useful for organizations that want to limit repository access to specific office locations or VPNs.
Compliance and Data Privacy
Bitbucket’s commitment to SOC2 compliance ensures that your data is handled with the highest security standards. This compliance, along with Atlassian’s robust data privacy policies, gives organizations the confidence that their code and data are safe.
Getting Started with Bitbucket
Setting up Bitbucket is simple and straightforward, whether you’re migrating from another platform or starting fresh.
Creating a Repository
To get started, the first step is creating a repository to store your code securely in Bitbucket. The process is user-friendly, with a guided interface that walks you through naming your repository, setting permissions, and choosing whether it’s private or public.
Connecting Your Local Repository
Bitbucket makes it easy to connect your local repository with clear instructions and Git commands. Once connected, you can push your code to Bitbucket, where it’s securely stored and accessible to your team.
Managing Branches and Workflows
Learning to manage branches and workflows is crucial for maintaining code quality and ensuring smooth development. Bitbucket’s branching model and workflows, such as GitFlow, support teams in creating a consistent and reliable development process.
Advanced Tips and Best Practices
Mastering Bitbucket involves not just using its core features but also leveraging advanced tips and best practices for optimal results.
Using Pipelines for CI/CD
Bitbucket Pipelines can be customized for a wide range of CI/CD workflows, helping automate your development processes. By setting up different pipelines for different branches or environments, you can ensure that your code is always tested and deployed in the right way.
Implementing Effective Code Review Processes
Establishing a thorough code review process within Bitbucket can significantly improve code quality and team collaboration. Encouraging regular feedback, using inline comments, and setting up mandatory approvals are key practices that lead to better code and fewer bugs.
Optimizing Branching Strategies
Choosing the right branching strategy is essential for maintaining a clean and manageable codebase. Whether you use GitFlow, feature branching, or another model, Bitbucket’s tools help enforce and automate these strategies, ensuring your team works efficiently.
Conclusion
Bitbucket is more than just a code hosting service; it’s a comprehensive platform that supports the entire development lifecycle with powerful tools and integrations. Its robust feature set, combined with seamless integration with Atlassian products, makes Bitbucket a valuable asset for any development team. By adopting Bitbucket and following best practices, teams can streamline their workflows, enhance collaboration, and ensure code quality across the board.
0 notes
Text
Web Development Roadmap
To start a career in the web development field, you need to choose either front-end web development or back-end web development and if you want to be a full-stack developer you can choose both. Here we will discuss both paths. First, we will talk about what things you should learn and use to go on either path.
Here are some core technologies and tools you need to learn for both frontend and backend roadmap tasks.
Git -
One of the most popular version control systems. It's not possible to live without Git anymore. Git is a software for tracking changes in any set of files, usually used for coordinating work among programmers. It’s goals include speed, data integrity and non-linear workflows.
SSH -
SSH stands for Secure Shell. It is a Cryptographic Network Protocol for operating network services securely over an unsecured network. Typically applications include Remote Command Line, Login and Remote Command Execution. Every network service can be secured with SSH.
It is a popular networking concept every web developer should know.
HTTP/HTTPS -
HTTP stands for Hypertext Transfer Protocol and HTTPS stands for Hypertext Transfer Protocol Secure.
Hypertext Transfer Protocol Secure is an Extension of Hypertext Transfer Protocol. It is widely used over the Internet. For Secure Communication over a computer network, HTTPS is a good way to communicate. HTTP Protocol is the Backbone of the web, and to be a Web Developer you should have good knowledge of both HTTP and HTTPS.
Linux Command - Basic Terminal Uses -
Linux command is the utility of the Linux Operating System. All basic and advanced tasks can be done by executing commands. The commands are executed on the Linux Terminal. The terminal is a Command Line Interface. It is used to interact with the system, it is similar to Command Prompt in Windows.
Not just a Web Developer but for any Programmer, Command Line is a very important factor.
Data Structures & Algorithms -
A Data Structure is a named location which can be used to store and organize data. An Algorithm is a collection of steps which help you to solve a problem. Learning Data Structure and Algorithms allows us to write efficient and optimized computer programs
These are the building blocks for every program and better knowledge of data structure and algorithm. It is vital for your next job or doing well at your current job..
Character Encoding -
If you are creating global applications that show information in multiple languages, across the world then you should have a good knowledge of character encoding.
Character Encoding is used in Computing, Data Storage and Data Transmission to represent a collection of characters by some kind of encoding system. This technique assigns a number to each character for digital representation.
Github -
There is no doubt that every developer or programmer uses Github and Git for getting code information and give some mock tests to check the performance in coding.
Both Git and Github are the standard terms in code repositories.
Github is a provider of internet hosting for software development and version control using Git. It offers the Distributed Version Control and Source Code management functionality.
Now we will discuss both the roadmaps, step by step.
Frontend Developer Roadmap -
If you want to become a Frontend Developer then you should have knowledge in some coding technologies.
In the starting phase, you should have knowledge about some basics of HTML, CSS and JavaScript.
In HTML you should know about the basics of html, semantic html, basic seo and accessibility.
In CSS you should know about the basics of css, making layout, media queries and also CSS3. You should know roots, positioning, display, box model, css grid and flex box.
In JavaScript, you should have a knowledge about syntax and basic constructs, learn dom manipulation, learn fetch api, ajax, ecmascript 6 and modular javascript.
Then you need to start learning about Package Managers, in this you can learn npm and yarn. npm is the latest technology, but still behind yarn in some features. You can select one of them.
Then you have to learn about CSS Preprocessors, which should be SASS and PostCSS.
You can learn about CSS Frameworks, in this you should know about Bootstrap 4.
You can start learning about CSS Architecture, with modern frontend frameworks, there is more push towards CSS in JS methodologies.
Now you can build tools, Task Runners, Module Bundlers, Linters and Formatters. In task runners, you can use npm scripts. In module bundlers, you can use webpack and rollers.
After completing all these steps you need to choose a Framework, it should be Reactjs, Angular and Vue.js. Then use CSS in JS and then test your apps.
Web Development Basics -
It's pretty apparent that if you want to become a web developer, then you should know the basics of the internet, web applications, protocols like http. In general you have knowledge about web development.
HTML and CSS -
HTML and CSS are the backbones of any website, html provides the structure and css provides the style and helps them to look better. If you want to become a serious frontend developer then you must master these two.
JavaScript -
Just like the four pillars of object oriented programming, encapsulation, abstraction, polymorphism and inheritance. Web Development has three pillars, which are HTML, CSS and JavaScript.
HTML and CSS provide structure and style but Javascript makes them alive by adding Interactiveness.
TypeScript -
Just like in programming, we should know about C and C++, the same as TypeScript, which is considered as JavaScript++.
TypeScript is also a programming language developed by Microsoft and also maintained by Microsoft. It is a superset of JavaScript. It is designed for the development of large applications.
Angular -
Angular is a web application framework. It is a typescript based free and open source framework. It is developed by the Angular Team of Google. Angular is an enhanced form of AngularJS, it is completely rewrite.
In the starting phase you should have knowledge about HTML, CSS and JavaScript. But these days, most of them work on Angular, Vue.js, Reactjs and Typescript.
They provide short and simple code which consumes low storage.
Reactjs -
Like Angular, Reactjs is also a very popular library to develop web applications. Reactjs is developed and maintained by Facebook Team. Most people work on reactjs instead of php and other programming languages.
Reactjs is an enhanced form of PHP and we can also include HTML, CSS and JavaScript.
Backend Web Developer Roadmap -
To become a backend web developer, you need to know about some languages.
So the first step is to pick a language.
It should be Functional Language and Scripting Language.
In functional language you need to learn about Java and .Net and in Scripting language you need to learn about Python, Ruby, PHP, Node.js and Typescript.
After learning all these languages, you need to start doing practice, as a beginner you need to do the practice.
Implement those commands you have learned. Learn about the Package manager and start implementing this. Learn about Testing and Bug Fixing.
Start knowing about Relational Database and Framework. You can learn MongoDB Database, it is enough to know about databases and uses of databases. Then start gaining knowledge of Web Server like Apache.
Node.js -
Same as reactjs, node.js is mostly used by maximum web developers. Like reactjs, node.js allows you to make complete web applications using a single language which is Node.js.
Java -
Mostly in the starting phase, people start learning about java. And almost all made their first application using java. Java is a very old language but its popularity is not gone till now like C. Java provides 99% features of object-oriented programming.
Python -
Python is a trending Language, you should have a focus on python. You can make your career bright by learning Python. If you want to develop the back-end code using python then you can use Django. It is a Full Stack Web Development Framework for Python Programmers.
#webdevelopment#websitedevelopment#appdevelopment#ecommercedevelopment#mobileappdevelopment#digitalmarketing#seo
8 notes
·
View notes