#gradient generator websites
Explore tagged Tumblr posts
Visit Tumblr Blog
Explore Tumblr blogs with no restrictions, modern design and the best experience.
Last Seen Tumblr Blogs


Fun Fact
Tumblr was named as a finalist in Lead411’s New York City Hot 125 in Aug 2010.
Text
WHY IS EVERYTHING AI BULLSHIT
#i'm trying to do RESEARCH and it's on my EBOOK WEBSITE USED BY MY UNIVERSITY#GO AWAYYYYYYYY#i would LOVE to do this faster really i would really i would like my brain to be able to run as fast as a machine and focus for once#but come ON get OUT of my way you are SLOWING ME DOWN WITH YOUR CLAIMS THAT YOU WILL SPEED ME UP#LEAVE ME ALONE.#LET ME GET TO THE BLASTED CONTENT ALREADY#i'm so TIRED and you are dangling deals with the devil in front of me but the devil isn't a fucking linguist#leave me ALONE. fuck OFF with your stupid gradient and sparkles i am going to kill you stop besmirching the aesthetic of twilight sparkle#she would not STAND for this#go AWAY.#...#sorry. having a moment. not doing great. i would like this to be easier.#i would like to not be constantly bombarded by shit that claims it will make my life easier#that i know full well will not make my life easier because it DOESN'T UNDERSTAND WHAT IT IS ON ABOUT.#YOU DO NOT KNOW HOW TO ANALYSE LYRICS. YOU CANNOT REASON THROUGH HOW TO CONSTRUCT A REPRESENTATIVE CORPUS.#YOU ARE A COMPLICATED PREDICTIVE TEXT MODEL#grumble grumble i feel like general john macnamara at 1:17:19 of the guy who didn't like musicals.#it is not the same thing but you understand my sentiment. please understand my sentiment.#a blott on the record
9 notes
·
View notes
Text
GRADIENT TEXT TUTORIAL

HOW TO GET OMBRÉ STYLED TEXT ON TUMBLR
𝜗℘ I got a request on TikTok asking to do a tutorial on gradient text — tumblr doesn’t have an in-app option on doing gradient texts. This is how.
𝜗℘ Sites you can use: image color picker / stuffbydavid (gradient text).
𝜗℘ People say that you have to use a computer for this, which isn’t true. I am able to make gradient text on my phone, but you can use a computer if you want.

color picking from an image is optional, but highly recommended.
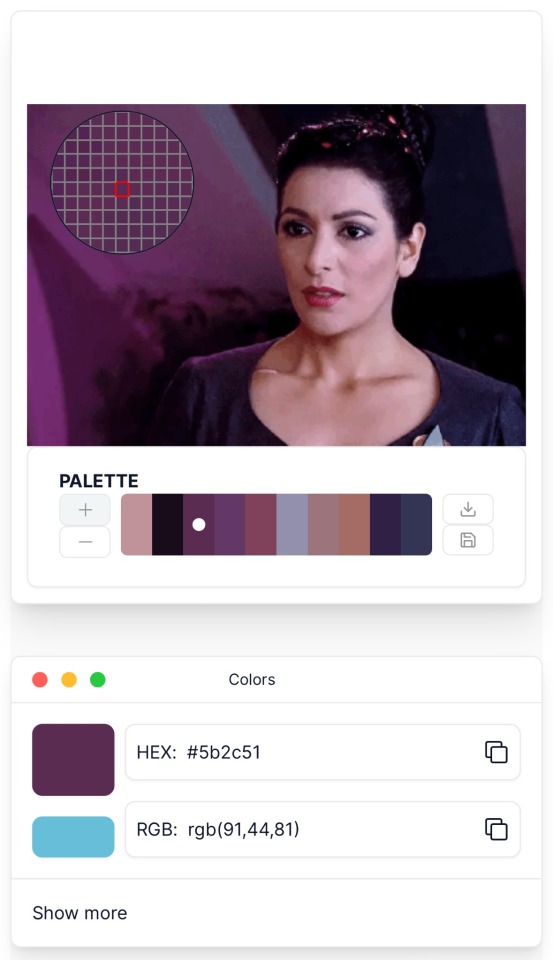
one: put the text you want to color for your tumblr post.
two: change the color of the text to whatever color you want. there are several options on how you want it. pick whatever option you want. the text will automatically generate for you.
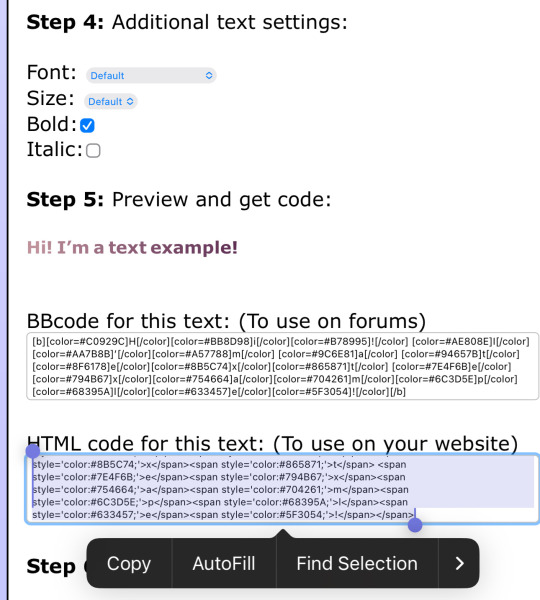
three: copy the entire code then press “copy”.
four: go over to tumblr (website, not the app) and click “edit post” (the pencil) or create a new post.
five: click the settings button and change it from “rich text” to “HTML.”
six: paste the code from the gradient text website in the HTML where you want it to go. (I paste it then just save the post to my drafts then edit the text on the app)
#jasper’s tutorials#tutorial#gradient text#ombré text#text#tumblr text#text post#colored text#text tutorial#tumblr blog#tumblr tutorial
429 notes
·
View notes
Text
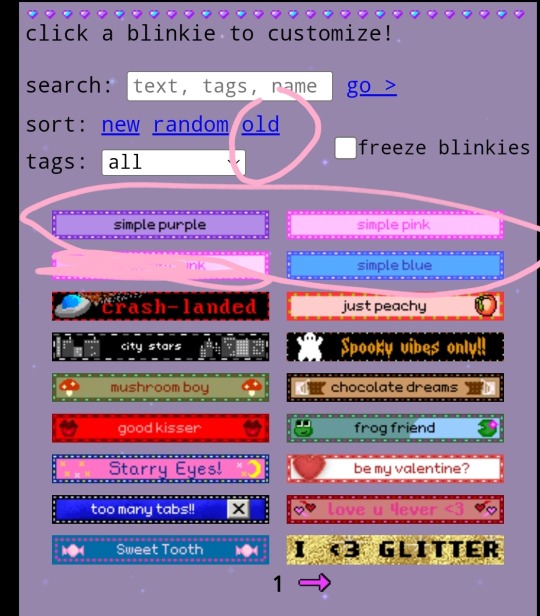
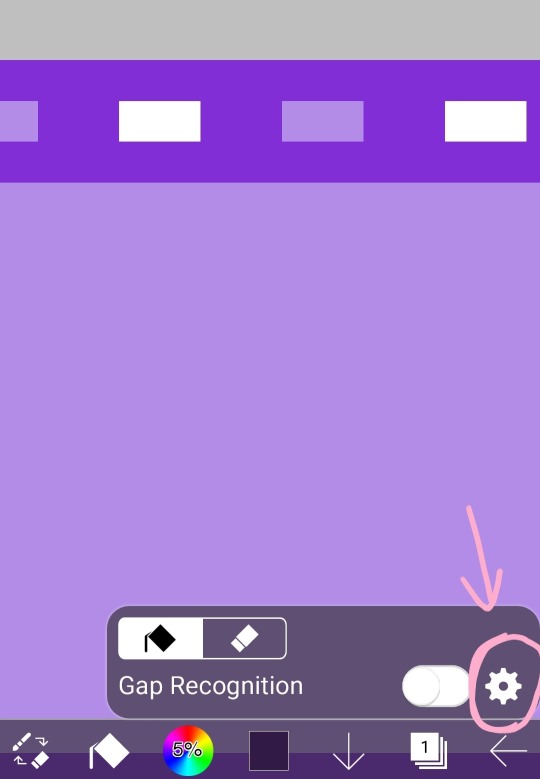
EXPLAINING HOW I MAKE BLINKIES :3
like these guys


websites / apps: blinkies.cafe , ibis paint x , ezgif.com !
STEP ONE !! go to blinkies.cafe and select a blinkie. i reccomend going to old and selecting one of the very simple ones !! DO NOT SELECT THE GRADIENT ONE YOU WILL SUFFER
STEP TWO !! click on it btw. anyways, since spaces won't work, put " " !! it will register !! this is also how to make videos on yt title-less i think... anyways, choose the biggest size
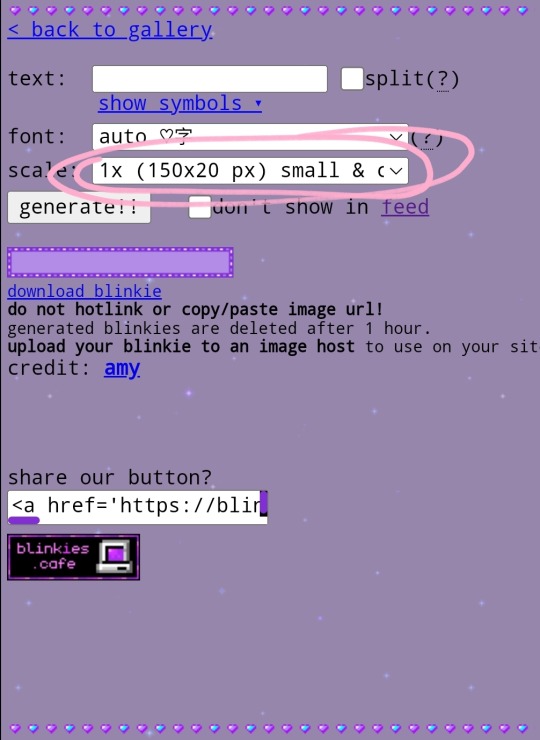
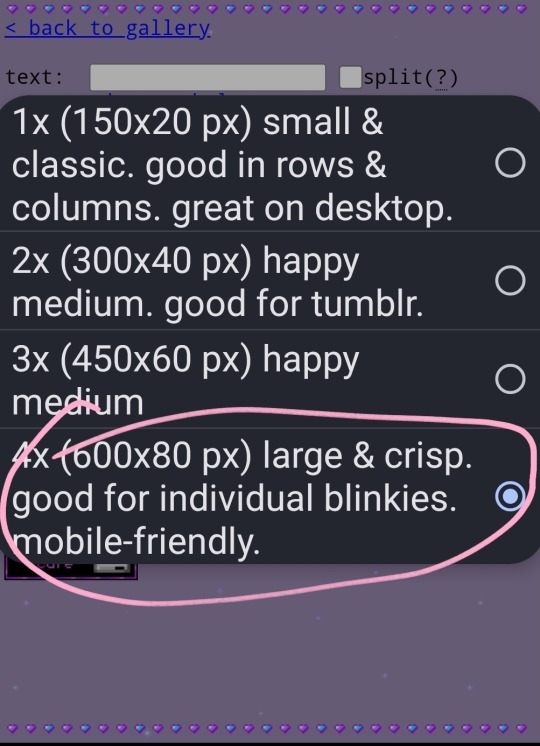
then click generate and download the blinkie!!
STEP THREE !! import into ibis paint !!
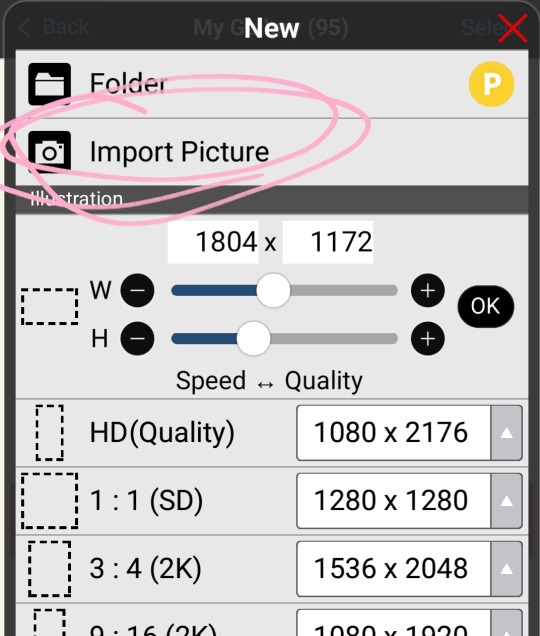
now i reccomend putting a reference of whatever character in your ref window. won't explain that, look it up.
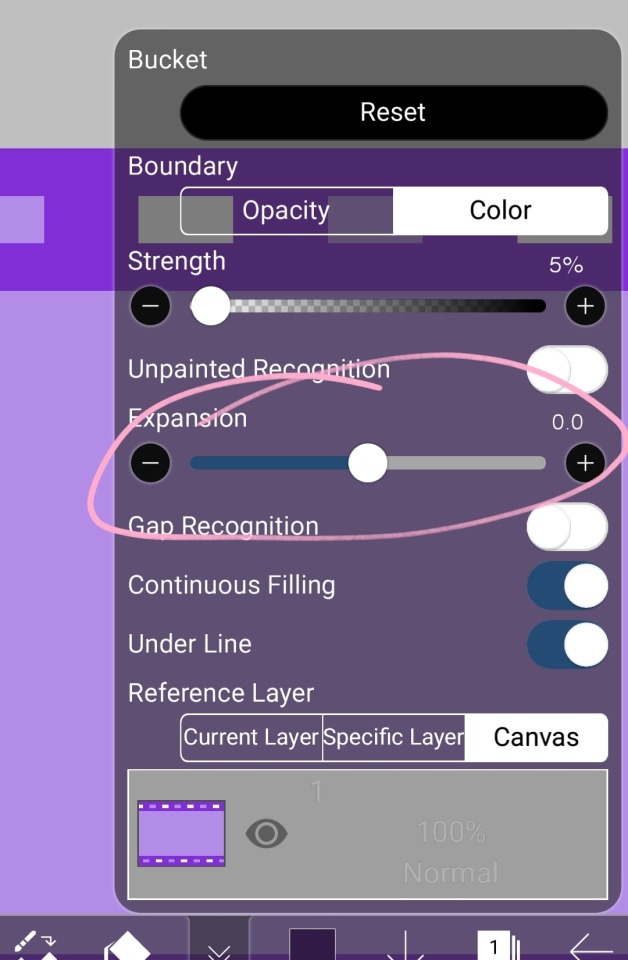
STEP FOUR !! choose colors and recolor with bucket tool on 0
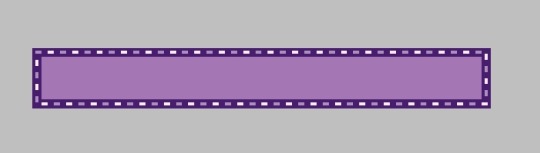
wow, look at that !!
STEP FIVE !! import a transparent image of your character and put the text of your choice.
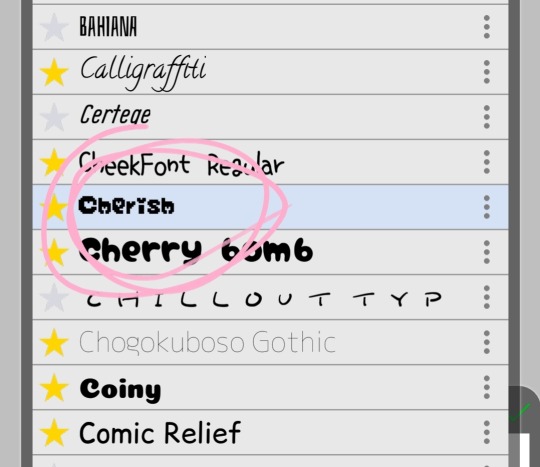
heres the font i use !!
advice for choosing colors of the text: make the body the color of the blinkies border and the outside the brightest light !!
STEP FIVE AND A HALF !! this is optional, but i make a very small border around the text. duplicate layer and bring it on top, make all other layers invisible, alpha lock, make it the color of the border, turn off alpha lock, use bucket tool on expand 0.5 or 1 and tap a few times on the blob, turn other layers back on, put the duplicate under the original thing and merge so it's a small border. it's very subtle but i like it.
see the difference?


STEP SIX !! download it, then flip ONLY THE BLINKIE LAYER horizontal and vertical then save again

if you want another set of words, add them now!!
STEP SEVEN !! go to ezgif.com and imput them
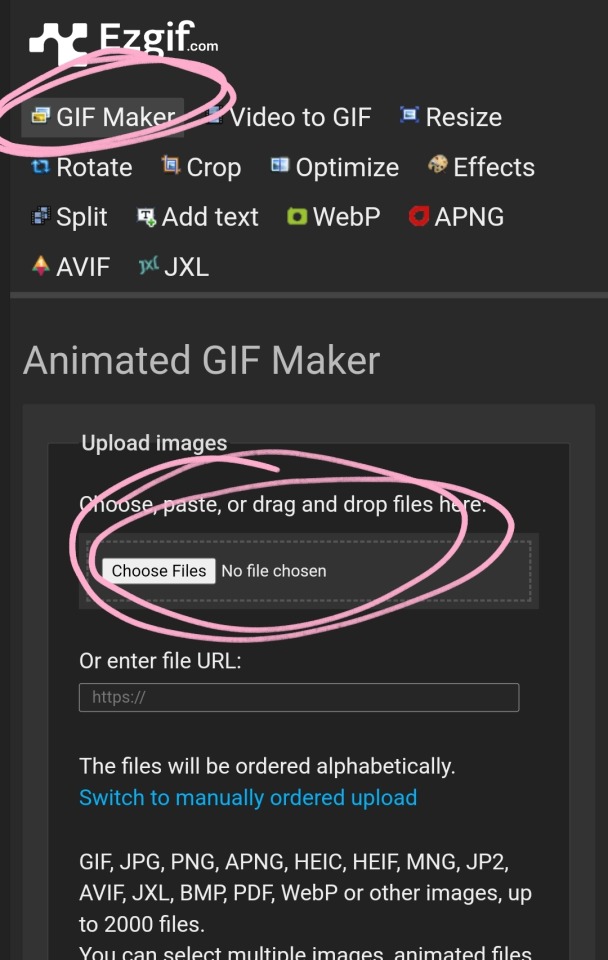
the click upload files. then click make a gif :3

the end (≡・x・≡)
#🧁 sweet shenanigans#jiraiblr#vflower#blinkie#blinkie tutorial#web graphics#web resources#blinkies#tutorial
188 notes
·
View notes
Note
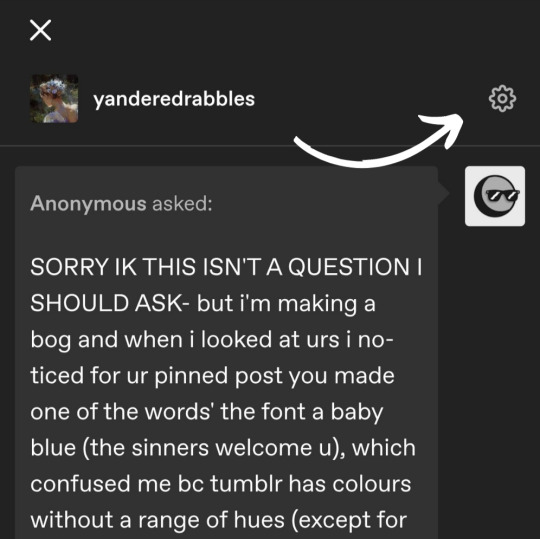
SORRY IK THIS ISN'T A QUESTION I SHOULD ASK- but i'm making a bog and when i looked at urs i noticed for ur pinned post you made one of the words' the font a baby blue (the sinners welcome u), which confused me bc tumblr has colours without a range of hues (except for the blog title). So I was curious...how did you do it?
I can defo tell this is not a question you would have expected in ur inbox bae
it's super easy!
The method I use is mostly applicable to the mobile website, but I'm sure you can use it on desktop and the app as well.
First, type out whatever you want in your tumblr post.
Next, head to this website.
Type or paste your text into the upper bar and choose your colours. To get the text all baby blue, I chose solid colour from the drop down menu.

Next, copy the HTML code it generates.
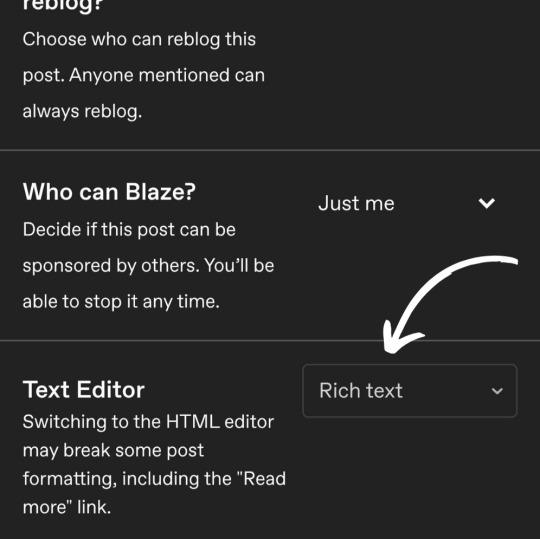
On your tumblr post, you're going to press the little setting button in the upper corner. Where it says rich text, you're going to change it to HTML.
Your post is going to look really scary but don't worry! You're going to select the text you want and then replace it with the code you copied.

Once you've done that, press the preview button and you'll be able to edit like normal! This is particularly fun if you want to use gradient text or if you just want more fun colours
171 notes
·
View notes
Text
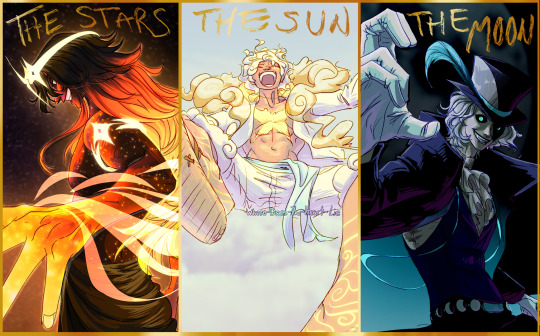


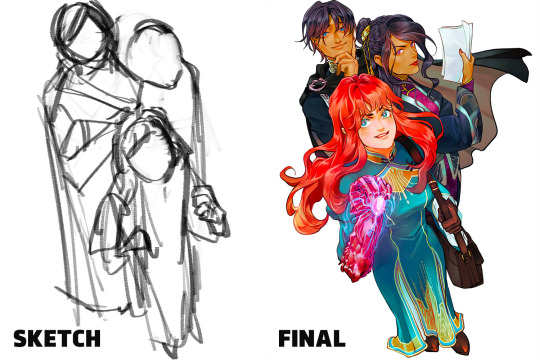
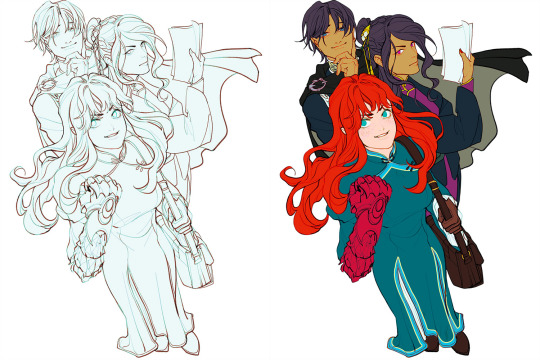
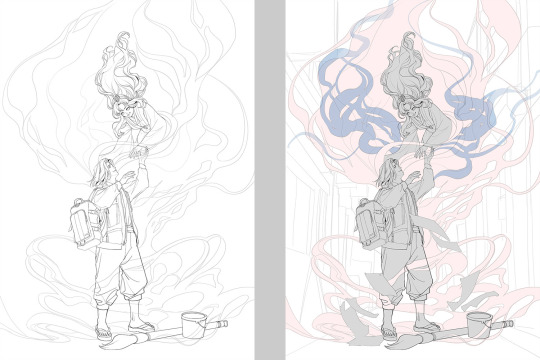
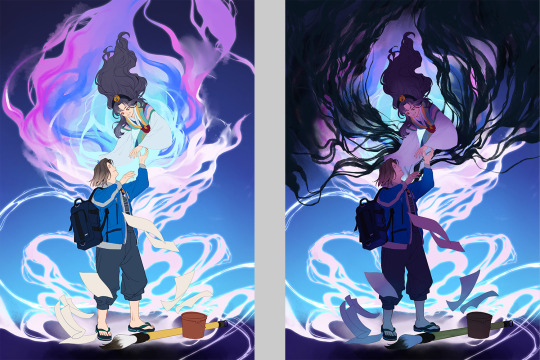
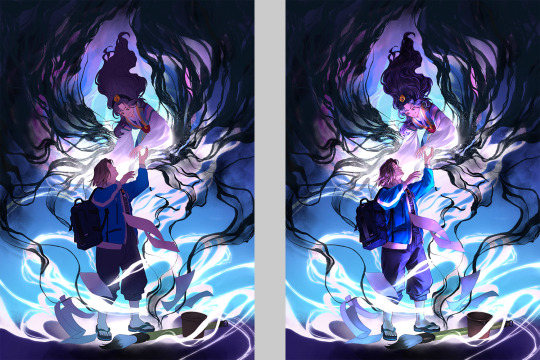
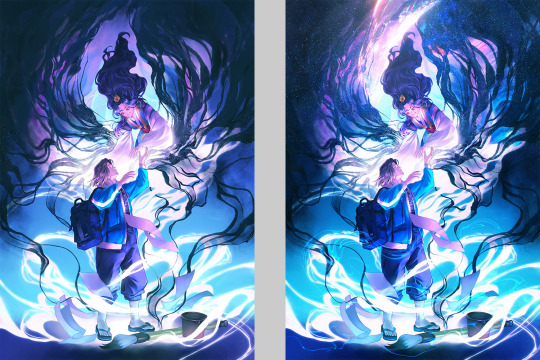
For @orange-artist ‘s ASL god AU DTIYS! (congrats on the milestone!)
This was really fun, I absolutely love drawing ethereal designs
Additional notes 👇
So i adjusted the original designs ... a bit... To draw in my style means that i have to make everything extra, sorry.
Ace:
I like the base design for Ace a lot! i looked at other posts to get more context to these outfits and i say this draping billowy pants design that i liked a lot more, so I used that instead of the ones he has in the picture.
I love his cute little star crown, i think it looks dope as hell. I wanted to bring it to other parts of him too, so I gave him an arm cuff with it, too! If i had drawn the front of him, you would also see that crown design around his waist as a belt, too.
i originally had him in a pose similar to the one he has in the original, but after i sketched out the other two poses i found he looked a little two flat, so i brought his hand out to the foreground.
I like the choice for his hair to gradient out to look like a comet! I had a lot of trouble trying to make it look Just Right, but i think I nailed it
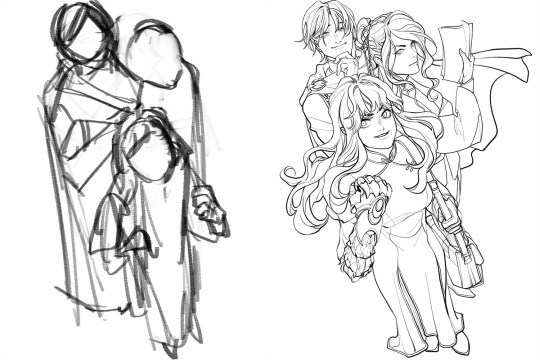
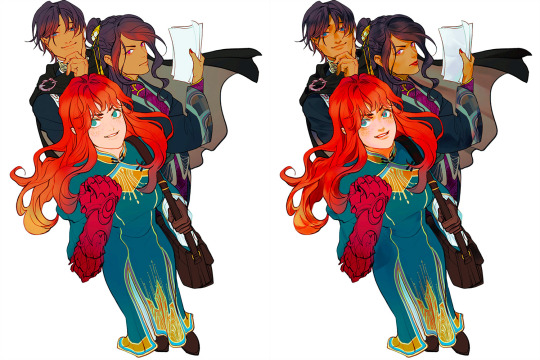
Luffy:
I didn't change much about his design, I really just made him a little more yellow than he was before. Its hard to improve an already banger design. He's my ethereal silly guy...
I really love the idea of Luffy's scars looking like gold, that's really cool.
I wish I could've added that cold crown he has around his head, but i didn't know how to without it looking sloppy so i had to leave it out.
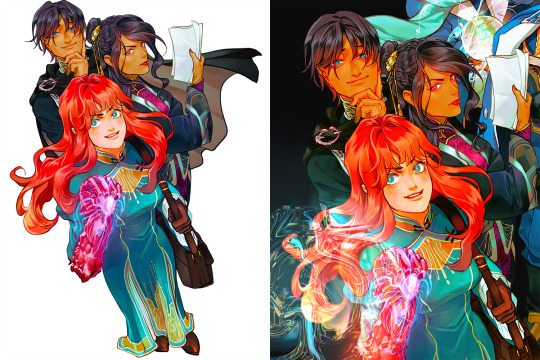
Sabo:
I changed so much about Sabo's design, i would like to send out a formal apology for it, I admit I went a little too ham. I had already completed the picture before i went back to look at the original post and saw the comments about how Sabo was supposed to look... discreet...... I... Did Not Make Him Discreet. In The Slightest. :DDD ehe
I needed help for Sabo's pose because i was having so much trouble with the hand, i called upon my good website friend JustSketchMe to get it right. I had this idea for the pose because i wanted the claw to look like a crescent moon, I think it looks pretty good.
I would've given him normal snakebite piercings too but i felt that the ring piercings looked more Crescent-like, so i went with that.
Moon belt. i want that moon belt. I have no outfits it would go with. but i still want it.
I love Sabo's whispies that he has in the original design, but when I put them in the art i had, it cluttered up the piece too much and I had to get rid of them. A moment of silence for the fallen whispies...
Noticing now I forgot Sabo's Cane..... oops.
General:
I shaded Luffy to be lighted by the sun, Sabo the moon, but i made Ace be the light for himself. There's some deep meaning to that, but I cant think of one right now.
I had a lot of fun drawing this, i hope i was failthful enough to the original designs even though i changed everything a lot :)
Drinking game: take a shot everytime I used the word "I", take a double shot each time i forgot to capitalize it, too. You will be Dead by the end of the post, though.
#my art#monkey d. luffy#sabo#asl brothers#one piece fan art#portgas d. ace#sabo the revolutionary#OP god au#asl au#@orange-artist#DTIYS
2K notes
·
View notes
Note
Hi! How you doing the combination in the titles? Can you do a tutorial please! Thanks!
Hello @elvisbdoll 🫶🏻
~ Firstly, I'll share the link from where I learnt to do that. It is explained in a very easy and short way here.
~ You need to use Tumblr web on your phone or laptop for this idk why it doesn't work on the app.
~ I'll also explain below in my own detailed way, hoping that this becomes easy for anyone who follows my posts and wants to know how I do it😁

• Website for the Gradient Text :
TEXT COLOR FADER
• Detailed process of how I use customised gradient text on Tumblr :
( Pay attention to the colors that I have used in the steps as well as the screenshots to understand better. The markings on the photos are to make it easier to spot what I'm talking about. )
.
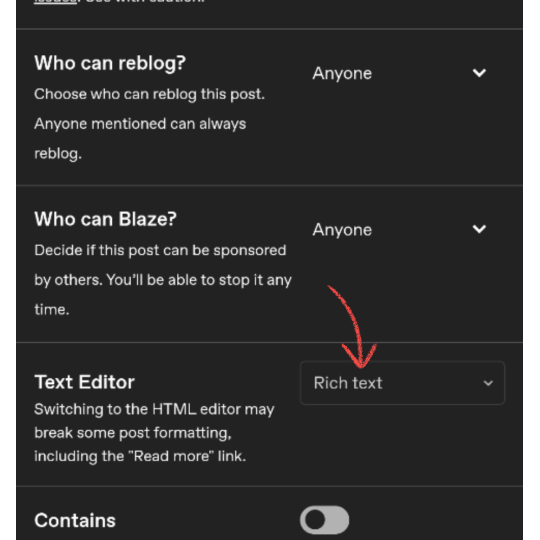
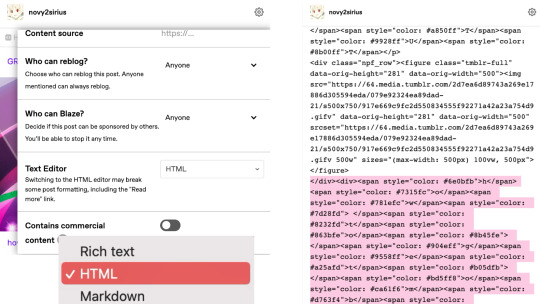
1. Create a post on Tumblr by writing the text you want to make a gradient of and save it as a draft. In the draft → Go to the Settings wheel and in the Text Editor section select HTML which is required by Tumblr to read a coded* text.
* ( The colors of the Gradient text are basically coded into text on the Website I shared above. Hence, changing into the HTML type here will help Tumblr recognise that coded text and turn it into a normal Gradient colored text. )


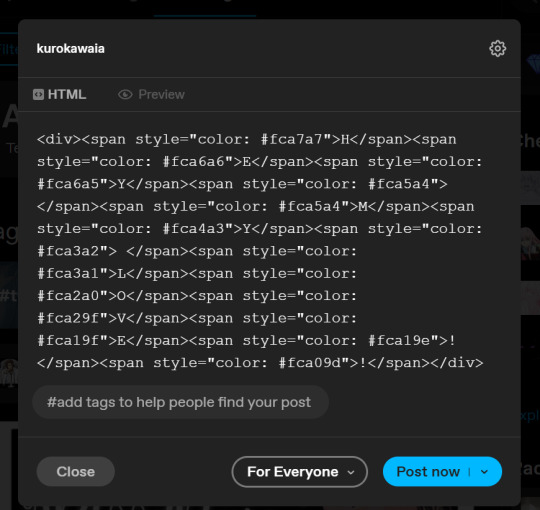
2. You will see a coded version of the text you wrote which is encoded between <h1>...your text...</h1> for my text in the photo below. You can toggle between HTML & Preview to see the coded and uncoded(normal) version of the text. Copy the normal version of the text from the Preview mode that you want to turn into gradient.

3. Visit the Website in the link I've shared above.
.
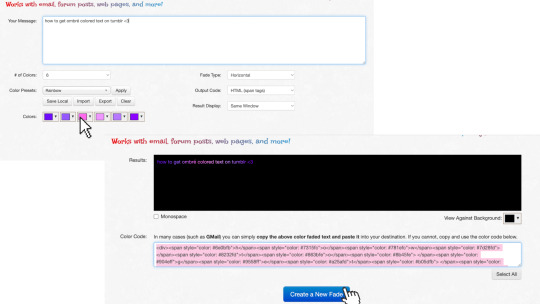
A: is the part where you paste the text you just copied and want to change into a Gradient.
B: is the number of colors you want to use in the gradient.
C: is the part where you put the color codes (HEX/RGB) or just swipe to get the desired color from the color wheel.

4. I pasted the text in the text box and made the changes that I need to do to get the gradient I want in the next part. I used 4 colors and put the Hex codes for the Teal and Beige colors. Once you're done click on "Generate Color Coded Text"

5. On the next page you'll get to see a preview of the text and the coded text in the box below. Click on Select All and Copy the coded text.
If you want to make any changes you can go back by clicking on "Create a new fade" and you will be taken back to edit the current gradient.

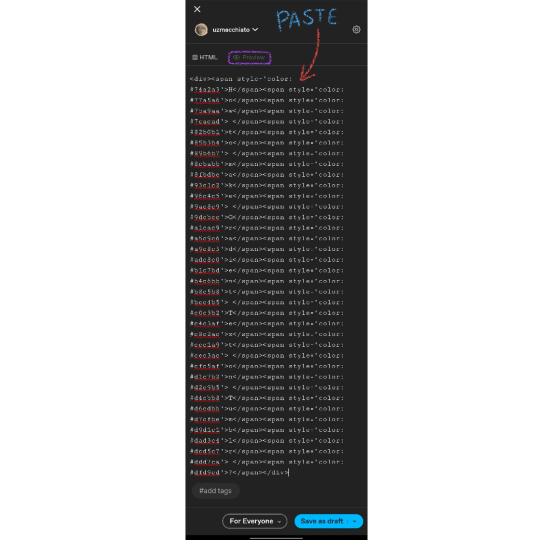
6. Go to the draft and delete the existing text to avoid mixing the coded text with it. Stay on the HTML mode rather than Preview mode.
Paste the coded text while you're on the HTML mode of the draft (the codes are really long depending on the number of colors and length of the text)
After pasting in HTML mode click on Preview and you're DONE.
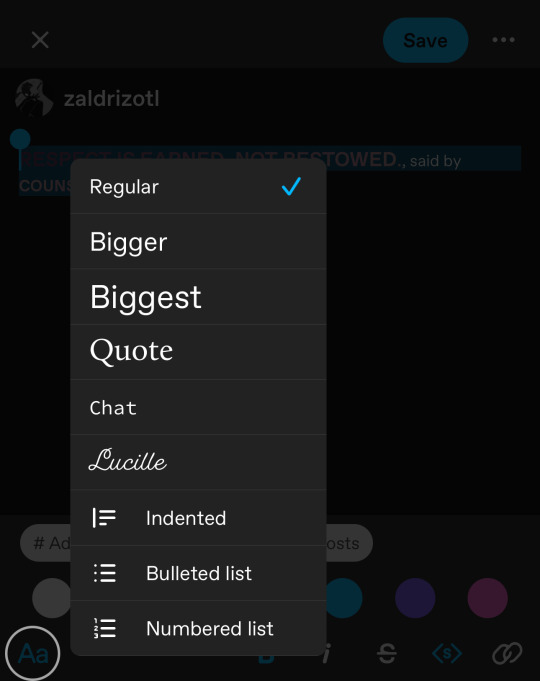
Other than that you can edit the text style after pasting here into the basic styles provided by Tumblr — bold, italic, Chat, Intended, etc.

Final Result : How to make Gradient Text on Tumblr ?
I hope this was helpful😭 I love editing the text and making it match my dividers, so this is magic for me. You can DM me if you need any more help understanding this.
Thank You❤️
#gradient text#Gradient Text tutorial#asks answered#asks#ask answered#uzmacchiato_asks#custom text color#tumblr tutorial#ask
80 notes
·
View notes
Text
It's Just a Game, Right? Pt 4
Masterpost
"Okay, so like. We start with this video." Bernard says, bumping Tim's shoulder lightly. Huddling over a laptop together is a familiar experience; before they actually started dating they both regularly used laptop videos as an excuse to get close. It's a memory that Tim sort of cringes at, because now it seems so silly to be scared of Bernard not liking him back, and yet now he finds himself thinking back to those early days. The thrill of huddling together to solve a mystery is a little different from the thrill of being around your crush, but there's something there, a sort of excitement in questions yet to be answered.
"All right, hit me." And as Tim leans into Bernard a little harder, his boyfriend presses play.
The video is definitely weird. That much is immediately obvious. It seems to be a slideshow of pictures, complete with audio, but the pictures just seem off in a way that Tim can't describe and the audio is - it's a little sticky, but that is definitely Space Oddity, only it sounds kind of wrong like somebody's playing certain notes off key.
"Oh, that is definitely a Caesar cipher, huh?" Tim mutters. There's a line of text written beneath every photo in the little slideshow, but they're all garbled nonsense - it would seem entirely random, but Tim can already see a touch of pattern, some of the letters definitely appearing more common than others.
"Spy phase, huh?" Bernard teases. "I should've known you would already be on this stuff."
Tim grins and does his best to pretend he's not blushing. He's never been more grateful for his tendency to go overboard with his interests. The last thing he needs right now is Bernard asking questions about why he knows so much about code-breaking. Sure, he wants desperately to tell him all about Red Robin, but it's complicated with the rest of the family being implicated in your own identity.
The video continues in the same line for the whole duration of the song, then abruptly cuts off the second the last note of the song plays.
"Well, my first thought is that it seems kind of basic." Tim offers, at Bernard's expectant look.
"Right? Like when I first watched it I was kind of like what's the hype even about? But like, every video follows this general format, but the gradient of apparent code just keeps increasing, and it's like. What if there's more here and nobody ever realized they needed to look for it?"
"Okay well, the text has already been deciphered, right? So what does it say, and how'd they decode it."
"Here," Bernard switches tabs, to a document with screenshots of the various images. The first image was a simple photograph of a man, with the translated text reading Jonathan, January Thirteenth. The next photo, which was of an empty street, dusted with snow, read Hawthorn Way, Johnny's birthday. The rest of the photos followed in the same line. Simple labels describing who or what the photo showed and when they had been taken. None of the information seemed odd or suspicious, just the kind of photos that a family might take.
"Okay, it's a Caesar cipher, but each time the alphabet is being shifted a different amount."
"Yeah. And I already tried writing down the amounts in order to see if that meant anything but like.... No luck." Bernard gestures to his notes, where there is indeed a long number sequence.
"Okay, but how'd you solve it? Did anybody look for a clue to imply the shift or did they just brute force it?"
"I mean, there's literally websites that will run it for you, so I think people just did that." Tim hums, tapping his pen against his ear. The number sequence Bernard had shown him -
"None of the shifts are greater than eleven." Tim says. Bernard blinks, and glances back over his list.
"Huh. You're right, but what does that mean?"
"Means we need to figure out what's eleven." Tim reaches out and switches back the video and starts it again. The music still seems weird to him. He's no expert musician by any means, but he did take piano lessons for a bit when he was little, and more than that, he trusts his instincts. "There's only seven notes in a scale so it's not that..."
"A scale? Do you think there's something in the music? I mean other than it just being creepy?" Tim stares at Bernard.
"Bernard, you literally told me that you think it's all been more intentional than anyone realized. If that's true then the music definitely means something."
"Huh. Yeah, that is. Oh, we definitely needed new eyes on this, huh?" Bernard's huffs, then leans into Tim. "Okay well some the notes in the song are just straight up rank so maybe it's something to do with that?"
Tim hits play on the video again, focusing on the music. Six seconds in, a note hits, sounding very off.
"See?" Bernard says hitting pause. "It does that sometimes. Just plays a wrong note. I thought it was just to fuck with us, make us on edge, but maybe it means something?"
"We need the sheet music on this."
"Yeah? Do you know how to transcribe it?"
"Not reliably enough. But I know how to find someone who can."
"Babe, you're doing it again." Bernard laughs. "That could not have sounded more like Mafia energy if you tried."
"Oh my god, shut up."
#dp x dc#the one where the amity parkers make an arg#aka Tim dives headfirst into a new obsession#he gets to have fun with it... for now...#next up: probably still gonna be tim and bernard going over clues#i am. definitely still figuring out both of their voices so forgive me lol
208 notes
·
View notes
Text
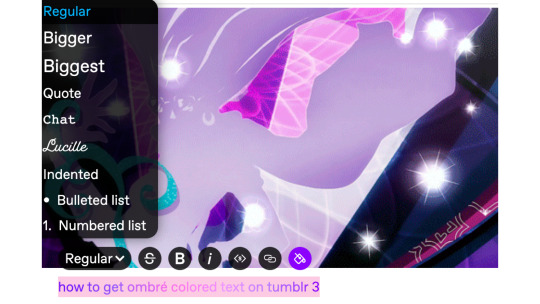
GRADIENT TEXT TUT

how to get ombré colored text on tumblr <3
꧞ i get a lot of dms and comments asking about how to change the color of your text to colors that tumblr doesn’t have or to an ombré text. this is how
꧞ sites you can use: the one i use // two // three
꧞ you can use your phone for this, but i prefer using the computer. just go to safari to do it instead of the app if you wanna do it on the phone


one: copy the text you want to color from your tumblr post then paste it into the websites text box
two: change the color of the text to whatever color you want. with the website i use it allows you to pick presets or you can also customize your own then click generate
three: click the “select all” button and copy the code
four: go over to tumblr and click the edit button on your post
five: click the settings button and change the text editor to "html" then find the html section at the top and click on it
six: paste the code from the color fader website in the html where you want it to go (i paste it at the top and just edit it on my phone by holding text down and moving it)
216 notes
·
View notes
Note
Hey how do you do the color gradient thing for your dialog tags?
Assuming you mean these things, I've actually been meaning to make a guide of my own for a while lol.
For one, you can only do this on computer/the website of Tumblr! There's no option to select this stuff on the app.

STEP 1: CREATE A NEW DOC / GO TO SETTINGS

It opens a dropdown menu/whole screen full of options!
From there, select the "text editor" dropdown, which starts as displaying "rich text".

Select "HTML"

And it should change how the entire post looks!

STEP TWO: CHEAT
Yeeeeeaaaaah, so I use a website for this lol

I inserted my colors for faeries (#30853C) and Cloud (#6DC1B4) for my example of "these things" earlier. To make this easier, I most often have two windows open at a time while working on uploading my scripts to Tumblr.

To get colours to insert into the Text Colorizer website, you can use any kind of hex color picker or even this one website I've used to yoink "thematic" colors from photos!


Personally, I've developed a massive library of colors over time for this exact purpose lol. Using my old colors as a "base", I can change it accordingly to the kind of "new color" that I want for a specific character or thing!


(I'll use the website to also make gradients for "in-between" colors lol)
STEP 3: INSERT TEXT / DESIRED COLORS
To make Nova's gradient, I start with #A600D9, my color for Magic, and end with #F56745—their individual color. However, being as it's short, I'll use a quote from them instead lol.

Once you've inserted your text and colors, you will click in the text box I highlighted in red, ctrl+a and ctrl+c to copy it all, and go back over to your new tumblr post tab!
From there, you'll ctrl+v to paste the entirety into the HTML area, which pastes the code into your post!

AND VOILA!

You have gorgeous gradient text!
However, I want to give a fair warning and a bit of advice! If you didn't notice wayyyyyyy back when...

Tumblr warns that this all can break your formatting!
It doesn't do it too often, but take it from someone who does an obscene amount of formatting... it's 100% true.
STEP 4: CHEAT SOME MORE!
For this reason, I personally have a whole separate draft post full of my characters' colors (and names lol) that I use to copy-paste them in from rather than using the "html" text editor on every post!
I mentioned earlier I often have multiple windows open while editing? Here's what that looks like!

Additionally, I'll use a separate tab off on the left (my "current wip post" side) with the "html editor" enabled for me to copy-paste stuff!
(Also here's yet another example of how many colors I have)

Once again, you can ctrl+c these things to paste them into another tumblr post with the correct colors!
And it's ONLY possible to do on the website!!!
EXTRA INFO!
WARNING:
Tumblr will only allow each "paragraph's html to be so many characters long, so you can't have too big of anything in a gradient!

And by "anything"... I mean you really can't have that big of a gradient in general. RIP lol.
It straight-up won't save the post so long as you have that "overflow" in the character block! MAKE SURE YOU'VE FIXED IT, OR YOU CAN AND WILL LOSE ALL PROGRESS ON YOUR POST!
SINGLE-COLOR TIP:
You don't need the website for a single color! If you'd like, you can just change the "color code" within the html editor to change specific colors!

MAKE SURE COLORS CAN WORK ON DIFFERENT BACKGROUNDS!
On desktop, you can use shift+p while not on any sort of textbox to change the color pallet! I always do tests to see which colors work best before settling on any!

(Tho, the blue background SPECIFICALLY is nightmarish to work around. So if that's the ONLY thing I can't make work, I often ignore it and let you guys who use it suffer lmao)
(Hopefully this'll give you guys some respect for me and how much I do to make my posts aesthetic af lol)
Also hopefully this all helps???
divider by @cafekitsune
73 notes
·
View notes
Note
my lovely sweet angel victoria, i need to know how you do custom text colours for your fics im so sick of this ugly ass pink especially when it doesn’t match the rest of my blog 😭
— mira ^_^
okay i’m going to use this ask as an opportunity to give a step by step tutorial on how i do this <3 (on mobile is the only way i know how to do it, but i don’t think it’s much different from desktop). i get a lot of questions about this so i’ll try to break it down as easily as i could!
1.) in order to have your text a certain color besides the ones tumblr gives you, you have to do it on a browser, since you can’t do it in-app. all this means, is that you have to be logged into tumblr on safari, google chrome, or any online browser of your choice.
2.) once you’re logged in, you’re going to go to this website and type the text that you want to be colored in the text margin.
3.) once you type in your text, you’re going to choose the first colored box and you can either make your own custom color using the slider (i recommend copying the hex code and pasting it in your notes so you don’t lose that specific color), or you can choose from the default settings.
4.) if you want to make a gradient text, then you’ll choose the color you want the first color you chose to fade into. but if you just want the word, sentence, or paragraph to be all one color, then you’ll copy and paste the previous color code into the second box.
5.) once you have your text and your color, or colors selected, you’re going to press ‘generate’.
6.) after you do that, you’ll scroll down and see a whole bunch of coding (it’s usually in a grey box).
7.) you’re going to tap it and press ‘copy’.
8.) now, go to the window where you’re logged into tumblr, and press the pencil icon so you can make a post.
9.) before you paste anything, you’re going to press the setting icon in the upper right corner, and find the box where it says ‘rich text’.
10.) once you find it, you’re going to press it, and choose the option that says ‘HTML’
11.) after you choose that option, now you can paste the coding from the website.
12.) it’s going to look like a lot, but once you save it as a draft, it’ll be your text in your desired color.
i hope this was clear and helpful! if you have existing posts that you want to edit and make with a different color, you’re going to edit it on browser, choose the ‘HTML’ option and repeat. once you save the post, you can edit it and move the text around where you want it IN the tumblr app <3
66 notes
·
View notes
Note
What resources do you use to make your sp so pretty??
okay here, lemme rattle off some of our resources for things:
(I'm using your ask as a general thing to link resources for lots of things, but yeah ^^)
Firstly, as of late we've just been looking up "[insert thing] [insert type of graphic]" on tumblr. EX:
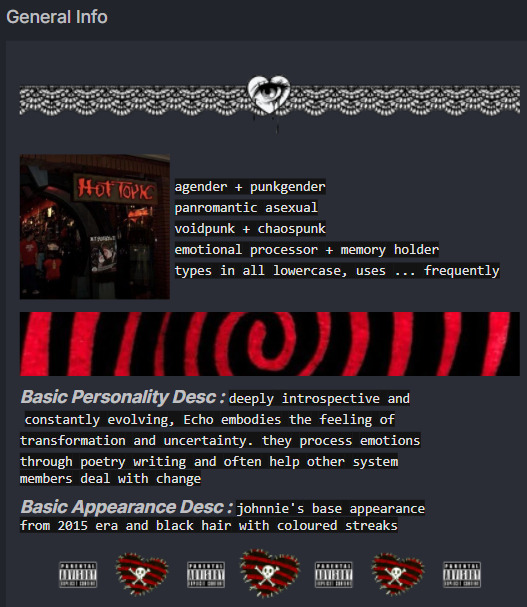
for the above we searched things like: "Red dividers" "Red stamps" "Red pngs" "Red Pixels" "Red Blinkies" , "Black dividers" "Black stamps" "Black pngs" "Black Pixels" "Black Blinkies" , "Emo dividers" "Emo stamps" "Emo pngs" "Emo Pixels" "Emo Blinkies" -----
There's a lot of shit on tumblr lol
Now, moving away from tumblr searching, before we got lazy (/hj)
if you go here it's a list of graphics related pages, some are gone, some still exist. Find your favourites and gatekeep them /hj
For cute symbols we go here , or here , second one includes a search function.
Then we get our fonts here
----
Away from talking about graphics, when it comes to setting up your sp all pretty, there are certain commands you're gonna want/need
image:

now, if you need it a certain size you can go

Now if you look at the first photo up above, the text surrounded by black is caused by going `like this` around your text. Not necessarily needed but we like to use it :p
*this* will cause italics, **this** will cause bold text, ***this*** will cause both
----
Make sure your image links are not from discord. they will disappear.
I personally prefer using desktop as someone who uses so many images, as it is far easier to copy image links. I usually copy the links directly from tumblr or Pinterest, however I have a feeling they'd disappear if the posts were deleted? Idk I've never personally had an issue lol.
----
That's all I've got for SP, but now I'm gonna hand out the things I use for BAH packs
For graphics see the start, I always use random tumblr shit lol
Get emojis on desktop
Find roles here
Post I used for gradient text
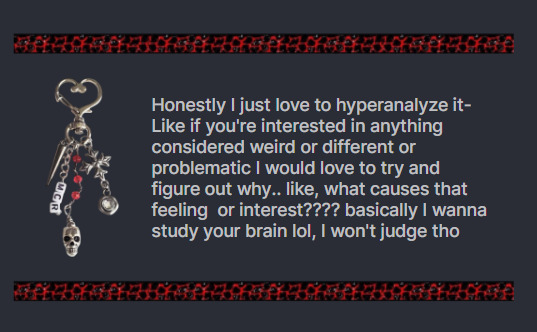
Literally Pinterest It seems so obvious but it's 100% neccessary for me. Faceclaims, aesthetics, Quotes, xenogenders, etc.
Rq/Transid/Mogai archive I find like- all of my ID's & MUDs here
Para emoji code
Where I make simple userboxes

use that code on the website, and then look up "colour picker" online to grab hex codes for colours.
Alternatively I use Canva to make our fancier userboxes, Pretty simple to use, we currently have pro but it's 100% not necessary for making them.
I find voice claims on tiktok, make up typing quirks off the top of my head, and basically make up names and prns on the spot, however again, pinterest.
Hope this is helpful!!
#important info;#simply plural;#simply plural#resources#bah blog#bah#build a headmate#build a headspace#build an alter
40 notes
·
View notes
Note
Hello Botanica I admire your art so much ❤️ do you mind giving tips on how you improved your art over the years? I would also be delighted if you could show us what your drawing process is like a little bit, if not thats cool too🤗 have a great day!!✨
Hey there! (*waves*) Thank you so much for the love <3 I'd be happy to share some insights on the topics you mentioned! (Sorry that it took a while.)
I think I’ve been drawing for almost 20 years now (Whoa!). Honestly, I don’t even know how I made it through, but ever since I was a kid, I knew art was a necessary part of my life. Looking back now, I’m just glad I stuck with it!
This piece is like a visual timeline of my art evolution. It’s wild to think I went from those super basic kid doodles to the style I have now. Growth is real, y’all!
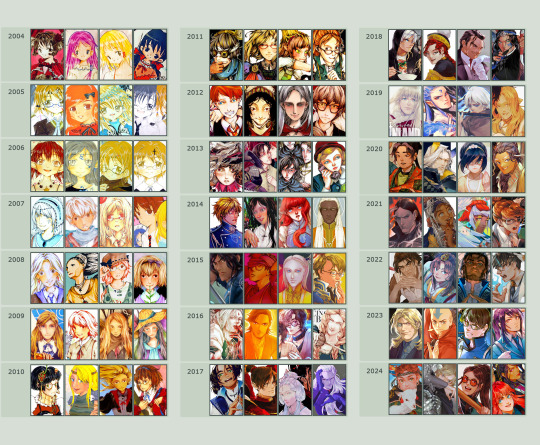
So the tips! (They are mainly for those hobbyist artists, since I don’t have the luck to make it as my career.)
Keep your eyes and mind open to learn from different fields. It’ll spark fresh ideas and enrich your art, but always double-check when diving into unfamiliar territory.
Find tutorials that vibe with you, and collect references IRL.
Use primary sources to avoid distorted or AI-altered refs.
Take your own photos as ref.
Use 3D websites like Sketchfab, Blender for 3D assistance, and posing apps or manikins to help with your art.
Practice consistently. Balance your time between quick sketches and more polished pieces.
Accept where you are now and improve from there. Don't let others' opinions or other artists’ activities throw you off your path.
If art’s your hobby, the goal is to have fun! No pressure to push boundaries unless you’re feeling it.
Let’s move to drawing process. I’ve been doing hand-drawn art for more than a decade, but had to fully switch to digital media after 2016. Now I usually use Procreate for sketches and lines, then use Clip Studio Paint and Photoshop for colors and adjustments.
I’m gonna share two sets of process. One is for generic character art, and the other one is for pieces influenced by environment.
So character art is like:
(More under the break.)
Do some (very) rough sketch to locate the characters → Line art
Define coloring section → Do flat basic colors, adjust the tone via gradient map, change line color
Add more details, use airbrush to shape the volume → Rendering (layer mode: multiply, linear burn)
More rendering (layer mode: screen, overlay, soft light) → Post effects
Done!
The next is art influenced by environment:
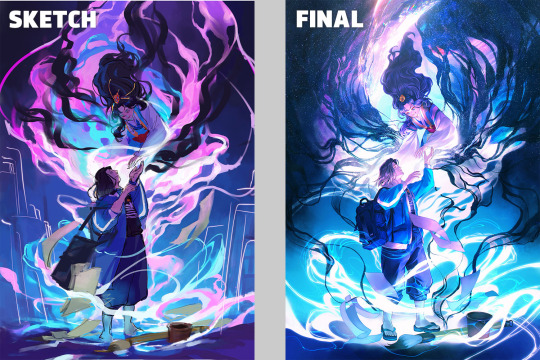
Make a color sketch to set the general tone → Line art
Flat basic colors (background & characters) → Darken the art (layer mode: multiply), add more details
Add more details and begin rendering → More rendering, lighten some parts (layer mode: screen)
More rendering, use gradient map to adjust the tone → Post effects
Done!
Wow, this turned into a long post! Hope you found something useful here! Thanks for sticking around till the end! 🙌✨
41 notes
·
View notes
Text


from @/theindigenousanarchist on instagram. Image description under the cut.
[Image ID]: 14 instagram slides with a pink and yellow gradient background, with white text boxes. All text is in black unless otherwise stated.
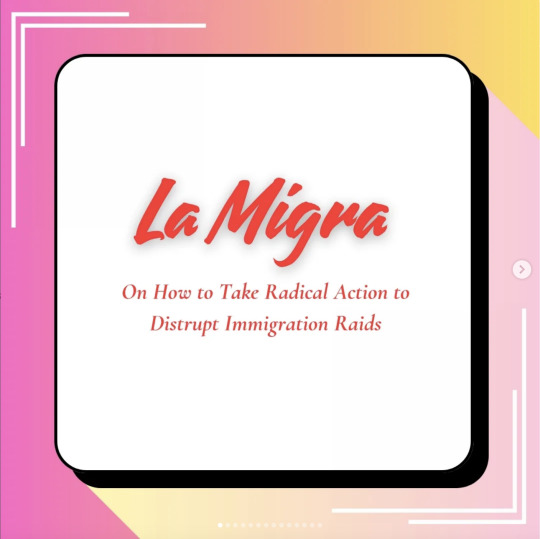
Slide 1: (in red text) "La Migra: On How to Take Radical Action to Disrupt Immigration Raids"
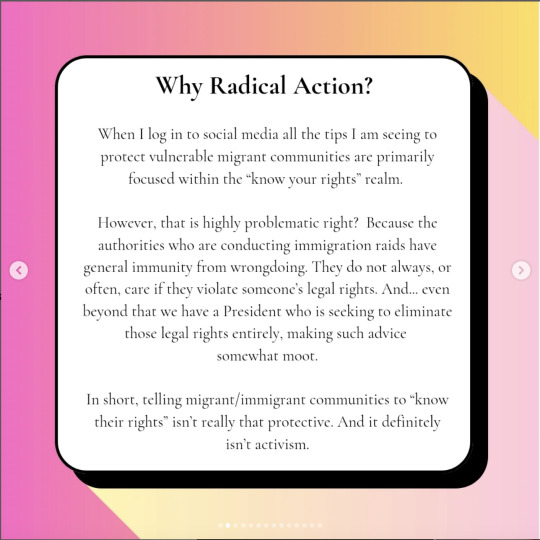
Slide 2, titled "Why Radical Action?": "When I log in to social media all the tips I am seeing to protect vulnerable migrant communities are primarily focused within the 'know your rights' realm. However, that is highly problematic, right? Because the authorities who are conducting immigration raids have general immunity from wrongdoing. They do not always, or often, care if they violate someone's legal rights. And...even beyond that we have a President who is seeking to eliminate those legal rights entirely, making such advice somewhat moot. In short, telling migrant/immigrant communities to 'know their rights' isn't really that protective. And it definitely isn't activism."
Slide 3, titled "Show Up, Show Up, Show Up": "Of course the best way to know how to help targeted communities is to...be in-community with affected people. When folks invite you into their spaces or host cultural events: show up. Let people from those communities see your face and know you are a safe person. And when someone in your community says ICE vehicles have been spotted: show up. Go see what they look like. Teach yourself how to spot these folks so you can be someone who reports sightings with integrity. You cannot only support anti-racism in theory. Show up as often as possible."
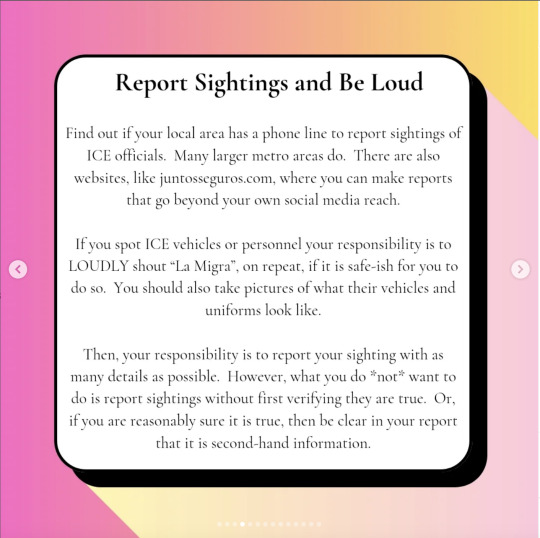
Slide 4, titled "Report Sightings and Be Loud": "Find out if your local area has a phone line to report sightings of ICE officials. Many larger metro areas do. There are also websites, like juntosseguros.com where you can make reports that go beyond your own social media reach. If you spot ICE vehicles or personnel your responsibility is to LOUDLY shout "La Migra," on repeat, if it's safe-ish for you to do so. You should also take pictures of what their vehicles and uniforms look like. Then, your responsibility is to report your sighting with as many details as possible. However, what you do *not* want to do is report sightings without first verifying they are true. Or, if you are reasonably sure it is true, then be clear in your report that it is second-hand information."
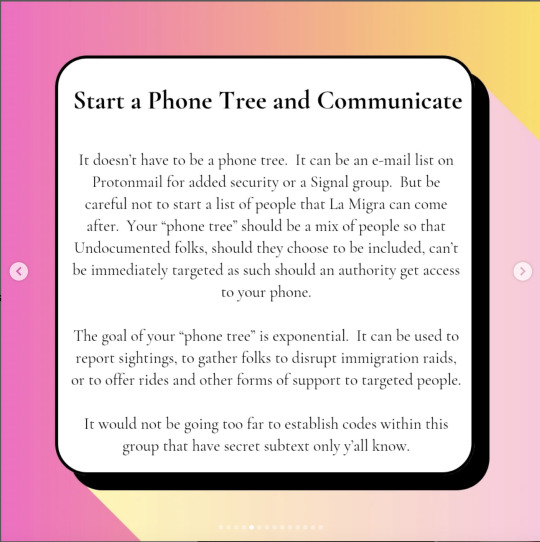
Slide 5, titled "Start a Phone Tree and Communicate": "It doesn't have to be a phone tree. It can be an e-mail list on Protonmail for added security or a Signal group. But be careful not to start a list of people that La Migra can come after. Your "phone tree" should be a mix of people so that Undocumented folks, should they choose to be included, can't be immediately targeted as such should an authority get access to your phone. The goal of your "phone tree" is exponential. It can be used to report sightings, to gather folks to disrupt immigration raids, or to offer rides and other forms of support to targeted people. It would not be going too far to establish codes within the group that have secret subtext only y'all know."
Slide 6, titled "Distract and Deflect": When ICE agents come to your neighborhood shouting "La Migra" is useful. But! If targeted communities do not have a chance to leave the area or get inside their homes...then its usefulness is limited. Targeted people need a chance to get out of sight of those agents. So...Distract. Use your phone tree to Flash Mob. Pull a fire alarm. Fall and pretend to hurt yourself. Turn on your emergency flashers and stall your car, maybe a spider was trying to get at you. Or, if you have privilege approach the officers and ask questions until they demand you leave. Do whatever you can to give folks time to flee. This is a time where your protest tactics might be useful."
Slide 7, titled "Hide and Keep Secrets": "One thing we do not want to do is advertise what we are doing to help targeted communities. Nobody needs to know. Share only general information relevant to the issue and keep the details of what you are doing strictly secret. Police will harass you for helping and you become unsafe if they know what you are doing. And...if you are able to be a safe person you can then offer direct support to targeted populations. For example, if La Migra is in your area then neighbors might need rides to work so they don't have to use public transport, they might need you to go grocery shopping for them or watch their children instead of send them to school. Also, this allows a greater chance for you (or someone) to be present if they are stopped by Immigration authorities. In any case, be sure to ask if they have someone they want you to contact should that happen."
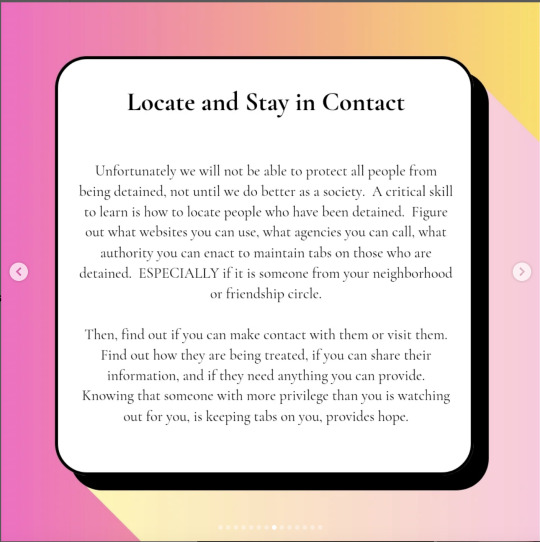
Slide 8, titled "Locate and Stay in Contact": "Unfortunately we will not be able to protect all people from being detained, not until we do better as a society. A critical skill to learn is how to locate people who have been detained. Figure out what websites you can use, what agencies you can call, what authority you can enact to maintain tabs on those who are detained. ESPECIALLY if it is someone from your neighborhood or friendship circle. Then, find out if you can make contact with them or visit them. Find out how they are being treated, if you can share their information, and if they need anything you can provide. Knowing that someone with more privilege than you is watching out for you, is keeping tabs on you, provides hope."
Slide 9, titled "Raise Funds and Pressure Legal Aid": "Another way we can provide assistance is to raise funds for targeted folks to have legal representation. The extent to which legal representation can help them is always in flux but it is FAR better to have it than not. And if we can take it a step further...even better. We can contact local immigrant attorneys and ask, even pressure, them to take cases for free or at reduced cost. Many people have been successful at this because ultimately that is why these people get into this field in the first place...to help people in need.
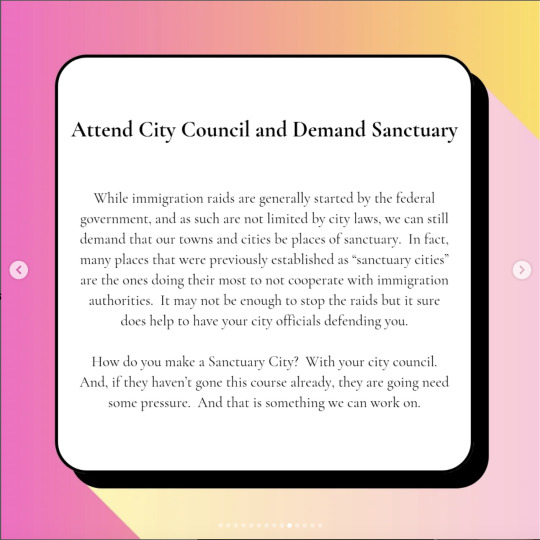
Slide 10, titled "Attend City Council and Demand Sanctuary": While immigration raids are generally started by the federal government, and as such are not limited by city laws, we can still demand that our towns and cities be places of sanctuary. In fact, many places that were previously established as 'sanctuary cities' are the ones doing their most not to cooperate with immigration authorities. It may not be enough to stop the raids but it sure does help to have your city officials defending you. How do you make a Sanctuary City? With your city council. And, if they haven't gone this course already, they are going to need some pressure. And that is something we can work on."
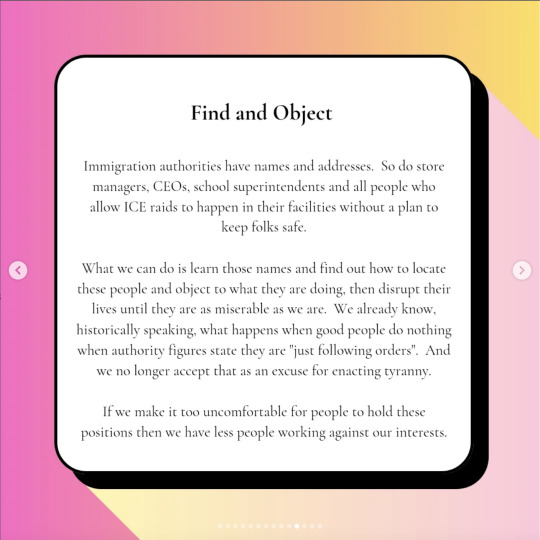
Slide 11, titled "Find and Object": "Immigration authorities have names and addresses. So do store managers, CEOs, school superintendents and all people who allow ICE raids to happen in their facilities without a plan to keep folks safe. What we can do is learn those names and find out how to locate these people and object to what they are doing, then disrupt their lives until they are as miserable as we are. We already know, historically speaking, what happens when good people do nothing when authority figures state they are 'just following orders.' And we no longer accept that as an excuse for enacting tyranny. If we make it too uncomfortable for people to hold these positions then we have less people working against our interests."
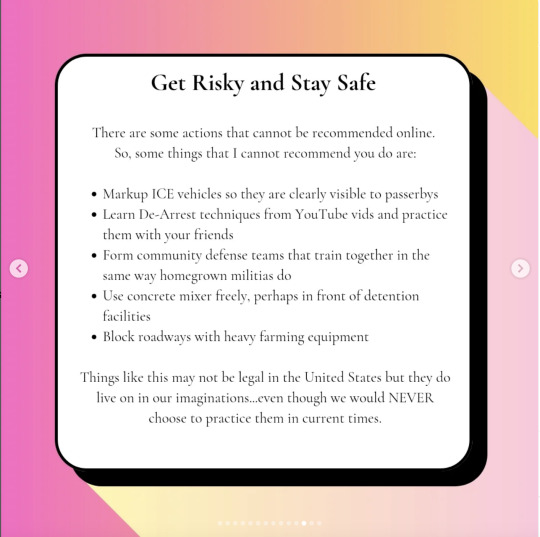
Slide 12, titled "Get Risky and Stay Safe": There are some actions that cannot be recommended online. So, some things I cannot recommend you do are:
Markup ICE vehicles so that they are clearly visible to passerbys
Learn De-Arrest techniques from Youtube vids and practice them with your friends
Form community defense teams that train together in the same way homegrown militias do
Use concrete mixer freely, perhaps in front of detention facilities
Block roadways with heavy farming equipment
Things like this may not be legal in the United States but they do live on in our imaginations...even though we would NEVER choose to practice them in current times."
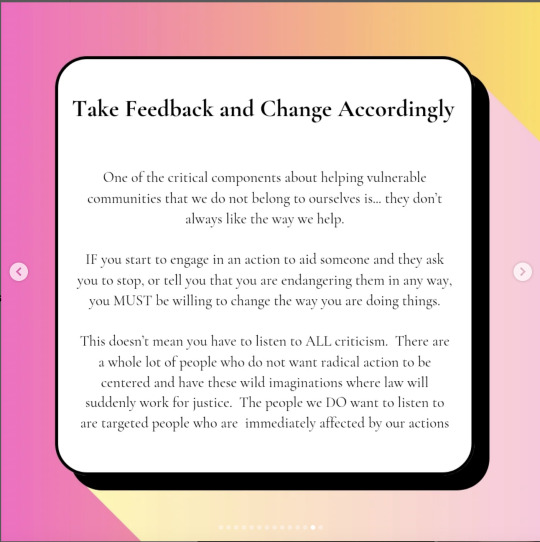
Slide 13, titled "Take Feedback and Change Accordingly": "One of the critical components about helping vulnerable communities that we do not belong to ourselves is...they don't always like the way we help. If you start to engage in action to aid someone and they ask you to stop, or tell you that you are endangering them in any way, you MUST be willing to change the way you are doing things. This doesn't mean you have to listen to ALL criticism. There are a whole lot of people who do not want radical action to be centered and have these wild imaginations where law will suddenly work for justice. The people we DO want to listen to are targeted people who are immediately affected by our actions."
Slide 14: (in red text) "¡Viva La Raza!" [/ End Image ID]
#vero.txt#t#resources#i'd appreciate if you guys reblogged this one because it's actually a good actionable list
35 notes
·
View notes
Text

The gang indulges in some unrestrained summer fun!
This has been a wip for gosh knows how long, but I managed to get it done. It started with just Maire but then everyone got to join in.
The gang mostly belongs to @libras-interactives Lottie belongs to @maryannsstrawberry i belive. So sorry for misattributing her to Libra. Who has custody of Little Lottie I'm still unsure of tho.
Individual pngs below (theyre suposed to be transparent, but i guess tumblr can just decide not to do that sometimes. free website and all that), as well as art thoughts.


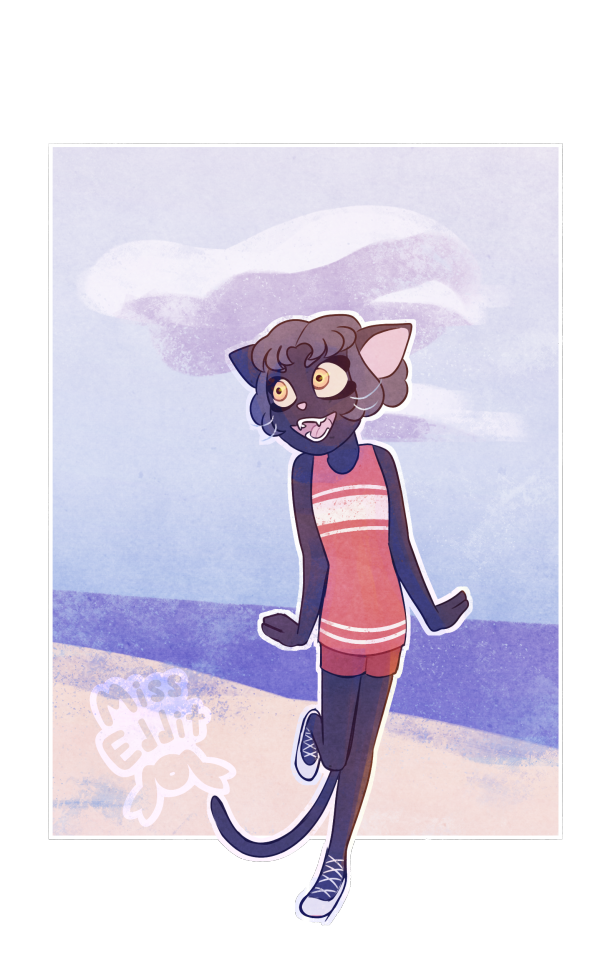
We’ll go from left to right
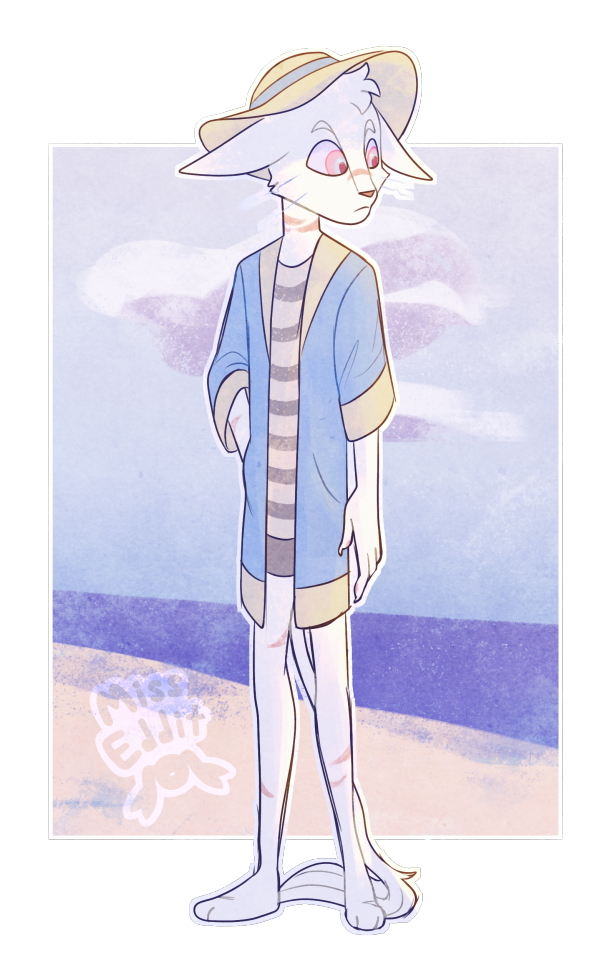
Jack: I feel like if Jack is going to the beach he need some protection from the sun. So along with a early 1920s style mens swimsuit, he’s also got a sun hat and a housecoat. I based it of a womans house coat as they look very light and breathable which probably helps with the heat while keeping him safe from sun. House coats were also generally not uncomon to wear on the beach. I also just like messing around with gender presentation in my art. I’m sure Marius approves.


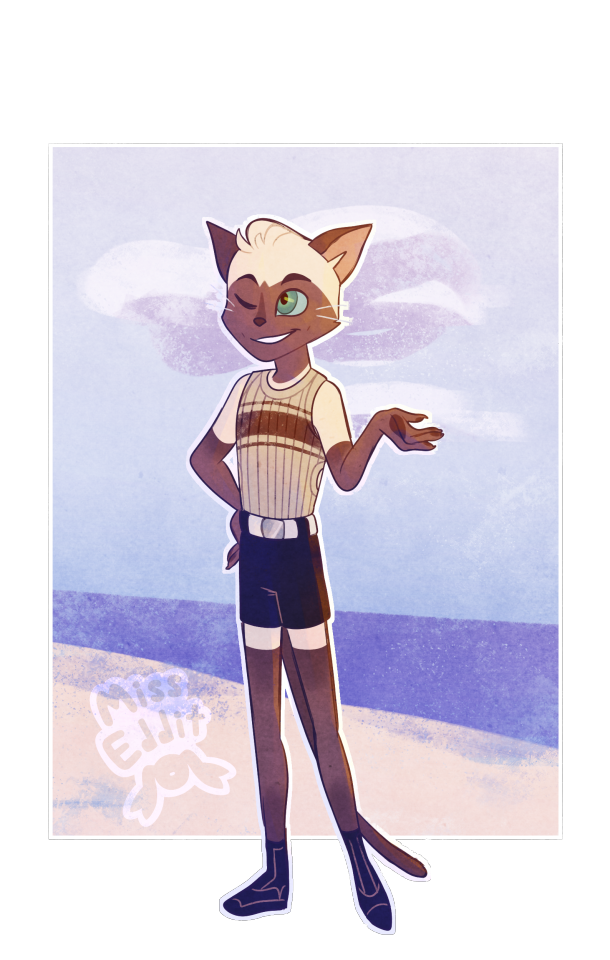
Marius: Marius is sporting a mens bathing suit from the late 1920s. As he is very fashion forward I felt it fit him to wear something a bit more up to date. His fur pattern does make it look like he was wearing shorts and a t shirt and got sunburned lol. I based his fur on Eveline’s and the photos of the cat he was based on. Maybe a gradient would make it look a bit less silly idk. Feel free to weigh in if you have any ideas.


Eveline: I know Eveline prefers clothing from the late 1900-1910s more but I really loved how she looked with her hair up. I based her bathing suit on a 1920s version but added a few flairs to give it a bit more of a retro vibe for the time.

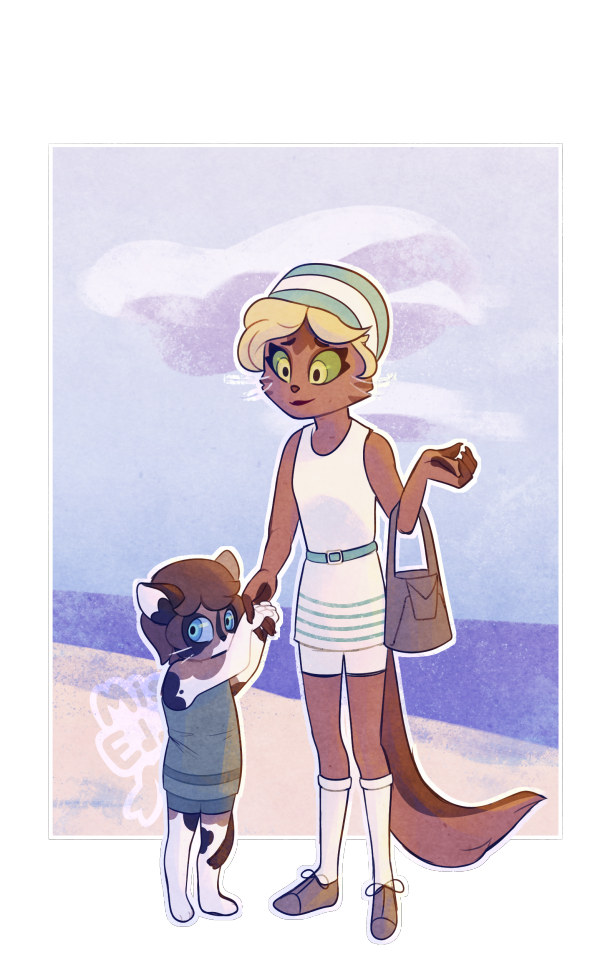
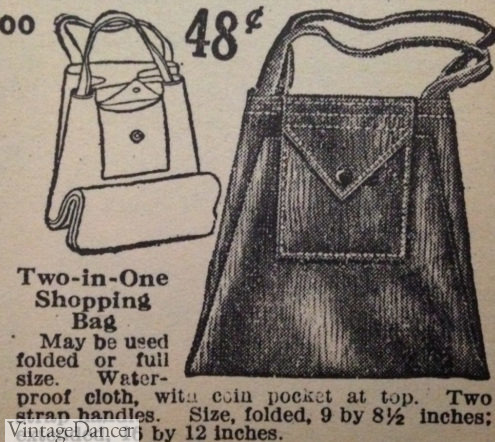
The Lotties: I gave Lottie a bathing suit with a belt and a cap. As per the laws of the Lackadaisy-verse her ears are tucked safely into her cap. No ear holes here. I wanted to give her a beach bag but I couldn't find any type of purse specifically for that so she’s got a shopping bag instead. I felt she needed somewhere to keep little Lottie's beach toys and sun screen, speaking of: She is wearing a very normal child's bathing suit. Not much to say on it. I focused more on her posing than her fashion.

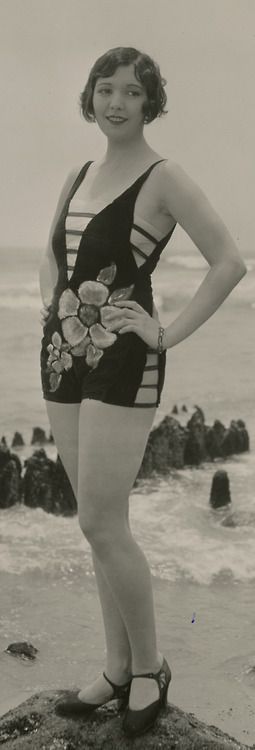
Máire: the original name for this drawing when I was just planning on drawing her was bathing beauties… Anyway, she strikes me as someone who uses her time at the beach to relax and look good while doing it. Her swimsuit is based on something I saw on Pinterest. It had flowers painted on it which strikes me more as being ornamental. Shes also a pair of fashionable heals and a parasol.

And last but not least Malwina: Malvina’s bathing suit is technically from 1926, so maybe she is just way ahead of the trends. Her shoes are laced beach shoes. I feel like shed take the opertunity to enjoy the fresh air, and swim in the cooling water. Maybe check out some cute boys. I think shed enjoy having a day where she can just be a normal teenager.

Mc is probably around. Maybe off buying soda pops for everyone.
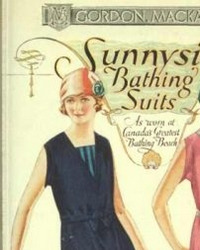
My main source for most of this was vintage dancer
#lackadaisy#lackadaisy oc#art#my art#other people's oc#under the devils moon#utdm#Máire utdm#Eveline utdm#jack utdm#marius utdm#malwina utdm#lottie utdm#little lottie utdm#utdm fanart#if:devil's moon#i keep putting Eveline in modern clothing im so sorry#This is another drawing that im not sure if im completely happy with#it might just be the Self Doubt™ tho#better finished than never posted
89 notes
·
View notes
Note
Honey, could you please help me? How did you do your letters in a peachy pink color in your pinned post? When I wanted to make letters in a rich red color, I saw a few options on how to make them colorful: orange, orange-red, green, blue, pink and purple. As you can see in these options there’s no rich red or peachy pink. How can I get more colors?
YES I WOULD LOVE TO HELP YOU !!! ill give you a step by step guide on how i do it!!! (you can't do this with the app on a phone though :( this is a desktop/ web feature only)
Go onto this website https://patorjk.com/text-color-fader/
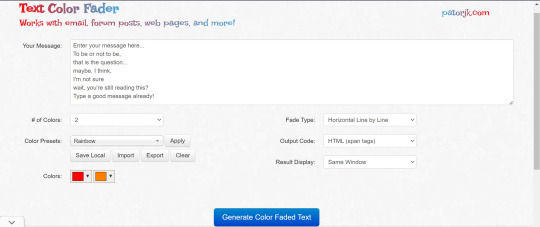
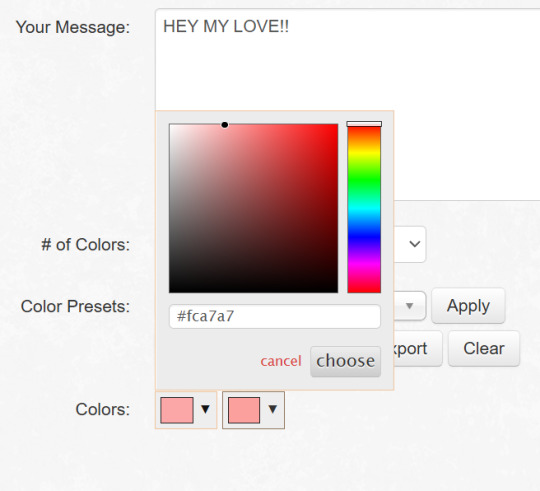
2. then delete the text in 'your message' and put in what you want. Where it says '# of colours' you put in how many colours you want. Where is says Colours you pick the colours you want (YOU CAN MAKE IT GRADIENT IF YOU WANT TO AS WELL!! ILL GIVE TWO EXAMPLES!!!!)
peachy colour i pick (bc you have minimum of two colours i put the same colour for the second option!!!) OR YOU CAN DO A GRADIENT ONE WHICH ILL SHOW YOU TOO!!
3. then, you are going to click 'generate colour faded font' and you will come to a page that looks like this:

NOW WHAT YOU ARE GOING TO DO, THIS IS IMPORTANT OTHERWISE IT WONT WORK!!!
4. GO ONTO TUMBLR ONTO YOUR DRAFT AND CLICK THE SETTINGS, THIS RIGHT HERE FOR DESKTOP::

5. SCROLL UNTIL YOU FIND 'text editor' and click 'HTML'
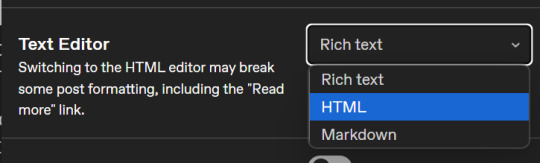
your draft will switch to this:

6. copy and paste the colour code from the site into the 'HTML' section

7. click preview and BOOM, YOU HAVE YOUR OWN COLOUR!!!

8. here's a quick vid of my doing it!!
note: i know this is a lot of work but ive gotten used to it!!
41 notes
·
View notes
Note
i feel sooo dumb asking this but how do u make the text a color gradient on ur posts / a color you actually want?? i feel like the colors we have available are soooo drab

aw no don’t feel dumb for asking,, we all start somewhere & i’m super happy to help ૮꒰ྀི⊃´ ꒳ `⊂ྀི꒱ა !! ( as i was once in your shoes as well & had to figure it out all on my own with a bunch of v v v helpful posts from like 5-6 yrs ago T^T )
this is gonna be really long bc i wanna be as transparent & as helpful as possible so be warned pfftttjsfhdjh

but yes i so agree w/ you that the very minuscule, very . . . neon . . . colours aren’t really to my tastes either T^T so for colour picking i normally find a picture to use for a general ~vibe~ ( ie. the gif in my pinned, i took a still and uploaded it to this website [https://imagecolorpicker.com] & individually picked a light to dark green gradient i was happy with ^^ )
however you could also generate a gradient you’d like from this website [https://coolors.co] & randomize it until you get a colour scheme you fw (˶˃ ᵕ ˂˶)
oooooor you could just manually go through various pinks, blues, greens and purples on this website [https://htmlcolorcodes.com/color-names/] & pick a light to dark gradient all by yourself ദ്ദി ˉ͈̀꒳ˉ͈́ )✧
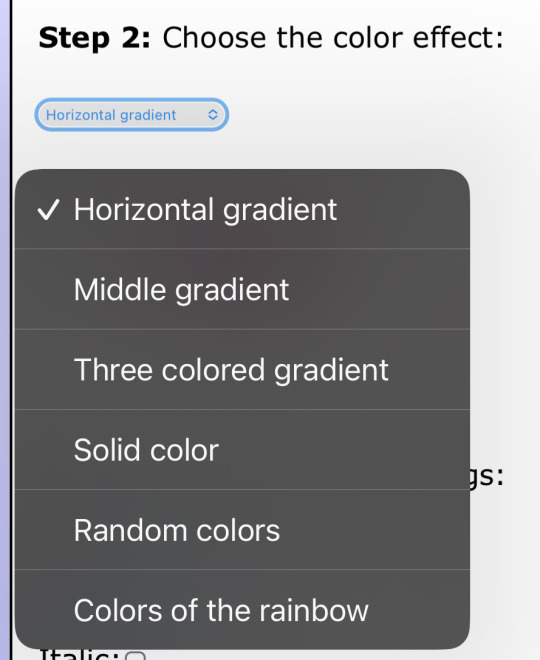
as for actually colouring the text, this website has been my holy grail for like a year now [https://www.stuffbydavid.com/textcolorizer] and it’s v straightforward. just input what your text is in the textbox, pick the gradient effect ( for my post I used the three coloured gradient ) , input the hex codes of the colours you selected going from light to dark ( or vice versa if you wish )
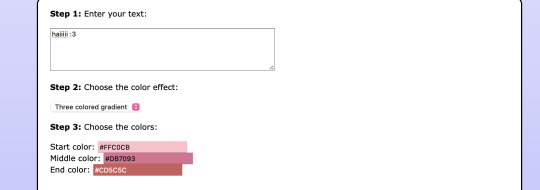
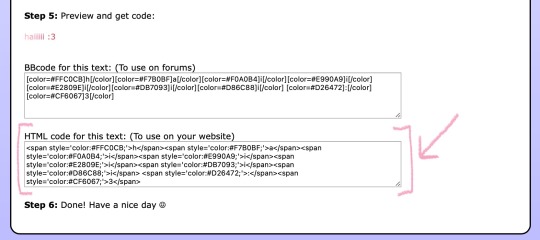
do not bother with anything from “step 4”, look at the preview of the text and if you’re happy with it , copy the entire box from the HTML code section.
then you’re gonna open tumblr and create a new post but instead of directly pasting it on, you have to click the gear icon on the top right to toggle settings and go to text editor and click the ‘HTML’ option which will bring you to the coding ( i think ? T^T )
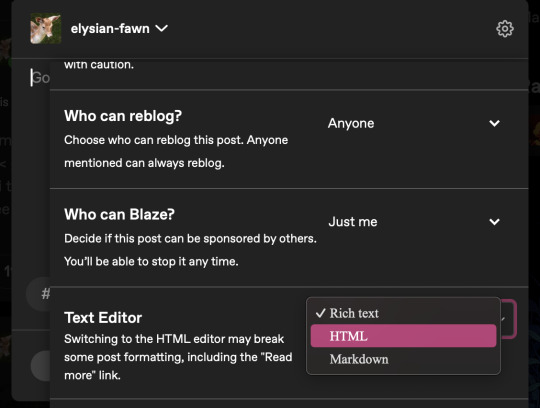
& that’s where you’ll want to paste what you copied earlier , and if you don’t want to change the font you can click “preview” and see if you’re happy w/ it & save the draft and add to your post as normal once you toggle back to "rich text".
& the final result should look like this : haiiiii :3
however, if you are like me, and want that extra little flourish, you can literally just search up " font copy and paste " and like go to the first site or wtv & type in your text and copy the font you wish.
however it gets a little convoluted and time consuming in regards to pasting it (if you use a gradient), because you have to individually replace each standard font letter with the desired font letter like so until the entire word is replaced w/ ur desired font ^^
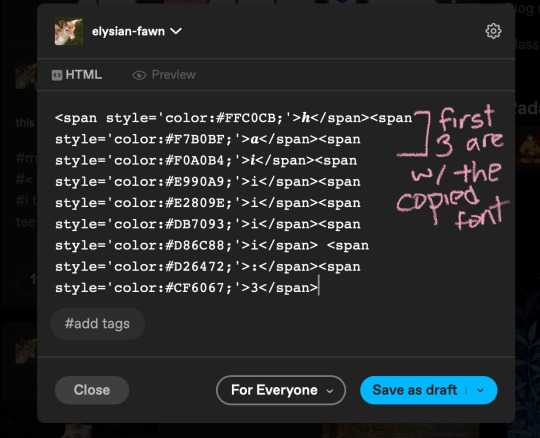
& the final result should look like this : 𝒉𝒂𝒊𝒊𝒊𝒊𝒊 :3
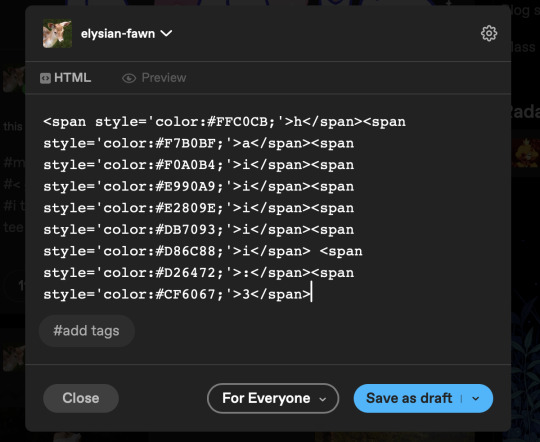
but, if you only do a solid colour it's much easier to replace the text as in the html side it'll look like " <span style='color:#DB7093;'>haiiiii :3</span> " & you can easily replace the whole text [ in this example "haiiiii :3" ] in just one easy paste [ with "𝐡𝐚𝐢𝐢𝐢𝐢𝐢 :3" in its stead ]
ALSO ! my biggest tip would be to make two separate drafts bc it gets so confusing for me personally when i see the coding for the large text wall on the rest of my post. so what i do is just make a separate draft of the coloured text, copy the final result then paste it onto the draft i'll actually post ₍ ᐢ.ˬ.ᐢ₎
very slight disclaimer though, i majority use tumblr/format my posts on the desktop version, so i'm not entirely sure if this is applicable on mobile ( in regards to the html toggle on tumblr ). regardless i hope this was straightforward & easy to follow nonnie ,, here's to gracing tumblr w/more visually appealing posts 2025 o( > ᗜ < )o ₊˚⊹ ᰔ

#𓂃 𓈒 𓏸 𝚒𝚗𝚋𝚘𝚡 𓆟 • . ˚#this is a very imperative skill set to have when writing fanfic so you can have a visually appealing layout#. . . speaking from experience . . . don’t ask ໒꒰ྀི๑﹏๑// ꒱ྀིა
29 notes
·
View notes