#if tumblr doesn't mess with the quality
Text
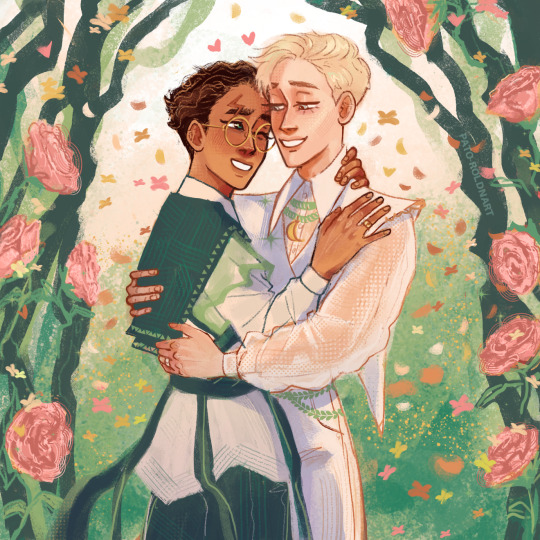
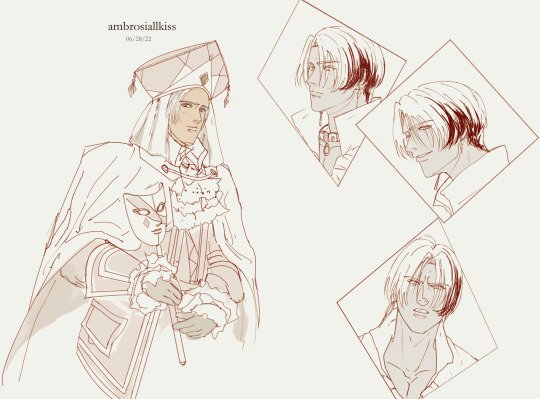
"He pulls himself together for the exchange of rings, which is the most wonderful thing Harry’s done in his life."
In the Presence of My Enemy
Commission for @dodgerkedavra fic!!!!!
Thank you so much for commissioning! I'm happy I could draw drarry and design their clothes 🥰🥰, it's always my favourite part jejeje
#seriously#thanks a lot#i took a little liberty adding more textures than usual 🙊#if tumblr doesn't mess with the quality#you can zoom in and see the textures on their faces too 🥺🥺#drarry#drarry fanart#drarry fic#harry potter fanart#harry potter#draco malfoy#pato's art#artist on tumblr
753 notes
·
View notes
Text

Let's pretend that I can give him a veil that turns sunlight into moonlight so he can walk with me during the day.
#astarion#astarion ancunin#bg3#bg3 astarion#bg3 romance#astarion acunin#bg3 fanart#lets just pretend it doesn't mess with his hair either#tumblr pls dont eat the quality i worked so hard#my art
3K notes
·
View notes
Text
Sailing through space to find the love of your life all by yourself handsome? (← he's not. His bff and his alien car would never let that happen)
#i'm So excited for s5 can you believe my favorite lady is coming back in two days#hopefully tumblr doesn't mess with the quality lol ❤️#the penumbra podcast#tpp#juno steel#junoverse
302 notes
·
View notes
Text
Here it is!! The LockNation family ghost portrait!!!!!!!!!
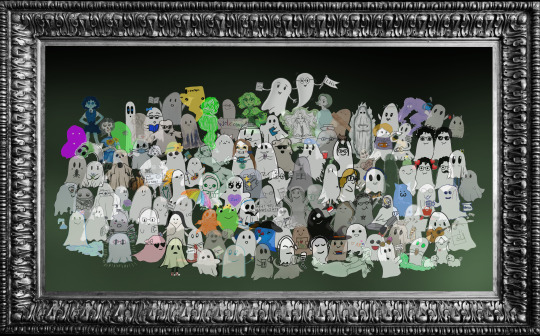
The Lockwood & Co. fam came together from all sides of the fandom for a whopping cluster case of 113 ghosts!!!
Thank you thank you thank you to everyone that submitted a ghostie!! I hope everyone gets a chance to check out ClusterCon this Saturday, October 21, 2023 which will be available over on this youtube!!!
And a massive thank you to @katherinen2002 @cassiesnowberry @julkesposts @krash-and-co @lucy-j-carlyle and Caitlin (lol you don't have tumblr) who all helped me get this project together AND get the word out about it.
@savelockwoodandco
#ghost family portrait#lockwood and co#save lockwood and co#locknation#clustercon#locknation clustercon#anthony lockwood#lucy carlyle#george cubbins#george karim#lockwood & co#cluster con#I really really hope tumblr doesn't mess with the photo quality#but you guys!!!!!!!!#I could scream I love all of the ghosts!!!!!!!!!!!!#lololol I got the date wrong for clustercon oopsie#it’s fixed now but watch out in the reblogs
140 notes
·
View notes
Note
Illumina + 72 for the ask game? :3
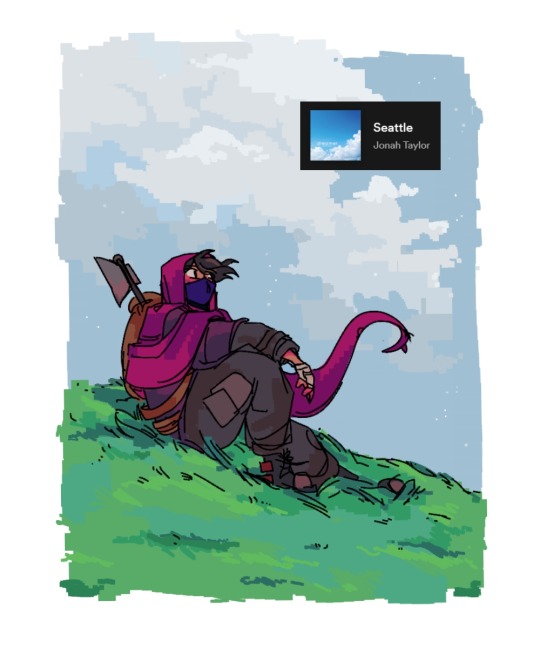
starting it off with seattle by jonah taylor :]
#cal doodles#illumina#jukebox challenge#illuminahd#illumina1337#gotta get all the tags in#mcyt#mcyt fanart#indirectly stole this song from tea#i really hope tumblr doesn't mess up the quality on this#let the doodles begin :D
327 notes
·
View notes
Text

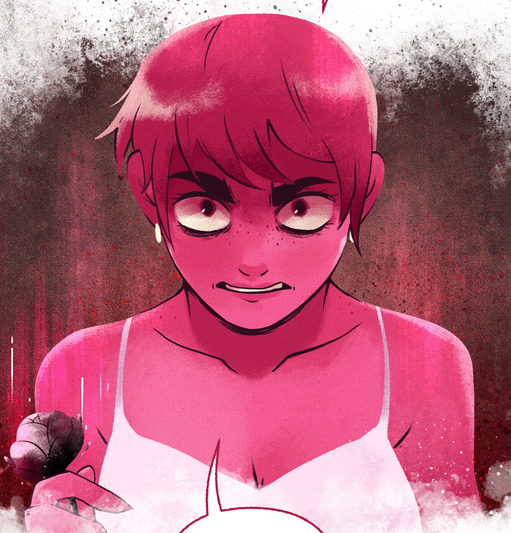
The Death Card
A recent experiment with how I do lighting/shading and backgrounds ^^
#Praying that tumblr doesn't mess with the quality ;-; ;-;#my art#digital art#digital artist#original art#small artist#artists on tumblr#playing cards#roses#art#art practice#concept art#character concept#character design
15 notes
·
View notes
Text


In which Alex is flabbergasted at the discovery that his very precise & scientific algorithm for helping his sister find a date isn't foolproof.
#family ties#alex p keaton#apk#family ties gifs#tumblr really messes up gifs. click for better quality#also gif form doesn't fully capture the emphatic way Alex shouts ''I like! Paper!'' as he desperately tries to explain his feelings
39 notes
·
View notes
Text
the best video I took throughout the whole show bc i wasn't on my phone a lot
5 notes
·
View notes
Photo
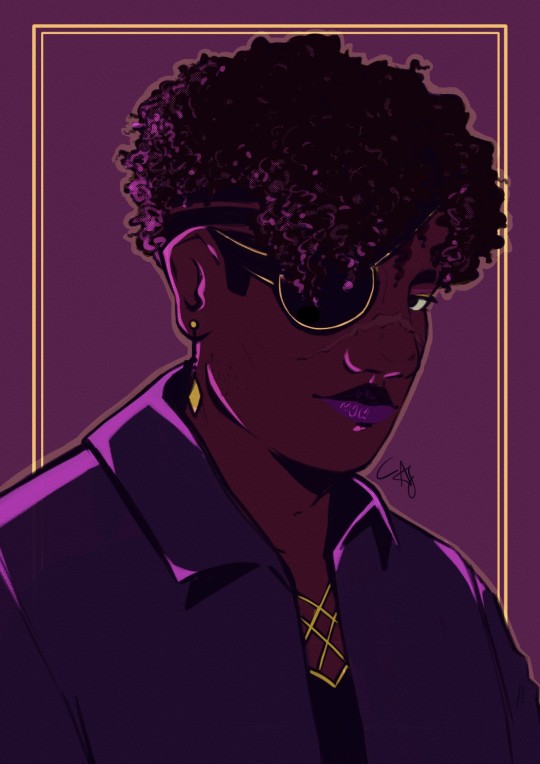
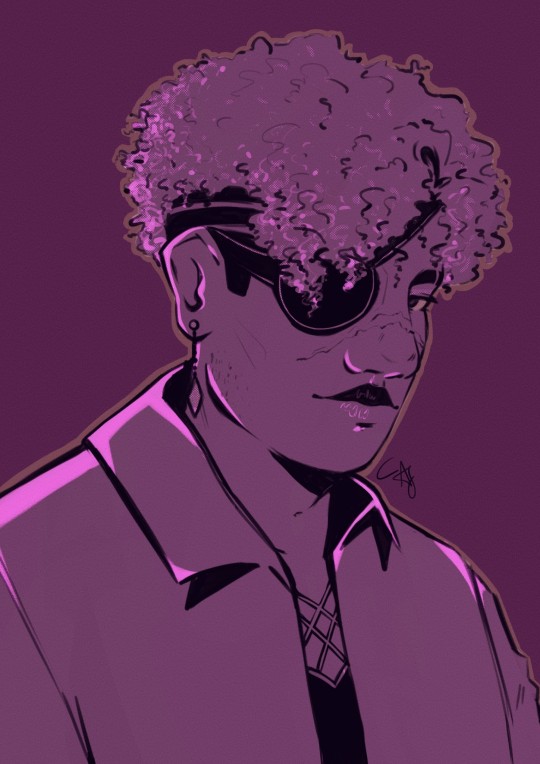
Carnevale Silvio * (king of diamonds insp.)
dedicated to: @dear-mrs-otome
#ikeprince silvio#ikepri silvio#this was more a labor of love than intended#hope i did the tsun puppy justice#hope you notice a little detail *cough*#tame him#ummm and cleavage#it's a silvio holiday everyone#the agitated rhombi#lol#hope tumblr doesn't mess with the quality
25 notes
·
View notes
Text
Ikrr vote tumblr most functional website!! (cries)
- Mod Dave
#tumblr I promise I'm not a bot pls let my goofy posts appear on the dash#although it actually doesn't bother me too much bcz this blog is already getting a lot of traction through reblogs and the like#thanks for that guys!#mod dave#they also keep messing up the quality of the images unless you click on it#thanks tumblr very cool/sar#not a confession
4 notes
·
View notes
Text

Had to make another drawing for the sk8positivity Valentine's event on twitter! (slightly) NSFW prompt was for Day 3: Fuzzy Cuffs 😳 Adam had these made for his Eve~ 🌹❄️
#sk8 the infinity#eden sk8#edenshipping#adam x langa#Ainosuke x Langa#langa hasegawa#Yes this is heavily eden implied#The details should show if tumblr doesn't mess with the quality#my art
3 notes
·
View notes
Text
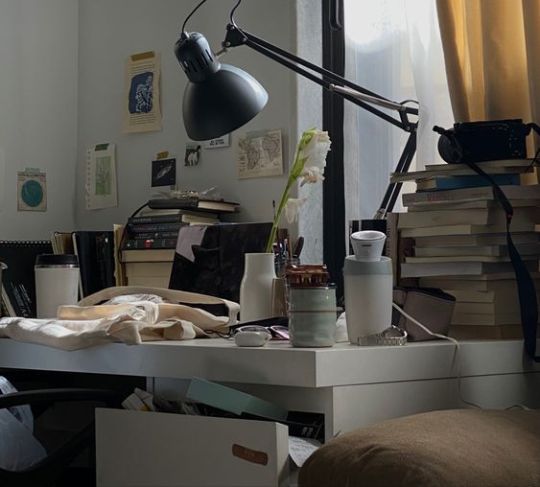
POV: It's 2am and you fall asleep at your desk or wherever you are because you just couldn't stop hyperfixating about your blorbos.


Your body and brain clearly telling you, "no, rest now, enough is enough. The silly little guys won't go anywhere. They'll still be here after you wake up."
You decide to get some rest when suddenly you realise that your most blorbo of all blorbos must have feelings for your second most blorbo of all blorbos because of something blorbo A said to blorbo B at a party that blorbo C (a lesser blorbo) was holding the other day, but you now understand that your third most blorbo of all blorbos has been trying to get between your two most blorbos the whole time so he can no longer be your third most blorbo or a blorbo at all. So now the lesser blorbo C becomes your third most blorbo and you have to find a substitute for the previously lesser blorbo. Changing everything about how you've approached your favourite series. Suddenly you're fully awake again.
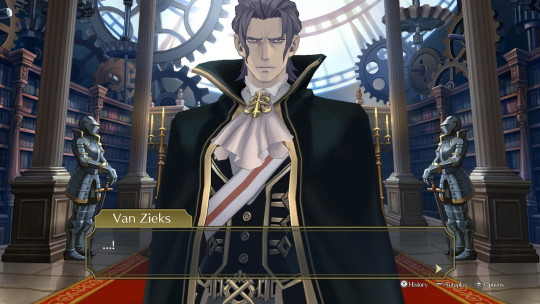
The force is strong in these little fictional guys. They hold immense power over us mere mortals. Who needs sleep when we have lore and fanfics.
#nonsense#i have no tag for this#what's up with tumblr messing with the image quality unless you click on a photo#barok is so tall he doesn't even fit in the photo#blorbo#not serious...but you know#barok
13 notes
·
View notes
Text
Lore Rekindled; The Lore Olympus that should have been
To be honest, I checked out the rekindled version before the original one and now having reading the original as well, it's extremely odd. Y'know goodbye volcanic high where the original was a mess but a group of 4chaners made a parody game which turned out to be of better quality than the original? This is like that but replace 4chan with tumblr users, mainly @genericpuff whose series is pinned in their tumblr blog where you can check all of the episodes, especially updated ones. In this post, I will be praising this series of how it fixes the problems of the original
The Pacing
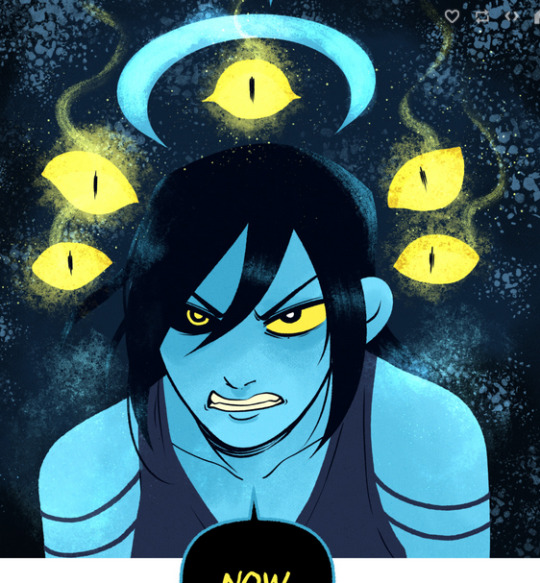
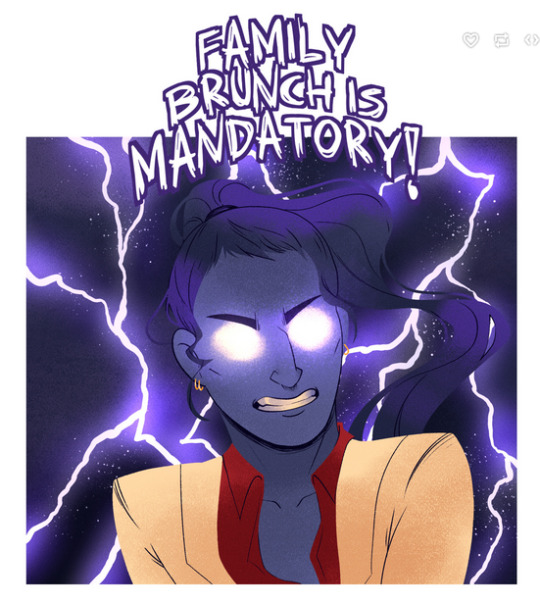
One thing I notice about lore olympus and lore rekindled is the pacing. Not just the flow of the story but where it chooses to focus on. Now in lore olympus, the pacing is kinda a mess and its mainly to do with what it focuses on. An example is the magazine plotpoint; in the original, its basically kinda there in between doses to focus on other stuff like persephone and hades together, persephone's sa (i'll get to that later), eros story, zeus and hera etc...The flow generally isnt that bad per say (except for persephone's sa cuz that was way too quick) but for a story meant to be a romance between hades and persephone, you'd think it idk, it would focus on persephone and hades specifically, not eros which is another example of; its flashbacks. Eros specifically has such a dragged out flashback in episode 12 which we didnt need or at least with that much exposition when it should've naturally expand in the story and that's what rekindled does. The magazine plotline has turned into the first conflict of persephone and hades as we see how it affects their lives and relationships. This works for its pacing better because it doesn't give you too much stuff to jumble with, making the narrative more concise and easier to understand where the story is going. And with the flashbacks, rekindled cuts out the fat in the flashbacks from the original to a perfect balance where it gives exposition of the characters while also leaving mystery for the audience to be intrigued, my favourite one would have to be this (though it more of a nightmare than a flashback specifically speaking);
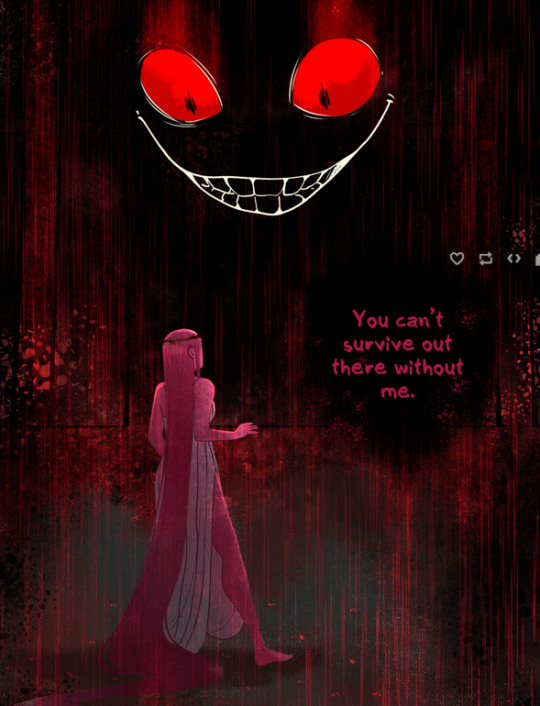
It's of persephone in a greenhouse her mother placed her in with this red eye thing following her from outside the greenhouse. I have no idea of this lurker if its her metaphorical rage or a danger in her life but either way, i am intrigued by its presentation.
The Characters
When reading lore rekindled and lore olympus, the characters are definetly an odd experience. For lore olympus, the characters arent exactly uh....great per say. I think the main reason for this is how their ultilised, with characters like eros, hera, hectate etc being there to mostly be a matchmaker for hades and persephone even if it was initially seen as wrong like with hera and hectate, be antagonistic as a way to have conflict between hades and persephone like minthe, demeter and recently leuce even if ones had reasons too like minthe with hades emotionally cheating on her and demeter because lets be honest, she had a point. Then there's hades and persephone, whoo boy where to start with them.
Hades starts off as a creep eyeing at persephone during a party, specifically at her body and still lusts persephone even being aware that shes 19 and he's 2000 years old. Also is a shitty boss, father AND contributes to slavery with it while being adressed in some way, doesnt change him which isnt good for a character that's meant to be the main protagonists love interest.
Persephone though, I can get the self insert vibes. From favouritism towards the story, being who most of the men in the story are attracted too, portrayed as a 'cinnamon roll' (they actually said that early on in the story, im not kidding) who cant do no wrong. She acts like a teenager rather than a young adult which makes the scenes where shes sexualised just more uncomfortable (and they already unnecessarily were) along with adding that uncomfortability to the romance
But with rekindled, they expanded on the characters much more than they originally were. Persephone for instance has turned from a 'sexy baby' legal teenager to an actual young relatable adult with agency and allows her to screw up (e.g, getting drunk on her own rather than eros drunking her). Her adult attitude makes the romance between her and hades not only more palpable, but also strays away from the infantilisation/uncomfortable sexualisation of her character which is nice to see. Hades also is written well in the series from how it acknowledges his faults while still making him likable. And thats the same for every character really, their personalities are much more fleshed out and nuanced which makes their characters feel real to life, gaining effectiveness for more emotional scenes with them. An interesting thing too is that they even expanded the magazine guy's character from making fake news for profit into feeling guilt over what they done, standing up for persephone which is a pretty nice change.
No Sa Plotline
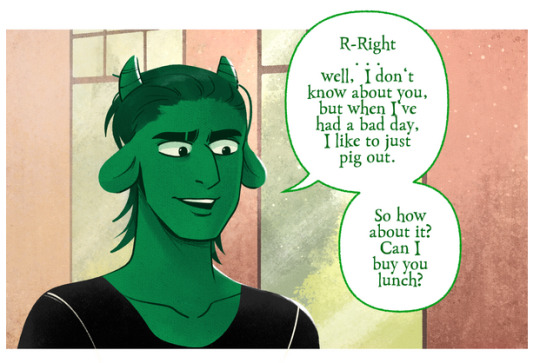
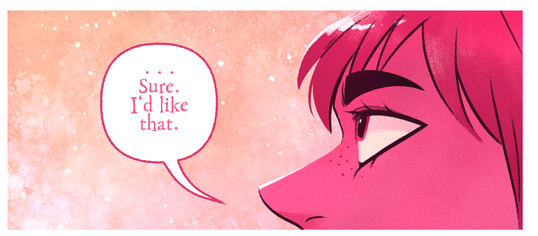
Not like you cant have sa in your story ever but if you never planned it from the beginning and only did when people tell you that the scene you drew from your comic was sa then....maybe just not do it. Lore olympus does exactly that where while an attempt was made, it goes on to retcon it into making apollo (the guy who sa'd persephone) into a lesser evil like that would made a difference instead of just cutting it out from the very beginning. Lore rekindled thankfully just made apollo into his pilot version, a shitty bf but more likeable and expanded upon (which should have been his portrayal from day 1). His shittiness doesnt come up in the story, more like self absorbness/egotisticalness although with its recent chapter of the magazine guy offering persephone lunch, it might reveal some cracks or at least further down the story it will be revealed to us which futhers how effective rekindled character writing is in how its expansion of characters would give us the feels. That or portray him as not a good match for persephone, either way much better than the original.
Artstyle
Lore olympus has a pretty good artstyle (at least in s1/the early episodes, s3 is just kinda goofy) but lore rekindled has got a good artstyle which is on top, more consistent too. Here's some examples;


Comedy


It's objectively funnier than lore olympus, no question asked
All in all, if you want to read lore olympus, i recommend you to read the lore rekindled one instead as it's better in every way. Give it a read.
#lore olympus critical#lo critical#anti lo#anti lore olympus#lore rekindled#generic puff#genericpuff
666 notes
·
View notes
Text
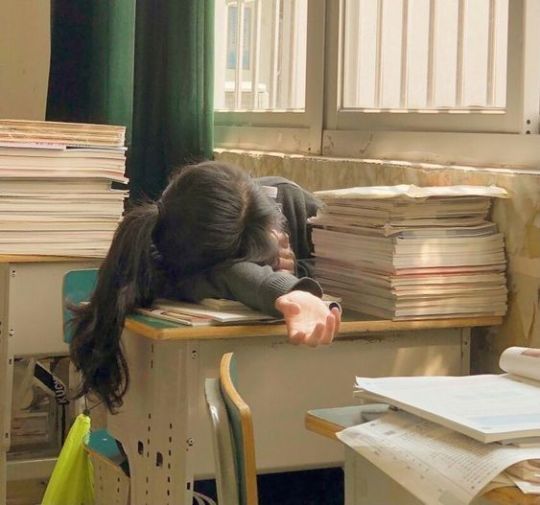
❥﹒♡﹒☕﹒𝘀𝘁𝘂𝗱𝘆 𝘁𝗶𝗽𝘀 𝘁𝗵𝗮𝘁 𝗮𝗰𝘁𝘂𝗮𝗹𝗹𝘆 𝗺𝗮𝗸𝗲 𝗺𝗲 𝗽𝘂𝘁 𝗺𝘆 𝗮𝘀𝘀 𝗼𝗻 𝗮 𝗰𝗵𝗮𝗶𝗿 𝗮𝗻𝗱 𝘀𝘁𝘂𝗱𝘆
organization: i know it's the most trivial advice in the world, but i swear it works. before doing anything, i take my planner and review everything i have to do, i divide the study by subject, amount of things to study and review spaces for exams. realistically, you can't expect to do it all in one day, but a good plan could almost allow you to sleep at night!
a clean workspace: i can't fucking concentrate if there's a mess aroud me, i get distracted easily, even by dust, so before i start studying i always deep-clean my desk. i know that not everyone can afford a personal and quiet place to study in their houses, so try to find yourself a small angle where you can really focus.
go to study in a library / café: i didn't believe it at first, but it's actually useful. if you have the opportunity to go to a library or a café after school ( or near your house ) do so. being surrounded by people who are studying like you really helps to focus, you'll be less inclined to get distracted and procastinate. i would feel uncomfortable using my phone in a library with other people who are doing their work while i'm sitting there scrolling on tumblr.
breaks: ik ik, not very blair waldrof, hermione granger, spencer hastings, rory gilmore of me, isn't it? but is it worth it. sometimes i end up having really bad headaches from studying and, even if i keep studying, the quality of my work decreases significantly. breaks are fundamental. i would not recommend using social networks for your beak, because they litteraly drain your attention, rather do your skincare, prepare yourself a snack ( eating is important! it's what makes you focus ), read 10 pages of your book, dance a little bit in your room, do stretching, go outside and buy some mint chewingum, something like that.
EAT!: girls, boys and theys, we know. i honestly think that almost every person that craves academic validation ends up developing a sort of eating disorder. it's not even the food, is the fact that you are too busy studying that you forget to eat, ignoring stomach cramps, or the fact that you didn't get that answer right and now you don't feel like you deserve the lunch. i understand bc i AM like this, like you. but think about it: you need to do it in order to survive ( but this is secondary to the grades, right? ) and to keep your brain active. you can't walk around with blurred vision because you haven't eaten or drunk for fourteen continuous hours. i swear that eating like a normal human being helps you to keep going.
sleep: same thing as eating, but with our terrible sleeping schedules. i know that school is toxic so we end up finishing our homeworks at 2 am everyday ( if we're lucky ) but when you have the chance, take a nap and recover.
repeat things as if you were explaining them to someone: this is litterally the fastest way ever to learn fundamental concepts when you're studying. imagine that you're talking to a friend that doesn't know anything about the subject that you're studying and try to explain the topic to them. finding simple words for a difficult topic will help you understand it thoroughly, on this basis you can then build an articulated and more academic speech. repeat things out loud, doesn't matter if you look crazy, you already are <3
check and organize your notes the same day: i never have time to take proper notes in class, so i review them as soon as possible, with the lesson still fresh in mind. it really helps me understand the subject and makes the further study much easier.
watch youtube videos: youtube is my favourite class. sometimes teachers are dumber than students and you, who don't have a degree in that subject and are tackling a topic for the first time, don't understand a damn thing. ofc not!! sometimes professors are terrible at explaining stuff, but fazal from pakistan isn't. i passed my physics class with a 10/10 thanks to an indian guy on youtube. documentaries and yt videos are a simple and nice way to understand better topics and do insights for extra credits.
delete social media: i'm gonna do another post specifically for this.
"STUDY!" wallpaper: last but not least, the dumbest yet the smartest advice, set as lockscreen a white / black / whatever background with a big fat "STUDY!" written on it. everytime you're about to pick up your phone and procastinate the wallpaper will scold you.
hope this was useful or at least fun to read byee
#academia#college#education#note taking#school#student#study aesthetic#study blog#study inspiration#study motivation#study notes#study tips#studyblr#studyinspo#studyspo#university life#univeristy#uni life#university#university student#university studyblr#university stuff#college life#dark academia#light academia#chaotic academia#academic validation#academic weapon#academic life#architecture studyblr
249 notes
·
View notes
Text
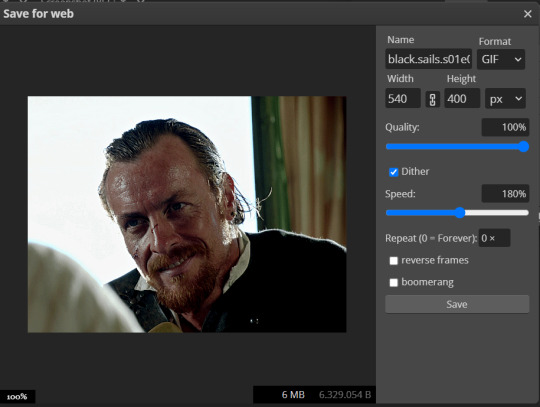
GIFMAKING TUTORIAL: PHOTOPEA (for Windows)

Screencapping
Gif Width/Size Limit/Ezgif
Loading Frames
Cropping and Resizing
Rasterize/Make Frames
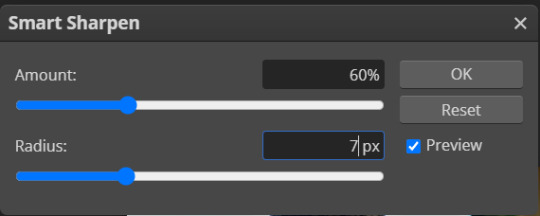
Sharpening
Coloring (not detailed. Links to other tutorials included)
Exporting
Obligatory Mentions: @photopeablr ; @miwtual ; @benoitblanc ; @ashleysolsen
Definitely check out these blogs for tips, tutorials and resources, they're a gold mine. Finally I recommend browsing the PHOTOPEA TUTORIAL / PHOTOPEA TUTORIAL GIF tags.
DISCLAIMER: English is not my first language and I'm not an expert on what I'm going to discuss, so if anything's unclear feel free to drop another ask.
1. SCREENCAPPING -> PotPlayer (the one I use) or MVP or KMPlayer
INSTALL PotPlayer (tutorial)
Play your movie/episode and press Ctrl + G. The Consecutive Image Capturer window will pop up. Click Start to capture consecutive frames, Stop when you got what you needed.
Where it says "Image Type -> Format" I recommend picking PNG, for higher quality screencaps.
To access the folder where the screencaps are stored, type %appdata% in windows search, open the PotPlayerMini64 folder (or 32, depending on your system) and then the Capture folder. That's where you'll find your screencaps.

Admittedly MVP is a lot faster but I prefer Potplayer because it generates (at least in my case) higher quality screencaps. MVP kind of alters the hue and it made it harder for me to color my gifs. Still, if you're interested in how to use it, I recommend this tutorial.
As for KMPlayer, every tutorial out there is outdated and I couldn't figure out the new version of the software.
2. GIF WIDTH/HEIGHT, SIZE LIMIT, EZGIF OPTMIZER
At this point you should already know how big your gifs are going to be. Remember the ideal gif width(s) on tumblr are 540 px / 268 px / 177 px. These specific numbers take into account the 4 px space between the gifs. No restrictions on height. Here are some examples:
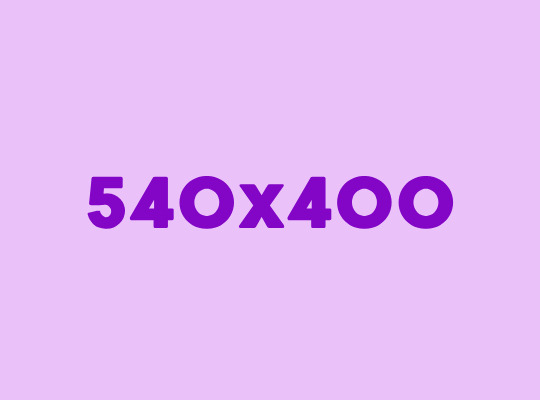

You can play around with the height (177x400, 177x540, 268x200, 268x268, 268x350, 268x400, 540x440, 540x500, 540x540 etc) but if you go over the 10 MB limit you'll either have to make your gifs smaller/delete some frames.
OR you can go on ezgif and optimize your gif, which is usually what I do. The quality might suffer a little, but I'm not really (that) obsessed with how crispy my gifs look, or I'd download photoshop.

Depending on the gif size, you can decrease the compression level. I've never had to go over 35. It's better to start at 5 (minimum) and then go from there until you reach your desired ( <10mb) gif size. Now that I think about it I should have included this passage at the end of the tutorial, I guess I'll just mention it again.
3. LOAD YOUR FRAMES
File -> Open... -> Pick one of your screencaps. The first one, the last one, a random one. Doesn't matter. That's your Background.
File -> Open & Place -> Select all the frames (including the one you already loaded in the previous passage) you need for your gif and load them.
(I recommend creating a specific folder for the screencaps of each gif you're going to make.)
WARNING: When you Place your screencaps make sure the Crop tool is NOT selected, especially if you've already used it and the width/height values have been entered. It will mess things up - I don't know why, could be a bug.
You can either select them all with Ctrl+A or with the method I explained in the ask: "when you want to select more than one frame or all frames at once select the first one, then scroll to the bottom and, while pressing Shift, select the last one. this way ALL your frames will be selected".
WARNING: Depending on how fast your computer is / on your RAM, this process may take a while. My old computer was old and slow af, while my new one can load even a 100 frames relatively fast, all things considered. Even so, I recommend ALWAYS saving your work before loading new frames for a new gif, because photopea might crash unexpectedly. Just save your work as often as you can, even while coloring or before exporting. Trust me, I speak from experience.
Now you can go ahead and delete the Background at the bottom, you won't need it anymore.
4. CROPPING AND RESIZING
Right now your screencaps are still smart objects. Before rasterizing and converting to frames, you need to crop your gif.
Technically you can rasterize/convert to frames and then crop, BUT if you do it in that order photopea will automatically delete the cropped pixels, even if you don't select the "Delete Cropped Pixels" Option. Might be another bug, unclear.
Basically, if you crop your gif and then realize you cropped a little too much to the left or the right, you can go ahead, select the Move Tool (shortcut: V) and, after selecting ALL YOUR FRAMES, move them around on your canvas until you are satisfied. You won't be able to do this if you rasterize first and then crop, the excess pixels will be deleted. I don't know why, I found out by accident lol.
CROPPING
(Cropped pixels: the gray/opaque area outside of the selected area. That area disappears once you press enter and crop, but the pixels are retained, so you can move the frames around and reposition them as you like. In this case I could move the frames to the left and include Silver's figure [curly guy in the foreground] in the crop)
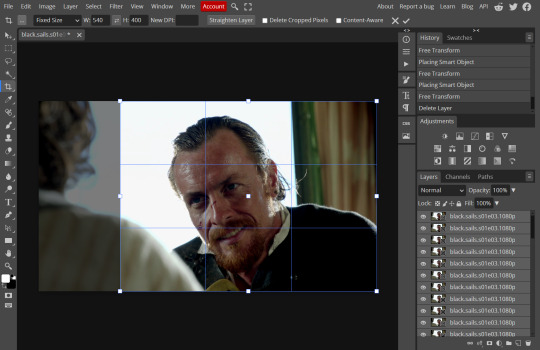
After deleting the Background, you will need to select all your frames (using the Shift key), use the C shortcut on your keyboard to choose the Crop tool. Or you can click on it, whatever's more convenient. Once you do that, a dropdown menu is going to appear. You need to select the "FIXED SIZE" option, as shown in the following screencap.
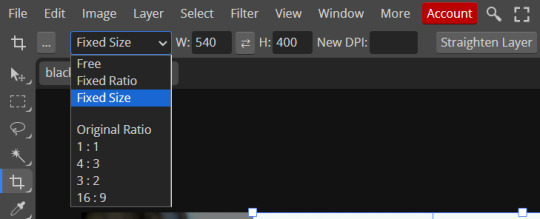
Once you do that, you can type in your desired width and height. Do not immediately press enter.

Your work area should now look like this. Now you can click on one of the white squares and enlarge the selected area until the edges are lined up. You can then move it around until it covers the area you wish to gif.
WARNING: to move the big rectangle around, you're gonna have to click on a random point of the work area, PREFERABLY not to close to the rectangle itself, or you might accidentally rotate it.

See? When your cursor is close to the selected area it turns into this rotating tool. Move it away until it reverts to your usual cursor, then you can start moving the rectangle. Press Enter when you're satisfied with the area you selected.
RESIZE
This isn't always necessary (pretty much never in my case) - and it's a passage I often forget myself - but it's mentioned in most of the tutorials I came across over the years, so I'd be remiss if I didn't include it in mine. After cropping, you'll want to resize your image.
IMAGE -> Image Size...

This window will pop up. Now, should the values in the Width and Height space be anything other than 540 and 400 (or the values you entered yourself, whatever they might be) you need to correct that. They've always been correct in my case, but again. Had to mention it.
5. RASTERIZE & MAKE FRAMES
Now that your screencaps are cropped, you can go ahead and convert them.
LAYER -> Rasterize (if you skip this passage you won't be able to Sharpen (or use any filter) on your frames at once. You'll have to Sharpen your frames one by one.
Photopea doesn't feature a timeline and it's not a video editor, which makes this passage crucial. When you select all your smart objects and try to apply a filter, the filter will only by applied to ONE frame. Once you rasterize your smart objects and make them into frames, you can select them all and sharpen them at once.
Unfortunately this also means that you won't be able to - I don't know how to explain this properly so bear with me - use all smart filters/use them in the same way a photoshop user can. For example, you can sharpen / remove noise / add noise / unsharp mask... but you can't act on those filters in the same way a photoshop user can.
When you work on smart objects you can change the blend mode - which is critical if you decide to use a filter like High Pass. If you simply apply a high pass filter on photopea you won't be able to change the blend mode and your gif will look like this (following screencaps). Or rather, you will be able to change the blend mode by clicking on the little wheel next to "High pass" (circled in green in the 2nd screencap), but you'll have to apply the filter to each frame manually, one by one.

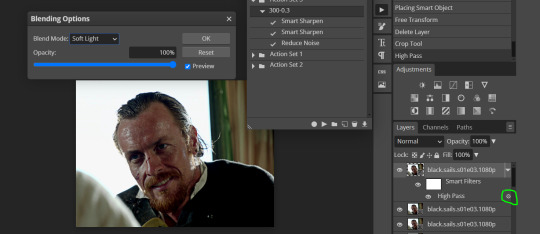
Then you can rasterize/make into frames, but it's extremely time consuming. I did it once or twice when I first started making gifs and it got old pretty soon haha.
Layer -> Animation -> Make frames. This passage will add "_a_" at the beginning of all your frames and it's what allows you to make a (moving) gif. As I said in the ask, if you skip this passage your gif will not move.
6. SHARPENING
Some people prefer to color first and sharpen later, but I found that sharpening filters (more or less) dramatically alter the aspect of your gif and already brighten it a bit (depending on your settings) and you may end up with an excessively bright gif.
Now, sharpening settings are not necessarily set in stone. The most popular ones are 500/0.4 + 10/10, which I use sometimes. But you may also need to take into account the quality of the files you're working with + the specific tv show you're giffing. I've been using different settings for pretty much every tv show I gif, especially in the last couple months. Some examples:

followed by
OR
AMOUNT: 500% RADIUS 0.3px
followed by
AMOUNT: 20% (or 10%) RADIUS 10px
You'll just need to experiment and see what works best for your gifs.
Some gifmakers use the UNSHARP MASK filter as well (I think it's pretty popular among photopea users?) but it makes my gifs look extra grainy, makes the borders look super bright and it clashes with my coloring method(s), so I use it rarely and with very moderate settings. Something like this:

Again, depends on the gif and on what you like. I've seen it used with great results by other gifmakers!
REDUCE NOISE
Sometimes - and this is especially the case for dark scenes - your gif may look excessively grainy, depending on how bright you want to make it. Reducing noise can help. Keep it mind, it can also make it worse and mess up the quality. BUT it also reduces the size of your gif. Obviously, the higher the settings, the more quality will suffer.
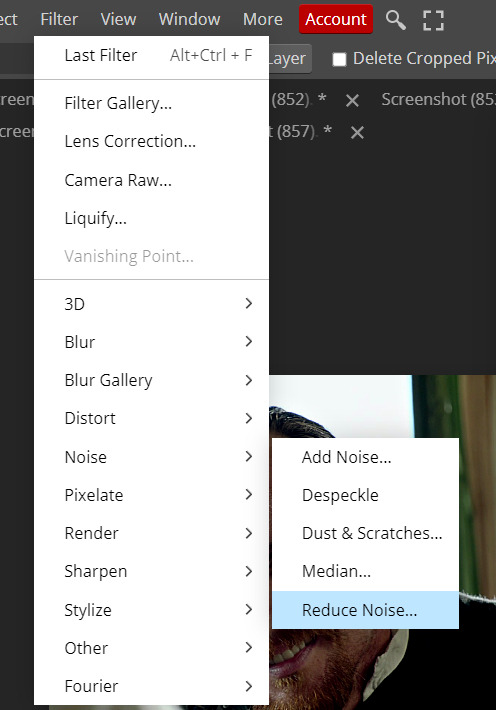

These are my standard settings (either 2/70% or 2/80%). It's almost imperceptible, but it helps with some of the trickier scenes.
ADDING NOISE
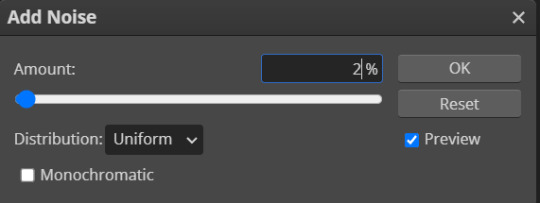
Adding noise (1% or 2% max) can sometimes help with quality (or make it worse, just like reduce noise) but it will make your gif so so so much bigger, and occasionally damage the frames, which means you won't be able to load your gif on tumblr, so I rarely use it.
You'll also want to create ACTIONS which will allow you to sharpen your gifs much faster.
HOW TO CREATE AN ACTION ON PHOTOPEA
The Action Button (shaped like a Play button as you can see in the following screencaps) may not be there if you're using photopea for the first time. If that's the case click on the magnifiying glass next to "Account" (in red) and type "actions". Press Enter and the button should immediately show up.
Once you do that, click on the Folder (circled in yellow)

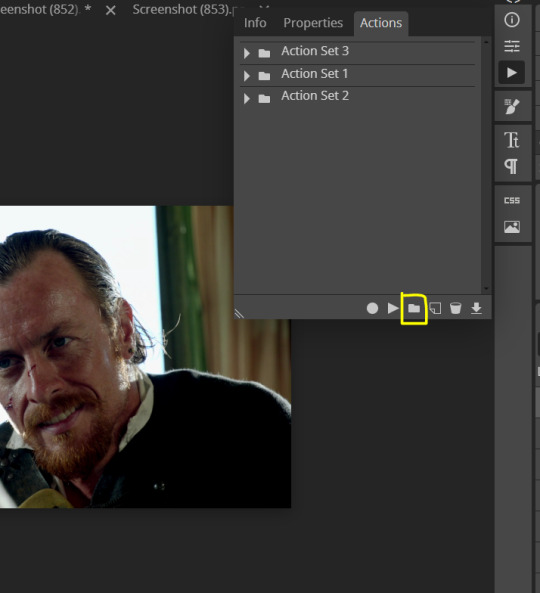
and rename it however you like.

now click on New Action (circled in red). now you can press the Recording button (circled in green)

Now
FILTERS -> Smart Sharpen
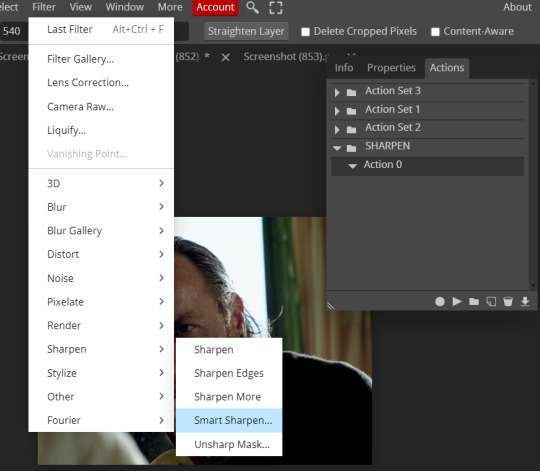
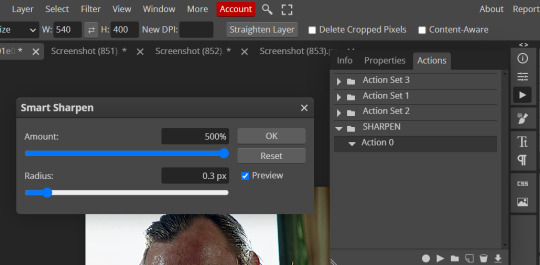
and you can enter your values. Then you repeat this passage (WITHOUT pressing rec, WITHOUT pressing new action or anything else, you just open the smart shapen window again) and, if you want, you can sharpen your gif some more (10%, 10px, or anything you want.)
Maybe, before creating an action, experiment with the settings first and see what works best.
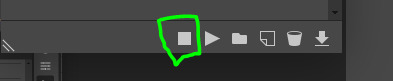
When you're satisfied, you can PRESS STOP (it's the rec button, which is now a square) and you can DOWNLOAD your action (downwards facing arrow, the last button next to the bin. Sorry, forgot to circle it) .
You need to download your action and then upload it on your photopea. When you do, a window will pop up and photopea will ask you whether you wish to load the action every time you open the program. You choose "Okay" and the action will be loaded in the storage.
When you want to sharpen your gif, you select all your frames, then you click on the Play button, and select the Action, NOT the folder, or it won't work.

Actions can also be created to more rapidly crop and convert your frames, but it doesn't always work on photopea (for me at least). The process is exactly the same, except once you start recording you 1) crop your gif as explained in step 4, 2) convert into frames. Then you stop the recording and download the action and upload it. This won't work for the Rasterize step by the way. Just the Animation -> Make Frame step.
7. COLORING
Now you can color your gif. I won't include a coloring tutorial simply because I use a different method for every tv show I gif for. You normally want to begin with a brightness or a curve layer, but sometimes I start with a Channel Mixer layer to immediately get rid of yellow/green filters (there's a tutorial for this particular tool which you will find in the list I mention in the link below)
[Plus I'm not really an authority on this matter as my method is generally... fuck around and find out. Two years of coloring and I still have no idea what I'm doing. 70% of the time.]
Simple Gif Coloring for Beginners -> very detailed + it includes a pretty handy list of tutorials at the bottom.
8. EXPORTING
Now you can export your gif. Some gifmakers export their (sharpened) gifs BEFORE coloring and then load the gifs on photopea to color them. I'm not sure it makes any difference.
FILE -> EXPORT AS -> GIF
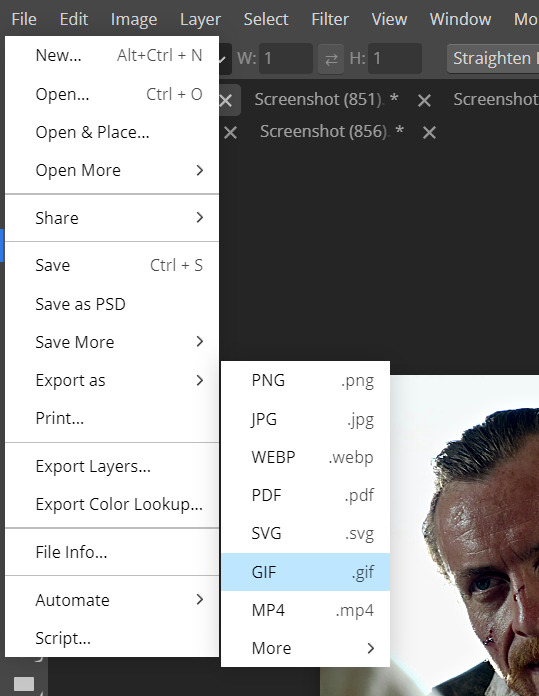
(not colored, just sharpened)
As you can see, unlike photoshop the exporting settings are pretty thread bare. The only option available is dither - it sometimes help with color banding - which, and I'm quoting from google for maximum clarity:
"refers to the method of simulating colors not available in the color display system of your computer. A higher dithering percentage creates the appearance of more colors and more detail in an image, but can also increase the file size."
SPEED
When you export your gif, it will play at a very decreased speed (100%). I usually set it at 180/190%, but as for every other tool, you might want to play around a little bit.
GIF SIZE/EZGIF OPTIMIZER (See Step 2)
And that's it.
P.S.: worth repeating
Save your work as often as you can, even while coloring or before exporting.
#photopea#my inbox is open if you have any questions <3#image heavy under the cut#photopeablr#tutorials#gif tutorial#allresources#photopea tutorial#completeresources#gifmaking
82 notes
·
View notes
Text

OH I should have done this before, but just in case anyone wants to join the AU with your own takes on the twst cast or with OCs, here's a blank template to facilitate things! Of course, if you're interested in joining there is no need to exclusively use mine or anything. You're free to make your own templates or edit this one too! there are no rules for its usage here, just have fun and get creative! 💃
The font I've been using is typewriter condensed (for no particular reason, I just think it's neat), and for the hand-written notes and doodles I use a textured pen brush! If the character sprite doesn't fit in the space on the left side of the page, I duplicate the template, lower its opacity a bit, smooth out its edges with an airbrush eraser and theeen put this see-through layer between the character and the text that may go over them! This is like I did for Idia's, for example
Drive archive if tumblr messes up the quality here lol
242 notes
·
View notes
Last Seen Blogs
lesbianshakespeare-remade
now at @dykeshakespeare
okysposa
Oky Sposa Atelier
bestestduoduel
THE BESTEST DUO DUEL!!!
halcyonfawn
Some Dramatic Title.