#menu dropdown html
Explore tagged Tumblr posts
Visit Tumblr Blog
Explore Tumblr blogs with no restrictions, modern design and the best experience.
Last Seen Tumblr Blogs


Fun Fact
Tumblr was named as a finalist in Lead411’s New York City Hot 125 in Aug 2010.
Text

Drop Down Menu On Hover
#dropdown menu on hover#html css dropdown menu#html css#divinectorweb#css#html#frontenddevelopment#css3#html5#css dropdown menu#drop down menu css#dropdown list#pure css dropdown menu#webdesign#learn to code#css snippets
5 notes
·
View notes
Text

Drop Down Menu HTML CSS
#pure css dropdown menu#dropdown menu#codingflicks#html css#frontend#css#html#css3#code#frontenddevelopment#webdesign#html css menu#css menu#drop down menu
14 notes
·
View notes
Text

Animated Dropdown Menu
#animated dropdown menu#css menu#css navigation menu#navigation menu#menu html css#navigation menu html css#css animation#css tricks#css effects#codenewbies#html5 css3#html css#pure css animation#css animation examples
3 notes
·
View notes
Text
#copy code#codepen#dropdown#tools#code tools#html#css#navbar#menu#links#html tools#css tools#otros tumblrs#artículo
1 note
·
View note
Text
How To Embed An Image In An Ao3 Comment
Sometimes, an image is worth a thousand words. You've read a fic, and the only way to respond to it is with a picture. Maybe this is a scribble you drew in the notes app on your phone, maybe it's art you drew with actual artistic talent, maybe it's a meme you just looked up, maybe it's a meme you just made. But you have your image, and you want to put it in someone's comments. How do you do that?
Ao3 comments support HTML, so to embed an image you need an image link to where the image is hosted somewhere on the web, and you need a bit of HTML code. First thing, the image.
You can use a site like Imgur to host your image, or a private tumblr post, or a fandom image host like Squidge Image Hosting. The important thing is that you want the actual image URL, and not the link to the page that the image is hosted on. Let's say you put your image in a private tumblr post, it would look something like this to get the image link.

You want to right-click (or control-click, whatever works on your screen) to get this dropdown menu, and go down to Copy Image Address. That drops the URL into your clipboard. And then you copy this code:
<img src="YOUR IMAGE URL" alt="DESCRIPTION OF YOUR IMAGE" border="0" width="Max-width 95%" />
In order that's the code that tells the HTML which image to pull off the web, a description that will work for screen readers, telling it that it doesn't need a border, and a bit of code that will keep the image from running off the screen if you grabbed a big image. You put your image URL in that bit of code and write a fast description, and then bingo, you're ready to post your image!
Oh god though, you're on mobile, that all looks awful: quick tip! If you host your image on images.squidge.org, they will do the html for you. It's free fandom image hosting as long as you're over 18. Upload your image, and then scroll down on the page, and there's a convenient button with the HTML just done for you already.
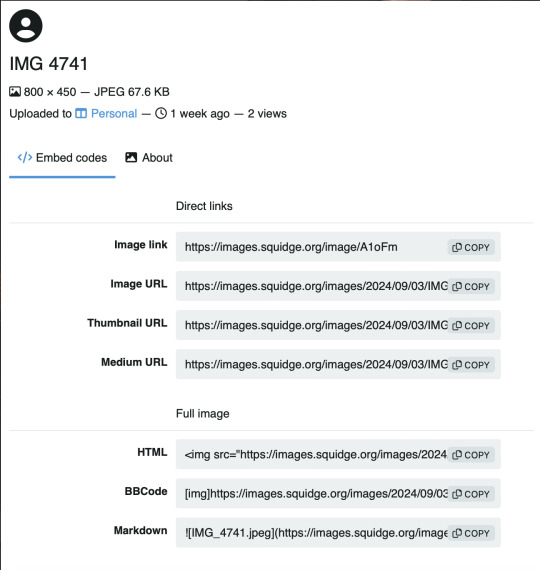
Scroll down to HTML and hit the copy button, and then just paste that into the Ao3 comment box, update the image description (cause it'll just have the title there) and you're good to go!
Go forth and decorate the world with images!

131 notes
·
View notes
Note
Hey how do you do the color gradient thing for your dialog tags?
Assuming you mean these things, I've actually been meaning to make a guide of my own for a while lol.
For one, you can only do this on computer/the website of Tumblr! There's no option to select this stuff on the app.

STEP 1: CREATE A NEW DOC / GO TO SETTINGS

It opens a dropdown menu/whole screen full of options!
From there, select the "text editor" dropdown, which starts as displaying "rich text".

Select "HTML"

And it should change how the entire post looks!

STEP TWO: CHEAT
Yeeeeeaaaaah, so I use a website for this lol

I inserted my colors for faeries (#30853C) and Cloud (#6DC1B4) for my example of "these things" earlier. To make this easier, I most often have two windows open at a time while working on uploading my scripts to Tumblr.

To get colours to insert into the Text Colorizer website, you can use any kind of hex color picker or even this one website I've used to yoink "thematic" colors from photos!


Personally, I've developed a massive library of colors over time for this exact purpose lol. Using my old colors as a "base", I can change it accordingly to the kind of "new color" that I want for a specific character or thing!


(I'll use the website to also make gradients for "in-between" colors lol)
STEP 3: INSERT TEXT / DESIRED COLORS
To make Nova's gradient, I start with #A600D9, my color for Magic, and end with #F56745—their individual color. However, being as it's short, I'll use a quote from them instead lol.

Once you've inserted your text and colors, you will click in the text box I highlighted in red, ctrl+a and ctrl+c to copy it all, and go back over to your new tumblr post tab!
From there, you'll ctrl+v to paste the entirety into the HTML area, which pastes the code into your post!

AND VOILA!

You have gorgeous gradient text!
However, I want to give a fair warning and a bit of advice! If you didn't notice wayyyyyyy back when...

Tumblr warns that this all can break your formatting!
It doesn't do it too often, but take it from someone who does an obscene amount of formatting... it's 100% true.
STEP 4: CHEAT SOME MORE!
For this reason, I personally have a whole separate draft post full of my characters' colors (and names lol) that I use to copy-paste them in from rather than using the "html" text editor on every post!
I mentioned earlier I often have multiple windows open while editing? Here's what that looks like!

Additionally, I'll use a separate tab off on the left (my "current wip post" side) with the "html editor" enabled for me to copy-paste stuff!
(Also here's yet another example of how many colors I have)

Once again, you can ctrl+c these things to paste them into another tumblr post with the correct colors!
And it's ONLY possible to do on the website!!!
EXTRA INFO!
WARNING:
Tumblr will only allow each "paragraph's html to be so many characters long, so you can't have too big of anything in a gradient!

And by "anything"... I mean you really can't have that big of a gradient in general. RIP lol.
It straight-up won't save the post so long as you have that "overflow" in the character block! MAKE SURE YOU'VE FIXED IT, OR YOU CAN AND WILL LOSE ALL PROGRESS ON YOUR POST!
SINGLE-COLOR TIP:
You don't need the website for a single color! If you'd like, you can just change the "color code" within the html editor to change specific colors!

MAKE SURE COLORS CAN WORK ON DIFFERENT BACKGROUNDS!
On desktop, you can use shift+p while not on any sort of textbox to change the color pallet! I always do tests to see which colors work best before settling on any!

(Tho, the blue background SPECIFICALLY is nightmarish to work around. So if that's the ONLY thing I can't make work, I often ignore it and let you guys who use it suffer lmao)
(Hopefully this'll give you guys some respect for me and how much I do to make my posts aesthetic af lol)
Also hopefully this all helps???
divider by @cafekitsune
73 notes
·
View notes
Note
Hellooo
Quick question:
How do you make the text in your posts rainbow? Like literally (with the gradient and everything)?
Thanks for your time, have a nice dayy 🤍
I figured it out from a tutorial that I sadly can't find anymore but here's my process broken down quickly!
I use these two websites to do it: Text colorizer Replace Text
Step 1:
So as a note, you can only do this on the browser version of Tumblr because you need to activate the HTML editing mode. If you're on your phone, you can go to the website and request the desktop view, but it's a bit more finnicky on a phone - so I recommend using a PC for this if you can.
To do that, first click on create post, then go to the settings on your post (the little gear at the top right) and turn on HTML in the Text Editor dropdown menu where it says rich text.
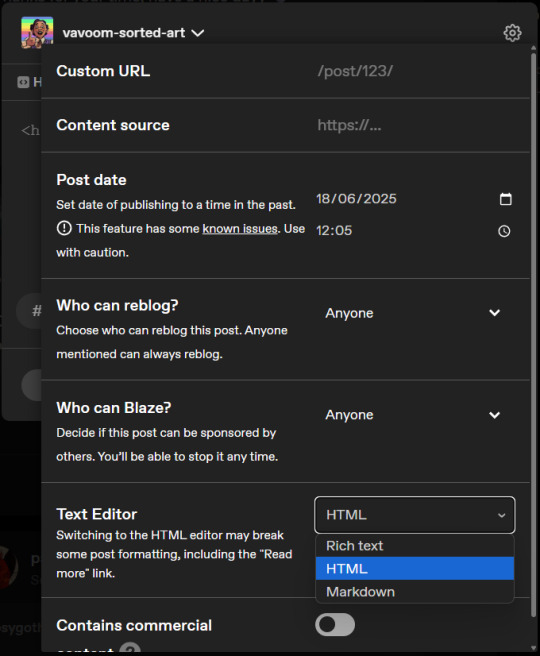
I like to write out my post first and then switch over to HTML mode.
Step 2:
Then you'll switch to Text Colorizer and type in your text and select your colours. You can choose any colours for your gradients, different modes or a rainbow effect!
Once the preview looks good, go select and copy everything in the bottom field where it says HTML code. Use CTRL+A to make sure you selected everything!
Step 3:
If you paste this in your post, it won't work yet. First, you need to go to Replace Text and remove all the semicolons, so you paste in your copied HTML and type a ; into the field where it says "Replace this:" and leave the Field "With This:" empty.
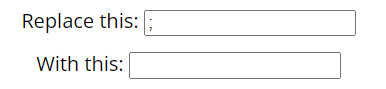
Click Replace Text and then Copy to Clipboard.
Step 4:
Now you're ready to paste your rainbow text into your post! If you've already written it out, find the bit you want to colour and replace it with your code, or you can just paste it in.
Once you pasted it, you can click on the "Preview" tab at the top and format your post like normal. Don't return to Rich Text mode, that might break it!
You're done!
Enjoy your rainbow text!
29 notes
·
View notes
Note
How old does your blog have to be to see the desktop blog view thing?
You can just make it happen whenever you want!
In your browser, set it to desktop mode (available in the dropdown dots menu) and then just type in a user's name first, then tumblr.com
Example:
Fangirltothefullest.tumblr.com
If they have set up a desktop version it'll show
Users older than when mobile became a thing will have desktop versions as they are more customizable. You could even add music if you had the html code for a player.
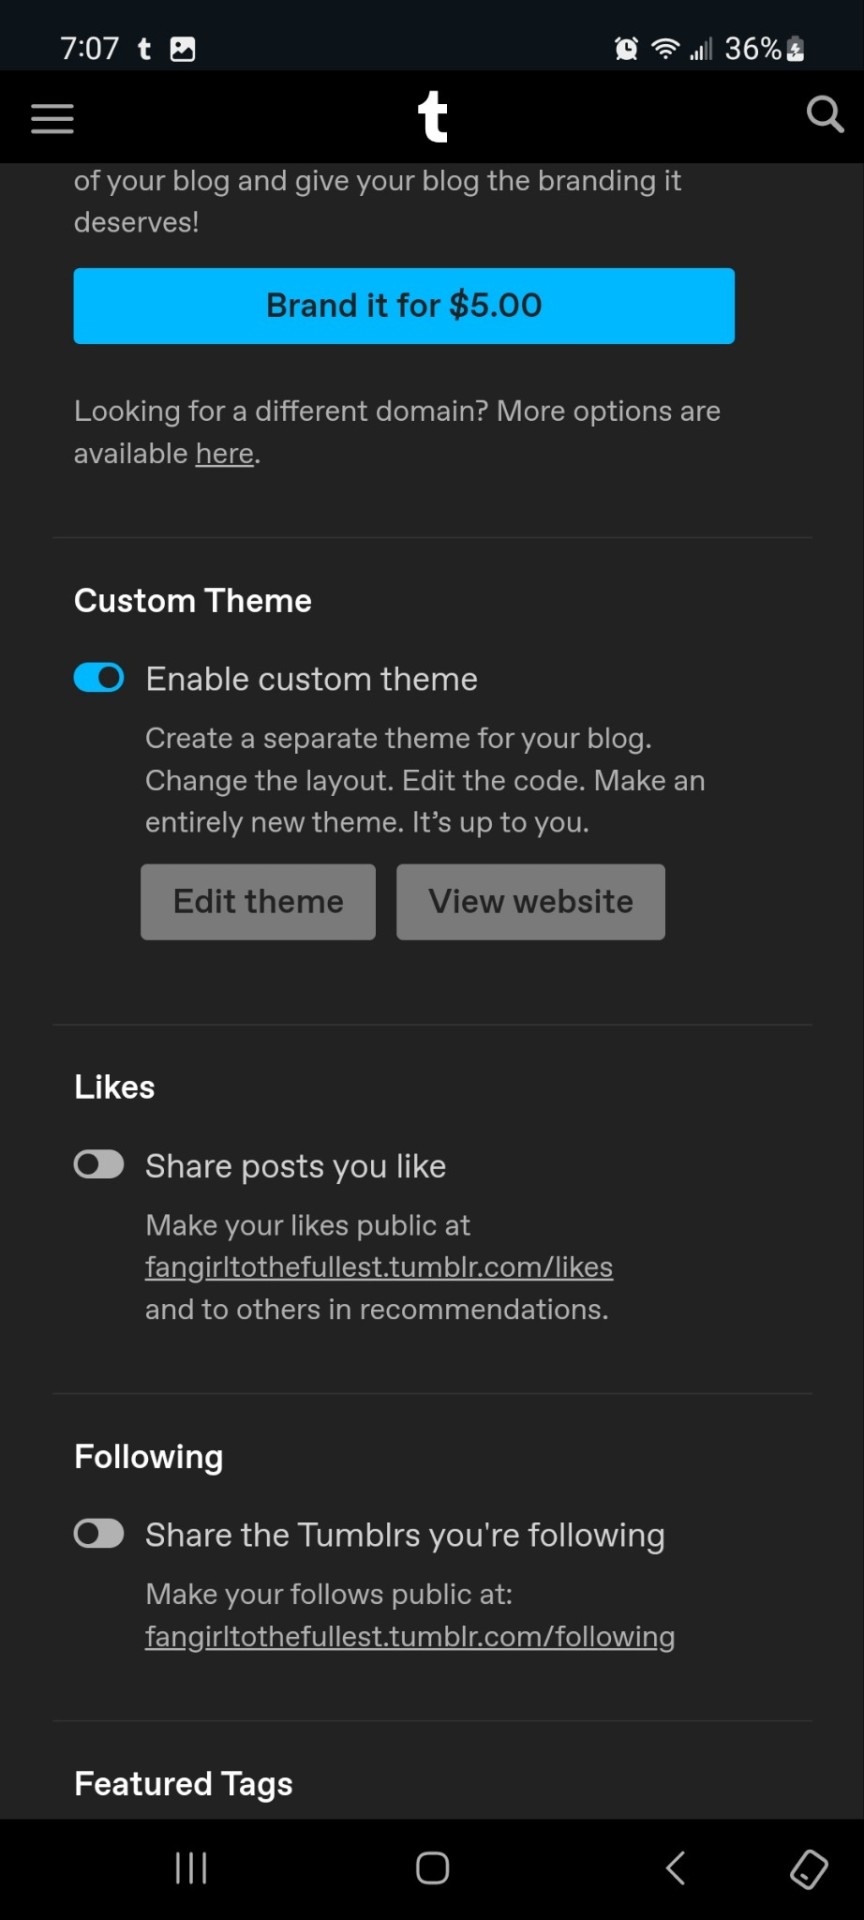
If you wsnt one yourself, you have to enable custom themes.
Log into tumblr on your browser either on desktop or on mobile. I suggest logging in through desktop mode on your phone's web browser and opening the log in in a new tab so it stops trying to pop up the app.
Once logged in you can disable desktop mode in your browsers drop down to see things easier.
It'll probably up like this otherwise and be a formating nightmare.
Now.... once it's OFF desktop mode,
Go to the blog you want and hit blog settings in the drop down.
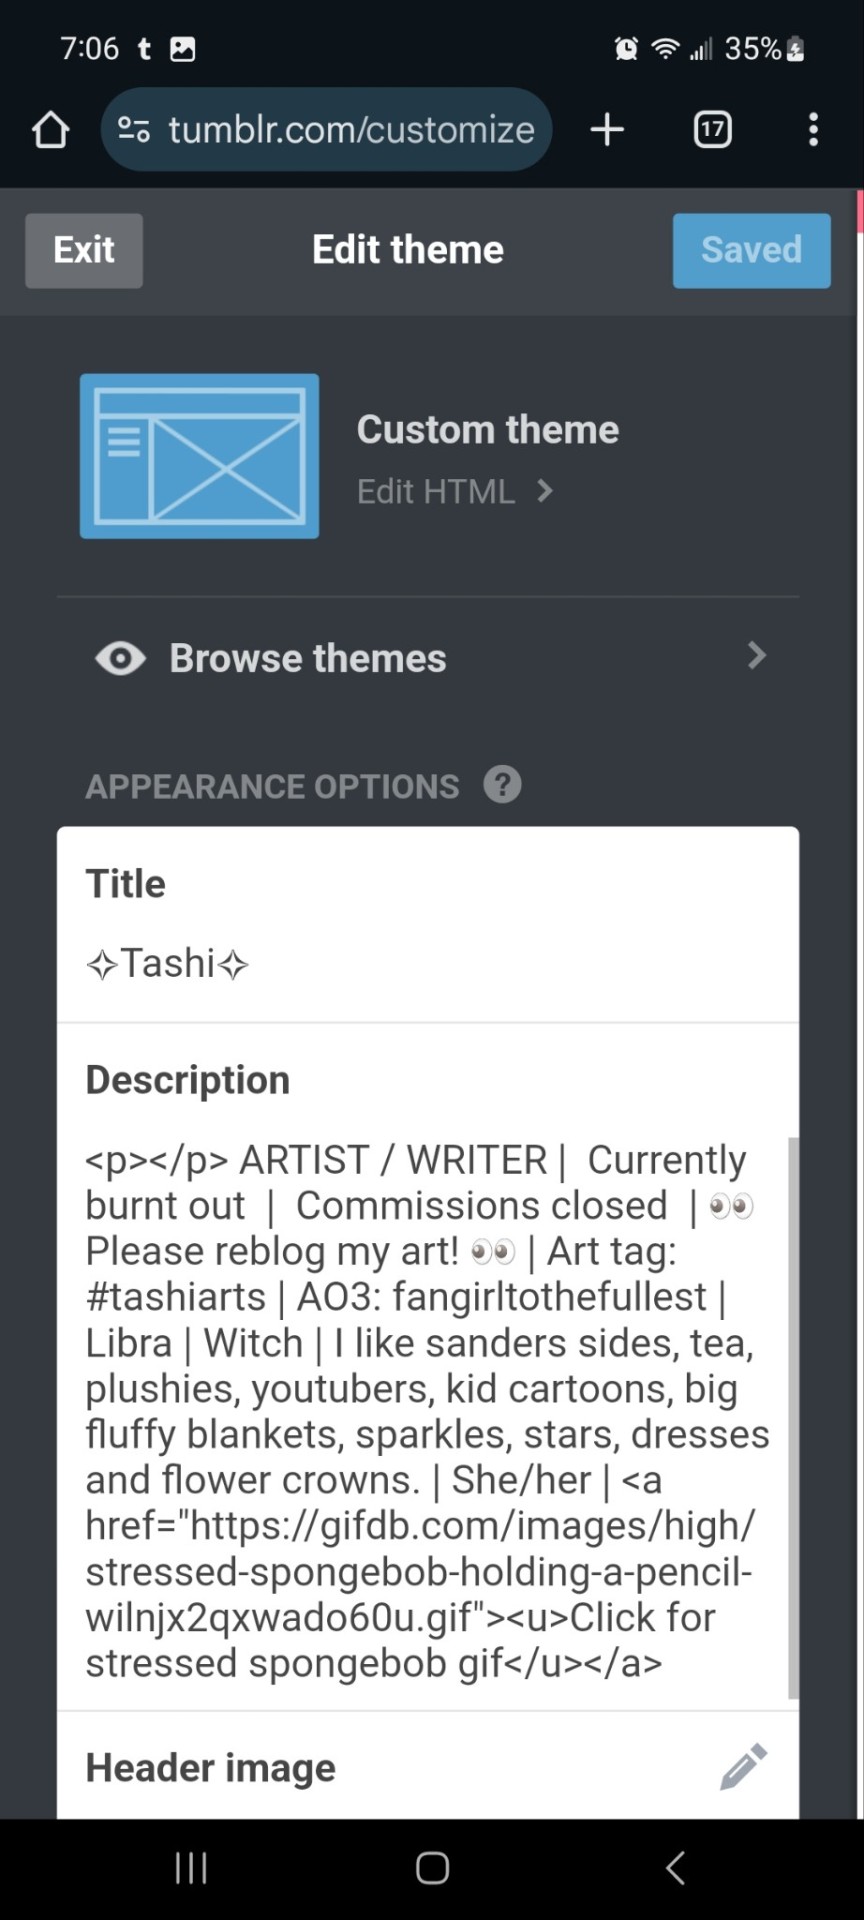
Enable the custom theme and hit the edit theme button. You'll be taken to a place that looks likethis:
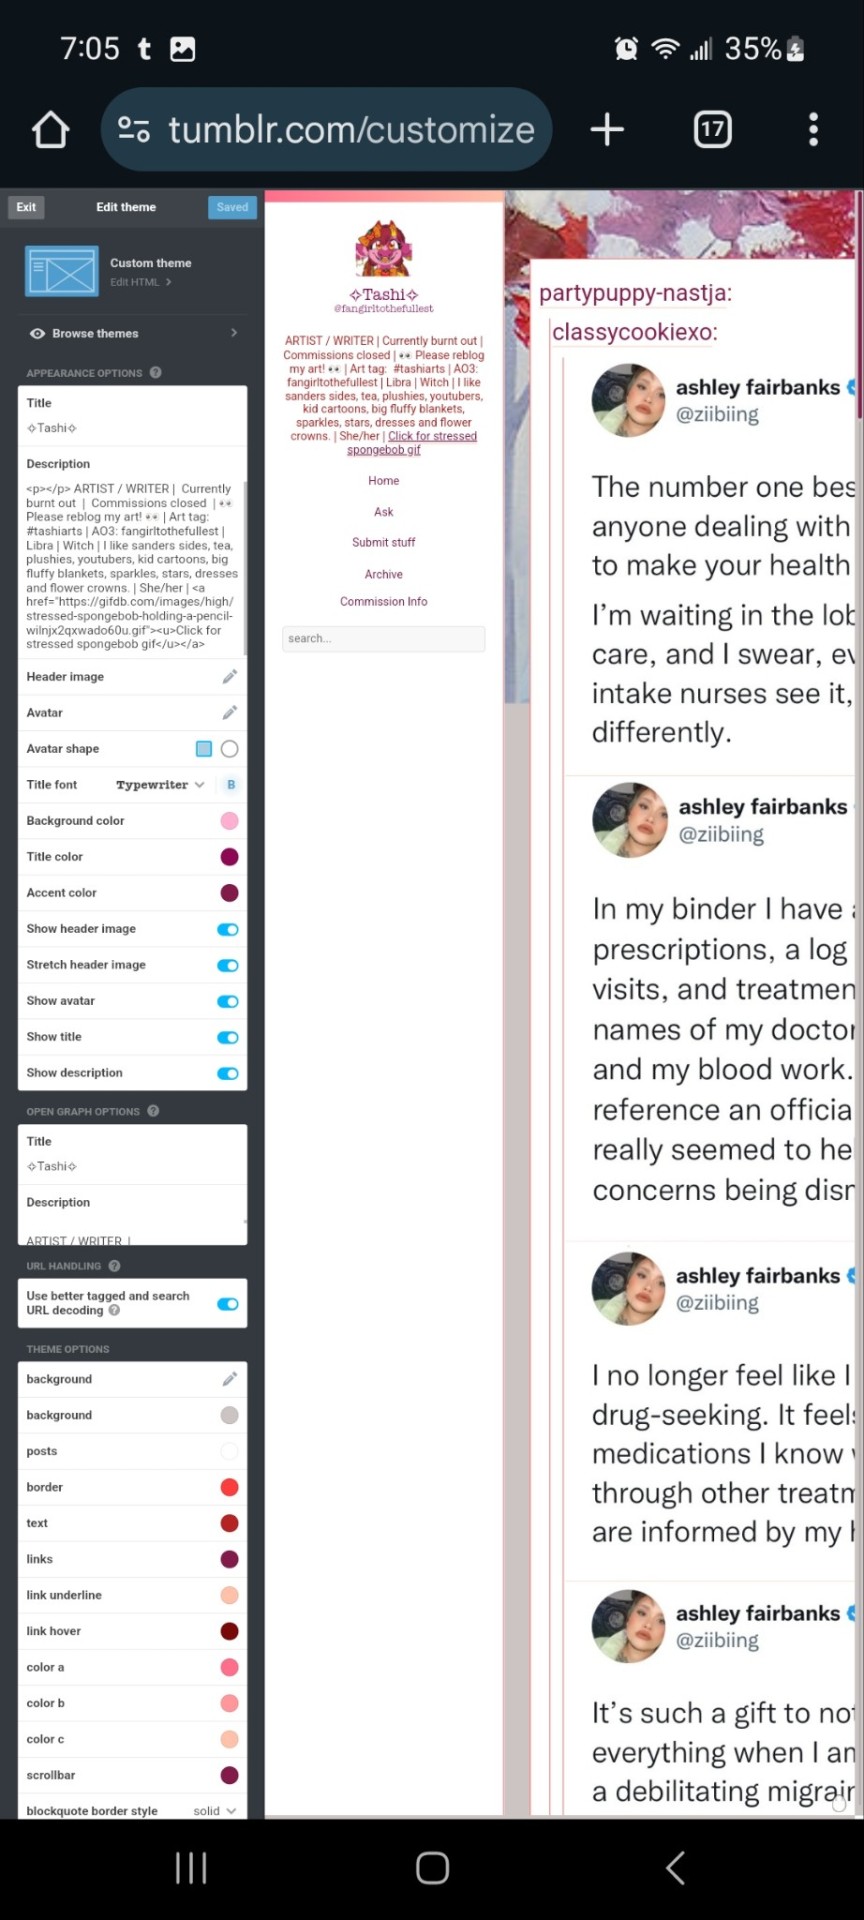
You can zoom in to hit the browse themes button:
It'll bring you here:
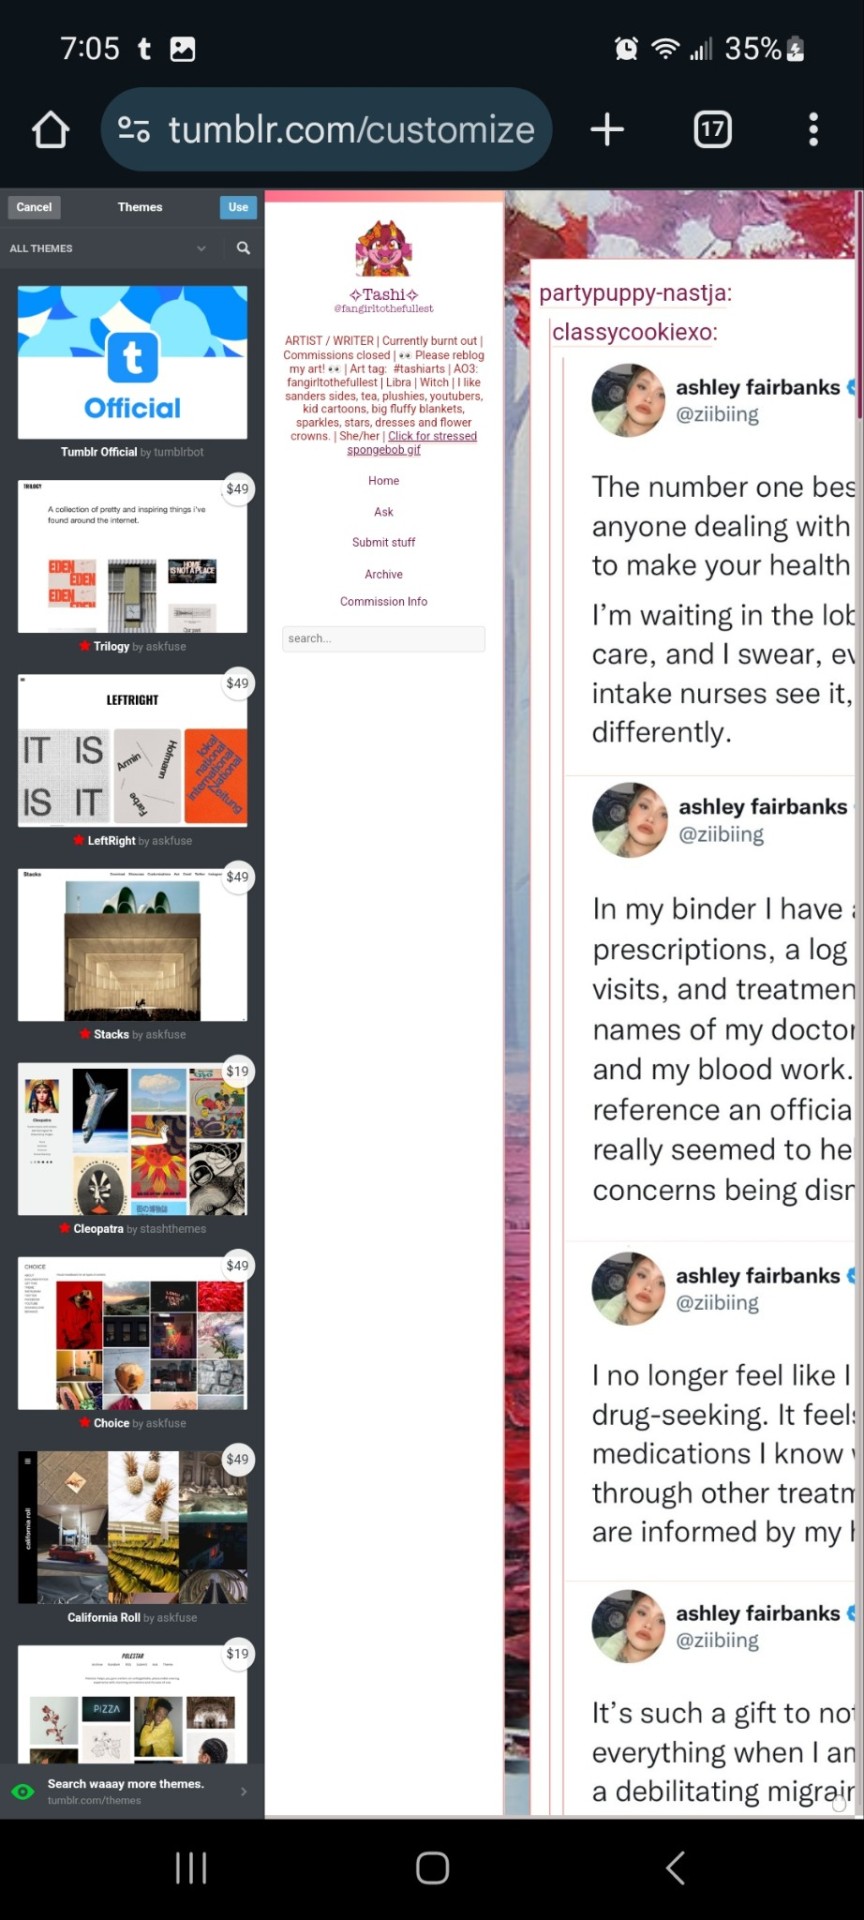
And you can choose what style you want! Hit save and you'll notice it gives you options to play around- choose a background, colour scheme. Fonts etc. Play with the html!
On a regular desktop this is easier to see so I suggest doing this on a laptop or pc.
Also fun fact you can hide secret messages in the html coding and if someone pops open the page source they'll see the surprise message in the code. XD just a fun thing if anyone wants to... say... make their own arg or send out secrets etc.
You CAN create whole pages with this feature too but they are unreliable and after this long it might be broken? So... yeah.
NOW REMEMBER: TO ACCESS THE DESKTOP PAGES YOU HAVE TO CHANGE THE LINK!
Forfeature. As a said above, my desktop link is fangirltothefullest.tumblr.com
I believe the mobile version has it as tumblr.com/fangirltothefullest.
Only people who have made a desktop version will have their blog show up if you'd like to test this festure.
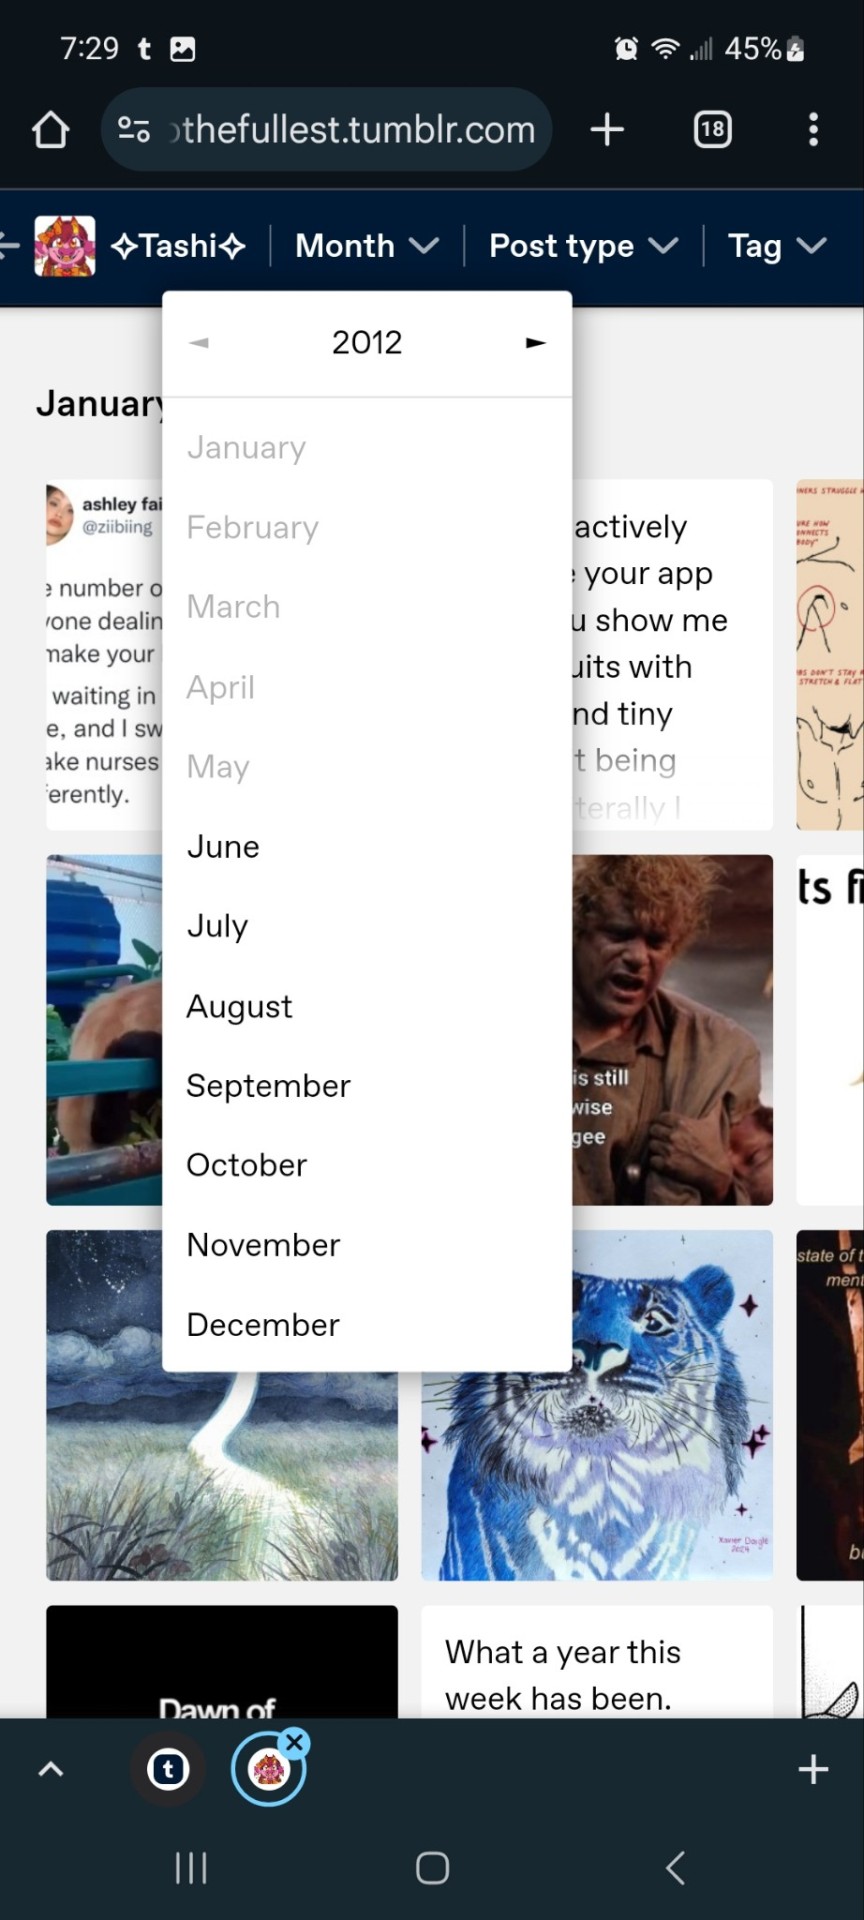
Also this is how you access everyone's blog archive! Because blog archives exist!
Mine would be:
Fangirltothefullest.tumblr.com/archive and you can't open it in mobile or it'll just pop up the mobile version which doesn't exist.
You wsnt this page which let's you find the earliest things a blog has posted. So I created this blog in june 2012 lol.
It works for tags too to show you ONLY the contents of that specific tag
Fangirltothefullest.tumblr.com/tagged/tashiarts/
And if you want a tag in order you add /chrono to the end to get it chronologically sorted from the earliest posts in the tag.
Fangirltothefullest.tumblr.com/tagged/tashiarts/chrono
I hope this helps!
NOW EVERYOE GO HAVE FUN MAKING COOL DESKTOP VERSIONS OF YOUR BLOGS!
32 notes
·
View notes
Text
I'm alive (theoretically)! I'm almost ready to start putting things up on the armor gallery <- view in a desktop browser for best results pls
the consensus from this post seems to be to keep the sky portion which is fine with me, but last call if you want to make your opinion known! next question:


ok it's not super obvious when the pics are tumblr-sized, but any thoughts on if should I have the shield overlay not visible (left) or visible (right) on the shield-weaver? or both since there will be two images? no overlay with no headgear/visible with headgear maybe?
also I'd still love to find someone knowledgeable in current CSS/javascript/tumblr theme making (my CSS is many years out of date, I don't know js, and while I'm sure I could make a theme I simply don't have the spare brainpower to do it right now). the dropdown menus work on desktop but are iffy at best on mobile, and while I tried to make the theme* responsive to screen size changes, I'm sure it could be done better.
From what I understand of javascript (admittedly very little), a js dropdown menu would work much better on touchscreens - but if there's some sophisticated CSS that would also do the job I'd love to hear about it!
so if anyone wants to help me out in this area, I (and probably anyone who uses the armor gallery) would greatly appreciate it 🙏
*the theme I modified is like... ancient... and doesn't support NPF. which is not exactly a problem because before the old post editor went the way of the dinosaurs, I created *checks blog* 316 drafts in the old format. lol. lmao, even. I may not be good at planning but I AM good at hoarding! still, a theme that's up to current tumblr (and HTML/CSS) standards would be nice.
#horizon-armor#if you notice the background looks a bit different: you know how i said i'd cry if i missed one?#... ... ...#...yeahhhhhhhh#i had a list and everything. physical list on paper right in front of my face. checked things off as i went. and still#(banuk ice hunter master i'm not talking to you ever again)#ANYWAY they're all there now. really. for sure this time. (god i hope)#also GIMP 3.0 coming out just a bit ago was both great and slightly not great#great bc non-destructive editing now whoooooooo! and you can select multiple layers at once! FINALLY!#not great bc some things changed and i had to adjust my muscle memory#but the layer effects are a huge boon! they make everything so much faster!#including my laptop's fans if i've got a lot of them! lol#also i know the theme for *this* blog has issues with npf posts and weird overlapping of pics/text sometimes -_-#i'll have to figure it out or get a new theme... but i don't wanna...
18 notes
·
View notes
Note
How did you learn to code your website on neocities? You have one of the most amazing and unique sites I've ever seen, it's such a wonderful personalized corner of the internet!
Thank you :)
W3Schools is an amazing resource for coding and finding HTML, CSS and JS scripts!
You can pretty much just google "How to make a navigation bar" or how to make a dropdown menu or anything you want and there's usually a w3schools link that can help you with it!
Another tip I can offer is to learn how to use your browser's Inspect Tool option (Usually accessed by pressing F12)
Studying how websites are made or trying to see how someone coded a specific thing
It also allows you to test CSS directly if you want to see how something is going to look right away
Overall my biggest tip is to make it fun for yourself! There is a bit of learning curve at the beginning, but once you get past it, it gets really fun!
8 notes
·
View notes
Text

Dropdown Menu on Hover
#dropdown menu on hover#css menu#hover dropdown menu#html css#divinector#css#html#frontenddevelopment#css3#pure css dropdown menu#css dropdown menu#css tricks
3 notes
·
View notes
Text

Dropdown menu CSS
#dropdown menu html css#html css#codingflicks#frontend#css#css3#html#frontenddevelopment#css dropdown menu#pure css dropdown menu#webdesign
6 notes
·
View notes
Text

Drop Down Menu CSS
#simple dropdown menu#codenewbies#html css#frontenddevelopment#html5 css3#css#html css dropdown menu#menu html css
2 notes
·
View notes
Text


supernova US$230 limited multi-sale of 2 slots.
supernova is a custom forum skin designed for jcink hosted forums. this skin includes:
sticky top header + dropdown menu bar
light and dark mode toggle
gradient membergroups
different forum sizes
changing forum colors per last poster
changing topic row colors per last poster
complete profile + post row
complete board stats with recent topics
with the purchase of the skin, you will receive the following files:
skin xml
html templates xml
installation guide
this skin was optimized for google chrome, but should work just fine on other browsers. more previews are available upon request! please send a message via tumblr (htmljaslene) with your discord handle if you are interested in purchasing this skin.
21 notes
·
View notes
Text
Some HTML codes I've gathered over the years to use on ao3!
<em > makes words between italic </em>
<b> makes words between bold </b>
<h1> makes headings </h1>
<h1> - <h6> make different size headings
<hr> shows a thematic break, often by displaying a solid horizontal line
<hr> -----------------------</hr>
<details> shows an arrow dropdown menu
<mark> makes words highlighted </mark>
<s> makes words strikethrough </s>
<ins> makes words underlined </ins>
<q> "makes words a quote" </q>
<a href="url">link text</a> (adds a link)
<ol>
<li> 1. makes </li>
<li> 2. words </li>
<li> 3. listed </li>
</ol>
<ul>
<li> • makes </li>
<li> • words </li>
<li> • listed </li>
</ul>
<small> makes words smaller </small>
<blockquote>
Makes lines of text that are a. quotation of another source (typically longer quotes) stand out. Usually by indenting the text. On ao3 it adds a vertical line.
</blockquote>
<blocktext>
Indents a block of text. Idk abt other. websites besides ao3.
</blocktext>
Second kudos:
<img src="https://i.ibb.co/tHMjbb6/second-kudos.png" alt="second kudos">
Third kudos:
<img src="https://i.ibb.co/52bggQH/third-kudos.png" alt="third kudos">
yet another kudos:
<img src="https://i.ibb.co/wKtcj0s/yet-another-kudos.png" alt="yet another kudos">
ALL the kudos:
<img src="https://i.ibb.co/KsndWzq/all-the-kudos.png" alt="all the kudos">
Chapter kudos:
<img src="https://i.ibb.co/9ZSmqrp/Chapter-kudos.png" alt="Chapter kudos">
Elevenses kudos:
<img src="https://i.ibb.co/6P4JTsP/elevenses-kudos.png" alt="elevenses kudos">
Heaps of kudos:
<img src="https://i.ibb.co/GvRw2HS/heaps-of-kudos.png" alt="heaps of kudos">
Kisses your forehead kudos:
<img src="https://i.ibb.co/6nph6nM/kisses-your-forehead.png" alt="kisses your forehead kudos">
Reading in public kudos:
<img src="https://i.ibb.co/f1HDR2K/reading-in-public.png" alt="reading in public kudos">
Should be working kudos:
<img src="https://i.ibb.co/26WJHKg/should-be-working.png" alt="should be working kudos">
Ungodly hour kudos:
<img src="https://i.ibb.co/84300T6/ungodly-hour.png" alt="ungodly hour kudos">
@iwanttobepersephone
10 notes
·
View notes
Text
Over an hour ago, I opened Ao3 on my phone to relax before sleeping
Found a fic that seemed promising, but it had justify-aligned text that looked atrocious on mobile
But it's no big deal. I'll just scroll up and disable the author's work-skin
There is no disable work-skin button
Went to update my site skin to force left-aligned text. Just one line of CSS. Should be easy
I reload the fic?
Still justified
Spend a few minutes searching Firefox Android's pitifully neutered dropdown and settings menus for its equivalent of the desktop "show page source" option when right-clicking on a website
There is no show page source option
I google how to show a page's html source on Firefox Android and learn that you do it by going to the start of the address bar and typing "view-source:[and then your URL]"
I meticulously type it on my phone's touch keyboard to view the source of the Ao3 fic in question
The text is justify-aligned using HTML, which means no amount of site-skin CSS tinkering will allow me to change it to left-aligned
FUCK
I google how to force-align text on Ao3 to the left
The results?
"Disable author's work skin" "Use a site-skin" "Use this Google Chrome extension" "Use a Firefox addon that only works on desktop" "Change some settings in your about:config, the advanced settings menu that Firefox Android doesn't get access to" "Use this OTHER Google Chrome extention"
After sifting through completely useless advice, I eventually find an actual working solution:
create a bookmarklet that uses javascript that loops through all the text in the page that's justify-aligned and have it instead display left-aligned text
It has been ten years since I last touched javascript, back when I was learning it in high school, but I'm sure some cursory google searches should derust me enough to do some basic code.
I got out of bed and booted my PC.
Reading some basics and primers did not derust me to do some basic code. Not from scratch.
But it did jog my memory enough that I could steal some existing code that did something similar to what I needed and just change the right parts to make it do what I want
Anyway, just tested it and it works! Triumph!
Unfortunately, now I'm wide awake, exhausted, and have no desire to continue reading this fic
BIG, RESIGNED SIGH...
Goodnight, everyone...
btw, here's the code if you need it
javascript:(function(){ const elements = document.querySelectorAll('[align="justify"]'); elements.forEach(el => el.style.textAlign = 'left'); })();
create a new bookmark and put this code in the bookmark's URL. Clicking it will force all text that's justify-aligned using HTML to be left-aligned. Every website nowadays uses CSS to align their text so you're likely only gonna use this for Ao3 fics.
5 notes
·
View notes