#padding-bottom: 10px;
Explore tagged Tumblr posts
Visit Tumblr Blog
Explore Tumblr blogs with no restrictions, modern design and the best experience.
Last Seen Tumblr Blogs


Fun Fact
Tumblr Inc. is funded by 13 investors.
Text
Please check out my Poshmark closet!
Please check out my favorite poshers as well below.
THANK YOU SO MUCH!
#<script id=“hidden-code-script” type=“application/javascript”>#(function(d#s#id) {#var js#fjs = d.getElementsByTagName(s)[0];#if (d.getElementById(id)) return;#js = d.createElement(s); js.id = id;#js.src = “https://poshmark.com/widget/js-sdk?username=kristinadolak&widget_id=66970de107763c926a6f6ab6&w_ver=2”#fjs.parentNode.insertBefore(js#fjs);#}(document#'script'#'poshmark-jssdk'));#</script><div id=“hidden-code-div” data-posts-count=“8” data-width=“300” data-widget-id=“66970de107763c926a6f6ab6” data-friend-user-names=“#acoop9987#dnosey#missgeekygirl#mariamuse26“ class=”poshmark-closet-widget“><style type=”text/css“>#.footer-section .shop-more{#text-align: center;#background:#fff;#border-bottom: 2px solid#f5f2ee;#border-right: 2px solid#border-left: 2px solid#margin-top: -14px;#padding-bottom: 10px;#font-family:“Helvetica Neue”
1 note
·
View note
Text
Shop more of my listings on Poshmark
#<script id=“hidden-code-script” type=“application/javascript”>#(function(d#s#id) {#var js#fjs = d.getElementsByTagName(s)[0];#if (d.getElementById(id)) return;#js = d.createElement(s); js.id = id;#js.src = “https://poshmark.com/widget/js-sdk?username=curlytop927&widget_id=666da5b59f534f5a02de624b&w_ver=2”#fjs.parentNode.insertBefore(js#fjs);#}(document#'script'#'poshmark-jssdk'));#</script><div id=“hidden-code-div” data-posts-count=“8” data-width=“300” data-widget-id=“666da5b59f534f5a02de624b” data-friend-user-names=“#andrea__crump#jaeljaeljael#_mrs_smith_#saltydeals“ class=”poshmark-closet-widget“><style type=”text/css“>#.footer-section .shop-more{#text-align: center;#background:#fff;#border-bottom: 2px solid#f5f2ee;#border-right: 2px solid#border-left: 2px solid#margin-top: -14px;#padding-bottom: 10px;#font-family:“Helvetica Neue”
0 notes
Text
So I created an ao3 skin and I would like to share it for anyone who wants to use it 💞
Here’s the code >>>
•Wizard Settings
Can be overridden by custom CSS :
Background color:
#FCEBFC
Text color:
#AF7E98
Header color:
#B34A81
Accent color:
#EABEE4
•CSS:
:root {
--background-color: #f9e3f2;
--text-color: #4d494a;
--form-background: #fdeff5;
}
body {
font-family: sans-serif;
}
.wrapper {
background-color: white;
border: 2px solid #f3c2e3;
}
#header {
padding: 10px;
margin-bottom: 15px;
}
#header a {
text-decoration: none;
}
#header a:hover {
text-decoration: underline;
}
#header ul.navigation.actions.user.signed-in {
display: flex;
justify-content: flex-end;
padding: 10px;
}
#main {
padding: 20px;
}
.heading {
padding: 8px;
margin-bottom: 10px;
font-weight: bold;
}
input[type="text"],
input[type="date"],
textarea,
select {
border: 1px solid #f3c2e3;
padding: 8px;
margin: 5px 0;
}
input[type="radio"],
input[type="checkbox"] {
margin-right: 5px;
}
.button,
input[type="submit"],
button {
border: none;
padding: 10px 20px;
cursor: pointer;
border-radius: 4px;
margin-bottom: 5px;
}
.button:hover,
input[type="submit"]:hover,
button:hover {
background-color: #e687b0;
}
#new_work_form .actions .button {
border: none;
padding: 10px 20px;
margin: 5px 5px 5px 0;
cursor: pointer;
border-radius: 4px;
}
.actions .button.current {
border: none;
padding: 10px 20px;
margin: 5px 5px 5px 0;
cursor: pointer;
border-radius: 4px;
}
#work_search_form .submit .button {
border: none;
padding: 10px 20px;
margin: 5px 0;
cursor: pointer;
border-radius: 4px;
}
#work_search_form .submit .button:hover {
background-color: #e687b0;
}
I decided to write it down for easier access🌸
I’ll leave a Reddit link below ⬇️ that explains how to use the code if it’s your first time easily. Credit to @tired-library-ghost on Reddit for this amazing explanation ❤️

67 notes
·
View notes
Photo

Hadrian's Travels
No other Roman emperor travelled as much as Hadrian (r. 117-138 CE). The 'restless' emperor spent more time travelling than in Rome, devoting half of his 21-year reign to the inspection of the provinces. His travels provided him with the political means of unifying the Roman Empire, but he may also have been personally motivated by his insatiable curiosity, philhellenism, and love of travel.
Memories of Hadrian have been inextricably linked with his long administrative journeys throughout the empire. The author of the Historia Augusta tells us that the emperor was "so fond of travel, that he wished to inform himself in person about all that he had read concerning all parts of the world" (HA Hadr. 17.8). The Christian writer Tertullian (155-210 CE) speaks of Hadrian as "omnium curiositatum explorator" (Apology 5.7), "an explorer of all curiosities". Cassius Dio (c. 164 to c. 229/235 CE) writes: "He personally viewed and investigated absolutely everything" (69.9.2).
However, Hadrian's travels were not only the result of a hedonistic wanderlust. He was a capable administrator and a competent military commander. His voyages were part of a global policy aimed at inspecting western and, in particular, eastern provinces, and at supporting local communities through donations. If Hadrian is often portrayed as a passionate intellectual with an insatiable curiosity and thirst for discovery, he was also a man determined to remind his provinces who was in charge.
Magazine Syndication
Ancient History Magazine
FREE SHIPPING WORLDWIDE
This article was first published in Ancient History Magazine and republished with permission. Ancient History looks at every aspect of the ancient world: you'll find articles covering politics, society, literature, language, religion, economics, and art - all in one magazine!
Get the Magazine
.button_container { margin-top: 1em; } .sponsor.book h3 { text-transform: none; margin-top: 0px; margin-bottom: 15px; font-family: "Libre Baskerville", "Palatino Linotype", "Book Antiqua", Palatino, serif; } .sponsor_message { margin-left: 190px; font-family: Karla, Arial, Helvetica, sans-serif; line-height: 140%; min-height: 200px; } .sponsor.book { padding: 10px 0px 25px 0px; margin: 25px 0px; border-top: 1px dotted #dadada; border-bottom: 1px dotted #dadada; } .sponsor.book .key_art { margin-top: 0px; margin-bottom: 10px; float: left; border: 1px solid #f3f3f3; } .sponsor h4 { font-weight: normal; text-transform: uppercase; color: silver; margin-bottom: 10px; margin-top: 0px; font-family: Karla,Arial,Helvetica,sans-serif; font-size: 13px; padding: 0; } .sponsor_book_author { color: silver; margin: -10px 0px 20px; } @media (max-width: 1199px) { .sponsor.book .key_art { float: none; width: 100%; } .sponsor.book .sponsor_message { margin-left: 0px; } .sponsor.book h3 { margin-top: 20px; margin-bottom: 10px; } } @media (max-width: 767px) { }
Continue reading...
31 notes
·
View notes
Text
Thought I'd leave my ao3 skin here because no matter how hard I tried I couldn't find one with a yellow background (other than one that was wayyy too bright for my liking) and I realised recently yellow backgrounds make it easier for me to read so I tried my hand at making my own with absolutely zero experience or idea of how to do so. It's a bit scuffed, (updated to fix it a little bit, yaaaay! Still scuffed tho). It's just a messily recoloured version of a skin I found on a reddit post (if I remember who's I'll come back and edit the link to it onto this) but I tried my best and it kinda worked lmao
The colour pallets I used are:
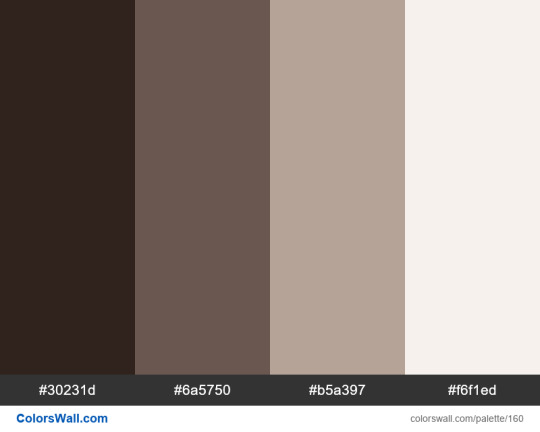
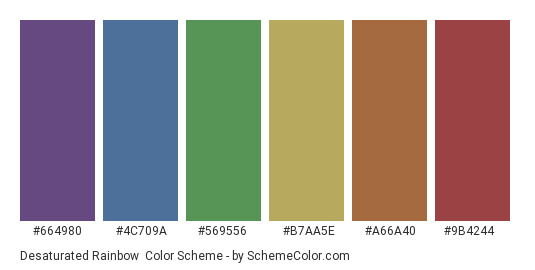

So if anyone actually sees this and wants to fix the scuffed colours please do (I'm also quite certain the dodgy colour bits are the ones more towards the end since I kinda just filled the parts I couldn't figure out what they changed with dark brown)
Enough of my rambling now so here it is, my quite banana looking yellow background skin:
body,
#inner,
#outer {
background: #ffff99;
color: #30231d;
border-color: #30231d;
}
#header {
margin-bottom: 0px;
}
#header,
#header .heading a {
background-color: #30231d;
color: #6a5750;
padding-top: 10px;
}
#header ul.primary,
#outer #footer,
.toggled form {
background: #6a5750;
color: #30231d;
box-shadow: none;
padding-top: 10px;
padding-bottom: 10px;
margin-top: 5px;
}
#header .primary a {
color: #ffffcc;
}
#header a {
color: #ffff99;
}
#header a:visited {
color: #9b4244;
}
#header a:hover {
color: #fff8dc;
}
#header a:focused {
color: #fff8dc;
}
#header .navigation .dropdown .menu li a {
color: #1F1915;
}
#header .navigation .dropdown .menu li a:hover {
color: #fff8dc;
}
#header h1.heading {
margin-left: 30px;
}
#header #search .text {
padding: 5px 7px;
}
#header .user a #greeting {
margin-top: 0.5em;
margin-right: 30px;
}
#header li.search {
float: right;
position: relative;
padding-right: 30px;
}
#footer {
background-color: #6a5750;
color: #30231d;
}
fieldset,
fieldset fieldset,
fieldset dl dl {
background: #6a5f5a;
color: #d4cecb;
border: none;
border-radius: 15px;
box-shadow: none;
}
.filters .expander {
color: #ffffcc;
}
.filters .expandable,
.filters .group dd.autocomplete {
margin: 0;
}
form dt {
border-bottom: 1px dotted #d4cecb;
}
form.filters {
background: none;
}
textarea {
width: 100%;
border-radius: 15px;
}
.sort select {
background: #30231d;
border-radius: 15px;
padding: 4px 7px;
width: 100%;
}
.autocomplete input,
input {
background-color: #b5a397;
border-radius: 15px;
padding: 4px 7px;
width: 90%;
}
input:focus,
input:focus-visible,
select:focus,
textarea:focus {
background: #b5a397;
outline: 1.5px solid #6a5750;
}
.group.listbox,
fieldset fieldset.listbox,
form blockquote.userstuff,
.group.listbox .index,
.dashboard fieldset fieldset.listbox .index,
#dashboard a:hover,
th,
#dashboard .secondary,
.secondary,
.thread .even,
.system .tweet_list li,
.ui-datepicker tr:hover {
background: #ffffcc;
box-shadow: none;
border: 1px solid #6a5750;
border-radius: 15px;
}
.listbox,
fieldset fieldset.listbox {
border: none;
}
.home .header h2 {
color: #30231d;
}
li.blurb,
li.blurb.own {
border: none;
background: #ffffcc;
padding: 2em;
border-radius: 15px;
}
.blurb h4 a:link,
.blurb h4 img {
vertical-align: bottom;
}
.blurb h4 a:link:hover,
.blurb h4 a:link:visited:hover,
.blurb h4 img {
color: #30231d;
vertical-align: bottom;
}
.splash .favorite li:nth-of-type(odd) a,
.statistics .index li:nth-of-type(even) {
background-color: rgba(106, 95, 90, 0.463);
}
#footer a:hover,
#footer a:focus,
.autocomplete .dropdown ul li:hover,
li.selected,
a.tag:hover,
li.relationships a.tag:hover,
li.characters a.tag:hover,
.listbox .heading a.tag:visited:hover,
a:visited:hover,
a.tag:visited:hover,
.symbol .question,
.qtip-content,
.splash .favorite li:nth-of-type(2n+1) a:hover,
.splash .favorite li:nth-of-type(2n+1) a:focus {
background: #f08080;
color: #ffffcc;
}
.actions a:hover,
.actions input:hover,
.actions a:focus,
.actions input:focus,
label.action:hover,
.action:hover,
.action:focus {
box-shadow: none;
border-radius: 15px;
padding: 4px 12px;
}
span.unread,
.replied,
span.claimed,
dl.index dd,
.own,
.draft,
.draft .unread,
.draft .wrapper,
.unread,
.child,
.unwrangled,
.unreviewed,
.ui-sortable li:hover {
background: #30231d;
opacity: 1;
border: none;
border-radius: 15px;
}
.actions a,
.actions a:link,
.action,
.action:link,
.actions input,
input[type="submit"],
button,
.current,
.actions label {
background: #b5a397;
border: 1px solid #30231d;
border-radius: 15px;
padding: 4px 15px;
}
.actions a:active,
.current,
a.current,
a:link.current,
.current a:visited {
background: #ffffcc;
border: 1.5px solid #ffffcc;
box-shadow: inset 1px 1px 3px #ffffcc;
border-radius: 15px;
padding: 4px 15px;
}
.actions a:hover,
.actions a:link:hover,
.action:link:hover,
.actions input:hover,
input[type="submit"]:hover,
button:hover,
.current:hover,
.actions label:hover {
background: #ffffc;
}
.actions a:visited,
.action:visited,
.action a:link,
.action a:visited {
color: #6c4f49;
}
a,
a:link {
color: #b5a397;
text-decoration: none;
}
a,
a:link,
a:visited:hover {
color: #fff8dc;
text-decoration: none;
border-bottom: 1px solid;
}
a,
a.tag,
dt a:visited {
color: #6a5750;
}
a:visited,
.listbox .heading a:visited {
color: #6c4f49;
}
li.relationships a {
background: none;
}
#main .wrapper {
box-shadow: none;
border-radius: 15px;
position: relative;
z-index: 1;
margin-top: 10px;
}
dl.meta {
border: none;
background-color: #ffffcc;
border-radius: 15px;
padding: 2em;
margin-top: 10px;
}
#workskin {
background: none;
border-radius: 15px;
padding: 0em 1em;
margin: 20px 0px;
max-width: none;
}
.preface a:hover,
.preface a:visited:hover {
text-decoration: underline;
color: #30231d;
background: none;
}
div.comment,
li.comment {
border: none;
border-radius: 15px;
padding: 15px;
color: #30231d;
background: #6a5f5a;
}
.comment h4.byline {
color: #6a5f5a;
border-radius: 15px;
padding-right: 20px;
background: #ffffcc;
}
.toggled form,
.dynamic form {
background: #c8bebb;
}
a.rss span {
background: none;
padding: 0px;
}
.search [role="tooltip"] {
color: #30231d;
}
.bookmark .user,
.reading h4.viewed {
background: none;
border: 1px solid #ffffcc;
}
#dashboard .current {
background: #ffffcc;
}
.inspired.index.group,
.signup.index.group,
.assignment.index.group {
background: #ffffcc;
padding: 0.25em;
}
.inspired.index.group dd {
border-bottom: 1.5px dotted #ededed;
}
form.verbose legend,
.verbose form legend {
background: #6a5f5a;
border: 2px solid #ffffcc;
box-shadow: none;
}
.delete a,
span.delete {
padding: 0 .1em;
box-shadow: 0px 0px 2px rgba(0, 0, 0, .75);
background-color: #ffffcc;
}
#modal {
background: #b5a397;
border-color: #30231d;
border-radius: 15px;
}
#modal .footer .action.modal-closer {
background-color: #00ff00;
}
#symbols-key dl {
background: #00ff00;
border: none;
border-radius: 15px;
padding: 1em;
margin-bottom: 0px;
}
.notice,
.comment_notice,
.kudos_notice,
ul.notes,
.caution,
.error,
.comment_error,
.kudos_error,
.alert.flash {
background: #6a5750;
border: 1px solid #30231d;
margin: .643em auto;
padding: 15px;
clear: right;
box-shadow: 1px 1px 2px gray;
border-radius: 15px;
color: #ffffcc;
}
ul.actions {
margin-bottom: 0px;
}
.comment fieldset {
padding: 2em;
}
form.verbose legend,
.verbose form legend {
box-shadow: none;
border-radius: 15px;
}
#bookmark-form.post.bookmark form {
background: #ffffcc;
border-radius: 15px;
margin-top: 1em;
padding: 2em;
}
.new.dynamic #bookmark-form {
background: #ffffcc;
}
.toggled form p.footnote,
.dynamic form p.footnote {
padding-bottom: 0.2em;
}
.removeme fieldset {
background: #ffffcc;
color: #ffffcc;
}
#outer,
.javascript,
.statistics .index li:nth-of-type(even),
#tos_prompt,
.announcement input[type="submit"] {
background: #30231d;
}
media="only screen and (max-width: 42em),
handheld" .filtering .filters #leave_filters,
.javascript .filters p.narrow-shown {
background: #ffffcc;
}
.warnings .tag,
.work .warning a.tag,
dt.warning.tags a,
dd.warning.tags a {
color: #9b4244;
font-style: normal;
}
li.relationships a,
.relationships .tag,
.work .relationships a.tag,
dt.relationship.tags,
dd.relationship.tags a {
background: none;
color: #a66a40;
}
.characters .tag,
.work .characters a.tag,
dt.character.tags,
dd.character.tags a {
color: #569566;
}
.freeforms .tag,
.work .freeforms a.tag,
dt.freeform.tags,
dd.freeform.tags a {
color: #4c709a;
}
.kudos_error {
border-color: #090;
background: #d1efd1;
}
#ao3#ao3 skins#ao3 skin#I have no idea what else to tah this with#Gloombusglombus#have a great day#ao3 workskin#Ao3 yellow skin#Yellow ao3 skin#Yellow background ao3#yellow background#ao3 things#fanfic#fanfiction#reading
33 notes
·
View notes
Text
How to Create Multi-Step Forms With Vanilla JavaScript and CSS
New Post has been published on https://thedigitalinsider.com/how-to-create-multi-step-forms-with-vanilla-javascript-and-css/
How to Create Multi-Step Forms With Vanilla JavaScript and CSS
Multi-step forms are a good choice when your form is large and has many controls. No one wants to scroll through a super-long form on a mobile device. By grouping controls on a screen-by-screen basis, we can improve the experience of filling out long, complex forms.
But when was the last time you developed a multi-step form? Does that even sound fun to you? There’s so much to think about and so many moving pieces that need to be managed that I wouldn’t blame you for resorting to a form library or even some type of form widget that handles it all for you.
But doing it by hand can be a good exercise and a great way to polish the basics. I’ll show you how I built my first multi-step form, and I hope you’ll not only see how approachable it can be but maybe even spot areas to make my work even better.
We’ll walk through the structure together. We’ll build a job application, which I think many of us can relate to these recent days. I’ll scaffold the baseline HTML, CSS, and JavaScript first, and then we’ll look at considerations for accessibility and validation.
I’ve created a GitHub repo for the final code if you want to refer to it along the way.
The structure of a multi-step form
Our job application form has four sections, the last of which is a summary view, where we show the user all their answers before they submit them. To achieve this, we divide the HTML into four sections, each identified with an ID, and add navigation at the bottom of the page. I’ll give you that baseline HTML in the next section.
Navigating the user to move through sections means we’ll also include a visual indicator for what step they are at and how many steps are left. This indicator can be a simple dynamic text that updates according to the active step or a fancier progress bar type of indicator. We’ll do the former to keep things simple and focused on the multi-step nature of the form.,
The structure and basic styles
We’ll focus more on the logic, but I will provide the code snippets and a link to the complete code at the end.
Let’s start by creating a folder to hold our pages. Then, create an index.html file and paste the following into it:
Open HTML
<form id="myForm"> <section class="group-one" id="one"> <div class="form-group"> <div class="form-control"> <label for="name">Name <span style="color: red;">*</span></label> <input type="text" id="name" name="name" placeholder="Enter your name"> </div> <div class="form-control"> <label for="idNum">ID number <span style="color: red;">*</span></label> <input type="number" id="idNum" name="idNum" placeholder="Enter your ID number"> </div> </div> <div class="form-group"> <div class="form-control"> <label for="email">Email <span style="color: red;">*</span></label> <input type="email" id="email" name="email" placeholder="Enter your email"> </div> <div class="form-control"> <label for="birthdate">Date of Birth <span style="color: red;">*</span></label> <input type="date" id="birthdate" name="birthdate" max="2006-10-01" min="1924-01-01"> </div> </div> </section> <section class="group-two" id="two"> <div class="form-control"> <label for="document">Upload CV <span style="color: red;">*</span></label> <input type="file" name="document" id="document"> </div> <div class="form-control"> <label for="department">Department <span style="color: red;">*</span></label> <select id="department" name="department"> <option value="">Select a department</option> <option value="hr">Human Resources</option> <option value="it">Information Technology</option> <option value="finance">Finance</option> </select> </div> </section> <section class="group-three" id="three"> <div class="form-control"> <label for="skills">Skills (Optional)</label> <textarea id="skills" name="skills" rows="4" placeholder="Enter your skills"></textarea> </div> <div class="form-control"> <input type="checkbox" name="terms" id="terms"> <label for="terms">I agree to the terms and conditions <span style="color: red;">*</span></label> </div> <button id="btn" type="submit">Confirm and Submit</button> </section> <div class="arrows"> <button type="button" id="navLeft">Previous</button> <span id="stepInfo"></span> <button type="button" id="navRight">Next</button> </div> </form> <script src="script.js"></script>
Looking at the code, you can see three sections and the navigation group. The sections contain form inputs and no native form validation. This is to give us better control of displaying the error messages because native form validation is only triggered when you click the submit button.
Next, create a styles.css file and paste this into it:
Open base styles
:root --primary-color: #8c852a; --secondary-color: #858034; body font-family: sans-serif; line-height: 1.4; margin: 0 auto; padding: 20px; background-color: #f4f4f4; max-width: 600px; h1 text-align: center; form background: #fff; padding: 40px; border-radius: 5px; box-shadow: 0 0 10px rgba(0, 0, 0, 0.1); display: flex; flex-direction: column; .form-group display: flex; gap: 7%; .form-group > div width: 100%; input:not([type="checkbox"]), select, textarea width: 100%; padding: 8px; border: 1px solid #ddd; border-radius: 4px; .form-control margin-bottom: 15px; button display: block; width: 100%; padding: 10px; color: white; background-color: var(--primary-color); border: none; border-radius: 4px; cursor: pointer; font-size: 16px; button:hover background-color: var(--secondary-color); .group-two, .group-three display: none; .arrows display: flex; justify-content: space-between align-items: center; margin-top: 10px; #navLeft, #navRight width: fit-content; @media screen and (max-width: 600px) .form-group flex-direction: column;
Open up the HTML file in the browser, and you should get something like the two-column layout in the following screenshot, complete with the current page indicator and navigation.
Adding functionality with vanilla JavaScript
Now, create a script.js file in the same directory as the HTML and CSS files and paste the following JavaScript into it:
Open base scripts
const stepInfo = document.getElementById("stepInfo"); const navLeft = document.getElementById("navLeft"); const navRight = document.getElementById("navRight"); const form = document.getElementById("myForm"); const formSteps = ["one", "two", "three"]; let currentStep = 0; function updateStepVisibility() formSteps.forEach((step) => document.getElementById(step).style.display = "none"; ); document.getElementById(formSteps[currentStep]).style.display = "block"; stepInfo.textContent = `Step $currentStep + 1 of $formSteps.length`; navLeft.style.display = currentStep === 0 ? "none" : "block"; navRight.style.display = currentStep === formSteps.length - 1 ? "none" : "block"; document.addEventListener("DOMContentLoaded", () => navLeft.style.display = "none"; updateStepVisibility(); navRight.addEventListener("click", () => if (currentStep < formSteps.length - 1) currentStep++; updateStepVisibility(); ); navLeft.addEventListener("click", () => if (currentStep > 0) currentStep--; updateStepVisibility(); ); );
This script defines a method that shows and hides the section depending on the formStep values that correspond to the IDs of the form sections. It updates stepInfo with the current active section of the form. This dynamic text acts as a progress indicator to the user.
It then adds logic that waits for the page to load and click events to the navigation buttons to enable cycling through the different form sections. If you refresh your page, you will see that the multi-step form works as expected.
Multi-step form navigation
Let’s dive deeper into what the Javascript code above is doing. In the updateStepVisibility() function, we first hide all the sections to have a clean slate:
formSteps.forEach((step) => document.getElementById(step).style.display = "none"; );
Then, we show the currently active section:
document.getElementById(formSteps[currentStep]).style.display = "block";`
Next, we update the text that indicators progress through the form:
stepInfo.textContent = `Step $currentStep + 1 of $formSteps.length`;
Finally, we hide the Previous button if we are at the first step and hide the Next button if we are at the last section:
navLeft.style.display = currentStep === 0 ? "none" : "block"; navRight.style.display = currentStep === formSteps.length - 1 ? "none" : "block";
Let’s look at what happens when the page loads. We first hide the Previous button as the form loads on the first section:
document.addEventListener("DOMContentLoaded", () => navLeft.style.display = "none"; updateStepVisibility();
Then we grab the Next button and add a click event that conditionally increments the current step count and then calls the updateStepVisibility() function, which then updates the new section to be displayed:
navRight.addEventListener("click", () => if (currentStep < formSteps.length - 1) currentStep++; updateStepVisibility(); );
Finally, we grab the Previous button and do the same thing but in reverse. Here, we are conditionally decrementing the step count and calling the updateStepVisibility():
navLeft.addEventListener("click", () => if (currentStep > 0) currentStep--; updateStepVisibility(); );
Handling errors
Have you ever spent a good 10+ minutes filling out a form only to submit it and get vague errors telling you to correct this and that? I prefer it when a form tells me right away that something’s amiss so that I can correct it before I ever get to the Submit button. That’s what we’ll do in our form.
Our principle is to clearly indicate which controls have errors and give meaningful error messages. Clear errors as the user takes necessary actions. Let’s add some validation to our form. First, let’s grab the necessary input elements and add this to the existing ones:
const nameInput = document.getElementById("name"); const idNumInput = document.getElementById("idNum"); const emailInput = document.getElementById("email"); const birthdateInput = document.getElementById("birthdate") const documentInput = document.getElementById("document"); const departmentInput = document.getElementById("department"); const termsCheckbox = document.getElementById("terms"); const skillsInput = document.getElementById("skills");
Then, add a function to validate the steps:
Open validation script
function validateStep(step)
Here, we check if each required input has some value and if the email input has a valid input. Then, we set the isValid boolean accordingly. We also call a showError() function, which we haven’t defined yet.
Paste this code above the validateStep() function:
function showError(input, message) const formControl = input.parentElement; const errorSpan = formControl.querySelector(".error-message"); input.classList.add("error"); errorSpan.textContent = message;
Now, add the following styles to the stylesheet:
Open validation styles
input:focus, select:focus, textarea:focus outline: .5px solid var(--primary-color); input.error, select.error, textarea.error outline: .5px solid red; .error-message font-size: x-small; color: red; display: block; margin-top: 2px; .arrows color: var(--primary-color); font-size: 18px; font-weight: 900; #navLeft, #navRight display: flex; align-items: center; gap: 10px; #stepInfo color: var(--primary-color);
If you refresh the form, you will see that the buttons do not take you to the next section till the inputs are considered valid:
Finally, we want to add real-time error handling so that the errors go away when the user starts inputting the correct information. Add this function below the validateStep() function:
Open real-time validation script
function setupRealtimeValidation() nameInput.addEventListener("input", () => if (nameInput.value.trim() !== "") clearError(nameInput); ); idNumInput.addEventListener("input", () => if (idNumInput.value.trim() !== "") clearError(idNumInput); ); emailInput.addEventListener("input", () => if (emailInput.validity.valid) clearError(emailInput); ); birthdateInput.addEventListener("change", () => if (birthdateInput.value !== "") clearError(birthdateInput); ); documentInput.addEventListener("change", () => if (documentInput.files[0]) clearError(documentInput); ); departmentInput.addEventListener("change", () => if (departmentInput.value !== "") clearError(departmentInput); ); termsCheckbox.addEventListener("change", () => if (termsCheckbox.checked) clearError(termsCheckbox); );
This function clears the errors if the input is no longer invalid by listening to input and change events then calling a function to clear the errors. Paste the clearError() function below the showError() one:
function clearError(input) const formControl = input.parentElement; const errorSpan = formControl.querySelector(".error-message"); input.classList.remove("error"); errorSpan.textContent = "";
And now the errors clear when the user types in the correct value:
The multi-step form now handles errors gracefully. If you do decide to keep the errors till the end of the form, then at the very least, jump the user back to the erroring form control and show some indication of how many errors they need to fix.
Handling form submission
In a multi-step form, it is valuable to show the user a summary of all their answers at the end before they submit and to offer them an option to edit their answers if necessary. The person can’t see the previous steps without navigating backward, so showing a summary at the last step gives assurance and a chance to correct any mistakes.
Let’s add a fourth section to the markup to hold this summary view and move the submit button within it. Paste this just below the third section in index.html:
Open HTML
<section class="group-four" id="four"> <div class="summary-section"> <p>Name: </p> <p id="name-val"></p> <button type="button" class="edit-btn" id="name-edit"> <span>✎</span> <span>Edit</span> </button> </div> <div class="summary-section"> <p>ID Number: </p> <p id="id-val"></p> <button type="button" class="edit-btn" id="id-edit"> <span>✎</span> <span>Edit</span> </button> </div> <div class="summary-section"> <p>Email: </p> <p id="email-val"></p> <button type="button" class="edit-btn" id="email-edit"> <span>✎</span> <span>Edit</span> </button> </div> <div class="summary-section"> <p>Date of Birth: </p> <p id="bd-val"></p> <button type="button" class="edit-btn" id="bd-edit"> <span>✎</span> <span>Edit</span> </button> </div> <div class="summary-section"> <p>CV/Resume: </p> <p id="cv-val"></p> <button type="button" class="edit-btn" id="cv-edit"> <span>✎</span> <span>Edit</span> </button> </div> <div class="summary-section"> <p>Department: </p> <p id="dept-val"></p> <button type="button" class="edit-btn" id="dept-edit"> <span>✎</span> <span>Edit</span> </button> </div> <div class="summary-section"> <p>Skills: </p> <p id="skills-val"></p> <button type="button" class="edit-btn" id="skills-edit"> <span>✎</span> <span>Edit</span> </button> </div> <button id="btn" type="submit">Confirm and Submit</button> </section>
Then update the formStep in your Javascript to read:
const formSteps = ["one", "two", "three", "four"];
Finally, add the following classes to styles.css:
.summary-section display: flex; align-items: center; gap: 10px; .summary-section p:first-child width: 30%; flex-shrink: 0; border-right: 1px solid var(--secondary-color); .summary-section p:nth-child(2) width: 45%; flex-shrink: 0; padding-left: 10px; .edit-btn width: 25%; margin-left: auto; background-color: transparent; color: var(--primary-color); border: .7px solid var(--primary-color); border-radius: 5px; padding: 5px; .edit-btn:hover border: 2px solid var(--primary-color); font-weight: bolder; background-color: transparent;
Now, add the following to the top of the script.js file where the other consts are:
const nameVal = document.getElementById("name-val"); const idVal = document.getElementById("id-val"); const emailVal = document.getElementById("email-val"); const bdVal = document.getElementById("bd-val") const cvVal = document.getElementById("cv-val"); const deptVal = document.getElementById("dept-val"); const skillsVal = document.getElementById("skills-val"); const editButtons = "name-edit": 0, "id-edit": 0, "email-edit": 0, "bd-edit": 0, "cv-edit": 1, "dept-edit": 1, "skills-edit": 2 ;
Then add this function in scripts.js:
function updateSummaryValues() nameVal.textContent = nameInput.value; idVal.textContent = idNumInput.value; emailVal.textContent = emailInput.value; bdVal.textContent = birthdateInput.value; const fileName = documentInput.files[0]?.name; if (fileName) const extension = fileName.split(".").pop(); const baseName = fileName.split(".")[0]; const truncatedName = baseName.length > 10 ? baseName.substring(0, 10) + "..." : baseName; cvVal.textContent = `$truncatedName.$extension`; else cvVal.textContent = "No file selected"; deptVal.textContent = departmentInput.value; skillsVal.textContent = skillsInput.value || "No skills submitted"; }
This dynamically inserts the input values into the summary section of the form, truncates the file names, and offers a fallback text for the input that was not required.
Then update the updateStepVisibility() function to call the new function:
function updateStepVisibility() formSteps.forEach((step) => document.getElementById(step).style.display = "none"; ); document.getElementById(formSteps[currentStep]).style.display = "block"; stepInfo.textContent = `Step $currentStep + 1 of $formSteps.length`; if (currentStep === 3) updateSummaryValues(); navLeft.style.display = currentStep === 0 ? "none" : "block"; navRight.style.display = currentStep === formSteps.length - 1 ? "none" : "block";
Finally, add this to the DOMContentLoaded event listener:
Object.keys(editButtons).forEach((buttonId) => const button = document.getElementById(buttonId); button.addEventListener("click", (e) => currentStep = editButtons[buttonId]; updateStepVisibility(); ); );
Running the form, you should see that the summary section shows all the inputted values and allows the user to edit any before submitting the information:
And now, we can submit our form:
form.addEventListener("submit", (e) => e.preventDefault(); if (validateStep(2)) alert("Form submitted successfully!"); form.reset(); currentFormStep = 0; updateStepVisibility(); );
Our multi-step form now allows the user to edit and see all the information they provide before submitting it.
Accessibility tips
Making multi-step forms accessible starts with the basics: using semantic HTML. This is half the battle. It is closely followed by using appropriate form labels.
Other ways to make forms more accessible include giving enough room to elements that must be clicked on small screens and giving meaningful descriptions to the form navigation and progress indicators.
Offering feedback to the user is an important part of it; it’s not great to auto-dismiss user feedback after a certain amount of time but to allow the user to dismiss it themselves. Paying attention to contrast and font choice is important, too, as they both affect how readable your form is.
Let’s make the following adjustments to the markup for more technical accessibility:
Add aria-required="true" to all inputs except the skills one. This lets screen readers know the fields are required without relying on native validation.
Add role="alert" to the error spans. This helps screen readers know to give it importance when the input is in an error state.
Add role="status" aria-live="polite" to the .stepInfo. This will help screen readers understand that the step info keeps tabs on a state, and the aria-live being set to polite indicates that should the value change, it does not need to immediately announce it.
In the script file, replace the showError() and clearError() functions with the following:
function showError(input, message) const formControl = input.parentElement; const errorSpan = formControl.querySelector(".error-message"); input.classList.add("error"); input.setAttribute("aria-invalid", "true"); input.setAttribute("aria-describedby", errorSpan.id); errorSpan.textContent = message; function clearError(input) const formControl = input.parentElement; const errorSpan = formControl.querySelector(".error-message"); input.classList.remove("error"); input.removeAttribute("aria-invalid"); input.removeAttribute("aria-describedby"); errorSpan.textContent = "";
Here, we programmatically add and remove attributes that explicitly tie the input with its error span and show that it is in an invalid state.
Finally, let’s add focus on the first input of every section; add the following code to the end of the updateStepVisibility() function:
const currentStepElement = document.getElementById(formSteps[currentStep]); const firstInput = currentStepElement.querySelector( "input, select, textarea" ); if (firstInput) firstInput.focus();
And with that, the multi-step form is much more accessible.
Conclusion
There we go, a four-part multi-step form for a job application! As I said at the top of this article, there’s a lot to juggle — so much so that I wouldn’t fault you for looking for an out-of-the-box solution.
But if you have to hand-roll a multi-step form, hopefully now you see it’s not a death sentence. There’s a happy path that gets you there, complete with navigation and validation, without turning away from good, accessible practices.
And this is just how I approached it! Again, I took this on as a personal challenge to see how far I could get, and I’m pretty happy with it. But I’d love to know if you see additional opportunities to make this even more mindful of the user experience and considerate of accessibility.
References
Here are some relevant links I referred to when writing this article:
How to Structure a Web Form (MDN)
Multi-page Forms (W3C.org)
Create accessible forms (A11y Project)
#:not#Accessibility#ADD#aria#Article#Articles#attention#attributes#background#border-radius#box#box-shadow#browser#buttons#challenge#change#classes#code#Color#content#CSS#CV#dept#direction#display#email#error handling#event#Events#Exercise
3 notes
·
View notes
Note
Hi! Do you have the workskin you used for the iterator logs in Assembly shared anywhere? I'd love to use it in my own fic if possible, with credit given!
Hello! So apparently it's not possible to make workskins public at this time, but I can give you the CSS and you can just paste it into a personal workskin yourself.
So far I've only made tags for SRS, NSH, FP, and LTTM. You can always just make your own for any other iterators if you need more.
CSS under the cut!
#workskin .broadcast {
margin-left: auto;
margin-right: auto;
background-color: rgba(0, 0, 0, 0.7);
font-family: times new roman;
color: #FFFFFF;
padding-top: 10px;
padding-bottom: 10px;
padding-left: 35px;
padding-right: 35px;
}
#workskin .SRS {
margin-left: auto;
margin-right: auto;
font-family: times new roman;
color: #ffbfbf;
}
#workskin .NSH {
margin-left: auto;
margin-right: auto;
font-family: times new roman;
color: #99cc99;
}
#workskin .LTTM {
margin-left: auto;
margin-right: auto;
font-family: times new roman;
color: #e5d999;
}
#workskin .FP {
margin-left: auto;
margin-right: auto;
font-family: times new roman;
color: #66d9bf;
}
#rain world#rain world fic#assembly#hm.. for some reason theres a lot of extra spaces in this css#i didn't put those in there#if they stop anything from working let me know and I'll edit this post#also let me know if you want an example of the css you use in the fic itself to use this stuff#it's kind of a pain in the arse i will warn you
25 notes
·
View notes
Note
Hi! 👋 Could you please tell me how to put a Scrollbox ontop of an image on Sentry? Thank You! :)

I position them until they look like they're on top of the image , but , the code for the an sntry i made for my bae is:
height: 120px; width: 155px; text-align: justify; position: relative; border-radius: 5px 5px 5px 5px; border: 2px solid #889cbd; z-index: 7; float: right; white-space: normal; padding: 5px; margins: 10px; overflow-y: auto; position: relative; z-index: 5; bottom: 400px; left: 3px; transform: rotate(-3deg);
you can adjust them however you want to :3


17 notes
·
View notes
Text
✦ QUESTION TIME! WHAT IS
THE ENGINEER?
❌👁️
<html>
<style>
body {
background-color: #000;
color: #fff;
font-family: 'Crimson Text', serif;
margin: 0;
padding: 0;
display: flex;
justify-content: center;
align-items: center;
height: 100vh;
}
.container {
display: flex;
flex-direction: column;
align-items: center;
justify-content: center;
width: 100%;
height: 100%;
background: url('https://source.unsplash.com/1600x900/?horror') no-repeat center center fixed;
background-size: cover;
}
.logo {
width: 200px;
height: 200px;
background-color: #fff;
border: 1px solid #000;
box-shadow: 0 0 10px rgba(255,255,255,0.5);
margin-bottom: 20px;
}
.logo-img {
width: 100%;
height: 100%;
2 notes
·
View notes
Note
hello! i'm using your 'page 3: encounter' and i was wondering if there's a way for the synopsis to have a shorter summary without it breaking the layout? i tried pasting in what i have for my wip, but it ended up moving the updates to be right next to the cover image :(
hello <3 i know you've already sorted it out, but i thought i should share it with my answer in case anyone else wants to fix it. i already fixed the code hosted on pastebin, and what i did was modify these properties in bold:
#entry .right { float: right; /*previously 'left'*/ padding: 0px 10px; line-height: 1.8; font-size: 12.5px; width: 600px; margin-bottom: 30px; } .updates { float: none; display: inline-block; /*previously 'block'*/ margin-top: 0px; width: 800px; margin-bottom:20px; }
i have no idea why i wrote float: left on a selector named 'right' lol
i'm still a beginner so i highly appreciate the feedback! i hope you enjoy the page, and if anything falls out of place again, feel free to send me another ask :)
2 notes
·
View notes
Text
In legal no-man’s land, refugees in Malaysia struggle to eat, pay rent
Kuala Lumpur, Malaysia – It is late afternoon in Kuala Lumpur and in the harsh heat, Zabi* concludes his third visit to the doctor in a month, still unsure of what is causing his excruciating stomach aches despite all his reports being normal so far.
He worries about paying for the doctor as, being a refugee, he does not have much money or any medical benefits.
.adtnl4-container { width: 100%; max-width: 100%; background-color: #34495e; border-radius: 10px; overflow: hidden; box-shadow: 0 10px 20px rgba(0, 0, 0, 0.2); margin: 20px auto; } .adtnl4-banner { width: 100%; max-height: 200px; overflow: hidden; } .adtnl4-banner img { width: 100%; height: auto; max-height: 200px; object-fit: cover; } .adtnl4-content { width: 100%; padding: 20px; box-sizing: border-box; text-align: left; font-family: 'Open Sans', sans-serif; color: #ecf0f1; background-color: #34495e; } .adtnl4-title a { font-size: 1.2em; font-weight: bold; margin-bottom: 10px; color: #fff; text-decoration: none; } .adtnl4-description { font-size: 1em; line-height: 1.6; color: #fff; margin-bottom: 15px; margin-top: 5px; } .adtnl4-learn-more-button { display: inline-block; padding: 10px 20px; font-size: 1em; font-weight: bold; text-decoration: none; background-color: #e74c3c; color: #fff; border-radius: 5px; transition: background-color 0.3s; } .adtnl4-learn-more-button:hover { background-color: #c0392b; } .adtnl4-marker a { font-size: 0.8em; color: #ccc; }
How to Get AdSense Approval Quickly a Personal Journey to Monetizing a Niche Blog
I will share my personal journey of getting AdSense approval quickly for my blog focused on the SME
Read Article
Ads by NSMEJ
When Zabi came from Afghanistan to Malaysia as a teenager five years ago, he had no choice but to fend for himself. His family had only enough money for one of them to flee.
“I know it’s illegal for a refugee to work in Malaysia. But I have no choice as an orphan, as I have no trace of my family at the moment. I work around 18 hours a day and I hardly get paid four ringgit ($0.88) an hour,” the 18-year-old told Al Jazeera.
Zabi is working as a housekeeper in a Malaysian-owned hotel in Kuala Lumpur but because he is a refugee and not officially allowed to work, he has no written contract.
He has had a series of other jobs – as a security guard, in restaurants and in customer service – and lives a precarious existence, struggling to make enough money to pay his 500 Malaysian ringgit ($106) monthly rent.
“After extremely exhausting long working days, Maggi instant noodles are something I eat most days,” he said.
Malaysia has no formal framework for refugees, which means they are left in a legal no-man’s land where they are vulnerable to exploitation by those who do employ them. Under Malaysian law, refugees are also no different to undocumented migrants who are often targeted in official crackdowns.
Asked about refugees at the United Nations last month, the Malaysian representative defended the government’s approach and indicated that there was no room for change.
“Who is the deserving refugee? Who is a deserving asylum seeker? Who is an economic migrant? Who is to determine them as such?” Foreign Affairs Ministry Deputy Secretary General (multilateral affairs) Bala Chandran Tharman told the Universal Periodic Review (UPR) in Geneva, according to the Malay Mail.
While Malaysia is a member of the UN, it has never signed the 1951 Refugee Convention and there are no laws (PDF) in place to recognise and provide for those fleeing persecution and conflict.
Refugees also have no right to work, attend school or access medical care.
Registration with the local office of the UN High Commissioner for Refugees (UNHCR) provides some measure of protection and support, including limited access to healthcare, education and other services provided by the UN and its partners.
“This is only an identity document and has no formal legal value in Malaysia,” the UNHCR website notes of the card given to all those registered with it.
In 2022, the Malaysian government said all asylum seekers and refugees would need to register under the government’s Tracking Refugees Information System (TRIS), which was launched in 2017.
The TRIS website talks about safety and the risk of social problems linked to the influx of refugees but suggests registration may allow cardholders to work in some, mostly unskilled, areas.
“The lack of legal protection forces refugees to work illegally, and most of the jobs that they find are 3D jobs, the ‘difficult, dangerous, and dirty’ kind of work that Malaysians try to avoid,” said Jana Stanfield, the co-founder of Together We Can Change the World and founder of the Refugee Film School in Kuala Lumpur.
Without legal protection and proper contracts, many do not receive Malaysia’s national minimum pay (introduced in May 2022) of 1,500 Malaysian ringgit ($329) per month or 7.21 Malaysian ringgit ($1.64) an hour.
Zabi, who spent five months learning English after arriving in Malaysia in 2018, says the boss at the security firm where he once worked had agreed to pay him about 1,000 Malaysian ringgit ($219) a month but never did.
Even now, he is forced to do overtime, which is unpaid, and work in other roles to meet his employer’s needs. He told Al Jazeera he has to agree to these conditions, having no alternative.
More than 70 percent of the 185,000 refugees in Malaysia registered with the refugee agency are of working age. According to information gathered from refugee communities, most make a living in restaurants, retail and other service jobs as well as agriculture and construction.
“It is a ‘win-win’ for Malaysia, as it would take into consideration both the humanitarian needs of refugees, whilst also benefiting the Malaysian economy as it recovers from the social and economic impact of the pandemic,” UNHCR spokeswoman Yante Ismail said in a statement to Al Jazeera about allowing the community to work legally.
Malaysia has allowed certain groups of refugees to join the workforce in the past.
In 2015, some Syrians were allowed to work and send their children to school under a scheme based on an initiative in the early 1990s for Bosnians fleeing the Balkan wars.
“Malaysia can allow refugees to exercise their right to work under an existing legal framework … and then this can be expanded to include education and healthcare,” said Mahi Ramakrishnan, an investigative filmmaker and activist based in Malaysia. “The question is whether the government has the political will to do so.”
In 2017, a pilot project allowed about 300 Rohingya refugees with UNHCR cards to work legally in the plantation and manufacturing sector, but was not adopted.
In October, the Human Resources Ministry said refugees might be allowed to work officially in the so-called “3D jobs” amid shortages of workers who are usually brought in through government-backed arrangements from countries such as Bangladesh and Indonesia. Those schemes are currently under review as Malaysian seeks to regularise its policies on foreign workers.
Ultimately, refugee advocacy groups say the government needs to take the lead on any policy change.
“To grant refugees the right to work is to ensure that they are able to have access to livelihood that is safe, decent and dignified,” Hui Ying Tham, the executive director at Asylum Access, told Al Jazeera. He stressed that the implementation of this “requires a multifaceted approach with the government leading, in consultation with refugee communities, the changes in laws, policies and attitudes to create a framework that recognises and supports the rights and potential of refugees.”
Tham added that work should also recognise the skills and experience of the individual refugees as it does with any other member of the workforce.
Abolfazly*, an Afghan refugee school teacher whose village was burned down by the Taliban, agreed.
“We had a life before taking refuge in another land,” he said. “We’re educated, we’re resourceful. Host countries like Malaysia can use us – not only in agriculture but in their socioeconomic development,” said the 28-year-old, who is working on finishing his PhD in law.
The UNHCR remains hopeful that there will eventually be a resolution, although the latest comments at the UPR suggest that might not happen soon.
For refugees like Zabi, that means continued struggle.
“I want to go to university. I love learning new languages,” he told Al Jazeera. “Right now, my life is all about eating, sleeping and working. I have no plans for the future because I know none of the plans will work. But I’ll still keep trying – like I always do.”
*Pseudonyms have been used to protect the refugees’ identity
.adtnl4-container { width: 100%; max-width: 100%; background-color: #34495e; border-radius: 10px; overflow: hidden; box-shadow: 0 10px 20px rgba(0, 0, 0, 0.2); margin: 20px auto; } .adtnl4-banner { width: 100%; max-height: 200px; overflow: hidden; } .adtnl4-banner img { width: 100%; height: auto; max-height: 200px; object-fit: cover; } .adtnl4-content { width: 100%; padding: 20px; box-sizing: border-box; text-align: left; font-family: 'Open Sans', sans-serif; color: #ecf0f1; background-color: #34495e; } .adtnl4-title a { font-size: 1.2em; font-weight: bold; margin-bottom: 10px; color: #fff; text-decoration: none; } .adtnl4-description { font-size: 1em; line-height: 1.6; color: #fff; margin-bottom: 15px; margin-top: 5px; } .adtnl4-learn-more-button { display: inline-block; padding: 10px 20px; font-size: 1em; font-weight: bold; text-decoration: none; background-color: #e74c3c; color: #fff; border-radius: 5px; transition: background-color 0.3s; } .adtnl4-learn-more-button:hover { background-color: #c0392b; } .adtnl4-marker a { font-size: 0.8em; color: #ccc; }
How to Get AdSense Approval Quickly a Personal Journey to Monetizing a Niche Blog
I will share my personal journey of getting AdSense approval quickly for my blog focused on the SME
Read Article
Ads by NSMEJ
2 notes
·
View notes
Text
#WMDEDGT am 5. Februar 2024
„Was machst du eigentlich den ganzen Tag?“ – kurz WMDEDGT – fragt Frau Brüllen immer am Monatsfünften. Es soll die alte Tradition des Tagebuchbloggens zumindest für einen Tag im Monat beleben. Im Blog von Frau Brüllen werden die Beiträge dann immer gesammelt. Hier ist der aktuelle Monat.
Es ist ein ganz normaler Montag.
[3:00] Ich bringe das große Kind zurück in ihr eigenes Bett. Sie war vor einer halben Stunde unter meine Decke gekrochen. Eigentlich will ich einfach nur schlafen, aber wir hatten vereinbart, dass sie mal wieder eine komplette Nacht in ihrem eigenen Bett verbringen soll. Konsequenz in der Erziehung: so wichtig. Ich beiße in den sauren Apfel und trage das Kleinkind ohne Gegenwehr hinüber. Dann bin ich erstmal wach.
[5:00] Nach dem nächsten Schlafzyklus klettert wieder eine Maus über mich drüber. Konsequenz in der Erziehung: so egal, wenn man einfach nur schlafen will.
[6:25] Fünf Minuten vor dem Wecker kann ich den kleinen Herrn nicht mehr ignorieren, der schon längst hellwach ist, seine Morgenmilch und Aufmerksamkeit möchte. Klein-Lea und ich stehen auf. Dann mache ich Morgendinge: Nasszelle, Brotboxen, frühstücken, Zähneputzen, Kinder einsammeln, ihnen die Zähne putzen, alle anziehen und für die Kita einpacken.
[8:30] Nachdem ich die Kinder abgeliefert habe, komme ich im Büro an. Etwas mehr als eine Stunde habe ich noch meine Ruhe, bevor die erste Kollegin kommt.
[10:30] Ab nun beginnt ein Meetingmarathon, der fast ohne Pausen bis zum Feierabend anhält.
[18:15] Ich fahre nach Hause. Dort erwartet mich eine Mutter, die auf dem Boden kriecht, um die Kinder zu belustigen, die freudvoll schreien. Wie schön, dass alle gut drauf sind. :)
[18:45] Mich hat außerdem ein voller Teller mit noch lauwarmen Nudeln erwartet. Ich aß sie und faltete noch schnell die Wäsche aus dem Korb, den ich aus dem Keller mitgebracht hatte. Nun bringe ich Klein-Lea ins Bett.
[19:30] Das Zubettbringen hat heute wieder mal ein wenig länger gedauert. Es gibt Schlimmeres, als Geschichten von Rabe Socke und Conni vorzulesen.
[20:00] Ich blogge noch eben (winke-winke!), dann schauen wir Tagesschau und ein Stückchen vom Dschungelcamp weiter. Wir sind schon bei Sonntag – vor einer Woche. Ein bisschen hintendran sind wir, also bitte nicht spoilern!
[22:00] Wir werden ins Bett gegangen sein.
Das Beitragsbild ist nicht ganz von heute, dafür von Klein-Lea. Sie hat mit meinem Handy ihr Frühstück fotografiert.
#mailpoet_form_1 .mailpoet_form font-family: "IBM Plex Serif" !important; #mailpoet_form_1 form margin-bottom: 0; font-family: "IBM Plex Serif" !important; #mailpoet_form_1 h1.mailpoet-heading margin: 0 0 20px; font-family: "IBM Plex Serif" !important; #mailpoet_form_1 p.mailpoet_form_paragraph.last margin-bottom: 5px; font-family: "IBM Plex Serif" !important; #mailpoet_form_1 .mailpoet_column_with_background padding: 10px; font-family: "IBM Plex Serif" !important; #mailpoet_form_1 .mailpoet_form_column:not(:first-child) margin-left: 20px; #mailpoet_form_1 .mailpoet_paragraph line-height: 20px; margin-bottom: 20px; font-family: "IBM Plex Serif" !important; #mailpoet_form_1 .mailpoet_segment_label, #mailpoet_form_1 .mailpoet_text_label, #mailpoet_form_1 .mailpoet_textarea_label, #mailpoet_form_1 .mailpoet_select_label, #mailpoet_form_1 .mailpoet_radio_label, #mailpoet_form_1 .mailpoet_checkbox_label, #mailpoet_form_1 .mailpoet_list_label, #mailpoet_form_1 .mailpoet_date_label display: block; font-weight: normal; font-family: "IBM Plex Serif" !important; #mailpoet_form_1 .mailpoet_text, #mailpoet_form_1 .mailpoet_textarea, #mailpoet_form_1 .mailpoet_select, #mailpoet_form_1 .mailpoet_date_month, #mailpoet_form_1 .mailpoet_date_day, #mailpoet_form_1 .mailpoet_date_year, #mailpoet_form_1 .mailpoet_date display: block; font-family: "IBM Plex Serif" !important; #mailpoet_form_1 .mailpoet_text, #mailpoet_form_1 .mailpoet_textarea width: 200px; font-family: "IBM Plex Serif" !important; #mailpoet_form_1 .mailpoet_checkbox font-family: "IBM Plex Serif" !important; #mailpoet_form_1 .mailpoet_submit font-family: "IBM Plex Serif" !important; #mailpoet_form_1 .mailpoet_divider font-family: "IBM Plex Serif" !important; #mailpoet_form_1 .mailpoet_message font-family: "IBM Plex Serif" !important; #mailpoet_form_1 .mailpoet_form_loading width: 30px; text-align: center; line-height: normal; font-family: "IBM Plex Serif" !important; #mailpoet_form_1 .mailpoet_form_loading > span width: 5px; height: 5px; background-color: #5b5b5b; font-family: "IBM Plex Serif" !important; #mailpoet_form_1 .mailpoet-has-font font-family: "IBM Plex Serif" !important; #mailpoet_form_1 .mailpoet-has-font a color: var(--primaer); #mailpoet_form_1border: 0px solid #f7f7f7;border-radius: 0px;background: #eff3fd;color: #313131;text-align: left;#mailpoet_form_1 form.mailpoet_form padding: 10px;#mailpoet_form_1width: 100%;#mailpoet_form_1 .mailpoet_message margin: 0; padding: 0 20px; #mailpoet_form_1 .mailpoet_validate_success color: #b455f2 #mailpoet_form_1 input.parsley-success color: #b455f2 #mailpoet_form_1 select.parsley-success color: #b455f2 #mailpoet_form_1 textarea.parsley-success color: #b455f2 #mailpoet_form_1 .mailpoet_validate_error color: #db5865 #mailpoet_form_1 input.parsley-error color: #db5865 #mailpoet_form_1 select.parsley-error color: #db5865 #mailpoet_form_1 textarea.textarea.parsley-error color: #db5865 #mailpoet_form_1 .parsley-errors-list color: #db5865 #mailpoet_form_1 .parsley-required color: #db5865 #mailpoet_form_1 .parsley-custom-error-message color: #db5865 #mailpoet_form_1 .mailpoet_paragraph.last margin-bottom: 0 @media (max-width: 500px) #mailpoet_form_1 background: #eff3fd; @media (min-width: 500px) #mailpoet_form_1 .last .mailpoet_paragraph:last-child margin-bottom: 0 @media (max-width: 500px) #mailpoet_form_1 .mailpoet_form_column:last-child .mailpoet_paragraph:last-child margin-bottom: 0
Bitte dieses Feld leer lassen
Erfahre zuerst, wenn ich was Neues geschrieben habe!
input[name="data[form_field_OTU0YmY4YTcxOWI1X2VtYWls]"]::placeholdercolor:#000000;opacity: 1;E-Mail-Adresse *
input[name="data[form_field_ZjEyNWRkZDQzYjdkX2ZpcnN0X25hbWU=]"]::placeholdercolor:#000000;opacity: 1;Vorname
input[name="data[form_field_ZGZiNjEzYTI0YmY4X2xhc3RfbmFtZQ==]"]::placeholdercolor:#000000;opacity: 1;Nachname
Ich sende keinen Spam! Erfahre mehr in meiner Datenschutzerklärung.
Nur noch ein Schritt! Bitte prüfe deinen Posteingang oder Spam-Ordner, um dein Abonnement zu bestätigen.
(Original unter: https://1ppm.de/2024/02/wmdedgt-februar-2024/)
2 notes
·
View notes
Text
In this ultimate guide, freelancers will learn how to pitch their ideas successfully to small and medium businesses, covering everything from crafting an executive summary to developing a winning marketing strategy. Master the art of pitching and secure lucrative contracts with this essential resource. Elevate Your Freelance Success Download our FREE checklist to master the art of pitching ideas to SMBs and unlock new opportunities in your freelance career! Download (PDF) #row-316077434 > .col > .col-inner { padding: 0px 10px 0px 10px; } #section_1270264039 { padding-top: 30px; padding-bottom: 30px; margin-bottom: 30px; background-color: rgb(40, 40, 40); } As a freelancer, one of your most essential tasks is to pitch your ideas to potential clients. Navigating the world of small and medium businesses can be challenging, but with the right approach, you can secure lucrative contracts and grow your freelance career. TL;DR? Get the summary: Tap me for the article summary For those short on time, here's a quick overview of the key takeaways from this guide: Develop a concise, impactful executive summary highlighting your main objectives and key selling points. Showcase your expertise, experience, and accomplishments in the business information section. Clearly outline SMART goals and objectives for your pitch. Conduct a thorough competition and SWOT analysis to understand the market landscape and your idea's potential. Identify your target market and create a customer journey map to improve the customer experience. Define your unique selling proposition (USP) and develop a cohesive brand identity. Select your target audience's most effective marketing channels and develop a comprehensive strategy. Establish key performance indicators (KPIs) to measure the success of your marketing efforts. Conclude your pitch with a strong summary and call to action. Tailoring your pitch to your target audience, clearly communicating your value proposition, and supporting your claims with evidence and examples are crucial for success. #section_288535827 { padding-top: 30px; padding-bottom: 30px; background-color: rgb(249, 254, 244); } #image_200227493 { width: 100%; } The 12-Step Blueprint for a Winning Freelancer's Pitch to SMBs This comprehensive guide will cover the essential components of a successful pitch, from developing a solid understanding of your target market to crafting the perfect marketing strategy. By following the tips and best practices outlined in this article, you'll be well on your way to making a lasting impression on prospective clients and winning their business. 1: Executive Summary An executive summary is a brief overview of your pitch that quickly communicates your goals, strategies, and expected outcomes. This section should be concise yet impactful, providing a snapshot of your proposal's most crucial aspects. To craft a compelling executive summary: Keep it brief (no more than 1-2 pages) Highlight your main objectives and key selling points Use clear, concise language and avoid jargon Tailor the tone to match your target audience #section_1340238136 { padding-top: 30px; padding-bottom: 30px; background-color: rgb(250, 239, 239); } 2: Business Information This section provides a brief background of your business, including your experience, skills, and any relevant accomplishments. Be sure to: Showcase your expertise and authority in your niche Highlight your most significant achievements or past successes Include any relevant certifications or industry affiliations Provide testimonials or case studies (if available) #section_1632365089 { padding-top: 30px; padding-bottom: 30px; background-color: rgb(252, 245, 233); } 3: Introduction to Your Goals Clearly outline the goals and objectives of your pitch, ensuring they are specific, measurable, achievable, relevant, and time-bound (SMART). In this section, you should: Define the problem you're solving or the opportunity you're seizing
Explain the benefits your idea will bring to the client's business Set realistic expectations and timeframes for achieving these goals #section_1663196460 { padding-top: 30px; padding-bottom: 30px; background-color: rgb(252, 251, 239); } 4: Competitive Analysis A thorough competitive analysis will help you understand the market landscape, identify your competitors' strengths and weaknesses, and pinpoint potential opportunities for your idea. To conduct a practical competitive analysis: Identify your main competitors and their market positioning Analyse their strengths, weaknesses, opportunities, and threats (SWOT) Determine how your idea differentiates from the competition #section_745870558 { padding-top: 30px; padding-bottom: 30px; background-color: rgb(243, 250, 235); } 5: SWOT Analysis Conduct a SWOT analysis to identify your idea's strengths, weaknesses, opportunities, and threats. This exercise will help you: Understand the current state of your vision and its potential Identify areas for improvement or potential challenges Uncover new opportunities to pursue #section_29633506 { padding-top: 30px; padding-bottom: 30px; background-color: rgb(241, 250, 242); } 6: Target Market Overview Identify and describe your target market, including demographics, psychographics, and other relevant characteristics. Understanding your target audience will help you: Tailor your pitch to their specific needs and preferences Develop a more focused and effective marketing strategy #section_1191737657 { padding-top: 30px; padding-bottom: 30px; background-color: rgb(237, 250, 247); } #image_354422902 { width: 100%; } 7: Customer Journey Map Create a customer journey map to visualise your target audience's steps when engaging with your product or service. This map should include touchpoints, pain points, and opportunities for improvement. It will help you: Identify gaps in your marketing and sales processes Enhance the overall customer experience #section_603488951 { padding-top: 30px; padding-bottom: 30px; background-color: rgb(237, 250, 250); } 8: Unique Selling Proposition (USP) Your USP is what sets your idea apart from the competition. To define your USP, consider the following: The specific problem your idea solves or needs it addresses The unique benefits it offers How it differentiates from other solutions in the market #section_1392738708 { padding-top: 30px; padding-bottom: 30px; background-color: rgb(239, 250, 254); } 9: Branding Develop a cohesive brand identity that reflects your business's values and appeals to your target audience. Consider elements such as: Logo and visual design The tone of voice and Messaging Brand personality and values #section_1084521185 { padding-top: 30px; padding-bottom: 30px; background-color: rgb(244, 244, 255); } 10: Marketing Channels Identify the most effective marketing channels for reaching your target audiences, such as social media, email marketing, content marketing, or paid advertising. In this section, you should: Research and select the most appropriate channels for your target market Develop a plan for each channel, including frequency, content, and targeting Explain how these channels will help achieve your overall goals #section_1823353540 { padding-top: 30px; padding-bottom: 30px; background-color: rgb(248, 239, 250); } 11: Measurements and KPIs Determine the key performance indicators (KPIs) you will use to measure the success of your marketing efforts. These should be closely tied to your overall goals and objectives. Examples of KPIs include: Website traffic Conversion rates Social media engagement Email open and click-through rates #section_2130715736 { padding-top: 30px; padding-bottom: 30px; background-color: rgb(255, 242, 245); } 12: Marketing Strategy and Tactics Develop a comprehensive marketing strategy that outlines your specific tactics to achieve your goals. This should include the following:
A detailed plan for each marketing channel A content calendar with topics and deadlines Clear responsibilities and roles for execution A budget for marketing efforts #section_1861180517 { padding-top: 30px; padding-bottom: 30px; background-color: rgb(250, 244, 241); } #image_1926674539 { width: 100%; } Conclusion Wrap up your proposal with a compelling conclusion reiterating your main points and emphasising your idea's value to the client's business. Be sure to: Summarise your goals, strategies, and expected outcomes Reinforce your USP and competitive advantage Express confidence in your ability to deliver results Include a call to action, such as scheduling a follow-up meeting or signing a contract By following the tips and best practices outlined in this guide, you'll be well-prepared to confidently pitch your idea to small and medium businesses. Remember to tailor your pitch to your target audience, clearly communicate your value proposition, and support your claims with evidence and examples. You can win over prospective clients and grow your freelance career with the right approach. Don't Miss Out on Your Next Big Break Get our essential checklist for freelancers and ensure your pitches to SMB clients stand out from the competition. Download now for FREE! Download (PDF) #row-731428055 > .col > .col-inner { padding: 0px 10px 0px 10px; } #section_1426411674 { padding-top: 30px; padding-bottom: 30px; margin-bottom: 30px; background-color: rgb(40, 40, 40); } This article was first published on AIO Spark: The Freelance Marketer's Guide to Pitching SMBs
2 notes
·
View notes
Photo

The Kingdom of Kush
Kush was a kingdom in northern Africa in the region corresponding to modern-day Sudan. The larger region around Kush (later referred to as Nubia) was inhabited c. 8,000 BCE but the Kingdom of Kush rose much later. The Kerma Culture, so named after the city of Kerma in the region, is attested as early as 2500 BCE and archaeological evidence from Sudan and Egypt show that Egyptians and the people of Kush region were in contact from the Early Dynastic Period in Egypt (c. 3150 - c. 2613 BCE) onwards. The later civilization defined as 'Kushite' probably evolved from this earlier culture but was heavily influenced by the Egyptians.
While the history of the overall country is quite ancient, the Kingdom of Kush flourished between c. 1069 BCE and 350 CE. The New Kingdom of Egypt (c. 1570-1069 BCE) was in the final stages of decline c. 1069 BCE, which empowered the Kushite city-state of Napata. The Kushites no longer had to worry about incursions into their territory by Egypt because Egypt now had enough trouble managing itself. They founded the Kingdom of Kush with Napata as its capital, and Kush became the power in the region while Egypt floundered.
Kushite kings became the pharaohs of Egypt's 25th Dynasty and Kushite princesses dominated the political landscape of Thebes in the position of God's Wife of Amun. The Kushite king Kashta (c. 750 BCE) was the first to establish himself on the Egyptian throne and appointed his daughter, Amenirdis I, the first Kushite God's Wife of Amun. He was followed by other great Kushite kings who reigned until the Assyrian invasion of Egypt by Ashurbanipal in 666 BCE.
In c. 590 BCE Napata was sacked by the Egyptian pharaoh Psammeticus II (595-589 BCE) and the capital of Kush was moved to Meroe. The Kingdom of Kush continued on with Meroe as its capital until an invasion by the Aksumites c. 330 CE which destroyed the city and toppled the kingdom. Overuse of the land, however, had already depleted the resources of Kush and the cities would most likely have been abandoned even without the Aksumite invasion. Following this event, Meroe and the dwindling Kingdom of Kush survived another 20 years before its end c. 350 CE.
Sponsorship Message
This article was sponsored by Total War™
Total War: ROME II – Desert Kingdoms is a Culture Pack DLC released on March 8th, 2018. Pre-order now to get 10% off. Full faction details available on Steam. Learn More
.sponsor.ca h3 { text-transform: none; margin-top: 0px; margin-bottom: 15px; font-family: "Libre Baskerville", "Palatino Linotype", "Book Antiqua", Palatino, serif; } .sponsor.ca .ca_logo { width: 100px !important; height: 46px; float: right; box-shadow: none; margin: 0; } .sponsor_message { margin-left: 280px; font-family: Karla, Arial, Helvetica, sans-serif; line-height: 140%; } .sponsor.ca { padding: 10px 0px 25px 0px; margin: 25px 0px; border-top: 1px dotted #dadada; border-bottom: 1px dotted #dadada; } .sponsor_message .big_red_button { margin-top: 13px; } .sponsor.ca .key_art { margin-top: 0px; margin-bottom: 10px; width: 260px; height: auto; float: left; } .sponsor h4 { font-weight: normal; text-transform: uppercase; color: silver; margin-bottom: 10px; margin-top: 0px; font-family: Karla,Arial,Helvetica,sans-serif; font-size: 13px; padding: 0; } @media (max-width: 1199px) { .sponsor.ca .key_art { float: none; width: 100%; } .sponsor.ca .sponsor_message { margin-left: 0px; } .sponsor.ca h3 { margin-top: 20px; margin-bottom: 10px; } } @media (max-width: 767px) { }
Continue reading...
27 notes
·
View notes
Text
Grow Mallow Plant With Expert Advice

Have you ever wanted a lively, vibrant garden to spruce up your yard and make your outdoor space complete? Few plants provide the splash of color and unique texture that mallow plants do. Dubbed as “malva” by ancient Greeks, they are known for their velvety flowers, leafy foliage, and delicious tasting fruit. Now, with the experts’ advice, you can easily learn how to grow mallow plants and add a splash of eye-catching beauty into your garden! Grow Mallow Plant With Expert Advice body { font-family: Arial, sans-serif; line-height: 1.6; margin: 0; padding: 20px; } h2 { font-size: 24px; margin-bottom: 10px; } h3 { font-size: 20px; margin-bottom: 5px; } p { font-size: 16px; margin-bottom: 10px; } ul { list-style-type: disc; margin-left: 20px; margin-bottom: 10px; } li { margin-bottom: 5px; } blockquote { margin: 0; padding: 10px; background-color: #f9f9f9; border-left: 4px solid #ccc; }
Grow Mallow Plant With Expert Advice
Have you ever wished for a charming plant that not only adds beauty to your garden but also offers a range of medicinal benefits? Well then, the Mallow plant might just be your new horticultural best friend! This delightful perennial herbaceous plant is often overlooked, but today, we're here to give it the recognition it deserves.
The Marvelous Mallow
With its vibrant flowers and lush foliage, the Mallow plant (Malva spp.) is a sight to behold. This hardy plant comes in various species, including the Common Mallow (Malva sylvestris) and the Marsh Mallow (Althaea officinalis), both of which have been traditionally used for medicinal purposes.
"Growing a Mallow plant is like having a loyal friend who is both beautiful and useful."
So, why should you consider growing a Mallow plant in your garden? Well, besides its aesthetic appeal, the Mallow plant has a multitude of benefits. From soothing irritated skin to providing relief for digestive issues, this plant is truly a hidden gem in the world of herbs.
Planting and Care Tips
If you're ready to embark on a journey of growing your own Mallow plant, here are some expert tips to ensure success:
Choose the right location: Mallow plants thrive in well-drained soil and prefer full sun or partial shade.
Sow the seeds: Start by sowing the seeds directly into the soil after the last frost date in your area. Make sure to space them about 12-18 inches apart.
Watering: Keep the soil moist but not waterlogged. Avoid overwatering as it can lead to root rot.
Fertilization: Apply a balanced organic fertilizer during the growing season to promote healthy growth.
Pruning: Regularly prune your Mallow plant to encourage bushier growth and remove any dead or diseased parts.
Medicinal Uses of Mallow
Now, let's dive into the fascinating world of Mallow's medicinal properties:
Soothing Skin Salve: The leaves and flowers of the Mallow plant can be used to create a soothing salve for skin irritations, burns, and insect bites. Simply crush the leaves and mix them with a carrier oil like coconut oil.
Respiratory Relief: Mallow has natural expectorant properties, making it a great herb for relieving coughs, colds, and sore throats. Prepare a herbal tea by steeping the dried leaves in hot water for 10-15 minutes.
Digestive Aid: Mallow leaves are known for their mucilage content, which helps soothe and protect the digestive tract. Prepare an infusion by pouring boiling water over the dried leaves and let it steep for 15-20 minutes.
A Plant Worth Cultivating
There you have it! The Mallow plant is not only a beautiful addition to any garden but also a valuable herbal remedy waiting to be explored. Its versatile nature and numerous health benefits make it a plant worth cultivating.
So, why not give this charming plant a chance to shine in your garden? Not only will it provide you with a sense of accomplishment, but it will also be your very own natural pharmacy right outside your doorstep.
Remember, gardening is a delightful journey of trial and error, so don't be afraid to experiment and learn from your plants. Happy gardening!
Disclaimer: The information provided in this article is for educational purposes only and does not replace professional medical advice. Please consult with a healthcare professional before using any herbal remedies. Learn more about gardening with Taim.io!
2 notes
·
View notes
Text
One-Click Document Output in Dynamics 365
D365 Docs body { font-family: ‘Segoe UI’, Tahoma, Geneva, Verdana, sans-serif; margin: 0; padding: 0; background: #f4f7fa; color: #333; } header { background: #0078d4; color: white; padding: 2rem; text-align: center; } .container { padding: 2rem; max-width: 1200px; margin: auto; } .feature { background: white; border-radius: 10px; padding: 1.5rem; margin-bottom: 1.5rem; box-shadow: 0 2px 6px…
0 notes