#quick practice with some new color and texturing techniques
Explore tagged Tumblr posts
Visit Tumblr Blog
Explore Tumblr blogs with no restrictions, modern design and the best experience.
Last Seen Tumblr Blogs


Fun Fact
70% of Tumblr users say the Dashboard is their favorite place to spend time online.
Text

Color practice
#quick practice with some new color and texturing techniques#ngl I really like how this turned out even though it barely took me any time at all#my art <3#artists on tumblr#art#jason todd#jason todd fanart#bruce wayne#bruce wayne fanart#Batman#batman fanart#batfam#batfamily#dc robin#jaybin#robin#dc comics#detective comics#dc#I love how Jason turned out in this#the blood n stuff is just ugh#love it
129 notes
·
View notes
Text
Top Tips for Finding the Perfect Haircut in Medford
Medford is a city that effortlessly blends scenic charm with urban flair. It’s also home to a thriving beauty scene, offering some of the finest salons and most talented hairstylists in the region. Whether you’re a local looking to switch up your look or a visitor in need of a quick refresh, Medford has a wide range of haircut options to suit your style and budget.
Why Choose Medford for Your Next Haircut?
Medford has quickly become a go-to destination for hair and beauty services. With an impressive mix of upscale salons, budget-friendly options, and highly skilled stylists, the city caters to every hair need. Medford’s hairstylists are known for their versatility, seamlessly creating both trend-forward cuts and timeless styles that align with each client’s personality and preferences.

How to Choose the Right Salon in Medford
With so many salons to choose from, finding the perfect one can feel overwhelming. Here's a quick guide to help you make the right choice:
Upscale Salons If you’re looking for a luxurious, full-service experience, Medford’s high-end salons are the place to be. Enjoy tailored consultations, premium treatments, and expert styling in a relaxing atmosphere.
Affordable Options On a budget? No problem. Medford has a variety of salons that offer stylish haircuts at reasonable prices. These salons deliver efficient service without compromising on results.
Specialty Salons Have specific hair needs such as curly hair care, color services, or precision cutting? Medford is home to specialty salons with stylists who are trained in handling various hair textures and techniques, ensuring you get the perfect look.
Tips for Getting the Best Haircut
To make the most of your haircut experience in Medford, consider the following tips:
Bring Inspiration Show your stylist photos from Instagram or magazines to communicate your vision clearly. Visual references help align expectations and ensure your desired outcome.
Think About Maintenance Consider how much time and effort you’re willing to spend on upkeep. Styles like layered cuts or textured bobs may require less maintenance, while others might need more regular styling.
Trust the Experts Medford stylists are experienced professionals. If you’re uncertain about what works best for your face shape or hair type, ask for their advice—they’re happy to guide you toward a flattering and practical style.
Book in Advance Popular salons tend to fill up quickly, especially on weekends. To secure your spot, schedule appointments ahead of time. Many salons now offer online booking for added convenience.
Final Thoughts
Whether you’re looking for a bold new style or just a simple trim, Medford has a salon that’s right for you. One standout option is Revive By Tara, a highly recommended salon known for its personalized approach and professional service. Next time you’re ready for a stylish haircut in Medford, let us help you look and feel your best—with a cut that’s tailored just for you.
0 notes
Text
2025’s Game-Changing Embroidery Trends & How To Future-Proof Your Machines For Maximum Impact
The world of embroidery is changing fast, and 2025 is set to bring exciting new trends. Whether you run a small embroidery shop or a large-scale embroidery business, staying updated is key to keeping customers happy and staying competitive.
1. Sustainable Embroidery Practices
More customers care about sustainability, and embroidery is no exception. Businesses are switching to greener materials and processes to reduce waste and appeal to eco-conscious buyers.
Natural and recycled threads—organic cotton, bamboo, and recycled polyester—are becoming popular choices.
Low-waste techniques—Smart embroidery machines now help reduce excess thread and fabric waste.
Energy-efficient upgrades—Newer machines use less power, cutting costs and environmental impact.
What You Should Do: If you’re still using older machines, consider upgrading to models that support sustainable threads and have thread-saving features.
2. Custom Designs Are in High Demand
People love personalized items, whether it’s a name on a jacket or a custom logo for a business. Fast, high-quality customization is a must.
Quick turnaround times—Customers expect fast service, so speed matters.
Easy design software—User-friendly programs help create unique patterns quickly.
What You Should Do: Look for embroidery machines with multi-needle setups and software that lets you easily upload and adjust designs.
3. 3D Embroidery Adds a Bold Touch
3D puff embroidery isn’t going anywhere. It’s perfect for making logos and designs stand out, especially in hats, jackets, and sportswear.
Foam-backed stitching—Creates a raised, textured effect.
Mixed materials—combining 3D embroidery with beads or sequins for extra flair.
What You Should Do: Make sure your machine can handle thicker materials and has adjustable settings for different fabric layers.
4. Smarter Machines with IoT Features
Technology is making embroidery easier than ever. New embroidery machines come with smart features that save time and reduce errors.
Remote monitoring—Check machine status from your phone.
Automated thread changes—no more manual switching between colors.
Self-diagnosis—Machines can detect and alert you to problems before they cause downtime.
What You Should Do: If you run a large-scale embroidery business, investing in IoT-enabled machines can boost productivity and reduce maintenance headaches.
5. Metallic and Glow-in-the-Dark Threads for Eye-Catching Designs
Specialty threads are trending, especially in fashion and promotional products.
Shiny metallic threads—great for luxury branding.
Glow-in-the-dark effects— Perfect for safety gear or fun nighttime apparel.
What You Should Do: Some specialty threads can be tricky to work with. Choose machines with strong needles and adjustable tension to prevent breaks.
6. Bigger Projects Need Multi-Head Machines
If you handle bulk orders, efficiency is everything. Multi-head embroidery machines let you stitch multiple items at once, saving time and labor.
12+ needles—Switch colors without stopping.
Large hoops—Handle bigger designs easily.
What You Should Do: If you’re scaling up, industrial multi-head machines are worth the investment.
7. Vintage Styles Are Making a Comeback
Retro fonts, classic floral patterns, and distressed embroidery are back in style.
Satin stitch elegance—a timeless look for logos and monograms.
Faded, vintage effects—give a worn-in, nostalgic feel.
What You Should Do: Machines with precise stitch control help achieve clean, consistent vintage looks.
8. Augmented Reality (AR) Lets Customers Preview Designs
Some businesses now use AR so customers can see how an embroidery design will look before ordering.
Virtual try-ons—Reduce returns and increase satisfaction.
Interactive previews—Help clients visualize the final product.
What You Should Do: If you offer custom work, consider software that integrates AR for a better customer experience.
Final Thoughts
2025 combines old-school methods with new tech. From eco-friendly fabrics to clever machines and eye-catching styles, getting ahead means jumping on board.
If your embroidery gear is behind the times, it's time to get new stuff. When you embrace these new trends, you'll pull in more customers and edge out your rivals.
At R3V ENTERPRISES, we get what's changing in the embroidery world. We sell top-notch embroidery machines and offer expert help with sales, upkeep, fixes, and tune-ups for both small and large embroidery shops. If you want to upgrade your gear or keep your current machines humming along, we have got your back. Want to sew your way to the top in 2025? Reach out to R3V ENTERPRISES today, and let's push your embroidery business to tomorrow!

1 note
·
View note
Text
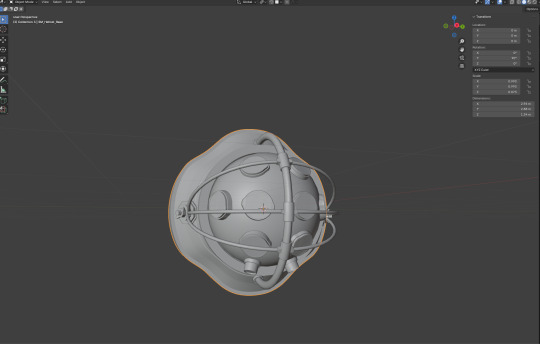
Development Blog: Timeless Epoch
Blog #15 – Finishing the Substance Painter Tutorials
Wrapping Up the Tutorial Series
youtube
As part of my commitment to improving my texturing skills, I recently completed the “Substance Painter 2021 Getting Started” tutorial series on YouTube. The course walked me through the full process of texturing a sci-fi robot model—starting from the basics and gradually layering in more advanced features.
While the course content was structured for beginners, it provided a wealth of practical techniques that directly improved my day-to-day workflow in Adobe Substance 3D Painter.
What I Learned


Over the course of the tutorials, I picked up numerous tips and tricks that I’ve already begun to integrate into my Timeless Epoch workflow:
Quick Texture Application: How to apply and fine-tune materials rapidly while maintaining control over detail and variation.
Vertex Painting Use Cases: Understanding how vertex painting can be used in combination with masks to introduce unique surface wear or color variations.
Decals System: Gained a new appreciation for the decal feature in Painter, which allows for non-destructive placement of logos, damage, text, and dirt.
Normal Map Exploration: I took a deeper dive into how normal maps affect surface detail and how they can be used to fake depth and complexity without increasing geometry.
These aren’t just flashy features—they’re workflow enhancers that make a real difference when working with modular assets and large environment kits.
My Own Spin: Dark Angels Repaint

Once the course was complete, I retextured the robot from scratch, this time applying my own creative spin using the Dark Angels color scheme from Warhammer 40K.
The result was a satisfying exercise in artistic direction, as I explored how to balance grim, battle-worn surfaces with a cleaner, ceremonial aesthetic. It helped reinforce everything I’d just learned, but also challenged me to push further with custom mask creation, smart material blending, and stylized detailing.
A Bioshock Detour That Didn’t Happen (Yet)


Originally, I had planned to texture a Bioshock-style helmet that I previously modeled as an additional exercise. But after some thought, I’ve decided to keep it as a separate project—one that I can polish and present independently, rather than squeezing it into the Timeless Epoch workflow.
This decision helps keep my current focus sharp and dedicated to the needs of this project, especially with modular asset creation and PCG design just around the corner.
What’s Next: Adobe Substance 3D Designer
With this part of my learning complete, I’m now setting my sights on Adobe Substance 3D Designer. The ability to create materials from scratch is an essential skill for any environment artist—and for the kind of architectural detail and stylization I want to achieve, procedural texture creation will play a major role.
This next step will complement my work in Painter and help me push even closer toward the visual targets I’ve set for Timeless Epoch.
Resources:
Adobe Substance 3D (2024). Adobe Substance 3D Designer for Beginners | Course Overview | Adobe Substance 3D. [online] YouTube. Available at: https://www.youtube.com/watch?v=At3FoFcuN6k&list=PLB0wXHrWAmCxBw92VSRjqsbqYXgkF8puC
ArtStation. (2025). A Plague Tale: Requiem - Chapter III, Olivier Cannone. [online] Available at: https://www.artstation.com/artwork/4XKW5Y [Accessed 23 Apr. 2025].
ArtStation. (2025). A Plague Tale: Requiem – Concept arts part 2, Tom Hisbergue. [online] Available at: https://www.artstation.com/artwork/140zlZ [Accessed 23 Apr. 2025].
ArtStation. (2025). Frostpunk 2: Environment Concept Arts, ZooWe (Tsu-Wei) Chen. [online] Available at: https://www.artstation.com/artwork/3EeBgo [Accessed 23 Apr. 2025].
ArtStation. (2025). Isaac Oster. [online] Available at: https://www.artstation.com/isaacoster [Accessed 23 Apr. 2025].
ArtStation. (2025). Jef Simons. [online] Available at: https://www.artstation.com/jef_simons [Accessed 23 Apr. 2025].
ArtStation. (2025). joannie leblanc. [online] Available at: https://www.artstation.com/joannie [Accessed 23 Apr. 2025].
ArtStation. (2025). Michael Chae. [online] Available at: https://www.artstation.com/michaelchae [Accessed 23 Apr. 2025].
Artstation.com. (2025). Page Restricted. [online] Available at: https://www.artstation.com/tonch-la-gonch [Accessed 23 Apr. 2025].
ArtStation. (2025). Shinta Lyu. [online] Available at: https://www.artstation.com/kiritsugu [Accessed 23 Apr. 2025].
ArtStation. (2025). Tanguy Talbert. [online] Available at: https://www.artstation.com/gaxxx [Accessed 23 Apr. 2025].
ArtStation. (2025). TRACE studio. [online] Available at: https://www.artstation.com/trace_studio [Accessed 23 Apr. 2025].
ArtStation. (2025). V Rising - Environment Props, Linn Wilhelmsson. [online] Available at: https://www.artstation.com/artwork/rlDqVO [Accessed 23 Apr. 2025].
baldursgate3.game. (n.d.). Baldur’s Gate 3. [online] Available at: https://baldursgate3.game
Epic Games (2024). Procedural Content Generation Overview | Unreal Engine 5.5 Documentation | Epic Developer Community. [online] Epic Games Developer. Available at: https://dev.epicgames.com/documentation/en-us/unreal-engine/procedural-content-generation-overview
OpenAI (2025). ChatGPT. [online] chatgpt.com. Available at: https://chatgpt.com.
Procedural Minds - YouTube. Creating Procedural Content. [online] Available at: https://www.youtube.com/@Procedural_Minds
Stuart, K. (2022). A beginner’s guide to Elden Ring: what it is and why you should play it. The Guardian. [online] 2 Mar. Available at: https://www.theguardian.com/games/2022/mar/02/elden-ring-beginners-guide-open-world-adventure
Substance Painter 2021. Getting Started - Course Introduction. [online] Available at: https://www.youtube.com/watch?v=-ZbmRsOnApk&list=PLB0wXHrWAmCwnqWfKdGEmbtSKN2EzvLrY
UNF Games (2024). Creating a village using Procedural Generation PCG in Unreal Engine 5 - Beginner Tutorial. [online] YouTube. Available at: https://www.youtube.com/watch?v=E5tsS-5sYYo [Accessed 23 Dec. Mar]
www.focus-entmt.com. (n.d.). A Plague Tale: Requiem - Focus Entertainment. [online] Available at: https://www.focus-entmt.com/en/games/a-plague-tale-requiem
War:, T. (2022). Total War: WARHAMMER III - Home. [online] Totalwar.com. Available at: https://warhammer3.totalwar.com [Accessed 23 Apr. 2025].
0 notes
Text
Mastering the Art of Fashion Illustration: A Beginner’s Guide

Understanding Fashion Illustration
Fashion illustration is the artistic representation of clothing designs, capturing the essence of style, movement, and texture. It serves as a bridge between a designer’s vision and the final garment, helping bring ideas to life before production begins. Mastering this art requires a keen eye for detail, creativity, and an understanding of fashion trends.
Essential Tools and Materials
A good fashion illustration starts with the right tools. Traditional methods involve using pencils, markers, watercolors, and ink, while modern illustrators often prefer digital tools such as graphic tablets and illustration software. Choosing the right materials enhances the precision and vibrancy of your sketches, allowing for greater expression and refinement.
Developing Basic Sketching Skills
Before diving into detailed illustrations, it is essential to master basic sketching techniques. Understanding body proportions, movement, and balance is key to creating realistic and stylish figures. Practicing quick gesture drawings helps in capturing poses and fluidity, making sketches more dynamic and lifelike. Observing real-life models and analyzing fashion photography also contribute to improving sketching skills.
Understanding Fashion Proportions
Fashion illustration differs from realistic figure drawing, as proportions are often exaggerated to emphasize style and elegance. The typical fashion figure is elongated, with a heightened focus on the legs and torso. Learning these proportions helps in creating visually appealing illustrations that highlight the design details effectively.
Experimenting with Different Styles
Fashion illustration is not limited to a single style. Some artists prefer minimalistic sketches with clean lines, while others opt for highly detailed and textured artworks. Experimenting with different approaches allows illustrators to develop their unique artistic identity. Exploring various mediums, from watercolor washes to digital rendering, helps in finding the most comfortable and effective style.
Bringing Illustrations to Life with Colors and Textures
Color theory plays a crucial role in fashion illustration, as it conveys mood, season, and material quality. Mastering shading techniques helps in depicting different fabric textures such as silk, denim, and wool. Adding shadows and highlights enhances the realism of the illustration, making designs look more three-dimensional and lifelike.
The Importance of Fashion Illustration in the Industry
Fashion illustration is not just an artistic skill but also an essential tool in the fashion industry. Designers use illustrations to communicate their ideas with clients, manufacturers, and stylists. Editorial illustrations in magazines and advertisements showcase trends and inspire audiences. As technology advances, digital fashion illustration is gaining popularity, enabling designers to create and modify designs with ease.
Learning from the Masters
Studying the works of legendary fashion illustrators provides valuable insights into different techniques and artistic styles. Exploring the creations of pioneers such as René Gruau, Antonio Lopez, and David Downton helps in understanding the evolution of fashion illustration over the decades. Observing contemporary illustrators on social media platforms also offers inspiration and new perspectives.
How to Start Your Journey in Fashion Illustration
Developing a daily sketching routine helps in honing skills and building confidence. Seeking feedback from mentors and peers allows for improvement and refinement. Enrolling in the fashion design courses in Chandigarh or fashion illustration courses provides structured learning and exposure to industry techniques. With practice, patience, and passion, anyone can master the art of fashion illustration and carve a niche in the fashion world.
#iifd#education#careers#fashion design courses#fashion designing#interior design#fashion design#iifd chandigarh#fashion design colleges
0 notes
Text
5 Quick Punch Needle Projects for the Weekend
Are you looking for a punch needle project for a fun weekend? You’ve come to the right place. We’ve got some interesting punch needle projects that you can complete in a weekend. The punch needle art is a fantastic way to create beautiful textured designs. You can work on a coaster, or small rug or add textures to a fabric with minimal time investment. In this blog, we’ll walk you through some easy and quick patterns for rug hooking punch needle projects.
Getting Started with Punch Needle Projects for the Weekend
Whether you are new to the craft or have the experience of years, punch needle projects require minimal tools and techniques. Here’s what you’ll need to collect before diving into these weekend-friendly projects.
Punch Needle Tool – Punch needle tools are used for punch needle rug hooking. There are multiple sizes available according to the yarn weight and the texture you would like to create. Choosing The Oxford Punch Needle is a good choice. The ergonomic tools ensure smooth stitching with electro-polished stainless steel needle tips with laser-etched sizes and ergonomic wood handles in natural birchwood and colorful Symfonie wood. Available in regular point and fine point in sizes #8 Fine (½" / 1.27cm Loop), #9 Fine (⅜" / 0.95cm Loop), #10 Fine (¼" / 0.635cm Loop), #13 Fine (³⁄₁₆" / 0.48cm loop) and #14 Fine (⅛” / 0.3175cm tall loop). Choose the appropriate size according to the texture you want to create.
Monk’s Cloth – The foundation of the punch needle rug yarn projects, it is tightly woven for smooth stitching. You can choose precuts and yardage according to your need.
Rug Yarn – Explore the Violet Jane collection, for durability and texture. The 100% wool yarn hand-dyed in solid and variegated shades are variable in rug yarn and fine yarn for all your punch needle projects.
Frame or Hoop – A handy punch needle craft accessory that keeps your fabric taut while working.
Scissors and Marker Pens – Essential for tracing and trimming your design.
Now that you have gathered all supplies, let’s explore five fun and easy punch needle projects! You can get started with free rug hooking patterns or explore the Oxford Company kits that have everything you need in one place.
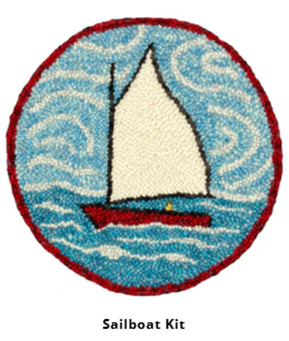
Sailboat Kit
View the Kit
Indulge in the coastal vibes with the Sailboat Kit. The perfect weekend project is a great choice for beginners. The kit includes a pre-printed pattern, Monk’s cloth, and the right yarn for rugs. Get ready to bring your nautical scene to life. Use the #10 regular Oxford Punch Needle to add texture and depth to the waves and sails, creating a striking decorative piece for your home. Make it as a chairpad, wall hanging, table decoration, or even a pillow cover.
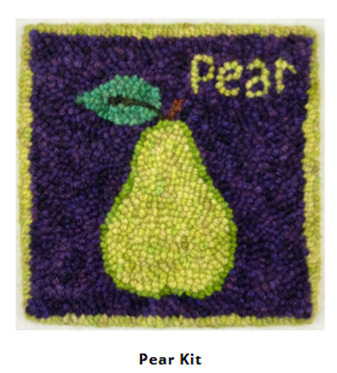
Pear Kit
View the Kit
Want to make something fresh and tempting? The Pear Kit offers a delightful fruity 8" x 8" design, perfect for kitchen decor, pillow cover, or chairpad. Get the right rug yarn in shades to cover the detailing, curved lines and shading and the pattern printed on a 24" x 24" 100% cotton Monk's Cloth. A #10 regular Oxford Punch Needle you can have the tropical delight in just a weekend.
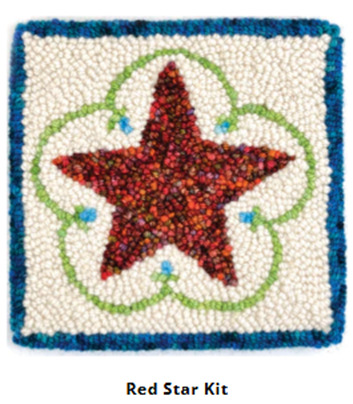
Red Star Kit
View the Kit
A beginner-friendly punch needle project that allows you practice all skills, the Red Star Kit is ideal for holiday decor or year-round display. Whether you use this as a festive accent or a cozy winter decoration, the deep red tones and symmetrical design make it a striking addition to any space. This also make a great last-minute handmade gift. The kit comes with the rug yarn in shades needed for the design with a #10 regular Oxford Punch Needle for smooth crafting.
Heart Kit (Red)
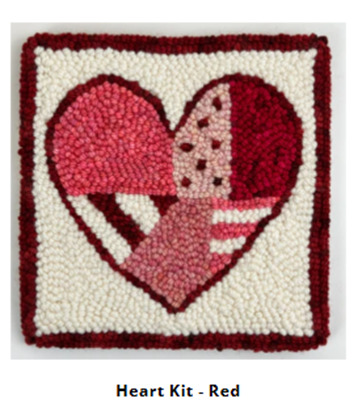
View the Kit
If you’re searching for a heartfelt craft, the Heart Kit (Red) is an adorable way to express love through your creativity. This easy-to-follow project is perfect for birthdays, anniversaries, or as a heartfelt gift for a special day. A perfect kit for beginners, this project allows to explore new techniques with a a #10 regular Oxford Punch Needle.
5. Ginkgo Kit

View the Kit
For the nature lovers, the Ginkgo Kit is a timeless botanical design is perfect for creating a zen-like atmosphere in your home. The organic shapes and delicate curves make this a meditative and enjoyable punch needle project. Be it a wall-hanging, pillow cover, table decoration or anything else, the pattern printed 24" x 24" 100% cotton Monk's Cloth is your canvas.
Punch needle rug hooking projects are a fantastic way to have fun while explore your creativity with creating something meaningful. So, are you ready to get started? Pick your favorite punch needle kit and enjoy a weekend of crafting magic!
#punch needle#craft ideas#diy craft#hand crafted#art and craft#rug yarn#monks cloth#punch needle tools#punch needle yarn
0 notes
Text
Simple handicraft ideas to unleash your creativity .
Crafting is more than just a fun pastime; its a great way to express your creativity, relieve stress, and even create meaningful gifts. Whether you are a seasoned crafter or a complete beginner, there are always something new and exciting to try. If you are looking to unleash your inner artist, here are some simple handicraft ideas that can inspire you to get started.
1. Paper Maccha Art
Paper maccha is a timeless craft that allows you to create anything from sculptures to decorative bowls. All you need is newspaper, flour, and water to create the paste. By layering the paper and letting it dry, you can mold it into various shapes. Once dry, you can paint and decorate your creations to add personality. This craft is perfect for experimenting with different textures and designs, and the possibilities are endless!
2. Macrama Wall Hangings
Macrame, the art of knotting cords, has made a huge comeback. It’s a relaxing and meditative craft that allows you to create stunning wall hangings, plant hangers, or even table runners. All you need is some rope or string, and a few basic knots to get started. Whether you prefer a minimalist design or something more intricate, macrama offers the perfect outlet for expressing creativity with texture and pattern.
3. Hand-Painted Rocks
If you’re looking for a quick and easy way to create something beautiful, hand-painted rocks might be the perfect choice. Find smooth, clean stones and let your imagination guide you. You can paint flowers, animals, or abstract designs on the rocks and even turn them into little paperweights or garden decorations. This is a great way to tap into your creativity and leave little bits of joy around your home or community.
4. DIY Candle Making
Candle making is both fun and practical. With just a few suppliesa wax, a wick, fragrance oils, and moldsa ”you can create your own beautiful, scented candles. Experiment with different colors, shapes, and scents to personalize your candles. Not only do they make great gifts, but they also add a cozy and inviting atmosphere to your home.
5. Upcycled Fabric Crafts
Before throwing away that old shirt or pair of jeans, consider turning them into something new! Upcycling old fabric is a wonderful way to create unique accessories like bags, pillows, or even decorative patches. With a little bit of sewing or even no-sew techniques, you can repurpose old clothing into something new and stylish. This is not only a great way to create but also an eco-friendly approach to crafting.
0 notes
Text
Orlando’s Guide to Resurfacing Your Concrete Pool Deck with Style
Your pool deck is the focal point of your outdoor oasis, and in Orlando, where the sunshine is abundant and pool parties are a year-round affair, it's crucial to keep it in top shape. Over time, however, exposure to the sun, moisture, pool chemicals, and constant foot traffic can take a toll on your concrete pool deck, leaving it cracked, stained, and faded. Fortunately, resurfacing offers a practical and stylish solution to breathe new life into your outdoor space without the need for a full replacement.
Whether you’re looking to enhance the aesthetic appeal of your poolside or increase its durability and safety, resurfacing your concrete pool deck can offer a range of benefits, including design versatility, cost-effectiveness, and longevity. In this guide, we’ll explore the process of resurface concrete pool deck Orlando, FL with style and provide tips on choosing the perfect materials, finishes, and design options for your outdoor retreat.
Why Resurface Your Concrete Pool Deck?
Before we dive into the specifics of how to resurface your pool deck with style, let's take a moment to understand why resurfacing is a great choice for Orlando homeowners:
Aesthetic Appeal: Over time, concrete pool decks can become worn and unattractive due to exposure to the elements. Resurfacing offers an opportunity to refresh your pool area with new colors, textures, and finishes.
Cost-Effective: Rather than tearing out the old concrete and rebuilding, resurfacing is a much more affordable option that can still provide stunning results.
Increased Safety: Resurfacing not only improves the appearance of your deck but also adds slip-resistant textures, making your pool area safer for children, pets, and guests.
Durability: Quality resurfacing materials provide long-lasting protection against cracking, fading, and staining. This helps extend the life of your pool deck, saving you money on future repairs.
Quick Installation: The resurfacing process is typically faster than full deck replacement. In many cases, your pool area can be restored in just a few days, meaning minimal disruption to your outdoor lifestyle.
Step-by-Step Guide to Resurfacing Your Concrete Pool Deck in Orlando
1. Assess the Condition of Your Pool Deck
The first step in resurfacing your pool deck is to assess its current condition. Walk around the entire surface and look for cracks, discoloration, and damage caused by weather, pool chemicals, and general wear. If your deck has deep cracks or significant structural damage, you may need to repair those areas before resurfacing.
You’ll also want to determine whether there are any imperfections that need to be addressed during resurfacing, such as chips or stains. This will ensure that your new surface is smooth, even, and ready for a fresh look.
2. Choose the Right Resurfacing Material
One of the best things about resurfacing your concrete pool deck is the variety of materials available. Orlando’s sunny, humid climate calls for durable options that can withstand the elements, while still giving your deck a stylish and personalized look.
Here are some popular resurfacing options to consider:
Stamped Concrete: For a high-end, luxurious look, stamped concrete is a great option. This method uses molds to create patterns in the resurfaced concrete, allowing you to mimic the look of natural stone, brick, or tile. Stamped concrete is highly customizable and can add texture and depth to your pool deck, making it a favorite choice for homeowners who want a designer finish.
Exposed Aggregate: If you want a more natural, earthy look, exposed aggregate is a great option. This technique involves removing the top layer of concrete to expose the decorative aggregate (small pebbles or stones) underneath. The result is a textured, slip-resistant surface that has a unique, rustic appearance.
Acrylic or Cool Deck Coating: For those looking for a more cost-effective and heat-resistant solution, acrylic or cool deck coatings are perfect. These coatings help keep the surface cooler underfoot in Orlando’s hot climate, making them ideal for pool areas. Cool deck coatings are also available in a range of colors and finishes, from smooth to textured, so you can customize the look of your pool deck while also keeping it cooler during hot summer days.
Concrete Overlay: If you're looking for a modern, sleek design, a concrete overlay is an excellent choice. This thin layer of concrete can be applied over your existing pool deck and is available in various colors, textures, and finishes. Concrete overlays can be stamped, stained, or polished to create a sophisticated, custom look. This option is great for homeowners who want a contemporary and low-maintenance deck.
Epoxy Coatings: For a shiny, durable surface that is easy to clean and maintain, epoxy coatings are an excellent choice. These coatings provide a high-gloss finish that resists stains and pool chemicals, making them a popular option for pool decks that experience heavy use. Epoxy is ideal for homeowners who want a modern, sleek look with added protection.
3. Prepare the Surface
Once you've selected your resurfacing material, the next step is preparing the surface. This involves thoroughly cleaning the existing concrete to remove any dirt, debris, algae, and old sealants. Power washing is typically the most effective method, as it can reach deep into the cracks and crevices to ensure a clean surface.
If your pool deck has any cracks, these should be repaired before resurfacing. Small cracks can be filled with concrete filler, while larger cracks may require more intensive patching. The goal is to create a smooth, even surface for the new material to adhere to, which is crucial for the durability and longevity of the resurfaced deck.
4. Apply the Resurfacing Material
With the deck clean and prepped, it’s time to apply the resurfacing material. This process requires skill and attention to detail, so if you’re not experienced with concrete resurfacing, it’s often best to hire a professional contractor.
The resurfacing material is typically applied in thin layers, starting from one corner of the pool deck and working outward. If you're opting for a stamped or textured design, the pattern or texture will be applied while the material is still wet. The final result should be a seamless, smooth, and even surface that looks and feels fantastic.
5. Allow for Curing and Sealing
After the resurfacing material has been applied, it’s essential to allow it to cure properly. Curing times will vary based on the material used and the weather, but it's important to give it sufficient time to harden before using the pool area.
Once cured, a protective sealant should be applied to the surface to protect it from moisture, UV rays, and pool chemicals. Sealing also helps maintain the vibrant color of your deck and makes it easier to clean. Depending on the material, you may need to reseal your deck every few years to maintain its appearance and durability.
Design Tips for a Stylish Pool Deck
Resurfacing offers endless design possibilities for your pool deck. Here are some design ideas to help you create a poolside retreat that suits your style:
Complement Your Home’s Architecture: Choose colors and patterns that match the architectural style of your home. For example, a Mediterranean-style home might look great with a stamped concrete finish that mimics natural stone, while a modern home could benefit from the clean lines and sleek look of a polished concrete overlay.
Add Contrast: Consider using contrasting colors for different areas of your pool deck. For instance, a darker color can be used for borders or accents, while a lighter color is applied to the main pool deck surface to create visual interest.
Incorporate Functional Features: If you’re resurfacing your deck to increase both form and function, consider adding slip-resistant finishes or textured patterns to reduce the risk of slips, especially around the pool area. You can also add decorative elements like decorative inlays, custom borders, or faux stone patterns to further personalize your space.
Conclusion
Resurface concrete pool deck Orlando, FL is a great way to breathe new life into your pool area, enhance safety, and create a stylish, functional space that you and your family can enjoy for years to come. With a wide variety of materials and design options available, resurfacing gives you the opportunity to customize your pool deck to suit your aesthetic preferences and needs.
If you're ready to elevate your pool area with a fresh, modern look, be sure to work with a professional contractor who specializes in pool deck resurfacing. They can help guide you through the process, recommend the best materials for your budget and style, and ensure a flawless result. With the right resurfacing treatment, your concrete pool deck will look as good as new—stylish, durable, and ready for all your outdoor fun!
Reference: Refinishing a pool deck Orlando, FL
Reference: Pool deck resurfacing Bartow
#pool deck resurfacing eustis#cement pool deck#cement pool decks#pool deck resurfacing lakeland#pool deck resurfacing bartow
0 notes
Text
Budget-Friendly Design Ideas That Wow
Creating a beautiful, stylish home doesn’t have to come with a hefty price tag. With a little creativity, even the tightest budgets can stretch to achieve stunning results. Whether you’re looking for affordable interior design tips or clever ways to spruce up your home on a shoestring budget, Godecor offers design inspiration and professional insights. Here are practical, budget-friendly home renovation ideas to help you make a statement without overspending.
Affordable Interior Design Tips for Any Room
The key to affordable luxury home design lies in focusing on impactful changes. Swap out smaller decor elements like curtains, throw pillows, and rugs to bring a fresh look to any room instantly. Look for versatile colors and patterns that can transition through the seasons to get the most mileage. Investing in a few high-quality items to anchor the room—such as a solid coffee table or statement mirror—can elevate your interior design without requiring a full makeover.
Creative Budget Interior Design: Big Impact for Less
If you want your home to look designer-made without the designer price, focus on creative budget interior design techniques that make a big impact. Try upcycling furniture, which can be both affordable and unique. Painting an old dresser in a bold color or updating cabinet handles in the kitchen can add a lot of style with minimal cost. Godecor’s design professionals can also help with creative guidance on how to achieve stylish design on a budget, ensuring that each dollar is put to good use.
DIY Home Decor Tips for a Personalized Touch
DIY projects are some of the best low-cost home decor ideas, adding personality and charm without a major investment. For example, create a gallery wall using inexpensive frames or print your favorite photos for a personal touch. You can also use peel-and-stick wallpaper for a quick and easy accent wall. By sourcing materials from local thrift stores or even making your own wall art, you get inexpensive design ideas for living rooms, bedrooms, or even hallways that reflect your style.

How to Decorate on a Budget: High-Impact, Low-Cost Updates
A fresh coat of paint is one of the most transformative yet affordable design tricks for small spaces. Choose light, neutral colors to brighten rooms or go bold on a single accent wall for depth. Adding indoor plants is another affordable interior design tip that brings a sense of life and tranquility to any space. In addition, updating lighting fixtures can create a dramatic effect; swap out standard overhead lights with pendant lamps, or add affordable LED strips under cabinets for a cozy, warm glow.
Small Budget, Big Impact Decor for Your Living Room
Living rooms are the heart of the home, so a few well-chosen updates here can make a big difference. Try arranging furniture to create a more inviting layout, making your space feel larger without needing to buy new pieces. Layering rugs is another budget-friendly decor trick, especially if you mix textures and patterns. Add some inexpensive throw pillows or a colorful blanket for extra style. For an added touch, consider a low-cost upgrade to your wall art by swapping photos or prints with new designs that suit your evolving taste.
Low-Budget Kitchen Renovation Tips: Affordable Kitchen Style
The kitchen is one of the costliest rooms to renovate, but it doesn’t have to be. Low-budget kitchen renovation tips include painting cabinets, changing hardware, and using peel-and-stick backsplash tiles. These are easy, affordable ways to modernize the kitchen. Look for energy-efficient, low-cost appliances or consider adding open shelving to display favorite dishes, creating an open and airy feel. Godecor’s design services can provide professional insight into budget-friendly ways to make your kitchen feel stylish and fresh without a full remodel.

Affordable Renovation Tips for Homeowners with Tight Budgets
When it comes to affordable renovation tips, focus on areas with high impact. For example, updating the flooring in key spaces like the entryway or hallway can set the tone for the whole home. Vinyl or laminate flooring can mimic the look of hardwood at a fraction of the price. Replacing old hardware in bathrooms, like faucets and towel racks, can also give these rooms a fresh look. You can make each room look more cohesive by sticking with a similar color palette throughout the home.
Cheap Ways to Upgrade Home Interiors for a Luxe Look
One of the easiest ways to add affordable luxury home design elements is through textiles. Velvet cushions, faux fur throws, or linen curtains can instantly make any room feel more upscale. Small details like switching out plastic light switch covers with metal ones or adding decorative moldings to walls can make a noticeable difference. If you’re looking to elevate a small bathroom, try adding a simple yet stylish mirror, giving the space an updated, high-end look without a complete renovation.
Inexpensive Design Ideas for Living Rooms on a Budget
In living rooms, storage can be both functional and decorative. Opt for budget-friendly, dual-purpose furniture like storage ottomans or ladder shelves to organize and display decor. You can also make use of natural light to brighten the room—move bulky furniture away from windows to let in more light. Affordable wall sconces or plug-in lamps are also inexpensive ways to upgrade the lighting, adding warmth and sophistication to the living space.
Affordable Design Tricks for Small Spaces
For smaller spaces, affordable design tricks can create the illusion of more room. Opt for furniture that’s scaled to the space; larger pieces can overwhelm a small room. Mirrors are a fantastic trick for reflecting light and making rooms feel larger. Wall-mounted shelves or foldable furniture pieces are also great additions that can save space. Using light colors and minimalistic decor can prevent small spaces from feeling cluttered, while still achieving a chic look.

Home Decor Ideas on a Tight Budget for Every Room
With home decor ideas on a tight budget, the aim is to add personality without going overboard. Consider rearranging furniture for a new perspective or using items you already own in creative ways. Decorative trays, baskets, or bowls can organize essentials while adding visual interest. Add a touch of color with inexpensive artwork or create a focal point with a vintage-inspired accent piece from a flea market. Godecor can connect you with affordable interior design professionals to offer expert advice for maximizing style on a small budget.
Upgrading your home doesn’t have to drain your bank account. With these budget-friendly ideas and professional insights from Godecor, you can achieve a beautiful, stylish home that reflects your personality and style without breaking the bank
1 note
·
View note
Text
Bring New Life to Your Carpets with Labrador Cleaning
When it comes to maintaining a clean and inviting home, carpet cleanliness is a crucial factor. At Labrador Cleaning, we understand how essential it is to keep your carpets looking their best. Our team of dedicated professionals combines state-of-the-art cleaning technology with industry-leading expertise to provide a comprehensive service that breathes new life into your carpets.
Why Regular Carpet Cleaning Matters
Carpets play a significant role in the ambiance and comfort of your home or office. However, over time, they accumulate dirt, allergens, and stains, which can diminish their appearance and affect the indoor air quality. Regular cleaning is not just about aesthetics; it’s essential for health and hygiene. Here’s why routine professional carpet cleaning is vital:
Prolonged Carpet Lifespan: Dirt particles embedded in carpet fibers can lead to wear and tear. Regular cleaning removes these abrasive particles, extending the life of your carpet.
Improved Indoor Air Quality: Carpets can trap dust, allergens, and pollutants. Over time, these can become airborne, impacting indoor air quality and aggravating allergies. A professional cleaning eliminates these contaminants.
Aesthetic Appeal: A clean carpet significantly enhances the appearance of your space. Regular deep cleaning ensures that your carpets maintain their original color and texture.
Bacteria and Mold Prevention: Moisture and dirt in carpets can lead to mold and bacteria growth. A professional cleaning eliminates these risks, ensuring a safer environment.
Our Advanced Carpet Cleaning Techniques
At Labrador Cleaning, we offer a range of carpet cleaning services tailored to meet the specific needs of your carpets. Our experts use advanced cleaning methods that are both effective and eco-friendly. Here’s a look at some of the techniques we employ:
1. Steam Cleaning (Hot Water Extraction)
Steam cleaning is one of the most recommended methods by carpet manufacturers. This technique involves injecting hot water and a specialized cleaning solution deep into the carpet fibers. The solution loosens dirt, allergens, and grime, which are then extracted using powerful suction.
Benefits of Steam Cleaning:
Deeply cleans and sanitizes
Removes tough stains effectively
Eco-friendly as it requires fewer chemicals
2. Dry Carpet Cleaning
If you prefer a low-moisture cleaning process, our dry carpet cleaning method is ideal. This technique involves applying a specialized cleaning powder that binds with dirt particles. The powder is then thoroughly vacuumed, leaving the carpet clean and ready for immediate use.
Benefits of Dry Carpet Cleaning:
No drying time required
Ideal for delicate or moisture-sensitive carpets
Reduces the risk of mold and mildew growth
3. Encapsulation Cleaning
This method uses a special cleaning solution that crystallizes dirt particles. Once the solution dries, the encapsulated dirt is vacuumed away. Encapsulation cleaning is efficient and quick, making it perfect for commercial spaces with high foot traffic.
Benefits of Encapsulation Cleaning:
Quick drying and minimal disruption
Improves the carpet’s appearance over multiple cleanings
Environmentally friendly as it uses fewer chemicals and less water
4. Bonnet Cleaning
For carpets that require a surface-level refresh, our bonnet cleaning service is a great choice. This method involves using a rotating buffer and a cleaning solution to lift surface dirt and stains. Bonnet cleaning is typically used for maintenance in areas with moderate dirt accumulation.
Benefits of Bonnet Cleaning:
Effective for routine maintenance
Quick drying and minimal downtime
Economical and efficient
The Labrador Cleaning Difference
1. Expertise You Can Trust
With years of experience in the industry, our team of trained professionals understands the intricacies of carpet care. We employ industry-best practices and cutting-edge equipment to deliver results that exceed expectations. At Labrador Cleaning, we invest in our staff through continuous training and certification programs, ensuring they stay up-to-date with the latest advancements in carpet cleaning technology.
2. Customized Cleaning Plans
We recognize that every carpet has unique requirements. That’s why we offer customized cleaning plans tailored to meet the specific needs of your carpet. Whether you have delicate Oriental rugs, high-pile carpets, or synthetic blends, we’ve got you covered. Our experts carefully assess your carpet’s condition and recommend the most appropriate cleaning method for optimal results.
3. Eco-Friendly Cleaning Solutions
At Labrador Cleaning, we prioritize the health of our clients and the environment. Our eco-friendly cleaning solutions are non-toxic and safe for children and pets. We use biodegradable cleaning agents that effectively remove dirt and stains without harming your carpet fibers or the environment.
How Labrador Cleaning Enhances Your Carpet’s Lifespan
Proper carpet care involves more than just routine cleaning. At Labrador Cleaning, we focus on the comprehensive maintenance of your carpets to maximize their lifespan. Here’s how we achieve that:
1. Protective Treatments
After cleaning, we offer protective treatments such as stain-resistant coatings and fabric protectors. These treatments prevent future staining and make routine cleaning more effective.
2. Expert Repairs and Restorations
In addition to cleaning, our team is skilled in carpet repairs and restorations. From fixing minor frays and loose seams to addressing significant damage, we can restore your carpet’s appearance and functionality.
3. Regular Maintenance Plans
To keep your carpets in pristine condition year-round, we offer regular maintenance plans. Our scheduled cleanings prevent dirt buildup and preserve the look and feel of your carpets over time.
Get Your Free Estimate Today
Are you ready to bring new life to your carpets? Contact Labrador Cleaning today for a free, no-obligation estimate. Our team is here to answer any questions and provide the best carpet cleaning solutions for your needs. You can trust Labrador Cleaning to deliver exceptional results every time.
0 notes
Text
Effortless Style with Messy Bun Scrunchies – Instant Volume & Texture
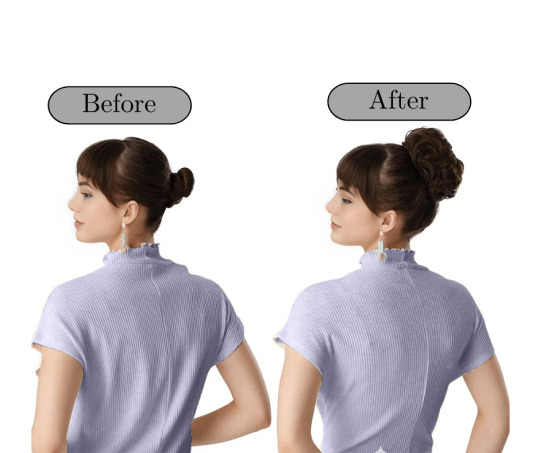
When you're in a hurry but still want to look effortlessly chic, there’s one hair accessory that can transform your look in seconds
The Messy Bun Scrunchie. This clever hairpiece delivers instant volume and a touch of texture without the hassle of complicated styling. Whether you’re heading to the gym, running errands, or preparing for a night out, a messy bun scrunchie is your go-to solution for easy, stylish hair.
Why Choose a Messy Bun Scrunchie?
With busy lifestyles, we all want quick solutions that still look polished. That’s where messy bun scrunchies step in. Here’s why they’re loved by thousands of women:
Instant Volume & Fullness: Achieve that “I-woke-up-like-this” effortless style in no time. The scrunchie adds just the right amount of volume and bounce to your hair.
Easy to Use: Whether you’re a hairstyling pro or a novice, these scrunchies make it easy to create a trendy messy bun. No need for bobby pins or complicated techniques—just twist and go!
Versatile Styling: Not just for buns! You can use these scrunchies to add texture to ponytails or half-up styles. They’re perfect for creating that lived-in, tousled look we all crave.
Suitable for All Hair Types: From fine to thick, straight to curly, messy bun scrunchies work for every hair texture, making them an essential accessory for anyone who wants to upgrade their hairstyle.
How to Use a Messy Bun Scrunchie
Achieving the perfect messy bun has never been easier! Here’s a simple step-by-step guide to using a messy bun scrunchie:
Start with a Ponytail: Gather your hair into a high or low ponytail, depending on where you want your bun to sit. Secure it with a regular hair tie.
Wrap the Scrunchie Around the Ponytail: Place the messy bun scrunchie around your ponytail, twisting it if necessary to secure it tightly.
Adjust for Volume: Gently pull sections of the scrunchie or your natural hair to add more volume and texture. The beauty of a messy bun is that it doesn’t have to be perfect—so feel free to play around with it until you get the desired look.
Finish with Hairspray (optional): For extra hold, spritz some light hairspray to keep the style intact throughout the day.
With just four easy steps, you’ll have a gorgeous, voluminous messy bun that stays in place all day long!
Why Messy Bun Scrunchies Are a Must-Have for Your Haircare Routine
Whether you’re someone who’s always on the go or you just want to simplify your styling routine, messy bun scrunchies are the perfect solution. They give you:
Quick, No-Fuss Styling: Perfect for busy mornings or when you’re pressed for time.
A Stylish Look Anytime, Anywhere: From casual days to formal events, messy buns can be dressed up or down.
An Easy Way to Add Volume and Texture: Great for those with thinner hair who want a fuller look without extensions.
Ready to Elevate Your Hairstyle? Shop Messy Bun Scrunchies Now!
If you’re ready to experience the effortless style and instant volume of a messy bun scrunchie, look no further. Our scrunchies come in a variety of colors to match your natural hair, making them a perfect addition to your daily routine.
Shop now and discover the magic of messy bun scrunchies—where fashion meets function. Whether you’re running errands, heading to the gym, or going out for a night on the town, these scrunchies will have you looking your best in seconds. Don’t miss out on this must-have hair accessory!
Conclusion
Messy bun scrunchies are more than just a trend—they’re a practical, stylish solution for anyone who wants to add texture and volume to their hair without the hassle. Easy to use, versatile, and suitable for all hair types, these scrunchies will become your new favorite hair accessory.
For more hairstyling tips, product recommendations, and exclusive offers, sign up for our newsletter or follow us on social media. Get ready to style effortlessly every day!
FAQs
1. How do Messy Bun Scrunchies add volume and texture to my hair?
Messy bun scrunchies are designed with built-in hair fibers that create the illusion of a fuller, more voluminous bun. When wrapped around your natural hair, they instantly add both volume and texture, giving you that effortless, messy bun look without the need for additional styling tools or products.
2. Are Messy Bun Scrunchies suitable for all hair types?
Yes! Messy bun scrunchies work for all hair types—whether your hair is fine, thick, straight, or curly. They are flexible and secure, offering a natural look no matter your texture or length. They’re especially useful for adding volume to thin or fine hair.
3. How do I use a Messy Bun Scrunchie?
Using a messy bun scrunchie is simple! Start by tying your hair into a ponytail, then wrap the scrunchie around it, adjusting the fibers to create a fuller, tousled look. You can easily customize the volume and style by pulling sections of the scrunchie or your hair to achieve your desired messy bun effect.
4. Can I style Messy Bun Scrunchies for different occasions?
Absolutely! Messy bun scrunchies are incredibly versatile. They’re perfect for casual, everyday wear, but can also be dressed up for formal events or nights out. Whether you’re running errands or attending a wedding, they help you achieve a stylish look effortlessly.
5. How do I care for my Messy Bun Scrunchie?
To maintain the look and longevity of your messy bun scrunchie, avoid excessive heat or rough handling. Gently hand wash it with mild shampoo and let it air dry. This will help keep it looking fresh and voluminous for many uses!
#clip-in extensions#human hair extension#clip in hair extensions#hairstyleoriginals#natural hair extensions for black women#luxury hair extensions#tape-in hair extensions#clipinhairextensions#clip-in#hairextensions#Messy Bun Scrunchies
0 notes
Text
Mulching
The Benefits and Best Practices of Mulching
Mulching is a simple yet highly effective gardening technique that offers numerous benefits to plants, soil, and garden aesthetics. By applying a layer of organic or inorganic material on the soil surface, mulch helps to retain moisture, suppress weeds, regulate soil temperature, and even improve soil structure. Whether you're new to gardening or an experienced green thumb, learning the basics of mulching can greatly enhance your garden’s health and productivity.
The Benefits of Mulching a) Moisture Retention Mulch acts as an insulating layer that reduces water evaporation from the soil, keeping it moist for longer. This is especially beneficial in hot climates or during dry periods, as plants require less frequent watering. By maintaining consistent soil moisture, mulching helps prevent water stress, which can negatively affect plant growth.
b) Weed Suppression A thick layer of mulch blocks sunlight from reaching weed seeds, reducing their ability to germinate and grow. This minimizes competition for nutrients, water, and space, allowing your plants to thrive. Mulching also makes it easier to remove any weeds that do manage to break through the barrier.
c) Soil Temperature Regulation Mulch acts as an insulator, keeping soil temperatures stable. In the summer, it prevents the soil from becoming too hot, which can stress plant roots. During winter, it protects the soil from freezing temperatures, safeguarding perennial plant roots and beneficial soil organisms from frost damage.
d) Soil Improvement Organic mulches such as straw, leaves, grass clippings, and wood chips break down over time, adding organic matter to the soil. This improves soil structure, enhances drainage, and boosts microbial activity, promoting a healthy ecosystem for plants. The decomposition process also adds essential nutrients back into the soil, reducing the need for chemical fertilizers.
e) Aesthetic Appeal Mulch gives your garden a neat, uniform appearance by covering bare soil. It also comes in various colors and textures, allowing you to enhance the overall look of your garden while reaping its functional benefits.
Types of Mulch There are two main categories of mulch: organic and inorganic.
a) Organic Mulches Organic mulches are derived from natural materials that decompose over time. They are preferred for their ability to improve soil quality as they break down. Some popular organic mulches include:
Wood Chips and Bark: Excellent for decorative purposes and long-lasting. Straw or Hay: Great for vegetable gardens and helps keep soil light. Grass Clippings: Good for quick decomposition but should be applied in thin layers to avoid matting. Leaf Mold: Rich in nutrients and ideal for garden beds. Compost: A nutrient-rich option that adds organic matter to the soil. b) Inorganic Mulches Inorganic mulches do not decompose and therefore do not improve soil structure. However, they are highly effective at weed suppression and soil insulation. Common inorganic mulches include:
Gravel or Pebbles: Used mainly in xeriscaping or succulent gardens where water retention is less critical. Plastic Sheeting: Effective at preventing weeds and retaining soil moisture but may cause overheating in hot climates. Landscape Fabric: A durable option that allows water to penetrate while blocking weeds.
Best Practices for Mulching a) Apply the Right Thickness For organic mulches, a layer between 2 to 4 inches is usually sufficient. Too little mulch won’t provide the necessary weed suppression, while too much can create a barrier that prevents water and air from reaching the soil. Inorganic mulches, such as gravel, should be applied in a thinner layer of around 1 to 2 inches.
b) Keep Mulch Away from Plant Stems To prevent rot and disease, make sure the mulch is kept a few inches away from the stems or trunks of plants. Piling mulch directly against plant bases can trap moisture, leading to fungal issues or inviting pests.
c) Replenish Mulch as Needed Organic mulches break down over time, so it’s important to replenish them periodically to maintain the desired thickness. This may be necessary once or twice a year, depending on the material used and the climate.
d) Consider the Type of Plants Not all plants benefit from the same type of mulch. For instance, acid-loving plants like azaleas and blueberries thrive with pine needle mulch, while vegetable gardens do well with compost or straw. Matching the mulch to your plants ensures optimal results.
e) Time Your Mulching For most gardens, it’s best to mulch in the spring before the growing season kicks into full gear. Mulching too early in the spring, however, can slow soil warming, so wait until the soil has had a chance to warm up. In colder regions, applying mulch in late fall helps protect plants from winter’s freezing temperatures.
Conclusion Mulching is an invaluable tool for gardeners, offering benefits that range from moisture conservation to enhanced soil fertility. With the right type of mulch and proper application, you can reduce labor, support plant growth, and create a beautiful, low-maintenance garden. Whether you choose organic mulch for its soil-improving qualities or inorganic mulch for its durability, implementing a mulching strategy will help your garden thrive year after year.

0 notes
Text
simple handicraft ideas to unleash your creativity.
Crafting is more than just a fun pastime; it’s a great way to express your creativity, relieve stress, and even create meaningful gifts. Whether you are a seasoned crafter or a complete beginner, there are always something new and exciting to try. If you are looking to unleash your inner artist, here are some simple handicraft ideas that can inspire you to get started.
1. Paper Maccha Art
Paper Maccha is a timeless craft that allows you to create anything from sculptures to decorative bowls. All you need is newspaper, flour, and water to create the paste. By layering the paper and letting it dry, you can mold it into various shapes. Once dry, you can paint and decorate your creations to add personality. This craft is perfect for experimenting with different textures and designs, and the possibilities are endless!
2. Macrama Wall Hangings
Macrama , the art of knotting cords, has made a huge comeback. It’s a relaxing and meditative craft that allows you to create stunning wall hangings, plant hangers, or even table runners. All you need is some rope or string, and a few basic knots to get started. Whether you prefer a minimalist design or something more intricate, macrame offers the perfect outlet for expressing creativity with texture and pattern.
3. Hand-Painted Rocks
If you are looking for a quick and easy way to create something beautiful, hand-painted rocks might be the perfect choice. Find smooth, clean stones and let your imagination guide you. You can paint flowers, animals, or abstract designs on the rocks and even turn them into little paperweights or garden decorations. This is a great way to tap into your creativity and leave little bits of joy around your home or community.
4. DIY Candle Making
Candle making is both fun and practical. With just a few supplies—wax, a wick, fragrance oils, and molds—you can create your own beautiful, scented candles. Experiment with different colors, shapes, and scents to personalize your candles. Not only do they make great gifts, but they also add a cozy and inviting atmosphere to your home.
5. Upcycled Fabric Crafts
Before throwing away that old shirt or pair of jeans, consider turning them into something new! Upcycling old fabric is a wonderful way to create unique accessories like bags, pillows, or even decorative patches. With a little bit of sewing or even no-sew techniques, you can repurpose old clothing into something new and stylish. This is not only a great way to create but also an eco-friendly approach to crafting.
0 notes
Text
Quick Renovation Tips: Transform Your Home’s Interior and Exterior Designs Without Breaking the Bank
Renovating your home—whether it's the interior or the exterior—can often seem daunting and expensive. However, with a few creative and budget-friendly updates, you can breathe new life into your space without emptying your wallet. Here are some practical tips to help you transform any room or outdoor area quickly and affordably.

1. Paint Magic
One of the most effective ways to refresh your home’s interior design is with paint. A fresh coat can dramatically change the mood of a space. Consider:
Accent Walls: Paint one wall a bold color to create a focal point in your living room or bedroom.
DIY Techniques: Experiment with sponging or stenciling for added texture and interest in your interior spaces.
Exterior Touch-ups: Give your front door or window trim a fresh coat of paint to enhance your home’s curb appeal.
2. Swap Out Hardware
Replacing cabinet knobs and drawer pulls is an inexpensive way to modernize your kitchen or bathroom. Choose trendy finishes like matte black or brass for a stylish upgrade. This small change can have a significant impact on the overall look of your home’s interior design.
3. Declutter and Organize
Sometimes, the best renovation is simply decluttering. Remove items that don’t belong or haven’t been used in a while. Consider these organizing tips:
Storage Bins: Use stylish baskets or bins to hide clutter while adding a decorative touch to your living space.
Outdoor Storage Solutions: Consider weatherproof storage options for your patio or garden area to maintain a clean and inviting exterior design.
4. Accessorize Wisely
Accessories can transform a room in no time. Here are some ideas for both interior and exterior designs:
Throw Pillows and Blankets: Update your sofa or outdoor seating with new textiles that add color and comfort.
Artwork and Prints: Hang affordable art prints inside, or consider outdoor wall art to enhance your patio or garden.
Rugs: A new area rug can anchor a room or define an outdoor seating area, tying your interior and exterior designs together.
5. Lighting Upgrade
Good lighting can completely change a room’s ambiance. Consider:
Switching Fixtures: Replace outdated light fixtures inside or install stylish outdoor lighting to enhance your home’s exterior design.
Smart Bulbs: Use smart bulbs to adjust brightness and color according to the time of day or occasion.
String Lights: Add charm with string lights in your backyard or patio, perfect for creating a cozy atmosphere.

6. Repurpose and Reimagine
Before you toss something out, think about how you might repurpose it. Old furniture can be:
Upcycled: Turn an old table into a bench or a wooden pallet into a coffee table for your deck.
Refinished: Sanding and staining can revive tired pieces for both indoor and outdoor use, blending functionality with design.
7. Plants and Greenery
Adding plants can bring life and freshness to your home, both inside and out. Consider:
Low-Maintenance Options: If you’re not a plant person, choose succulents or snake plants for your interior design; opt for hardy outdoor plants to enhance your garden's exterior design.
Hanging Plants: Use macramé hangers indoors or wall-mounted planters outside to save space and create visual interest.
8. Temporary Wallpaper or Decals
If painting isn’t an option, consider peel-and-stick wallpaper or decals for your interior spaces. They come in a variety of patterns and can be easily removed or replaced, making them perfect for renters or those who frequently change their decor style.
9. DIY Decor
Get crafty with DIY projects that can enhance your home’s interior and exterior designs:
Personalized Artwork: Create your own canvas art for your living room or make decorative signs for your garden.
Photo Collage: Assemble a collection of photos in a stylish frame to showcase memories inside, or create a themed photo display outdoors.
10. Refresh Your Bathroom
Small changes in the bathroom can make a big difference. Consider:
New Towels: Invest in plush, colorful towels for a spa-like feel in your bathroom.
Shower Curtain: Change out your shower curtain for an instant refresh.
Candles and Decor: Add decorative items or candles to create a serene atmosphere in your bathroom.

1 note
·
View note
Text
A Beginner’s Guide to Painting Miniatures
Painting miniatures is a rewarding hobby that combines creativity, precision, and a love for detail. Whether you’re a tabletop gamer looking to bring your armies to life or a hobbyist interested in creating detailed art pieces, painting miniatures can be both relaxing and fulfilling. This beginner’s guide will walk you through the essentials of getting started with miniature painting, from selecting the right tools to mastering basic techniques. With the right guidance and a bit of practice, you’ll be on your way to creating stunning miniatures in no time.

Our social:
Why Paint Miniatures?
The Joy of Customization
One of the most exciting aspects of painting miniatures is the ability to customize your models. Whether you’re painting figures for a game like Warhammer, Dungeons & Dragons, or simply for display, painting allows you to bring your vision to life. You can choose unique color schemes, add intricate details, and create a miniature that’s truly one-of-a-kind.
Enhancing Your Gaming Experience
For tabletop gamers, painted miniatures add a whole new level of immersion to your games. A beautifully painted army or character figure can make battles feel more epic and stories more engaging. Plus, painted miniatures are often more visually appealing and can enhance the overall aesthetic of your gaming table.
A Relaxing and Meditative Hobby
Painting miniatures is also a great way to unwind. The focus required to paint tiny details can be meditative, helping to relieve stress and improve concentration. Many hobbyists find the process of painting to be a relaxing escape from the hustle and bustle of daily life.
Getting Started: Essential Tools and Materials
1. Miniatures
Before you start painting, you’ll need some miniatures to work on. Miniatures come in a variety of sizes, typically measured in millimeters (e.g., 28mm, 32mm). These miniatures can be made from plastic, metal, or resin. If you’re a beginner, it’s advisable to start with plastic miniatures as they are more affordable and easier to work with.
2. Paints
Acrylic paints are the most commonly used paints for miniature painting. They are water-based, quick-drying, and easy to clean up. When starting out, it’s best to purchase a basic set of paints that includes primary colors, black, white, and a few metallics. As you become more experienced, you can expand your collection with specialty colors and washes.
3. Brushes
Investing in a good set of brushes is crucial for achieving detailed and precise work. A few essential brushes for beginners include:
Basecoat Brush: For applying the initial layers of paint.
Detail Brush: For painting fine details like eyes, buttons, and small accessories.
Drybrush: For applying highlights and texture.
Wash Brush: For applying washes to shade your miniature.
4. Primer
Priming your miniatures is an important step that prepares the surface for painting. Primer helps the paint adhere better and ensures a smooth finish. You can choose between spray-on primer or brush-on primer, depending on your preference. It’s best to use a primer that matches your paint’s base color, such as white, gray, or black.
5. Palette
A palette is essential for mixing paints and thinning them out with water. A wet palette, which keeps paints from drying out too quickly, is particularly useful for longer painting sessions.
6. Other Essential Tools
Water Cup: For rinsing brushes.
Paper Towels: For wiping off excess paint and cleaning brushes.
Hobby Knife: For removing mold lines and cleaning up miniatures before painting.
Super Glue: For assembling miniatures.
Step-by-Step Guide to Painting Your First Miniature
1. Preparing Your Miniature
Before you start painting, it’s important to prepare your miniature:
Clean the Miniature: Use a hobby knife to carefully remove any mold lines or excess plastic. Wash the miniature with warm soapy water to remove any oils or residues.
Assemble the Miniature: If your miniature comes in multiple parts, glue them together using super glue.
Prime the Miniature: Apply a thin coat of primer to your miniature, ensuring even coverage. Let the primer dry completely before moving on to painting.
2. Basecoating
The basecoat is the foundation of your miniature’s color scheme:
Choose Your Colors: Decide on the color scheme for your miniature. Start with the largest areas, such as clothing or armor, and work your way to smaller details.
Apply the Basecoat: Use a basecoat brush to apply a smooth layer of paint to the entire miniature. Thin your paints with a bit of water to ensure even coverage without obscuring details.
3. Shading and Washing
Shading adds depth and contrast to your miniature:
Apply a Wash: Washes are thinned-down paints that flow into the recesses of your miniature, creating natural shadows. Apply a wash to the entire miniature, focusing on areas with lots of detail.
Let it Dry: Allow the wash to dry completely before moving on to highlighting.
4. Highlighting and Detailing
Highlighting brings out the details of your miniature:
Drybrushing: Use a drybrush to apply a lighter shade of your basecoat color to raised areas, edges, and surfaces that catch light. This technique adds texture and depth.
Detailing: Use a detail brush to carefully paint smaller elements, such as eyes, buttons, and accessories. Take your time and use a steady hand.
5. Finishing Touches
Finish your miniature with the following steps:
Varnishing: Apply a clear varnish to protect your paint job. Matte varnish is a popular choice, but you can use gloss varnish for shiny surfaces.
Basing: Add texture and scenery to the base of your miniature to complete the look. You can use sand, static grass, or small rocks for a realistic effect.
Common Mistakes to Avoid
1. Overloading the Brush
One common mistake beginners make is overloading the brush with too much paint. This can result in messy strokes and loss of detail. Remember to wipe off excess paint on your palette before applying it to the miniature.
2. Rushing the Process
Patience is key when painting miniatures. Rushing can lead to sloppy work and uneven finishes. Take your time with each step and allow paints and washes to dry completely before moving on.
3. Neglecting Brush Care
Proper brush care is essential for maintaining precision and control. Always clean your brushes thoroughly after each session, and store them with the bristles upright to prevent damage.
Conclusion
Painting miniatures is a hobby that offers endless opportunities for creativity and self-expression. While the process may seem daunting at first, with practice and patience, you’ll develop the skills needed to create stunning, detailed miniatures. Whether you’re painting for tabletop gaming or simply for the love of the craft, this guide provides the foundation you need to get started. So grab your brushes, choose your colors, and let your creativity shine!
0 notes
Text
Revamping Your Fridge: The Benefits of Kühlschrank Folieren

In the ever-evolving world of home decor and DIY projects, Kühlschrank folieren—literally "fridge foiling" in German—has emerged as a stylish and practical way to transform an ordinary refrigerator into a standout piece. This technique involves applying adhesive foil or film to the surface of a fridge, offering a quick and cost-effective solution for those looking to update their kitchen aesthetics without undergoing a major renovation. This article explores the benefits of Kühlschrank Folieren and provides insights into how this simple upgrade can enhance your kitchen.
What is Kühlschrank Folieren?
Kühlschrank Folieren is the process of covering a refrigerator with a specialized adhesive film that mimics various textures and designs. From sleek metallic finishes to vibrant colors and patterns, these foils can completely alter the appearance of your fridge, making it a focal point in your kitchen. This technique allows homeowners to customize their appliances without the need for extensive remodeling or purchasing a new unit.
Why Choose Kühlschrank Folieren?
1. Affordability
One of the most appealing aspects of Kühlschrank Folieren is its affordability. Replacing an old fridge can be a significant financial investment, especially if you want to upgrade to a more modern or stylish model. Kühlschrank Folieren provides a budget-friendly alternative, allowing you to give your existing appliance a fresh new look without the hefty price tag of a replacement.
2. Versatility
Kühlschrank Folieren offers an extensive range of design options. Whether you prefer a sleek, minimalist look or a bold, patterned design, there is a foil to suit your taste. The versatility of this technique means you can match your fridge to other elements in your kitchen, such as cabinetry or countertops, creating a cohesive and polished appearance.
3. Simple Application
Applying foil to your fridge is a relatively straightforward process that many homeowners can tackle as a DIY project. The adhesive film is designed to be easy to apply, with a self-adhesive backing that adheres securely to the fridge's surface. With some careful measurement and cutting, you can achieve a professional-looking result without the need for specialized tools or professional assistance.
4. Protection and Durability
In addition to its aesthetic benefits, Kühlschrank Folieren offers practical advantages. The adhesive film provides an extra layer of protection for your fridge, shielding it from scratches, dents, and other everyday wear and tear. Modern foils are designed to be durable and resistant to heat and moisture, ensuring that your fridge's new look will last for years to come.
How to Apply Kühlschrank Folieren
1. Prepare the Surface
Start by thoroughly cleaning the fridge to remove any dirt, grease, or residue. Make sure the surface is completely dry before applying the foil. Any imperfections or debris can affect the adhesion and appearance of the film.
2. Measure and Cut
Measure the dimensions of your fridge and cut the foil to size, leaving a little extra around the edges to ensure a precise fit. Using a sharp utility knife or scissors will help achieve clean, accurate cuts.
3. Apply the Foil
Carefully peel away the backing from the adhesive film and begin applying it to the fridge's surface. Start at one edge and work your way across, smoothing out any air bubbles or wrinkles as you go. A squeegee or credit card can help press the foil down evenly and ensure a smooth finish.
4. Trim and Finish
Once the foil is applied, trim away any excess material along the edges for a clean, seamless look. Check for any areas where the foil may need additional smoothing or adjustment.
Conclusion
Kühlschrank Folieren offers a creative and cost-effective way to rejuvenate your kitchen's look by transforming an ordinary appliance into a stylish statement piece. With its affordability, versatility, and ease of application, this technique is a fantastic option for homeowners seeking a quick and impactful upgrade. By choosing Kühlschrank Folieren, you can enhance your kitchen's aesthetic while extending the life of your existing refrigerator.
#kueche folieren#küche folieren#Küche folieren#Kühlschrank folieren#Küchenfronten folieren#küchenfronten folieren
1 note
·
View note