#vue js form tutorial
Explore tagged Tumblr posts
Visit Tumblr Blog
Explore Tumblr blogs with no restrictions, modern design and the best experience.
Last Seen Tumblr Blogs


Fun Fact
In 2020, Tumblr had 29.4 million users in the US.
Link
We are going to learn how to post multipart form data to web server in Vue application using Axios plugin and FormData web API.
0 notes
Photo

Vue JS 2 Tutorial #30 – Checkbox Binding Hey gang, in this Vue JS tutorial we'll take a look at how to use the v-model directive to bind data to check boxes in our Vue forms. ----- COURSE LINKS: + Repo ... source
#binding#Checkbox#checkbox binding#checkbox binding tutorial#checkbox v-model#tutorial#tutorials#vue#vue form tutorial#vue js#vue js 2#vue js 2 tutorial#vue js 2 tutorial for beginners#vue js checkbox binding#vue js checkboxes#vue js form#vue js form tutorial#vue js tutorial#vue js tutorial for beginners#vuejs#vuejs 2 tutorial#vuejs tutorial#vujs tutorial for beginners
0 notes
Text
Easy and Quick Form Generation Using JSON Schema in VueJS
We developers always find ways to get things done quickly and efficiently. Keeping the need for easy form generation in lesser time, here’s a tutorial for you! A few days back, there was a client requirement for integrating form and customizing it in the project using vuetify-jsonschema-form. Searching for a proper informative tutorial for the same was a real struggle. The task was done with efficiency within the deadline. But, the thought crossed my mind what if another fellow developer might face this same issue. So, to lessen their struggle and smoothen the process here’s a form generation using JSON schema in VueJS that will show a hustle-free technique of implementing vuetify-jsonschema-form to generate and customize the form.
Here are some benefits of implementing vuetify-jsonschema-form:
Supports all basic data types.
Allows the implementation of nested objects and nested arrays.
Supports different display options.
Supports validation against the provided schema.
Allows content injection using slots.
Provides consistency and reusability.
There are many packages that support jsonSchema. But, here in this tutorial, we will discuss @koumoul/vuetify-jsonschema-form and implement a few advanced features.
Initial Set-Up
Install Dependencies
Configure SchemaForm.vue
Passing Values to Props
Read More: Form Generation Using JSON Schema in VueJS
#jsonschema#softwaredevelopment#form generation#development#vue js tutorial#programming#agile#technology#web development
2 notes
·
View notes
Text
List of Top JavaScript Frameworks 2020 For Front End Development
JavaScript is defining the future of the tech world with its wide genre of competent frameworks, which are capable of accelerating the development of applications in many ways. How to choose a certain framework in JavaScript is based on the company’s goals, project requirements and how certain frameworks can be used in different scenarios.
JavaScript, one of the most surreal and beautiful programming languages, enwrapped by the intriguing fact that even though it is named “Java” Script, it doesn’t have any association with Java. In mid-1995, when JavaScript came into existence it was disguised as the name Mocha and later it was named as “LiveScript” and when Netscape and Sun did a license agreement it was finally renamed to “JavaScript”. Nobody had even imagined in its initial form that it would be such a revolutionary programming language and would be entitled as one of the major languages to learn. The world is pacing fast with the ever-changing technology and programming languages being the pillar of technology. JavaScript is surely defining the future with its compelling and competent frameworks.
What are the Frameworks?
In general, a framework is a prototype or conceptual structure intended to serve as a support or guide for the building of something that expands the structure into something useful. According to Wikipedia ” A software framework is an abstraction in which software providing generic functionality can be selectively changed by additional user-written code, thus providing application-specific software.”
JavaScript web frameworks are cheat codes for quick web application development. They serve as a skeletal frame for single page application development and allows developers to worry less about code structure or maintenance and help them in focusing more on the creation of complex interface elements and expand opportunities of JS and plain HTML.
So, Which frameworks of JavaScript are most popular and why?
Below is the list of a few Javascript frameworks:
1. AngularJS- AngularJS is an open-source framework used in frontend and is maintained by Google. It is mainly used to subside and sort the problems encountered while creating single-page applications usually have, as it simplifies both development and testing of such application by providing a framework for client-side model view controller (MVC) and model view-view model (MVVM) architectures. For now, it is known to be the most used JavaScript framework for single-page applications and have the largest community of developers.
2. ReactJS- ReactJS camouflage itself to be JS framework but it is more of an open-source JS library, which has huge names like Facebook and Instagram behind it. React was built by a software engineer at Facebook. In 2011, it was first deployed on Facebook’s newsfeed and later on Instagram in 2012. React Js emerges in an ecosystem of complete frameworks, but it’s just the view. In MVC(Mobile-View-Controller) pattern, React.js acts as “V” and can be smoothly integrated with any architecture.
A fully functional dynamic application can’t be built with React alone. Recently, On April 18th 2017, Facebook announced a new core algorithm of React framework library for building user interface named React Fiber, which is said to be the foundation for future development and improvement of ReactJS.
3. Ember JS- A few years back, in 2015, EmberJs was considered to be the best framework leaving React and AngularJS behind. It does two-way data binding as same as AngularJS keeping both view and model in sync for all the time. Emberjs is commonly used for complex feature-rich web applications and website. LinkedIn, Netflix, Chipotle, Blue Apron, Nordstrom are one of the few of the top names that have incorporated EmberJS.
What works in its favour is that it is easy to learn and have many tutorials online which helps to learn it with ease.
4. Vue.Js- Vue.js is considered to be one of the best solutions for cross-platform development. The development of Vue.Js is considered by taking the best qualities from Angular, React and Ember such as Vue.js offers two-way data binding (same as in AngularJS), server-side rendering (like in Angular2 and ReactJS), Vue-CLI (backbone tool for quick start) and optional JSX support. and all the altering flaws in prior three.
5. MeteorJS- MeteorJS is a free and open-source framework, which is well-equipped with tons of features for back-end development, front-end rendering, DB(database) management and business logic. Being a full-stack platform, it has the quality that its name suggests which is being fast. If you’re looking to rapidly develop smaller, reactive applications on the Node.js platform, Meteor is definitely an excellent choice.
Due to its modular structure, all the packages and libraries can be used at a high pace. In terms of performance, all the changes in the database are transmitted to the UI in the shortest time possible and in conversely with no evident time losses caused by different languages or server response time.
The consideration of a JavaScript framework is based on the company’s goals, project requirements and how certain frameworks can be used in certain scenarios. JavaScript is portraying the whole new depiction of the future of technology as it backs the prompt development and prototyping.
These frameworks and libraries have already reshaped the way how JS collaborates with HTML and CSS to compile views both in browsers and now even on native platforms.
#java script framework#javascript framework development#javascript development 2020#website development company
2 notes
·
View notes
Text
General InformationAll DocumentationRealm DocumentationDeveloper Articles & TopicsCommunity ForumsBlog
MERN Stack Explained MERN is one of several variations of the MEAN stack (MongoDB Express Angular Node), where the traditional Angular.js frontend framework is replaced with React.js. Other variants include MEVN (MongoDB, Express, Vue, Node), and really any frontend JavaScript framework can work. Ready to take the next step? Setup your free Atlas account by clicking below and try our MERN Stack Tutorial to create a full-stack MERN application in no time. Get started free
What is the MERN Stack? MERN stands for MongoDB, Express, React, Node, after the four key technologies that make up the stack.
MongoDB - document database
Express(.js) - Node.js web framework
React(.js) - a client-side JavaScript framework
Node(.js) - the premier JavaScript web server
Express and Node make up the middle (application) tier. Express.js is a server-side web framework, and Node.js the popular and powerful JavaScript server platform. Regardless of which variant you choose, ME(RVA)N is the ideal approach to working with JavaScript and JSON, all the way through. How does the MERN stack work? The MERN architecture allows you to easily construct a 3-tier architecture (frontend, backend, database) entirely using JavaScript and JSON. React.js Front End The top tier of the MERN stack is React.js, the declarative JavaScript framework for creating dynamic client-side applications in HTML. React lets you build up complex interfaces through simple Components, connect them to data on your backend server, and render them as HTML. React’s strong suit is handling stateful, data-driven interfaces with minimal code and minimal pain, and it has all the bells and whistles you’d expect from a modern web framework: great support for forms, error handling, events, lists, and more. Express.js and Node.js Server Tier The next level down is the Express.js server-side framework, running inside a Node.js server. Express.js bills itself as a “fast, unopinionated, minimalist web framework for Node.js,” and that is indeed exactly what it is. Express.js has powerful models for URL routing (matching an incoming URL with a server function), and handling HTTP requests and responses. By making XML HTTP Requests (XHRs) or GETs or POSTs from your React.js front-end, you can connect to Express.js functions that power your application. Those functions in turn use MongoDB’s Node.js drivers, either via callbacks for using Promises, to access and update data in your MongoDB database. MongoDB Database Tier If your application stores any data (user profiles, content, comments, uploads, events, etc.), then you’re going to want a database that’s just as easy to work with as React, Express, and Node. That’s where MongoDB comes in: JSON documents created in your React.js front end can be sent to the Express.js server, where they can be processed and (assuming they’re valid) stored directly in MongoDB for later retrieval. Again, if you’re building in the cloud, you’ll want to look at Atlas. If you’re looking to set up your own MERN stack.
Appwars Technologies is the India's fastest growing company in the field of Educational Workshop, On Campus Training, Professional Training & Corporate Training with most advanced technologies & experience in hand.APPWARS TECHNOLOGIES provides various courses and internship programs which are free of cost. It helps you to explore yourself and help to increase your skills and provide you the best opportunities for the job. In future it's really helpful for you to get a job and a great career opportunity.
For further information please go through the below given link 👇👇
No. 1 Training Company In Noida - Appwars Technologies APPWARS Technologies is the India’s fastest growing company in the field of Educational Workshop, On Campus Training and Professional Training & Corporate Training with most advanced technologies & experience in hand. https://appwarstechnologies.com/
0 notes
Text
React JS Tutorial for Beginners | What is React JS and Why use React JS?
What is React JS?
It's a JavaScript library for creating user interfaces, to put it simply. Let's start with the fundamentals before moving on to the rest of the React JS course. There are two words in this definition: javascript library and user interface. Let's have a look at what these terms signify.
The library is a collection of pre-written code that is efficient, complicated, well-written, and easily accessible. As a result, it simplifies our lives and allows us to use code written by others with ease.
Assume we wish to find the cosine value of 20. Rather of obsessing over how this library was created, we simply use the math library. For instance, Math.cos (20).
The user interface is what the user sees right away.
React JS is a powerful tool that breaks down a page into many building elements known as components, allowing for fast front-end development.
React JS pre-requisites
There are some prerequisites to bear in mind before we plunge into the depths of our React JS Tutorial. We need a fundamental understanding of HTML, CSS, and JavaScript because these are the cornerstones of any frontend development and are required to become an expert.
1. HTML
(Hypertext Markup Language) is an acronym for Hypertext Markup Language.
It's a markup language used to make web pages and documents.
Tags for Beginners:
div> span>: div> span> is a tag that is used to organise elements.
form>: to create a form that will be used to collect data from users.
input>: specifies what and how users' input should be collected.
button>: creates a button and specifies the functions that will be executed when the button is clicked.
2. CSS
Cascading Style Sheet (CSS) is an acronym for Cascading Style Sheets (CSS).
It's in charge of the website's appearance and feel.
You can apply styling to HTML items that you've selected.
Syntax at a High Level:
selector{property1 : value1; property2 : value2; property3 : value3;}
CSS has three main selectors: selectors, selectors, and selectors, selectors.
In an HTML document, id(#) is unique.A group of elements is referred to as a class(.).-Box Model Tag(tag name) – all tags of a specific tag name
Every constituent is given the shape of a rectangular box.Four edges make up each box.Border Padding Padding Padding Padding Padding Padding Padding Padding PaddingOther features, such as colours, fonts, and backgrounds, must also be well-understood.
3, JavaScript
Arrays
Objects
Functions
Control Flow Statements
DOM Manipulation
DOM Events
Closure
Prototype
OOPs
With this in mind, you can ensure that the rest of the
React JS Tutorial
is clear to you.
Why use React JS?
We can move on to the next level of the React JS tutorial now that you know what React is and why we utilise it.
In front-end development, React is a strong and widely used tool.
React is more popular than Vue and Angular, which are competitors. The fact that React is a library is one of the key reasons for its success. As a result, as compared to Angular, which is a framework, you have more control over the application's flow.
The components that aid in optimization can be easily reused. In comparison to Angular and Vue, React has an extremely low learning curve. React is used by some of the world's most well-known companies, including Facebook, Netflix, PayPal, Tesla, and others.
When we create a single-page application, we can see the full benefits of React. React developers have more job opportunities than Angular developers.
Single Page Application
Multiple server requests were sent with multiple reloading in the traditional system. This resulted in lower performance, increased bandwidth, and increased processing time. Single-page apps, on the other hand, make only one request to the server, and the server responds as the data is re-written.
Components make up the entirety of the web page. Virtual DOM locates the component that needs to be reloaded and updates that item in the actual DOM without reloading all of the webpage's components.
Single-page applications save time and bandwidth while also improving performance. Gmail, Facebook, and Twitter are examples of SPA.
JSX
JavaScript XML is abbreviated as JSX.
It's utilised by React to allow HTM and JavaScript code to coexist.
In the past, we used to include JavaScript in HTML. However, using JSX, you may now use HTML in JavaScript.
https://www.phptpoint.com/reactjs-tutorial/
0 notes
Text
THE BEST WEB APPLICATION FRAMEWORKS YOU WILL FIND TODAY!
Every time we talk about technology, there is always the unmistakable thought of how rapid the advancements have been. The world has gone digital, which is a big reason for the rise of mobile and web app development services. For sound web development, frameworks form the backbone of how web applications get created. Because technology makes things complicated due to its sheer pace of evolving, the benchmarks of web applications too are constantly rising.

Web app frameworks keep things in check. What is a Web App Framework? In simplest terms, a web application framework is a software framework that facilitates the development of different types of web apps including services, resources, and even APIs for that matter. Frameworks can also be considered as libraries that allow for quicker and better development of apps. Presently, the number of web app frameworks has gone up drastically, and there are a lot of options to choose from. And making the right choice is pretty important if you actually want to create an interactive web app. The Best Web App Frameworks for You to Choose From Any kind of web app has two sides to it- Front-end as well as Back-end. While the front-end is visible to the client or end-user, the back-end is supposed to the business-end of the web app development spectrum. Because both the ‘ends’ are dependent on each other, we will try to tell you the best frameworks for both cases- Back-end Frameworks 1- Rails Rails is a relatively modern framework that’s actually loved by a pretty healthy chunk of developers. It is considered to be a great framework for beginners and allows them to quickly begin their journey into the world of web development. The community of Rails is robust too, with a large number of tutorials and resources that prove to be assistive in becoming a Rails expert in a pretty quick time. 2- Express Node.js is now a dominant constituent of a number of companies that offer custom software development services, which is a big reason why Express is also proving to be a trending web development framework. The biggest takeaway of Express is its minimal and highly no-nonsense approach. With the basic framework functionalities intact, it does not compromise on the features of Node and further harnesses the already efficient performance of Node.js. 3- Spring Spring is a framework that makes use of Java, a programming language that needs no introduction. The framework has a number of smaller projects that call for markedly better performance and allow for a quicker scaling of businesses. The simple fact that it uses Java is enough reason for a huge number of developers to make use of this framework. The only thing that can pose a little problem is that for someone who is not too familiar with Java, the learning process can be tricky. Front-end Frameworks 1- Angular Angular is a very popular framework that creates amazing single-page apps. Because it is entirely dedicated to the client-side of things, the scope of learning is pretty limited. The basic nature of Angular does not show a lot of support for SEO but can be tuned to become SEO-friendly. 2- Vue Vue.js is another framework that is gaining rapid popularity as a novel JS option. Vue is pretty dynamic, where you can make use of it for one part of a particular project, without actually hampering the overall other parts of the same project. Also, the ecosystem is something that brings the flexibility of allowing you to build entire front-end applications. While there are giants like Google that don’t include support for Vue, the future is pretty bright for this web app development framework. 3- React Developers are aware of what a component-based architecture is, and that’s mostly because React was the first to bring in use, later on, to be adopted by Angular and a number of other frameworks later brought into use. While it’s actually a front-end library, it’s referred to as a framework and provides the ability to work on both, the server-side as well as the client-side. Final Thoughts So, these are some of the top web app development frameworks that will surely make your lives easier. Here’s hoping that making a choice for one is a little easier now. If you have a web development project, make sure that you reach out to Consagous Technologies, a leading website design and development company with just the right set of people to take care of your project perfectly.
0 notes
Photo

Alternatives to SPAs, Next.js 10, and running Node on iOS
#512 — October 30, 2020
Unsubscribe | Read on the Web
🎉 512 issues.. we're half way to 1 kibi-issue? 😄 Powers of 2 are much more fun to celebrate than hundreds or thousands, right? Thank you for all your ongoing support. __ Peter Cooper, your editor
JavaScript Weekly
What It's Like Being a jQuery Maintainer — Michał Gołębiowski-Owczarek is one of those heroes who drives and maintains a library that can seem either essential or unnecessary, depending on what company you keep: jQuery. Here’s a look at how he approaches this responsibility.
GitHub ReadME
Create React App 4.0 Released — It's over a year since the last major release of create-react-app, a popular way to quickly spin up a new React app, but with v4 we get support for Fast Refresh (a modern alternative to hot reloading), plus React 17 and TypeScript 4 support.
Facebook React Team
How to Build Forms With React the Easy Way — The challenges inherent to building forms with React, such as state management and validation, can be tackled with finesse. Read TJ VanToll’s blog to find out how to solve them quickly with the KendoReact Form component. Check it out.
Progress KendoReact sponsor
StandardJS 16: An Attempt at a Standardized JavaScript Style — StandardJS isn’t a formal standard but is nonetheless widely used to enforce consistency. v16 promises better performance and improved JSX, React and Next.js support.
Feross Aboukhadijeh et al.
esbuild: An Extremely Fast JavaScript Bundler — “You featured this last month,” I hear you say. True, but it now has an all new homepage complete with extra useful documentation and it continues to be a project I’m seeing a lot of buzz around. Next time you have ten minutes to play with a new tool, check it out.
Evan Weaver
⚡️ Quick bytes:
Node 14 has now become a Long Term Support (LTS) version as of v14.15.0.
GitHub has published a new roadmap for npm, as well as a new feedback process.
GitHub is running its annual Game Off game development contest throughout November if you fancy trying something new.
💻 Jobs
Senior Web Developer (Node/ReactJS) - Remote — Millions get inspired and plan adventures with our apps. To help us make komoot.com the place to go to plan outdoor adventures, we’re looking for a one of a kind Web Developer to join our team.
Komoot
JavaScript Developer at X-Team (Remote) — Join the most energizing community for developers and work on projects for Riot Games, FOX, Sony, Coinbase, and more.
X-Team
Find Your Next Job Through Vettery — Create a profile on Vettery to connect with hiring managers at startups and Fortune 500 companies. It's free for job-seekers.
Vettery
📚 Tutorials, Opinions and Stories
If Not Single Page Apps (SPAs) Then What? — If you’re not a fan of the SPA approach, what else can you do? Turns out there are numerous modern alternatives from Stimulus to RedwoodJS.
Tom MacWright
Running Node on iOS and iPadOS via iSH — iSH provides a Linux shell on iOS devices and with the most minor of fiddling you can get Node running on it too.
Dr. Axel Rauschmayer
Getting Audio Visualizations Working with Web Audio API — A developer works through the trickiness of cross-browser issues around the Web Audio API and comes up with a neat visualization for his audio chat system.
Dwayne Harris
Logi Composer: An Out-of-the-Box Development Platform for Analytics — See how easy it is to build, customize, and embed analytics in your application. Download a free 14-day trial here.
Logi Analytics sponsor
JavaScript's Memory Management Explained — A summary of the core concepts of memory management as it relates to JavaScript.
Felix Gerschau
How to Use Sharp for Image Processing in Node.js — Sharp is a high-performance module for resizing and formatting images (it uses libvips behind the scenes) and here’s how to get started with it.
Indrek Lasn

React Review
Did you know that we also publish a weekly React newsletter? Here's a few of the links shared in the latest issue:
React Form Validation with Formik and Yup
How to Create a Camera App with Expo and React Native
Understanding When to Use useMemo
Wouter: A Minimalist Alternative to React Router
If you've an interest in keeping informed on all things React, you can subscribe here for more.
▶ Learn About Angular's Site Generator Scully — Scully is the most prominent Angular-based static site generator and its v1 release dropped recently.
Tara Manicsic
Curve Modifiers in Three.js — Three.js makes it easier to work with WebGL and 3D in general from JavaScript and Ada has added a neat new feature to bend models around curves.
Ada Rose Cannon
Angular Security Best Practices
Snyk.io sponsor
When (and When Not) to Reach for Redux — Redux is a very generic state management tool that can be used for a broad array of use cases and while it might not be the absolute best at any of them, it offers a lot of opportunities.
Mark Erikson
🛠 Code & Tools
supported by

Deno 1.5 Released: The Security-Focused JS Runtime — Now with improved bundling (deno bundle now does tree shaking and is up to 15x faster), REPL improvements, and support for alert, confirm and prompt for user interactions.
Deno Team
Next.js 10 Released: Image Optimization, Internationalized Routing, React 17 Support — Next.js gains a new built in image component and image optimization, Analytics (incorporating Web Vitals) as well as Next.js Commerce which is a collaboration with BigCommerce.
Vercel
XRegExp 4.4.0: Extended JavaScript Regular Expressions — I enjoy looking up if we linked something before and we did.. 1862 days ago! XRegExp is for you if you want to spice up normal regular expressions – see the examples.
Steven Levithan
Square Terminal API — Connect your app to the all-in-one payments device merchants love with a simple REST API. Learn more.
Square sponsor
Lucia: A Tiny (Vue-Inspired) Library for Tiny Web Apps — A library trying to bridge the divide between moving from jQuery to more modern systems. It provides directives you can use in HTML markup for adding bindings, handlers, etc.
Aiden Bai
sql.js 1.4: A Library to Run SQLite on the Web
SQL.JS
csprng: Isomorphic Wrapper for crypto.randomBytes in Node and Browser Luke Edwards
by via JavaScript Weekly https://ift.tt/3jCDGJG
0 notes
Text
Why Use React For Your Business in 2020?

Since the day Facebook has launched React, it has reserved its place in the technology field. It’s getting more popular day by day. In fact, ReactJS is a JavaScript open-source library. It helps developers to build exceptional user interfaces that are high performing.
As per Stack Overflow, 74.5% of developers recommend using ReactJS for web development.
In this competitive world, there are many tools available in the market which help in web and app development. But among all only a few tools are utilized and preferred by the enterprises due to their features. And Facebook’s ReactJS is one of them. Having a plethora of frameworks available these days, it’s not that easy to find a framework that could ultimately not become outdated soon. So, the question that comes to mind is, is there any scalable platform or framework which always strives to remain the best in the world of technology?
Well, after going through some research, as a renowned web and mobile app development company, at Concetto Labs, we have concluded that ReactJS would be the perfect solution for all your needs for now and future.
Reasons to Choose ReactJS for Your Project in 2020
Here, we are going to explain some reasons why some big giants like Facebook, Instagram, and WhatsApp are relying on ReactJS. Many organizations are choosing ReactJs to build interactive, unique, creative, and user-friendly apps. It’s the most suitable for startups, small and large enterprises.
Easy Learning Curve
When we talk about ReactJS, it’s easy to grasp for any JavaScript developer. It’s a very simpler and effective framework. It’s a lightweight JavaScript library and deals only with the view layer.
In fact, it’s the major reason why React gained so much popularity in no time. It helps businesses quickly build their projects without having any troubles. Since it’s easy to learn and understand, it will not take much time for a developer to understand the development process. Hence, it’s human tendency to adapt that technology which is easy to use and learn and avoid things that are difficult to learn.
Moreover, when we compare React with Angular and Vue, React is much easier to learn and especially in the documentation. As a business owner, you can develop applications quickly.
Rich User Interface
While developing an app, every organization focuses on developing rich user interfaces. It has become an important part of app development. If the user interface is designed poorly, then there are high chances of an application to get failed. Moreover, customers always expect more from your website. Hence, it’s also important to meet their expectations without making them wait and affecting other factors. Therefore, it’s become necessary for every business to survive and thrive in the market.
ReactJS allows developers to build an application with user-interfaces that can promise an exceptional user experience. So if you develop an app using ReactJS, then there are better chances that your users will stay on your app and love to use it. You can easily build amazing and intuitive UI using declarative components.
Faster Development
With the help of React, a developer can develop high-quality user interface applications in very little time. Since it has reusable components and other development tools, it allows developers to develop an app at a very faster time. However, you will find readily available React developers tools like a browser extension. This makes coding much better than ever before.
So, if you are planning to develop an amazing website with seamless user experience, but have no time, ReactJS is the perfect solution for you. Moreover, due to its reusability feature, you can save a lot of money as well. This will be your pocket-friendly project.
As a renowned ReactJS development company, our ReactJS developers develop and deliver a web app in no time. So that you can start serving your customers.
Fast Rendering

When you develop a complex, high-load app, it becomes essential to define the structure of the app in the beginning. As it can slow down the performance of the app.
When you use ReactJS, it has its own DOM. Virtual DOM is the representation of DOM that allows testing all changes to the virtual DOM first to calculate the risks with each modification. It’s tree-structured which helps to maintain high app performance and guarantees a better user experience.
In this way, ReactJS avoids costly DOM operations and does updates in an efficient manner.
SEO Friendly
Search engine optimization opens the door to success for any online business. But many of the JavaScript frameworks are not search engine friendly.
As per the Moz, the lower the page load time and the faster the rendering speed. This will help an app to rank on search engines.
But surprisingly, ReactJS stands out among other frameworks. Due to its virtual DOM, it will reduce the page load time, which adheres to the Google algorithm. This secures its first position on Google Search Engine Result Page.
Useful Developer Toolset
Leveraging emerging technologies and implementing them in projects can be beneficial, but only if used correctly.
Facebook has understood the concept and added React dev tools and Chrome dev tools in their ReactJS framework. ReactJS comes up with many benefits from a developer’s perspective. The React tools basically help developers discover child and parent components. It also observes component hierarchies and inspects their present state and props.
Strong Community Support
It’s the place where you never feel that you are left alone. Because the React community is very huge and extremely helpful when you get stuck with any problems. It’s the main reason that React documentation is getting better day by day. Every issue or bug you report will be solved immediately.
Being an open-source library, ReactJS has formed its strong community to support budding ReactJS developers. You will find plenty of tutorials, articles, blogs, and many other useful resources on the internet.
Apart from this, React experts keep helping the community by clearing other’s doubts, solving queries, and answering questions on groups, QA Platforms like Stack Overflow, Reddit, and Quora.
Conclusion
So, with this, we hope, we have made your mind clear that why ReactJS would be the next choice for your project. Moreover, it comes with a bonus mobile application development platform called React native. And with it, you can build top-class cross-platform applications.
Definitely, React is a high-quality framework and is worthy of your attention. So what are you still waiting for?
Hire ReactJS developers from Concetto Labs and develop a high-quality app for your project. As an experienced ReactJS development Company, Concetto Labs helps organizations to deliver quality and flexible ReactJS development services across the world.
Hire React JS Developers to get started today!
0 notes
Photo

Vue JS 2 Tutorial #29 – Input Binding (Creating a blog, part 1) Hey gang, in this Vue JS 2 tutorial we'll start to create our small blog application. The first thing we'll cover is input binding. ----- COURSE LINKS: + Repo ... source
#binding#blog#Creating#Input#input binding#input binding tutorial#input modiefiers#Part#tutorial#v-model#vue#vue forms#vue input#vue js#vue js 2#vue js 2 input binding#vue js 2 tutorial#vue js 2 tutorial for beginners#vue js forms#vue js input binding#vue js tutorial#vue js tutorial for beginners#vue js v-model#vue v-model#vuejs#vuejs 2 tutorial#vuejs tutorial#vujs tutorial for beginners
0 notes
Text
VueJS & Firebase Cloud Firestore Stripped-Back - Tutorial Part 1
In this tutorial series we will explain how to start developing with the Vuejs framework & Firebase Cloud Firestore to build full-stack web applications. We’ll start from scratch by stripping everything back to the basics - no CLIs, build tools or bundlers, just a HTML page, an editor and a browser so you can get to grips with building apps with Vue & Firebase more quickly and be productive faster.
VueJS
Vuejs is now one of the big 3 Javascript frameworks in the web client ecosystem. However it’s not developed or backed by a huge corporation, it was developed by one individual, Evan You. The proliferation of JS frameworks in recent years has led to the term “Javascript Fatigue” where developers have become weary of all of the new and self-proclaimed “latest and greatest” open source frameworks. It is in this environment that Vue has emerged through all of the noise to become a major player alongside Angular and React (both backed by huge technology companies, Google and Facebook respectively). That Vue has achieved such a status in this environment backed by one individual highlights just how Vue has hit a chord with developers and is filling a gap that isn’t being met by Angular, React or other competitors like Ember and Aurelia.
Evan You is an ex-Googler who was familiar with AngularJS (often referred to as Angular 1) and used it for internal projects at Google that he was working on. He set out to achieve a framework that delivered the benefits of AngularJS but was more lightweight, faster and better suited to smaller apps that didn’t require the heavy-lifting of the huge apps that AngularJS was originally built to develop such as their Adwords platform and their internal CRM system. What he produced was a beautifully simple solution and it quickly attracted adoption as the front-end framework of choice for many PHP developers, particularly from the Laravel community.
Despite promising early adoption in some quarters, Vue may well have stayed a “me-too” framework in the ecosystem had it not been for Google’s decision to redevelop their AngularJS framework from scratch. Angular (often referred to as Angular 2) was such a departure from the original AngularJS framework that it introduced a fundamental shift in approach and required developers to learn many new concepts just to build basic apps. Developers were kept in limbo between AngularJS and Angular for almost 2 years, with many alphas and then betas and many breaking changes and missing pieces to deal with during the transition and then no easy migration path for their existing code and apps.
There’s no doubt that, as a new framework in it’s own right, Angular is a fantastic, powerful, all-in-one next generation framework but it isn’t “Angular” as millions of developers know it. Perhaps the biggest mistake Google made was in not launching their next-gen framework under new branding. In any event and unfortunately for Google, Angular 2 was too big a change for many developers and while uptake was initially high, it hasn’t achieved the type of ongoing adoption or love as AngularJS or React and it’s clear that Vue, with many obvious similarities to the original Angular, has arrived just in time to sweep up and become a magnet for disgruntled Angular devs.
In addition, the droves of developers jumping in to the Javascript ecosystem over the past years, in their evaluation of an appropriate framework, are choosing Vue in vast numbers due to how easy it is to learn and how quickly they can start building apps. I would say that the best word to describe Vue to developers choosing a framework is “approachable” - it seductively invites you in and once there you find it’s so intuitive and simple to get productive, covering all of the bases you need, that once you’re in you tend to stick with it. For me personally I actually enjoy spending my days developing around Vue, I cannot say the same for Angular unfortunately.
In 2018, Vue is set to gain even greater momentum and overtake Angular into second place in the Javascript framework popularity chart. The main reason for this may be that the massively popular Ionic mobile and PWA framework is about to release a version that decouples it from Angular and enables developers to build apps with Ionic using any framework (or none at all). It’s interesting that this is likely to be a tipping point for Vue to achieve critical mass and yet is due to the Ionic team’s concern that Angular isn’t seeing the level of adoption anticipated and continuing to hitch their wagon to Angular is likely to hamper their own growth.
To address this, in Ionic 4, they’ve developed a framework-agnostic, web component-based edition of their mobile framework. When you look online it’s fairly clear that the majority of the delight at Ionic’s shift away from Angular is coming from those who want to use Ionic with Vue. Personally I only stuck with Angular because of Ionic despite my preference for Vue and since their announcement of Ionic 4, I have thrown myself fully into Vue. The sweet spot that Vue hits between Angular and React is in delivering a more lightweight and simple approach than Angular, focussing first and foremost on being a view renderer like React but providing optional elements that are officially supported and developed by the Vue core team, such as routing that can be easily dropped in to your app. This is what is meant when Vue is called a “progressive framework”, you can start by using as little or as much of the framework as you need, progressively using more of it’s subsidiary elements as required. Another advantage to using Vue is that it’s lightweight enough to use it in one part of your app and progressively expand it to other parts when you’re ready, for example if you have existing app in vanilla Javascript, jQuery or another framework that you want to change over to Vue piece by piece.
As mentioned, Vue’s biggest advantage is it’s simplicity and approachability. While other frameworks require knowledge of build systems, CLIs, Node, NPM etc just to start building an “Hello World” app, with Vue you can strip everything right back, open up an HTML file in an editor and get started simply without needing to spend time learning anything else. While you’ll likely want to move over to the full modern JS development environment as you get more involved, it isn’t required to get started.
Firebase Cloud Firestore
So Vue is a fantastic front-end framework but to build even the most trivial worthwhile app, we need a back-end and a data store. Like with using Vue, we want to use something that delivers simplicity and approachability yet gives us the power to build advanced apps as you become more experienced. For this project Firebase Cloud Firestore is a no-brainer to use as the database back-end. Like Vue, we can just get started using Firebase with just a basic HTML page - no need for CLIs and build tools to just start building something.
I first used Firebase back in 2014, when they were a small, private company shortly before they were acquired by Google. At the time Firebase was not a platform but a hosted realtime database and I fell in love with it immediately - for prototyping it was perfect and it’s realtime capabilities were just awe-inspiring at the time.
However Firebase did have some serious limitations that made it unsuitable for me to use as the back-end database in a production app. It didn’t allow server-side code, so all of your logic was exposed on the client and it’s database querying facilities were extremely limited. Also, as a No-SQL document database, organising relational-style data into something that was manageable without joins and queries required denormalisation and duplication of data, something which is anathema to those coming from a SQL-based relational database background. I felt it was a real shame as, despite these limitations, it was very impressive and working with it’s Javascript API was a joy.
After Google’s acquisition, Firebase was expanded into a full serverless platform allowing for storage, cloud messaging, hosting, authentication, analytics and much much more. What had been “Firebase” became the Realtime Database element of the platform. Fortunately Google started to address the limitations that I and many other developers had found with the original Firebase. First server-side code, in the form of Cloud Functions, was added which enables you to put more of your sensitive business logic code onto the server.
More recently Google introduced an alternative database to the original realtime database which they call Cloud Firestore. Cloud Firestore addresses many, but not all, of the issues with the realtime database in terms of querying and organisation of data. It still provides the full realtime capabilities that we know and love and is still a No-SQL database based on documents. However you can now organise them into Collections (similar to relational DB Tables) which enables you to perform much more advanced queries. You can have specifically defined fields each of which can have a specific type. One of these types is the Reference type which lets you store links between documents on different collections to enable a form of join. In addition Cloud Firebase enables offline usage so the user can continue to use your app even if access to the server isn’t available. There are still limitations, remembering it’s not a relational database, and full joins are not possible and neither are aggregate queries such as SUM, COUNT etc. However with 90% of the issues I had with the original Firebase realtime database now dealt with through Cloud Functions and Cloud Firestore, Firebase is now an excellent choice as the back-end, serverless platform and data store for building full-scale production apps.
OK so enough talk about the what and why, let’s get going with the how and write some code. We’re going to start, as we’ve talked about, with a single HTML page. Choose your OS, code editor and browser of choice (I’m using VSCode on OSX and highly recommend using Chrome as your browser).
Open up your editor and select to create a new file in a new folder. Just call the new file index.html. Once you’ve done this, start with a skeleton html page as shown below :
<html>
<head> <title>VueJS & Firebase From Scratch</title> </head>
<body>
</body>
<script>
</script>
<html>
The first thing we’ll need to do is to import the VueJS library. We can do this with a CDN link (see below) which is placed below the closing body tag and before the opening script tag :
<script src="https://cdn.jsdelivr.net/npm/vue"></script>
This recommended CDN link is correct at the time of writing however may change in future. To ensure it’s correct, once you’ve inserted this link into your page, save it and open it up in Google’s Chrome browser (select File from Chrome’s menu and select Open File … to navigate and select your newly created index.html file). The page will show as blank in any case however right-click on the page and select Inspect from the pop-up menu and click the Console tab. If this displays nothing eg there are no error messages then you’re good however if you do get an error complaining about the vue library then browse to https://vuejs.org/v2/guide/ and look for the link displayed under Getting Started.
We’re ready to build our app! The first thing we need to do is to create the Vue Instance Object that will be used as the core of your app.
<script> var app = new Vue({ el : '#app' }) </script>
This creates a new Vue instance that we can reference throughout our html template and which contains all of the data and methods that we’ll create to develop the app. Some call it the View Model however we’ll stick to calling it the Instance Object. We simply create a new object called app from Vue and pass in an object with all of the information about our app. To begin with, we only declare a single property in this object which is el, short for element, and we assign #app. This tells Vue that any reference to an element that has the id of app is to be controlled by our Vue Instance Object.
In our html template we can now simply create a container html tag and assign it the id of app. All of the content within that tag is then controlled automatically by our Vue instance object. (Please note that any content in bold from here on in denotes new or changed content.)
<body>
<div id=‘app’>
</div>
</body>
Please note : Unlike AngularJS, with Vue you cannot assign the reference to the Instance Object on the body tag, you have to create your own container tag to assign it to, as in this case we’re assigning it to a div container.
Great but we’re not actually doing anything yet. Now we want to give our app some life. To do this we’ll give the app a name and display it as a title and we’ll do this as data held on the Instance object rather than write it directly on the template. To do this we’ll need to add another property called data to our instance object. The data property is an object which contains any variables you want to reference in your template or elsewhere in your app. In this case we’ll create a variable called appTitle and assign it a name. The app we’re going to build is an employee tracker that is going to be so indispensable to it’s users that it will be like magic!
<script> var app = new Vue({ el : '#app’, data : { appTitle : ‘EmployeeMagic’ } }) </script>
We can now use the data binding features of Vue to display our new app title in our page template.
<body>
<div id=“app”>
<h1>{{ appTitle }}</h1>
</div>
</body>
Save and refresh your page in Chrome and you’ll see EmployeeMagic as your app header. The double curly braces are pretty standard in most frameworks these days to denote data-binding (also called interpolation). The content inside the double-curlies is interpreted by Vue and the required content is displayed at that point in the template. In this case Vue recognises that we have a variable called appTitle in data in our Instance Object and replaces it in our template with the value contained in the variable. There are many benefits of data-binding, the main one being that any change in the variable in our instance object is automatically reflected in our template without any additional effort on our part.
So far so good but it’s a little plain-Jane so let’s add the Bootstrap library link for a bit more aesthetic to it without any extra effort. The link used below for then Bootstrap CDN was current at the time of writing however check the Bootstrap website if you have trouble with the link :
<header> <title>EmployeeMagic</title>
<link rel="stylesheet" href="https://maxcdn.bootstrapcdn.com/bootstrap/4.0.0-beta.3/css/bootstrap.min.css"/>
</header>
Let’s say however we want to add a margin around the app so it’s not displaying right up against the edge all the time. To do this we’ll need to add some CSS styling however we can take advantage of a cool Vue feature which lets us set our styles programatically.
Let’s add another variable to our data object which is specifically for styles, let’s call it mainStyle. This will be an object so that we can assign as many different CSS style settings as we like. For now we just want to assign a margin of 20 pixels :
<script> var app = new Vue({ el : ‘#app’, data : { appTitle : ‘EmployeeMagic’, mainStyle : { ‘margin’ : ‘20px’ } } }) </script>
Now we need to tell Vue where to use that styling property in our template. We’ll create a new container div tag to wrap around the rest of our app. In that tag we need to tell Vue to assign the styling we’ve defined in mainStyle. To do this we can use a Vue directive called v-bind:style and assign it the name of style object we want to use.
<body>
<div id=“app”>
<div v-bind:style=“mainStyle”>
<h1>{{ appTitle }}</h1>
</div>
</div>
</body>
Save and refresh in Chrome and you’ll see the margin has been applied. I personally love this feature of Vue and there are lots more you can do to apply styling which we’ll cover later in the tutorial.
It’s interesting to note that when using directives such as v-bind:style, Vue offers a more shorthand way by dropping the v-bind. If Vue just sees :style it knows what to do, so we could have used ...
<div :style=“mainStyle”>
... instead. Throughout these tutorials I’ll continue to use the more verbose version to show the full directives consistently however where a new directive is shown, I’ll also highlight the shorthand version. Generally if you see v-bind followed by a colon and the command, you can drop the v-bind although there are exceptions that we’ll cover in a future part of the tutorial.
We’ve so far covered what VueJS and Firebase Cloud Firestore are, why we’re using them as the framework and platform for this app, and the basics of setting up a simple HTML page to build our employee tracker app, setting up our Vue object, basic data-binding and styling using a Vue directive.
In the next 4 parts of this tutorial we’ll focus on each element of CRUD (Create, Read or Retrieve, Update and Delete) so in part 2 we’ll deal with Creating records to store in our Firebase Cloud Firestore.
Hope you can join me in Part 2 :)
You can download the completed code for this part of the tutorial on Github using the repo below and select the part1 folder. https://github.com/MancDev/VueFire
1 note
·
View note
Link
0 notes
Text
Handling Forms in Vue.js
New item has been added on CodeHolder.net https://codeholder.net/code/handling-forms-vue-js
When building web applications, there is always the possibility of working with forms. Learning to handle them as you work with different tools is very important. In this tutorial, you will see how to handle forms in Vue.js.
1 note
·
View note
Text
Building Mobile Apps With Ionic And React
Building Mobile Apps With Ionic And React
Ahmed Bouchefra
2019-08-07T12:30:00+02:002019-08-07T10:36:12+00:00
Ionic has recently added support for React; so now, React developers can get the advantages of Ionic to build hybrid mobile apps and progressive web apps (PWAs). In this post, we’ll show you how to get started using Ionic with React by building a simple demo app from scratch.
Prerequisites
In order to properly follow this tutorial, you’ll need the following prerequisites:
recent versions of Node.js and npm installed on your system,
working knowledge of TypeScript and React.
You can check that you have the latest Node.js version (v10) installed by running the following command:
$ node -v
Introducing React And Ionic
Let’s start with brief introductions to both React and Ionic.
According to the official website:
“React is a declarative, efficient, and flexible JavaScript library for building user interfaces. It lets you compose complex UIs from small and isolated pieces of code called ‘components’.”
React focuses on building UIs and doesn’t provide any built-in tools for the common tasks required in web development, such as fetching remote data and routing, so you’ll need to use some existing third-party libraries for these tasks.
According to the Ionic website:
“Ionic Framework is the free, open-source mobile UI toolkit for developing high-quality cross-platform apps for native iOS, Android, and the web — all from a single codebase.”
Basically, it’s a set of UI components that you can use with plain JavaScript or any popular front-end framework or library, such as Angular, React or Vue, to build a hybrid mobile app and PWA.
In this tutorial, we’ll see and use some Ionic UI components such as the following:
IonMenu: With this, a navigation drawer will slide in from the side of the current view.
IonToolbar: These top bars are positioned above or below the content.
IonHeader: This parent component holds the toolbar component.
IonContent: This component provides a content area, with methods to control the scrollable area and other things. You need only one content component inside a single view.
IonList: This component contains items with similar data content, such as images and text. It’s made up of IonItem objects.
IonItem: This component may contain text, icons, avatars, images, inputs and any other native or custom element.
IonButton: This component provides a clickable element, which can be used in a form or anywhere that needs simple, standard button functionality.
Installing Ionic CLI v5
Ionic’s command line interface (CLI), version 5, has support for creating Ionic projects based on React. So, let’s get started by installing the tool from npm.
Open a CLI, and run the following command:
$ npm install -g ionic
At the time of writing, Ionic’s CLI v5.2.3 is the latest.
Note: *According to how you installed Node.js in your system, you may need to add sudo before your command in macOS or Linux or run the command prompt as administrator in Windows if you get any permission errors. You can also simply fix your npm permissions or use a tool such as nvm.*
Next, install Cordova Resources (which is used to generate Cordova resources locally) and Native Run (used to deploy app binaries to devices):
$ npm install -g cordova-res native-run
These are required only if you want to test your application on a real mobile device or emulator.
Creating An Ionic And React Project
Now, let’s create a project based on React. Go back to your terminal, make sure you are in your working directory, and run the following command:
$ ionic start myApp --type=react
We use --type=react to generate a project based on React. You’ll next need to choose a starter template from the available ones. Let’s pick sidemenu for a starter template with a side menu and navigation.
After generating the project and installing the dependencies, you can serve your app locally using the following commands:
$ cd ./myApp $ ionic serve
Your app will be available from the http://localhost:8100 address, and you can actually use your web browser to start playing with it.
Ionic is called a hybrid mobile framework because it makes use of web technologies that were originally designed to create web apps, along with a native container (Cordova or Capacitor), to build mobile apps without using native technologies for the target platforms, such as Java or Kotlin for Android or Swift for iOS.
Because your mobile app is actually a web application, you can do most development by testing in a web browser without using an emulator or a real mobile device, except for testing native device features such as the camera or the SQLite storage, in case you’ve used them in your app. In fact, it’s even possible to use certain techniques to mimic the plugins that provide the native features and do the entire testing during development in your web browser.
Cleaning Our Project
We have the app’s basic structure, with two pages (home and list) and a menu. Let’s remove the list page since it’s just boilerplate code.
First, remove the src/pages/List.tsx file, then open the src/App.tsx file, and remove the entry for the list page from the appPages array:
const appPages: AppPage[] = [ { title: 'Home', url: '/home', icon: home } ];
Also, remove the import of the list page from the file:
import List from './pages/List';
Next, remove <Route path="/:tab(home)/list" component={List} exact={true} /> from the App component:
const App: React.FunctionComponent = () => ( <IonApp> <IonReactRouter> <IonSplitPane contentId="main"> <Menu appPages={appPages} /> <IonPage id="main"> <IonRouterOutlet> <Route path="/:tab(home)" component={Home} exact={true} /> <Route exact path="/" render={() => <Redirect to="/home" />} /> </IonRouterOutlet> </IonPage> </IonSplitPane> </IonReactRouter> </IonApp> ); export default App;
The App component is the root component that gets rendered by our application. If you open the src/index.tsx file, you’ll find the following code:
import React from 'react'; import ReactDOM from 'react-dom'; import App from './App'; ReactDOM.render(<App />, document.getElementById('root'));
The render() method is used to render a React element into the DOM in the supplied root element.
Theming The App
Having created, served and cleaned our Ionic project, let’s now see how we can change the colors of the UI so that it looks more professional.
Let’s get started with the side menu. Open the src/components/Menu.tsx file, and add a color attribute with a primary value to the IonToolbar, IonContent, IonList and IonItem UI components:
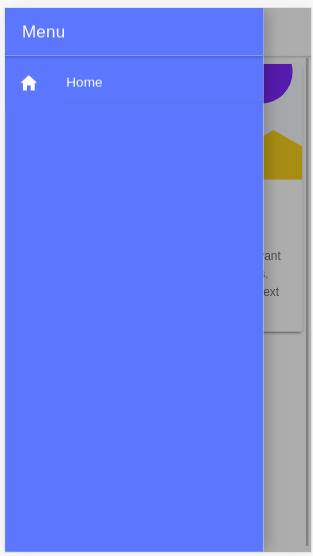
const Menu: React.FunctionComponent = ({ appPages }) => ( <IonMenu contentId="main"> <IonHeader> <IonToolbar color="primary"> <IonTitle>Menu</IonTitle> </IonToolbar> </IonHeader> <IonContent color="primary"> <IonList style= color="primary"> {appPages.map((appPage, index) => { return ( <IonMenuToggle key={index} auto-hide="false"> <IonItem color="primary" href={appPage.url}> <IonIcon slot="start" icon={appPage.icon} /> <IonLabel>{appPage.title}</IonLabel> </IonItem> </IonMenuToggle> ); })} </IonList> </IonContent> </IonMenu> );
Ionic provides some default colors (primary, secondary, tertiary, success, warning, danger, light, medium and dark) that can be used to change the color of UI components. A color can be applied to an Ionic component in order to change the default colors using the color attribute. See “Colors” for more information.
These colors have default values, but you can customize them via some predefined CSS variables. See “Modifying Colors“.
This is a screenshot of our menu:
Ionic menu. (Large preview)
Next, let’s change the color of the Home page. Open the src/pages/Home.tsx file, and set the color attribute of the IonToolbar and IonContent components to primary:
const HomePage: React.FunctionComponent = () => { return ( <> <IonHeader> <IonToolbar color="primary"> <IonButtons slot="start"> <IonMenuButton /> </IonButtons> <IonTitle>Home</IonTitle> </IonToolbar> </IonHeader> <IonContent color="primary" > </IonContent> </> ); };
This is a screenshot of the page:
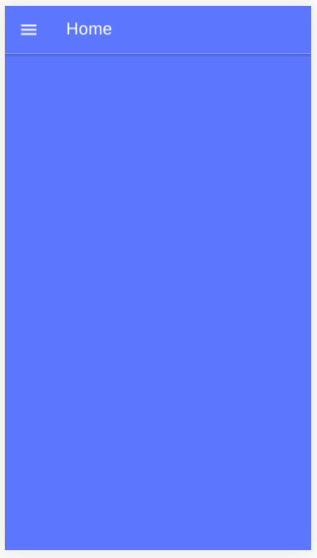
Ionic home. (Large preview)
Installing Axios And Consuming A REST API
We’ll see how to install Axios and consume a third-party RESTful API in our application, and we’ll also see how to display the fetched data using Ionic card and list components.
Having themed our application, let’s now see how to fetch data using Axios. We’ll use the third-party API available from NewsAPI.org.
First, we need to grab an API key, so that we can communicate with the API. Go to the registration page, enter your information, and register an account. You’ll be given an API key; note it, and let’s continue.
Head back to your terminal, and run the following command to install Axios:
$ npm install axios --save
Next, open the src/pages/Home.tsx file, and start by importing Axios and IonButton:
import { IonButton } from '@ionic/react'; import axios from 'axios';
Next, define the API_KEY and URL constant variables:
const API_KEY = "<YOUR_API_KEY_HERE>"; const URL = `https://newsapi.org/v2/top-headlines?sources=techcrunch&apiKey=${API_KEY}`;
In the URL variable, we’ll add an endpoint to get the top headlines from our source, TechCrunch. You can use any source you want from the available sources.
Note: Make sure to put your own API key in the API_KEY variable.
Next, define the fetchArticles() method as follows:
const fetchArticles = () => { return axios({ url: URL, method: 'get' }).then(response => { console.log(response); return response.data; }) };
We simply call the axios() method to send a GET request to the news endpoint, and the result from the method is a promise that needs to be resolved in order to get the news data.
Next, update the HomePage component as follows to call the fetchArticles() method and resolve the returned promise:
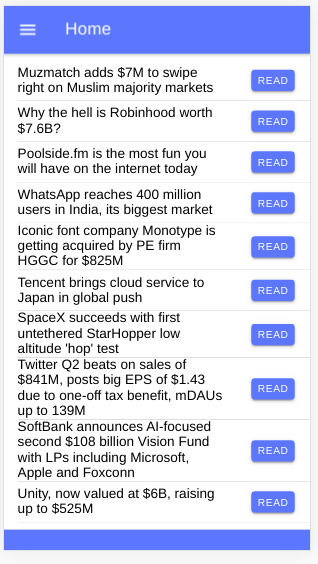
const HomePage: React.FunctionComponent = () => { const [articles, setArticles] = React.useState([]); const items: any[] = []; React.useEffect(() => { fetchArticles().then(data => setArticles(data.articles)); }, []); return ( <> <IonHeader> <IonToolbar color="primary"> <IonButtons slot="start"> <IonMenuButton /> </IonButtons> <IonTitle>Home</IonTitle> </IonToolbar> </IonHeader> <IonContent color="primary" > <IonList color="primary"> { articles.map(a => { return ( <IonItem> {a['title']} <IonButton href={a['url']} color="primary" slot="end">Read</IonButton> </IonItem> ); }) } </IonList> </IonContent> </> ); };
In our function component, we first call the useState() hook of React to create the articles state variable, which will hold the news articles after we fetch them from the API.
useState() returns the state variable, which has the empty array as its initial value and a function that we can use to change the value of the variable. We use destructuring assignment to unpack the values from the returned pair into distinct variables (i.e. articles and setArticles()).
Next, we call the useEffect() hook to perform a side effect in our component. In our case, the side effect is to fetch data from the news API using the fetchArticles() method, which returns a promise. Once the promise is resolved, we call the setArticles() method to assign the news data to the articles variable.
Both useState() and useEffect() are built-in React hooks that were introduced in React 16.8; they simply let you use state and other React features without having to write a class. The useEffect() hook is equivalent to calling the componentDidMount, componentDidUpdate and componentWillUnmount lifecycle methods combined in class-based components.
Finally, in the view template, we iterate over the articles array using the map() method, and we display the title of each news article inside an IonItem element of the IonList component, and also a button that takes us to the page of the full article.
This is a screenshot of the page:
Ionic news app (Large preview)
You can find the source code in this GitHub repository.
Conclusion
In this tutorial, we have started using both Ionic and React and used them to build a simple mobile application that fetches and displays news data from a third-party API using the Axios client. We have also seen how to use hooks in React — namely, the useState() and useEffect() hooks — to create state and perform side effects inside React function components. With Ionic, we’ve seen how easy it is to generate a project based on React and how we can theme the application using the color attributes of components.

(dm, al, yk, ra, il)
0 notes
Text
7 Best Material Design UI Component Libraries
Material design is a popular visual design system created by Google. It aims to enable designers and developers to create applications that have a unified look on all platforms. Apps that follow material design principles look beautiful and professional on all operating systems and devices. Google’s official material design toolkit supplies you with many assets such as guidelines, components, color palettes, themes, and icons.
However, that’s just the beginning. As material design is an open-source project, third-party developers have also created their own tools following material design principles. In this article, we have collected the best material design UI component libraries that can help you a lot in your next web or mobile app project.
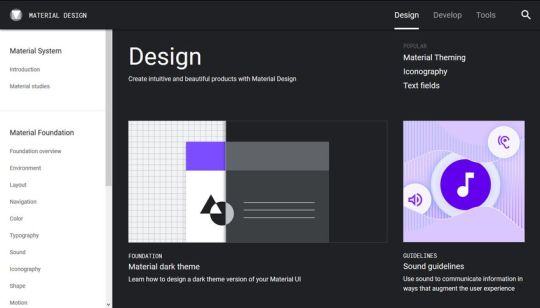
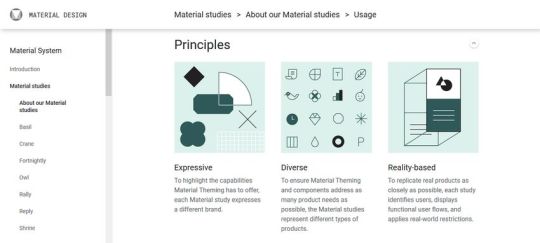
Google’s material design guidelines at Material.io
Material Design Principles
Before getting started with the best material design UI component libraries, let’s have a quick glance at the most important material design principles. They are as follows:
material color palettes typically use a primary and a secondary color,
colors need to indicate the state of components and the relationship between them,
text and icons should meet legibility standards,
motion on the screen always needs to have a meaning,
components should be reusable,
icons should have clean folds and crisp edges,
and many others.
Google made a thorough research to create the material design system and it takes some time to go through the guidelines. And, this is where the best material design UI component libraries can help you a lot. If you find one you like, you don’t have to be a material design expert to create apps that follow Google’s material guidelines.
Sample from Google’s material design guidelines
The Best Material Design UI Component Libraries
Now, let’s see the best material design UI component libraries. Although you can use them for regular web development, too, they fit espcially well with Web Components and component-based JavaScript libraries such as React, Vue, Angular, and others.
1. Materialize
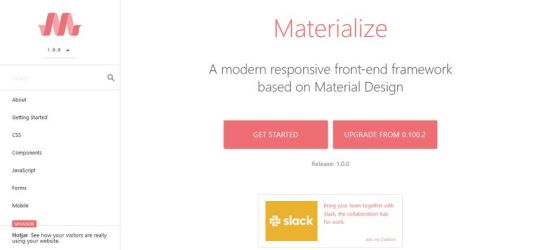
Materialize is a responsive CSS framework that follows the principles of material design. It provides you with multiple ready-to-use components such as badges, buttons, breadcrumbs, cards, icons, navigation bars, and more. Besides elements typical to websites, Materialize also includes mobile app components such as a cool drag-out menu and unobtrusive mobile alerts.
All Materialize components come with code examples you only need to add to your HTML page. Besides HTML and CSS components, you also get access to a number of customizable JavaScript elements such as a carousel, modals, parallax effects, and others. The team behind Materialize also offers themes that have been created with the component library, however they charge $19.00 – $49.00 per theme (or you can get the whole set for $59.99).
2. Material Design for Bootstrap
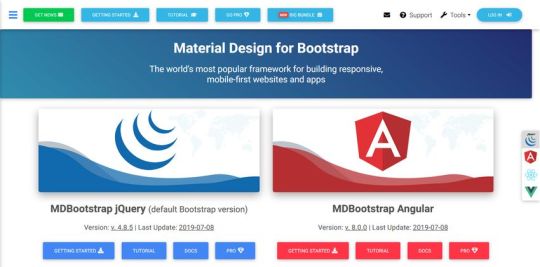
Material Design for Bootstrap is a versatile component library that allows you to build responsive, mobile-first websites and applications. It has been created for the Bootstrap 4 framework to help you use both front-end technologies at the same time. The default config uses jQuery for interactivity, however, the library also has setups for the three most popular JS frameworks: Angular, React, and Vue.
It has both a free and premium version. You can download the free material UI kit from GitHub. Currently, it includes 400+ material UI elements, 600+ material icons, 74 CSS animations, tutorials, and pre-made templates. Although the free library is more than enough for most apps, the pro version contains 4500+ premium components, 50+ premium sections, plugins, and JS modularity, too.
3. Material UI (for React)

Material UI is a popular UI component library for the React framework. If you want to create any kind of React app with a material look and feel, you need not go further. The components of Material UI work out of the box, they don’t require any additional configuration. The library includes layout components, all kinds of input elements, navigation bars, surfaces, utilities, and more. For the full list of components, take a look at the documentation.
Besides having access to multiple pre-designed components, Material UI also provides you with an extensive Component API. It lets you customize all the components with the help of props and CSS customization points. Material UI’s docs are really good and easy-to-follow, with a lot of examples, code snippets, and demos, so you can quickly get started with prototyping.
4. Vue Material
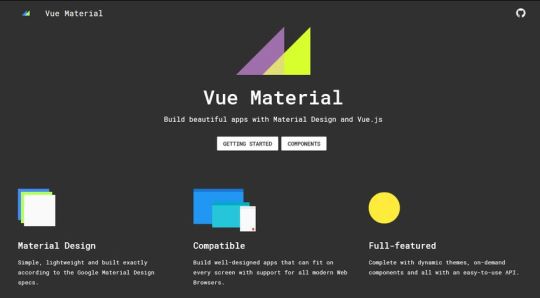
Vue Material is a lightweight material design UI component library for the Vue.js framework. Its creators take pride in having built all the components exactly according to Google’s material design specifications. Vue Material comes with tons of pre-designed UI elements such as avatars, buttons, cards, dialogs, forms, icons, lists, toolbars, and many more.
As Vue Material is pretty well-documented, it’s easy to get started with it if you worked with HTML, CSS, and Vue before. Each component is published within a live sandbox so that you can change the code online and see the results in real-time. Vue Material is a free UI component library that comes with two themes: Vue Material Dashboard Free including 16 components and the full-featured Vue Material Dashboard Pro for $59.00.
5. Angular Material
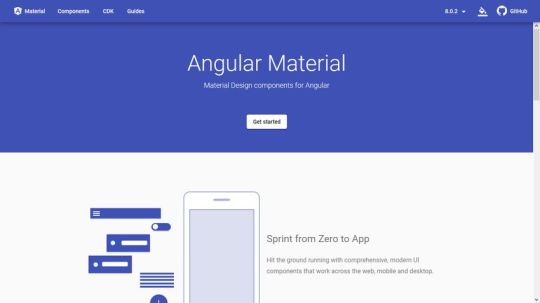
If you are on the look for a material design UI component library for your Angular application, Angular Material can be a good solution for you. It has been created by Google for the Angular 2 framework and it’s still under active development. Besides multiple UI components, Angular Material also includes the Angular Component Development Kit (CDK). Angular CDK is a toolkit that implements common interaction patterns such as accessibility, bi-directionality, drag-and-drop functionality, scrolling, and others.
Angular Material allows you to quickly prototype the user interface of any Angular application by providing you with professionally designed components created by Google. The components are categorized into six groups:
form controls,
navigation,
layout,
buttons & indicators,
popups & modals,
and data table for tabular data.
The library also comes with detailed guides that explain everything you need to know about building UIs with Angular Material.
6. MUI CSS

MUI CSS is a lightweight material design UI component library that includes the most important components you need in a website or application. You only need to add a minified CSS (6.6 kbyte) and JavaScript (5.4 kybte) file to your HTML page. As MUI CSS doesn’t have any external dependencies, it’s easy to set it up, even for beginners.
Besides components written in regular CSS and JS, MUI CSS has ready-to-use UI elements for React and Angular apps. The MUI CSS team has also begun to develop the beta version of a Web Components library, currently with three types of components: a HTML boilerplate, buttons, and forms. In addition, MUI CSS has a cool email UI library, too, with which you can create email templates that follow the material design guidelines.
7. Material Components for the Web
Material Components for the Web is the successor of Material Design Lite (MDL), both created by Google’s in-house team. Google’s documention on GitHub even refers the Material Components for the Web library as MDL v2. So, if you were thinking about using MDL for your project, use this library instead, as MDL vs1 is already in limited support mode.
You can find Google’s Material Components on the same material.io website where Google hosts its material design guidelines mentioned above in the article. You get access to pre-designed material UI components for four platforms:
Android,
iOS,
web,
and Flutter.
The web library provides you with a wide range of UI components such as buttons, cards, grids, surfaces, menus, tabs, and many others. If you want to create a web or mobile app that looks like Google’s own applications, the Material Components for the Web library can be the best solution for you.
Conclusion
Material design can give a professional look and feel to any web or mobile application. It’s especially a good choice if you want to build apps for the same brand for different platforms.
Creating a good-looking UI can be quite a challenge. With the best material design UI component libraries, you can follow Google’s material design guidelines without being an experienced designer.
If you are a programmer who usually works with back-end languages but want to know more about how to use UI frameworks, check out or backend developer’s guide to UI design, too.
This post comes from Digital Marketing Warrington
0 notes
Text
Best Material Design UI Component Libraries for Your Next Project
Material design is a popular visual design system created by Google. It aims to enable designers and developers to create applications that have a unified look on all platforms. Apps that follow material design principles look beautiful and professional on all operating systems and devices. Google’s official material design toolkit supplies you with many assets such as guidelines, components, color palettes, themes, and icons.
However, that’s just the beginning. As material design is an open-source project, third-party developers have also created their own tools following material design principles. In this article, we have collected the best material design UI component libraries that can help you a lot in your next web or mobile app project.

Google’s material design guidelines at Material.io
Material Design Principles
Before getting started with the best material design UI component libraries, let’s have a quick glance at the most important material design principles. They are as follows:
material color palettes typically use a primary and a secondary color,
colors need to indicate the state of components and the relationship between them,
text and icons should meet legibility standards,
motion on the screen always needs to have a meaning,
components should be reusable,
icons should have clean folds and crisp edges,
and many others.
Google made a thorough research to create the material design system and it takes some time to go through the guidelines. And, this is where the best material design UI component libraries can help you a lot. If you find one you like, you don’t have to be a material design expert to create apps that follow Google’s material guidelines.

Sample from Google’s material design guidelines
The Best Material Design UI Component Libraries
Now, let’s see the best material design UI component libraries. Although you can use them for regular web development, too, they fit espcially well with Web Components and component-based JavaScript libraries such as React, Vue, Angular, and others.
1. Materialize

Materialize is a responsive CSS framework that follows the principles of material design. It provides you with multiple ready-to-use components such as badges, buttons, breadcrumbs, cards, icons, navigation bars, and more. Besides elements typical to websites, Materialize also includes mobile app components such as a cool drag-out menu and unobtrusive mobile alerts.
All Materialize components come with code examples you only need to add to your HTML page. Besides HTML and CSS components, you also get access to a number of customizable JavaScript elements such as a carousel, modals, parallax effects, and others. The team behind Materialize also offers themes that have been created with the component library, however they charge $19.00 – $49.00 per theme (or you can get the whole set for $59.99).
2. Material Design for Bootstrap

Material Design for Bootstrap is a versatile component library that allows you to build responsive, mobile-first websites and applications. It has been created for the Bootstrap 4 framework to help you use both front-end technologies at the same time. The default config uses jQuery for interactivity, however, the library also has setups for the three most popular JS frameworks: Angular, React, and Vue.
It has both a free and premium version. You can download the free material UI kit from GitHub. Currently, it includes 400+ material UI elements, 600+ material icons, 74 CSS animations, tutorials, and pre-made templates. Although the free library is more than enough for most apps, the pro version contains 4500+ premium components, 50+ premium sections, plugins, and JS modularity, too.
3. Material UI (for React)

Material UI is a popular UI component library for the React framework. If you want to create any kind of React app with a material look and feel, you need not go further. The components of Material UI work out of the box, they don’t require any additional configuration. The library includes layout components, all kinds of input elements, navigation bars, surfaces, utilities, and more. For the full list of components, take a look at the documentation.
Besides having access to multiple pre-designed components, Material UI also provides you with an extensive Component API. It lets you customize all the components with the help of props and CSS customization points. Material UI’s docs are really good and easy-to-follow, with a lot of examples, code snippets, and demos, so you can quickly get started with prototyping.
4. Vue Material

Vue Material is a lightweight material design UI component library for the Vue.js framework. Its creators take pride in having built all the components exactly according to Google’s material design specifications. Vue Material comes with tons of pre-designed UI elements such as avatars, buttons, cards, dialogs, forms, icons, lists, toolbars, and many more.
As Vue Material is pretty well-documented, it’s easy to get started with it if you worked with HTML, CSS, and Vue before. Each component is published within a live sandbox so that you can change the code online and see the results in real-time. Vue Material is a free UI component library that comes with two themes: Vue Material Dashboard Free including 16 components and the full-featured Vue Material Dashboard Pro for $59.00.
5. Angular Material

If you are on the look for a material design UI component library for your Angular application, Angular Material can be a good solution for you. It has been created by Google for the Angular 2 framework and it’s still under active development. Besides multiple UI components, Angular Material also includes the Angular Component Development Kit (CDK). Angular CDK is a toolkit that implements common interaction patterns such as accessibility, bi-directionality, drag-and-drop functionality, scrolling, and others.
Angular Material allows you to quickly prototype the user interface of any Angular application by providing you with professionally designed components created by Google. The components are categorized into six groups:
form controls,
navigation,
layout,
buttons & indicators,
popups & modals,
and data table for tabular data.
The library also comes with detailed guides that explain everything you need to know about building UIs with Angular Material.
6. MUI CSS

MUI CSS is a lightweight material design UI component library that includes the most important components you need in a website or application. You only need to add a minified CSS (6.6 kbyte) and JavaScript (5.4 kybte) file to your HTML page. As MUI CSS doesn’t have any external dependencies, it’s easy to set it up, even for beginners.
Besides components written in regular CSS and JS, MUI CSS has ready-to-use UI elements for React and Angular apps. The MUI CSS team has also begun to develop the beta version of a Web Components library, currently with three types of components: a HTML boilerplate, buttons, and forms. In addition, MUI CSS has a cool email UI library, too, with which you can create email templates that follow the material design guidelines.
7. Material Components for the Web

Material Components for the Web is the successor of Material Design Lite (MDL), both created by Google’s in-house team. Google’s documention on GitHub even refers the Material Components for the Web library as MDL v2. So, if you were thinking about using MDL for your project, use this library instead, as MDL vs1 is already in limited support mode.
You can find Google’s Material Components on the same material.io website where Google hosts its material design guidelines mentioned above in the article. You get access to pre-designed material UI components for four platforms:
Android,
iOS,
web,
and Flutter.
The web library provides you with a wide range of UI components such as buttons, cards, grids, surfaces, menus, tabs, and many others. If you want to create a web or mobile app that looks like Google’s own applications, the Material Components for the Web library can be the best solution for you.
Conclusion
Material design can give a professional look and feel to any web or mobile application. It’s especially a good choice if you want to build apps for the same brand for different platforms.
Creating a good-looking UI can be quite a challenge. With the best material design UI component libraries, you can follow Google’s material design guidelines without being an experienced designer.
If you are a programmer who usually works with back-end languages but want to know more about how to use UI frameworks, check out or backend developer’s guide to UI design, too.
Best Material Design UI Component Libraries for Your Next Project published first on https://deskbysnafu.tumblr.com/
0 notes