#w3schools html tags
Explore tagged Tumblr posts
Visit Tumblr Blog
Explore Tumblr blogs with no restrictions, modern design and the best experience.
Last Seen Tumblr Blogs


Fun Fact
Tumblr is available in 18 languages.
Note
OH MY GOSH... I never knew UI database was a thing!! I'm so incredibly grateful you responded to my ask with that link, it's a game changer for sure. I've been referencing some of my favorite games when thinking through UI for my own game (Cyberpunk 2077, my beloved) but I never knew there was a site like that for more cohesive referencing. Thank you!!!!
hi!! i am so incredibly sorry i am late answering these. life! you know how it goes.
i recommend w3schools for html, css and javascript! they have a lot of beginner tutorials for things you might be interested in, as well good explanations alongside examples.
i also watched a lot of dan cox's tutorials on youtube. he has a bunch of stuff on his page for sugarcube 2. as far as i know he has a few video for the new 2.37 version, where as i'm using 2.36 but that's up to you! super SUPER helpful to watching someone actively using the programme and talk through it.
idrellegames' coding in twine tag is also super helpful! i was scrolling through it all the time when i got started with twine lol
my best advice for coming up with a design that is unique is to not go straight into the coding first! i mocked up all of chop shops designs in photoshop before i started building it in twine. here are some old mock ups. it doesn't have to be photoshop, that's just the tool i have on hand, but something like canva would definitely work just as well! or, if you don't have access to anything digital, just using a pen and paper would work just as well. it's much easier to draw out a design than start coding it when you're not sure how it's even supposed to look yet.
i hope that helps a little! <3
40 notes
·
View notes
Note
THANK YOUUUUU the pngs are super fun there are so many cool ones out there hehe. also thats so real with the homework teh only reason i've been able to do this all day is cos the painting i really should be doing is just a base colour that's still drying rn so i literally can't start working on that today. good luck for the thousand words & the math and IVE NEVER SEEN TADC BUT OKAY YAY I HOPE IT GETS BETTER 👍
GOOD MORNINGGGGGG HOW ARE YOUUUU
GOOOOOD EVENING TO YOU GOOD SIR i'm doing pretty good! i've been working on my neocities like all day lol its really absorbing But it's fine that ive been on the computer all day cos i'm making something! i like doing graphics too though i'm not sure how good they are lol i'm working on a little site button & the other pages hehe its really fun! ooh & i saw my cousin today she's a couple years younger than me but she's nice & kinda cool so that was nice HOW ARE YOU
#i was following someone who used to blog about it Incessantly so i know about it though. hope the ep gets better who knows it might pull#it all together in the last ten minutes#also btw!! a lot of stuff i learned in html off w3schools#<- ooh cool i should check that out thanks hehe#jordan tag :D
6 notes
·
View notes
Note
Hello there!! First off, I love your work- your creative voice is developed and your art style is delicious. V much an inspiration 😁
Anyway, I've been having trouble with embedding images in my fics, and since you write and draw I thought you might have some tips. I've exhausted Reddit and Ao3's FAQ has been no help. I'll take anything, html tips, better hosting sites for images, etc.
Thanks in advance!!
hiii thank you so much!! AO3 uses limited HTML, so for future referencing you can use any general html guide (w3school etc) to check how to write your code correctly.
this page is the most straightforward reference for embedding pics on ao3
since ao3 cannot host images, you need to upload your pic somewhere before embedding it. i use postimages.org
in the html editor, insert your image with the code:
<img src="URL GOES HERE">
SRC is the source of the image, aka the url. you can resize an image using WIDTH and/or HEIGHT. and if you want to get fancy, you can add hover text using TITLE and alt text with ALT. so, if you wanted to resize a square down to 100px, that would look like this:
<img src="URL" width="100">
you can also align your image as left, right, or centered on the page. just place your image within a <div> tag like so:
<div align="center"> <img src="URL"> </div>
41 notes
·
View notes
Text
Resource: Responsive Web Design
Starter kit basically.. for those working on jcink skins. Viewport plus using media queries, css variables, grid, and flex will ease the process of making responsive skins but I advise keeping them in mind early on.
10 notes
·
View notes
Text
after months of groveling i got an infant's grasp on basic html & css and am proud to share my neocities website!!! i'll be updating this often with projects and other stuff i'm up to.
there's still a lot wrong with it but i fixed up the more obvious and obnoxious details. thnx substack & w3school because oh my god. i will never experience anything like troubleshooting lines of nonsensical code for 3 hours just to find out i didn't close a div tag.
have a live look here!
#.jrnl#neocities#it's a weird url ik it's gonna be hard to get to but that's another important problem for later#i rmr talking about making a site for years and ITS HERE!! ITS HERE!!!#i forgot to mute the video..... it just makes the irl speed of this funny its so janky
13 notes
·
View notes
Note
do you have ideas of how to use graphics and stuff without coding/doing html? :o
Hi there!! :)

First of all, never be afraid of HTML!!! All you need to do to use graphics is know how to put a link in between two <img> tags, I promise...!!! Anyone can get started with HTML within 15 minutes or so; I particularly liked w3schools's interactive pages!

Regardless, I personally use bullets and dividers to break up my digital school notes and make them more visually appealing... I find spending time to decorate them forces me to stare at the information long enough to start getting it into my head ^^'!
Many, particularly on Tumblr and deviantART, use web graphics to break up large chunks of text in diary entries, creative writings, essays, etc... Animated text was particularly popular on MySpace and Facebook, and I continue to send animated text graphics to friends when texting from my computer... And on sites such as Tumblr which allow for custom themes, it's incredibly easy to insert graphics to decorate one's web theme!
101 notes
·
View notes
Text
Mini React.js Tips #3 | Resources ✨
Continuing the #mini react tips series, its components making time~!
In React, a component is like a Lego brick for building websites or apps. It's a small, independent part of the user interface (UI) that you can reuse whenever you need it. These components can be combined to create bigger and more complex applications. Examples are the header, footer, cards, asides, etc!
What you'll need:
know how to create a React project >> click
know the default React project's file structure >> click
know basic HTML
know basic JavaScript
basic knowledge of using the Terminal

What We Are Creating:
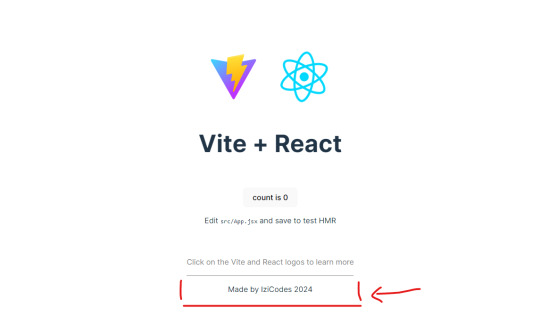
The footer at the bottom!
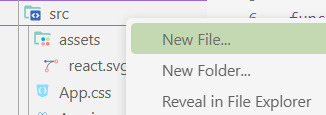
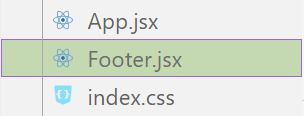
[ 1 ] Navigate to the 'src' Folder: Open your project in Visual Studio Code, locate the 'src' folder, and right-click on it.
[ 2 ] Create a New File: Click 'New File' to create the file within the 'src' folder. This file will house the code for your React component.
[ 3 ] Naming Conventions: Give your component a name, according to the convention of starting with a capital letter. This naming convention is essential for React to recognize your component~!!
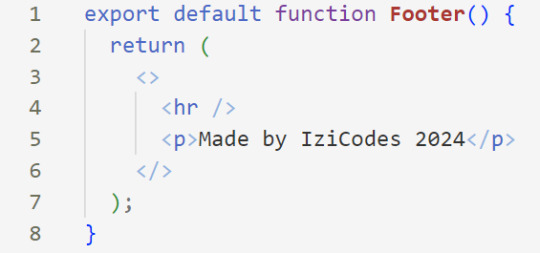
[ 4 ] Create The Initial Function: Open the file and type:
export default function [name of component]() {}

[ 5 ] Insert The return() Statement: The statement is used within a component to specify what content should be rendered when the component is invoked or used. Type:
return()

*the error is there because we haven't added anything inside yet, don't worry!
[ 6 ] Insert The Empty Tags: Inside of the return(), add empty tags (tags that don't have a specified element inside of them).

[ 7 ] Time For Some HTML: Inside the empty tags, enter the normal HTML elements that you want~!
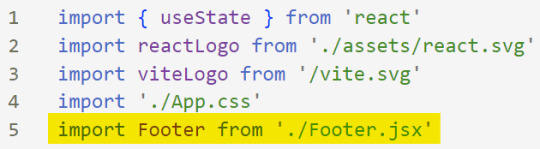
[ 8 ] Integration with App.jsx: Navigate to the 'App.jsx' file in the project, which is typically the entry point of your React application. At the top, import your newly created component. Type:
import [name of component] from './[location of the component]'
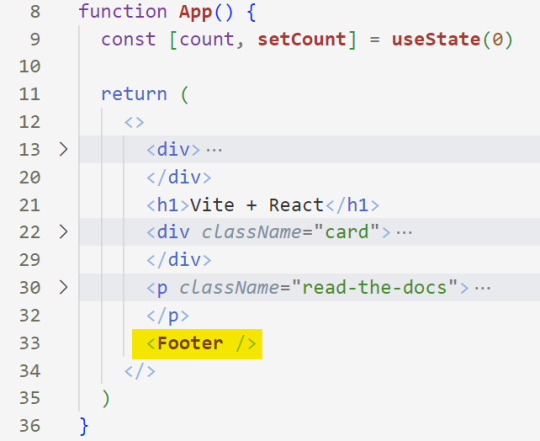
[ 9 ] Use Your Component: Inside the return() statement of the 'App()' function, include your component using the following syntax:
<[name of your component] />
[ 10 ] Run the Development Server: Start your development server with the command (the 'Local' link):
npm run dev
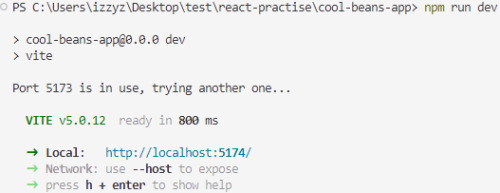
[ 11 ] Preview Your Project: Open the link provided in your terminal in your web browser. Witness your component in action!
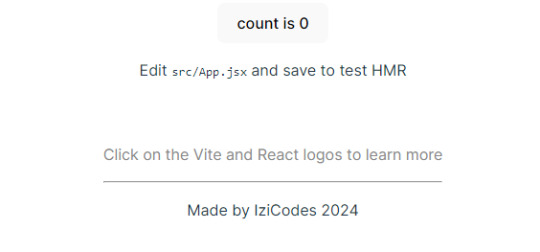
Congratulations! You made your first component! Try and create some new ones and place them around in the App()~!
BroCode’s 'React Full Course for Free’ 2024 >> click
React Official Website >> click
W3School's React Components >> click
Importing and Exporting Components >> click
🐬Previous Tip: Tip #2 The anatomy of the default React project >> click
Stay tuned for the other posts I will make on this series #mini react tips~!
#mini react tips#my resources#resources#codeblr#coding#progblr#programming#studyblr#studying#javascript#react.js#reactjs#coding tips#coding resources
33 notes
·
View notes
Note
Hiya! I found your blog through your neocities website! I was wondering if there’s any tips or things you read/watched that help you make your site. (Im heavily considering making one of my own neocities site it just seems fun)
hihi welcome !! i have quite a few pieces of advice, but the tldr is you should come up with an idea for what you want to make beforehand, and look up how to do each piece! your knowledge will start to fill in along the way :]
(this is probably gonna be long as hell so under the cut is all of the fun stuff /silly)
the way i personally started off was by sketching out what i wanted my site to look like! if you know what you want before you begin, you'll know where to look to figure out what you need to do. html+ css are extremely easy languages to read/write once you know what to look for!
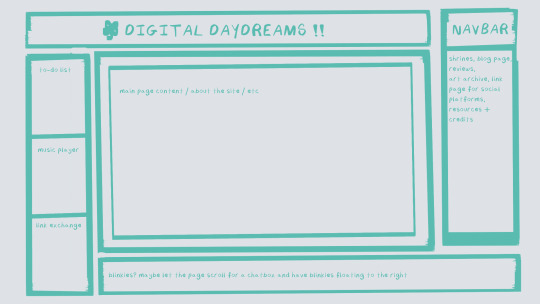
^ this was the original sketch for my site, where i planned out everything i wanted to include. it's a bit different from what actually ended up on the site, but that's alright! it's just about having an outline to work from. i think of it like outlining before you write, it feels like such a pain in the ass because u just wanna start working NOW but u will thank yourself later for taking the time to plan.
once you know what you want to make, start looking for tutorials and resources to make it easier! the grid for my homepage and some of my other subpages was made using a css grid generator, since its one of the more confusing bits of css. you can make grids without it, but its a very easy way to make a more asymmetrical design if ur using the generator!
thats linked here, it gives you some css to put in your head or css sheet, and then the html for the different boxes to slap in your main document. it can be easier to understand what itll look like if you give each one a border while you work, even if its just temporary!
when looking for information about css and html, w3schools is your best friend. its a pretty comprehensive database of every little piece of html + css you could ever need, with examples you can play with yourself to understand what each variable does! it's been a lifesaver for me, ive watched basically zero video tutorials because everything on there is explained so well and you can find basically Anything.
they even have code snippets for things that take more than one or two lines of code, which you can use and adapt yourself! (the tooltips on the official art + my art sections on the hinata shrine were adapted from a tutorial on there!)
in general, having a plan and working from there will make ur life so much easier. the pages that ive sketched out beforehand or ive had a very clear vision for have been WAYY easier to code than the ones i tried to come up with on the fly, and ive been much happier with how they've turned out as well. though i do also have some smaller, rapidfire tips as well that ill go thru now!!
— inline css (the style="" tag) seems so so useful but really should only be used when you're resizing images like buttons. when u keep all of your css in the head or in a seperate document, its way easier to debug and read later. i cleaned up my homepage recently by removing all of the inline css and looking at the code stresses me out WAY less because i can actually read it LOLOL ... plus cutting the css out and putting it in its own document made me realize that id accidentally wrote some really weird code in some places
— this is very much 'do as i say, not as i do,' but use an external editor (like visual studio code) instead of editing live on neocities! you can set up a live preview, and generally wont be pushing out 100 updates every single time you change or add something. i tend to code directly on neocities but its a bad habit and i want to break it eventually v_v
— if you really like an effect someone else has on their site, you can peek using inspect element i promise the coding police won't get you !! dont steal code line for line, but you can figure out what theyre doing and put your own spin on it. things like border images can be really cool, and i only figured out about them because i looked at what someone else was doing and figured out how to adapt it for my own site! check linkbooks and credit sections as well, a lot of people will include links to any effect they didnt make themself or got help with. (including me! the credits section of the linkbook has a ton of little things i got from other places, including a really neat little music player, the rss feed for my status cafe, and the wobbly text on the homepage!)
— most stuff in html and css basically just... says what it does in the tag. so looking stuff up for it is extremely easy! if you've used carrd before you honestly probably already know more abt html than u'd think just intuitively. when ur adjusting the margins or padding in carrd, you're adjusting the margin: and padding: properties in the css of the website it's outputting!
this is getting way too long but!! my best advice is to just get started. you'll never be able to learn without trying, and it genuinely is so fun to have something that's truly your own!
(if u have any specific questions im happy to answer anytime as well! i love talking abt neocities, its a super fun hobby and way easier to pick up than u would think!)
#originals.txt#inbox.txt#neocities.zip#god im so sorry abt how long this is i havent had time to work on the site for a while and its getting to my head /silly
6 notes
·
View notes
Note
Hellu))
I looked at your neocities thingy, and I just wondered how you did that with the text boxes and the background and stuff. If you are willing to share, if you aren't, then sorry for wasting ur time)
I'm very new to coding (I suck) and "Penelope the cat" doesn't really help much T-T
Hi! Don't worry about asking, I'm always happy to help and give info on anything I know to the best I can! (Though to be completely honest, I too don't know much of HTML so... lol)
I used a <table> tag and the other tags that come with it. I also used boarder, boarder style, and background color, which would be in the CSS part of the code. Makes the boarder that's around it, The style that boarder will be in, and the background color of that table.Here's a website that explains it better then I can and also helps me out A LOT.
I heavily recommend this site, it's a life saver and will explain everything.
Also here is some CSS to help with the boarder and background!
Some other extra tips I'll throw in here:
I recommend using "Visual Studios". It's a free program and you can get a plug-in that allows you to see how your website looks without having to edit, go to the website, refresh, over and over. It also helps with coding as well, overall I'm loving it!
Now, by no means am I saying you should copy somebody else code and steal it. That's wrong. However, if you see something you like and want to know how it works, inspect the page and look at the code! I've learned a lot from doing this and it's help me figure out how things work too. Once again, do not straight up steal lines of somebody else's code. By that point you're not coding, you're copying, pasting, and stealing.
I also think you should learn the basics of HTML, and if you really want to make things then I say take the time to learn HTML. Personally for me, I love the look of broken ugly websites. Just some basic CSS will do for me! But if you're not like me, then yes, I think you should learn more then just the basics.
I'm sure there's some HTML nerds that can explain this way better then what I can so like I always say when it comes to learning stuff, look it up! The internet has unlimited free information, somebody 12 years ago on reddit probably asked the same question you did and the answer will be in the comments of that post. Always search for things!
9 notes
·
View notes
Note
Hiiiii I’m new to neocities and I love ur site!!! I like how you organized everything and the whole aesthetic is really cool 🍔🕷️ !
I was wondering if you have any recommendations for learning css? The little neocites interactive course on html was super helpful to me, cause it had a little sandbox area to test out commands in. The course on css wasn’t as interactive and I’m struggling 2 learn :(
Wow thank you! I worked very hard to make that thing look good lmfao
I learned the foundations of my html/css knowledge from a class I took in high school and then everything afterwards was a sort of "fuck it we ball" effort so DISCLAIMER: I am shit at this because I just shake it around violently until it works
If you want a "sandbox" like you mentioned to just test stuff out in without reloading a html file x2000 on your computer, I recommend this lightweight site. You can use a <style> tag to slap CSS onto things without creating a new file or you can look into a proper WYSIWYG program, I have no recommendations because I'm very very picky...
As far as actually diving into CSS, I sincerely wouldn't know how to step into it besides the aforementioned "fuck it we ball" In high school, the way it was taught to me was more watching a video of someone coding CSS into a site, explaining things as they went while you followed along and coded with them. This sort of thing doesn't work for everyone but it might be the level of interaction you need.
I'm sure you have already seen this site mentioned but I definitely recommend checking out w3schools, it has tutorials of its own and references for every single CSS property, selectors, and even lists of web safe fonts and colors.
#I hope this was at least marginally helpful. I am no good at explaining processes and tools#astronautcorpse
35 notes
·
View notes
Text
So I know how to code websites now, but idk how to upload it to the internet. My plan is to give you all a post that will update with a string of code to sort of visit the website(s?) that I am curating. I will reblog a post that had the original, and include a more patched version as time goes on. I am so sorry in advance.
Because of this.... Lemme show you how html and css works!!
For Project Our Realities, it will all be in html and css since that's what I'm learning so far. JavaScript will be included later.
HTML and CSS basics below!!
HTML, or Hyper-Text Markup Language is the basics of coding a website. It describes how a website will look. It unfortunately doesn't get you too far in terms of digital design, which is why we have languages like Css and javascript.
All HTML files start with <!DOCTYPE html>. This declares to the file that you will be coding in html rather than something like lua.
Each HTML file, after declaring it as an html file, starts with <HTML> and </HTML>. To end a tag, you must close it by adding a forward slash before writing its name (unless it is <br> or <hr>, or similar).
The <head> tag lets you add a title (silly little tab name), a favicon (silly little icon next to the name of the tab) and ways to link your CSS to the HTML.
An HTML file will look like this <!DOCTYPE html>
<html>
<head>
</head>
<body>
</body>
</html>
In the body, you can write the rest of your page, using headers (<h>/<h1-6>), paragraphs (<p>), and even forms (<form>).
--
CSS, also known as Cascading Style Sheets, is a type of coding language that is often used to create websites. No, it is not C++.
Rather than <>, CSS uses brackets {} to code.
CSS is used to style html websites, so it addresses html tags and lets you style their appearance. There is something known as inline CSS, where you can use the <style> tag to style something in your HTML file. HTML was never meant to have colors in its code, but you can change the color of text with inline css. Let's say you would like to style a header.
In your HTML file, it would say:
<!DOCTYPE html>
<html>
<head>
<link rel="stylesheet" href="(name of .css file goes here)">
</head>
<body>
<h1> My first header!!! :> </h1>
</body>
</html>
Now that we have our header, let's turn it red.
In your CSS file, it should say...
h1 {
color: red;
}
The H1 addresses that it will select all h1 elements. The code in the brackets shows that all those addressed will be the color red.
CSS has no starting or finishing lines, all elements will by stylized with {}.
--
To create an HTML file, you must end it with .HTML
To create a CSS file, you must end it with .css
Sometimes, when I create a link for the Css, the required name for the file will be in the HTML code already. Make sure that both files are in the same folder, and not one in a different folder within the same parent folder. This will not work.
--
Wanna test this out? Make a new notepad file on Windows, title it as "firsthtml.html", and create another file called "firstcss.css".
Place this in the .HTML file: <!DOCTYPE html>
<html>
<head>
<title> First HTML </title> <link rel="icon" type="image/x-icon" href="https://i.pinimg.com/736x/1a/8d/9d/1a8d9d26cdca15285d217c817f6953ec.jpg">
<link rel="stylesheet" href="firstcss.css">
</head>
<body> <h1>Welcome, traveler!!</h1>
<h3><I>Thank you for reading the tutorial!! Follow the blog to keep up with our news.</I><h3>
</body>
</html>
Now, for your .css file, write this down:
h1 {
color: dark blue;
}
h3 {
color: orange;
}
--
Thank you so much for following this tutorial. I mainly learned about this from w3schools and in my school course. Happy coding!!! :>
-ava
#.io#ava#ava our realities#io our realities#eps foundation#entertainment productions studio#project our realities#our realities#coding#html#HTML stuff#css#Css stuff#hyper text markup language#cascading style sheets#there will be more coding to come#I hope this helps you guys get into coding
3 notes
·
View notes
Note

take so good it made me make a chart (+ check the notes of that post to see if anyone got some better takes. they did not get better takes)
hey your writing seems epic (<- not a joke , a compliment, i'll probably read it whenever i can depending on if i'm willing to read fics for a fandom i'm not in which i don't do) have you considered using the blockquote element to separate different parts of your summaries ? /genuine question
<blockquote>like this: here's the <a href="https://www.w3schools.com/tags/tag_blockquote.asp">w3schools link</a> for it but all you have to do is surround the text you want blockquoted with '<blockquote>' and '</blockquote>' - sorry idk how much html you know + w3schools is a good resource for simple explanations of elements (i think it's a bit outdated thou), there's a question thing on ao3 that tells you what elements it allows i think.</blockquote>
^example of how you use it (and a elements for no reason. but i like them theyre niceys)
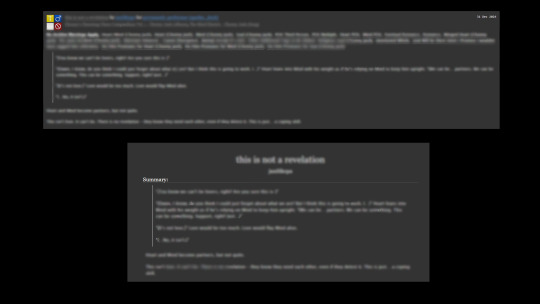
^ this is how it looks (blurred everything cause i was worried about it seeming like i was subtly advertising my fic which is Dumb but Whatever)
html <2 anyway. bye
REALLY REALLY GOOD POSTS U MADE. genuinely like u get it on such a beautiful and awesome level i was going around feeling so delighted that someone else Got It all day. i love the [violence/sex] blurry spectrum & the {intimacy / eroticism / [violence/sex]} venn diagram. how on earth are people thinking abt messin around in a ribcage or gently tugging a knife through and Not considering the pure intimacy there. entirely different but not mutually exclusive to sex!!! (also i genuinely think i've said pretty much all the same things almost word for word. something i think about lots. so much.)
+ I FORGOT HOW TO DO THIS. AWESOME. genuinely thank u so much i Have thought about this and then gone mmmm not worth the trouble of finding it again Several times. thank you!!!! they look so niceys and awesome. i will Absolutely be doing this. :]

this was such a cool surprise in my inbox here is a creature photo in exchange <333 ty!!!!!!!!!!!!
#waugh... <333#also like. very much not trying 2 promo my fics or whatever. literally just hearing that someone thinks theyre cool made my fucking day u d#Not have 2 read them ever. but. fwiw.turmoil and wonder is the messing around gathering up intestines pressing fingers against lungs one <3#anyway. hope u have such a good night/timezone!!!!!!!#asks :)
4 notes
·
View notes
Note
Hi! Gonna start off and say that I love the work you're doing with the Welcome Home neocities website! It's perfectly stylized for the project/puppet show and I can see the work you're putting into it.
I'd love to learn how to make my own neocities website (for fun? For a personal project??), so I was wondering if you could provide some tips and/or pointers for a first-timer.
Thank you!
HAHA well first of all i'm flattered that someone would think i'm skilled enough to be giving pointers in the first place. i still consider myself a novice when it comes to web design (for example, if you're wondering why every page on welcome to welcome home has its own CSS, it's because CSS is Way harder for me to wrap my head around than HTML) so i can't give any Super advanced tips, but i can at least write about what's helped me so far:
GUIDES. neocities has its own tutorial and list of HTML/CSS resources, but user-made guides are your best friend when it comes to figuring out where to go from there. a.n. lucas and pauli kohberger both have really good guides for beginners, but for the more advanced stuff, i found myself referencing the resources on solaria's webspace and sadgrl.online the most. w3schools is also very helpful when it comes to answering more specific questions like "how do i use two different fonts on the same page?" (and probably more.) if all else fails, then usually just googling "how to (x) in HTML" or "how to (x) in CSS" will yield at least one useful result. for making your website more accessible, there's the accessible net directory and this masterpost by foxpunk on tumblr.
it sounds obvious, but it helps to have a solid idea of what kind of site you want to build before you actually dive in, and then snoop around on neocities to get an idea of how other users approach the same topic. for example, i got the idea to start a welcome home wiki on neocities after being reminded of the 8:11 wiki on the same site, and then i spent a couple days just looking up stuff like "wiki" or "fansite" on neocities and then clicking on any page that caught my attention to study it.
layouts! there's no shame in using a premade one, and you can even learn more about HTML/CSS in real time just by messing around with the base code before implementing any intentional changes. sadgrl.online's layout builder is a VERY popular choice, since you can already do a lot with the basic options it offers and it's easy to further customize once you have it set up on your page; it's what i used to make welcome to welcome home. sadgrl.online's webmaster links also feature a bunch of other options under the "layouts" tag, and if none of those work for you, then you can even find something just by looking up template/templates/layout/layouts/HTML/CSS on neocities itself.
side note: if you're reading this and you want to make a wiki then you can also use this wikitable code. it came out after i had already established the Look of welcome to welcome home, so i probably won't implement it any time soon, but i TOTALLY WOULD HAVE if it was around when i first set the site up.
you can scale images up or down using percentage, with 100% being the image's default size. i don't know how helpful or acceptable that is, but i use it a lot.
don't feel pressured to get everything done at once, even if you expect people to be visiting your site frequently. usually if you just slap on an "under construction" gif or even just write "hey this site is still under construction" then people will understand. i don't think i've ever seen anyone get super huffy about slow updates on neocities, anyway.
EDIT: OH. GRAPHICS. i mention all of these on welcome to welcome home's front page but i Also wanted to note them here: betty's graphics and websets by lynn both have HUGE collections of background tiles and other graphics that work especially well if you're going for that old web charm. i also like to use this mirror of patterncooler for backgrounds bc of the customization options. you can also make your own background tile and then use a seamless tile maker like this if all else fails.
EDIT 2: ALSO. obviously. do not be like me and use discord or any other chat client as a filehost, no matter how promising it looks, because one day you WILL get a very nasty surprise when the request signature on those urls expire and the images are no longer accessible on other sites. there are a myriad of other filehosts out there, but personally i recommend file garden (and also donating to file garden if you can, even if only for a couple months. i know i said that just yesterday, but if it gets more folks to subscribe then i'm gonna keep saying it.)
#imaginatorofthings#ask#welcome to welcome home#web design#? yeah i'll slap that tag on there why not#neocities
20 notes
·
View notes
Note
Hnnnghh I was informed by tatp that u know about about coding wdgvbb any tips or whatever I’m trying to make a neocitys website or smthg
Since it's neocities website all you need is: HTML, CSS and maybe some graphics. As I said before I'm shit at explaining stuff but I will try my best. So here's "I want to make my own website" the basics!
HTML - markup language, the base of your websiteCSS - style of your website, can change color of html elements, size, font etc. I linked w3schools website since it's pretty easy to understand.Do you need to learn all of this before coding? No. I think it's the best to just check things that you need for your website. If you need to change background color of your website just find a w3schools tutorial on it or simply search for "how to change background color in css". You just should know html tags and basic attributes: id and class and how to link your css in html file so your style actually works! Neocities has it's own tutorials on html and css so you could check them out too! Neocities also has it's own code editor. You can edit everything in browser. I personally like to code in Visual Studio Code then just paste the code into Neocities editor. VS Code has a lot of addons (some of them are there by default) that make coding way easier for example: autocorrection of syntax errors and giving you suggestions!
Example: If you type html in vs code html file you will get 3 suggestions:
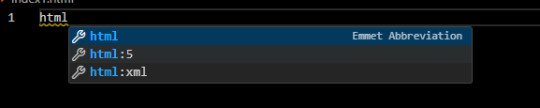
choose the html:5 one:
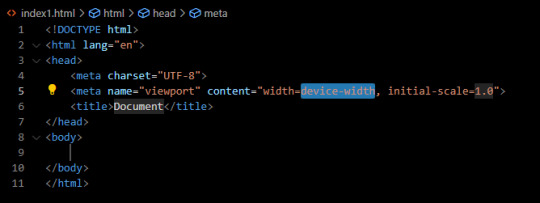
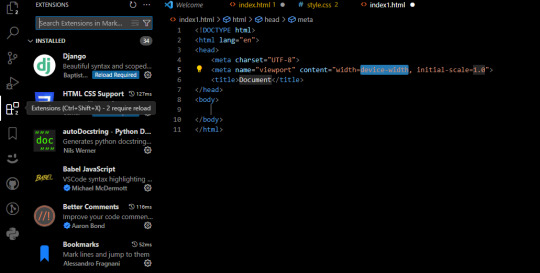
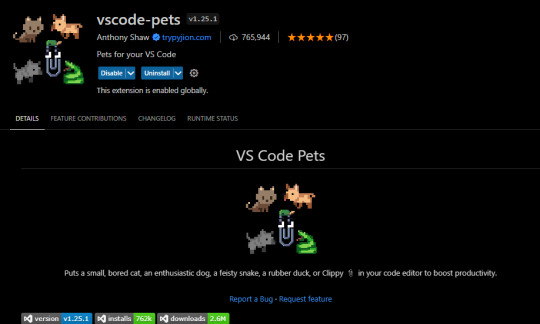
TAADAAAM!! VS Code just wrote the whole website structure for you! You can install more extensions here under extension section! There is this extension called vscode-pets it won't help you with coding but its really cute:
some yt tutorials: CINNIMANI (specifically for neocities), web coding playlist (this one is good for all websites in general); https://sadgrl.online if you were on neocities you probably saw her website. She has a lot of useful resources including image resources and also she made her own WEBSITE BUILDER or acutally layout builder! It's pretty simple website builder but still. If you are looking for premade layouts you can just search them on google or get sum from the website I linked ^__^ Uploading your website to neocities is really easy since all you need to do is to put all the files on there! I guess that's all for now. If you have any problems or questions just ask. I'm here to help ^^ websites with free to edit code: https://codepen.io, https://github.com
10 notes
·
View notes
Note
how are you able to incorporate imagery (not as a metaphor but the actual images and gifs) so well into your games? thank you and i love your work!
if you just want the actual command, its a pretty basic html tag you can just google. its like <img src = "INSERT STUFF HERE "> iirc
if you want my process, here:
figure out the style as in like. the art style. the vibe. i like each of my works to have a distinct visual style i can follow because that makes actually drawing things a lot easier. for childhood homes it was ditherpunk black and white, for my brother;the parasite it was painted images run through a crunchy pixel-y filter. buy PIxaTool its good
draw a rough layout / reference something else a visual reference is very helpful!! i like to read through different works and steal parts i like, then sketch up something, then actually build it in html.
Code It this part sucks. i'm a novice at twine/html/etc so i am bad! but i am also very stubborn. get comfortable combing through forums and not understanding why the image isnt where its supposed to be. things will break and thats just the way it is. try again and again and eventually things will work. w3schools and stack overflow are my best fucking friends as a newbie.
beyond that, a lot of it is just coding, testing, and then tweaking things over and over until i like how it looks alongside the text. also!! keep in mind the mood of the scene!! how the reader should feel!! and adjust your images accordingly. never underestimate the impact a minor change in a picture will have. people notice, especially when its the only thing TO notice.
#i just got off work and am tired so i might not be the most articulate. apologies!#but basically i just do what i think looks good#atmosphere is one of the most important things in my game so i make sure things are built to support that#'if i were a reader would i like this?' type stuff. which means things arent always perfect but everything has a purpose#if you have specific questions on coding and whatnot you can dm me and i can send you my hideous html lol#inquiries#anon
9 notes
·
View notes
Note
different user, but how did you make your neocities page look tidy on mobile?

<meta name="viewport" content="width=device-width, initial-scale=1.0">
usually you want to add something like this line of code right under your head tag in your html file, and that works most of the time
i recommend you go through w3school's page on the html meta tag: it'll give you an explanation on it and even show you an example of a website when it has that snippet of code vs without it. i hope this helped!
6 notes
·
View notes