#HDC Photo
Text

Johnny Hallyday, fondateur du HDC Desperados, club de bikers en Harley Davidson.
3 notes
·
View notes
Note
hi! since your requests are open, could I ask for some room hdc?? with characters of your choice 🧎♀️
please take care of yourself and take your time!!
Creepypastas room headcanons!
➥ Jeff the Killer, Homicidal Liu, Eyeless Jack, Ben Drowned, Clockwork and Hobo Heart
Oh hi and thank you!! Here you go sweetie! If you wanted someone more then feel free to uptade!! :33

.•┈••✦ 🖤 ✦••┈•.
☆ Jeff the Killer
What a stinky men. Im sorry but his room is messy for sure and you can't convince me otherwise! Dirty clothes, empty cans, leftovers, stains..man, hire him a maid or something. Some dead plants and messy grafitties, stolen traffic signs and construction boards! Propably never in his life made bed, and his sheets aren't changed often.
Definitely has many band posters on his walls too! Maybe some vinyls too?? Mostly the black, red and grey colours can be seen. Hates the big light, so usually sits in dark or with small lamp. His drapes 24/7 covered. He is emo and plays loud music.
Smells like cigarettes and like room that hadn't been aired for long time.
☆ Homicidal Liu
Pretty, clean and organized room! The only 'messy' thing could be mugs he forgot to clean (same tho). Im sure he has gramophone and listen some of this old, silly, romantic songs! Also - a lot of plants, maybe even lego flowers? Couple of this aesthetic posters, some gobelins, small paintings. Photos with his friends, S/O! His bed is almost always well made. He have many books, and an easel (what an art hoe of him).
Mostly green, brown and beige colours. He loves natural light and candles, and if the weather is nice then his windows are open.
His room smells like cleaning detergents, soil and candles (usually the flower ones).
☆ Eyeless Jack
Soo..his room is not as clean, but its caused by his wild side. On his walls and furnitures are many straches from his hands (or even teeth!). Otherwise? You don't have to worry about surviving visiting his room, you have high chance to not caught anything! I would say his room is pretty dark, only becasue his walls are in gloomy colours - maybe not black, but gray, green or navy blue (all in dark shades).
Let's pretend that he actually was into medicine before all his tragic events..pls? Propably has some decorations, like skeleton, anatomy-related posters! Also likes to keep his blinds shut, he is pretty hypersensitive in terms to hearing, sight, smell. And maybe..he would have this small, funny fridge in his room, you know - to keep his..food..fresh!
About the smell..maybe a bit of blood? And something rotten? But its not that strong tho!
☆ Ben Drowned
Musty, dusty and rusty room, but we still love him! He would clean once in a while, and he do that very solid..but that doesn't last long - his room gets messy very easly. When he isnt gaming then he is sleeping..pretty productive, huh? Bed is never made, lots of junk food wrappers, empty (or not) cans..
LED lights 25/8! His room is pretty dark, propably never seen the sun. On his walls are posters from movies, anime and games. Has pretty professional gaming set when it comes to computer (I would describe it but i only know that computer need screen and keybord lol). High chance of having some psp gaming corner! Like bean bag pouffe, TV and stuff. Also! Collects figures like funko pops, anime figures, nendoroids. Ben have pretty nice Lego collection too!
His room smells like sweat and energy drinks.
☆ Clockwork
A bit messy, but in this aesthetic way - in other way, chaos under control! You know, some clothes at the floor or on chair..some dirty mugs..and her trash can is a bit too full..but as I said - everything looks pretty planed..! She has many blankets and plushies (she would never admit to that tho) on her bed.
In her room dominates mostly shades of dark green and white! Has many fun stuff in her room - rocks, animal skulls..sorry fellow animal lovers, promise they were found! But also a guitar! Full jewelry holder - and they are all well made! Thats why they are a bit too messy.. And she keeps many fake plants, she sucks at taking care of them. Clockwork has many string lights in various shapes!
Dunno, but I cant really assign smell of her room! Maybe something like dust and coffee?
☆ Hobo Heart
Ahh I miss this pretty boy to be honest! His room is clean, end of the sentence, thats it. I also think that he would have some pet in terrarium or aquarium - lizard, frog or just some fishes. Even if they are small, he treat them with proper respect and like the family members!
Has white walls with paintings and photos of his friends/SO, but most of the decorations are in shade of red. Also vinyls as decorations and posters of his favorite singers/bands (m sorry but he totally looks like somoene listening to Lana Del Ray vibes T^T) - all in this 'aesthetic way'! Simple light bed sheets, and when his bed is made (which is pretty often) he put pillows that have this silly shapes. Like to keep his room natural lightened and loves candles!
His room smells pretty like vanilia, but its not a strong scent.
.•┈••✦ 🖤 ✦••┈•.
#slasher#slasher x reader#creepypasta#creepypasta x reader#jeff the killer#jeff the killer x reader#jeffrey woods#homicidal liu#homicidal liu x reader#jeffery woods#liu woods#horror#headcanon#ben drowned#ben drowned x reader#ej x reader#eyeless jack#eyeless jack x reader#hobo heart#hobo heart x reader#clockwork#clockwork x reader#room#ej#crp#fandom#creepypasta fandom#wholecircus#requests#requested
272 notes
·
View notes
Text

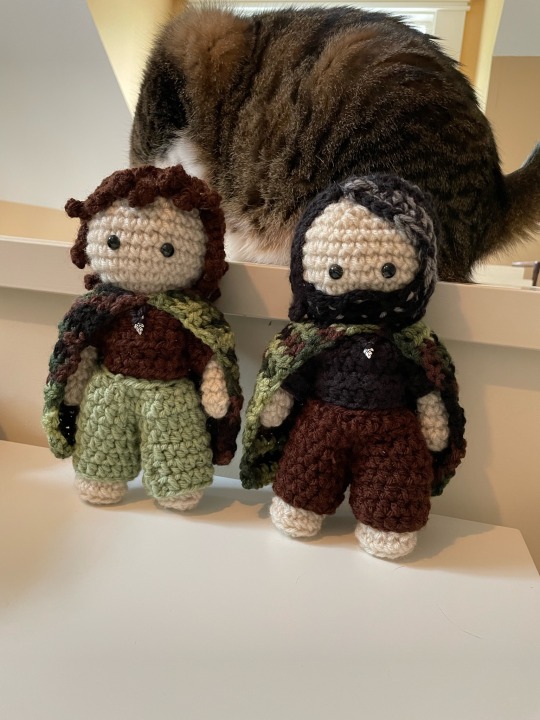
One grouchy father figure, as requested (plus my cat who wanted to be included). The beard was tricky but he looked like an emo preteen without it. Pattern stuff for Halt is below.
This is probably not very helpful, I've never made one of these before and don't really know what to put. Please let me know if something is confusing!
4.25 mm hook, weight 4 yarn, 9 mm safety eyes.
I used this tutorial for the body, minus the wig cap.
Beard:
Ch 13
Row 1: 12sc
Row 2: 4 slst, ch 4, slst in last 4 (to make a little gap)
Take a long strand of grey yarn and weave it randomly in and out to get the speckles.
Pants:
Ch 14, slst into a ring. Hdc around until the desired length (the photo has 5 rows). Make another one. Mimic tutorial to join and make the waist potion.
Shirt:
Ch 10, 5 rows of Hdc. Make another. Sew the two squares together, leaving 2 rows unconnected. I use the tails to tie the tops together. Hdc in the ring to make sleeves, I end up with about 9 stitches. Hdc around until desired length (picture has 3 rows)
Cloak:
Ch 23
Rows 1-13: Hdc across.
Tie two corners together.
Hair is strands of single crochet glued down. I recommend using bobby pins to mess with the placement before gluing and leaving this for last. Most of the strands are 14 stitches long, getting slightly shorter or longer depending on where they are on the head.
85 notes
·
View notes
Text


i don't think i've shared this WIP on here yet!! just a simple stripey throw using hdc and pairs of colors : ) i like to call it my better call saul blanket, literally just bc i've been watching better call saul while working on it lmao : )
this one is definitely a new favorite of mine, i LOVE the weight (not too heavy, not too light) and it's a lovely texture. works up pretty quick too!!
[ID:
Two photos of a crochet blanket made using half double crochet stitches. Colors include chartreuse, orange, blue, yellow, and green. ]
#my art#crochet#crocheting#crochet blanket#half double crochet#fiber art#fiber artist#yarnblr#yarn art#my crochet
73 notes
·
View notes
Text
While I am waiting for the potatoes to come to a boil and get smash-able, here are photos of what I made for my kids this year (besides gifting them other things).
For my son, I knit a hat:

Cascade 220 Superwash, size 6 needle, 2x2 rib and then double seed stitch.
For his girlfriend, I knit fingerless mitts:
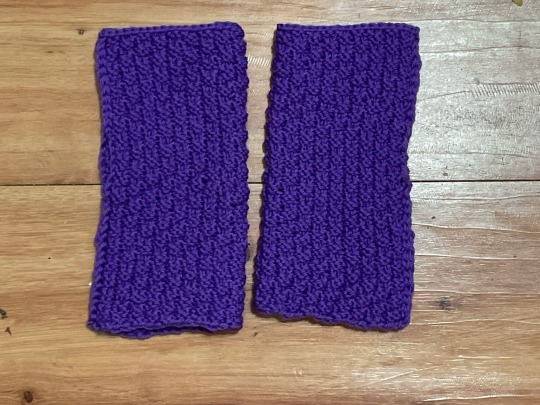
Cascade 220 Superwash, size 6 needle, double seed stitch. I had intended to knit something else for her, but that yarn didn’t want to cooperate and I was running out of time…!
(Cascade 220 Superwash is the yarn I had so much hassle with - it kept fraying. So many tails sewn in on one of those mitts.)
And speaking of “the yarn didn’t want to cooperate and I was running out of time,” here is what I crocheted for my daughter:
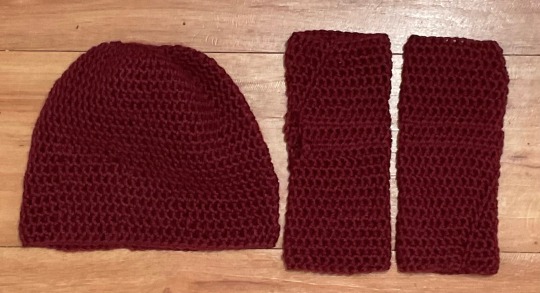
Caron Simply Soft, size H hook, hdc. Took up almost the whole skein.
23 notes
·
View notes
Note
Hi, do u write for Sugawara?-
If yes, could u pls do some relationship hdcs w/ him?
It's alright if you don't btw!<3333
SUGAWARA RELATIONSHIP HCS

gn!reader | i don't write for suga much but he's very lovely!! :)
one time there was a cheesy love song playing over the speaker and suga said "this is like us" and now it's become a habit anytime he hears one. doesn't even realize he says it sometimes. he's just like me fr energy
suga shares his food with you easily (as long as he can have some of yours) sometimes he teases you by doing the little airplane noises, laughing when you push his shoulder
he asked if you had a favourite flower/colour before your first date so you know,, his plan was so incredibly obvious after the question. but it's fine because he made it a habit to surprise you regularly !! flowers or a bracelet that's your favourite colour on a random tuesday kind of deal :')
he keeps extras of any small things you might need on a regular basis. hair ties, lip balm, a charger—he's ready for anything. he'll pass them to you wordlessly with a knowing grin or soft smile; it just depends on the mood
if he sees you watching something, he'll lean up against you and rest his head on your shoulder and ask what it is. even if it's something he has no idea about, he'll watch with you. if you don't mind him asking questions he'll definitely ask some
^ he may or may not end up getting way more invested than originally planned, but now you always have someone to watch with
somehow always finds new text stickers/gifs to send you ?? like the little cute animals with hearts. you keep asking how the hell he has so many and he always says its a secret (has spent at least 7 dollars buying sticker packs and 20 minutes finding key words to search)
he doesn't mind being big or little spoon, but he will sometimes cling to you in his sleep. why are you trying to leave him rn?
he likes holding hands but also like, when you hold onto his arm? something about it y'know
he's made a plan to take a photo together in the same place every couple of months :') he has a specific album for all of them and plans to print them all out or put them in a timelapse
if you asked him to do a little cheer with the pose (you know the one) he would, especially if you're upset and he knows it would cheer you up. he'll do it unprompted if he notices you're stressed and tired. like literally sitting next to you and making up a silly cheer while clapping until he gets you to laugh
^ if he's ever feeling down and you do it for him ? immediate smile to his face. takes a deep breath and thanks you
really good with words of affirmation and talking in general. if you're looking for empathy and sound advice he's your guy fr
adores when you dote and cheer him on!!! call him lovely and strong and amazing and the best boyfriend ever he's putty in your hands. goes "i am, aren't i?" as if he isn't blushing
will ask why you're up late as if he isn't also up late. says "this isn't about me" that's easily refuted by an "it is now." now you're both going to bed and pretending this didn't happen
suga surprises you with little gifts he saw while he was out! there's always a little note with each of them; they're usually just a reminder to take care of yourself or a cheesy joke to make you smile
the first time you get him a big gift—something he's wanted for ages or has a lot of sentimental value—he (almost) cries. it hits him you care enough to remember and do something for him and it means a lot
he keeps any cards from you in a specific drawer and scatters your gifts around his room. that one toy you got as a joke 2 years ago? still on his dresser
everyone knows when you're coming to watch a game. everybody. /lh they all adore you,, they just find it funny how bright/energetic he gets knowing you'll be there
he tells them not to bother you when you visit and is shocked when you join their schemes and acts if he hasn't also joined in. "i've never played a prank in my life," he says before getting tackled
makes "you'll understand when you're in a relationship" jokes with the others while he's planning things for you . gets "okay old man?" / "why would you say this" (/j) energy in return
suga will do a new move they've been practicing in front of you and act so so confident / nonchalant after they succeed. you clap and he does a little bow, saying it was nothing. everyone reminds him he's been practicing for weeks and he pretends they're lying
loves little photobooth places and having matching accessories!! thinks they're super cute and keeps the photo strips on his wall/in his wallet
tricks you into looking away from the card reader so he can pay for your things . watch out fr
if yoy have an appointment, for hair or nails or a tattoo or whatever else, he'll come with if allowed ! comments on how nice it looks and offers his opinion
hugs you without question if you ask for one. Will cocoon the both of in with a blanket if he notices you're sad
you succeed with something ?? he's running toward you with both arms raised to 1) high-five you and/or 2) hug you and jump around in a circle
kind of specific but he loves shopping for home decor with you. if you ask him to join you on a little thrifting or ikea adventure he's always in
suga's grateful he has access to your phone solely so he can look at your different wishlists on etsy or amazon or whatever. he's able to surprise you with things you want until you inevitably catch on because how did you even find this very specific listing i've had liked for 4 months ??
he likes those apps you can get to share notes with each other on your phones if you know about those . does his best to think up new doodles every morning for you to see
he also likes taking walks . doesn't really matter where or when, maybe after dinner or to do some chores but he just likes walking with you
suga's a really good person to go to if you're anxious about doing something. if you want him to go up and do it, he will. if you ask him to convince/motivate you, he will!! he just wants you to be comfortable
goes with things you say even without knowing what you're talking about. suga i'm just a little cat in rain boots standing in a puddle and he responds with yeah sweetheart you are (immediatelu looks up what photo he assumes you Must talking about)
^ calls you lovey-dovey cheesy pet names if you don't mind. keeps thinking of new ones (that don't even really make sense) to surprise you. "hello my sugar plum angel honey nut cheerio" what are you saying to me rn ?

@devilgirlcrybabiey @lordbugs @smiithys @xfangirl-trashx @passionateuchiha @scaramouchesfootstool @fifteenshadesofpinkk @chloee0x0 @kenmaslov3r @bakugosgrenade @dai-tsukki-desu @Thathoneybee3 @momoewn @aintgeluh @dazaisfavgf @simpforerenn @crystal-lilac @vhenis @omiigad @kur0-kawa @semispilledcoffee @ksyhmm @idontlikeyourjob @sparrowb3nscloset @awkwardaardvarkforever @rory-cakes @prblmtc @kuroaka @sunaslay @h0n3ysgh0st @lackey-laufeyson @bontensbabygirl @dira333 @the-b-u-n-n-y @Kamukayakmonyet @danyisapingu @isentsworld @lilithlunas @anime-ships-gay @todorokiskitten
160 notes
·
View notes
Text
Ok I’m back once again with a questionable Furby accessory crochet pattern. This time it’s the carrier.
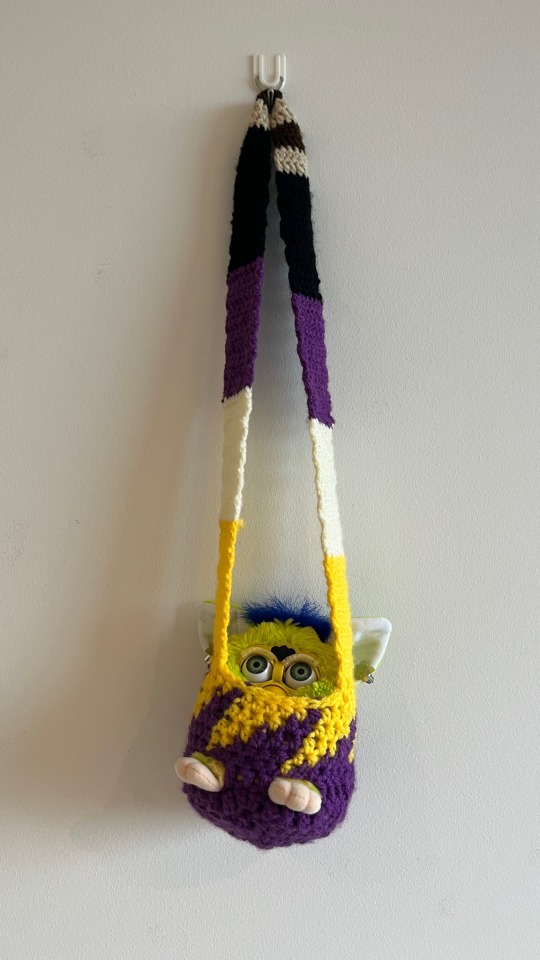
It took way longer than I expected because I got bored doing the repetitive strap and became addicted to some roguelike dungeon crawler.
The project started from replicating this:
But I soon realized that I’m a very tight crocheter and if I simply follow this pattern the final product will be too small. Also, I don’t really like the weird protrusion as shown in the original creator’s final product…
So a tweaked version below the cut… A quick disclaimer I’m not sure how well will this replicate, I’m someone who tries to create a blanket out of granny squares and end up with 9 that each has a different measure.
I guess just don’t be afraid to redo rows or modify things, and politely ask your beloved Furb to try it on every now and then.
Tools of the trade:
A 7.0 mm hook (There are places where I personally used a 4.0 mm hook, which will be specified. In a hindsight, it’s probably better to use the 7mm hook throughout this project)
Good old 3mm yarn that’s 35g/59m (1.23oz/64.52yd) (Yeah blame me for relying on Daiso as my sole source of crochet gears, I dare you) Roughly as dense as worsted/4 yarn
Jargon:
ch - chain stitch
dc - double crochet
hdc - half double crochet
ss - slip stitch
What I did (with a lot of unnecessary ranting):
R1: Start with slip knot, ch 2, dc 6 in second stitch from hook (used 4mm hook, because I kinda suck at starting a circle)
And from here on I switched to the 7mm hook as
Otherwise I have trouble keeping the circle flat
A bigger hook makes each stitch and the final product larger
R2: dc 2 in each of the previous stitches (12 stitches)
R3: [dc 1 in the first stitch, dc 2 in the second stitch]*6 (18 stitches)
R4: [dc 1 in the first stitch and second stitch each, dc 2 in the third stitch]*6 (24 stitches)
R5: [dc 3, 2 dc’s in the fourth stitch]*6 (30 stitches)
R6: [dc 4, 2 dc’s in the fifth stitch]*6 (36 stitches)
Experienced reader will realize that it’s just inc 6 for each round, until you have 36 stitches in one round.
One thing to notice is that after you finish R5, the circle should be roughly same size as your furb’s bottom.
R7: dc 3, ch 3, dc into 4th stitch from hook, dc 2, ch 3, dc into 4th stitch from hook, dc 12, ch 6, dc into 7th stitch from hook, dc 5 (used 4mm hook, 36 stitches)
This gives you the two peet holes and one tail hole. Yes a quick calculation should show that this is not symmetric but somehow it fits, so remember to use your own Furb as measure and adjust if necessary.
From here on I switched to hdc to control for the height increase and *ahem* save yarn.
I tried to continue with 4mm hook but the opening contracts significantly, so just stick to the 7mm hook throughout.
This is also where the pattern starts. If you want a single colored one, just replace all the following rows with hdc 36:
R8: [hdc 5 using the color you started the project with (color A hereafter), hdc 1 using a different color (color B hereafter)]*6 (36 stitches)
R9: [hdc 4 using color A, hdc 2 using color B]*6 (36 stitches)
R10: [hdc 3 using color A, hdc 3 using color B]*6 (36 stitches)
R11: [hdc 2 using color A, hdc 4 using color B]*6 (36 stitches)
R12: [hdc 1 using color A, hdc 5 using color B]*6 (36 stitches)
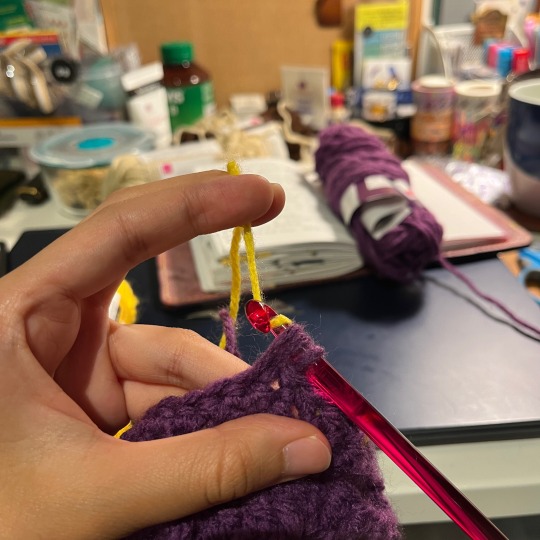
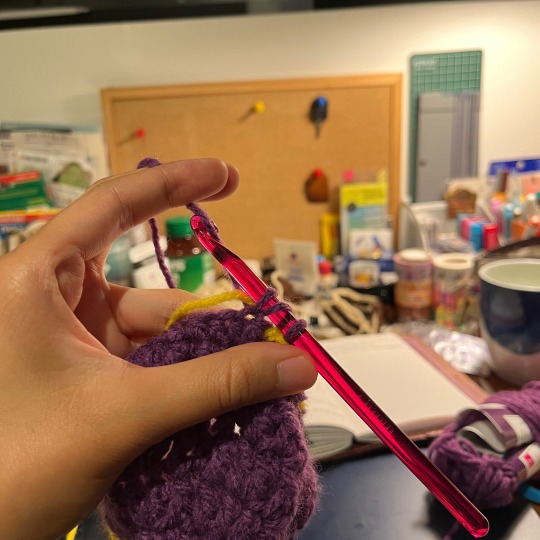
For alternating between two colors I yarn over with color A, and pull through color B. For other stitches I brings along the inactive color by tucking it in between the three loops and the active yarn when you are supposed to pull through (see below for two poor quality photo as reference):
R13: Edging for the body. hdc 5, ss 11, hdc 5, ss 15 and then sc 1 in the same stitch as last ss using color B (37 stitches)
The two hdc 5 clusters will serve as base for the strap.
Then you just baby blanket it, I dc'ed all the way until the end of the first cluster and ch 2 for turning, repeat until desired length. Also did two dc's in the first and last stitch of the 5 hdc base to add extra width to the strap (So each row has 7 dc).
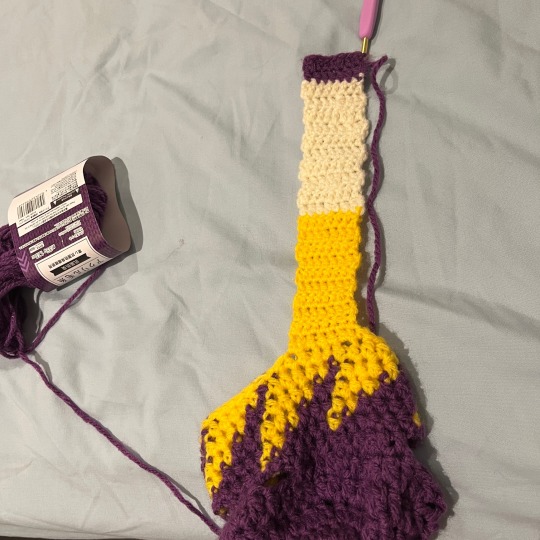
I also reverted back to 4mm hook (finally) for a neater look.
For this part simply do however many rows as you will find fitting. I did 90 rows of 7 dc.
When the strap is finished, connect it together with a technique similar to this on the inside. I used slip stitch instead of single crochet to give the seam a more even look.
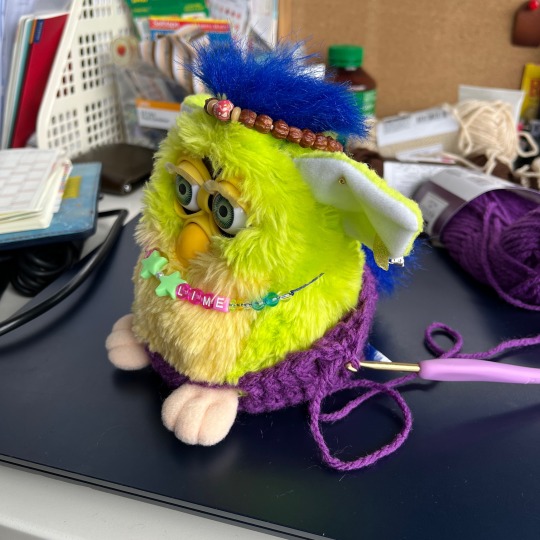
Honorable mentions: This and that for reference on specific technical details and pattern writing, and Lime helping me with the fit.
#allfurby#furby#safefurby#furblr#furby 1998#furby resources#the wise fruit#random rat rattle#yarn shenanigans
17 notes
·
View notes
Text
Amigurumi Narwhal – Crochet Pattern
Supplies
* Size D/3 3.25 mm crochet hook
* Medium weight yarn in main color (Red Heart Super Saver in Aruba Sea, and Stitch Studio by Nicole Studio Soiree in Arctic Blue [discontinued] used in photos) – about 100 yds
* Medium weight yarn in contrast color (Bernat Baby Coordinates in Cotton Candy and Big Twist Sincerely in Rainbow Confetti [discontinued] used in photos) – about 10 yds
* 1 pair of 12 mm safety eyes
* Fiberfill stuffing
* Straight pins (optional)
Abbreviations
*= indicates beginning/end of a section to be repeated
Beg = beginning
BLO = back loop only
Ch = chain
Dc = decrease
Hdc = half double crochet
Rep = repeat
Rnd(s) round(s)
Sc = single crochet
Sc2tog = single crochet 2 together
St(s) = stitch(es)
Tr = triple crochet
Gauge
Exact gauge is not essential to this project.
Size
About 7 inches in length
How to Make This
Instructions
Body
This piece is worked in continuous rnds; do not join. You may wish to use a stitch marker and move it up at the beg of each new rnd.
Rnd 1 – with Main Color, make a magic ring, 6 sc in ring. (6 sc)
Rnd 2 – 2 sc in each st around. (12 sc)
Rnd 3 – 2 sc in next st, sc in next st; rep around (18 sc)
Rnd 4 – 2 sc in next st, sc in next 2 sts; rep around (24 sc)
Rnd 5 – 2 sc in next st, sc in next 3 sts; rep around (30 sc)
Rnd 6 – 2 sc in next st, sc in next 4 sts; rep around (36 sc)
Rnd 7 – 2 sc in next st, sc in next 5 sts; rep around (42 sc)
Rnd 8 – 2 sc in next st, sc in next 6 sts; rep around (48 sc)
Rnds 9 – 20 – sc in each st around. Attach safety eyes near Rnds 7 and 8, and begin stuffing. (48 sc per rnd)
Rnd 21 – sc2tog over next 2 sts (see photo below), sc in next 6 sts; rep around (42 sc)
Rnd 22 – sc in each st around. (42 sc)
Rnd 23 – sc2tog over next 2 sts, sc in next 5 sts; rep around (36 sc)
Rnd 24 – sc in each st around. Continue stuffing. (36 sc)
Rnd 25 – *sc2tog over next 2 sts, sc in next.* Rep from * to * 6 more times. Sc in next 15 sts. (29 sc)
Rnd 26 – *sc2tog over next 2 sts, sc in next.* Rep from * to * 4 more times. Sc in next 14 sts. (24 sc)
Rnd 27 – sc2tog 5 times. Sc in next 14 sts. (19 sc)
Rnd 28 – *sc2tog over next 2 sts, sc in next.* Rep from * to * 5 more times. Sc in last st. Continue stuffing. (13 sc)
Rnds 29 – 37 – sc in each st around. (13 sc per rnd)
Rnd 38 – sc2tog 6 times, sc in last st. Finish stuffing. (7 sc)
Do not fasten off.
Fins
Ch 8.
Row 1 – Working back down sts of ch, in 2nd ch from hook, sc in next, hdc in next, dc in next, tr in next 2 sts, hdc in next, sc in last (see first photo below). Sl st through both sides of rnd below (see second photo below), ch 1, turn. (2 sc, 2 hdc, 1 dc, 2 tr)

Row 2 – Working across Row 1 of first Fin, sc in next, hdc in next, tr in next 2 sts, dc in next, hdc in next, sc in last (see first photo below) . Ch 1, turn, and sl st down row just created, back down to Body. Sl st through both sides of rnd below (second photo below), and rep Rows 1 and 2 to make second Fin (third photo below). Fasten off. (2 sc, 2 hdc, 1 dc, 2 tr)


Arm (make 2)
This piece is worked in continuous rnds; do not join. You may wish to use a stitch marker and move it up at the beg of each new rnd.
Rnd 1 – With Main Color, make a magic ring, 5 sc in ring. (5 sc)
Rnd 2 – 2 sc in each st around. (10 sc)
Rnds 3 – 5 – sc in each st around. (10 sc per rnd)
Fasten off leaving long tail for sewing.
Horn
This piece is worked in continuous rnds; do not join. You may wish to use a stitch marker and move it up at the beg of each new rnd. NOTE: all rnds after Rnd 1 are worked in BLO (see first photo below).
Rnd 1 – with Contrast Color, make a magic ring, 6 sc in ring. (6 sc)
Rnd 2 – sc in each st around. (6 sc)
Rnd 3 – 2 sc in next st, sc in next st; rep around. (9 sc)
Rnd 4 – sc in each st around. (9 sc)
Rnd 5 – 2 sc in next st, sc in next 2 sts; rep around. (12 sc)
Rnds 6 – 13 – sc in each st around. (12 sc per rnd)
Fasten off, leaving long tail for sewing. Second photo below shows finished Horn.


Finishing
With black, make a small v between eyes for Smile. With pink, make small horizontal lines underneath each eye for Blush. (See first photo below.) Lightly stuff Horn, and arrange Arms and Horn on Body as seen in second photo below (use straight pins to hold in place if desired). Sew pieces to Body. Weave in all ends, and/or tie off and hide knots inside sts.


Here is the finished Narwhal!


I hope you enjoyed crocheting this little Narhwal along with me today! If you love fun, free patterns, please be sure to subscribe to my email list to keep up to date with my latest designs:
And also be sure to follow me on social media, and tag me with photos of your finished projects so I can see your lovely work!
Happy Crocheting!
3 notes
·
View notes
Text

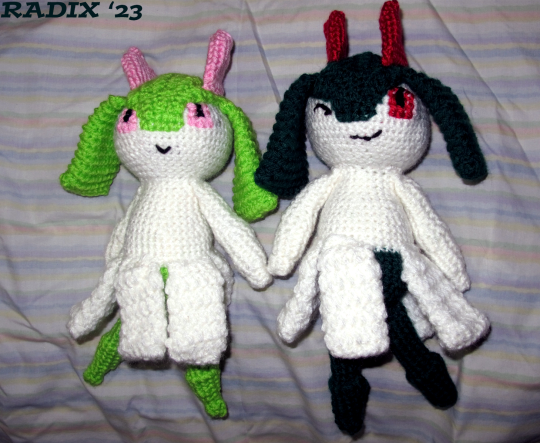

Projects 12 and 13: two members of my Pokemon X team, Helios (dark green/red) and Selene (normal colours), back when they were both Kirlias. I was considering marking Selene as "project 12.5", since he's made from the same pattern, but decided to save myself future numbering headaches.
Helios is a remake of my first-ever amigurumi, shown in the third photo for comparison; I was able to give him a fuller skirt (even if I could only fit on five segments) and didn't make the mistake of stuffing his hair. While I was already thinking about it, having a piece left over from Helios spurred me to make Selene right after; they took about three days each, which has to be a personal record.
The original pattern I followed was by Machbunny; this new one is entirely my own and can be seen below:
[HEAD]
{white}
0) MR6
1) inc 6 (12)
2) [sc, inc] x6 (18)
3) [sc 2, inc] x6 (24)
4) [sc 3, inc] x6 (30)
5) [sc 4, inc] x6 (36)
6) [sc 5, inc] x6 (42)
7) [sc 6, inc] x6 (48)
8) [sc 7, inc] x6 (54)
9-13) sc 54
14) [sc 7, dec] x6
15) [sc 6, dec] x6
16) [sc 5, dec] x6
17) [sc 4, dec] x6
18) [sc 3, dec] x6 (24)
--
[HAIR A]
{normal: light green}
{shiny: light blue}
0) ch 29
1-6) sc 3, hdc, dc 20, hdc, sc 3, ch, turn
{tip of front is sewn on around r10; fill in point with embroidery}
--
[HAIR B] x2
{normal: light green}
{shiny: light blue}
0) ch 11
1) sc 10, continue on other side, sc 10 (20)
2-8) hdc 20
9) dec, hdc 9, dec, hdc 9 (18)
10-12) hdc 18
{sc closed; don't stuff}
--
[HORNS] x2
{normal: pink}
{shiny: orange}
0) ch 7
1) sc 6, continue on other side, sc 6 (12)
2) [inc, sc 5] x2 (14)
3) [inc, sc 3] x4 (18)
4) [inc, sc 4] x4 (22)
5-7) sc 22
8) [inc, sc 10] x2 (24)
9) sc 24
{sc closed; don't stuff}
--
[BODY]
{normal: start w/light green}
{shiny: start w/light blue}
0) MR 6
1) inc 6 (12)
2) [sc, inc] x6 (18)
3) [sc 2, inc] x6 (24)
4) [sc 3, inc] x6 (30)
5) [sc 4, inc] x6 (36)
6-9) sc 36
10) cc white, sc 36
11-14) sc 36
15) [sc 4, dec] x6 (30)
16) sc 30
17) [sc 3, dec] x6 (24)
18-20) sc 24
21) [sc 2, dec] x6 (18)
--
[LEGS/FEET] x2
{normal: light green}
{shiny: light blue}
0) MR 6
1-3) sc 6
4) [sc, inc] x3 (9)
5) sc 9
6) [sc 3, inc] x3 (12)
7) sc 12
8) sc 12 on outer edge
9) dec 3, sc 9
{begin stuffing foot}
10-16) sc 9
--
[ARMS/HANDS] x2
{white}
0) MR 6
1-2) sc 6
3) [sc, inc] x3 (9)
4-6) sc 9
7) [sc 3, inc] x3 (12)
8) sc 12
9 [sc 3, dec] x3 (9)
{begin stuffing arm}
10) [sc, dec] x2 (7)
11-15) sc 7
--
[SKIRT] x5
{white}
0) ch 7
1) sc 6, continue on other side, sc 6 (12)
2-6) dc 12
7) sc 12
{sc closed; don't stuff}
7 notes
·
View notes
Text


Project 28, Josiah! Who got ahead of Raz because I don't think I'll be making the rest of the DV crew in joining order.
While it's not visible in these photos, this is my first time sewing a functional button to one of these (it's under his cloak's front panel), as well as making a hat. Both this and his cloak are removable; Josiah had to be fully stuffed and assembled before they could be made.
(Note: for his head, I used the same anti-pilling yarn as I did with Johnnie, which seems to have a shorter gauge than most of my other yarn.)
Pattern:
[HEAD]
{clay}
0) MR 6
1) inc 6 (12)
2) [sc, inc] x6 (18)
3) [sc 2, inc] x6 (24)
4) [sc 3, inc] x6 (30)
5) [sc 4, inc] x6 (36)
6) [sc 5, inc] x6 (42)
7) [sc 6, inc] x6 (48)
8) [sc 7, inc] x6 (54)
9-21) sc 54
{embroider face; top of R15 is top of eye, bottom of R16 is bottom of eye, R20 is mouth}
22) [sc 7, dec] x 6 (48)
23) [sc 6, dec] x 6 (42)
24) [sc 3, dec] x12 (30)
--
[EARS] x2
{start w/amethyst}
0) MR 6
1) inc 6 (12)
2) sc 6, cc white, sc 6
3) cc amethyst, [sc, inc] x3, cc white, [sc, inc] x3 (18)
4) cc amethyst, sc 9, cc white, sc 9
{stuff}
--
[HAIR, CAP]
{orchid}
0) MR 6
1) inc 6 (12)
2) [hdc, hdc-inc] x6 (18)
3) [hdc 2, hdc-inc] x6 (24)
4) [dc 3, dc-inc] x6 (30)
5) [dc 4, dc-inc] x6 (36)
6) [dc 5, dc-inc] x6 (42)
7) [dc 6, dc-inc] x6 (48)
--
[HAIR A (top layer)]
{orchid}
0) ch 11
1-3) sc, hdc, dc 6, hdc, sc, ch, turn
4) ch 11
5-7) sc, hdc, dc 6, hdc, sc, ch, turn
8) ch 11
9-11) sc, hdc, dc 6, hdc, sc, ch, turn
12) ch 11
13-15) sc, hdc, dc 6, hdc, sc, ch, turn
16) ch 11
17-19) sc, hdc, dc 6, hdc, sc, ch, turn
20) ch 11
21-23) sc, hdc, dc 6, hdc, sc, ch, turn
--
[HAIR B (bottom layer)]
{orchid}
[Repeat pattern for Hair A up to round 15]
--
[SIDEBURNS] x2
{orchid}
0) ch 5
1) sc 2, dc 3-in-1, sc
--
[STRAY BIT]
{orchid}
0) ch 5
1) sc 2, dc 3-in-1, sc
2) ch 4
3) sc, dc 3-in-1, sc
--
[BANGS A]
{orchid}
0) ch 7
1) sc 2, hdc 2, dc 2, ch, turn
2) dc 2, hdc 2, sc 2, ch, turn
3) sc 2, hdc 2, dc 2
4) ch 5
5) sc, hdc 2, dc
--
[BANGS B]
{orchid}
0) ch 7
1) sc 2, hdc 2, dc 2
2) ch 10
3) sc 3, hdc 3, dc 3
--
[BANGS C]
{orchid}
0) ch 5
1) sc, hdc 2, dc
2) ch 7
3) sc 2, hdc 2, dc 2, ch, turn
4) dc 2, hdc 2, sc 2, ch, turn
5) sc 2, hdc 2, dc 2
--
[BANGS D]
{orchid}
0) ch 9
1) sc 4, dc 2, tc 2, ch, turn
2) tc 2, dc 2, sc 4, ch, turn
3) sc 4, dc 2, tc 2
--
[BODY]
{start w/ sunflower}
0) MR 6
1) inc 6 (12)
2) [sc, inc] x6 (18)
3) [sc 2, inc] x6 (24)
4) [sc 3, inc] x6 (30)
5) [sc 4, inc] x6 (36)
6) [sc 5, inc] x6 (42)
7) [sc 6, inc] x6 (48)
8-10) sc 48
11) cc cherry blossom, sc 48
12-16) sc 48
17) [sc 7, inc] x6 (54)
18) sc 54
19) [sc 3, dec] x 12 (42)
20) [sc 3, dec] x 12 (30)
--
[WAISTBAND]
{sunflower}
0) ch 45
1) hdc 44
{sew down bottom edge only}
--
[LEGS] x2
{start w/white}
0) ch 17
1) sc 16; join round
2-4) sc 16
5) cc clay, sc 16
6) cc sunflower, [sc 3, inc] x 4 (20)
7-12) sc 20
--
[FEET] x2
{white}
0) MR 6
1) inc 6 (12)
2) [sc, inc] x6 (18)
3-9) sc 18
{begin stuffing foot}
10) [sc, dec] x6 (12)
11) dec 6 (6)
12) dec closed
--
[ARMS] x2
{start w/white}
0) ch 15
1) sc 14; join rounds
2-5) sc 14
6) cc cherry blossom, [sc 7, inc] x2 (16)
7-12) sc 16
13) [sc 7, dec] x2] (14)
{sc closed}
--
[HAND & THUMB] x2
{start w/clay}
0) ch 7
1) sc 6, continue on other side, sc 6 (12)
2) sc 12
3) cc white, [sc 6, inc] x 2 (14)
4-5) sc 14
6) {thumb} ch 3
7) sc 2
--
{stuff and assemble Josiah before proceeding}
--
[SCARF]
{white}
0) ch 11
1) dc 10, ch, turn
2-3) hdc 10, ch, turn
4) ch 35
5) sc 34
{insert hook into top of R1; close around Josiah's neck and join end of R5 into other side of scarf opposite R4}
--
[CLOAK]
{amethyst}
{work in rows}
0) ch 45
1-6) dc 44
7-9) dc-inc 2 at beginning and end of rows (54 final)
10-15) dc 54
16) dc, skip 3, continue dc'ing down row
--
[CLOAK DEC]
{sunflower}
{work in rows}
0) ch 5
1) sc 4
2) inc, sc 2, inc
3-7) sc 6
--
[HAT]
{sunflower}
0) MR 6
1) inc 6 (12)
2) [dc, inc] x12 (24)
3) [dc 2, dc-inc] x 12 (36)
4) [dc 3, dc-inc] x12 (48)
5) [dc 4, dc-inc] x12 (60)
6) [dc 5, dc-inc] x12 (72)
7) dc 72
--
[HAT BRIM]
{sunflower}
0) ch 15
1) sc 14, continue on other side (28)
2) inc 2, sc 11, inc 2, sc 14 (33)
3-4) sc 33
{DO NOT sc closed}
2 notes
·
View notes
Text
I'm getting frustrated.
I've repeatedly gotten advice to change hook sizes on this blanket and, under normal circumstances, that would be excellent advice but in this case it isn't.
Here's why.

All of these stitches are different sizes.
The starting rows, which were EXACTLY THE RIGHT SIZE and tension, are HDC so I've omitted them from this comparison. That's a different stitch which is supposed to be shorter than the other stitches in the blanket. The end would be done in the same way, if I ever got to that point.
But, the starting chain and the first few rows of HDC are the CORRECT size. The swatch was right, and the width was as expected for the stitch count.
I kept that just-right width and tension for about 6 inches of blanket (the yellow stitches higher up, which were DC not HDC) then went too loose and kept working more and more loosely.
That's how I ended up with this:

The first 6 inches of blanket at the top of the photo were just right and consistent. The last rows before I decided to go back were too loose and about 2 feet wider than the starting rows. It doesn't really look it from that photo but I didn't leave any sort of size reference in the photo.
Those correctly sized first few rows of DCs were a little over half an inch tall.
The DCs I frogged back (yellow stitches lower down in the first photo) were about an inch and a half tall.
I frogged back until the stitches were about an inch tall, which is still too tall compared to the just right first 6 inches (actually looking at the stretched photo and based on the colors I didn't frog back NEARLY enough... will have to go back a lot more or start over completely... I'll have to lay it out to get a better look) and then put in another row of stitches that were about a half inch tall, which, while about the same height as the just-right stitches in the beginning, is too SHORT compared to the too long stitches in the previous row.

So, here's why suggesting changing the hook size isn't good advice in this case:
These were all done on the same hook.
All of them. Same hook.
The just-right stitches
The toooooooooo loose and big stitches
The would-be-just-right-but-compared-to-the-row-before-too-tight stitches
All on the same hook.
The hook is not the problem.
It's me.
If the stitches were all the same size but not the right size for the project, then changing the hook would be good advice.
5 notes
·
View notes
Text

Full step by step photo tutorial on the Half Double Crochet Slip Stitch is up on my blog! 🌟😃🧡
Playlist featuring more Stitches with Beautiful Texture here!
#yarn#fiberartist#crocheterofinstagram#crochet#crocheting#crocheted#youtubers#youtube#phototutorial#photography#crochettutorial#crochettutorials#diy#howtocrochet#beautiful#craft#crafting#crafty#tutorials#tutorial#patterns#love#crochetstitch#crochetstitches#yarnaddict#crochetaddicted#instamood#crochetcreations#photooftheday#handmade
9 notes
·
View notes
Note
So i know you said you were just answering Soulmate hdc rn but i need to ask before i forget to :
Hdcs for Photos and Videos of the Future (in case i didn't get the title right; that one AU where Izuku and literally everyone gets to see Izuku's different futures with potential partners)
And if you don't mind I remember you saying you would make another part later on where it happens again and it has other people that he met only after the first Sport Festival so if you don't mind could you tell us about some of the people you will include ?
Headcanons... hmmm... Mostly I have ones for the OCS who won't show up until the Internship, as any others probably will... no wait I do have a few. I also think I posted a list with the future people involved, but I'll remention a few.
-Info Dropper, Izuku's hero mentor for the fic, was trained by Nezu. They are also friends with him. They would have joined UA if the Fae Court didn't snap them up first.
-Aoyama as mentioned in a year older then the other kids. He doesn't talk about it (other then mentioning his non-twink status).
-There is no traitor in this AU.
-Ojiro is queer, though he believed he was straight for a very long time. It's just guys don't really do it for him all the time.
-Fuyumi, who is a potential partner, thought she was gay for a long time as guys never did it for her either. But through time she realizes she is in fact bisexual. (This was done after reading a post about how people don't like showing a 'downgrade' to bisexual from gay even though it happens so fuck it I'm doing it)
-Tsu's parents aren't bad people they just do not understand what they were doing is parentification. After a few years, they do realize but it kind of tarnishes their relationship with the kids.
-Tomoe in this AU would be born when Izuku is about 17/18. She would isntantly be put into foster care. Though now she's gonna get snatched up by Izuku fast.
SPOILERS UNDER CUT
-Toga never becomes a villain due to Anders calling in his old hero friends who swoop in. She gets adopted by them, though she spends a few years in a mental health facility. She is also a potential spouse in the future.
-Shindo meets Izuku during the whole mall thing, while Shigaraki wants to talk to his future husband.
-Hawks is a transman who is also asexual. (less spoilery but... meh)
-One and Two are born when Izuku is about 20-21.
8 notes
·
View notes
Text

Mission District / Noe Valley
San Francisco, California
-
Photo taken on 35mm film (Agfa HDC 400) with a Canon EOS Rebel G camera.
4 notes
·
View notes
Text
can somebody size up this pattern to 7ft for snorlax for the head, body, arms, feet, ears, belly, face and assembly.
Here are the abbreviations used in crochet:
CH = chain
MR/MC = magic ring/magic circle
SC = single crochet
INC = single crochet increase (unless specified otherwise)
SC-INC = single crochet increase (I use this in the feet section instead of ‘inc’ to avoid confusion
DEC = single crochet decrease (I recommend using the invisible decrease method)
DC = double crochet
DC-INC = double crochet increase
HDC = half double crochet
HDC-INC = half double crochet increase
SLST = slip stitch
RND = round
Materials/Notations:
Yarn: Super Bulky (6) unless specified otherwise.- Bernat Blanket yarn the color ‘Dark Teal’ for the body (3 [300g] skeins)- Bernat Blanket yarn in the color ‘Vintage White’ for the belly and face plate (1 [300g] skein)- Bernat Blanket yarn in the color ‘Almond’ for the feet (1 [300g] skein)- OPTIONAL: Bernat Baby Blanket yarn in the color ‘White’ for the nails - you may also use the same color as the belly/face plate (Vintage White) but I prefer to use a brighter white for the nails (1 [300g] skein)- Any medium 4 black yarn for the eyes and mouth
OPTIONAL for the 2 teeth:- White felt- White embroidery thread- Embroidery Needle
Polyester Stuffing
6mm Crochet Hook
Stitch markers
Sewing pins
Yarn Needle
Scissors
Notes:
This pattern uses US terminology only.
I use the yarn under/yarn over method, but you may use whichever method you prefer.
All decreases in this pattern use the invisible decrease method - the regular decrease method will leave larger gaps in your work. I highly recommend using the invisible decrease method.
The body parts are crocheted in a continuous spiral, and the belly and face plates are crocheted in rows. This will also be specified in their relative sections before you begin crocheting the pieces.
When you crochet the body, you will find that ruffles or curls form. This is normal due to the large amount of increases in the belly and it’s okay because it’s what’s going to make him nice and chunky in the end! Just make sure when it’s time to stuff that you stuff him enough so that his body takes on a round shape!
Body Measurement:
Use Dark Teal Yarn
CH 15 and work in a continuous spiral around both sides of the chain.
Round 1: Starting in the second chain from hook - sc 3 inc (make 3 sc’s in the same stitch), sc 12, inc
Now flip your work and continue onto the other side of the ch; your first sc will be in the same stitch you just worked in, just on the opposite side- sc 3 inc (make 3 sc’s in the same stitch), sc 12, inc (34)
Round 2: inc x2, 14 sc, inc x3, 14 sc, inc (40)
Round 3: (sc, inc) x2, sc 14, (sc, inc) x3, sc 15, inc (46)
Round 4: (sc 2, inc) x2, sc 14, (sc 2, inc) x3, sc 16, inc (52)
Round 5: (sc 3, inc) x2, (sc, inc) x7, (sc 3, inc) x3, (sc, inc) x7, sc 3, inc (72)
Round 6: sc 2, inc, sc 4, inc, sc 25, inc, (sc 4, inc) x2, sc 25, inc, sc 2 (78)
Round 7: (sc 5, inc) x13 (91)
Round 8: sc around (91)
Round 9: sc 6, inc, (sc 12, inc) x6, sc 6 (98)
Round 10: sc 10, (sc 5, inc) x 7, sc 46 (105)
Round 11: sc around (105)
Round 12: sc 7, inc, (sc 14, inc) x6, sc 7 (112)
Round 13-15: sc around (112) [3 ROUNDS]
Round 16: sc 7, dec, (sc 14, dec) x6, sc 7 (105)
Round 17-27: sc around (105) [11 ROUNDS]
Round 28: (sc 13, dec) X 7 (98)
Round 29-30: sc around (98) [2 ROUNDS]
Round 31: sc 6, dec, (sc 12, dec) X6, sc 6 (91)
Round 32-33: sc around (91) [2 ROUNDS]
Round 34: (sc 11, dec) X7 (84)
Round 35: sc around (84)
Round 36: sc 5, dec, (sc 10, dec) x6, sc 5 (77)
Round 37: (sc 9, dec) X7 (70)
Round 38: (sc 5, dec) X10 (60)
Round 39: sc 2, dec, (sc 4, dec) X9 , sc 2 (50)
TIP: For this pattern, I crochet into the front and back loop of each chain, so on the first side, I will be crocheting into all 14 front loops. When I flip to the other side, I am crocheting into ALL 14 back loops of the chain. (ignoring the 15th chain) Below are photo examples of this.
Head measurement:
CH 13 and work in a continuous spiral around both sides of the chain.
Round 1: Starting in the second ch from hook - inc, sc 11
Now flip your work and continue onto the other side of the ch; your first sc will be in the same stitch you just worked in, just on the opposite side- inc, sc 11 (26)
Round 2: inc x2, sc 10, inc x3, sc 10, inc (32)
Round 3: (sc, inc) x2, sc 10, (sc, inc) x3, sc 11, inc (38)
Round 4: sc, inc, sc 2, inc, sc 12, inc, (sc 2, inc) x2, sc 12, inc, sc (44)
Round 5: sc 10, inc, sc 6, inc, sc 14, inc, sc 6, inc, sc 4 (48)
Round 6: (sc 7, inc) x6 (54)
Round 7: sc 4, inc, (sc 8, inc) x5, sc 4 (60)
Round 8: sc around (60)
Round 9: (sc 9, inc) x6 (66)
Round 10: sc around (66)
Round 11: sc 5, inc, (sc 10, inc) x5, sc 5 (72)
Round 12-15: sc around (72) [4 rounds]
Round 16: sc 5, dec, (sc 10, dec) x5, sc 5 (66)
Round 17: sc around (66)
Round 18: (sc 9, dec) x6 (60)
Round 19: sc around (60)
Round 20: (sc 4, dec) x10 (50)
Make a slst and leave a tail, but there’s no need for it to be long because we left a long tail on the body to sew the head and body together. Wait until assembly to stuff, and set aside. Move onto the arms.
Arms measurement:
Round 1: mr 8 (8)
Round 2: (inc 2, sc 2) x2 (12)
Round 3: (sc, inc) x2, sc 3, inc, (sc, inc) x2 (17)
Round 4: (inc, sc) x3, inc, sc 4, (inc, sc) x3 (24)
Round 5-16: sc around (24) [12 ROUNDS]
Round 17: (sc 2, dec) x6 (18)
Round 18-19: sc around (18) [2 ROUNDS]
Stuff the bottom of the arm normally, and the top of the arm slightly.
Pinch the opening of your arm closed and then sc 9 across both sides, crocheting it shut. Set to the side, and move onto the feet.
1. After stuffing, pinch the sides of the arms shut.
2. Crochet through both sides. To do this, insert your hook into the next stitch as well as the last stitch you made. SC as normal.
3. You should be left with 9 sc’s.
Feet Measurement:
Make 2 - Start With Almond Yarn
Round 1: mr 10 (10)
Round 2: inc x10 (20)
Round 3: sc, hdc-inc, (dc, dc-inc) x2, hdc, (sc-inc, sc) x6 sc-inc (30)
Change color from almond to vintage white.
Round 4: sc 2, inc, (sc 4, inc) x 5, sc 2 (36)
Round 5: (sc 5, inc) x6 (42)
Round 6: (sc 3, inc) x4, sc 26 (46)
Round 7: hdc x3, dc x12, hdc x3, sc 28 (46)
Round 8: sc around (46)
Round 9: sc 25, dec, sc 6, dec, sc 11 (44)
Round 10: (sc 2, dec) x5, (sc 4, dec) x4 (35)
Round 11: (sc 3, dec) x7 (28)
Round 12: sc, dec, (sc 2, dec) x6, sc (21)
Round 13: (sc, dec) x7 (14)
Stuff the foot.
Round 14: dec x7 (7)
Close shut, and fasten off. Leave a long tail for sewing. Set to the side and continue onto the ears.
Ears measurement:
Make 2 - Use Dark Teal Yarn
Round 1: mr 4 (4)
Round 2: inc x4 (8)
Round 3: (sc, inc) x4 (12)
Round 4: sc around (12)
Round 5: sc, inc, (sc 2, inc) x3, sc (16)
Round 6: sc around (16)
Round 7: (sc 3, inc) x4 (20)
Round 8: sc 2, inc, (sc 4, inc) x3, sc 2 (24)
Make a slst, leave a long tail for sewing, and set ears to the side. Continue onto the belly.
Belly measurement:
Use Vintage White Yarn
CH 13 and work in rows. I do NOT ch 1 at the end of my rows. You may do so if you’d like, I just find it makes cleaner edges!
Row 1: inc, sc 4, inc, sc 5, inc, turn (15)
Row 2: inc, sc 2, inc, sc 7, inc, sc 2, inc, turn (19)
Row 3: inc, sc 17, inc, turn (21)
Row 4: inc, sc 5, inc, sc 8, inc, sc 5, turn (24)
Row 5: inc, sc 22, inc, turn (26)
Row 6: sc across, turn (26)
Row 7: inc, sc 24, inc, turn (28)
Row 8-19: sc across, turn (28) [12 ROWS]
Row 20: dec, sc 24, dec, turn (26)
Row 21: sc across, turn (26)
Row 22: dec, sc 22, dec, turn (24)
Row 23: sc across (24)
Row 24: dec, sc 20, dec, turn (22)
Row 25: (dec, sc 8) x2, dec, turn (19)
Row 26: dec, sc 6, dec, sc 7, dec, turn (16)
Row 27: dec, sc 3, dec, sc 2, dec, sc 3, dec (12)
Sc around the entire edge of the belly, make a slst, and then leave a long tail for sewing. Continue onto the face.
Face measurement:
Use Vintage White Yarn
CH 16 and work in rows. I do NOT ch 1 at the end of my rows. You may do so if you’d like, I just find it makes cleaner edges!
Row 1: sc 15, turn (15)
Row 2: inc, sc 13, inc, turn (17)
Row 3: inc, sc 15, inc, turn (19)
Row 4: inc, sc 17, inc, turn (21)
Row 5-8: sc across, turn (21) [4 ROWS]
Row 9: dec, sc 8, slst, sc 8, dec, turn (19)
Row 10(L): dec, sc 7, turn (8)
Row 11(L): dec, sc 6, turn (7)
Row 12(L): dec, sc 3, dec, turn (5)
Row 13(L): dec, sc, dec, turn (3)
Row 14(L): sc, dec (2)
FASTEN OFF, THIS END WILL NOT BE USED FOR SEWING.
Make a slip knot around your hook and insert your hook into st 11 of row 9. This is where we will start the right side of row 10.
The left side of the face is complete - now insert your hook into st 11 of row 9 as shown above. This is where you’ll start the next peak!
Row 10(R): sc 7, dec, turn (8)
Row 11(R): sc 6, dec, turn (7)
Row 12(R): dec, sc 3, dec, turn (5)
Row 13(R): dec, sc, dec, turn (3)
Row 14(R): sc, dec (2)
This is how the face should look after Row 14(R). Now sc around the entire edge of the face and it’s done!
Sc around the entire edge of the face. When you make it to the slst syou made on round 9, make another slst into it instead of a sc. Crochet over any loose ends as you go, and when you make it to the end, slst into the first sc you made. Fasten off, and leave a long tail for sewing. Move onto the assembly.
Note to see rest of information please go to this website and give this creator credit for the pattern
1 note
·
View note
Text
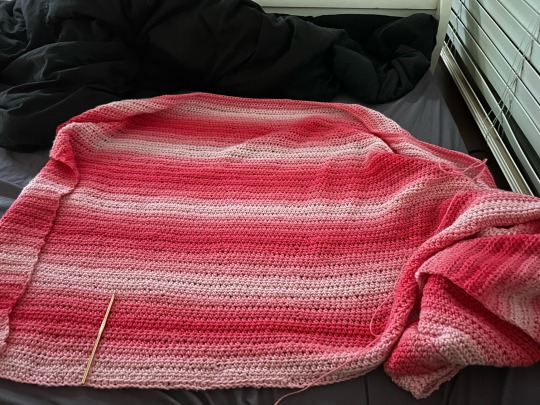
this is my the progress i’ve got on a blanket that i started in summer 2023 so it’s been freaking MONTHS since i started it but also i keep putting it off so that’s probably why i haven’t finished it
my goal for this blanket was to have it done by winter so that i could have used it for the winter and like IF I HAD IT DONE IT WOULD HAVE BEEN USEFUL it was so fucking cold ugh
but whatever i’ll definitely have it done for winter this year instead 😭
this blanket was actually my first crochet project i ever started!! the photo doesn’t show it much but the beginning rows are janky and the edges are lopsided since i was still learning the ropes of crocheting!! so i’ve been crocheting for about 7 months now which like WOW that’s so crazy to think about haha
i ended up doing other smaller projects on the side because i felt like i wasn’t learning much while sticking to this blanket, mainly since this blanket is just rows upon rows of HDC (American terms)
let me tell you guys i thought i was so creative when i started this project and i knew nothing about any of the stitches so i just did something random which turned out to be a HDC but i didn’t know that so i was like “wow i totally came up with something new!” NOPE
but i’m glad i didn’t spend a bunch of time grinding to get this blanket done because when i started trying other stitches and learning stuff like granny squares and magic rings and all that i was SO LOST i was like what the fuck is this and i almost just quit
when i started crocheting in the summer i thought it would be one of those things that i try and don’t do again for a long time and im pleasantly surprised to say that i haven’t dropped it yet! i love picking up new hobbies such as jewelry making and cross-stitching and just creative stuff in general but i only ever do it for a month and then forget about it for a while
don’t get me wrong it’s not like i drop all my other hobbies but i just don’t remember to put time into them, and for crocheting i’d leave it for like a week or two but id end up coming back to it ahah
at this point it’ll be hard to drop or forget about because of the insane amount of yarn i bought, i had to put drawers and stuff in my room to keep all of the stuff organized and not all over my floor lmao
back to the blanket, i have a 5mm crochet hook sitting at the bottom for size reference, the width is a bit longer than my height (5’5”) and in my original plan i wanted to make it double my height length wise but that is definitely NOT happening
it’s about 3’ right now and it’s already heavy and chunky when i fold it all up and i already have no room for it so i’m only going to make it long enough to cover my mattress (which is like 1’ taller than me)
the yarn i’m using is the ombré red heart super saver yarn and it feels really nice and soft! and also a 5mm hook as mentioned before
i’m gonna try and just invest all my crochet time in this blanket instead of my other projects so i can maybe use it before the cold is completely gone 😭 this is my first time posting anything about crochet stuff and i’ll definitely be posting more in the future and showing the completed blanket whenever i finish it lol but anyway!!! that’s my blanket :)
0 notes
Last Seen Blogs

lunashaelovely
La Luna Lovely

mx-destiny
𝒎𝒙-𝒅𝒆𝒔𝒕𝒊𝒏𝒚
librariangayballstits
Gayass n books

butecatasa
Untitled

cronicasdasamambaia-blog
Samambaia