#Localhost
Explore tagged Tumblr posts
Visit Tumblr Blog
Explore Tumblr blogs with no restrictions, modern design and the best experience.
Last Seen Tumblr Blogs


Fun Fact
Tumblr has a low social media market share in South America.
Text
For Security Purposes, I am Shutting Down the Wild Hemlock Facebook and Instagram Accounts
Meta knows every website you visit that has the Meta Pixel installed.
And who you are.

Don't worry - I'm staying here on Tumblr! But stop by and take a look at the New and Improved WildHemlock.Com!
As explained by The Register, Hacker News, and elsewhere, all of the apps created by Meta (formerly Facebook) are exploiting a permission in the Android operating system to track everything you do on mobile web browsing apps such as Chrome, Firefox, and even partially DuckDuckGo. According to LifeHacker, the mobile web browser Brave successfully blocked the tracking. I could not find any information about other web browsers such as Vivaldi or the many additional Firefox flavors.
So how is Meta doing this exactly? First, let’s talk about apps. The Instagram app only allows you to post via mobile app which is additionally nefarious. When Meta’s apps are installed on your phone, it will continually run in the background as a service. This grants the app additional privileges. For a popular example, YouTube didn’t always use to be able to make a video play while you were using another app. It was rewritten some time ago as a service, as opposed to a normal app, and now it can play both audio or picture-in-picture while you use your phone and other apps because it has more permissions. This is the type of app that Facebook and Instagram are.
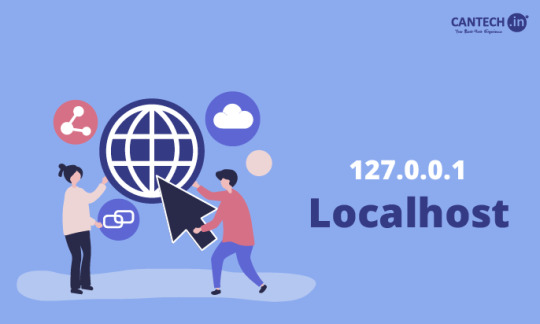
Android services have access to what is referred to as localhost. Think of it like the local device hosting the app – it is an address which loops back to your phone. The address is 127.0.0.1 in web browsing – it points back to your own computer. If you were hosting a service on your computer, it would open service when you type “127.0.0.1” into the address bar of your web browser. This is very useful for developers, both on a mobile phone or computer, especially for testing network programming.
Wild Hemlock Will NEVER Install a Meta Pixel Script!
Learn More @ WildHemlock.Com!
#wildhemlock#wild#hemlock#localhost#facebook#meta#instagram#leavingfacebook#leavinginstagram#opsec#security#mobile phone#android#meta pixel#surveillance#data leak#tech explained#basic opsec#basic security#tech#technology#technology explained#social media#article#small business#etsy#shop small#leaving facebook#leaving instagram
2 notes
·
View notes
Text
Setting Localhost
Ada solusi yang dapat membantu Anda mempublikasikan localhost Anda secara online dengan mudah dan aman - yaitu dengan menggunakan Cloudflare.
2 notes
·
View notes
Photo

Localhost Nedir?
0 notes
Video
youtube
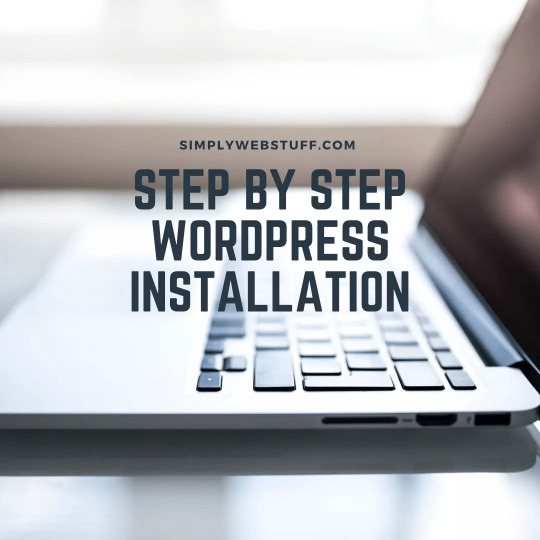
The ABSOLUTE BEST Way to Install WordPress on XAMPP in 8 Minutes
🎥📢 Want to set up WordPress on your own computer? Then this video is for you! 💻🔥
In this tutorial, I’ve shown how to easily install WordPress on localhost using XAMPP. Start practicing web development from the comfort of your home! 🚀
👇 Watch the video now and don’t forget to share!
1 note
·
View note
Text
How to Install WordPress Locally on Your MacBook (Easy Guide)
🚀 Exciting news for all you WordPress developers and enthusiasts! 🎉 Just published a new blog post on how to easily install WordPress locally on your MacBook! 💻 Perfect for testing themes, plugins, and building websites offline. No more messing with live servers! 🙌 This step-by-step guide walks you through the entire process, making it super simple even for beginners. Whether you're using MAMP, XAMPP, or another local development environment, this tutorial has you covered. 🤓 Check it out now and start building your WordPress projects locally! 👇 #WordPress #LocalDevelopment #MacBook #Installation #Tutorial #WebDev #MAMP #XAMPP #Localhost #PHP #MySQL #WordPressTutorial #WebDevelopment #Coding #Tech #BlogPost #NewBlog #LearnToCode #RTFM #100DaysOfRTFM #Innovation #Technology #Creativity #LocalWP #SoftwareDevelopment #DigitalStrategy #DigitalMarketing
So, you’re ready to dive into the world of WordPress development, but you don’t want to mess with a live server just yet? Great idea! Setting up WordPress locally on your MacBook is the perfect way to experiment, test themes and plugins, and build your website in a safe environment. This guide will walk you through the process step-by-step. Why Install WordPress Locally? Before we jump in, let’s…
#Installation#Local Development#Localhost#MacBook#MAMP#MySQL#PHP#Tutorial#Web Development#WordPress#XAMPP
0 notes
Text
How to Move Your WordPress Site from Localhost to a Live Server
Developing a WordPress site on localhost is a great way to build and test your website in a controlled environment. However, the real challenge arises when it's time to move the site from your local server to a live hosting environment. If not done correctly, you could encounter broken links, missing images, or even database errors.
In this blog, we'll guide you through a step-by-step process to successfully move your WordPress site from localhost to a live server.

Step 1: Choose the Right Hosting Provider
Your first step is to select a reliable web hosting provider that meets your website’s needs. Look for:
Server Speed: Fast servers for better performance.
Uptime Guarantee: At least 99.9% uptime to ensure availability.
Ease of Use: User-friendly dashboards and tools.
WordPress Support: Hosting optimized for WordPress websites.
Popular options include Bluehost, SiteGround, and WP Engine.
Step 2: Export Your Local WordPress Database
The database is the backbone of your WordPress site. To export it:
Open phpMyAdmin on your local server (e.g., XAMPP or WAMP).
Select your WordPress database.
Click on the Export tab and choose the Quick Export method.
Save the .sql file to your computer.
Step 3: Upload Your WordPress Files to the Live Server
To move your files:
Compress Your WordPress Folder: Zip your local WordPress installation folder.
Access Your Hosting Account: Use a file manager or an FTP client like FileZilla.
Upload the Files: Transfer the zipped folder to your hosting server's root directory (usually public_html).
Unzip the Folder: Extract the files once uploaded.
Step 4: Create a Database on the Live Server
Now, set up a new database on your live hosting server:
Log in to your hosting control panel (e.g., cPanel).
Navigate to the MySQL Databases section.
Create a new database, database user, and password.
Assign the user to the database with full privileges.
Step 5: Import the Database to the Live Server
Open phpMyAdmin in your hosting control panel.
Select the new database you created.
Click the Import tab.
Choose the .sql file you exported from your localhost.
Click Go to import the database.
Step 6: Update the wp-config.php File
To connect your site to the live database:
Locate the wp-config.php file in your WordPress installation.
Open the file in a text editor.
Update the following lines: define('DB_NAME', 'your_live_database_name'); define('DB_USER', 'your_live_database_user'); define('DB_PASSWORD', 'your_live_database_password'); define('DB_HOST', 'localhost'); // Keep this unless your host specifies otherwise.
Save the file and upload it to your server via FTP.
Step 7: Update URLs in the Database
Your localhost URLs need to be replaced with your live site URLs.
Use a tool like Search Replace DB or run SQL queries in phpMyAdmin.
In phpMyAdmin, run the following query: UPDATE wp_options SET option_value = 'http://your-live-site.com' WHERE option_name = 'siteurl'; UPDATE wp_options SET option_value = 'http://your-live-site.com' WHERE option_name = 'home';
Step 8: Test Your Live Website
Once everything is uploaded and configured, check your website by entering its URL in a browser. Test for:
Broken Links: Fix them using plugins like Broken Link Checker.
Missing Images: Ensure media files were uploaded correctly.
Functionality: Verify forms, buttons, and features work as expected.
Step 9: Set Up Permalinks
To ensure proper URL structure:
Log in to your WordPress admin dashboard on the live site.
Go to Settings > Permalinks.
Choose your preferred permalink structure and click Save Changes.
Step 10: Secure Your Live Website
After migrating, secure your site to prevent vulnerabilities:
Install an SSL Certificate: Most hosting providers offer free SSL certificates.
Update Plugins and Themes: Ensure everything is up to date.
Set Up Backups: Use plugins like UpdraftPlus for regular backups.
Conclusion
Moving your WordPress site from localhost to a live server may seem daunting, but by following these steps, you can ensure a smooth and error-free migration. A successful move allows you to showcase your site to the world, engage your audience, and achieve your goals.
Start today and take your WordPress project live with confidence!
0 notes
Text
Cara Tepat Memasang SSL/TLS Pakai Apache & Nginx di Localhost Linux
Halom Pembaca! HTTPS merupakan standar keamanan via web yang paling banyak diimplementasikan saat ini. Tidak dapat dipungkiri, pengembangan situs web tahap staging di Localhost terkadang membutuhkan enkripsi SSL/TLS. Namun, Certificate Authority ternama seperti Let’s Encrypt, Comodo, dan Digicert tidak mau memberikan sertifikat untuk situs Localhost (beralamat IP 127.0.0.0 s.d. 127.255.255.255),…
0 notes
Text
What is Localhost?
Localhost is a loopback address (127.0.0.1) that refers to your own computer as a server. It’s widely used for testing websites or software in a local environment before deployment. Localhost ensures developers can work offline, troubleshoot, and make changes without affecting live systems.
0 notes
Video
youtube
Apprenez à Installer WordPress sur WampServer en 5 Étapes Simples
1 note
·
View note
Text

THIS is what programming feels like on a good day. Everything's happening right here on localhost!
Artist: Inner Loop Press - store, insta
0 notes
Text
How To Install WordPress On Localhost Right Now
View On WordPress
#article#blog#blogging#development#howto#instruction#instructions#localhost#wamp#wampserver#web#webdev#webdevelopment#website#wordpress
0 notes
Text
ローカルでwordpressのインポート容量を増やす
.htaccessに下記を追記して任意の数値に変更
php_value upload_max_filesize 85280M php_value post_max_size 90128M php_value memory_limit 256M php_value max_execution_time 800 php_value max_input_time 800
0 notes
Text
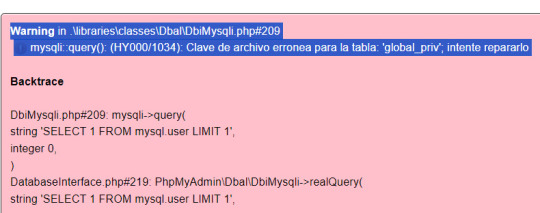
Como reparar el error de MySQL en XAMPP
Si estas trabajando en el desarrollo de un sitio web o aplicación con un servidor de base de datos, lo mas factible, es que estés usando alguna paquete de desarrollo al estilo XAMPP. Este paquete incluye un servidor web, uno de bases de datos y los interpretes de lenguajes PHP y Perl. Hace poco tiempo, comenzó a aparecer un mensaje de error del gestor de bases de datos incluido por defecto en…
View On WordPress
0 notes
Text
Backing Up Your Localhost WordPress Site: Methods and Tools
Creating backups of your localhost WordPress site is an essential practice for safeguarding your work and ensuring you can recover from unexpected errors or data loss. Whether you are testing themes, developing plugins, or building a new website, a reliable backup process can save you time and stress. This blog outlines effective methods and tools to back up your localhost WordPress site.

Why Backup Your Localhost WordPress Site?
Prevent Data Loss
Unintentional file deletions, database errors, or hardware failures can result in losing hours of work.
Streamline Testing
Backups enable you to revert to a previous state if something breaks during theme or plugin testing.
Ease Migration
Backing up your localhost site simplifies the process of moving it to a live server or another environment.
Experiment Freely
Knowing you have a backup allows you to experiment with code or settings without fear of permanent damage.
Components to Back Up
A WordPress site consists of two primary components:
WordPress Files
These include core files, theme files, plugin files, and uploaded media stored in the wp-content folder.
Database
The database stores your website’s content, settings, and user data. It is usually managed through tools like phpMyAdmin or MySQL Workbench.
Methods for Backing Up Localhost WordPress Sites
1. Manual Backup
Steps:
Copy WordPress Files
Navigate to the directory where your WordPress installation resides (e.g., htdocs in XAMPP).
Copy all files and folders to a secure location, such as an external hard drive or cloud storage.
Export the Database
Access phpMyAdmin or your database management tool.
Select your WordPress database and click on the "Export" option.
Choose the "Quick" export method and save the .sql file.
Advantages:
Complete control over the backup process.
No additional tools required.
Disadvantages:
Time-consuming and prone to human error.
2. Using Plugins
Many WordPress backup plugins work seamlessly on localhost installations. Here are some popular choices:
UpdraftPlus
Schedule and automate backups for both files and databases.
Store backups locally or on cloud platforms like Google Drive, Dropbox, or OneDrive.
Duplicator
Create complete site backups, including files and databases.
Ideal for migrating your localhost site to a live server.
All-in-One WP Migration
Export your site’s files and database into a single file.
Easily import backups to restore your site.
Steps to Use a Plugin:
Install the chosen plugin on your localhost WordPress site.
Follow the plugin’s setup instructions to create and save backups.
Store the backups in a secure location.
Advantages:
Automated and user-friendly.
Additional features like scheduling and cloud integration.
Disadvantages:
Some advanced features may require a premium version.
3. Using Command Line Tools
If you are comfortable with the command line, tools like WP-CLI can streamline the backup process.
Steps:
Backup Files
Use commands to compress your WordPress directory into a zip file:zip -r backup.zip /path/to/wordpress
Backup Database
Export your database using WP-CLI:wp db export backup.sql
Advantages:
Fast and efficient for advanced users.
Scriptable for regular backups.
Disadvantages:
Requires familiarity with the command line.
4. Using Localhost Management Tools
Tools like Local by Flywheel and DevKinsta come with built-in backup options, making the process simpler.
Steps:
Locate the backup feature in your chosen tool.
Follow the instructions to create and store a backup.
Restore the backup if needed.
Advantages:
Integrated with the localhost environment.
Minimal setup required.
Disadvantages:
Limited to specific tools.
Best Practices for Backing Up Localhost WordPress Sites
Schedule Regular Backups
Set a schedule to ensure backups are created consistently.
Use Multiple Storage Locations
Keep backups in at least two locations, such as an external drive and cloud storage.
Test Your Backups
Regularly restore backups to verify their integrity and functionality.
Document Your Process
Maintain a clear record of your backup and restoration steps for future reference.
Secure Your Backups
Encrypt sensitive backups and limit access to authorized users.
Conclusion
Backing up your localhost WordPress site is a vital step in ensuring the safety and continuity of your work. Whether you choose manual methods, plugins, or advanced tools, the key is consistency and reliability. By implementing these best practices, you can safeguard your projects and work with confidence, knowing that you’re prepared for any challenges that come your way.
0 notes