#Portrait Tutorial
Explore tagged Tumblr posts
Visit Tumblr Blog
Explore Tumblr blogs with no restrictions, modern design and the best experience.
Last Seen Tumblr Blogs


Fun Fact
In 2020, Tumblr had 29.4 million users in the US.
Text
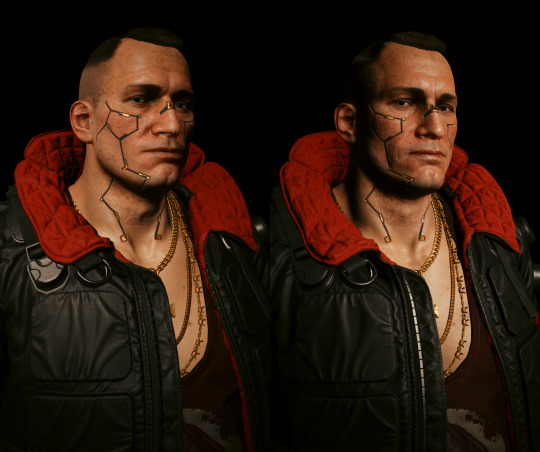
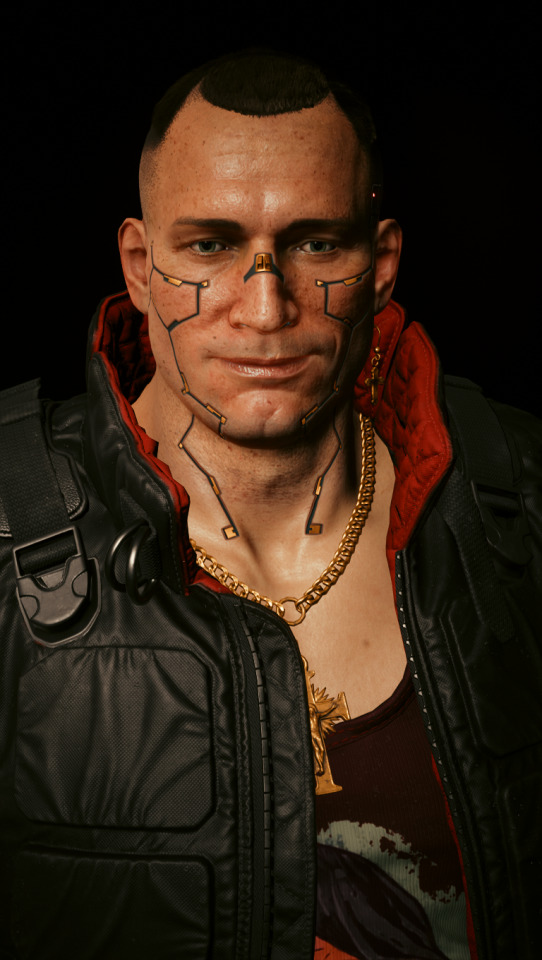
Cyberpunks’ Portrait Lighting Patterns with AMM
One of the fundamentals of portrait photography are lighting patterns. By having an understanding about position of light sources to our subject, we can create exciting and flattering portraits.
I’ll be mostly using Customizable Spot Light decor. Alternatively, you can use IGCS (Injectable Generic Camera System)’s Cyberlit mod for this.
As always, this is my dark studio at the top of Arasaka Tower (we’re in the major leagues!);
Game.TeleportPlayerToPosition(-1347.3859863281,140.73120117188,545.84606933594)
Types of Light Patterns for Portrait Photography
1. Broad Lighting (R)
Angle subject from the main light source, facing the bright side of the face.
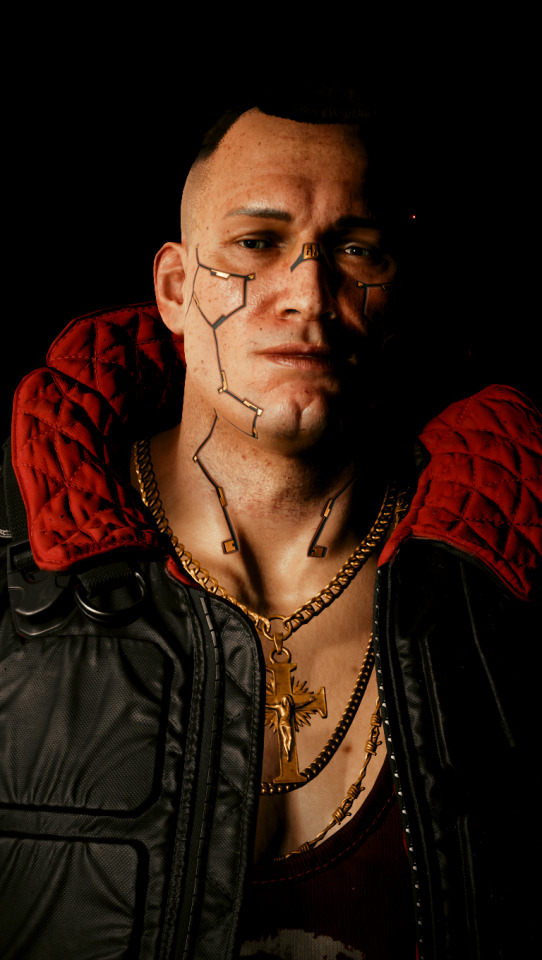
2. Short Lighting (L)
The opposite of Broad lighting. Darker side of the face is angled towards the camera.
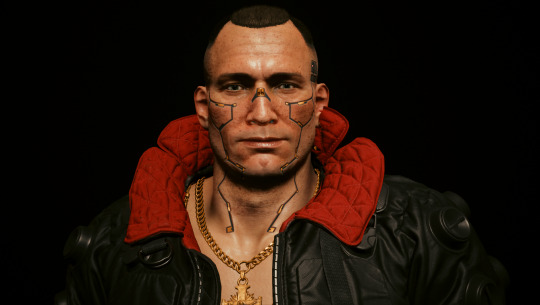
3. Butterfly (Paramount) Lighting
Overhead light angled down. Dark shadows underneath the face and nose (depending on the nose shape).
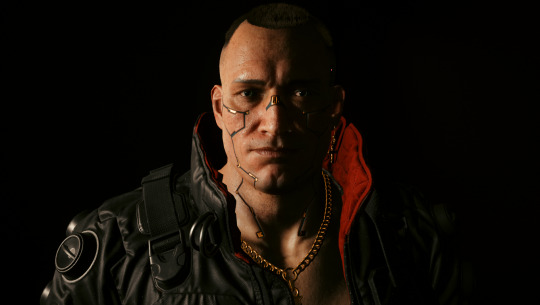
4. Split Lighting
90° to the subject.
For true split lighting; (with Photoshop)
5. Loop Lighting
45° to the subject (slightly above eye level and slightly down).
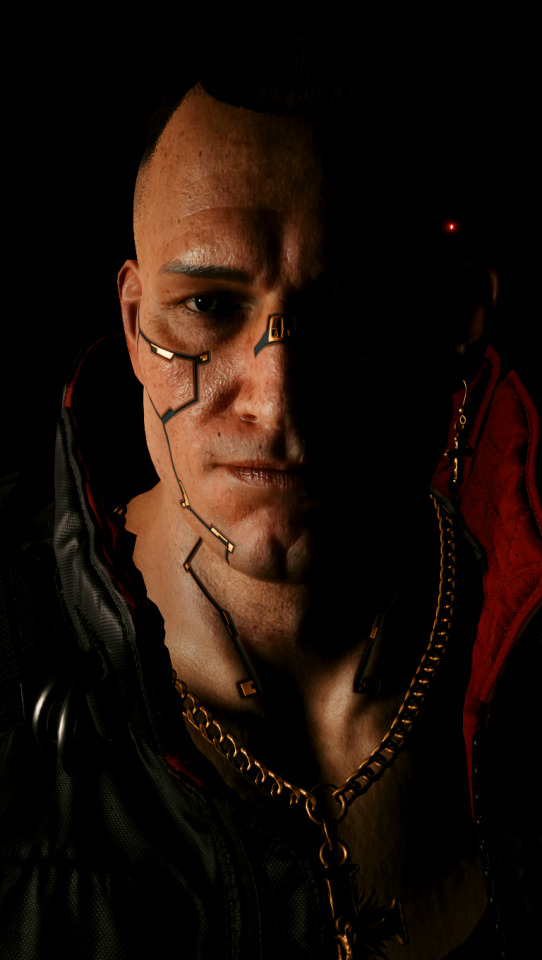
6. Rembrandt Lighting
30° from the subject, a bit above their head and angled down. Triangle shaped on cheek (also depending on nose shape)
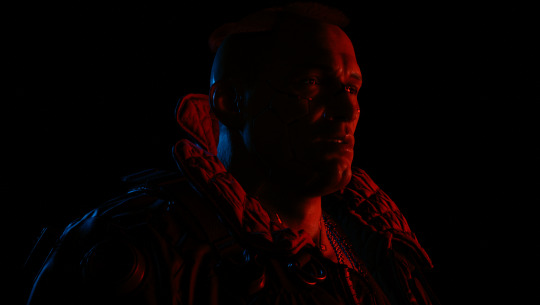
7. Back Lighting (Rim Lighting)
Bright outline that define the subject.
#Cyberpunk 2077#Jackie Welles#Portrait Tutorial#Appearance Menu Mod#Lighting techniques#Virtual Photography
114 notes
·
View notes

Text

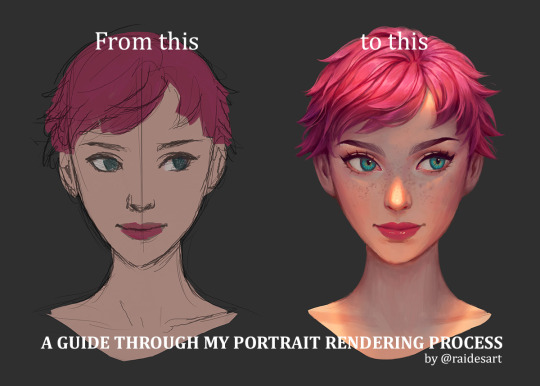
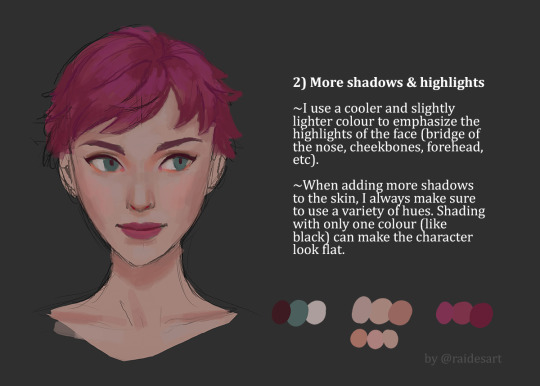
Grayscale to color process done over livestream
posting the process explanation later~
#art tutorial#portrait tutorial#portrait#drawing process#grayscaletocolor#drawing tutorial#painting tutorial#hes rly pretty help#theres something sexy about multiply and overlay layers
17 notes
·
View notes
Photo


Light and color studies ♥ My gallery ♥ My twitter ♥ Support me on Patreon
611 notes
·
View notes
Video
youtube
My brand new process / tutorial video is now live!
More of my work: Instagram | Twitter | Facebook | Website
#dog portrait#pet portrait#soft pastel#pastel#dry pastel#pastel artwork#animal artwork#animal art#artist#art#portrait#dog#realistic art#realistic animal art#realistic portrait#art tutorial#portrait tutorial#fur tutorial
42 notes
·
View notes
Video
youtube
Some help if you dont know how to improve on your portrait skills!
#portrait painting#art tutorial#how to draw faces#portrait tutorial#digital portrait#art tips#art help
57 notes
·
View notes
Video
youtube
New video guys! With voice over! yes hear my tiny voice! LISTEN TO IT!
In this I try to explain how I create my backgrounds and paint skin.
I am super backed logged with videos. I will try to get them all out as soon as I possibly can.
#watercolor#watercolor tutorial#how to paint skin#how to paint faces#portrait tutorial#painting tutorial#painting process#traditional art#fantasy art#fantasy character#mermaid#mermaid art#creepy art#gothic art#horror art#creepy mermaid#painting video
18 notes
·
View notes
Photo

Skin Tone Reference For Digital Painting by: Renee Chio
#art#art reference#skintone#digital painting#art tutorial#Renee Chio#coloring skintones#layering#contouring#portrait tutorial
2K notes
·
View notes
Text


FACE ANALYSIS WITH TAE TUTORIAL Part 2


FACE ANALYSIS WITH TAE TUTORIAL Part 1
A deep dive into how I analyze and draw faces. I hope this is helpful <3
#how to draw#digital art tutorial#portrait tutorial#kim taehyung#kth#bts#my tutorials#I forgot the word for portrait…
35 notes
·
View notes
Text
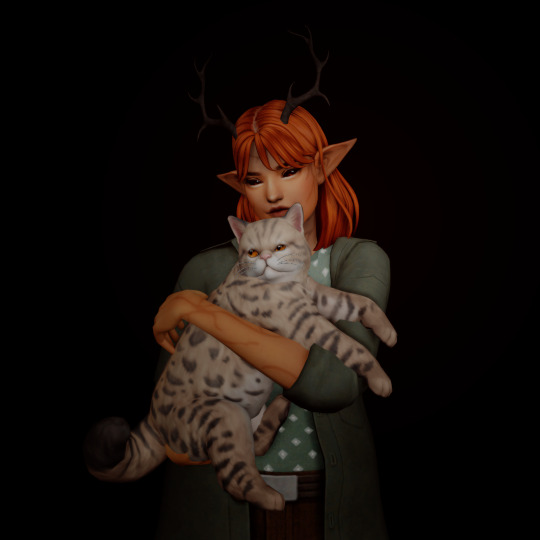
pidge + turnip ♡
#i was making a lil tutorial for a friend & thought it was cute :3#still making my way through building the save btw#it's just been slow going but i only have...3 households left to make?#and i have 2 more that i just haven't posted yet#the sims 4#the sims#sims#ts4 portrait#sim:pigeon#turnip the cat
87 notes
·
View notes
Video
youtube
HOW TO DRAW SEMI-REAL PORTRAIT in Photoshop. Simple shading in Photoshop...
5 notes
·
View notes
Text

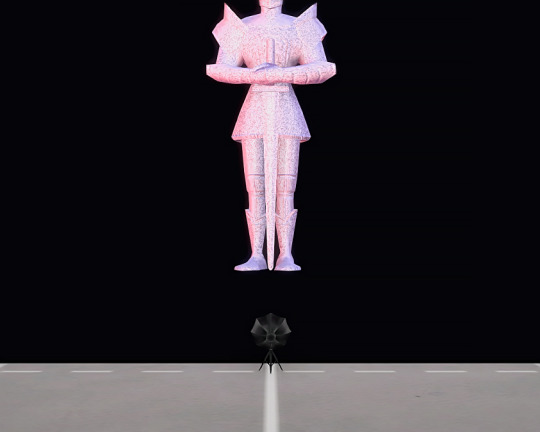
to the anon who asked about my portrait lighting, sorry this took so long! but here's my quick tutorial on portrait lighting, including links to the cc i use. ;)
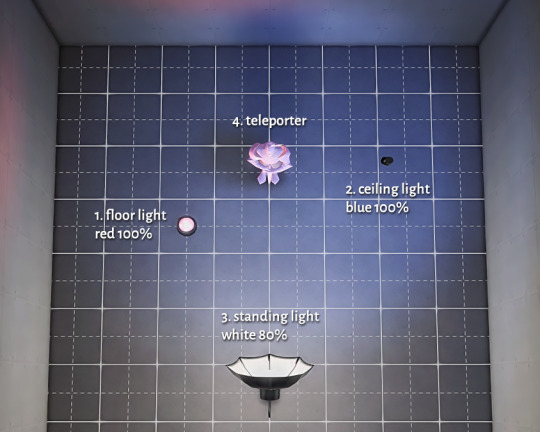
in a room 8 x 14 (with no windows or doors), i set up my lighting and teleporter first as you see spaced here. lights 1 & 2 are each 1 square away diagonally from the teleporter and turned a quarter inward using the < or > keys. light 3 is 4 squares directly in front of the teleporter. i usually alternate one light red and another blue for contrast, but the front light is always neutral. you can do any other color combination for the side lights, but i recommend doing contrasting colors like red and blue or purple and cyan. doing orange and pink, for example, will probably just blend together.
then i pop in the backdrop i'll be using (or paint the walls and lay down flooring), and resize my lights so they're not in the way.
if you'd like to use the exact items i use, here they are:
base game "outdoor ground light"
tuds ema 30° ceiling lamp
kewai-duo umbrella light short
teleport any sim
andrew's pose player
helgatisha's backdrop

#ts4#sims 4#the sims 4#ts4 tutorial#sims 4 tutorial#the sims 4 tutorial#ts4 portrait#simblr#dreamstatesims
423 notes
·
View notes
Photo


youtube
118 notes
·
View notes
Photo

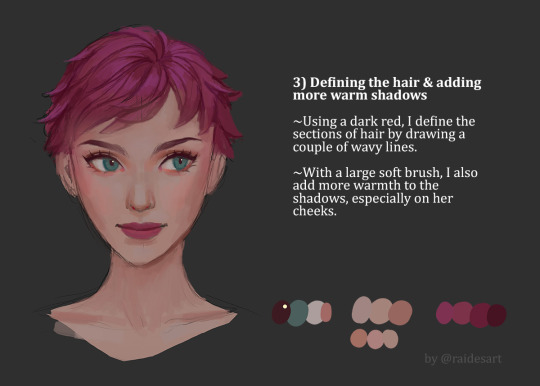

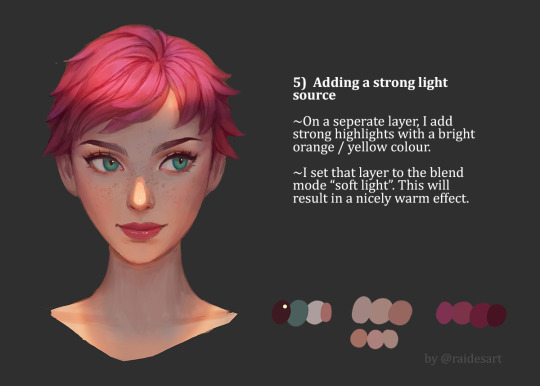
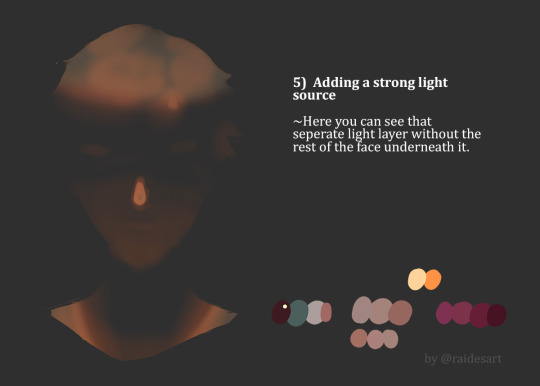
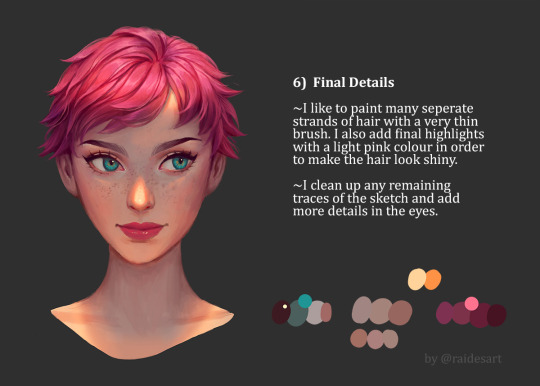
So many of you asked for a tutorial on how I paint faces/ add a light source, so here you go! 😍 Let me know if you guys have any feedback or if you want to try it yourself! 💜
40K notes
·
View notes
Link
#digtal painting#Digital art tutorial#portrait painting#art tutorial#portrait tutorial#how to draw#clip studio paint
4 notes
·
View notes
Photo


overly simple cheat sheet for shading faces
I mostly made this because I thought I would have appreciated this as a beginner so idk if this actually helps anyone else
here’s some thoughts:
the standard light source for a simple portrait is in front and above the character, which defines what kind of shadows you can get
(generally, the most common lighting situation has the light source above a character)
simple shadows under the chin, nose and following the shape of the eye-socket are the basics I put on almost any face
some places like directly underneath the chin, the nostrils and the inner ear should have the darkest shadows because light barely reaches these places
the upper eyelid casts a shadow over the eyeball
adding a soft shadow all around the face helps add dimension because it makes the head appear somewhat spherical
the upper is darker than the lower lip because it faces away from the light
if you want your character to look young and/or “““beautiful”““ (this is obviously subjective, I’m talking about hegemonic ideas of beauty) minimal shading helps you
darker shadows on the cheeks give the idea of sharp cheekbones
any hair that falls over the face will also cast a shadow
lastly: shadows are a result of light interacting with the 3-dimensional shape of the face, so they can be used to enhance the way your linework defined the features of a character
also: photo reference will always be more accurate than whatever this is, so please use it :3
anyway, hope this helps some poor 12 year old out there who’s just getting into drawing people
#wren rambles#digital sketchbook#drawing tutorial#(???)#can I call it that#let's just call it an opinion piece on use of shading in portraits ajhksfhdg
55 notes
·
View notes