#WAMP server HTTPS localhost
Explore tagged Tumblr posts
Visit Tumblr Blog
Explore Tumblr blogs with no restrictions, modern design and the best experience.
Last Seen Tumblr Blogs


Fun Fact
Tumblr was the first site to host the blog for President Barack Obama in 2011.
Text
How to configure SSL for WAMP server
The WAMP server (Windows, Apache, MySQL, PHP/Python/Perl) is a software stack designed to create a local development environment on Windows. It bundles “Apache”, a web server to host websites and applications, “MySQL”: A”, a relational database management system for managing data, and “PHP/Python/Perl”, a programming languages for server-side scripting. In this short article, we shall discuss how…
#configure HTTPS for development server#configure SSL for WAMP server#enable HTTPS on WAMP server#enable SSL localhost#install SSL certificate WAMP#Microsoft Windows#secure WAMP server website#secure WAMP server with SSL#SSL#SSL 3.0#ssl certificate#SSL certificate installation WAMP server#SSL configuration tutorial WAMP#SSL Encoding Format and Extensions#SSL setup for localhost WAMP#WAMP HTTPS configuration guide#WAMP server HTTPS localhost#WAMP server secure connection#WAMP server SSL setup#Windows#Windows 10#Windows 11#Windows Server#Windows Server 2012#Windows Server 2016#Windows Server 2019#Windows Server 2022
0 notes
Text
Dairy Farm Shop Management System Using PHP and MySQL

The Dairy Farm Shop Management System (DFSMS) is a web based application that can be accessed over the web. This system can be used to automate the workflow of dairy shop and their invoices.
The project has been planned to be having the view of distributed architecture, with centralized storage of the database. The application for the storage of the data has been planned. Using the constructs of MySQL Server and all the user interfaces has been designed using the PHP technologies. The database connectivity is planned using the “MySQL Connection” methodology. The standards of security and data protective mechanism have been given a big choice for proper usage. The application takes care of different modules and their associated reports, which are produced as per the applicable strategies and standards that are put forwarded by the administrative staff.
Click: https://phpgurukul.com/dairy-farm-shop-management-system-using-php-and-mysql/
Project Modules
DFSMS is a web-based application which manages the products of dairy shop. It has one module i.e. admin who manages all the functions of the dairy shop.
Admin Features :
Dashboard: In this section, admin can see all detail in brief like Total listed categories, companies, products and also see the sales.
Category: In this section, admin can add new categories and edit, delete old categories.
Company: In this section, admin can add new companies and edit, delete old companies.
Product: In this section, admin can add new products and edit old products.
Search: In this section, admin can search for a product then add the product into the cart and generate invoice /receipt.
Invoices: In this section, admin can view all generated invoices/receipts.
Reports: In this section, admin can generate two reports, one is B/w date and another one is for sales.
Admin can also update his profile, change the password and recover the password.
How to run the Dairy Farm Shop Management System Project (DFSMS)
1. Download the zip file
2. Extract the file and copy dfsms folder
3.Paste inside root directory(for xampp xampp/htdocs, for wamp wamp/www, for lamp var/www/html)
4. Open PHPMyAdmin (http://localhost/phpmyadmin)
5. Create a database with name dfsms
6. Import dfsms.sql file(given inside the zip package in SQL file folder)
7.Run the script http://localhost/dfsms
*********************Admin Credential*********************
Username: admin Password: Test@123
PHP Gurukul
Welcome to PHPGurukul. We are a web development team striving our best to provide you with an unusual experience with PHP. Some technologies never fade, and PHP is one of them. From the time it has been introduced, the demand for PHP Projects and PHP developers is growing since 1994. We are here to make your PHP journey more exciting and useful.
Email: [email protected] Website : https://phpgurukul.com
0 notes
Text
How to Develop a Website Using PHP
How to Develop a Website Using PHP
In today's digital era, websites play a crucial role in business growth and online presence. One of the most widely used server-side scripting languages for web development is PHP (Hypertext Preprocessor). It is open-source, easy to learn, and widely supported by web servers and databases. This guide will walk you through the step-by-step process of developing a website using PHP.

Why Choose PHP for Web Development?
Before diving into the development process, let’s explore some key reasons why PHP is a great choice for website development:
1. Open-Source: PHP is free to use, making it cost-effective for developers.
2. Cross-Platform Compatibility: Runs on Windows, Linux, and macOS without compatibility issues.
3. Database Support: Easily integrates with MySQL, PostgreSQL, and other databases.
4. Scalability: Suitable for both small websites and large-scale web applications.
5. Large Community Support: Extensive documentation and active developer communities for troubleshooting and learning.
Prerequisites for PHP Web Development
To develop a website using PHP, you need the following tools:
1. Text Editor or IDE: VS Code, Sublime Text, or PHPStorm.
2. Local Server: XAMPP, WAMP, or MAMP for running PHP scripts.
3. Database System: MySQL or PostgreSQL for data storage.
4. Web Browser: Chrome, Firefox, or Edge for testing the website.
Step-by-Step Guide to Developing a Website Using PHP
1. Setting Up Your Development Environment
To begin developing a PHP website, follow these steps:
· Install XAMPP (or WAMP/MAMP) to create a local server.
· Using the XAMPP Control Panel, launch Apache and MySQL.
· Navigate to htdocs in the XAMPP directory to store PHP project files.
2. Creating the Project Structure
Organizing your files properly enhances maintainability. A typical PHP project structure:
project-folder/
│-- index.php
│-- config.php
│-- assets/
│ ├── css/
│ ├── js/
│ ├── images/
│-- includes/
│ ├── header.php
│ ├── footer.php
│-- pages/
│ ├── about.php
│ ├── contact.php
│-- database/
│ ├── db_connect.php
3. Writing Your First PHP Script
Create an index.php file and add the following code:
<?php
echo "Welcome to My PHP Website!";
?>
Save the file and access it in the browser by navigating to http://localhost/project-folder/.
4. Connecting PHP with MySQL Database
To manage dynamic content, connect PHP with a MySQL database.
Create a Database
1. Open phpMyAdmin from XAMPP.
2. Create a new database, e.g., my_website.
3. Add a users table with fields id, name, email, and password.
Database Connection Code (db_connect.php)
<?php
$servername = "localhost";
$username = "root";
$password = "";
dbname = "my_website";
$conn = new mysqli($servername, $username, $password, $dbname);
if ($conn->connect_error) {
die("Connection failed: " . $conn->connect_error);
}
?>
5. Creating a User Registration System
A simple user registration form using PHP and MySQL.
Registration Form (register.php)
<form method="POST" action="register.php">
<input type="text" name="name" placeholder="Full Name" required>
<input type="email" name="email" placeholder="Email" required>
<input type="password" name="password" placeholder="Password" required>
<button type="submit" name="register">Register</button>
</form>
Handling User Registration (register.php)
<?php
include 'database/db_connect.php';
if(isset($_POST['register'])) {
$name = $_POST['name'];
$email = $_POST['email'];
$password = password_hash($_POST['password'], PASSWORD_BCRYPT);
$sql = "INSERT INTO users (name, email, password) VALUES ('$name', '$email', '$password')";
if ($conn->query($sql) === TRUE) {
echo "Registration successful!";
} else {
echo "Error: " . $conn->error;
}
}
?>
6. Implementing User Login System
Login Form (login.php)
<form method="POST" action="login.php">
<input type="email" name="email" placeholder="Email" required>
<input type="password" name="password" placeholder="Password" required>
<button type="submit" name="login">Login</button>
</form>
Handling Login Authentication (login.php)
<?php
session_start();
include 'database/db_connect.php';
if(isset($_POST['login'])) {
$email = $_POST['email'];
$password = $_POST['password'];
$result = $conn->query("SELECT * FROM users WHERE email='$email'");
$user = $result->fetch_assoc();
if(password_verify($password, $user['password'])) {
$_SESSION['user'] = $user;
echo "Login successful!";
} else {
echo "Invalid credentials!";
}
}
?>

7. Adding Navigation and Styling
· Use Bootstrap or CSS frameworks to improve UI.
· Include a header.php and footer.php for better navigation.
8. Deploying the PHP Website
Once development is complete, deploy your PHP website using:
· Shared Hosting with cPanel for easy management.
· Cloud Hosting (AWS, DigitalOcean) for high performance.
· Domain & SSL Certificate for a secure and professional website.
Conclusion
Developing a website using PHP is an efficient way to create dynamic and interactive websites. By following this step-by-step guide, you can build a PHP-based website from scratch, implement database interactions, user authentication, and deploy your project successfully. Start your PHP development journey today and create powerful web applications!
#web development#seo services#web designing#social media marketing#graphic design#digital marketing#digitalmarketing#marketing#digitalindia#seo
1 note
·
View note
Text
How to Move Your WordPress Site from Localhost to a Live Server
Developing a WordPress site on localhost is a great way to build and test your website in a controlled environment. However, the real challenge arises when it's time to move the site from your local server to a live hosting environment. If not done correctly, you could encounter broken links, missing images, or even database errors.
In this blog, we'll guide you through a step-by-step process to successfully move your WordPress site from localhost to a live server.

Step 1: Choose the Right Hosting Provider
Your first step is to select a reliable web hosting provider that meets your website’s needs. Look for:
Server Speed: Fast servers for better performance.
Uptime Guarantee: At least 99.9% uptime to ensure availability.
Ease of Use: User-friendly dashboards and tools.
WordPress Support: Hosting optimized for WordPress websites.
Popular options include Bluehost, SiteGround, and WP Engine.
Step 2: Export Your Local WordPress Database
The database is the backbone of your WordPress site. To export it:
Open phpMyAdmin on your local server (e.g., XAMPP or WAMP).
Select your WordPress database.
Click on the Export tab and choose the Quick Export method.
Save the .sql file to your computer.
Step 3: Upload Your WordPress Files to the Live Server
To move your files:
Compress Your WordPress Folder: Zip your local WordPress installation folder.
Access Your Hosting Account: Use a file manager or an FTP client like FileZilla.
Upload the Files: Transfer the zipped folder to your hosting server's root directory (usually public_html).
Unzip the Folder: Extract the files once uploaded.
Step 4: Create a Database on the Live Server
Now, set up a new database on your live hosting server:
Log in to your hosting control panel (e.g., cPanel).
Navigate to the MySQL Databases section.
Create a new database, database user, and password.
Assign the user to the database with full privileges.
Step 5: Import the Database to the Live Server
Open phpMyAdmin in your hosting control panel.
Select the new database you created.
Click the Import tab.
Choose the .sql file you exported from your localhost.
Click Go to import the database.
Step 6: Update the wp-config.php File
To connect your site to the live database:
Locate the wp-config.php file in your WordPress installation.
Open the file in a text editor.
Update the following lines: define('DB_NAME', 'your_live_database_name'); define('DB_USER', 'your_live_database_user'); define('DB_PASSWORD', 'your_live_database_password'); define('DB_HOST', 'localhost'); // Keep this unless your host specifies otherwise.
Save the file and upload it to your server via FTP.
Step 7: Update URLs in the Database
Your localhost URLs need to be replaced with your live site URLs.
Use a tool like Search Replace DB or run SQL queries in phpMyAdmin.
In phpMyAdmin, run the following query: UPDATE wp_options SET option_value = 'http://your-live-site.com' WHERE option_name = 'siteurl'; UPDATE wp_options SET option_value = 'http://your-live-site.com' WHERE option_name = 'home';
Step 8: Test Your Live Website
Once everything is uploaded and configured, check your website by entering its URL in a browser. Test for:
Broken Links: Fix them using plugins like Broken Link Checker.
Missing Images: Ensure media files were uploaded correctly.
Functionality: Verify forms, buttons, and features work as expected.
Step 9: Set Up Permalinks
To ensure proper URL structure:
Log in to your WordPress admin dashboard on the live site.
Go to Settings > Permalinks.
Choose your preferred permalink structure and click Save Changes.
Step 10: Secure Your Live Website
After migrating, secure your site to prevent vulnerabilities:
Install an SSL Certificate: Most hosting providers offer free SSL certificates.
Update Plugins and Themes: Ensure everything is up to date.
Set Up Backups: Use plugins like UpdraftPlus for regular backups.
Conclusion
Moving your WordPress site from localhost to a live server may seem daunting, but by following these steps, you can ensure a smooth and error-free migration. A successful move allows you to showcase your site to the world, engage your audience, and achieve your goals.
Start today and take your WordPress project live with confidence!
0 notes
Text
Creating a Simple REST API with PHP: A Beginner's Guide
In the digital era, REST APIs have become the backbone of web and mobile applications, facilitating seamless communication between different software systems. PHP, with its simplicity and wide adoption, is a powerful tool for building robust REST APIs. This guide aims to introduce beginners to the fundamentals of creating a simple REST API using PHP.
Understanding REST APIs
Before diving into the technicalities, it's essential to understand what REST APIs are. REST (Representational State Transfer) is an architectural style for designing networked applications. It relies on a stateless, client-server, cacheable communications protocol -- typically HTTP. In simpler terms, REST uses HTTP requests to GET, PUT, POST, and DELETE data.
Setting Up Your Environment
To start building your REST API with PHP, you'll need a local server environment like XAMPP, WAMP, or MAMP. These software packages provide the necessary tools (Apache, MySQL, and PHP) to develop and test your API locally. Once installed, start the Apache server to run your PHP scripts.
Planning Your API
Before coding, plan what resources your API will provide access to and the corresponding endpoints. For example, if you're building an API for a blog, resources might include articles, authors, and comments. An endpoint for retrieving articles could be structured as http://yourdomain.com/api/articles.
Creating the API
1. Setting Up a Project Structure
Create a new directory in your server's root folder (e.g., htdocs in XAMPP) named my_api. Inside this directory, create two files: .htaccess and index.php. The .htaccess file will be used for URL rewriting, making your API endpoints clean and user-friendly.
.htaccess
apacheCopy code
RewriteEngine On RewriteCond %{REQUEST_FILENAME} !-f RewriteRule ^([a-zA-Z0-9-]+)/?$ index.php?request=$1 [QSA,NC,L]
This configuration redirects all requests to index.php, passing the request path as a query parameter.
2. Implementing the API Logic
index.php
Start by initializing an array to mock a database of articles. Then, parse the request to determine which resource is being accessed.
phpCopy code
<?php // Mock database of articles $articles = [ ['id' => 1, 'title' => 'The First Article', 'content' => 'This is the first article.'], ['id' => 2, 'title' => 'The Second Article', 'content' => 'This is the second article.'] ]; // Get the request path $request = $_GET['request'] ?? ''; // Split the path into components $requestParts = explode('/', $request); // Determine the resource $resource = $requestParts[0] ?? ''; header('Content-Type: application/json'); switch ($resource) { case 'articles': echo json_encode($articles); break; default: http_response_code(404); echo json_encode(['error' => 'Resource not found']); break; }
This script checks the requested resource and returns a JSON-encoded list of articles if the articles resource is accessed. For any other resource, it returns a 404 error with a JSON error message.
3. Testing Your API
To test your API, you can use tools like Postman or simply your browser. For instance, navigating to http://localhost/my_api/articles should display the JSON-encoded articles.
Extending Your API
Once you've mastered the basics, you can extend your API by implementing additional HTTP methods (POST, PUT, DELETE) and adding authentication for secure access. This might involve more advanced PHP programming, including working with headers for content type and authentication tokens, and dealing with more complex routing and database interactions.
Best Practices
When developing your API, keep in mind best practices such as:
Security: Implement measures like authentication, input validation, and sanitization to protect your API.
Versioning: Version your API from the start (e.g., v1/articles) to avoid breaking changes for users as your API evolves.
Documentation: Provide clear, concise documentation for your API's endpoints, request parameters, and response objects.
Embracing PHP's Flexibility for Rapid Development
One of the unique aspects of creating a REST API with PHP is leveraging PHP's inherent flexibility and simplicity for rapid development. As a dynamically typed language, PHP allows developers to iterate quickly without the strict type constraints found in statically typed languages. This flexibility is particularly beneficial in the early stages of API development, where the data model and business logic might frequently change. Furthermore, PHP's extensive standard library and numerous frameworks can significantly speed up the development process. For instance, using a PHP framework like Laravel or Symfony can provide out-of-the-box solutions for routing, security, and ORM (Object-Relational Mapping), enabling developers to focus on the unique aspects of their application rather than boilerplate code. To streamline projects with experts, businesses look for top php development companies and avail their services to implement better development strategies.
The Power of PHP's Community and Resources
Another unique advantage of building REST APIs with PHP is the extensive community support and wealth of resources available. PHP is one of the most widely used programming languages for web development, with a vibrant community that contributes to a vast ecosystem of libraries, frameworks, and tools. This community support means developers can often find solutions to common problems and questions through forums, blogs, and tutorials. Additionally, the availability of comprehensive documentation and best practices makes it easier for businesses to avail PHP development services to delve deeper into advanced topics. The combination of PHP's ease of use and the support of its community makes it an excellent choice for developing REST APIs, providing both beginners and seasoned developers with the resources they need to succeed.
Conclusion
Building a REST API with PHP is a rewarding project that can enhance your web development skills. Following this guide, you've taken the first step towards creating your API, understanding its foundational concepts, and applying best practices. As want to incorporate more features, refine code, and explore the vast possibilities of RESTful services, the natural choice for them is to hire php developers by outsourcing.
Remember, the key to mastering API development is practice and continuous learning. Experiment with different scenarios, contribute to open-source projects, and stay updated with the latest trends in web development. Your journey as an API developer is just beginning, and the digital world eagerly awaits your contributions.
0 notes
Text
Getting Started with PHP: A Beginner's Guide to Your First "Hello World" Program

Introduction
PHP tutorial for beginners and professionals provides in-depth knowledge of PHP scripting language. Our PHP tutorial will help you to learn PHP scripting language easily.
This PHP tutorial covers all the topics of PHP such as introduction, control statements, functions, array, string, file handling, form handling, regular expression, date and time, object-oriented programming in PHP, math, PHP MySQL, PHP with Ajax, PHP with jQuery and PHP with XML.
What is PHP
PHP is an open-source, interpreted, and object-oriented scripting language that can be executed at the server side. PHP is well suited for web development. Therefore, it is used to develop web applications (an application that executes on the server and generates the dynamic page.).
PHP was created by Rasmus Lerdorf in 1994 but appeared in the market in 1995. PHP 7.0 is the latest version of PHP, which was released on 28 November. Some important points need to be noticed about PHP are as follows:
PHP stands for Hypertext Preprocessor.
PHP is an interpreted language, i.e., there is no need for compilation.
PHP can be embedded into HTML.
PHP is an object-oriented language.
PHP is an open-source scripting language.
PHP is simple and easy to learn language.

Why use PHP
PHP is a server-side scripting language, which is used to design dynamic web applications with MySQL database.
It handles dynamic content, database as well as session tracking for the website.
You can create sessions in PHP.
It can access cookies variables and also set cookies.
Using PHP language, you can control the user's to access some pages of your website.
It helps to encrypt the data and apply validation.
PHP supports several protocols such as HTTP, POP3, SNMP, LDAP, IMAP, and many more.
PHP Features

Install PHP
To install PHP, we will suggest you to install AMP (Apache, MySQL, PHP) software stack. It is available for all operating systems. There are many AMP options available in the market that are given below:
WAMP for Windows
LAMP for Linux
MAMP for Mac
SAMP for Solaris
FAMP for FreeBSD
XAMPP (Cross, Apache, MySQL, PHP, Perl) for Cross Platform: It includes some other components too such as FileZilla, OpenSSL, Webalizer, Mercury Mail, etc.
How to install XAMPP server on windows
We will learn how to install the XAMPP server on windows platform step by step. Follow the below steps and install the XAMPP server on your system.
Step 1: Click on the above link provided to download the XAMPP server according to your window requirement.
Step 2: After downloading XAMPP, double click on the downloaded file and allow XAMPP to make changes in your system. A window will pop-up, where you have to click on the Next button.
Step 3: Here, select the components, which you want to install and click Next.

Step 4: Choose a folder where you want to install the XAMPP in your system and click Next
Step 5: Click Next and move ahead
Step 6: XAMPP is ready to install, so click on the Next button and install the XAMPP.
Step 7: A finish window will display after successful installation. Click on the Finish button
Step 8: Choose your preferred language
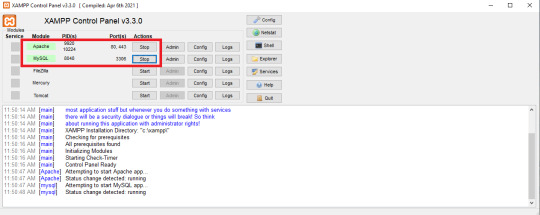
Step 9: XAMPP is ready to use. Start the Apache server and MySQL and run the php program on the localhost.
Step 10: If no error is shown, then XAMPP is running successfully

How to run PHP code in XAMPP
Generally, a PHP file contains HTML tags and some PHP scripting code. It is very easy to create a simple PHP example. To do so, create a file and write HTML tags + PHP code and save this file with .php extension.
All PHP code goes between the php tag. It starts with <?php and ends with ?>. The syntax of PHP tag is given below:
<?php
//your code here
?>
How to run PHP programs in XAMPP PHP is a popular backend programming language. PHP programs can be written on any editor, such as - Notepad, Notepad++, Dreamweaver, etc. These programs save with .php extension, i.e., filename.php inside the htdocs folder.
For example - p1.php.
As I'm using window, and my XAMPP server is installed in D drive. So, the path for the htdocs directory will be "D:\xampp\htdocs".
Step 1: Create a simple PHP program like hello world.
<?php
echo "Hello World!";
?>
Step 2: Save the file with hello.php name in the htdocs folder, which resides inside the xampp folder.
Step 3: Run the XAMPP server and start the Apache and MySQL.
Step4: Now, open the web browser and type localhost http://localhost/hello.php on your browser window.
Step 5: The output for the above hello.php program will be shown as the screenshot below

Most of the time, PHP programs run as a web server module. However, PHP can also be run on CLI (Command Line Interface).
Credits – Shweta Patil (Backend)
MetricsViews Pvt. Ltd.
MetricsViews specializes in building a solid DevOps strategy with cloud-native including AWS, GCP, Azure, Salesforce, and many more. We excel in microservice adoption, CI/CD, Orchestration, and Provisioning of Infrastructure - with Smart DevOps tools like Terraform, and CloudFormation on the cloud.
www.metricsviews.com
0 notes
Text
How to do programming in PHP
PHP, short for Hypertext Preprocessor, is a popular web programming language. Simplicity, adaptability, and dynamic and interactive online applications are its hallmarks. This is the spot to learn PHP programming for beginners. This guide will teach you PHP fundamentals step-by-step.
Prerequisites
Basic HTML and CSS expertise is helpful before learning PHP. Understanding these languages simplifies PHP code integration into web sites.
Setting Up Your Environment
PHP programming requires a development environment. The essential setup stages are:
Web Server: XAMPP, WAMP, or MAMP, which include PHP, Apache, MySQL, and other technologies, can be used. Use a cloud-based development environment instead.
Text editor or IDE: Use Visual Studio Code, Sublime Text, or PhpStorm, which supports PHP.
PHP Installation: Without XAMPP, you must install PHP individually. The official PHP website (php.net) offers the newest version.
Writing Your First PHP Script
Start with a simple "Hello, World!" example to learn PHP:
```php �?php echo "Hello, World!"; ?>
Save the code as a .php file (e.g., hello.php) and store it in your web server's document root folder.
To run the script, navigate to http://localhost/hello.php in your browser. The page should say "Hello, World!"
The PHP syntax
PHP code is contained in <?php and ?> tags. The server interprets PHP code within these tags.
These syntactic components are important:
Statements terminate with a semicolon (;). Variables begin with a $ symbol (e.g., $variable_name).
Comments can be single-line (//) or multi-line (/* */). Web page content is produced using echo commands. Variables, data types
PHP supports integers, floats, texts, booleans, arrays, and objects. The variables must begin with a $ and are case-sensitive. Example of variable usage:$name = "John"; $age = 25; $isStudent = true; The Control Structure PHP offers standard control structures such as `if`, `else`, `while`, `for`, and `switch`. These enable code choices and loops.
php if ($age < 18) { echo "You are a minor."; } otherwise { echo "You are an adult."; }
Functions
PHP functions encapsulate reusable code. How to define and invoke a function:
PHP function greet($name) { echo "Hello, $name!"; }
Say hello to "Alice"
Working with Forms
PHP processes HTML form data. To retrieve form data, use the $_POST or $_GET superglobal arrays. Simple form example:
```html Also in `process_form.php`: PHP <?php $username = $_POST["username"]; echo "Welcome, $username!"; ?>
This guide laid the groundwork for PHP programming. As you master the basics, you may learn about databases, user authentication, and dynamic web applications. PHP's large community and copious documentation make it a superb web development language, and there are many online resources to help you learn PHP. Get coding and develop PHP web applications!
#dissertation#essay writing#research paper#thesis#case study help#homework help#report#reportwriting#php#phpdevelopment#php script#php programming
0 notes
Text
How To Move Magento 2 From Localhost To Server [In 8 Steps]
Welcome to our comprehensive guide on how to seamlessly move your Magento 2 e-commerce store from localhost to a live server. Relocating your website is a crucial step in making your online business accessible to a wider audience. In this step-by-step tutorial, we’ll walk you through the entire process, ensuring a smooth transition with minimal downtime. Whether you’re a beginner or an experienced developer, follow along to master the art of transferring your Magento 2 store and unleash its full potential on the web. Let’s dive in and get your store up and running on the live server!
How To Move Magento 2 From Localhost To Server
Before embarking on the migration process of your Magento store from localhost to a live server, it’s crucial to ensure that you have everything you need to execute a successful transfer. Here’s a comprehensive checklist to guarantee a smooth and efficient migration:
Choose a Magento-specific hosting plan for optimized speed and performance.
Get a unique domain name to represent your store and improve SEO.
Install the latest versions of phpMyAdmin and MySQL for database management.
Use cPanel for easy website management, commonly provided by hosting providers.
With these essentials, you’re ready to migrate your Magento store successfully. Let’s proceed with the steps.
Steps to Move Magento 2 from Localhost to Server:
Step 1: Export Database from Localhost

Connect to your localhost software (e.g., XAMPP, WAMP) and log in to phpMyAdmin.
Select the database of your Magento store from the menu on the left.
Click on the “Export” option at the top of the page.
Click the “Go” button to initiate the database export process.
The database files will be available for download in .sql format, and you can also choose to save them as .zip files.
Following these steps will allow you to successfully export your Magento store’s database from the localhost environment.
Step 2: Create Magento Files in Zip Format
Select all the files and folders from localhost and create a zip file.
Go to htdocs folder (if you are using XAMPP) or www folder (if WAMPP)
Go to Magento folder and compress the files in zip format More Info: https://www.evrig.com/blog/move-magento-2-from-localhost-to-server/
#magento#magento 2#Localhost#server#ecommerce#ecommerce business#magento developer#magento development#EvrigSolutions
0 notes
Link
Maplestory private server
Is it safe? Let us understand the background and distinctive contents of private servers.
Maplestory private host
It helps MapleStory fans better enjoy the hard work involved with constructing successful MapleStory servers. However, what about punishment?
Personal Servers are somewhat illegal because they breach the TOS or Copyright claims or something. If Nexon has captured a private host, they'll send a notification to you or sue you enjoy they did to and which no longer exist.
The reason behind most personal servers is either from people who talk about the leaked info. The manufacturer of OdinMS created his personal host, or they're rebels such as The Resistance vs. The Blend in Half-Life 2.
But, there's absolutely no possible way for Nexon to prevent all private servers. They are continuing to be advanced from moving v55, v63, v72, and so on.
How Is a Private Server like Maplestory Made?
After all the years of unsuccessful leveling, upgrading, and recruitment of guild members, together with a destroyed Ghost Boat Exorcist badge onto a three-year-old Mechanic, I chose to retire into a MapleStory Private Server.
Additionally, $600CAD to find nx and buy stuff (for example, meso sacs and store permits) to get items across and find things out in M.S. the challenging way. Yes, I sacrificed $600CAD in substantial school lunch money to get things like hair coupons in M.S. once I might have used that money to receive a supercomputer.
Nexon is observing everything
The ruined GSE badge within my 3-year-old 210 mechanics. (through celebrity improvement window) and Nexon's shortage of gear reimbursement finally led me to do the one thing nobody would ever encourage me to do: I gave up on GMS. With no GSE badge, I can not continue on GMS.
Furthermore, I wasted a lot of real cash to sell items to acquire more Mesos. Instead, I've more insults than Mesos from players. Such as"Shoo."
[caption id="attachment_1282" align="aligncenter" width="1920"] Maplestory Private waiter [/caption]
My big problem here is how do you create a MapleStory Private Server (whether it is a v83 or the most recent version)? Like, do they divide into Nexon's H.Q. and extract all of the sprites, maps, sound effects, etc., off their computers and then rebuild it like a jigsaw puzzle?
If they did, then I will need to pack my bags and fly to California to do this. Like, the M.S. files will need to come from someplace. Also, it's the sole way to acquire the Wizet Invincible Hat. Besides, you'll find guidelines on other Personal Server sites.
Mesos
That says things like"no hacking, injecting of tools/unauthorized equips/packets, no wz document editing, etc.". I feel like I deserve a holiday from this game, but don't wanna devote another 1-2-3 years recollecting all the Mesos and equipping myself.
I would like to compensate for the 3 years of the wasted moment on M.S. and get my movie/animation jobs finished at precisely the same moment.
In addition to the hat, the G.M. class itself is making me envious. Yes, they're a class referred to as"SuperGM." So with a Personal Server (a Private Server intended for my personal use ), I will see exactly what it is like to be a G.M.
And bypass all other personal server site rules. Plus, there's a skill known as"Super Dragon Roar" that really does %1000 damage to all animals on screen.
While we are on this subject of hacking, why are robots poor? I never uttered before, but as a fantastic player from GMS, I find the only fair use for them would be to let me farm Mesos while doing home chores. I could call in my friend to play M.S. while I create breakfast/lunch/dinner, do laundry, etc. Why are robots taboo to MMORPG moderators like MapleStory private servers? That and having my friend drama M.S. for me personally will make no difference (at least that's what I presume ).
A side question: why or how are Personal Servers bad? Besides the fact that they permit one to play the sport and get stuff free, I really don't see how Private Servers are poor. Additionally, when you produce a Personal Server, do you, as the admin, get a Wizet Invincible Hat?
Also, how do I protect my P.S. from Nexon so they don't locate it? ExtaliaMS got closed down when Nexon found their I.P. address. But I want to take additional precautions to avoid going to court to face Nexon.)
So for this, I will have to place my MMD project on hold for now. I have to wait until the introduction of MS2 so that I can port its models to MMD.
(this is where Time is Money. Much like E.G., construction of a condo in a boom-town; the employees need to build it quickly to allow more residents to proceed.)
Additionally, you're only allowed to perform a daily event once a character. That's like more kids than Octomom should feed.
And that I consumed almost an entire day to do daily quests on all of them because of how many negative aspects in the match slowed me down since the days passed! When it's terrible hackers, DCs (that is an online game term for"disconnections") (no matter whether I have a great or poor internet connection). Unscheduled server maintenances, or other things along those lines!
Can not you compare with a v83 Personal Server right into a quit game console like the Gamecube or even the PlayStation 1?
How can we play an old game from several decades back without a machine that's capable of doing this? So yeah, how can we try the previous skills and senior classes of the elderly servers if we can't even play with the older servers of Tonight Now? Please refer to this link for additional info about discontinued games and game consoles: A significant Note about Emulators for Game Developers.
Also, can't you compare with an MMORPG Private Server into a Jailbreak (like IAP Cracker and Installous) for iPod Touches/iPhones/iPads? For games such as Tiny Tower, Subway Surfers, Candy Crush, and so Forth, even with no Jailbreak/with the official server. I am able to go the distance and find those games completed 100 percent without having to spend a single cent.
The programmer (s) that created these match (s) plans to place them up to download free of cost. But I can't waste any more time on these types of server-sided matches because I have other important things to do.
Besides internet service, how does a Private Server need funds to operate? Since most P.S. sites say in their community guidelines. "If possible, please contribute as Personal Servers need funds to operate...
How to Create a MapleStory Private Server [v83]
First, go to C:\
As soon as you find three folders, call all you want, but I will name them'ZenthosDev,'''Downloads,' and'MapleStoryV83' with this tutorial.
Download these programs/files.
(64bit)
MySQL Query Browser
JCE Unlimited Power Records
WampServer
LocalHost v83
ZenthosDev v83
MapleStory v83
W.Z. Files
Make certain you selected the appropriate variant matching your Operating System (O.S.) to avoid any difficulties.
Installations:
Before we start, make sure to extract everything if it's in a .rar format.
Installing MapleStory v83:
Install MapleStory with the download provided. It is a really straight forward installation. Follow the instructions.
Delete the following files/folders in the C:/MapleStoryV83 folder should they exist.
MapleStory.exe
Patcher.exe
GameLauncher.exe
shield (folder)
Installing WampServer:
Follow the directions and install it.
C:\Wamp
Don't be concerned about putting your email and these at the end. Just press finish.
Left-click it and click put Online'.
Then left-click it again and click on begin All Services.'
The Wamp icon must look totally green (if it is red or reddish, you have a problem).
Installing the MySQL Query Browser:
It is straightforward, runs the installation record, agrees to the conditions, and follow the instructions.
According to which system kind your computer as you may install 32bit or 64bit.
So set up the corresponding file.
For another simple installation, follow the directions.
Documents placement:
Paste them into these areas, overwrite when prompted.
(The (jdk1)/(jre7) folder version could differ. It is fine ). C:\Program Files\Java\jdk1.7.0_01\jre\lib
3. C:\Program Files\Java\jdk1.7.0_01\jre\lib\safety
Copy each of the folders and files within the ZenthosDev folder that we made before. So it seems in this way.
Now replicate the W.Z. folder within the ZenthosDev folder.
So it must look like this.
SQL setup:
Username: root
Then click on the document' button in the menu bar, and select open Directory...'.
Proceed to C:\enthosDev\SQL and open the document called'ZenthosDev.SQL.'
Following its opening, apply the file.
Preference installation:
(This component is optional if running the server to Receive your computer only)
You might also make any alterations to have the server to function how you need it.
Wait 10 minutes, and then your bat file must look similar to this.
Code:
ZenthosDev has started:
World Launched
Login Launched
Channel Launched
Is Maplestory’s personal server really safe?
I ask this question as somebody who has been part of the Maplestory personal server" community."
(unsure whether the neighborhood is the best term to describe it, but oh well) to get many of years now. I would not call myself a"host hopper" per se, but I have tried out a decent variety of servers to see what they provide. Most servers market towards Maplers, who prefer the old-school/pre-BB encounter.
The sole thing that differentiates them will be the attributes they supply. Some have higher or lower EXP/Meso/Drop prices to make things more or harder. Some make H.P. Washing"Optional." Some provide custom content...you get the notion.
Anyway, this question popped into my mind when I tried out a host known as"AvalonMS." I recall having a few conversations using a streamer there. He was currently looking for a server to repay. This man had hoped that Avalon would perform well. Eventually, he left because he could not see the server becoming successful and remaining alive for more than a few months.
I really don't remember his precise words. However, I believe he said something along the lines of"Private Servers need to be run with at least a small bit of professionalism, like a business nearly."
Along with the proprietors of this host, since he put it, were not too professional. Among the substantial issues was that they weren't transparent enough with the area concerning what sort of content/updates they'd do with their game. I tried looking around for their host just a minute before. And they appeared to have vanished off the face of the internet. No big surprise there.
A personal server such as Maplestory has been around. So what is the issue?
I got me wondering how many private servers have been around for a while to stay successful. When I say successful, I usually indicate they could maintain a decently-sized busy player base for an extended period. That, if you consider it, is already hard enough as it is. In any kind, Maplestory, whether it be the official game or the personal servers, isn't a super popular MMO.
The official sport is nowhere near as popular as it was during its prime. And therefore, you would think the subset of all gamers/Maplers that prefer old-school private servers inside the official game is most likely a pretty little demographic.
We've got SOME powerful servers such as Royals, Legends, Saga, etc., which have existed for a couple of decades. And these"powerful" servers hold a reasonably large percentage of personal server gamers.
I mean hell, even as soon as you go past the 6th or even 7th rated server on gtop100, you begin getting into the servers that have less than 100 active players. And needless to say, the personal server community is most likely dwindling.
There are just so many men and women who have played pre-BB Maple.
And they would prefer it on the modern versions. Finally, those folks will likely proceed with their own lives and stop playing with Maplestory entirely because nostalgia can maintain a player round for such a long time. I must wonder how many more years we have before Maplestory Private Servers die off completely. I hope we have a little bit more.
1 note
·
View note
Text
Manual for Building Your First Laravel Web Application
In the realm of coding and web applications, Laravel Web Application Development Services can assist you with getting the best site. Assuming you are hoping to have associated, laying them stepwise can be extremely tiring and muddled. Picking PHP systems is the best thing in serious times.
One such system that helps your business with magnificent web advancement and making amazing website architectures utilizing PHP is Laravel web improvement.
Presently, you might have an inquiry concerning for what reason to pick Laravel for your web improvement support?
Try to keep your hat on, Laravel is the engineers' most loved in light of its components from other comparable systems. It is viable and way more helpful to use in coding. Laravel will assist with fostering a remarkable, include rich, and fast web application with incredible convenient elements.
What precisely Laravel is? For what reason is it well known for web application advancement?
An essential structure for web applications in Laravel. It implies building PHP applications with the assistance of Laravel code. Laravel has a fantastic and organized way, simple to use for creating web applications.
Assuming you need a brilliant drawing in the application that liberates you from utilizing spaghetti code, Laravel gives that remarkable and clear insight and considers expressive grammar.
Designers who love utilizing Laravel realize that it is so invigorating to chip away at Laravel which prompts three central characteristics:
Practically Elegant - With negligible setup included, capacities run as expected with Laravel. It likewise depends on shows determined in the business that considers the counteraction of code-bulging.
Basic in nature - Laravel functionalities are straightforward and straightforward. On the off chance that somebody loves to improve advancement rapidly, Laravel is all set.
Very legitimate - Documentation is something we as a whole need in an organized manner. Laravel gives far-reaching documentation a maker update mode, so another form is refreshed when delivered.
Since its send-off, Laravel experienced gigantic and sublime development in 2011. Toward the finish of 2015, Laravel became one of the most well-known and adored PHP systems on GitHub.
It is mind-blowing that no other structure accomplished such a quick and developing outcome internationally.
Laravel is focused on the end-client first and not on different elements. The degree of straightforwardness, adaptability, and clearness in a comprehension of the necessary work performed. Significant associations and known web applications are created utilizing Laravel.
Additionally Read: How Businesses Benefit The Most With Laravel Framework?
Making a Laravel App from Scratch.
To fabricate an application with Laravel, you will require a few devices introduced in your framework.
The devices are as underneath:
PHP 5.3.X or higher
Information base (MySql).
A localhost Web Server or WAMP (for Windows), LAMP (for Linux), or MAMP (for MacOs). With the most recent PHP and MySQL information base, a localhost web server comes introduced. You can introduce either MAMP, LAMP, or WAMP. Go to http://ampps.com/downloads and pick the product on your foundation.
Writer - A region the board programming for PHP is expected to create an application with Laravel. To introduce the arranger, you can utilize https://getcomposer.org/and download it.
Code supervisor - It is an unquestionable requirement for improvement. We counsel you to utilize a free Visual Studio Code.
Node.js - It is an open-source and free JavaScript runtime climate that executes JavaScript beyond the program. We use Laravel behind the scenes to set our advancement stage.
I'm setting up encryption keys, URLs, and virtual hosts.
Before code advancement, you want specific encryption for Laravel. We have made this for the encryption of the information that might be required, similar to treats. Open the record application/config/application.php and find the key. Here, we change the default worth to clear.
Then, to Set up Encryption keys, URLs, and Virtual Host.
Before we begin fostering an application with Laravel, a definite encryption key is required. It is profoundly required for the encryption of information, like treats.
You should simply open the record, go to application/config/application.php and find the key.
Here, you want to alter the default worth to clear.
Making arrangements for App Development Phase
As another task of Laravel Software Development Services, we want to begin from someplace. As appointed work or simply a thought in your mind, how about we start coding for an application.
Complete application arranging is expected with step subtleties for any turn of events and elements and web planning before you begin coding. It is dominating in making an undertaking regardless of where it begins from.
How you plan relies on how much exploration you accomplish for your application and how you will fabricate it.
A stage ought to be continued exhaustively, as Expert Laravel developers do. As a known web and versatile application designer, we train our engineers to go stepwise with specialized skills for every improvement stage.
Wireframing, UI/UX, highlights, and arrangement, working in reverse into how code is made. It doesn't make any difference how you plan, yet standard techniques and experience assist you with getting the best Laravel application.
Here we are racing to get a connection catalog and foster it exhaustively.
Show a rundown of connections.
Construct a structure to add new connections.
Structure Validation.
Enter the substantial information into the data set.
Begin constructing your application.
The following stage is to illuminate the Terminal/Command Prompt.
From here, you go to Laravel's root catalog and afterward make the key utilizing -
PHP craftsman key: produce
It will help consequently make a 32-character key in Laravel for encryption.
If you have arranged before, this is easy to do as a game plan illustrated.
Presently, making a one-of-a-kind void task ready is an opportunity.
Get your undertaking to a ~/Sites index, and explicit bearings will utilize that area. You can "park" this catalog in Valet to stay away from any organizers. Furthermore, it will be planned to "organizer name. dev" in the program consequently.
Presently, go to your terminal application and change to this index. In addition, introduce Laravel's order line installer:
Author worldwide "laravel/installer."
Presently fabricate a venture by running: laravel new connections.
You should consolidate the space (instantpiks.com) with documents to have records because the area doesn't exist.
Assuming you have Windows frameworks, alter C:\Windows\System32\drivers\etc\hosts, and for Linux, alter/and so on/has.
Add the line given to the document - 127.0.0.1 instantpiks.com
It informs the framework that the space name instantpiks.com fixes area 127.0.0.1 as a neighborhood PC.
Directing Setting.
In the wake of finishing all the application improvement steps, Laravel demands the application for planning to strategies and regulators utilizing Routes.
Assume, to go to http://instantpiks.com/home, which presents the home record, here you can make a course inside the routes.php document.
It is where URLs need to go, and these point out to the application.
The Conception of the Laravel Controller.
For the regulators or application envelope, in Laravel, origination resembles a home to Controllers.
Of course, the Home Controller gets demands shipped off the foundation of the Laravel application.
For instance, in http://instantpiks.com, you will utilize the Home-> activity list() strategy.
The great thing to do is pick regulators or applications and afterward fabricate the record to plan a regulator.
Presently, the document name is normally set to some story or, exhaustively, as a name of the regulator class. You can fabricate the regulator Login for login purposes depending on the situation. If you need it, the best Laravel Development Services will assist you with finishing all the turn of events.
Working on the first Laravel View with Blade Template Engine.
The two extraordinary ways of reviewing an application created in Laravel are PHP-based Views, which use PHP language for layouts.
The second is the Blade-based Views that utilize the implicit format motor of Laravel.
Assuming you need to redo labels and strategies that approve a more huge detachment of utilization code and the show rationale, go with The Blade Templating Engine. It is likewise useful for effortlessness, as we for the most part incline toward Blade Templating Engine.
For the record .blade.PHP expansion, you will require the view documents to utilize the augmentation that decides Laravel to rehearse that fitting motor for a view record.
Building a List of Links
Presently, when you start with the entire undertaking and are close to finishing the task, it's not difficult to get astonished. You can break this out by parting everything down into little errands.
Thus, the requirement for joins is required the most. We should begin with a few connections:
In the underlying stage, it appears to be simple and little, yet all at once, it's not. Building a rundown of connections takes time, it requires a data set, information in the table, a data set question, a data set table, and a view record.
From that point forward, fostering a movement will be your initial step, and the Laravel Artisan order line device will assist with making the relocation.
Best Practices In Laravel
Master Laravel designers prescribe Laravel improvement SOPs to consolidate the accepted procedures with no mistakes.
For the prevalent Laravel Software Development Services, a smoothing out process is an unquestionable requirement. To create an effective application, detail the cycle and guarantee the greatness of the application.
Accomplishment benchmarks for PHP 5.4, 5.6, 7.0, 7.1, and 7.2 matter for the persistent audit in the application improvement industry.
Given these benchmarks in numerous application advancement circumstances, experienced Laravel designers much of the time decide and concoct choices for the PHP rendition.
Introducing and Configuring Dependencies
As a main Laravel programming improvement administration, the security of API is an unquestionable requirement. Your application will be API-based, so we expect to have safe APIs that can be just perceived clients to be permitted to get into it.
Introducing Laravel Passport
A device for API Authentication is known as Laravel Passport. This Passport
#laravel#Laravel Development#Laravel development services#Hire dedicated Laravel developer#Dedicated Laravel developer#Laravel development agency#Laravel development company#Laravel developer#Laravel Blog
0 notes
Text
How to Easily Install Joomla 4.x
As you know, Joomla is one of the most popular open-source Content Management Systems in the world. In previous years, you are used to using Joomla 3 to manage and build up their sites. We offered you a way to install Joomla 3.x so that you can easily and simply install and use the Joomla 3 versions. However, currently, the Joomla! 4.x coming with many new features has been released, which means you need a guide on how to install Joomla 4.x. That is the reason why we give you the blog today. So, let's start to explore it now!
The technical requirements to install Joomla 4.x
If you want to install Joomla 4.x, you need to check the technical requirements first in order to ensure that you can smoothly install without any trouble. Let's have a look at the requirements below: - Server: Linux, Apache. Besides, you can also locally install it on your computer using WAMP/ JAMP/ MAMP/ XAMPP software. - PHP: 7.3, 7.4, or 8. - MySQL/ MySQLi 5.6+ or MariaDB. - PostgreSQL: 11 (if you install on localhost). - memory_limit = 128MB or more. - upload_max_file_size = 4M or more. - max_execitopm_time = 180 or more. - CURL library: your server works with url_fopen or curl. - OpenSSL Libraries: enabled. - PHP file_get_contents() function: available or unlocked.
How to install Joomla 4.x
There are 2 ways for you to install Joomla 4.x. Thus, we will find out both of them so that you can easily choose the most suitable one. Install Joomla 4.x on a web server First of all, before you install Joomla 4.x on the web server, you need to download the Joomla! 4 package from the official website. After you click on the download button, the Joomla 4 installation package will be downloaded and saved on your computer. Don't forget to unzip it to a new folder.

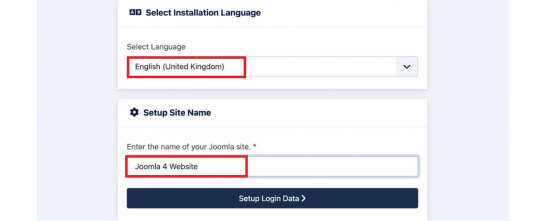
Set up the Database Now, it's time for you to generate a MySQL database, then assign a user with full permissions. In order to do that, let's follow the steps below: - Login to the cPanel. - Scroll down and select MySQL Databases in the Database section. - Create a new database by entering the name of the new database, then click on the Create Database button. - Generate a user for the database by filling out the username, password, confirmed password, and pressing the Create User button. Besides that, you can also add more users to the database in the Add User to Database section. - There will be a table of User Privileges, so check the All Privileges box at the top of the table to make sure the user will have all the privileges or full permissions. Install and set up Joomla 4 The next step you need to do is upload the Joomla files to your server via FTP Client. Let's ensure that you are utilizing an official release of an FTP Client so that there will no error during the Joomla 4 installation and setting process. Once uploading the Joomla package, we will start the installation by accessing your URL or domain you uploaded the Joomla 4 files before. For instance, it may be https://your-domain.com/folder-name. The interface will show you the language and site name setup first. Thus, simply choose the language, then fill out the name of your site. After that, you just need to click on the Setup Login Data button to move on to the next step.
Next, you need to enter the login data, including the Super User name, Super User account as well as password, and the email address of the Super User. Then, let's press the Setup Database Connection button.

Now, we will move on to the database configuration. So, you need to choose the database type first. After that, simply enter the hostname, username, password as well as database name. Besides that, you can fill out the table prefix randomly. Once everything was entered, let's click on the Install Joomla button.

Everything is done. You installed Joomla 4 successfully. There will be a congratulation message to ensure that. So, now, you can go to the admin backend dashboard or open the site without any difficulties.

Install Joomla 4.x on Localhost with XAMPP If you don't want to install Joomla 4.x on a web server, you can also do it on Localhost via XAMPP. In order to do that, simply implement the following steps. First of all, you need to download and install XAMPP.
Once installed, it's time for you to start the XAMPP and turn on the two options including Apache and MySQL.
Next, let's open the browser and type localhost/phpmyadm, then click on the New option in the top left of the screen. Now, simply fill out the database name and press the Create button.

We will go on the process by downloading the Joomla 4 package and extracting it from the root of your site. For instance, it may be C drive -> Program Files (x86) -> Ampps -> www -> create a folder and unzip the package there. Now, you just need open the browser to access localhost/yourfoldername. So, this is the place where you moved the unzipped Joomla file. For example, it may be localhost/joomla-file-name. So, the interface will show you the language and site name setting. You just need to follow the Joomla 4 configuration steps we introduce to you above.
Wrap up
In conclusion, we hope that the two methods we bring you will help you install Joomla 4.x quickly and effectively. If you have any trouble or difficulties during the Joomla 4 installation, don't hesitate to leave your comment below so that we can support you as soon as possible. Besides, in case you try to install Joomla 4.x successfully after following the steps below, let's share it with others. Last but not least, once Joomla 4 installation, don't forget to give it an eye-catching and professional appearance. All you need to do is visit our site as well as explore a lot of high-quality, attractive, and responsive Joomla 4 Templates. Thanks for your reading and hope you enjoy the blog. See you the next time with many tutorial blogs related to Joomla 4. Read the full article
0 notes
Text
Xampp On External Drive

To really be able to develop for WordPress or another CMS it’s best to have a local web server. This will save you time in FTPing and editing remote files on your final server. I used to use WAMP server, although very good, it had some limitations. I found I was switching between my desktop and laptop, making things unnecessarily complicated. Than I discovered XAMPP Lite, which I installed on a USB stick, and it works great. Another simple option is Instant WordPress, I haven`t played around to much, but I think you are much more limited.
Getting Started With Xampp
Xampp On External Drive Mac
Xampp Tutorial
Xampp Where Is Localhost
Installing XAMPP Lite
Installing XAMPP lite is pretty straight forward, use the link below to use the self extracting EXE file.
https://bellaload91.tumblr.com/post/654440098576957440/video-converter-to-avi-full-version-downloadmarcus-reid. Download XAMPP USB Lite 1.7.7 – as an EXE file, Zip and 7zip can be downloaded here.
Example, open up the XAMPP Configuration of Control panel by clicking on Config. Then click the button marked Service and Port Settings. A new box will open and be on the Apache tab. Change the port to something random, such as 11111. Then click the Filezilla tab, and change it. Not using the setup script, or selecting relative paths in the setup script, is preferred if you are installing XAMPP on a usb drive. Because on each pc such a drive can have an other drive letter. You can switch from absolute to relative paths at any time with the setup script. I can't seem to start MySQL on my external USB 3.0 drive. In the past, I haven't had problems working off of external drives. This is the first time using a large drive. Any help will be appreciat. If you're trying to get XAMPP to use a network drive as your document root you have to use UNC paths in httpd.conf. XAMPP will not recognize your mapped network drives. For example the following won't work, DocumentRoot 'X:/webroot' But this will, DocumentRoot '//192.168.10.100/webroot' (note the forward slashes, not back slashes). Hi, I am using XAMPP for developing my Inventory management system. I have stored the XAMPP in Drive C in Windows. But there is a risk if windows corrupt I will lose all my data, So I want to save the XAMPP in Drive D and acces all the pages stored in httdocs from Drive D. Please Guide me.
Launch the Installer, and browse where you want to install XAMPP.
Select the flash drive and directory you wish to use. You should have at least 400 MB of free space, plus how ever much space you need for your website, and databases.
Click install, all of the files will be extracted to your flash drive. This may take a few moments depending on your flash drive’s speed.
Click Finish and you are now done!
Launching XAMPP
Launching XAMPP is very easy. Navigate to the directory on your USB drive and launch xampp-control.exe.

Getting Started With Xampp
Click Start beside Apache and MySql to get your webserver running.
Please note: Do not check the Svc box, as this will run the server as a Windows service. To keep XAMPP portable, you do not want it running as a service!
Windows Firewall or your firewall may prompt you that it blocked the server; click Allow access to let your server run.
Open your favorite web browser and type localhost in the address bar. If everything is working correctly you should see the following in your address bar. Choose your default language…
Xampp On External Drive Mac
You should now see the default XAMPP page.
Click status to see that everything is working. If it is not try restarting the services.
You are now ready to start building and adding webpages your mobile webserver. Save all of your web files in the xampphtdocs folder on your flash drive.
Xampp Tutorial
Well that is it for installing XAMPP Lite. Check back tomorrow for how to setup wordpress in XAMPP Lite.
Xampp Where Is Localhost
Complete XAMPP details are available at http://www.apachefriends.org/en/xampp-windows.html.
0 notes
Text
Cách cài đặt localhost bằng XAMPP và AppServ đơn giản nhất
Phải chăng bạn vẫn đang mập mờ chưa hiểu Localhost là gì? Localhost và 127.0.0.1 khác nhau ở đâu? Cách cài đặt localhost bằng XAMPP và AppServ ra sao?…… Hãy để chúng tôi giải thích và hướng dẫn chi tiết cho nhé.
Tìm hiểu về Localhost là gì
Localhost – từ ghép của “local” (máy tính của bạn) và “host” (máy chủ) là thuật ngữ chỉ máy chủ chạy trên máy tính cá nhân.
Localhost được sử dụng để truy cập vào các dịch vụ mạng đang vận hành trên máy tính đó bằng một cổng mạng loopback. Bằng cách này, nó không sử dụng bất kỳ cổng mạng vật lý nào để thực hiện kết nối tới chính nó. Máy tính giờ đây hoạt động dưới dạng một hệ thống mạng ảo, chạy ngay bên trong nó.
Localhost cơ bản nó như một webserver bao gồm: Apache, MySQL, PHP và PHPmyadmin. Chúng được cài đặt và sử dụng trên chính chiếc máy tính của bạn, dùng chính ổ cứng máy tính để làm không gian lưu trữ và cài đặt trang web. Mục đích chính để giúp bạn học tập và thực hành trên đó mà chưa cần mua host.
Ứng dụng Localhost có chức năng cài đặt và thử nghiệm các website trên máy tính fiúp cho việc thao tác cũng như xử lý dữ liệu nhanh hơn. Không mất quá nhiều công sức là không lo mất kết nối như online hosting. Vì nó được đặt trên chính chiếc máy tính của bạn nên chỉ bạn mới có thể xem được trang web mà bạn cài đặt trên localhost mà người khác không thể xem được.
Localhost và 127.0.0.1 khác nhau như thế nào?
Hai khái niệm “Localhost” và “127.0.0.1” trong thực tế được sử dụng thay thế cho nhau. Tuy nhiên, chúng không hoàn toàn giống nhau.
Trên hầu hết các hệ thống, Localhost và 127.0.0.1 đều giống nhau về mặt chức năng. Nhưng Localhost là nhãn cho địa chỉ IP chứ bản thân nó không phải là địa chỉ IP. Localhost có thể được trỏ vào những địa chỉ IP khác nhau. Trong thực tế, Localhost có thể được trỏ đến bất kỳ địa chỉ IP nào, thậm chí một địa chỉ bên ngoài khối địa chỉ dành riêng được đề cập ở trên. File HOSTS không quan tâm và sẽ không ngăn cản bạn thực hiện việc này. Tuy nhiên, điều đó sẽ phá vỡ chức năng quan trọng trên hệ thống và làm bất kỳ ứng dụng nào dựa trên kết nối localhost gặp sự cố.
Khối địa chỉ 127 được chọn cho khối địa chỉ loopback vì đây là khối địa chỉ lớp mạng A (Class A) cuối cùng, chạy từ giá trị địa chỉ nhị phân 00000001 đến 01111111. Trong IPv6, địa chỉ loopback là địa chỉ đầu tiên, 0:0:0:0:0:0:0:1, thường được biểu thị dưới dạng rút gọn là :1.
Nếu bạn chuyển từ máy tính Windows sang hệ thống Unix, bạn có thể thấy rằng loopback thực tế đồng nghĩa với localhost. Bạn có thể sử dụng file HOSTS để thực hiện chuyển hướng loopback trở lại 127.0.0.1, nhưng điều đó chỉ mang tính thay đổi về hình thức mà thôi.
Hướng dẫn cách cài đặt Localhost bằng XAMPP và AppServ
Thông thường thì các lập trình viên thường sử dụng 2 phần mềm chính là Xampp và AppServ cài đặt cho localhost, bạn chỉ có thể cài một trong hai phần mềm trên vì nếu lập trình web bằng PHP thì khi cài 2 phần mềm trên hệ thống sẽ bị xung đột. Hãy cùng tìm hiểu cách cài đặt Localhost bằng 2 phần mềm này nha.
Cài Localhost bằng XAMPP
XAMPP là chương trình tạo web server được ứng dụng trên các hệ điều hành Linux, MacOS, Windows, Cross-platform, Solaris. Ý nghĩa chữ viết tắt XAMPP là gì? XAMPP hoạt động dựa trên sự tích hợp của 5 phần mềm chính là Cross-Platform (X), Apache (A), MariaDB (M), PHP (P) và Perl (P), nên tên gọi XAMPP cũng là viết tắt từ chữ cái đầu của 5 phần mềm này. Tìm hiểu chi tiết về XAMPP trong bài viết XAMPP là gì?
XAMPP là phần mềm rất phổ biến, miễn phí và luôn có các bản cập nhật liên tục. Nó hỗ trợ hầu hết các hệ điều hành Windows, Linux, Mac. Vì thế đa số thường sử dụng phần mềm này để cài đặt Localhost.
Các bước cài đặt XAMPP
Bước 1: Download XAMPP và chọn phiên bản phù hợp với hệ điều hành của máy tính bạn đang sử dụng tại đây. XAMPP chỉ có phiên bản cho hệ điều hành 32bit nhưng 64bit vẫn hoạt động bình thường. Bước 2: Cài đặt, mở file vừa tải về để cài đặt và chọn Next để tiếp tục.
Bước 3: Ở phần chọn Components như hình dưới và chọn Next để tiếp tục.
Bước 4: Chọn thư mục cài đặt Xamp Mặc định khi cài đặt hệ thống sẽ chọn ổ C:xampp.
Để đảm bảo vệ dữ liệu, bạn nên chọn ổ khác trên máy thay vì C: như mặc định. Tạo thư mục xampp và chọn Next để tiếp tục.
Bước 5: Bỏ tích chọn Learn more about Bitnami for XAMPP và chọn Next để tiếp tục.
Bước 6: Tiến tình cài đặt
Chờ hệ thống cài đặt xong, khởi động lại máy để hệ thống làm mới thông tin và start localhost.
Khởi động Localhost trên XAMPP
Bước 7: Khởi động localhost.
Vào ổ E:xamppxampp-panel.exe để mở bảng điều khiển của XAMPP hoặc vào Start, chọn All Programs, chọn XAMPP và mở Xampp Control Panel để xuất hiện cửa sổ như hình dưới.
Trong phần Actions, nhấp chuột vào Start với Apache và MySQL.
Với Win 7, Win 8 và các Windows cao hơn thường sẽ yêu cầu cho phép Public NetWorks cho Firewall bằng cách bạn nhấp chuột vào Allow Access với mysqld.exe và httpd.exe.
Kết quả: Nếu hai ứng dụng chuyển sang màu xanh thì việc khởi động đã thành công, còn ngược lại nếu không thành công thì bạn nên xem lại các bước đã cài đặt.
Bước 8: Test Localhost trên trình duyệt Mở trình duyệt, có thể dùng bất kỳ trình duyệt nào của chrome, firefox, IE… với url: http://localhost.
Bước 9: Chọn ngôn ngữ English phía bên dưới để thuận tiện thao tác hơn.
Như vậy là bạn đã hoàn thành cài đặt Localhost với Xampp rồi.
Cài Localhost bằng AppServ
Đ��ng quên vào trang chủ của AppServ để download AppServ: https://www.appserv.org/. Sau đây là từng bước cài đặt AppServ.
Bước 1: Kích hoạt file appserv-win32-2.5.10.exe để bắt đầu cài đặt.
Bước 2: Chọn Next. Bạn phải đồng ý với Điều lệ sử dụng AppServ, chọn I Agree để tiếp tục.
Bước 3: Chọn thư mục cài đặt. Thư mục cài đặt AppServ được mặc định là ổ C. Nếu cần chuyển bạn có thể nháy vào Browse… để thay đổi thư mục cài đặt. Bạn có thể yên tâm cài vào ổ C vì AppServ không bị xóa khi nâng cấp hay cài lại Windows. Chọn Next để tiếp tục.
Bước 4: Chọn các phần mềm cài đặt. Nếu bạn chỉ cần cài một trong 4 phần mềm của AppServ thì bỏ tick các phần không cài đặt. Nếu cài lần đầu thì tốt nhất bạn nên giữ nguyên. Chọn Next để tiếp tục.
Cấu hình Apache cho localhost
– Server Name: Tên server chạy Apache, bạn điền localhost. – Admin Email: Điền email của bạn để nhận thông báo “host” về mail khi có thay đổi. – HTTP Port: thông số này được mặc định là 80, khi HTTP Port là 80 thì bạn không cần phải khai báo nó theo sau server.
Ngoài ra bạn cũng có thể cài đặt localhost bằng WAMP.
WAMP hay Wampserver là một phần mềm giả lập server miễn phí, cho phép chạy thử website ngay trên máy tính cá nhân bằng Localhost. Ý nghĩa của từ WAMP là gì? Phần mềm WAMP dùng để cài đặt Apache, MySQL, và PHP lên hệ điều hành Windows.
Cấu hình MySQL cho localhost
– Root password: Đặt mật khẩu cho MySQL Database, mật khẩu này do bạn tự đặt, username được mặc định là root. – Charecter Sets: Ngôn ngữ cho Database, bạn chọn UTF-8 Unicode để có thể đánh được tiếng Việt với Unikey. – Old Password: Nhấp vào đây nếu bạn có lỗi khi lập trình với phiên bản cũ của PHP hoặc lỗi Client does not support authentication protocol requested by server; consider upgrading MySQL client. – Enable InnoDB: Nhấp vào đây nếu bạn sử dụng InnoDB, tốt nhất bạn nên để trống.
Bước 7: Thời gian cài đặt AppServ rất nhanh, chỉ khoảng 1 phút là hoàn thành. Bước 8: Hoàn thành cài đặt: Bạn có thể dùng luôn khi nháy Finish.
Quy tắc hoạt động của Localhost
Localhost với việc cài đặt nhiều ứng dụng hỗ trợ khác nhau, giúp bạn tạo ra một môi trường giống như hosting có thể chạy source code của WordPress trên máy tính của bạn. Thường để tạo một website WordPress, bạn sẽ phải thuê hosting và thiết kế website WordPress lên đó. Hoặc mua các gói dịch vụ WordPress Hosting bao gồm hosting và website WordPress được cài đặt sẵn. Với Localhost, bạn vẫn có thể xây dựng website lên đó, tuy nhiên nó chỉ mang tính chất để thử nghiệm hoặc thực hành coding.
Giống như Hosting, bạn cần những ứng dụng và phần mềm sau:
– Web server, Apache – PHP – MySQL – PHPMyAdmin
Sau khi cặt đặt được localhost, và khởi động Apache rồi thì bạn có thể truy cập vào địa chỉ http://127.0.0.0 hoặc http://localhost.
Có một lưu ý nữa là bạn phải kích hoạt các ứng dụng đi kèm khi chạy localhost.
Bên cạnh đó Localhost chỉ là hình thức giả lập cho hosting phục vụ cho nghiên cứu và học tập. Nếu bạn là doanh nghiệp đang tìm cách đưa website của mình vào kinh doanh thì việc thuê hosting sẽ tiết kiệm được chi phí mà đảm bảo website của mình hoạt động ổn định hơn. Sẽ có 2 hệ điều hành chính là cloud hosting Window và Linux.
Đọc đến đây thì chúng tôi chắc rằng bạn không còn mập mờ hay hoang mang về Localhost là gì? Localhost và 127.0.0.1 khác nhau ở điểm nào? Quy tắc hoạt động của Localhost cũng như cách cài đặt localhost đơn giản bằng XAMPP, AppServ rồi đúng không nào? Hi vọng những thông tin trên đây sẽ giúp ích rất nhiều cho bạn đọc!
0 notes
Text
Create Local Mysql Database Mac

Create Mysql Database On Local Machine
Create Local Mysql Database Macro
Create Local Mysql Database Macros
Create Local Mysql Database Mac Os
Whether you are a seasoned PHP / MySQL developer, or a beginner, it really helps to have a local development environment. This allows you to test your code as you develop your web application before publishing it 'live' to the Internet.
Choose a remote MySQL connection method. You can use either of the following methods to access your MySQL databases remotely: SSH tunnel: This is the more secure method. You set up an SSH tunnel that forwards a port on your local computer to the remote MySQL server.
Mysql -u root -p'root' -h 127.0.0.1 -P 3306 -D local no space after -p as specified in the documentation It will take you to the mysql console directly by switching to the mentioned database. In this quickstart, you connect to an Azure Database for MySQL by using Node.js. You then use SQL statements to query, insert, update, and delete data in the database from Mac, Ubuntu Linux, and Windows platforms. This topic assumes that you're familiar with developing using Node.js, but you're new to working with Azure Database for MySQL.
The following power tip will guide you through setting up a PHP, Apache, and MySQL development environment on your local Windows system. We'll also take a look at the UEStudio features that can make your PHP / MySQL development easier.
Please keep in mind that PHP, Apache, and MySQL are software provided by third party entities. Therefore we (IDM) cannot provide technical support for the installation of these on your system.
Step 1. Download the installation files
In days past, you would have had to download Apache server, PHP, and MySQL all separately. However, there are now solutions which include these components bundled together and pre-configured to run 'out of the box' on a Windows system. We recommend using WampServer, which provides the basics for setting up your local Apache / PHP / MySQL environment on Windows.
If you do not wish to use an 'all-in-one' solution, you will need to download and install the Windows installers for each of the below components:
Apache, the web server software.
PHP, the general purpose scripting language that runs on Apache.
MySQL, the database server software that works hand-in-hand with PHP and Apache.
Step 2: Install everything and make sure it works
For the purposes of this power tip, we are assuming that you've chosen to install WampServer. To install it, simply double-click the setup file and follow the prompts.
You can confirm that everything has installed properly by pointing your browser to http://localhost/ while Wamp is running. If you see the WampServer 'welcome' page, you know everything is installed and running properly. You can also verify this by checking the Wamp icon in the system tray – if the icon is green, then everything is up and running.
Note: You may need to download and install the dependencies described in this community forum post in order for WampServer to run properly on your system.

Step 3: Set up MySQL
Since Wamp installs MySQL, all you need to do is set up a user and a database. Click the Wamp icon in the system tray, then go to MySQL » MySQL console. If the console prompts you for a password, just hit Enter.
Create a MySQL database
Now you need to create a new MySQL database. You can do this by issuing the following command in the console:
Make sure to include the semi-colon at the end of the command! The console should give a 'query ok' response.
You can verify that the databases have been created by using the 'Show databases' command. If you type, 'Show databases;' and hit enter, you should see something similar to:
Create a Table
For the purposes of this power tip, we will create a table called 'names' that includes the following fields: key, first, last. Create this table in our 'uestudio_test' database by using the following commands:
USE uestudio_test;
...then:
CREATE TABLE names (id INT NOT NULL AUTO_INCREMENT, first VARCHAR(48), last VARCHAR(48), PRIMARY KEY(id));
We won't cover the syntax of these commands in the scope of this power tip.
You can see the structure of the table and confirm it was created correctly by typing:
You should see something similar to:
Now, we need to insert some sample data into our table. For example, if we want to create an entry to insert the name 'John' (first) 'Smith' (last) into the table 'names', we would do so using the following command:
INSERT INTO names (first, last) VALUES ('John', 'Smith');
You can insert additional data by modifying the VALUES. Because you created the column id as an auto increment, you don't need to specify a value for this field.
To display all the data in the table, simply type:
Because we inserted a few other names into our table, this query produced the following results:
Create a user
It's never a good idea to use the 'root' user in MySQL to interact with your databases. Create a new user and assign it to your database in the MySQL console by issuing the following command:
GRANT ALL PRIVILEGES on uestudio_test.* to 'SomeUser'@'localhost' IDENTIFIED BY 'SomePassword';
Obviously you will want to modify the user name and password in the above to suit your preferences. You should see the console spit out:
Step 5. UEStudio and PHP/MySQL
PHP Support
UEStudio has built in PHP support which allows you to run scripts, check syntax, and more. To configure PHP support, click the Coding tab then open the PHP drop down. Click the last item here to set the location of the PHP executable.
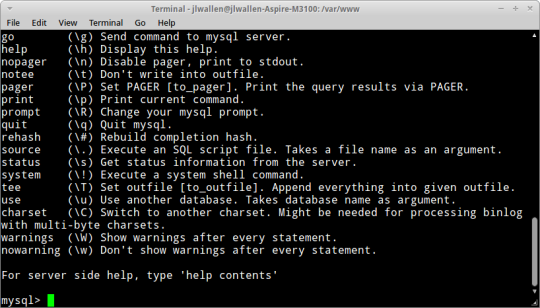
Click the Browse button to browse to and select the folder containing the PHP executable, which in a default Wamp installation would be:
C:wamp64binphpphp7.1.9
Create Mysql Database On Local Machine
Of course this folder path may vary based upon what version of PHP you have installed and running.
After you've set the PHP executable's parent folder, you can use the PHP options in the Coding tab. Simply open a PHP file then click on any of the options from the PHP icon.
UEStudio offers additional options that make developing PHP scripts easier, but before we demonstrate those options we will create a sample PHP script that we can work with.
Learning to code PHP is not within the scope of this power tip, so we won't go into great detail about the script below. This script is simply provided as an example.
The script below will connect to the 'uestudio_test' database running on localhost. This is the database we created earlier. The script connects, then retrieves all the data from the 'names' table and output the results in an HTML table.
If you used different values for the variables, you would need to change them for the script to work according to your environment.
Create and save this script with any file name and a .php extension, like 'mysql_test.php,' in the www directory, which is the same location as the phpinfo.php script from above. If you click on Run script in the PHP drop down, you'll see the output of the script in the output window.
You can try the other commands available in the PHP drop down.
Create Local Mysql Database Macro
To see the contents of the script in the web browser, type http://localhost/mysql_test.php in your browser. You should see something similar to:
1JohnSmith2BobWhite3MikeJones
Create a Project
You don't have to create a project to develop using PHP/MySQL in UEStudio, but there are added benefits to creating a project. If the files you are editing are part of a project, then UEStudio's IntelliTips will parse the PHP script, which provides you a visual representation of classes, functions, etc. in the Classviewer, and provides some context-aware auto-complete when typing source code.
To create a project, click on New project in the Project tab. Name and save the project file. The 'Project settings' dialog will open, and you can add the 'mysql_test.php' to the project by clicking + Active file.
To view the parsed representation of the file, click on the Tags tab at the bottom of the Workspace manager. If the Workspace manager is not open, you can open it by checking Workspace manager in the Layout tab. Using the mysql_test.php file you created in this tutorial, you should see something similar to the below parsed representation:
By adding your source files to a project, you can also access IntelliTips functionality in the Project tab, like Find symbol definition, Display functions, etc.
For a single file like in this example, there really isn't much advantage for this. However, if you are using an object-oriented style of PHP programming, and your project includes many files, you would see something that looks more like:
As you can see, with a large project, this feature can be very helpful.
Link local to remote
If your local development environment is intended to 'mirror' your live site, you can link a local folder to a remote folder. This will allow you to sync or upload / download files between the local and remote folder in a single click. Learn more about linking local folders to remote folders.
The package is located inside a disk image (.dmg) file that you first need to mount by double-clicking its icon in the Finder. It should then mount the image and display its contents.
Before proceeding with the installation, be sure to stop all running MySQL server instances by using either the MySQL Manager Application (on macOS Server), the preference pane, or mysqladmin shutdown on the command line.
To install MySQL using the package installer:
Download the disk image (.dmg) file (the community version is available here) that contains the MySQL package installer. Double-click the file to mount the disk image and see its contents.
Figure 2.1 MySQL Package Installer: DMG Contents
Double-click the MySQL installer package from the disk. It is named according to the version of MySQL you have downloaded. For example, for MySQL server 5.7.35 it might be named mysql-5.7.35-osx-10.13-x86_64.pkg.
The initial wizard introduction screen references the MySQL server version to install. Click to begin the installation.
Figure 2.2 MySQL Package Installer Wizard: Introduction
The MySQL community edition shows a copy of the relevant GNU General Public License. Click and then to continue.
From the Installation Type page you can either click to execute the installation wizard using all defaults, click to alter which components to install (MySQL server, Preference Pane, Launchd Support -- all enabled by default).
Although the option is visible, the installation location cannot be changed.
Figure 2.3 MySQL Package Installer Wizard: Installation Type
Figure 2.4 MySQL Package Installer Wizard: Customize
Click to begin the installation process.
After a successful installation, the installer displays a window with your temporary root password. This cannot be recovered so you must save this password for the initial login to MySQL. For example:
Figure 2.5 MySQL Package Installer Wizard: Temporary Root Password
MySQL expires this temporary root password after the initial login and requires you to create a new password.
Summary is the final step and references a successful and complete MySQL Server installation. the wizard.
Figure 2.6 MySQL Package Installer Wizard: Summary
MySQL server is now installed, but it is not loaded (or started) by default. Use either launchctl from the command line, or start MySQL by clicking 'Start' using the MySQL preference pane. For additional information, see Chapter 3, Installing a MySQL Launch Daemon, and Chapter 4, Installing and Using the MySQL Preference Pane. Use the MySQL Preference Pane or launchd to configure MySQL to automatically start at bootup.
When installing using the package installer, the files are installed into a directory within /usr/local matching the name of the installation version and platform. For example, the installer file mysql-5.7.35-osx10.13-x86_64.dmg installs MySQL into /usr/local/mysql-5.7.35-osx10.13-x86_64/ . The following table shows the layout of the installation directory.
Table 2.1 MySQL Installation Layout on macOS
Create Local Mysql Database Macros
DirectoryContents of Directorybinmysqld server, client and utility programsdataLog files, databasesdocsHelper documents, like the Release Notes and build informationincludeInclude (header) fileslibLibrariesmanUnix manual pagesmysql-testMySQL test suiteshareMiscellaneous support files, including error messages, sample configuration files, SQL for database installationsupport-filesScripts and sample configuration files/tmp/mysql.sockLocation of the MySQL Unix socket
Create Local Mysql Database Mac Os
During the package installer process, a symbolic link from /usr/local/mysql to the version/platform specific directory created during installation is created automatically.
0 notes
Text
Xampp Mysql Phpmyadmin

How to Create table in MySQL db using phpmyadmin xampp server. Start xampp control panel and run Apache, MySQL server. Open your web browser and type localhost/phpmyadmin into your address bar. Now first you have to create MySQL database so read my tutorial for How to create MySQL database in phpmyadmin. I've since uninstalled WAMP and tried XAMPP, and the problem still exists. Even just browsing the databases with PHPMyAdmin takes a long time between page loads. I am guessing it's a problem with MySQL. Any suggestions would be helpful.
Intro
Heroku offers a generous free tier for hosting up to five full-stack projects. But documentation for getting a PHP with MySQL site up and running with Heroku is poor - it took me way to much Googling. Yet the process isn't difficult, so I created this blog post to help others and myself in future deployments.
I also made a video tutorial which you can follow along to.
1. Create an account on Heroku and download Heroku CLI tools
Sign up to Heroku here.
Then download the Heroku CLI tools to allow you to write Heroku commands from your command line.
2. Open up your project folder in CLI
I’m using VS code’s integrated terminal and like to store my files in /c/xampp/htdocs/project-name but you can choose whatever you prefer.
3. Login to Heroku from the terminal
We next issue the command “heroku login”, then press any key. A login page will be opened in the browser where you can login.
4. Create an initial PHP file
We will deploy this test file.
5. Create a composer.json file
Every PHP project is required to have one when deploying to Heroku.
6. Initialise a git repository, add everything then commit
git init
git add .
git commit -m 'Added index file and composer.json'
Now for the Heroku stuff!
7. Create an Heroku project
This can easily be done through the command line but I prefer to use the Heroku website.
Login to Heroku and go to your apps dashboard.
Then click “create new app”.
Choose any available app name you want, choose your region, then click create app.
8. Push the app to Heroku
Tell git the remote Heroku repository we want to push to:
heroku git:remote -a dannys-tutorial-app
Replace “dannys-tutorial-app” with your app name from the previous step.
Then deploy to Heroku! Make sure to state the correct branch, here I am using the main branch:
git push heroku main
Heroku will then provide you with the URL to your app.
And here we have it, our app has been deployed!
9. Now to add a MySQL database

During development of your app, your app wouldv’e been connected to a local database on your machine which Heroku has no access to. So we need to set up a new MySQL database within Heroku. To do this we need to add the “ClearDB” add-on to our app.
Go to your app dashboard (https://dashboard.heroku.com/apps) and select your app.
Click Resources then add the ClearDB Add-on:
Be sure to select the free option then submit the order. You will probably be prompted to add your credit card details. Unfortunately this is required in order to add add-ons such as this to your project. But as long as you select the free option, Heroku won’t charge you.
Xampp Phpmyadmin Mysql Password
10. Get your database URL
Got to “settings” then scroll down to “config vars”. Copy your database URL into a text editor or word document for later use.
Here’s mine: mysql://b0cc1049d026d1:[email protected]/heroku_3b61f10a737bcca?reconnect=true
The URL contains the information you need to connect to your new Heroku MySQL database via PHPMyAdmin:
Username: b0cc1049d026d1
Password: da2394e8
Host: eu-cdbr-west-03.cleardb.net
Xampp Mysql Setup
11. Configure PHPMyAdmin to connect to the database
We now need to tell PHPMyAdmin our Heroku database information so that it can connect to it.
You need find your config.inc.php file which stores configuration information. My PHPMyAdmin came with XAMPP and so my config file is located here:
C:xamppphpMyAdminconfig.inc.php
Open Phpmyadmin Xampp
Open up this file in any text editor, I’m using VS code but you could use something like notepad as well.
Copy the code below to the bottom of the file (but still within the PHP tags). Change the host, username and password to the one’s you obtained from the URL before.
12. Configure your Heroku MySQL database
Open up PHPMyAdmin. If using XAMPP it can be done as below:
Open up the server side-panel and select your newly added Heroku server:
Go over to databases and select your Heroku database.
You can now create the tables you need in your database.
13. Connect to the Heroku database from PHP
Copy in the code below to load in your Heroku database configuration variables to your app. This will connect your app to the database.
And that’s it! We have deployed a PHP project to Heroku, made a remote MySQL database, configured the database using PHPMyAdmin, and finally connected our app to the database.
If that was helpful, you can say thanks by subscribing to my YouTube channel. Leave a comment if you have any questions or feedback (positive or negative) :)
Error resolving of PhpMyAdmin access denied.
For most first time install, accessing http://localhost/PhpMyAdmin will directly take us to the PhpMyAdmin web interface without asking for password or anything because by default there is no password set. But when you install it second time you can face an error like this while accessing PhpMyAdmin.Due to that previous default loaclhost port number is not valid now.
What should be done! Let’s see in below with some easy steps.
1. So , you have to open XAMPP Control Panel ->Click MySql Config->Click my.ini
It will open in notepad as shown in figure.
2. You have to write this line skip-grant-tables after (mysqld).
3.Open xamp folder ->PhpMyAdmin .You will see config.inc.php file in phpMyAdmin folder, just open it with notepad++
$cfg(‘Servers’)($i)(‘host’) = ‘127.0.0.1’; This is default port number.
4. Resolve this issue by manually editing in the file “config.inc.php” located at “C:xamppphpMyAdmin”. Write “localhost:3307” within $cfg(‘Servers’)($i)(‘host’) = ‘localhost:3307′; as shown given picture.
Localhost Phpmyadmin Mysql Localhost Xampp
5. Save this changes. You can find port number as follows: Open XAMP->config->service port setting->mySql.
Now , you can access MyPhpAdmin.
Xampp Mysql Phpmyadmin Error
Thanks.
How to install WordPress on Windows using XAMPP? Part-1 - April 8, 2021
How to merge two or multiple tables to each other in the Laravel PHP Framework? (Part-1) - September 7, 2020
How to merge two or multiple tables to each other in the Laravel PHP Framework? (Part-3) - September 7, 2020
0 notes
Link
I’ve got this .htaccess file installed in my folder API. It is being used to redirect all requests to the api.php script.
<IfModule mod_rewrite.c> RewriteEngine On RewriteCond %{REQUEST_FILENAME} !-d RewriteCond %{REQUEST_FILENAME} !-s RewriteRule ^(.*)$ api.php?rquest=$1 [QSA,NC,L] RewriteCond %{REQUEST_FILENAME} -d RewriteRule ^(.*)$ api.php [QSA,NC,L] RewriteCond %{REQUEST_FILENAME} -s RewriteRule ^(.*)$ api.php [QSA,NC,L] </IfModule>
Now, I have added some Swagger documentation for my API and need to be able to access it using this URL: localhost/API/Swagger/ui. I keep getting a 404 when I try to visit that URL.
Currently setup using WAMP but will be deploying to production server as soon as I get everything tested. I can access API functions like this just fine: localhost/API/GetMakes?year=2010
Any ideas on what to do?
Submitted June 01, 2018 at 09:12AM by MrBaseball77 https://www.reddit.com/r/webhosting/comments/8nt5tb/allow_directory_in_htaccess/?utm_source=ifttt
from Blogger http://webdesignersolutions1.blogspot.com/2018/06/allow-directory-in-htaccess.html via IFTTT
1 note
·
View note