#enable SSL localhost
Explore tagged Tumblr posts
Visit Tumblr Blog
Explore Tumblr blogs with no restrictions, modern design and the best experience.
Last Seen Tumblr Blogs


Fun Fact
The “We are the 99%” Tumblr blog became the slogan for the Occupy Wall Street movement.
Text
How to configure SSL for WAMP server
The WAMP server (Windows, Apache, MySQL, PHP/Python/Perl) is a software stack designed to create a local development environment on Windows. It bundles “Apache”, a web server to host websites and applications, “MySQL”: A”, a relational database management system for managing data, and “PHP/Python/Perl”, a programming languages for server-side scripting. In this short article, we shall discuss how…
#configure HTTPS for development server#configure SSL for WAMP server#enable HTTPS on WAMP server#enable SSL localhost#install SSL certificate WAMP#Microsoft Windows#secure WAMP server website#secure WAMP server with SSL#SSL#SSL 3.0#ssl certificate#SSL certificate installation WAMP server#SSL configuration tutorial WAMP#SSL Encoding Format and Extensions#SSL setup for localhost WAMP#WAMP HTTPS configuration guide#WAMP server HTTPS localhost#WAMP server secure connection#WAMP server SSL setup#Windows#Windows 10#Windows 11#Windows Server#Windows Server 2012#Windows Server 2016#Windows Server 2019#Windows Server 2022
0 notes
Text

Introduction
Nginx is a high-performance web server that also functions as a reverse proxy, load balancer, and caching server. It is widely used in cloud and edge computing environments due to its lightweight architecture and efficient handling of concurrent connections. By deploying Nginx on ARMxy Edge IoT Gateway, users can optimize data flow, enhance security, and efficiently manage industrial network traffic.
Why Use Nginx on ARMxy?
1. Reverse Proxying – Nginx acts as an intermediary, forwarding client requests to backend services running on ARMxy.
2. Load Balancing – Distributes traffic across multiple devices to prevent overload.
3. Security Hardening – Hides backend services and implements SSL encryption for secure communication.
4. Performance Optimization – Caching frequently accessed data reduces latency.
Setting Up Nginx as a Reverse Proxy on ARMxy
1. Install Nginx
On ARMxy’s Linux-based OS, update the package list and install Nginx:
sudo apt update sudo apt install nginx -y
Start and enable Nginx on boot:
sudo systemctl start nginx sudo systemctl enable nginx
2. Configure Nginx as a Reverse Proxy
Modify the default Nginx configuration to route incoming traffic to an internal service, such as a Node-RED dashboard running on port 1880:
sudo nano /etc/nginx/sites-available/default
Replace the default configuration with the following:
server { listen 80; server_name your_armxy_ip;
location / {
proxy_pass http://localhost:1880/;
proxy_set_header Host $host;
proxy_set_header X-Real-IP $remote_addr;
proxy_set_header X-Forwarded-For $proxy_add_x_forwarded_for;
}
}
Save the file and restart Nginx:
sudo systemctl restart nginx
3. Enable SSL for Secure Communication
To secure the reverse proxy with HTTPS, install Certbot and configure SSL:
sudo apt install certbot python3-certbot-nginx -y sudo certbot --nginx -d your_domain
Follow the prompts to automatically configure SSL for your ARMxy gateway.
Use Case: Secure Edge Data Flow
In an industrial IoT setup, ARMxy collects data from field devices via Modbus, MQTT, or OPC UA, processes it locally using Node-RED or Dockerized applications, and sends it to cloud platforms. With Nginx, you can:
· Secure data transmission with HTTPS encryption.
· Optimize API requests by caching responses.
· Balance traffic when multiple ARMxy devices are used in parallel.
Conclusion
Deploying Nginx as a reverse proxy on ARMxy enhances security, optimizes data handling, and ensures efficient communication between edge devices and cloud platforms. This setup is ideal for industrial automation, smart city applications, and IIoT networks requiring low latency, high availability, and secure remote access.
0 notes
Text
How to send email from localhost using PHP

In this tutorial, we will learn how to send an email from localhost using PHP and Gmail. In the PHP web application, mail() function used to send the mail. But mail() function will not work in the localhost environment. In this tutorial, we will send an email from the localhost system using PHP and Gmail.
In this tutorial, we will use PHPmailer to send email from the localhost using PHP. The PHPmailer library provides the way to send an email from localhost with the SMTP server using PHP. We will use the Gmail account as an SMTP server to sending the email from localhost. Before using the Gmail SMTP server we need to configure the setting in our Gmail account.
Click: https://phpgurukul.com/how-to-send-email-from-localhost-using-php/
Login into your google account.
Go to the security page.
<?php
use PHPMailer\PHPMailer\PHPMailer;
use PHPMailer\PHPMailer\Exception;
require ‘vendor/autoload.php’;
$mail = new PHPMailer;
if(isset($_POST[‘send’])){
// getting post values
$fname=$_POST[‘fname’];
$toemail=$_POST[‘toemail’];
$subject=$_POST[‘subject’];
$message=$_POST[‘message’];
$mail->isSMTP(); // Set mailer to use SMTP
$mail->Host = ‘smtp.gmail.com’; // Specify main and backup SMTP servers
$mail->SMTPAuth = true; // Enable SMTP authentication
$mail->Username = ‘[email protected]’; // SMTP username
$mail->Password = ‘Your_Gmail_Password’; // SMTP password
$mail->SMTPSecure = ‘tls’; // Enable TLS encryption, `ssl` also accepted
$mail->Port = 587; // TCP port to connect to
$mail->setFrom(‘[email protected]’, ‘Your_Name’);
$mail->addReplyTo(‘[email protected]’, ‘Your_Name’);
$mail->addAddress($toemail); // Add a recipient
// $mail->addCC(‘[email protected]’); // Set CC Email here
// $mail->addBCC(‘[email protected]’); // Set BCC Email here
$mail->isHTML(true); // Set email format to HTML
$bodyContent=$message;
$mail->Subject =$subject;
$bodyContent = ‘Dear’.$fname;
$bodyContent .=’<p>’.$message.’</p>’;
$mail->Body = $bodyContent;
if(!$mail->send()) {
echo ‘Message could not be sent.’;
echo ‘Mailer Error: ‘ . $mail->ErrorInfo;
} else {
echo ‘Message has been sent’;
}
}
?>
Explanation of the above code
Include the PHPMailer library and create an instance of this class.
Set SMTP credentials (host, username, password, and port).
Specify sender name and email ($mail->setFrom('[email protected]', 'Your_Name')).
Set recipient email address ($mail->addAddress($toemail)).
Set email subject ($mail->Subject).
Set the body content of the email ($mail->Subject =$subject;).
Use the mail->send() method of PHPMailer class to send an email.
Here is the Full code with HTML Form and PHP Code
<?php
use PHPMailer\PHPMailer\PHPMailer;
use PHPMailer\PHPMailer\Exception;
require ‘vendor/autoload.php’;
$mail = new PHPMailer;
if(isset($_POST[‘send’])){
// getting post values
$fname=$_POST[‘fname’];
$toemail=$_POST[‘toemail’];
$subject=$_POST[‘subject’];
$message=$_POST[‘message’];
$mail->isSMTP(); // Set mailer to use SMTP
$mail->Host = ‘smtp.gmail.com’; // Specify main and backup SMTP servers
$mail->SMTPAuth = true; // Enable SMTP authentication
$mail->Username = ‘[email protected]’; // SMTP username
$mail->Password = ‘Your_Gmail_Password’; // SMTP password
$mail->SMTPSecure = ‘tls’; // Enable TLS encryption, `ssl` also accepted
$mail->Port = 587; // TCP port to connect to
$mail->setFrom(‘[email protected]’, ‘Your_Name’);
$mail->addReplyTo(‘[email protected]’, ‘Your_Name’);
$mail->addAddress($toemail); // Add a recipient
// $mail->addCC(‘[email protected]’);
// $mail->addBCC(‘[email protected]’);
$mail->isHTML(true); // Set email format to HTML
$bodyContent=$message;
$mail->Subject =$subject;
$bodyContent = ‘Dear’.$fname;
$bodyContent .=’<p>’.$message.’</p>’;
$mail->Body = $bodyContent;
if(!$mail->send()) {
echo ‘Message could not be sent.’;
echo ‘Mailer Error: ‘ . $mail->ErrorInfo;
} else {
echo ‘Message has been sent’;
}
}
?>
<!DOCTYPE html>
<html lang=”en”>
<head>
<meta charset=”utf-8">
<meta name=”viewport” content=”width=device-width, initial-scale=1, shrink-to-fit=no”>
<title>How to send email from localhost using PHP</title>
<link rel=”stylesheet” href=”https://fonts.googleapis.com/css?family=Roboto|Courgette|Pacifico:400,700">
<link rel=”stylesheet” href=”https://stackpath.bootstrapcdn.com/bootstrap/4.5.0/css/bootstrap.min.css">
<link rel=”stylesheet” href=”https://maxcdn.bootstrapcdn.com/font-awesome/4.7.0/css/font-awesome.min.css">
<script src=”https://code.jquery.com/jquery-3.5.1.min.js"></script>
<script src=”https://cdn.jsdelivr.net/npm/[email protected]/dist/umd/popper.min.js"></script>
<script src=”https://stackpath.bootstrapcdn.com/bootstrap/4.5.0/js/bootstrap.min.js"></script>
<style>
body {
color: #000;
background: #fcda2e;
font-family: “Roboto”, sans-serif;
}
.contact-form {
padding: 50px;
margin: 30px auto;
}
.contact-form h1 {
font-size: 42px;
font-family: ‘Pacifico’, sans-serif;
margin: 0 0 50px;
text-align: center;
}
.contact-form .form-group {
margin-bottom: 20px;
}
.contact-form .form-control, .contact-form .btn {
min-height: 40px;
border-radius: 2px;
}
.contact-form .form-control {
border-color: #e2c705;
}
.contact-form .form-control:focus {
border-color: #d8b012;
box-shadow: 0 0 8px #dcae10;
}
.contact-form .btn-primary, .contact-form .btn-primary:active {
min-width: 250px;
color: #fcda2e;
background: #000 !important;
margin-top: 20px;
border: none;
}
.contact-form .btn-primary:hover {
color: #fff;
}
.contact-form .btn-primary i {
margin-right: 5px;
}
.contact-form label {
opacity: 0.9;
}
.contact-form textarea {
resize: vertical;
}
.bs-example {
margin: 20px;
}
</style>
</head>
<body>
<div class=”container-lg”>
<div class=”row”>
<div class=”col-md-8 mx-auto”>
<div class=”contact-form”>
<h1>Get in Touch</h1>
<form method=”post”>
<div class=”row”>
<div class=”col-sm-6">
<div class=”form-group”>
<label for=”inputName”>Name</label>
<input type=”text” class=”form-control” id=”inputName” name=”fname” required>
</div>
</div>
<div class=”col-sm-6">
<div class=”form-group”>
<label for=”inputEmail”>Email</label>
<input type=”email” class=”form-control” id=”inputEmail” name=”toemail” required>
</div>
</div>
</div>
<div class=”form-group”>
<label for=”inputSubject”>Subject</label>
<input type=”text” class=”form-control” id=”inputSubject” name=”subject” required>
</div>
<div class=”form-group”>
<label for=”inputMessage”>Message</label>
<textarea class=”form-control” id=”inputMessage” name=”message” rows=”5" required></textarea>
</div>
<div class=”text-center”>
<button type=”submit” class=”btn btn-primary” name=”send”><i class=”fa fa-paper-plane”></i> Send</button>
</div>
</form>
</div>
</div>
</div>
</div>
</body>
</html>
PHP Gurukul
Welcome to PHPGurukul. We are a web development team striving our best to provide you with an unusual experience with PHP. Some technologies never fade, and PHP is one of them. From the time it has been introduced, the demand for PHP Projects and PHP developers is growing since 1994. We are here to make your PHP journey more exciting and useful.
Website : https://phpgurukul.com
0 notes
Text
How To Make Your Own Website and Monetize it?

By following up with me in less than twenty-four hours, you will be ready to launch a Website that will undoubtedly earn you thousands of dollars every month! How to generate the money? Well, the website that we make will be offering SAAS service.
What is a SAAS service?
A SAAS (Software As A Service) service is essentially an online software or service that you pay to use.
For example, Mailchimp.com, which is a SAAS service, provides email marketing services that you pay for.

A SAAS service is anything you pay for to get an online service.
Now you can be the owner of a SAAS service, you will have your own Website, and people will subscribe to your service and pay you monthly recurring payments.
Let’s say you have 100 customers who use your SAAS service, and your service costs about $10 a month; you’d make $1000 per month!
All you have to do is sit at home and watch your passive income develop on your computer screen. It’s a fantastic and easy way to earn money.
How to get a SAAS service?

“How can I get my own SAAS service or software?” you might be wondering. The good news is that you don’t have to create one, learn to program, or even employ a programmer to do so.
You can simply buy it Online for $40–$60. You can buy software from a website called codecanyon
You can simply visit the website, click on the php scripts and search for SAAS and choose what kind of SAAS service that you preferred.
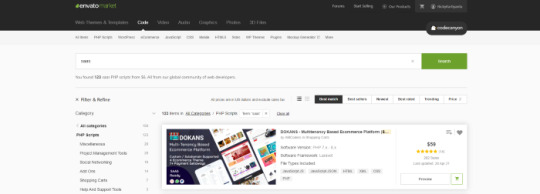
There are several types of SAAS applications available for purchase. Discount networks, accounting and billing software, email marketing systems, and employee management software are only a few examples. Take your time browsing the services and choose the one you like best, the one that fits you and you feel that you can be successful with.
Hosting Your Service
After you’ve created your SAAS service, the next move is to host it and make it public. To host it online, you’ll need a domain name and a server.
Now it is sounds hard since you don’t have any technical background in this term. Don’t worry, it is actually a simple and easy steps.
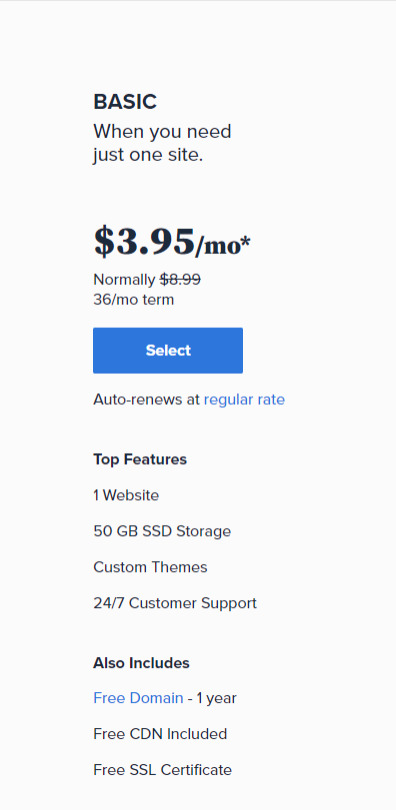
First you need a VPS server, you can visit and buy a cheap one from Bluehost. its only $3,95 permonth with and they give you free domain for 1 year! Check the price below. Buy the “LAMP” administration.
So What is VPS server? We do what we call “online hosting” when we want to publish a PHP page, script, or some other web application. This basically means uploading the files and database to a public server so that it can be accessed over the internet. On simple word, the place where you put the file is from VPS server.
In this tutorial we will used the shared server from Bluehost. Shared server only means that your server will be host with others website.
Now everything is ready, the only things that matter is how to install it. Let get to it.
Getting Started
After having your own server and domain on Bluehost, you need to connect them. Your VPS Server can be accessed now your Bluehost profile, but of course, we don’t want to access our website though an IP! we want to use our domain name. So simply, we are going to map the domain name to our VPS IP, so then we access the VPS and the WordPress website through both the domain and the IP.
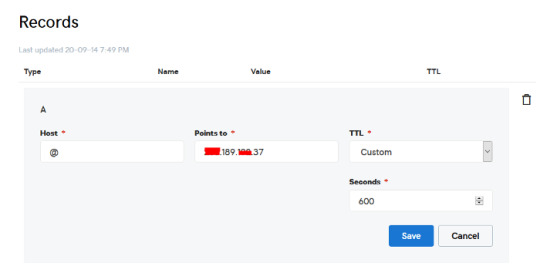
Configure your DNS Records
Simply open DNS management zone in your Domain Provider and edit the main A record.
Than we need to create MySQL database for the application. So Let’s Create one. Connect to your VPS server using any SSH client like putty. and Let’s start!
Just open Putty and enter the Server IP or Name, and Press Open. It will ask you to login, just enter “root” as the user, then enter your password which is sent to you by email.
Note: while typing the password, putty will now show it for security reasons, but It’s there, just type it!
What’s nice, is that we have MySQL installed already as part of the LAMP Stack, but we need to create a database and a user for out application.
Note: Every MySQL statement must end in a semi-colon (;)
To get started, log into the MySQL root (administrative) account by issuing this command:
mysql -u root -p
You will be prompted for the root password, just write or paste it and press Enter.
First, create a separate database that your PHP application will use. You can call this whatever you want, but we will be using TestDb in this guide to keep it simple. Create the database by running this command:
CREATE DATABASE TestDb DEFAULT CHARACTER SET utf8 COLLATE utf8_unicode_ci;
Next, we are going to create a separate MySQL user account that we will use exclusively to operate on our new database. Creating one-function databases and accounts is a good idea from a management and security standpoint. We will use the name DbUser in this guide. Feel free to change this if you’d like.
We are going to create this account, set a password, and grant access to the database we created. We can do this by typing the following command. Remember to choose a strong password here for your database user:
CREATE USER 'DbUser'@'localhost' IDENTIFIED BY 'enter_a_custom_password_here';GRANT ALL ON TestDb.* TO 'DbUser'@'localhost';
You now have a database and user account, each made specifically for Your PHP application. We need to flush the privileges so that the current instance of MySQL knows about the recent changes we’ve made:
FLUSH PRIVILEGES;
Exit from it by typing :
EXIT;
Upload The Script Files To The Server.
To upload the files, you need an application called WinSCP.
It is a free tool and you can download it from here.
Connect to Your VPS Server using WinSCP, and Update the PHP Files to the server to this path: “/var/www/html”
In most cases, the files would be zipped, so we need to extract them.
Again to Putty SSH CLient and Let’s install the unzip utility using the following command:
sudo apt-get install unzip
Clear putty screen to make in clean using the following command:
clear
Change directory to /var/www/html using the following command:
cd /var/www/html
Unzip the “.zip” file using the following command:
unzip YOURFILENAME*.zip
*Note: the file name may be different in your case, so replace YOURFILENAME with your file name.
Now, Move the latest folder content to the upper directory so it can be accessed directly -> use WinSCP Just copy all the files inside “YOURFILENAME” folder and paste them directly in html folder.
Configure Apache to Publish PHP Website
Well Done, Now your files are uploaded and placed in the html folder, we just need to configure apache so we can our Publish PHP Website and access our script using our domain name. To do so, open WinSCP again and navigate to this directory: /etc/apache2/sites-available/
Now, create a new empty file and name it “yourdomain.conf” . You can replace “Scriptname” with any name you want
Open yourdomain.conf Then copy and paste the content below into the file and save.
<VirtualHost *:80> ServerAdmin admin@YOUDOMAINNAME DocumentRoot /var/www/html ServerName YOUDOMAINNAME ServerAlias YOUDOMAINNAME <Directory /var/www/html/> Options +FollowSymlinks AllowOverride All Require all granted </Directory> ErrorLog ${APACHE_LOG_DIR}/error.log CustomLog ${APACHE_LOG_DIR}/access.log combined </VirtualHost>
Replace with your own domain, in my case its “YOURDOMAINNAME”
Enable your script configuration in apache and restart the service.
Now simply, run the following commands to finish the setup:
sudo a2ensite yourdomain.conf sudo a2enmod rewrite sudo systemctl restart apache2.service
ALMOST DONE!
Connect to MySQL Database.
Open your web browser now and navigate to your server name.
Continue the setup by entering the database info and your admin login information. In our example, the database name is TestDb and the user is DBUser with the password set.
That simple!
Setup cronjobs.What are cronjobs?
cron is a Linux utility which schedules a command or script on your server to run automatically at a specified time and date. A cron job is the scheduled task itself. Cron jobs can be very useful to automate repetitive tasks.
For example, you can set a cron job to delete temporary files every week to conserve your disk space. Some PHP web applicaitons, may require you to set up a cron job to perform certain functions.
Setup cronjobs.
To setup cronjobs, you need to add all required jobs to the server. This depends on your script, so if you bought a script from code canyon, the script owner should provide the cronjobs.
To do this, open WinSCP and got to /etc Open crontab file using the editor And paste all the jobs from your script to this folder. (cronjobs are listed in the app documentation)
Make sure each job is on a line and an empty line in the end.
Secure with a Free SSL.
SSL certificates are used within web servers to encrypt the traffic between the server and client, providing extra security for users accessing your application. Let’s Encrypt provides an easy way to obtain and install trusted certificates for free.
Connect to your Server using Putty SSH client. and Let’s Start!
Install the Let’s Encrypt Client
Let’s Encrypt certificates are fetched via client software running on your server. The official client is called Certbot.
First, add the repository to install Certbot:
sudo add-apt-repository ppa:certbot/certbot
You’ll need to press ENTER to accept.
Then, Update the package list to pick up the new repository’s package information:
sudo apt-get update
Install Certbot’s Apache package:
sudo apt install python-certbot-apache
Certbot is now ready to be used.
Set Up the SSL Certificate
Generating the SSL certificate for Apache using Certbot is quite straightforward. The client will automatically obtain and install a new SSL certificate that is valid for the domains provided as parameters.
Simply run the following command: (change the domain)
sudo certbot --apache -d YOUR_DOMAIN_NAME
You will be asked to provide an email address for lost key recovery and notices, and you will be able to choose between enabling both http and https access or forcing all requests to redirect to https. It is usually safest to require https, unless you have a specific need for unencrypted http traffic.
That’s it!
Test your website now and it should be SSL encrypted.
This tutorial I used are originated and made by Hasan By H-educate, you can check his link Here : https://h-educate.com/ or check his youtube on H-educate.
Other tips to make money online, check here : https://ricky-kartiyanta.medium.com/
Cheers!!
#website#saas solutions#saas#monetize#passive income#business#workfromanywhere#easy money#gettingrichfromhome
2 notes
·
View notes
Text
IPTABLES : Introduction to Linux Firewall
IPTABLES : Introduction to Linux Firewall

IPTABLES : Introduction to Linux Firewall
Linux is the most-used open source operating system. Managing network traffic is one of the toughest jobs to deal with. For this, we must configure the firewall in such a way that it meets the system and users requirements without leaving the system vulnerable. The default firewall in most of the Linux distributions is IPTables.
IPTables is a standard…
View On WordPress
#and SSL port firewall#Checking current Iptables status#Checking current Iptables status firewall#Defining chain rules firewall#Defining chain rules iptables#Deleting rules of iptables#Dropping all other traffic iptables#Enabling connections on HTTP#Enabling traffic on localhost firewall#Enabling traffic on localhost iptables#Filtering packets based on source iptables#installing firewall#installing iptables#IPTABLES : Introduction to Linux Firewall#Linux#Save changes to iptables#SSH
0 notes
Text
Webdav Server Windows 10

Windows 10 Connect To Webdav
Webdav Server Windows 10 Einrichten
WebDAV on Windows 10 How to access MyFiles off-campus using WebDAV on a Windows 10 PC From the Start Menu go to File Explorer and select This PC on the left hand pane. How to create a WebDAV server on Windows and connect it to ONLYOFFICE Community Server v.10.0 Community Server changelog. Open in new window. Version 10.0.4. Release date:. General portal changes. The Mono version used is updated to 6.0. To create a WebDAV server.
WebDAV is an FTP-like protocol you can use to remotely access or share your files over the Internet. In contrast to FTP, though, WebDAV works better through firewalls and can be password-protected and encrypted. In our latest server tutorial we'll share how to set up the WebDAV server that's included with Windows.
First, you must install the Internet Information Services (IIS) and WebDAV publishing features of Windows. In Windows 7, click Start, type 'Windows features,' and then click enter. In Windows 8, go to the Start screen, type 'Windows features,' select 'Settings' on the right, and then select the shortcut that appears.
Make sure you select at least the following:
Internet Information Services
IIS Management Console
WebDAV Publishing
Windows Authentication

Next, to enable the WebDAV publishing you must open the IIS Manager. In Windows 7, click Start, type 'IIS,' and open the shortcut that appears. In Windows 8, go to the Start screen, type 'IIS,' and then select the shortcut that appears.
To configure the authentication, select the 'Default Web Site' and double-click the 'Authentication' icon. The list of authentication types displayed will depend upon which ones you installed earlier, but I'd suggest disabling 'Anonymous' and enabling 'Windows Authentication' if you will only be using IIS for WebDAV.
Next, select the 'Default Web Site' site again and double-click the 'WebDAV Authoring Rules' and then click 'Enable' on the right. Now click 'Add Authoring Rule' on the right to configure the permissions and make your desired selections.
To test if IIS and the web server are running, open a web browser and type 'localhost' and hit Enter.
If you enabled Windows Authentication, you'll be prompted for a username and password, so enter your Windows account name and password here. If you have issues signing in, make sure you're using the correct account name — open the Computer Management console to check the local users list to confirm.
Once you've authenticated, you should next see the default webpage of IIS if you haven't already deleted or replaced it.
To test the WebDAV server in action, open a command prompt and type: net use * http://localhost. This should map a network drive to your WebDAV folder, showing just the files from your IIS web server directory.
If you want to offer access to other places you can add some virtual directories by right-clicking the Default Web Site and choosing 'Add New Virtual Directory.'
In order for you or others to access the WebDAV server share via the Internet, you must configure your firewall to open port 80 for unencrypted access and/or 443 for encrypted access, as well as configure your router to forward these ports to the Windows PC. Once properly configured, to access the WebDAV share via the Internet you'd use either your Internet IP address or a domain or host name if you have one configured.
While your WebDAV password is encrypted when using Windows Authentication, the rest of your session is sent in the clear if you choose to use normal HTTP via port 80. But you can also encrypt the entire session by enabling SSL encryption in IIS and using the HTTPS address when configuring/accessing the WebDAV share.
If you'd like to be able to see a listing of your files in a web browser, turn on Directory Browsing in IIS. Select the Default Web Site, double-click 'Directory Browsing,' and then click 'Enable' on the right.
Windows 10 Connect To Webdav
Eric Geier is a freelance tech writer — keep up with his writings on Facebook. He's also the founder of NoWiresSecurity, a cloud-based Wi-Fi security service, and On Spot Techs, an on-site computer services company.
Webdav Server Windows 10 Einrichten
Follow ServerWatch on Twitterandon Facebook
1 note
·
View note
Video
youtube
How to Install Wordpress With Nginx on Debian 10 VPS
This video shows you how to install WordPress with Nginx on Debian 10 VPS.
============================== INITIAL SERVER SETUP DEBAIN 10 ============================== Login to Server: ssh root@your_server_ip
apt update -y && apt upgrade -y
adduser debian
usermod -a -G sudo debian
Configure SSH : nano /etc/ssh/sshd_config
Add and change the information: Port 22500 Protocol 2 PermitRootLogin no
Add to End of File : UseDNS no AllowUsers debian
Save and Close
Restart SSH service: systemctl restart ssh.service
Logout:
Ctrl+D
Login using user with sudo privilages: ssh -p 22500 user@ip_address
============================== INSTALL NGINX, PHP AND MARIADB ============================== Install Nginx, MariaDB, PHP, and other PHP modules : sudo apt install nginx mariadb-server mariadb-client php-cgi php-common php-fpm php-pear php-mbstring php-zip php-net-socket php-gd php-xml-util php-gettext php-mysql php-bcmath unzip wget git curl -y
Open the php.ini file: sudo nano /etc/php/7.3/fpm/php.ini
Make the following changes: post_max_size = 64M memory_limit = 256M max_execution_time = 300 upload_max_filesize = 32M date.timezone = America/Chicago //optional
Save and Close : Ctrl O+X
Restart PHP-FPM service: sudo systemctl restart php7.3-fpm.service
============================== CONFIGURE NGINX FOR WORDPRESS ============================== Create root directory: sudo mkdir /var/www/domain
sudo nano /etc/nginx/sites-available/domain.name
------------------------------ server { listen 80; root /var/www/linuxscoop.cc; index index.php; server_name domain.name www.domain.name;
access_log /var/log/nginx/domain.name_access.log; error_log /var/log/nginx/domain.name_error.log;
client_max_body_size 64M; location = /favicon.ico { log_not_found off; access_log off; }
location = /robots.txt { allow all; log_not_found off; access_log off; }
location / { try_files $uri $uri/ /index.php?$args; }
location ~ \.php$ { try_files $uri =404; include /etc/nginx/fastcgi_params; fastcgi_read_timeout 3600s; fastcgi_buffer_size 128k; fastcgi_buffers 4 128k; fastcgi_param SCRIPT_FILENAME $document_root$fastcgi_script_name; fastcgi_pass unix:/run/php/php7.3-fpm.sock; fastcgi_index index.php; } location ~* \.(js|css|png|jpg|jpeg|gif|ico|svg)$ { expires max; log_not_found off; } } ------------------------------ sudo nginx -t sudo ln -s /etc/nginx/sites-available/domain.name.conf /etc/nginx/sites-enabled/ sudo systemctl restart nginx.service sudo systemctl restart php7.3-fpm.service
============================== CONFIGURE A WORDPRESS DATABASE ============================== sudo mysql_secure_installation
mysql -u root -p
CREATE DATABASE dbwordpress DEFAULT CHARACTER SET utf8 COLLATE utf8_unicode_ci;
GRANT ALL ON dbwordpress.* TO 'wpuser'@'localhost' IDENTIFIED BY '5tR0n6p@s5WorD';
FLUSH PRIVILEGES;
EXIT;
============================== INSTALL WORDPRESS ============================== cd /tmp wget https://wordpress.org/latest.tar.gz tar -xvzf latest.tar.gz cd wordpress cp /tmp/wordpress/wp-config-sample.php /tmp/wordpress/wp-config.php sudo cp -av wordpress/. /var/www/domain/
WordPress secret key generator : curl -s https://api.wordpress.org/secret-key/1.1/salt/ ------------------------------ define('AUTH_KEY', '|V^%QD3_3G*Q7oaQRYtC).`CRE2c(pOf rR9D8|%G-y~=AmGH.bhf.vYJ1j~-wQR'); define('SECURE_AUTH_KEY', '_Wa.<dawj6|+w0%0:K3D<0;+d,|]H7-oea,CVT_(2ha~+N(&7d+] ${-RA#^S9o<'); define('LOGGED_IN_KEY', 'hQH<I^d3G20Lp,ep%>f}m#beM9|vL&Yxt5iJwK4qlK25Qe#_+Np4Su?WZzQ~)+@R'); define('NONCE_KEY', ')b(/p}n{+BR=<| ^Hs=7G<A?Q9C?X=}fnR2x8r)U-V;|-|A4G:zV58pxicLd~G%/'); define('AUTH_SALT', 'HLJl6K5b4uGPsb^ev?E!Qi<4_0PD[z/|.CNx+cM8 O-&Qe l(tQ_j#@ellU)kd +'); define('SECURE_AUTH_SALT', 'sw1uE~TgH5~gYK23kdvn_p.<yS,G{8_G^=.m)1Y2U+34vvQWK4}D[}} %K:w^tw='); define('LOGGED_IN_SALT', 'y1Yb 2xG;yHgN*&*L|i2{mrfdGmPX2.E|l=U%gekC$x@G;dxTIL|-cw]zJZv{- <'); define('NONCE_SALT', '.coEf^|KY.|$`>MmuW5H(bEFY&_*r4Jky(Dh?,M6V)`!867aG~9-V+ESJK}rq9`8'); ------------------------------ sudo nano /var/www/linuxscoop/wp-config.php ------------------------------ // ** MySQL settings - You can get this info from your web host ** // /** The name of the database for WordPress */ define( 'DB_NAME', 'database_name' );
/** MySQL database username */ define( 'DB_USER', 'database_user' );
/** MySQL database password */ define( 'DB_PASSWORD', 'database_passsword' );
/** MySQL hostname */ define( 'DB_HOST', 'localhost' ); ------------------------------ sudo chown -Rv www-data:www-data /var/www/domain/
============================== INSTALL AND CONFIGURE LET'S ENCRYPT SSL CERTIFICATE ============================== sudo apt install python3-acme python3-certbot python3-mock python3-openssl python3-pkg-resources python3-pyparsing python3-zope.interface sudo apt install python3-certbot-nginx sudo certbot --nginx -d domain.name -d www.domain.name
Renew : sudo certbot renew --dry-run ============================== SETTING UP FIREWALL ============================== sudo apt install ufw sudo ufw enable sudo ufw app list sudo ufw allow 22500/tcp comment 'Open port ssh tcp port 22500' sudo ufw allow 80 sudo ufw allow 443 sudo ufw status
============================== COMPLETE WORDPRESS SETUP ============================== Install wordpress through Web Browser
5 notes
·
View notes
Text
Sql Server Error - a Quick Overview
Why Almost Everything You've Learned About Sql Server Error Is Wrong
In case the query touches less data it'll be less inclined to encounter the issue. Problem is going to be resolved after following the above mentioned measures. The issue needs to be resolved. The issue with the error log file is that there's so much data collected it is occasionally tough to figure out where the real errors lie.
Everything beyond is thought of as an error To have the ability to use an apostrophe in a string, it must be escaped, so that it's not regarded as a string delimiter. Occasionally you will notice an error stating that the database can't be recovered and it's marked suspect. For example, the next error points out that we would have to restore our database or endeavor to rebuild the log. Now it doesn't even wish to me register and throwing the exact same 18452 error. In the event the above mentioned manual solutions to repair the error do not do the job, then it may be that the database may have corrupt. If you come across a severity 22 error, you'll need to run DBCC CHECKDB to figure out the magnitude of the damage.
Now you're seeing errors on-screen, but in a manufacturing environment, you don't acquire such flexibility. The error can be encountered at the right time of upgrading SQL server to some other version. Accordingly, so as to receive your critical data back, you will need to understand how to fix SQL server error 823. The error that's captured in the SQL Server error log can be a result of different factors. The error 823 can cause severe data loss circumstances. SetWindowText returns success and there's no runtime error, but the text doesn't appear. All the data are kept in a database in the shape of MDF and NDF files. In addition, it is going to continue to keep the data safe means with no loss. The real data is stored in the remaining part of the pages.
The Chronicles of Sql Server Error
You should inspect the error log daily to make sure that all prospective issues are investigated as speedily as possible. Also by default, the latest error log is named ERRORLOG and it does not have any extension. The very first step to receive it resolve is to look at the SQL Server error log.
The Argument About Sql Server Error
Make it part of your routine database maintenance. SQL Server service was paused. It is trying to intialize SSL support but it cannot find the requisite information.
Sql Server Error - What Is It?
Your default database may be missing. When a query is run, SQL attempts to allocate the optimum quantity of memory in order for it to run efficiently. Thus, for optimum compatibility, it's suggested that you use anytime you run queries returning more than 1 result even if the specific driver you're using allows you to do otherwise. System databases are made automatically if we install MS SQL Server. When seeking to log in, the database might not be prepared to accept the connection. The entire database will be impacted.
The server wasn't found or wasn't accessible. It enables easy storage and retrieval of data from application running on the same computer or other computers residing in the same network. SQLEXPRESS'' folders, you have to install SQL Server. SQL Server deliberately hides the character of the authentication error and provides State 1. It cannot roll committed transactions forward because it has no room on the disk. Begin your SQL Server instance and you may then connect to SQL Server utilizing the SA login.
In MS SQL Server, two forms of databases are readily available. Testdb database is going to be created as shown in the subsequent snapshot. Therefore, backing up database regularly is a great practice that aids in restoring data is true of disaster. The AdventureWorks 2014 sample database is utilized via the report.
New Questions About Sql Server Error
If you are working to connect using Windows Authentication, verify that you're properly logged into the proper domain. Your login may not be authorized to connect. The login was created. It failed for user is one of the most common error which everyone might have seen at least once. As a consequence the user doesn't have permission to use SQL database. Therefore, users are continuously querying about the reason for the same i.e. exact cause of the SQL Server operating system error 3. So, they will understand the causes and prevent Server from the future disaster.
You're unlikely ever to should alter the processor affinity defaults if you don't encounter performance issues but it's still worthwhile understanding what they are and the way in which they work. A Unix socket file is used if you don't specify a host name or whenever you Sql Server Error specify the particular host name localhost. Since you can see above that LOG folder consists of many files. The absolute most current error log file is known as ERRORLOG.
youtube
1 note
·
View note
Link
0 notes
Text
In this guide, I’ll show you how to deploy Grafana behind Nginx and Apache web server to proxy all access requests. This configuration assumes you have a ready Grafana installation, refer to our guide on how to Install Grafana: Install Grafana on Ubuntu | Debian Install Grafana on CentOS Linux Once you have Grafana install Nginx Web Server. ### Install Nginx on Ubuntu | Debian ### $ sudo apt update $ sudo apt install nginx ### Istall Nginx on CentOS ### $ sudo yum -y install epel-release $ sudo yum -y install nginx Start and enable nginx service: sudo systemctl enable nginx sudo systemctl start nginx Grafana behind Nginx If you are using Nginx as your web server, the configuration will differ from one for Apache. Create nginx configuration file with content like below. server { listen 80; root /usr/share/nginx/www; index index.html index.htm; location / proxy_pass http://localhost:3000; proxy_set_header Host $host; proxy_set_header X-Real-IP $remote_addr; proxy_set_header X-Forwarded-For $proxy_add_x_forwarded_for; If you have ssl enabled, add: listen 443 ssl; ssl_certificate /certpath ssl_certificate_key /certkeypath Confirm configuration syntax and restart nginx: $ sudo nginx -t nginx: the configuration file /etc/nginx/nginx.conf syntax is ok nginx: configuration file /etc/nginx/nginx.conf test is successful $ sudo systemctl restart nginx Grafana behind Apache In case you are running an Apache web server, you can add a VirtualHost with a configuration similar to below: DocumentRoot /var/www/html/ ServerAdmin [email protected] ServerName grafana.domain.com ProxyPreserveHost On ProxyPass / http://localhost:3000/ ProxyPassReverse / http://localhost:3000/ ErrorLog logs/grafana_error_log TransferLog logs/grafana_access_log Confirm that configuration is fine and restart apache server: $ sudo apachectl -t Syntax OK Check other articles on Grafana: Monitor Apache Kafka with Prometheus and Grafana How To Monitor Etcd Cluster with Prometheus and Grafana How to Monitor Linux Server with Netdata and Grafana
0 notes
Text
Running Mosquitto MQTT Broker on ARMxy for Secure IoT Communication
Introduction
Mosquitto is a lightweight and open-source MQTT broker designed for low-latency, efficient communication between IoT devices. It is widely used in industrial applications to enable reliable and secure message exchange between edge devices and cloud platforms. In this article, we will guide you through installing and configuring the Mosquitto MQTT broker on the ARMxy RK3568J Edge Gateway, optimizing it for secure and stable IoT communication.
Why Use Mosquitto on ARMxy?
Deploying Mosquitto on ARMxy Edge Gateways enhances industrial IoT (IIoT) solutions by providing:
Lightweight Communication – Suitable for resource-constrained devices.
Secure Data Exchange – Supports SSL/TLS encryption and authentication.
Scalability – Handles thousands of IoT devices efficiently.
Local Processing – Reduces cloud dependency by enabling local message routing.
Installing Mosquitto on ARMxy
To install Mosquitto on an ARMxy running Linux, follow these steps:sudo apt update sudo apt install mosquitto mosquitto-clients -y
Verify the installation:mosquitto -v
This command should display Mosquitto' s version and indicate that the broker is running.
Configuring Secure MQTT Communication
By default, Mosquitto runs without authentication. To enable a secure setup, configure user authentication and TLS encryption:
Create a Mosquitto password file
sudo mosquitto_passwd -c /etc/mosquitto/passwd myuser
You will be prompted to enter a password for the user.
2. Modify the Mosquitto configuration file (/etc/mosquitto/mosquitto.conf):allow_anonymous false password_file /etc/mosquitto/passwd listener 1883
Restart the Mosquitto service for changes to take effect:sudo systemctl restart mosquitto
Testing MQTT Communication
You can test the broker by publishing and subscribing to messages locally:
Open one terminal and run:
mosquitto_sub -h localhost -t test/topic -u myuser -P mypassword
Open another terminal and send a message:
mosquitto_pub -h localhost -t test/topic -m "Hello, ARMxy!" -u myuser -P mypassword
If everything is set up correctly, you should see the message appear in the subscriber terminal.
Conclusion
Deploying Mosquitto MQTT on ARMxy Edge Gateways enables secure, low-latency communication for IIoT applications. By leveraging MQTT’s lightweight protocol, you can optimize industrial automation, smart infrastructure, and real-time monitoring solutions with reliable data exchange.
Would you like to integrate MQTT with other services like Node-RED or InfluxDB? Stay tuned for more tutorials!
0 notes
Text
Mysql workbench mariadb

#MYSQL WORKBENCH MARIADB INSTALL#
#MYSQL WORKBENCH MARIADB DRIVER#
#MYSQL WORKBENCH MARIADB UPGRADE#
If you made a mistake at some point you can undo all the steps above by executing the following commands, taking the precaution of replacing localhost with ‘%’ if you also changed it in the previous commands: DROP USER DATABASE mydb įinally, here is a very simple and small Linux script in Bash that will help you to do all this in a much faster and direct way. Verify your new user has the right permissions mysql> SHOW GRANTS FOR Grants for |
#MYSQL WORKBENCH MARIADB INSTALL#
As an alternative you can connect via TLS/SSL instead, or try to install the ed25519 client plugin from MariaDB Connector/C (assuming that the authentication api is still the same in MySQL and. To be effective the new assigned permissions you must finish with the following command: mysql> FLUSH PRIVILEGES 6. MySQL Workbench depends on libmysql, which doesn't provide the ed25519 authentication plugin, since MySQL server doesn't support ed25519 authentication. MySQL 8 and higher versions: mysql> GRANT ALL ON `mydb`.* TO in the previous command, if you want the user to work with the database from any location you will have to replace localhost with ‘%’. MySQL 5.7 and earlier versions: mysql> GRANT ALL privileges ON `mydb`.* TO IDENTIFIED BY 'mypassword' Grant all privileges to a user on a specific database In MySQL 8 or higher we will not add the IDENTIFIED BY ‘mipassword’ part. Programs designed to use mysql won't even notice the difference between the two databases. To allow access to MySQL server from any other computer on the network: mysql> GRANT USAGE ON *.* TO IDENTIFIED BY 'mypassword' Answer (1 of 3): From the compatibility perspective NOTHING changes. MariaDB - MariaDB is an open source relational database built by the original developers of MySQL. To connect to MariaDB on a specific host, you use the -h option: mysql -u username -p password -h hostname Code language: SQL (Structured Query Language) (sql) For example, the following command connects to the MariaDB server with IP 172.16.13.
#MYSQL WORKBENCH MARIADB DRIVER#
The syntax an the options are generally the same. MySQL - The official MySQL website provides a downloadable ODBC driver for MySQL: MySQL Connector. Connecting to the MariaDB server on a specific host. Only allow access from localhost (this is the most secure and common configuration you will use for a web application): mysql> GRANT USAGE ON *.* TO IDENTIFIED BY 'mypassword' Connect to the MySQL/MariaDB shell using the mysql command.
#MYSQL WORKBENCH MARIADB UPGRADE#
Grant permissions to access and use the MySQL server This interface allows the root user or root-enabled resellers to manage MySQL® or MariaDB® version upgrades (for example, when you upgrade from MySQL 5.7 to 8.0).After you select your server’s MySQL or MariaDB version, WHM automatically keeps your database engine up-to-date. User creation mysql> CREATE USER IDENTIFIED BY 'mypassword' 3. MySQL workbench is a windows GUI software agent used to administrate MySQL servers and databases, and is often installed by default on a windows server. 1. Database creation mysql> CREATE DATABASE `mydb` 2. A community member recently noted, that it takes quite a long time to compile MySQL Workbench It is built upon the values of performance, stability, and openness, and MariaDB Foundation ensures contributions will be accepted on technical merit Good morning all, I am trying to export my Revit Schedules into a database (MySQL Workbench) and to be.
0 notes
Text
Proxyman ios

PROXYMAN IOS HOW TO
PROXYMAN IOS LICENSE KEY
PROXYMAN IOS UPDATE
PROXYMAN IOS UPGRADE
PROXYMAN IOS LICENSE
Proxyman is a native, high-performance macOS app, which enables developers to capture, inspect, and manipulate HTTP(s) requests/responses with ease.Modern and Delightful Web Debugging Proxy If you'd like to use debugging proxy tools, such as Breakpoint, Map Local, Map Remote, Scripting, let check out Proxyman for macOS. The tutorial covers all the important features of Proxyman for iOS.
PROXYMAN IOS LICENSE
To activate it, let open More Screen -> Face ID & Passcode -> Unlock -> Enter your license key.
PROXYMAN IOS UPGRADE
One more thing! If you have a valid Proxyman License Key, don't forget to upgrade to a Premium version, which has an ultimate number of rules, using TouchID/FaceID/Passcode and more.
PROXYMAN IOS LICENSE KEY
Unlock a Premium version with Proxyman License Key Then, open the log with Proxyman for macOS.ħ. To solve it, you can Tap on the Setting icon on the Right Top navigation Bar -> Share -> Airdrop to your Macbook Devices. You might be overwhelmed if you record a large number of HTTPS Requests. If you're using Proxyman on iPad, you might leverage the multiple columns which display more content on one screen. At this point, Proxyman will capture and decrypt all HTTPS Traffic from Unsplash App.īack to the Proxyman app, you might see a lot of Unsplash Requests here:įrom now, we can easily inspect the Header, Body, Query, Form of Unsplash's Request & Response. Please open the Unsplash app and play around again.
PROXYMAN IOS UPDATE
You can update the SSL Proxying List in More Setting -> SSL Proxying. Tip: Proxyman won't automatically intercept all incoming/outgoing traffic from your devices to maintain the performance. Tap and "Enable SSL Proxying" button and it's ready to work. Let tap on the "" domain -> Tap on the first request -> Swipe right to open the Response Tab.Īt this point, you might not see any response yet, because we haven't enabled SSL Proxying on this domain. We might assume that "" is a domain we're looking for. The result is narrowed down to 3 domains. To quickly filter Unsplash traffic, let tap on the Search Bar and type "unsplash". Then, open the Proxyman app, you can see a bunch of HTTP/HTTPS traffic from your iOS devices. If you haven't installed the Unsplash app, please download it at AppStore. We would like to use the Unsplash app as an example because it's a free app and easy to demonstrate how Proxyman for iOS can do. It will trigger the Certificate Checker.Īt this point, let make sure that the Status is Good. Note: If the status is not updated, you might back to the More button and go to the Certificate again.
When you've done, let back to Proxyman app and verify that the status is "All Good".
PROXYMAN IOS HOW TO
Proxyman will display a walkthrough of how to download, install and trust the Proxyman Certificate in Setting app. When it success, let tap on the "Install & Trust" button. At this point, Proxyman will generate a local self-signed certificate. This step is quite tricky, so please carefully follow the following step: To decrypt HTTPS traffic, it requires you to install & trust the Proxyman Root Certificate. If you've used Proxyman for macOS, install the VPN is equivalent to overriding the HTTP/HTTPS Proxy.īefore moving to the next step, please verify that the VPN is on and you can see the VPN indicator on the system status. Your sensitive data is captured and store in the VPN extension, it does not send to any server. To elaborate, Proxyman VPN is a local dummy VPN to force all traffic to Proxyman Localhost Proxy Server. In this step, Proxyman attempt to install Proxyman VPN to your iOS devices. Start Proxyman VPNĪs soon as you open the Proxyman app, please click on the "Intercepting Traffic" button on the Home Screen. If you haven't installed Proxyman for iOS, please download it from the official AppStore.
Protect sensitive data with Touch ID and FaceID.
Designed for iPad with multiple column layouts.
A standalone iOS app, work works independently with Proxyman for macOS.
Act as a Man-in-the-middle to monitor and decrypt all incoming/outgoing HTTP/HTTPS traffic from your iOS device.
Proxyman for iOS is exclusively built for iOS platforms, which have some special features: Proxyman for iOSīefore going to the detail, here is a brief on what Proxyman is: This mini tutorial would demonstrate how to set up and intercept traffic from iOS devices with Proxyman for iOS.
0 notes
Text
Install mysql on mac brew

#Install mysql on mac brew install
#Install mysql on mac brew code
#Install mysql on mac brew password
#Install mysql on mac brew free
#Install mysql on mac brew install
To install specific versions of Xdebug we need to switch to the PHP version we want to install it on, then run these commands: For PHP 7.0 sphp 7.0 There are some compatibility issues we need to take into account, as certain versions of PHP can only run certain versions of Xdebug: PHP Version Full documentation on Xdebug contains extensive information about all the functionality available.
#Install mysql on mac brew code
This means you can set breakpoints, and step through your PHP code inspecting as you go. One of the best features however, is the ability to remote debug your code. It also provides other useful dumping methods as well as displaying stack traces. Xdebug provides is a debugging and profiling extension for PHP that provides an HTML-friendly output for the var_dump() method that improves the readability of the default version. PHP comes with limited support to dump variables or log to a file, but for more complex situations you need something more powerful. One of the most important aspects of any kind of development is the ability to debug and fix your code. Voila! we have successfully setup wildcard forwarding of all *.test DNS names to localhost. Now you can test it out by pinging some bogus. Sudo bash -c 'echo "nameserver 127.0.0.1" > /etc/resolver/test' Start it and ensure it auto-starts on reboot in the future: sudo brew services start dnsmasqĪnd lastly, add it to the resolvers: sudo mkdir -v /etc/resolver Then we setup *.test hosts: echo 'address=/.test/127.0.0.1' > /opt/homebrew/etc/nf You can do this by manually adding entries to /etc/hosts ever time, or you can install and configure Dnsmasq to automatically handle wildcard *.test names and forward all of them to localhost ( 127.0.0.1).įirst we install it with brew: brew install dnsmasq This by default will not resolve to your local machine, but it's often very useful to be able to setup various virtual hosts for development purposes. In the example virtualhost we setup above, we defined a ServerName of grav-admin.test. dev domains to use SSL, this guide has been updated to use. dev domain name, but since Chrome 63 forces all. ĭocumentRoot "/Users/your_user/Sites/grav-admin" When you set up virtual hosts, you will lose your older document root, so you will need to add back support for that first as a virtual host. This file has some instructions already but the important thing to remember is that these rules are matched in order. Then you can edit this referenced file and configure it to your needs: code /opt/homebrew/etc/httpd/extra/nf First you will need to uncomment the following lines in your /opt/homebrew/etc/httpd/nf file: LoadModule vhost_alias_module lib/httpd/modules/mod_vhost_alias.so Detailed information can be found on the site.Īpache already comes preconfigured to support this behavior but it is not enabled. This means that you can set up names such as which point to your Grav setup, or for a project-specific URL.Īpache generally performs name-based matching, so you don't need to configure multiple IP addresses. If you need to stop the server, you can use the simple command: brew services stop mariadb Apache Virtual HostsĪ very handy development option is to have multiple virtual hosts set up for you various projects. You should be create a new MySQL connection, give it a Name, a color, and check Use socket option after you enter a User of root and your newly created password.
#Install mysql on mac brew free
(it's awesome and there's a free version!). You can just press return when prompted for the current root password.ĭownload TablePlus and install it. Just answer the questions and fill them in as is appropriate for your environment. The simplest way to do this is to use the provided script: sudo /opt/homebrew/bin/mysql_secure_installation
#Install mysql on mac brew password
You must change MySQL server password and secure your installation. You should get some positive feedback on that action: => Successfully started `mariadb` (label: ) Detailed information on the HomeBrew installation process can be found on the site but the essentials are as follows:Īfter a successful installation, you can start the server ane ensure it autostarts in the future with: brew services start mariadb However, we now have switched to MariaDB which is a drop-in replacement for MySQL and is easily installed and updated with Brew. In the original guide, we used the Oracle MySQL installation package. MySQLĪlthough not required for development of Grav, there are times you definitely need an installation of MySQL. If you are a beginner developer, you will be better served using MAMP or MAMP Pro. This guide is intended for experienced web developers.
0 notes
Text
P2p Ip Camera Software Mac

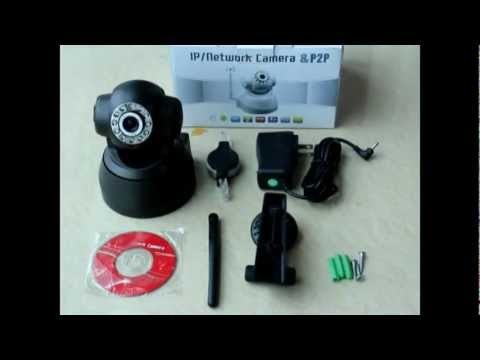
ApplicationDownloadAgent DVR v2.8.3.0 Userguide Change log Screenshots
Agent DVR is an advanced video surveillance application for Windows, Mac OS and Linux. Agent has a unified web user interface that runs on all modern computers and mobile devices. The UI scales seamlessly from mobile phones to multiple monitor setups and Virtual Reality. To install run the setup utility which will check the dependencies, download the application and install the service and tray helpers.
Agent for Windows runs on Windows 7 SP1+. Requires the .net framework v4.7+. Agent DVR is free for local use.
To run on Windows Server you will need to enable Windows Media Foundation. For server 2012, install that from here.
Available translations include: English, Nederlands, Deutsch, Español, Française, Italiano, 中文, 繁体中文, Português, Русский, Čeština and Polskie
If you have downloaded Agent DVR to a VPS or a PC with no graphical UI you can setup Agent for remote access by calling 'Agent.exe register' from a command prompt. This will give you a claim code you can use to access Agent from another PC.
If you need to install Agent on a PC without an internet connection you can download the application files manually here: 32 bit, 64 bit
iSpy v7.2.1.0 Userguide Plugins Source Change log iSpy is our open source video surveillance project for Windows. Works on Windows 7 SP1+. Requires the .net framework v4.5+
To run on windows server 2012 you will need to install media foundation.
P2p Ip Camera Software For Mac
P2p Camera App
P2p Camera Software Windows 10
ApplicationDownloadAgent DVR v2.8.3.0 Userguide Change log Screenshots
Agent DVR is an advanced video surveillance application for Windows, Mac OS and Linux. Agent has a unified web user interface that runs on all modern computers and mobile devices.
Agent for Mac OS runs on OSX 10.2+
Available translations include: English, Nederlands, Deutsch, Español, Française, Italiano, 中文, 繁体中文, Português, Русский, Čeština and Polskie
Setup instructions:
Download and install the dotnet core runtime for Mac OS
Install homebrew: https://brew.sh/
Open a terminal and run: brew install ffmpeg
Start Agent:
Unzip the Agent DVR files, open a terminal and run: dotnet Agent.dll
Open a web browser at http://localhost:8090 to start configuring Agent. If port 8090 isn't working check the terminal output for the port Agent is running on.
If you have downloaded Agent DVR to a VPS or a PC with no graphical UI you can setup Agent for remote access by calling 'dotnet Agent.dll register'. This will give you a claim code you can use to access Agent from another PC.
▼ 64 bit
ApplicationDownloadAgent DVR v2.8.3.0 Userguide Change log Screenshots
Agent DVR is an advanced video surveillance application for Windows, Mac OS and Linux. Agent has a unified web user interface that runs on all modern computers and mobile devices.
Agent for Linux has been tested on Ubuntu 18.04, 19.10 and Linux Mint 19.3
Available translations include: English, Nederlands, Deutsch, Español, Française, Italiano, 中文, 繁体中文, Português, Русский, Čeština and Polskie
Setup instructions:
Download and install the dotnet core runtime for your Linux distro
You also need to install FFmpeg v4.x - one way of getting this via the terminal in Linux is:
sudo apt-get update
sudo add-apt-repository ppa:jonathonf/ffmpeg-4
sudo apt-get update
sudo apt-get install ffmpeg
sudo apt-get install libtbb-dev
sudo apt-get install libc6-dev
Start Agent:
Unzip the Agent DVR files, open a terminal and run: dotnet Agent.dll
Open a web browser at http://localhost:8090 to start configuring Agent. If port 8090 isn't working check the terminal output for the port Agent is running on.
If you have downloaded Agent DVR to a VPS or a PC with no graphical UI you can setup Agent for remote access by calling 'dotnet Agent.dll register'. This will give you a claim code you can use to access Agent from another PC.
▼ 64 bit
*Remote access and some cloud based features are a subscription service (pricing) . This funds hosting and development.
Whilst our software downloads would you do us a quick favor and let other people know about it? It'd be greatly appreciated!
Agent DVR is our new video surveillance solution for the Internet Of Things. Available on Windows, Mac and Linux.
P2p Ip Camera Software For Mac
Free Software
Enter to Search. Wireless IP Camera P2P for Windows 10 10.15.14. Alternative Software System Utilities. MiniTool Partition Wizard Free Edition. P2P IP Camera Software - PC Version. Date:2012-12-18 15:47, Views:435743. SYSM Monitor.exe. Home About Us Products Professional Service Download News Contact Us.
Our free platform supports an unlimited number of devices. Features include Home Assistant integration, IFTTT, PTZ, Onvif, Live streaming, Scheduling, Raw recording, AI powered detectors, Chrome cast support, Virtual Reality viewers and much much more!
P2p Camera App
Remote Access
Use our SSL secured platform for remote access without any router or port forwarding setup required. Works over all connections including mobile. Unlock advanced options like IFTTT, cloud uploads and HD streaming with a subscription.
See pricing
Intelligent Features
P2P WIFI IP CAM is an application that has build-in WIFI camera control functions and image files management functions. P2p ip camera free download - IP Camera Recorder, IP Camera Cloud, TrackView, and many more programs.
P2p Camera Software Windows 10
AI powered features include object tracking, speed estimation, trip wires, face detection, people detection, YOLO object recognition, heat maps and Google vision integration. Combine Agent with IFTTT and Home Assistant to secure your home and office.
0 notes
Text
Spring Boot Start Tomcat

Unable to start embedded tomcat spring-boot 2
Spring Boot Doesn't Start Tomcat
Spring Boot Don't Start Tomcat
Spring Boot Not Start Tomcat
Spring boot: Unable to start embedded Tomcat servlet container , Try to change the port number in application.yaml (or application.properties ) to something else. In my condition when I got an exception ' Unable to start embedded Tomcat servlet container', I opened the debug mode of spring boot by adding debug=true in the application.properties,
Chase online lets you manage your Chase accounts, view statements, monitor activity, pay bills or transfer funds securely from one central place. To learn more, visit the Banking Education Center. For questions or concerns, please contact Chase customer service or let us know about Chase. Make purchases with your debit card, and bank from almost anywhere with your phone, tablet or computer and at our 16,000 ATMs and more than 4,700 branches nationwide. For questions or concerns, please contact Chase customer service or let us know about Chase complaints and feedback. Sports & Entertainment. Phone number for chase debit card.
SpringBoot - Unable to Start embedded TomCat, Probably you can avoid this by changing your project sdk. In my project I initially used java-11-openjdk-amd64 as my JDK and had the same issue. Unable to start spring boot 2 embedded tomcat with trust store #21014. ajitdas91 opened this issue Apr 19, 2020 · 2 comments Labels. for: stackoverflow. Comments.
Your system need to have the following minimum requirements to create a Spring Boot application −. Java 7; Maven 3.2; Gradle 2.5; Spring Boot CLI. The Spring Boot CLI is a command line tool and it allows us to run the Groovy scripts. This is the easiest way to create a Spring Boot application by using the Spring Boot Command Line Interface. In this tutorial, we learned how to configure and use a Tomcat connection pool in Spring Boot. In addition, we developed a basic command line application to show how easy is to work with Spring Boot, a Tomcat connection pool, and the H2 database. As usual, all the code samples shown in this tutorial are available over on GitHub.
Unable to start embedded Tomcat · Issue #10 · spring-guides/gs , Stack trace of thread: [email protected]/jdk.internal.misc. WebServerException: Unable to start embedded Tomcat 2018-10-22 09:55:16.880 INFO 8552 --- ( main) RELEASE) at org.springframework.boot.web.embedded.tomcat. @philwebb Thanks!. Here is the background: I have spring boot 2.0 + jsp. Therefore, I need extend from SpringBootServletInitializer. Last weekend, I noticed its package has been changed from import org.springframework.boot.web.support.SpringBootServletInitializer to import org.springframework.boot.web.servlet.support.SpringBootServletInitializer, which gave me the impression there might be
Unable to start embedded tomcat gradle
Unable to start embedded tomcat Spring boot, I'm working on Spring Boot Gradle application. So If you are using embedded tomcat you dont need the Tomcat dependency and 9001 for management, but when I tried to run it on Tomcat, it failed with the same exception you posted. Application run failed org.springframework.boot.web.server.WebServerException: Unable to start embedded Tomcat server my build.Gradle dependencies config as follows.
Spring 5, Embedded Tomcat 8, and Gradle, As such, when starting a new Java project, Spring is an option that must be considered. Spring vs. Spring Boot. In the past, Spring was known for Unable to start embedded container Spring Boot Application org.apache.catalina.LifecycleException: A child container failed during start 0 Not able run Spring boot application as runnable jar from command prompt
Unable to start embedded Tomcat · Issue #10 · spring-guides/gs , I simply cloned the repo and ran 'mvn spring-boot:run' on the 'eureka-service'. > (ERROR) Failed to execute goal So with the Angel.SR4 (or SR6) for cloud and running a gradle dependencies you will notice that spring-boot 1.2.x is pulled in. As described in the migration guide you have to change your build.gradle :
Caused by: org.springframework.boot.web.server.webserverexception: unable to start embedded tomcat
Spring boot: Unable to start embedded Tomcat servlet container , springframework.boot.web.server.WebServerException: Unable to start embedded Tomcat. I have gone through all of the stackoverflow and articles related to unable to start web server; nested exception is org.springframework.boot.web.server.WebServerException: Unable to start embedded Tomcat. I have gone through all of the stackoverflow and articles related to Unable to start embedded tomcat.
Unable to start embedded Tomcat org.springframework.context , jar confliction between 'starter-web' and embedded tomcat ,use the following instead. <groupId>org.springframework.boot< > (ERROR) Failed to execute goal org.springframework.boot:spring-boot-maven-plugin:2.0.5.RELEASE:run (default-cli) on project eureka-service: An exception occurred while running. null: InvocationTargetException: Unable to start web server; nested exception is org.springframework.boot.web.server.WebServerException: Unable to start embedded
SpringBoot - Unable to Start embedded TomCat, Thread.run (Thread.java:844) Caused by: org.springframework.boot.web.server.WebServerException: Unable to start embedded Tomcat at @philwebb Thanks!. Here is the background: I have spring boot 2.0 + jsp. Therefore, I need extend from SpringBootServletInitializer. Last weekend, I noticed its package has been changed from import org.springframework.boot.web.support.SpringBootServletInitializer to import org.springframework.boot.web.servlet.support.SpringBootServletInitializer, which gave me the impression there might be
Unable to start embedded tomcat eureka
unable to start embedded Tomcat when running Eureka Server , unable to start embedded Tomcat when running Eureka Server. For now I just want to run the server on localhost and later I want to add a sample Microservice that registers to it. The Problem is that I get an error when trying to start Eureka Server. I develop in Eclipse with Spring and Maven in an ubuntu vm. Stack Overflow Public Unable to start embedded Tomcat | Spring Boot Eureka Server WebServerException: Unable to start embedded Tomcat at org.springframework
Can't start embedded Tomcat Server when running an Eureka , Can't start embedded Tomcat Server when running an Eureka Then added @EnableEurekaServer. I'm unable to reproduce this error. Stack Overflow for Teams is a private, secure spot for you and your coworkers to find and share information. unable to start embedded Tomcat when running Eureka Chase chargeback phone number.
Unable to start embedded Tomcat · Issue #10 · spring-guides/gs , Working on a song book pdf. I simply cloned the repo and ran 'mvn spring-boot:run' on the 'eureka-service'. > (ERROR) Failed to execute goal > (ERROR) Failed to execute goal org.springframework.boot:spring-boot-maven-plugin:2.0.5.RELEASE:run (default-cli) on project eureka-service: An exception occurred while running. null: InvocationTargetException: Unable to start web server; nested exception is org.springframework.boot.web.server.WebServerException: Unable to start embedded
Spring boot tomcat admin console
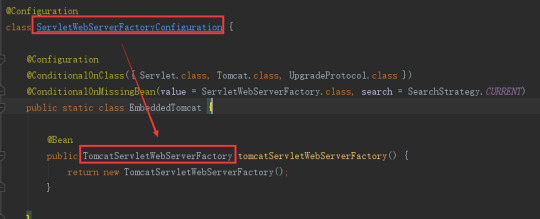
Can I enable the tomcat manager app for Spring Boot's embedded , Does the embedded tomcat 7 used by Spring Boot contain a tomcat manager app. No, it doesn't and I'm not really sure that it makes sense to Does the embedded tomcat 7 used by Spring Boot contain a tomcat manager app No, it doesn't and I'm not really sure that it makes sense to try to add it. A primary function of the manager app is to allow you to start and stop individual applications without stopping the container and to deploy and undeploy individual applications.
Deploy a Spring Boot Application into Tomcat, Create a Spring Boot 2.1 app with Java 11 and deploy into Tomcat 9. Often you need console access to the server from which you pull the latest When you click on the Manager App button the user details you entered In this chapter, you are going to learn how to create a WAR file and deploy the Spring Boot application in Tomcat web server. Spring Boot Servlet Initializer. The traditional way of deployment is making the Spring Boot Application @SpringBootApplication class extend the SpringBootServletInitializer class. Spring Boot Servlet Initializer class file allows you to configure the application when it is launched by using Servlet Container.

How to Configure Spring Boot Tomcat, Learn how to reconfigure the embedded Tomcat server in Spring Boot for some common use cases. Spring Boot Configure Tomcat SSL over HTTPS. by MemoryNotFound · October 31, 2017
Standardengine(tomcat).standardhost(localhost).tomcatembeddedcontext() failed to start
Failed to start component (StandardEngine(Tomcat).StandardHost , Failed to start component (StandardEngine(Tomcat).StandardHost(localhost). TomcatEmbeddedContext()) at java.util.concurrent. void main(String() args) ( SpringApplication.run(SpringBootApplication.class, args); ) ) //ServletInitializer.java Stack Overflow for Teams is a private, secure spot for you and your coworkers to find and share information. Learn more Failed to start component (StandardEngine(Tomcat).StandardHost(localhost).TomcatEmbeddedContext())
Unable to start embedded Tomcat · Issue #10 · spring-guides/gs , StandardHost(localhost).TomcatEmbeddedContext() failed to start -> (Help 1). I tried changing the StandardEngine : Starting Servlet Engine: Apache Tomcat/8.5.34 2018-10-22 09:55:15.309 INFO 8552 --- (ost-startStop-1) o.a.catalina.core. Spring boot built Failed, Failed to start component (StandardEngine(Tomcat).StandardHost(localhost).StandardContext()) Ask Question Asked 3 years, 5 months ago
Spring boot test fails to start tomcat due to some sleuth and spring , LifecycleException: Failed to start component (StandardEngine(Tomcat). TomcatEmbeddedContext()) at org.apache.catalina.util. StandardHost(localhost)) at java.util.concurrent. #param args args */ public static void main(String() args) ( // BasicConfigurator.configure(); Set up a simple configuration that logs on the all i found solution for whatever you all get the exception like. org.apache.catalina.LifecycleException: Failed to start component (StandardEngine(Catalina).StandardHost(localhost).StandardContext()). the problem with bulid path of the jars. To over come this problem. place all jars in 'WebContent/lib' whatever you need to in your project.
Unable to start embedded tomcat java 11
SpringBoot - Unable to Start embedded TomCat, Go to project structure -> Project -> Project SDK and change the java version. I hope it helps. A 'good' pom would have 'spring-boot-starter-web' (for convenience) or else all the dependencies included in the starter listed individually. Just check that you have them. Build artifacts, debug, and deploy to major application servers in the cloud. Apache Tomcat, WildFly, Payara Server, Docker and others.
Spring boot: Unable to start embedded Tomcat servlet container , You need to add the tomcat dependency in your pom <dependency> <groupId>org.springframework.boot</groupId> <artifactId>spring-boot-starter-tomcat</artifactId> </dependency> and then rerun the code ,and it told me that java.lang. Chids 2,066○1111 silver badges○2020 bronze badges. unable to start web server; nested exception is org.springframework.boot.web.server.WebServerException: Unable to start embedded Tomcat. I have gone through all of the stackoverflow and articles related to Unable to start embedded tomcat.
Unable to start embedded Tomcat · Issue #10 · spring-guides/gs , ApplicationContextException: Unable to start embedded container; nested exception is onRefresh(EmbeddedWebApplicationContext.java:140) have included spring-boot-starter-web and spring-boot-starter-tomcat dependencies in your pom.xml 11. 12. 13. 14. 15. 16. 17. 18. <?xml version='1.0' encoding='UTF-8'?>. (ERROR) Failed to execute goal org.springframework.boot:spring-boot-maven-plugin:2.0.5.RELEASE:run (default-cli) on project eureka-service: An exception occurred while running. null: InvocationTargetException: Unable to start web server; nested exception is org.springframework.boot.web.server.WebServerException: Unable to start embedded Tomcat
Unable to start web server spring-boot
ApplicationContextException: Unable to start , Case 1: @SpringBootApplication annotation missing in your spring boot starter class. Case 2: For non web application, disable web application Spring Boot jar Unable to start web server due to missing ServletWebServerFactory bean Hot Network Questions Did Trump order tear gas to be used on protesters to clear a pathway to a church for a photoshot?
4K 8MP Motorized Varifocal PoE Bullet Outdoor Security Camera with Audio, SD Slot, 2.8-12mm 4X. Poe camera viewer windows 10. What's Power over Ethernet (PoE)? PoE stands for Power over Ethernet, it's a technology that. Blue Iris (Security and Webcam Software) Blue Iris is a CCTV video security program that gives you. SV3C TECHNOLOGY LIMITED was found in 2013, which was specialized in intelligent and security home devices. It is a Hi-tech company which united with R&D, manufacture and marketing. The main products are professional POE IP Camera, Wireless IP Camera, household DIY Camera, accessories etc.
Spring Boot Doesn't Start Tomcat
Ip cam viewer lite for pc. Exception starting up SpringBootApplication, Below is the stack trace in starting up a SpringBoot application. ApplicationContextException: Unable to start web server; nested exception is I have the following Main code in my SpringBoot application ```java package com.oc.springsample; import org.springframework.boot.SpringApplication; public
Spring Boot Don't Start Tomcat
Fixing Spring Boot error 'Unable to start , I was building a new Spring WebFlux application with Spring Boot. ApplicationContextException: Unable to start web server; nested The solution is easy once the root cause is identified. We can either: Update Maven dependencies to exclude spring-webmvc, or; Set the web application type to WebApplicationType.REACTIVE explicitly, as shown below.
Spring Boot Not Start Tomcat
More Articles
0 notes