#WordPress blog tutorial
Explore tagged Tumblr posts
Visit Tumblr Blog
Explore Tumblr blogs with no restrictions, modern design and the best experience.
Last Seen Tumblr Blogs


Fun Fact
Tumblr.com rank in the US is 25.
Text
youtube
#wordpress#affiliate program#WordPress custom blog#Add blog to WordPress#WordPress blog customization#Custom blog design#WordPress blog setup#WordPress blog tutorial#WordPress blog layout#WordPress themes for blogs#Create custom blog WordPress#Blogging tips for WordPress#WordPress blog page#Custom blog section#WordPress blog plugins#Blog design ideas#WordPress beginner guide#Custom blog post layout#WordPress blog features#WordPress for blogging#Custom WordPress blog tutorial#WordPress design tips#Blog customization WordPress#Youtube
0 notes
Text
How to Start Money Making Blog for FREE with WordPress, AdSense, Affiliate & Email Marketing 2022
Check on YouTube

View On WordPress
0 notes
Text
youtube
Learn How to Create Software Downloading Website with WordPress and earn money online. In this video I'll explain all steps how to start software downloading website and the entire process cover in this video.
3 notes
·
View notes
Text
How to Automate Blog Creation with AI and Earn Money
Automate Blog Creation with AI : Learn how to set up a fully automated AI blogging system. It finds news and generates unique content. It also publishes blog posts to WordPress, even while you sleep. Boost traffic, save time, and grow your business effortlessly! How to Set Up an AI Automated Blogging System and Grow Your Company While You Sleep Imagine waking up every morning with new blog…
#AI blog automation#AI blog posting system#AI blog writer#AI blogging tools#AI content creation#automate blog posts#automate WordPress posts#blog automation tutorial#earn money blogging#gravitywrite AI#make.com automation#WordPress blog automation
0 notes
Text
How to Start a Blog in 2025: Step-by-Step Guide
Hey there! So you want to start a blog in 2025? Awesome—blogging is still one of the best ways to share your passion, build an audience, and even make some money. I’ve walked a bunch of people through this, so here’s the exact roadmap I’d share over coffee: 1. Figure Out Your Focus First up, think about what lights you up. Travel hacks? Plant-based recipes? AI tools? Jot down 5–10 topics you…
#beginner blogging guide#best blogging platform#blogging tips 2025#choose blog niche#content strategy 2025#how to start a blog#register domain 2025#tart a blog 2025#WordPress tutorial
0 notes
Text
#Technology Magazine#Free Online Tool#Interactive Tools and Collection#Internet Tools#SEO Tools#Learn Search Engine Optimization#Computer Tips#Freelancer#Android#Android Studio#BlogSpot and Blogging#Learn WordPress#Learn Joomla#Learn Drupal#Learn HTML#CSS Code#Free JavaScript Code#Photo and Image Editing Training#Make Money Online#Online Learning#Product Review#Web Development Tutorial#Windows OS Tips#Digital Marketing#Online Converter#Encoder and Decoder#Code Beautifier#Code Generator#Code Library#Software
0 notes
Text
How to Create a WordPress Website Using ChatGPT (Step-by-Step Guide)
Hello, friends! 😊 Are you looking to create a WordPress website but don’t know where to start? Don’t worry! In this article, we’ll walk you through the step-by-step process of setting up your website, from choosing a hosting provider to designing and optimizing it using ChatGPT. Let’s get started Step 1: Choose a Hosting Provider & Domain Name To launch a website, you need a hosting provider and…
#blogging#ChatGPT for WordPress#create WordPress site#digital marketing#eCommerce website#install WordPress#SEO optimization#web development#Website Customization#website design#WooCommerce#WordPress Hosting#WordPress plugins#WordPress Themes#WordPress tutorial#WordPress website
0 notes
Text
youtube
Beat the Summer Heat with Spicy & Sour Seafood! 🦐🌶️ Refreshing & Easy Recipe! #美食教程 #viralvideo
#food blog#food#how to start a food blog#how to create a food blog#street food#food blogging#start a food blog#food blogger#food blogging tips#food blogging for beginners#how to start a food blog and make money#food blog malayalam#blog#food bloggers on youtube#food ranger#how to become a food blogger#wordpress food blog tutorial#the food ranger#easy food blog#start food blog#food blog ideas#food blog theme#food blog money#easy food blogs#Youtube
0 notes
Text
youtube
1 note
·
View note
Text
youtube
#blogger#wordpress#blogging#blog#bloggingcommunity#blogpost#blog post#tumblog#vlogger#blog writing#blog tutorial#microblogshorts#learn marketing#digital marketing#seo#sem#smm#Youtube
0 notes
Text
youtube
Learn How to start a food blog with WordPress in 2023 and make money with your blog. In this video, I'll show you the step-by-step process of creating a food blog using WP Delicious plugin and also share earning method, how you can start earning with your food blog.
2 notes
·
View notes
Text
Master WordPress: Setting up your local Development Environment
WordPress is a popular and powerful platform for creating websites, blogs, and online stores. But before you can start building your WordPress site, you need to set up a development environment where you can work on your site without affecting the live version.
A development environment is a safe and private space where you can install WordPress, test new features, experiment with plugins and themes, and debug any issues. It also allows you to work offline, without relying on an internet connection or a web server.
In this article, I will show you how to set up a local development environment for WordPress using a free tool called Local by Flywheel.

Local by Flywheel is an easy-to-use application that lets you create and manage multiple WordPress sites on your own computer.
What You Need to Set up a Local Development Environment for WordPress
To set up a local development environment for WordPress, you need the following:
A computer running Windows, Mac, or Linux.
A web browser such as Google Chrome, Firefox, or Microsoft Edge.
A text editor or an integrated development environment (IDE) such as Visual Studio Code, Atom, or Sublime Text. (I personally prefer VS Code because easy to customize and use 😁)
A local server stack that includes PHP, MySQL, and Apache or Nginx. This is what powers your WordPress site locally.
A WordPress installation package that includes the core files and the database.
You can download and install all these components separately, but that can be time-consuming and complicated. That’s why I recommend using Local by Flywheel, which bundles everything you need in one convenient package.

How to Install Local by Flywheel
Local by Flywheel is a free application that you can download from the official website: https://localwp.com/
To install Local by Flywheel, follow these steps:
Download the installer for your operating system from the website.
Run the installer and follow the instructions on the screen.
Once the installation is complete, launch the application and create an account or log in with your existing account.
You will see the main dashboard of Local by Flywheel, where you can create and manage your local WordPress sites.
How to Create a Local WordPress Site with Local by Flywheel
To create a local WordPress site with Local by Flywheel, follow these steps:
Click on the + button at the top left corner of the dashboard.
Choose a name for your site and click on Advanced Options to customize the domain name, path, and environment type. You can leave the default settings if you want.
Click on Continue to proceed to the next step.
Choose a username, password, and email address for your WordPress admin account. You can also choose whether to install WordPress multisite or not.
Click on Add Site to start creating your site. This may take a few minutes depending on your internet speed and computer performance.
Once your site is ready, you will see it listed on the dashboard. You can click on Admin to access the WordPress dashboard, or click on Open Site to view the front-end of your site in your browser.
How to Work on Your Local WordPress Site
Now that you have created your local WordPress site, you can start working on it as you would on any other WordPress site. You can install plugins and themes, create posts and pages, customize settings, and more.
Some of the benefits of working on a local WordPress site are:
You can work faster and see changes instantly in your browser.
You can work offline without needing an internet connection or a web server.
You can test new features and updates without affecting the live version of your site.
You can experiment with different plugins and themes without worrying about breaking your site or losing data.
You can debug any issues more easily using tools such as WP_DEBUG or Query Monitor.
How to Make Your Site Live
Once you are happy with your local WordPress site, you may want to make it live so that other people can access it on the internet. To do this, you need to migrate your site from your local environment to a web hosting service.
There are different ways to migrate your site from Local by Flywheel to a web host, but one of the easiest ways is to use the Connect feature of Local by Flywheel.
The Connect feature allows you to connect your local site to a web host such as WP Engine or Flywheel (both owned by the same company as Local by Flywheel) and push or pull changes between them.
To use the Connect feature of Local by Flywheel, follow these steps:
Click on the name of your local site on the dashboard and go to the Connect tab.
Choose a web host that you want to connect to. You will need to have an account with them and create a site on their platform first.
Follow the instructions on the screen to link your local site and your web host site.
Once the connection is established, you can push or pull changes between your local site and your web host site. Pushing changes means sending your local site to your web host site, while pulling changes means receiving your web host site to your local site.
You can also choose whether to push or pull the entire site or only specific parts such as the database, files, or plugins and themes.
Conclusion
Setting up a local development environment for WordPress is a smart and efficient way to work on your WordPress site. It gives you more control, flexibility, and security over your site.
Using Local by Flywheel, you can easily create and manage multiple WordPress sites on your own computer, without needing any technical skills or extra software.
You can also migrate your site from Local by Flywheel to a web host using the Connect feature, and sync changes between them.
I hope this article helped you learn how to set up a local development environment for WordPress using Local by Flywheel. If you have any questions or feedback, feel free to leave a comment below. Happy WordPressing!

#wordpress#wordpress development#webdevelopment#localenvironment#flywheel#blogging#tutorial#techniki tantram#technikitantram#wordpressdeveloper
1 note
·
View note
Text
How to import CSV files in WordPress without a plugin
If you’re planning to transfer content to your WordPress site and wondering if it’s possible to do so without a plugin, then the answer is a resounding yes!
Fortunately, WordPress offers several built-in options that allow you to import without relying on a third-party plugin. Moreover, it also supports various file types that cater to your specific needs.
In this tutorial, we’ll guide you through the step-by-step process of importing programmatically to WordPress without the use of a third-party plugin.
Warning 1: Backup Before You Proceed
It is always important to backup your data regularly before you do something that updated the database whether you use a plugin or not. This ensures that you have a safe backup copy of your website’s content and database so that you can always rollback to a previous version in case of any issues, data loss or corruption.
Warning 2: Potential Risks Involved
Importing content without a plugin can potentially cause issues with theme or other plugins, and break the functionality or design issues. It is also increase the risk of security vulnerabilities if the content with malicious code or scripts get injected while importing.
How to use WordPress functions
Do you want to import a bunch of posts into your site but don’t want to do it manually one by one? Well, you’re in luck because I have a solution for you!
One way to import posts as CSV is by using the built-in wp function called wp_insert_post(). This function allows you to programmatically create and insert them into the database.
Here’s how you can use this function:
First, make sure your file is uploaded to your server or host through ssh, cpanel, ftp or sftp, for example in the directory /var/www/html/wp-content/uploads/posts.csv.
Next, add the following code snippet to your theme’s functions.php file e.g: \wp-content\themes\twentytwentythree\functions.phpif (($handle = fopen("/var/www/html/feb/wordpress/wp-content/uploads/smack_uci_uploads/imports/d107020a28796c63d6984ad91f0fcab5/post.csv", "r")) !== FALSE) { // Read the CSV file line by line while (($data = fgetcsv($handle, 1000, ",")) !== FALSE) { // Create a new post object and set its properties $post = array( 'post_title' => $data[0], 'post_content' => $data[1], 'post_status' => 'publish', 'post_type' => 'post', ); // Insert the post into the database $post_id = wp_insert_post($post); // Check if the post was inserted successfully if ($post_id > 0) { // Post was inserted successfully, do something else if needed } else { // Post was not inserted, handle the error if needed } } fclose($handle); }
Save the changes to your functions.php file.
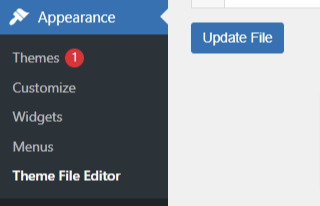
You can also edit the theme file from Appearance > Theme File Editor
That’s it! You are done now. .
Keep in mind that this is just a basic example, and you can modify the code to suit your specific needs. For example, you can add additional code to handle custom post types, taxonomies, or other properties.
Also, you can customize to use the code snippet in any filter or action hooks based on your trigger function.
If you need more help or would like to see more use cases, additional examples and code snippets, do not hesitate to reach out to us! You can leave a comment below or use the contact form, and we’ll be happy to update the tutorial with more information to help you out.
How to use the wp-cli method
Another method to import users as CSV into WordPress is by using wp-cli. This method is pretty straightforward and easy to follow. First, you need to prepare a the file in a specific format, which should look something like this:user_login,user_email,display_name,role,authors_parameter Johndoe,[email protected],John Doe,contributor,create smacksupport,[email protected],smackcoders,administrator,create jiju2fabio,[email protected],jiju2fabio,author,create
You can create or update your user CSV file to match this structure. If you want to use the same sample that we’ve used in this tutorial, you can download it for training purposes. Once you have your file ready, upload it to your uploads folder, and the path to the file should be /var/www/html/wp-content/uploads/users.csv.
Assuming you have already installed wp-cli, you can use the following WP-CLI command:
wp user import-csv /var/www/html/wp-content/uploads/users.csv
And that’s it! Your users should be imported now. Note that you can also upload the file from a remote URLs using this method.
However, it’s important to note that this method is only useful for users as CSV. If you’re looking to import posts from CSV, the wp function method is the better option. The wp-cli method is only compatible with WXR files, which can be complicated. So, if you want to import posts, it’s best to stick with the first method we discussed.
How to use the Built-in Options
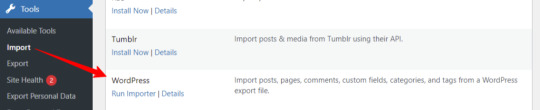
First, log in to your wp-admin dashboard and go to the Import section under Tools. Scroll down until you see the WordPress option and click “Install now”. Once it’s installed, you’ll see a new option called “Run Importer”. Click on that to start the process.
Next, you’ll be prompted to upload the WXR (.xml) file. This is the file that contains all the content you want to bring to your site.

Once you’ve uploaded the file, you’ll see the “Assign Authors” section. Here, you can choose how to handle author information. You can import authors, create new users, or assign them to already available users. Make sure to review and adjust the settings as needed. You can also choose to download any attachments that are included in the file.
Once you’ve configured all the settings, click “Submit” to start the process. The tool will process the WXR file and import the content. If any errors occur during the process, you’ll be notified so you can address them.
And that’s it! With this built-in tool, importing content has never been easier. No need for other plugins or custom code.
Know about Built-in WordPress All Import Options
Well, did you know that WordPress has other built-in options that you can use for this purpose?
To access these built-in tools, all you need to do is go to your WP-Admin dashboard, click on “Tools,” and then select “Import.” From there, you’ll see a table with different options available.
Depending on your needs, you can choose the option that suits you best. For example, if you want to migrate from a Blogger blog, you can use the Blogger option. If you want to import from an RSS feed, you can use the RSS option. And if you want to transfer from an export file in WXR format, which supports posts, pages, comments, custom fields, categories, and tags, you can choose the WordPress run importer option.
However, keep in mind that these default tools have some limitations. You can only use them for a one-time process, and you cannot automate or schedule the process. Also, filters and partial imports may not work correctly, and there is no proper support or fixes available.
But don’t worry, if you need more robust and reliable tools, there are third-party plugins like WP Ultimate CSV Importer available that can help you out.
Here are some plugins you can try
https://wordpress.org/plugins/one-click-demo-import/
https://wordpress.org/plugins/advanced-import/
https://wordpress.org/plugins/import-facebook-events
How to plan a simple migration
If you’re planning to import your data, it’s essential to plan well before getting started. Let’s discuss some takeaways that can help you choose the right option.
Firstly, if you want to import user metadata as CSV, you can do it programmatically using wp-cli without the need for any plugin. Secondly, you can use the WP function method by customizing the shared code to your specific needs. And if you have WooCommerce installed and active, you can import products and tax details as CSV without needing another plugin.
If you’re planning to use WXR, you can use the wp-cli method, but it requires more effort and time. The easiest way is to use the default importer option.
Moreover, there are other options available for bloggers, Tumblr, LiveJournal, Movable Type, TypePad, etc., and from an RSS feed as well. Understanding each option’s capabilities and limitations can help you choose the right option for your needs.
Also, It’s important to know about each file type that WordPress supports. Let me explain each file type in detail so that you can understand it better.
WXR: It stands for WordPress eXtended RSS. It is an XML-based file format that contains content, categories, and tags. It is the most common file format used for import export data.
XML: It stands for eXtensible Markup Language. It is a file format that is used to store and transport data. WordPress uses XML to export and import content.
CSV: It stands for Comma Separated Values. It is a file format that stores data in a tabular form where each column is separated by a comma. CSV files are commonly used to store data like product information, user data, and more.
RSS: It stands for Really Simple Syndication. It is a file format used to publish frequently updated content. It also allows you to import RSS feeds into your site.
JSON: It stands for JavaScript Object Notation. It is a file format used to store and exchange data. So, those are the file types supported. It’s important to choose the right file format based on your data and requirements.
I hope this information helps you. Some useful References:
If you want to learn more about the WP-CLI method, you can visit the WP-CLI website.
For using the WP function method, you can use the wp_insert_post() function. This function allows you to programmatically insert data into your WordPress site. You can learn more about it from wp developer reference.
Lastly, if you want to use the WordPress default options , you can find it in the plugin repository. In conclusion, importing content can be made easy with the right tools and an understanding of the available options and knowing the limitations and capabilities of each option.
With these tips in mind, you can transfer your content seamlessly and focus on creating quality content for your website.
#cms#wordpress#wordpress plugins#wordpress tutorial#plugins#website development#wordpresswebsite#import#blog post#csvimporter#importdata
0 notes