#and i currently don't :(
Text

If true we HAVE to make this the biggest flop in gaming history, as in 'destroys the company' levels of gaming flop as in a 'lesson must be taught' gaming flop, as in 'E.T. destroyed atari' gaming flop
#gta 6#grand theft auto#video games#I totally get like#a $10 price increase every decade or so to keep up with inflation#I don't like it but I get it#but effectively doubling the current price is insane#we can't let that be normalized
53K notes
·
View notes
Text
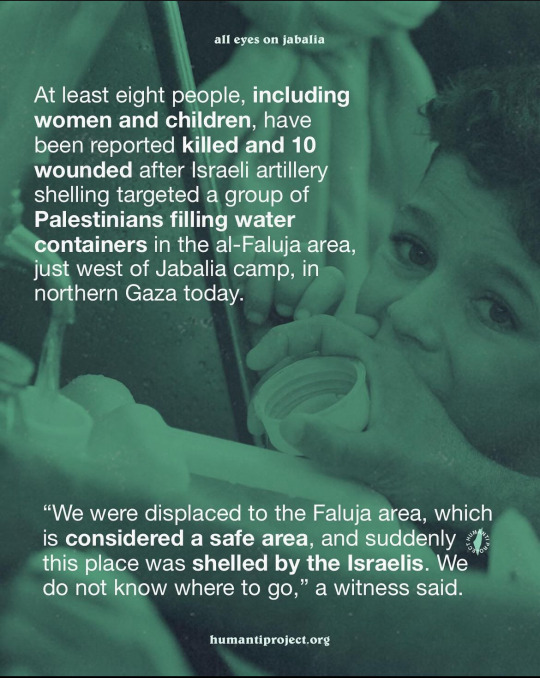
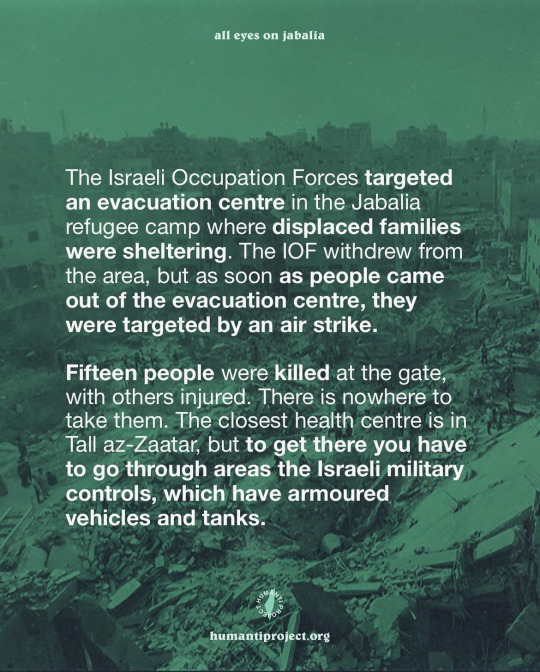
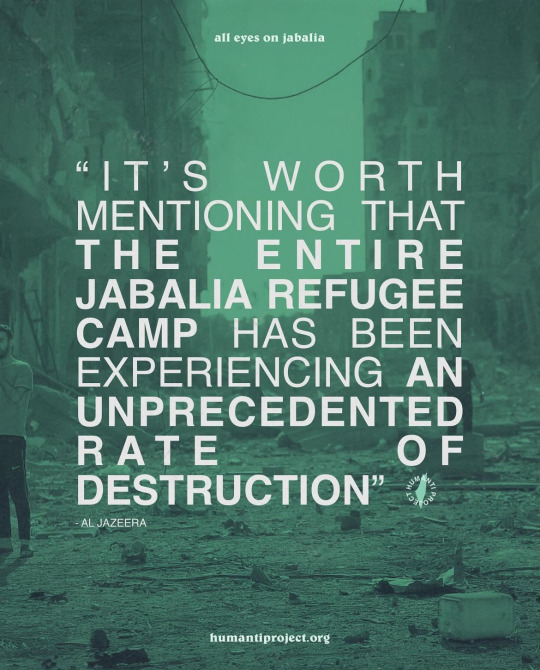
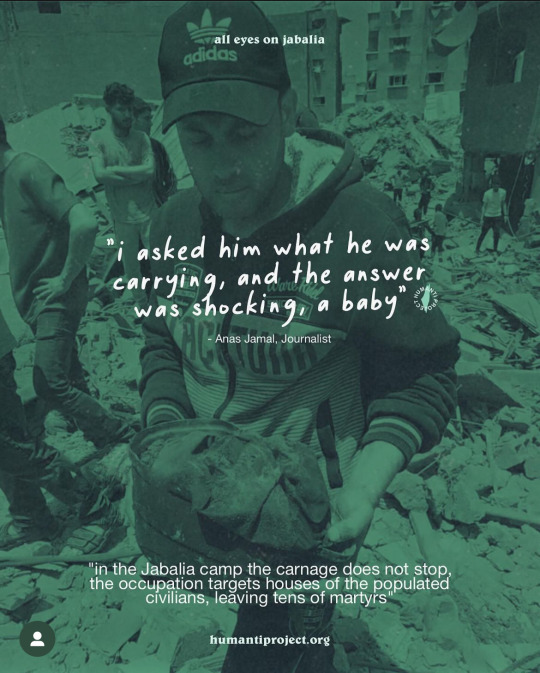
Yesterday marked the 100th day of genocide. Please, do not get used to this. Our people, killed, bombed, kidnapped, stripped, executed and starved is not normal. Our kids in pieces, their body parts collected in bags is not normal.
Israel has killed 23,700 human. More than 10,300 child. We'd need 177 school bus to carry the Palestinian children killed by Israel in gaza. 10,022 fatherless child. 8,352 motherless child. The wounded have their wounds rot and die waiting in front of the crossing. Maggots seen inside alive people's wounds. 5,500 pregnant woman will give birth in the upcoming weeks. 100 Days of Genocide. 100 Days of the world watching silently.
#if you want to share the text alone it's okay repost it i know a lot of people don't want to reblog videos or at least that’s what they said#palestine#gaza#israel#important#current events#free palestine#ethnic cleansing#free gaza#gaza strip#gaza under attack#gaza under genocide#israel apartheid#israel is terrorist#israel is an apartheid state#israel is a terrorist state#usa#america#joe biden#2024#new year#netenyahu#yemen#video
25K notes
·
View notes
Text
feel free to say which / why in the tags if you have a reason for your preference
#no nuance no rose gold no gunmetal no bronze no copper. pick 🔫#i'm like a 1 currently. i've been a 5 in the past tho. reason: my piercings are silver and i cba to change them all + don't like mixing
6K notes
·
View notes
Text
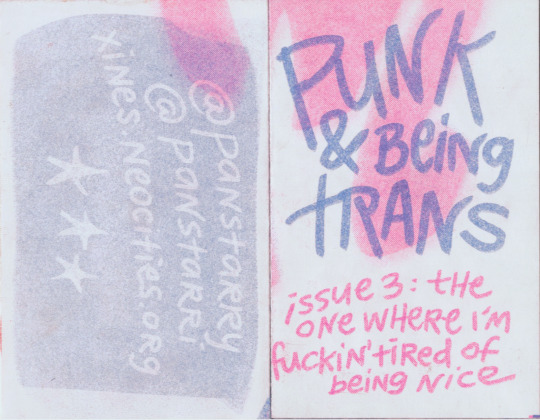
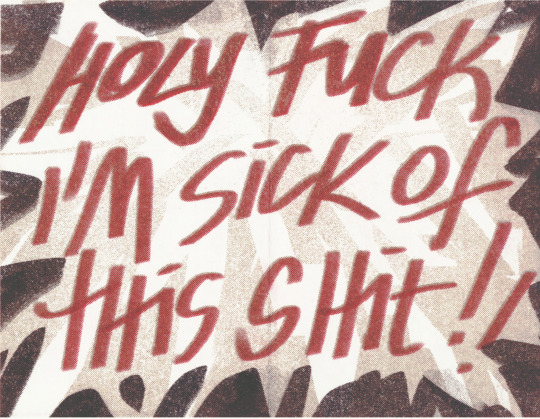

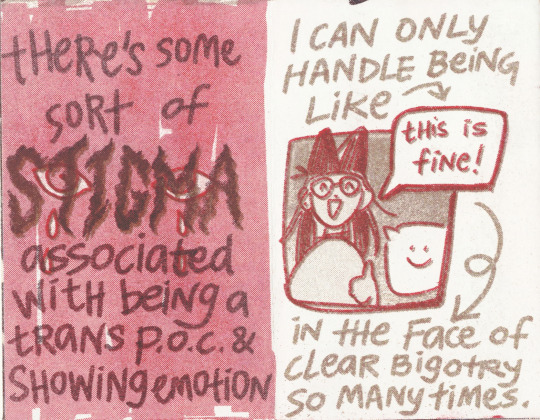
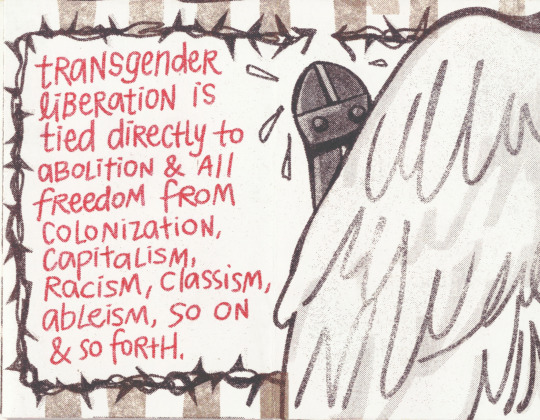
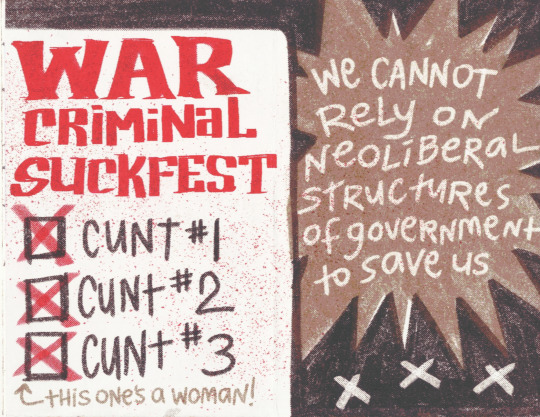

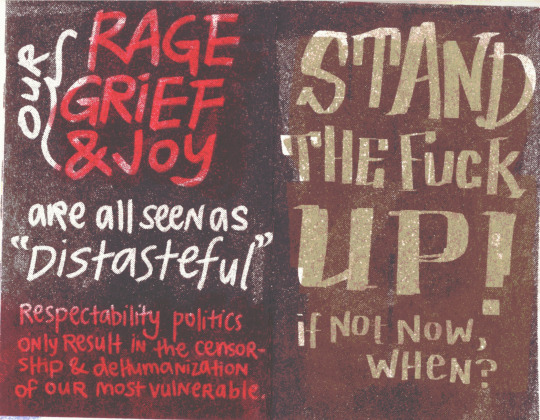
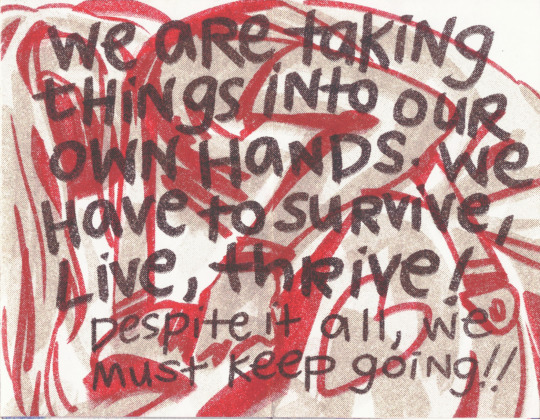
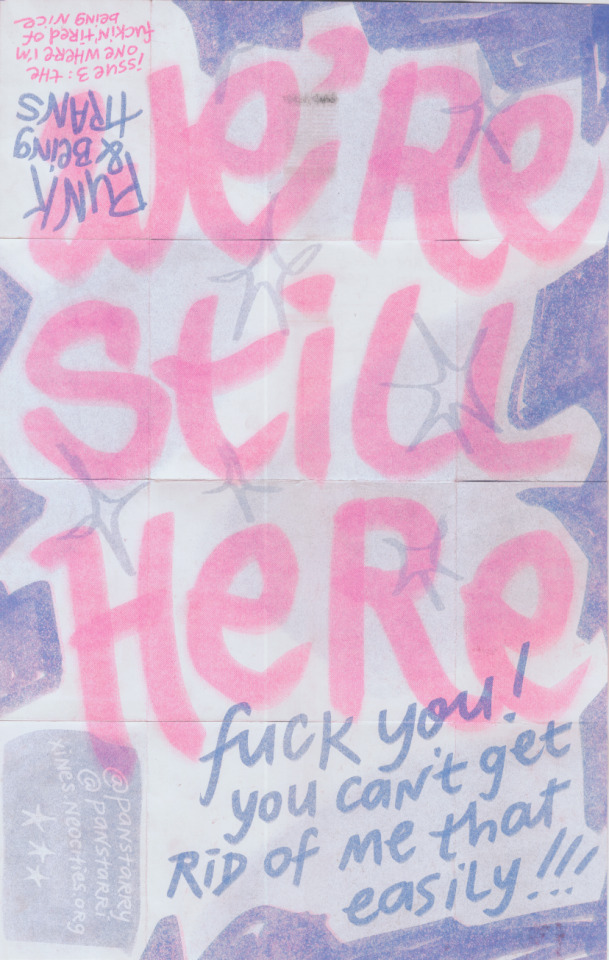
my final from last semester that i made into a zine. cooked this one up in a couple hours before the critique (the ink was still wet!), so it's very raw and kind of sloppy but the sentiment is there. i love you trans people of color. we are the backbone of this community 🌟
#pan draws#pan designs#zine#risograph#i'm not gonna lie i don't love how this one turned out OTL and i think the wording is not done but well... a deadline is a deadline#i'll probably touch it up and rewrite it in the future but who's to say.. i need to stew on how to articulate my feelings coherently#anyway my transness is so closely tied to my experience as a person of color. the current political climate is so fucking ass to exist in#but more than anything i am pissed off at white punks & leftists & trans people that refuse to have meaningful solidarity with us.#so yeah anyway. i was stuck on this one forever and only really got anywhere with it after attending 2 punk noise shows in a row where they#actually used their fucking platform to do like. anything. our struggles are connected you need to careeeee YOU HAVE TO CARE........ ok bye#tdov#trans day of visibility#<- i was sitting on uploading this for a while so the stars kind of aligned for it to be today huh.... happy tdov i love you
3K notes
·
View notes
Text
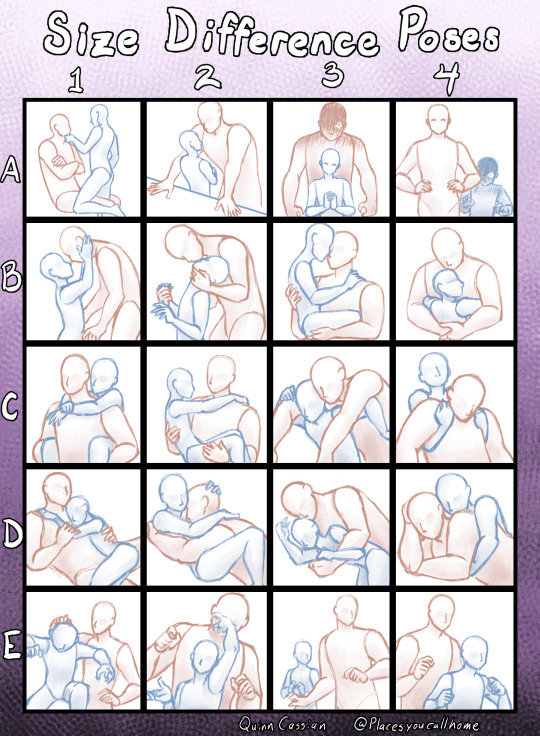
Size/Height difference poses
I love height differences aesthetically, but posing them can sometimes be a pain! So to cater to those that also struggle with posing smols and tols, I have a few options-
Meant for art of any type and ask memes, for drawing, writing, photography (like gpose!), ect. Gender nonspecific and for any sort of relationship type, romantic, platonic, and antagonistic!
#art meme#pose meme#height difference#drawing meme#ask meme#this is less about sending me things and more i wanna see other people use it#i have things i need to draw you people need to reblog so i can send things#idk why people don't use pose memes for gpose its not just about drawing#also i wanted obvious options for the smol being something other than soft uwu delicate sort#let smols be gremlins#i just need to feel like ive done something because i currently feel like a useless pos
4K notes
·
View notes
Text
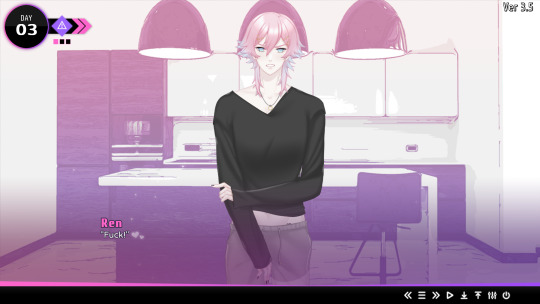
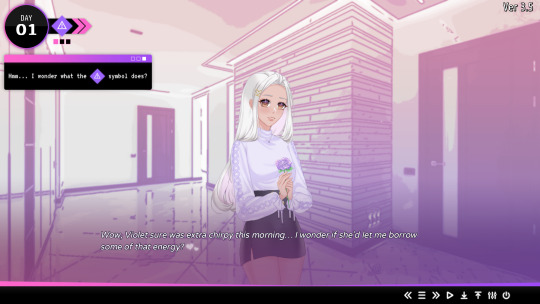
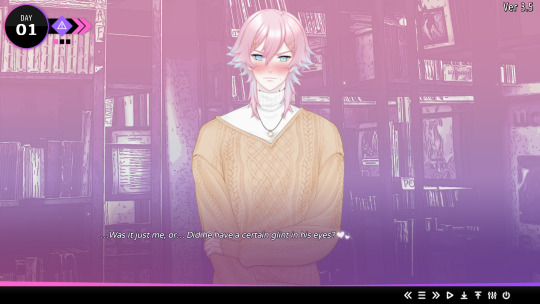
💖 Day 3.5 is now available! 💖
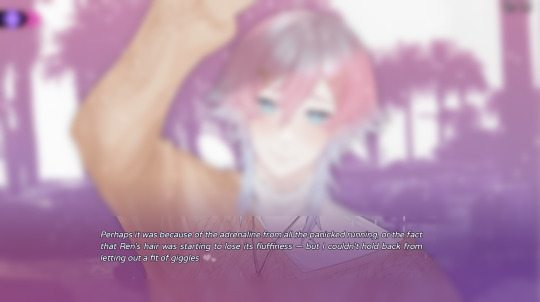
For the last couple of months, only Server Boosters had access to the 3.5 update... Buuuuut now it's available for everyone to play in the 14DWY Discord — and soon itch.io once I'm happy with the QA and state of the game — so please don't feel pressured to join unless you want to!!
The full devlog + even more screenshots are under the cut ^^

What's been added to the 3.5 version?
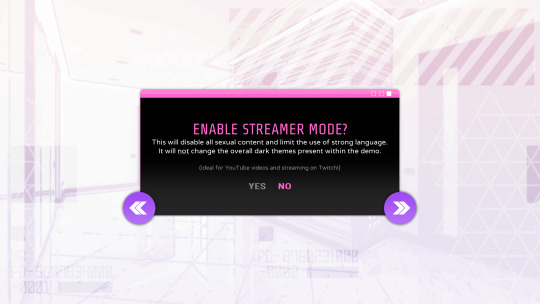
📺 Streamer Mode!
I've been told that it's difficult to stream and monetise age-restricted videos on YouTube and Twitch, so I added an option to remove the sexual content and strong language used in the demo.
Now y'all can invite Ren into your bed for cuddles without putting your streamer career on the line /silly /lh
This won't affect the 18+ rating or dark themes/elements of the game, however! Although Streamer Mode will prevent you from seeing any "gruesome" CGs in the future, most of the core elements of the game will still be tied to the choices and decisions you make. So you won't miss out on the overall experience by using streamer mode!!
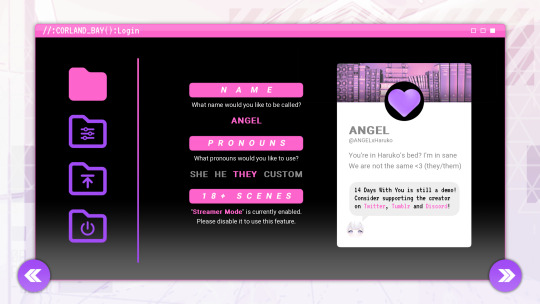

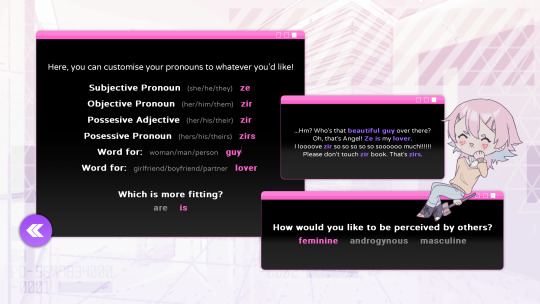
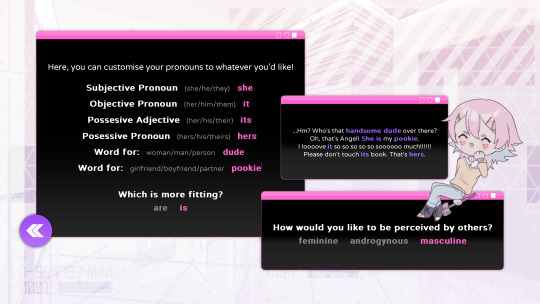
⚙️ Custom Pronouns!
It only took me one entire year to get around to it, but you can finally choose your own preferred pronouns (or use a set of pronouns instead)... At the cost of being able to change them mid-game ^^;
Since the original pronoun screen wouldn't update until a new scene was displayed, I temporarily disabled the feature. But once I find a workaround, I'll bring it back!

💗 Choose how others perceive you!
You can now choose how the cast and narration perceive you! Originally, the narration was kept strictly gender-neutral (outside of pronouns and genitalia picked by the player), but this will soon change in future updates.
For more clarity: you don't get to choose the words specifically, but you can choose between masculine, feminine, and androgynous terms!
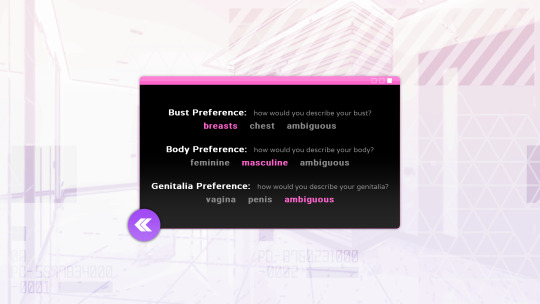
📋 Separate top and bottom genitalia!
You can now choose your tatas and pps separately! >:3
Alongside that, you can also choose your preferred body type!
I removed the "both" genitalia option because a few players still assumed it was an obscure version of "intersex". That wasn't my intention and I don't want to mislead anyone, so I took it out for now ^^;
I also didn't want to include a screenshot of the new genitalia choices in action (because it's NSFW), so y'all get the same character menu screen for the nth time instead lmao
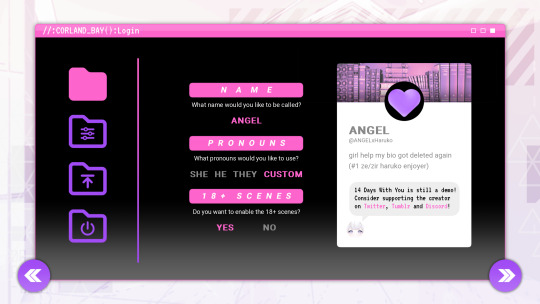
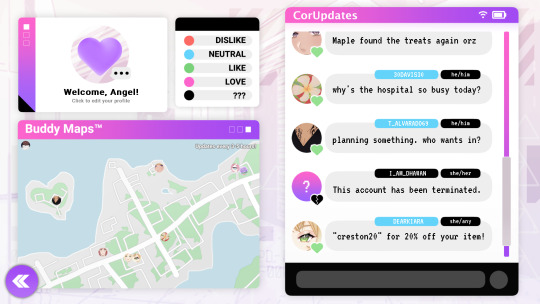
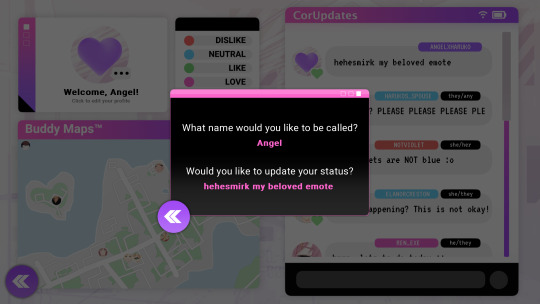
📱 Relationship Screen Overhaul!
You can now change your own status for more immersion, and long-term Server Boosters will eventually be able to submit and use their own icon within the game as well!
Stalking finding your friends has now become easier by using "Buddy Maps"; a new app that allows you to see the location of all the cast members!
I want to offer players more incentive to check the relationship screen since they tend to miss the status updates, so hopefully this might help ;v;
It also says it "updates every few hours" so folks don't go overboard and check every 5 seconds to see where Ren is gdsghf (also keep in mind that he's a hacker lol)
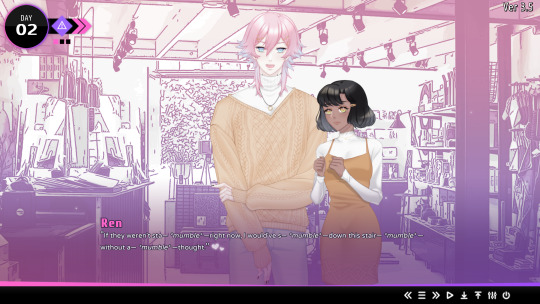
🖤 Additional Scenes Update!
Day 2 received a brand new CG!!!!! Originally, I planned on only adding a few CGs sporadically throughout the game, but it didn't feel right to leave Day 2 so... empty... so I added a brand new CG to (hopefully) make things feel more balanced and natural!
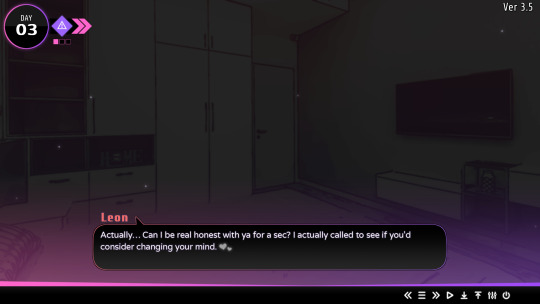
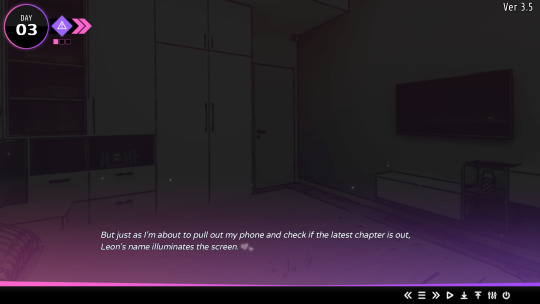
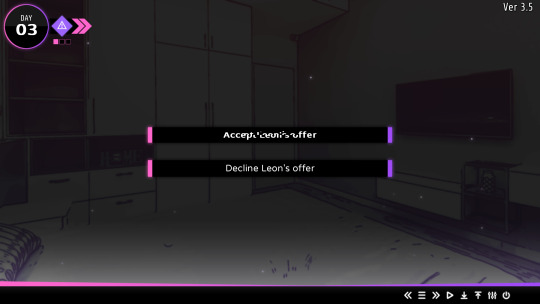
If you decline Teo's offer on Day 3, Leon will now call and try to convince you to reconsider. However, players are still allowed to decline, and if they do, they'll reach a dead end.
After listening to feedback on itch, I changed some of the dialogue during Days 1-3 to make it seem more consistent! They're only small changes though, so it's honestly not worth looking for sdgjssga
🎶 Updated BGM and SFX!
I wanted to try out a different style of music to see if it fits the vibe of 14DWY more! The BGM features more acoustics to suit the "beachy" theme of Corland Bay, though I made a conscious effort to include piano elements as well to stay true to the original!!
I figured it'd be better to give players a live example before I make a poll (to see if they prefer the change or not) and publish it to Itch.
Some new SFX have also been added, though it's very minimal and honestly not that noticeable.
How to download and play the update?
(warning: clicking on the following links will open Discord!!)
To download the Day 3.5 update, simply join the 14DWY Discord server, verify your age, and visit the "14dwy-updates" channel!
Alternatively, you can also wait until the update is publicly released on Itch to play it as well!! (It normally gets released shortly after a round of QA testing/getting feedback from the server, though I may release it earlier if I feel like it hehe ^^)
Enjoy!!
#14 days with you#14dwy#💖 — 14 days with queue.#🖤 — updates.#🖤 — spoilers.#I'm not gonna say much about my current doxxing situation because I've got it under control now + it's being handled privately#Plus I don't wanna give it/the people involved any unnecessary attention. I just wanna announce the update and Get Back To It™️#(''it'' bein the grind 💪 It never stops lmao /silly)#OG followers will also know that these topics aren't the vibe I normally have on this blog (or any of my accounts); so I don't think I'll—#—make ANOTHER public post about the situation and bring more attention to it (when I just want everything to be over and put to rest ^^;)#However I also don't want people to think that I'm... ignoring?? the situation entirely (because gettin doxxed is a very endangering thing)#So I DO want to quickly acknowledge it here and say that it's all currently handled + I'm safe and okay + this won't stop me from—#—continuing to work on 14DWY (and other future projects). I also don't want to give these awful people more power and incentive to continue#—this kind of pathetic behaviour; so the less attention and encouragement being shown will ultimately be better in the long run :3#Aaaaaanways!! 😮💨#My other accounts will be restored shortly and my askbox will be opened once I feel comfortable. I'll get around to following folks—#—again in my own time; so please don't feel offended if I unfollowed you during a moment of vulnerability and anxiety!!#This is all EXTREMELY overwhelming and scary for someone with SAD/AvPD; and I /gen can't handle seeing it all over my timeline ;v;#Sorry this got ranty and personal again hjdsgjsdh T_T I said I wouldn't say much; so I'll shut up now hehe#🖤 — shut up sai.
1K notes
·
View notes
Text

keep her down, boiling water
#song is seether by veruca salt#i just needed to finish something bc im currently in a huge rut#anyway wendy is so cool shes such an interesting character#and one of my favorites but i don't draw her enough#cw bright colors#bright colors#south park#wendy testaburger#possible eyestrain#eyestrain
2K notes
·
View notes
Note
Any tips on learning to make buttonholes? I've been putting it off for.... *checks notes* like three years.... but better late than never and all that. I don't have any fancy machines so I gotta do it by hand but that seems right up your alley.
Thanks!
It IS up my alley, yes, I do most of my buttonholes by hand!
I'm actually part way through filming an 18th century buttonhole tutorial, but I expect it'll be a few more weeks before I finish that and put it on the youtubes, so in the meantime here's the very very short version. (The long version is looking like it'll probably be about 40 minutes maybe, judging by how much script I've written compared to my last video?)
Mark your line, a bit longer than your button is wide. I usually use a graphite mechanical pencil on light fabrics, and a light coloured pencil crayon on dark ones. (I have fabric pencils too, but they're much softer and leave a thicker line.)
You may want to baste the layers together around all the marked buttonholes if you're working on something big and the layers are shifty and slippery. I'm not basting here because this is just a pants placket.

Do a little running stitch (or perhaps a running backstitch) in fine thread around the line at the width you want the finished buttonhole to be. This holds the layers of fabric together and acts as a nice little guide for when you do the buttonhole stitches.

Cut along the marked line using a buttonhole cutter, or a woodworking chisel. Glossy magazines are the best surface to put underneath your work as you push down, and you can give it a little tap with a rubber mallet if it's not going through all the way.

I'm aware that there are some people who cut their buttonholes open using seam rippers, and if any of them are reading this please know that that is abhorrent behaviour and I need you to stop it immediately. Stop it.
Go get a buttonhole cutter for 10 bucks and your life will be better for it. Or go to the nearest hardware store and get a little woodworking chisel. This includes machine buttonholes, use the buttonhole cutter on them too. If you continue to cut open buttonholes with a seam ripper after reading this you are personally responsible for at least 3 of the grey hairs on my head.
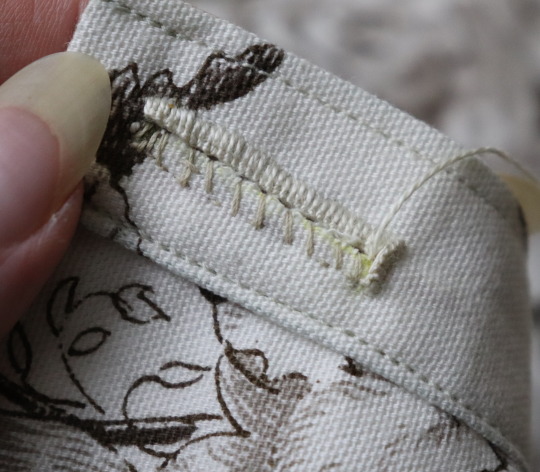
Do a whipstitch around the cut edges, to help prevent fraying while you work and to keep all those threads out of the way. (For my everyday shirts I usually do a machine buttonhole instead of this step, and then just hand stitch over it, because it's a bit faster and a lot sturdier on the thin fabrics.)

I like to mark out my button locations at this point, because I can mark them through the holes without the buttonhole stitches getting in the way.
For the actual buttonhole stitches it's really nice if you have silk buttonhole twist, but I usually use those little balls of DMC cotton pearl/perle because it's cheap and a good weight. NOT stranded embroidery floss, no separate strands! It's got to be one smooth twisted thing!
Here's a comparison pic between silk buttonhole twist (left) and cotton pearl (right). Both can make nice looking buttonholes, but the silk is a bit nicer to work with and the knots line up more smoothly.

I've actually only used the silk for one garment ever, but am going to try to do it more often on my nicer things. I find the cotton holds up well enough to daily wear though, despite being not ideal. The buttonholes are never the first part of my garments to wear out.
I cut a piece of about one arm's length more or less, depending on the size of buttonhole. For any hole longer than about 4cm I use 2 threads, one to do each side, because the end gets very frayed and scruffy by the time you've put it through the fabric that many times.
I wax about 2cm of the tip (Not the entire thread. I wax the outlining/overcasting thread but not the buttonhole thread itself.) to make it stick in the fabric better when I start off the thread.
I don't tend to tie it, I just do a couple of stabstitches or backstitches and it holds well. (I'm generally very thorough with tying off my threads when it comes to hand sewing, but a buttonhole is basically a long row of knots, so it's pretty sturdy.)

Put the needle through underneath, with the tip coming up right along that little outline you sewed earlier. And I personally like to take the ends that are already in my hand and wrap them around the tip of the needle like so, but a lot of people loop the other end up around the other way, so here's a link to a buttonhole video with that method. Try both and see which one you prefer, the resulting knot is the same either way.


Sometimes I can pull the thread from the end near the needle and have the stitch look nice, but often I grab it closer to the base and give it a little wiggle to nestle it into place. This is more necessary with the cotton than it is with the silk.
The knot should be on top of the cut edge of the fabric, not in front of it.

You can put your stitches further apart than I do if you want, they'll still work if they've got little gaps in between them.
Keep going up that edge and when you get to the end you can either flip immediately to the other side and start back down again, or you can do a bar tack. (You can also fan out the stitches around the end if you want, but I don't like to anymore because I think the rectangular ends look nicer.)
Here's a bar tack vs. no bar tack sample. They just make it look more sharp, and they reinforce the ends.

For a bar tack do a few long stitches across the entire end.

And then do buttonhole stitches on top of those long stitches. I also like to snag a tiny bit of the fabric underneath.

Then stick the needle down into the fabric right where you ended that last stitch on the corner of the bar tack, so you don't pull that corner out of shape, and then just go back to making buttonhole stitches down the other side.
Then do the second bar tack once you get back to the end.

To finish off my thread I make it sticky with a bit more beeswax, waxing it as close to the fabric as I can get, and then bring it through to the back and pull it underneath the stitches down one side and trim it off.


In my experience it stays put perfectly well this way without tying it off.
Voila! An beautiful buttonholes!


If you want keyhole ones you can clip or punch a little rounded bit at one end of the cut and fan your stitches out around that and only do the bar tack at one end, like I did on my 1830's dressing gown.

(I won't do that style in my video though, because they're not 18th century.)
Do samples before doing them on a garment! Do as many practice ones as you need to, it takes a while for them to get good! Mine did not look this nice 10 years ago.
Your first one will probably look pretty bad, but your hundredth will be much better!
Edit: Video finished!
youtube
And here's the blog post, which is mostly a slightly longer version of this post.
#ask#buttonholes#sewing#hand sewing#sewing tutorial#I've been procrastinating on the video this week#I want it done! I don't want to work on it I want new projects! I want to cut out more gloves!#currently forcing myself to do the last few buttonholes on these pants and then maybe I can cut out new gloves? as a treat?#but I hope I get some filming done tomorrow too
3K notes
·
View notes
Text
*sigh*
I'm seeing variations of this meme around again, so to today's (un)lucky 10000:
the "inside you there are two wolves" meme is racist. full stop. it was invented by a Christian pastor in the late 70s and attributed to the Cherokee nation, despite being completely made up. every native american / indigenous page I've ever followed denounces it as made up and racist, using their imagery to sound mystical and wise while ignoring the people themselves.
please consider using another format. try to use your guilt productively: I'm not calling you out, this is aimed at educating. You can't erase not knowing in the past, but you can elect to 1) not reblog these in the future, 2) delete any that are easy to delete, 3) help to spread education by following native people's accounts and news so that you hear this from them, not me.
#there is some 'debate' about the origins on the internet but i'm gonna be real:#when i can't find even one person who claims to be native who says it isn't racist and made up... it's racist and made up#do your own research but just... try to listen to the least heard voices and not just those trying to boost them#i'd go find a post on it from a native account but i am currently researched out due to IRL stuff i don't plan to talk about
2K notes
·
View notes
Text
To any disabled person undergoing tests to find What's Wrong: I hope your results come back the way you hope and that you receive the help you need. I hope you are not denied care, I hope you are taken seriously even after this, and I hope that you will be taken care of compassionately
#disability#currently going through something like this for myself and while i doubt there's anything 'wrong' i still did it#people are always weird about people who are disappointed or devastated about 'normal results' but...#...it's because normal results don't mean much when you still have the issue at hand...#...if my test came back that my back is physically normal that doesn't indicate that i don't have back pain does it?#because i am still in pain so often even if i have a 'physically normal' back...#...just as an example but i don't think a lot of abled people 'get it'#also like... if your tests are coming back 'normal' every time that might give your care providers pause...#...and they might just start infantilizing you or treating you like a hypochondriac...#...'are you SURE [problem] isn't just anxiety?' 'are you SURE you're actually experiencing [x] or are you exaggerating it?'
5K notes
·
View notes
Text
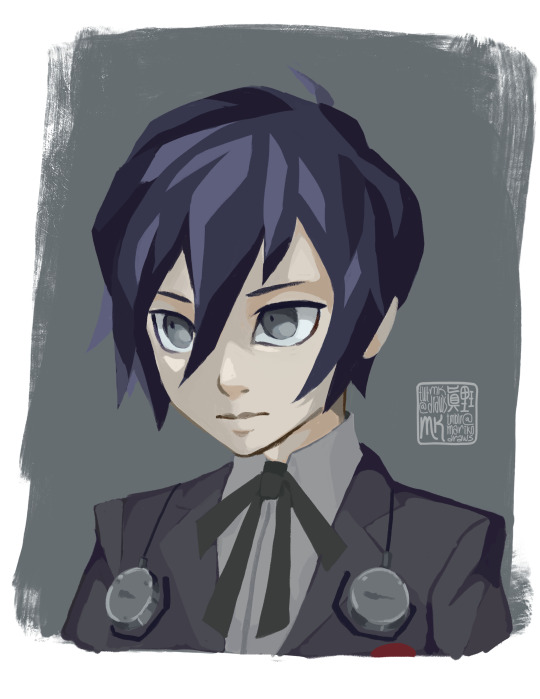
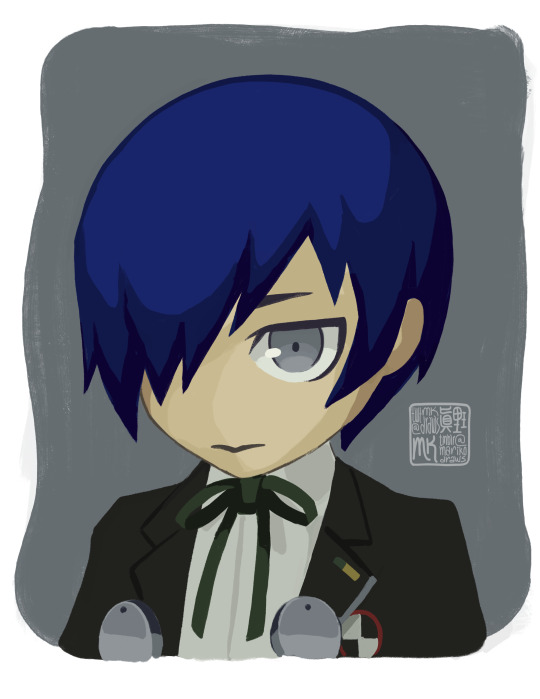
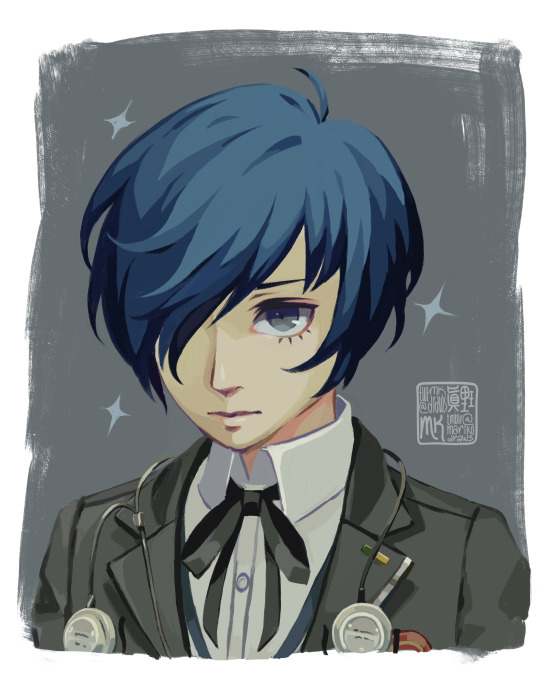
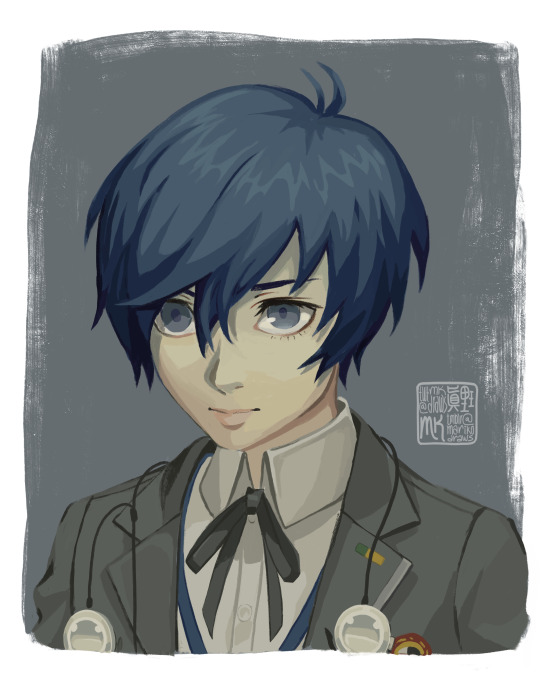
P3 protag studies based on his various character models 💙
#persona 3#p3 protag#minato arisato#makoto yuki#fanart#don't currently have a system i can play reload on so i am just rotating him#they each have their own charms and all that but his reload model is so nice and his eyes are so 🥺
2K notes
·
View notes
Photo
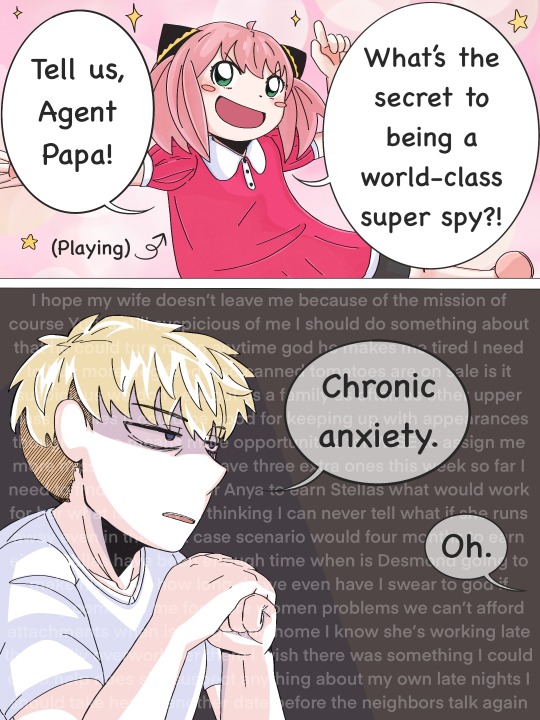

*slaps Loid like I’m a salesperson showing off a new car*: you can pack so much anxiety into this one man
#spy x family#loid forger#anya forger#sxf#spy family#loid x yor#yor x loid#twiyor#it's there if you read the text lol#twilight#if you do actually read the text please know I am very impressed#poor loid man he's in the one industry where his constant paranoia is actually justified#I'd say he should see a therapist but considering he's currently impersonating one I don't think it'd actually help#I haven't made multiple fanarts in a row in eons what is this 2017#let's pretend I can draw
13K notes
·
View notes
Text
Journalists in gaza are posting their last message.

What are we waiting for, what have we allowed to happen?
Ismail and motaz are the same journalists in this video by the way. They're people who always find light in the dark. Praying for them and all Palestinians.
#my god my god#i am not in Palestine but i am hurting for my country and I'm tired for my people how do they feel? when they're right there#ismail jood shared this#can't stop thinking of his son#i am full on having a panic attack#but we can't let despair one#we will be their voices#please don't tire and don't stop!#from the river to the sea palestine will be free#palestine#gaza#israel#important#current events#free palestine#ethnic cleansing#free gaza#gaza strip#gaza under attack#journalist#journaling#journalism#we are not numbers
2K notes
·
View notes
Text
every time I read about this Disney vs DeSantis thing and the bit about how the agreement doesn't end “until 21 years after the death of the last survivor of the descendants of King Charles III, king of England" all I can think about is some bumbling caper where the Florida government repeatedly tries to assassinate the entire royal family just to spite Disney
#ron desantis#desantis#disney#disney vs desantis#royal family#king charles 3rd#royalty#king charles the third#current events#florida#for the purposes of this bit the Florida Republican's primary weapon is gators#trained gator snipers on every roof top#are those snipers who shoot out gators or gators that are snipers? you decide#would you not you pay to see a movie where a Florida gator chases King Charles through the palace?#you would#don't lie#anyway is Disney evil in many ways? yes#am I also hoping Disney DESTROYS DeSantis in this? also yes#king of england
6K notes
·
View notes
Text
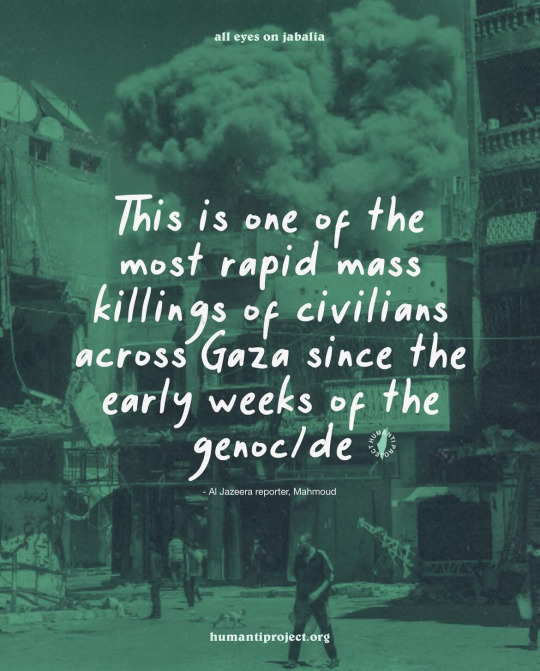
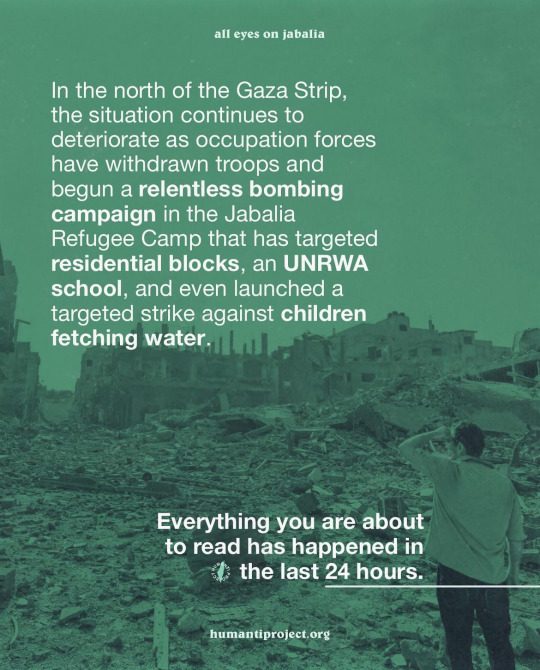
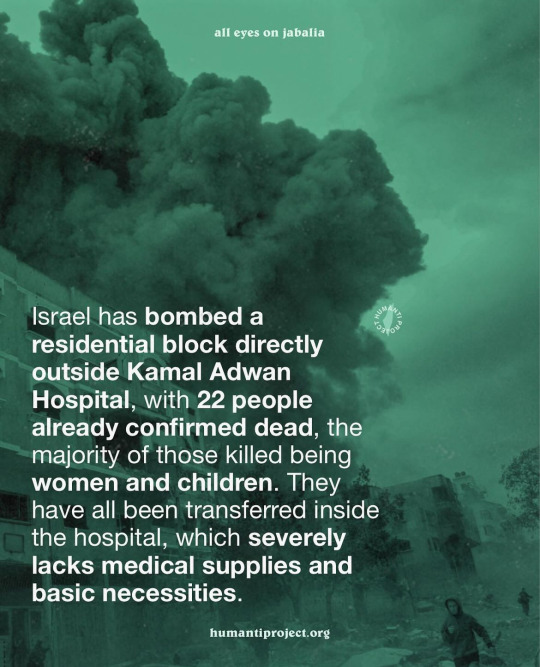
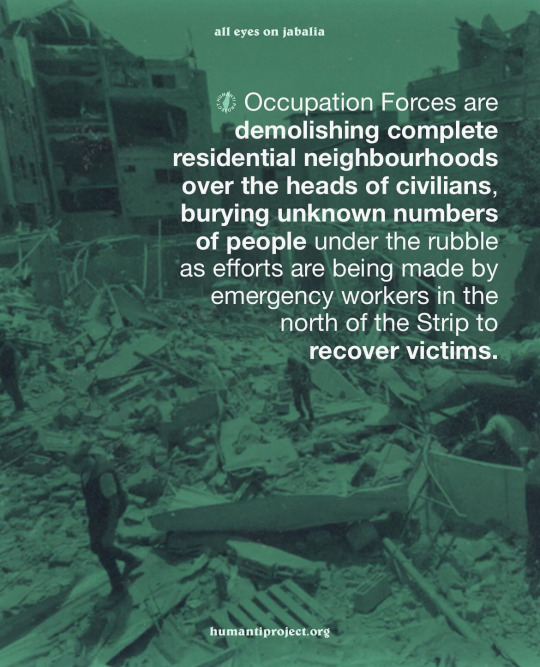
[Information 2 days old as of 20 May 2024.]
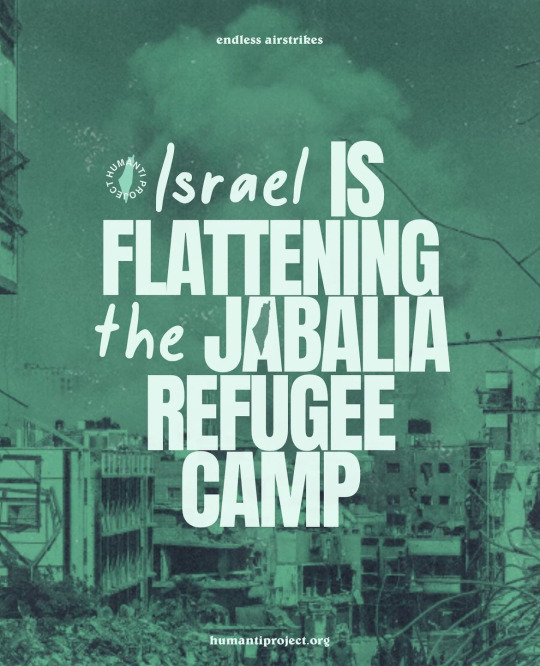
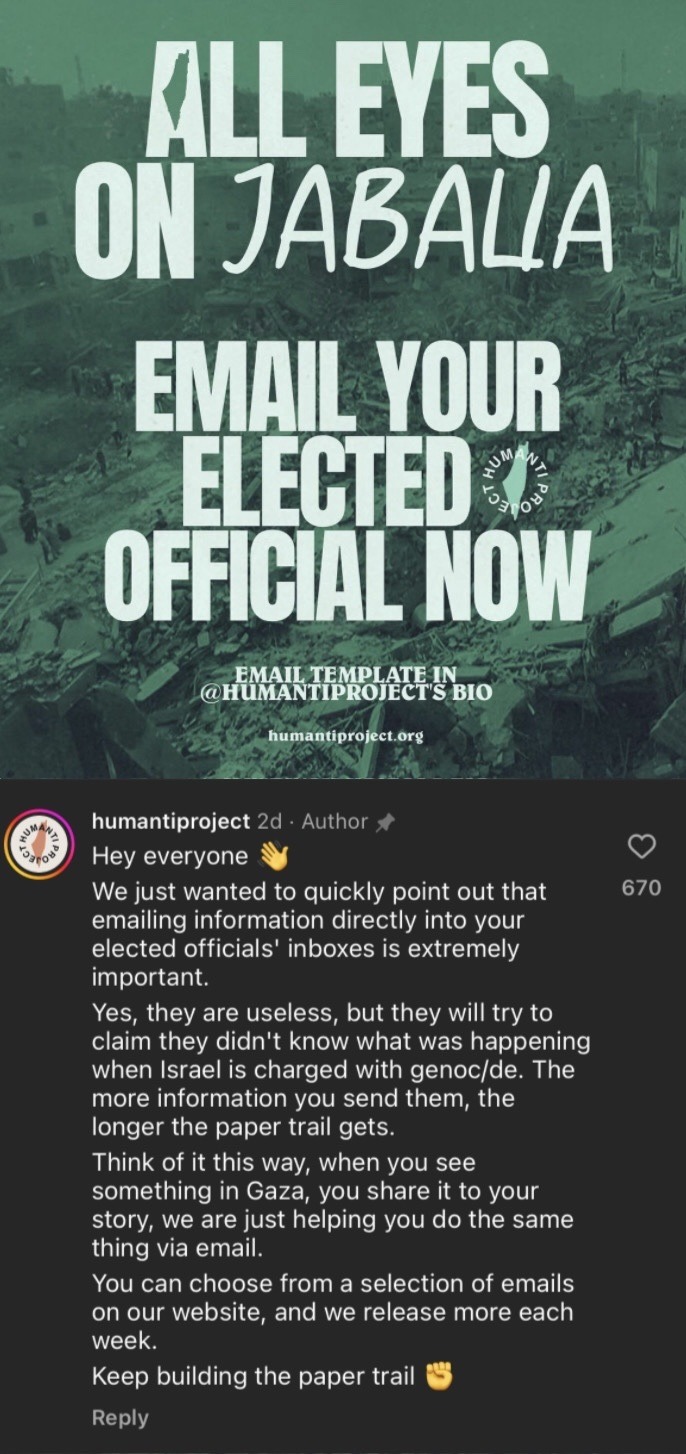
#i don't necessarily agree about emails but it's worth sharing#palestine#free palestine#gaza#free gaza#jabalia#jerusalem#israel#tel aviv#gaza strip#from the river to the sea palestine will be free#joe biden#benjamin netanyahu#gaza genocide#palestinian genocide#news#breaking news#palestine news#israel news#gaza news#yemen#news on gaza#current events#gaza update#iof#iof terrorism
922 notes
·
View notes
Text

ink and blackberry
ink by @/comyet
blackberry/error by @/loverofpiggies
#ok gotta say some things so i'll try to be brief#first off i feel the need to say sorry for drawing ink like this#ik mye said this bout drawing him with his current fit if it was possible but ahhrg#i like the idea of characters changing their clothes at a *certain* point#and second! please don't confuse this with NoL au#they may be similar but not at the same time cuz there's no blackberry in there#i just fell in love with blackberry and wanted to draw him !! interacting#undertale#undertale au#ink sans#error sans#errorink#error x ink#fluffy art#I ALSO FORGOT TO GIVE CREDITS IN THE BLUE AND FRESH DRAWING AAAHHRHF
806 notes
·
View notes
Last Seen Blogs

borderpoint
BORDER.POINT

linkotemius
linkotemius
eletainart
Eletainart

ispanski
km.txt

largando
Untitled