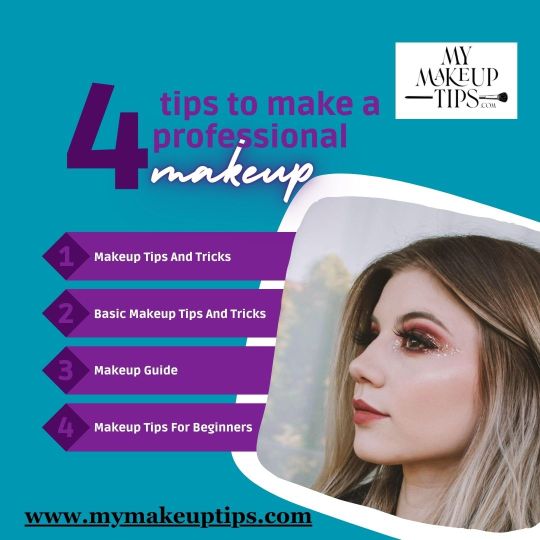
#basic makeup tips for beginners
Text
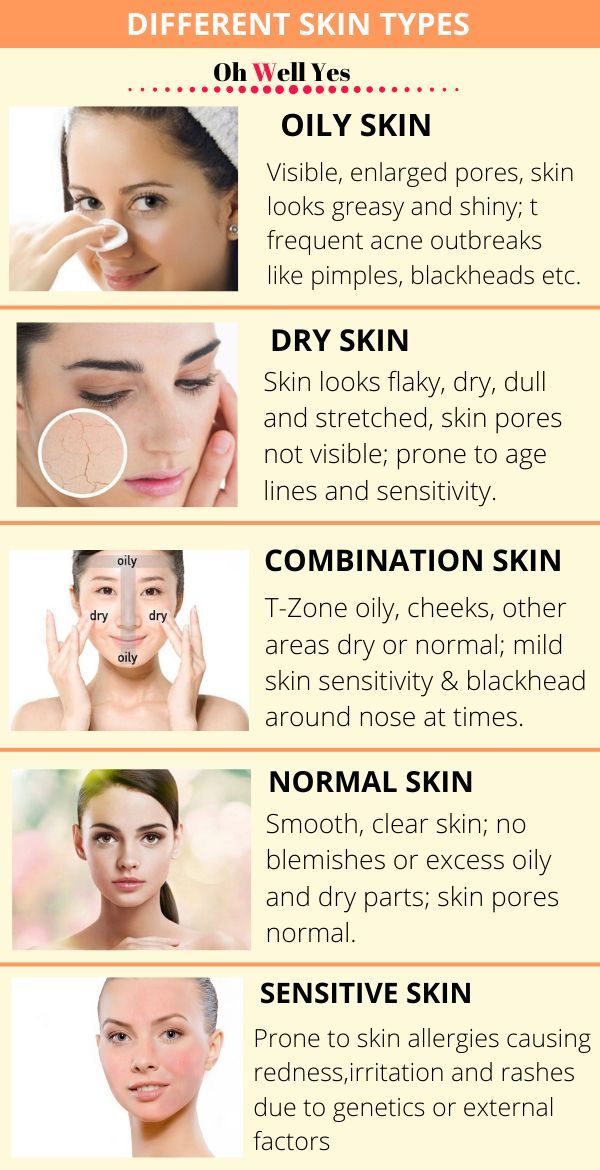
Makeup Tips for Different Skin Types - AZD Makeup & Skin Inc
Here are some makeup tips tailored to different skin types:
Dry Skin:
Start with a hydrating primer to create a smooth base.
Use a moisturizing foundation or a BB cream to add moisture and even out skin tone.
Avoid powder-based products as they can emphasize dry patches. Instead, opt for cream blushes and liquid highlighters for a dewy finish.
Set makeup with a hydrating setting spray to lock in moisture.
Oily Skin:
Begin with an oil-free mattifying primer to control shine and minimize pores.
Choose a matte or oil-free foundation to keep shine at bay throughout the day.
Use powder-based products such as pressed powder blushes and matte bronzers to set makeup and absorb excess oil.
Carry oil-absorbing sheets for touch-ups during the day.
Combination Skin:
Use a lightweight, oil-free moisturizer to hydrate dry areas without adding shine to oily zones.
Apply a mattifying primer to the T-zone to control oiliness.
Consider using a medium coverage foundation that balances hydration and oil control.
Use powder products on oily areas and cream or liquid products on dry areas for a balanced finish.
Sensitive Skin:
Look for makeup products labeled as hypoallergenic and fragrance-free to minimize irritation.
Conduct patch tests before trying new products to ensure they don't trigger allergic reactions.
Opt for mineral-based or natural makeup products, as they tend to be gentler on sensitive skin.
Remove makeup gently using micellar water or a mild cleanser to avoid aggravating sensitivity.
Normal Skin:
Lucky you! With normal skin, you have the flexibility to experiment with various makeup textures and finishes.
Choose a lightweight, moisturizing foundation for a natural look.
Experiment with different blush and bronzer formulas to find what works best for your preferences.
Set makeup with a translucent powder for a polished finish.
Enjoy experimenting with different makeup looks without worrying too much about specific skin concerns.
Regardless of skin type, it's crucial to cleanse your skin thoroughly before applying makeup and remove it completely at the end of the day to maintain skin health. Also, remember to wear sunscreen daily to protect your skin from harmful UV rays.
#professional makeup artist#professional makeup artist near me#professional makeup artist kit#professional makeup artist supplies#professional makeup artist classes#pro makeup artist near me#professional makeup artist course near me#professional costume makeup artist near me#professional makeup tips#professional makeup tips for beginners#pro makeup tips#pro makeup tips and tricks#pro makeup tips for beginners#professional beauty tips#professional makeup advice#professional makeup help#professional makeup artist tips#basic makeup tips for beginners#makeup tips for over 50#makeup tips for over 55#best pro makeup tips#pro eye makeup tips#pro makeup artist tips#how to do makeup like a pro#how to apply makeup like a pro
0 notes
Text
Unlocking Radiance: Understanding Why Your Makeup Looks Dry and Makeup Tips and Tricks for a Dewy Finish
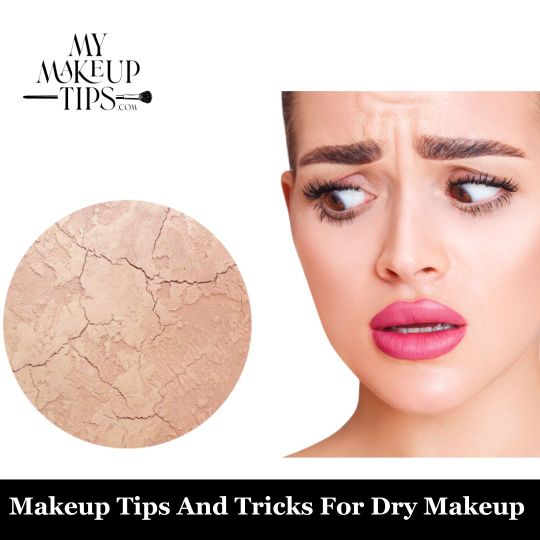
Ever ask yourself, Why does my makeup look dry? Many beauty fans want to have a beautiful, hydrated skin color, but sometimes their efforts don't quite work out.
Fortunately, there are easy and efficient Makeup Tips And Tricks that can help you achieve dewy, glowing skin. Let's examine various causes of makeup that appear dry and learn how to put new life into your beauty regimen.
For More Information Visit Here: https://mymakeuptips.com/unlocking-the-mystery-why-does-my-makeup-look-dry/
#Makeup Tips And Tricks#Basic Makeup Tips And Tricks#Makeup Guide#Makeup Tips For Beginners#Makeup Techniques
1 note
·
View note
Text
youtube
Ways To Use Highlighter In Your Makeup Routine | Beauty Basics | HT Lifestyle
Did you know that your makeup is just incomplete if you are not using a highlighter? Yes, Highlighter instantly lifts up our face, enhances the key areas, and gives a beautiful shine. Today we are going to show you some different ways in which a highlighter can be used.
#highlighter makeup#highlighter#how to apply highlighter#makeup#how to use highlighter#highlighter makeup tutorial#makeup tutorial#highlight makeup#how to use highlighter makeup#highlighter makeup tips#makeup revolution highlighter#highlighter eye makeup#highlighter tutorial makeup#how to use a liquid highlighter makeup#highlighter makeup challenge#liquid highlighter makeup tutorial#highlight makeup tutorial#makeup for beginners#ht lifestyle#beauty basics#Youtube
0 notes
Text
Makeup For Beginners: 10 Easy And Basic Tips For Everyone - Society19
Makeup For Beginners: 10 Easy And Basic Tips For Everyone

View On WordPress
0 notes
Note
my ask got eated I finks...
tips for transidol, kpop idols specifically:D? thankuuuu~
- @transvirtualangel :p

TRANS K - POP IDOL . . .
For the basics , learning Korean is obviously a good start ! There are lots of online free courses for that !! :D
Familiarize with Korean beauty standards ( if you haven't already ! ) - by being in the kpop community you can already learn a lot , but following korean influencers can help too !
Learning dances - there are lots of tutorials on Youtube that gently teach you popular kpop dances - there is a range of difficulty , from beginner to advanced , and even disability friendly ones that we personally had lots of fun trying out ! :D
Taking up dance classes can help to cultivate your skills ! There are dance classes specifically based around kpop - whether irl meet ups or online courses !
Invest in vocal coaching / singing classes ! These can help so much to help you practice - there are many free personal courses , but also YouTube videos for at home / do-it-yourself coaching !
Tips ; learning how to rap gives you lots of point for when you may try auditioning ! So try learning in english and korean !
Invest in Korean skincare - it's defiantly god sent , but kpop idols value their skincare , so taking care of yourself is also very good !
Euphoria tips ! ↓
You can record yourself dancing and edit them on simple editing apps , like capcut or velocity , to appear like fancams !
Try doing korean makeup ! There are lots of tutorials on Youtube or you can follow korean influencers that do their makeup tutorials !
You can take pictures and print them out as photo cards !
If you have friends who are into kpop - you can propose the idea of all taking pictures and ' trading ' eachothers photos for fun ! ( whether or not you aren't out as transidol !! :D )
Write your own songs ! There are lyric websites that can help you get some inspiration + simple song makers like Soundtrap where you can create the music !
Join kpop dance groups ! There are online groups dedicated to meet up somewhere and to record group dances - which can make you feel like you have your own group !
Hope this helped - good luck transitioning and stay safe !


#.ᐟ my dear corpse ..#radqueer#rq 🌈🍓#rqc🌈🍓#pro radq#rq#pro radqueer#pro rq 🌈🍓#radqueer safe#transid#pro transx#transid community#pro transid#transid safe#transid please interact#transid positivity#transid transitioning tips#transid transition#transid transitioning#transid tips#transx#radqueer community#radq#radq safe#pro rq#rqc#rq safe#radqueers please interact#rq community#rq 🍓🌈
41 notes
·
View notes
Note
hey, how'd you learn how to do your makeup? i'm kind of a novice over here
Hey!! So I learned via a lot of methods - tips from friends, videos, googling. It's hard for me to remember a lot of my sources over the years. That being said, I'm going to try to link the ones I know help the most.
The Pretty Fix - this channel hasn't updated in a while but has a lot of tutorials designed to be trans-inclusive and beginner friendly. It's a great resource for just starting out and for understanding a lot of basic techniques and things to keep in mind without it being overwhelming or throwing too many product types at you.
How to Apply Eyeshadow PERFECTLY (beginner friendly hacks) by AlexandrasGirlyTalk - This video is short and simple and yet probably the most effective one I've seen when it comes to breaking down eyeshadow. I still haven't fully 100% mastered doing eyeshadow, but I feel a lot more confident with it after watching this a few times.
Dude, eyeliner changes your whole face by Alexandra Anele - Another good technique and theory video that helps a lot when trying to figure out eyeliner, which IMO is the hardest part of trying to do eye make up and something I'm only starting to feel good with as of this year
NEW Updated 2021 E-Girl Makeup Tutorial! by hannah owo - This one might seem silly at first glance because, y'know, E-girl, but honestly this is one of the most helpful makeup tutorials I've found and has drastically affected how I've done my makeup. What makes this one so good and helpful IMO is that unlike a lot of other makeup tutorials you can find, this one uses a lot of drugstore and bargain brands (at one point it recommends using a Crayola marker to create freckles) and shows the ways one can make a super elaborate look using a surprisingly small amount of products.
FACE BASICS: Hide Facial Hair (using Makeup!) Part 2: Makeup by David K Davey - I don't really do a lot of this anymore (I used to go way overboard on covering that area early in transition lol) but for those worried about beard shadow or discoloration in that area, this helps teach how to be cover that up and the colour theory behind it. Mastering this can be a godsend.
Those are the main links I can think of right now! For someone still getting in, my best advice is to get the basic tools you'll need - primer, concealer, foundation, eyeliner, mascara, blush - as well as a sponge or brush kit and play around with them, using tutorials and googling every time you think you come into an issue. Then you can start looking at more advanced things like contours and eye shadows, and the good thing about eye shadows is that most palettes have a bunch of videos online of people doing various looks and tutorials with them, meaning if you find yourself stuck, you're almost always guaranteed to find something you can use as a reference.
Makeup is hard and I still don't feel like I have a perfect understanding of it, but it can be quite fun once you find a set up you like and start getting comfortable enough to experiment with new looks and products! I hope this could help at all and I wish you the best of luck going forward!
972 notes
·
View notes
Note
This might be an odd or personal question, but could I ask how you started knitting and where you started as a beginner? Or what would you recommend? I’ve tried to join clubs and groups irl, but there’s so much drama and gossiping. When I said I didn’t want to take part in that aspect, they started ostracizing and gossiping about me. Any websites, yt channels or books you’d recommend for a beginner?
--
Haha.
My friend, this does not even register on the scale of deeply personal or odd questions people have sent me.
I've been trying to remember exactly how I started and why (like, even before this ask). I think it was on a family vacation to Scotland the summer before I started college. That would have been in 1999.
I taught myself from one of those awful 90s pamphlets with the line drawings. They're a nightmare compared to being able to see someone do the motions in person or even in a video. I had some awful plastic needles and no guidance on yarn and just knit with what I found at some shop there. Do not recommend!
I achieved what I wanted during college, which was to make a nice cable-knit sweater that I still wear, and then I got frustrated with crappy acrylic yarn and drifted away from knitting until a year or so ago.
The fact is, I basically didn't do beginner projects. I moved straight from making one rectangle to making grandiose sweaters or whatever else struck my fancy. (But if you want to know, I was using Viking Patterns for Knitting and a bunch of Alice Starmore books, all of which you can still buy.) I know plenty of people who did it this way, but you certainly don't have to.
And you definitely don't need to learn from a terrible 90s printed pamphlet!
Luckily, nowadays, you can find a tutorial on just about anything on Youtube. I enjoy watching the technical and historical types discuss quirks of knitting you might not think of without years of practice or research.
Roxanne Richardson is great, for example.
Look for somebody old, not wearing a lot of makeup, and not talking about their indie dyeing/yarn business and you'll avoid most of the clowns who learned to knit five minutes ago and now want to be knitfluencers.
When I want a super simple technique tutorial, I usually end up looking at either Nimble Needles or VeryPink Knits. I find her super annoying, but her tutorials are spot-on. Norman's voice is much more soothing and I just enjoy his presence more, but both of them have good ultra close-up shots of what they're doing (which lots of vloggers don't because it requires special equipment).
I'd just figure out what kind of finished products you want to use knitting for and then find patterns and tutorials geared towards those.
Cables are relatively easy. Stranded colorwork requires a fair amount of physical coordination and some people find it rather difficult at first.
Circular needles are far more popular than traditional straight ones for people starting today.
Cotton yarn is relatively less nice to knit with than wool for most people, but it tends to be the natural fiber available at a low price point from major retailers.
Picking up general tips like that by watching various youtubers will help you pick a project that won't be too painful to work on.
People who naturally knit loosely should consider grippy bamboo or wooden needles. People who naturally knit tightly should consider slippery metal ones.
My biggest piece of advice is that you're usually better off with something "hard" that you actually like rather than a "practice" project you don't care about, at least after you've made like one rectangle to practice doing a knit stitch at all.
--
Finding community can be hard, and yes, some crafting hobbies are infested with drama.
But if you just want to know how to knit, you're way better off with some video tutorials and a nice pattern you like.
134 notes
·
View notes
Text
The Basics of Skin Care
A 100 skincare tips for beginners:
Cleansing:
1. Cleanse your face twice a day.
2. Use a gentle, sulfate-free cleanser.
3. Avoid hot water, as it can strip natural oils.
4. Use a cleansing brush or washcloth for gentle exfoliation.
5. Remove makeup before bedtime.
6. Double cleanse if you wear heavy makeup.
7. Don't over-cleanse; it can lead to dryness.
Exfoliation:
8. Exfoliate 1-3 times a week, based on your skin type.
9. Choose chemical exfoliants like AHAs or BHAs.
10. Be gentle when physically exfoliating.
11. Avoid over-exfoliation to prevent irritation.
Moisturizing:
12. Use a moisturizer suitable for your skin type.
13. Apply moisturizer while your skin is slightly damp.
14. Don't forget your neck and chest.
15. Consider using a humidifier in dry climates.
Sun Protection:
16. Always wear sunscreen, even on cloudy days.
17. Use a broad-spectrum SPF of at least 30.
18. Reapply sunscreen every 2 hours.
19. Wear protective clothing and sunglasses.
20. Avoid tanning beds and excessive sun exposure.
Anti-Aging:
21. Use products with antioxidants like vitamin C.
22. Apply retinol at night for anti-aging benefits.
23. Consider peptides for collagen support.
24. Stay hydrated to maintain skin elasticity.
25. Get enough sleep for skin repair.
Hydration:
26. Drink plenty of water for overall skin health.
27. Use a hydrating serum or hyaluronic acid.
28. Avoid hot showers that can dry out your skin.
29. Limit alcohol and caffeine intake.
Acne Management:
30. Use salicylic acid for acne-prone skin.
31. Don't pop pimples; it can lead to scarring.
32. Change pillow cases regularly.
33. Maintain a balanced diet to reduce breakouts.
34. Consult a dermatologist for severe acne.
Skincare Routine:
35. Develop a consistent skincare routine.
36. Patch test new products.
37. Customize your routine based on your skin's needs.
38. Consider professional facials occasionally.
Makeup:
39. Clean makeup brushes and sponges regularly.
40. Avoid sharing makeup to prevent infections.
41. Choose non-comedogenic makeup products.
42. Remove makeup before going to bed.
Eye Care:
43. Use an eye cream to address under-eye concerns.
44. Be gentle when applying and removing eye makeup.
45. Get enough sleep to reduce under-eye puffiness.
Lifestyle:
46. Manage stress to prevent skin issues.
47. Get regular exercise for better blood flow.
48. Avoid smoking and secondhand smoke.
49. Limit alcohol consumption.
50. Eat a balanced diet rich in fruits and vegetables.
Special Treatments:
51. Use a face mask 1-2 times a week.
52. Try sheet masks for extra hydration.
53. Consider facial oils for added moisture.
54. Use a lip balm to prevent chapped lips.
Skin Conditions:
55. Consult a dermatologist for skin conditions.
56. Use products with soothing ingredients for sensitive skin.
57. Eczema-prone skin should avoid harsh products.
58. Rosacea-prone skin should use gentle, non-irritating products.
59. Psoriasis-prone skin may benefit from salicylic acid.
DIY Skincare:
60. Be cautious with DIY treatments; research first.
61. Natural ingredients like honey and aloe can be beneficial.
62. Avoid DIY recipes with harsh or abrasive ingredients.
63. Test DIY masks on a small area first.
Sleep:
64. Get 7-9 hours of sleep for skin regeneration.
65. Sleep on a silk or satin pillowcase to reduce friction.
Hands and Feet:
66. Moisturize hands and feet, especially in winter.
67. Use sunscreen on your hands to prevent age spots.
Body Skin Care:
68. Don't forget to moisturize your body.
69. Exfoliate your body regularly.
70. Take short, lukewarm showers to prevent dry skin.
Shaving:
71. Shave in the direction of hair growth.
72. Use a sharp, clean razor.
73. Apply a moisturizing shaving cream.
Hair Care:
74. Use a gentle shampoo and conditioner.
75. Avoid hot water when washing your hair.
76. Protect your hair from UV damage.
Hormonal Changes:
77. Adjust your skincare routine during hormonal changes.
78. Birth control can affect skin; consult a dermatologist.
79. Manage menopausal skin changes with skincare.
Allergies:
80. Be aware of allergens in skin care products.
81. Perform a patch test for new products.
82. Hypoallergenic products can be a safe choice.
Tattoo Care:
83. Follow aftercare instructions for tattoos.
84. Use a mild, fragrance-free lotion.
85. Avoid direct sunlight on a healing tattoo.
Skin Care Tools:
86. Cleanse skincare tools regularly.
87. Replace loofahs and brushes when they wear out.
Consult a Professional:
88. If you're unsure about a product, ask a dermatologist.
89. Consider professional treatments for specific concerns.
Inflammation:
90. Use products with anti-inflammatory ingredients.
91. Manage skin redness with calming products.
Massage:
92. Gently massage your face for better circulation.
93. Use upward motions to prevent sagging.
Eyes and Lips:
94. Use SPF lip balm to protect your lips.
95. Choose an eye cream with ingredients like caffeine.
Preventive Care:
96. Start a skincare routine early for preventive care.
97. Be patient; skincare results take time.
98. Embrace your natural beauty.
99. Avoid comparing your skin to others'.
100. Remember that skincare is individual; what works for one person may not work for another.
These tips can help you maintain healthy and radiant skin. However, always consult a dermatologist for personalized advice based on your skin's unique needs.
98 notes
·
View notes
Note
Ok from a transfemme to a trans woman - how do you makeup? I've been wanting to get into it for so long but the first time I tried was an absolute disaster, and I can't find any tutorials that go through the absolute beginner basics
tbh, you have to just keep on doing it even though it’s a complete disaster. i started my transition in 2020 but i was doing makeup and “cross dressing” for nearly 8 years before i considered myself to be trans. and it was years before i was able to do makeup to the point where i felt good about the way that i looked every time i did it.
that being said, there’s no guide that’s gonna be able to tell you everything you need to know but i’ll try to give as many tips and jumping points i can in order for you to try out things and figure out what to look up.
- make up is different for everyone - everyone has a different face shape, eye shape, cheekbones, jawline, complexion, etc. and the way to do makeup that looks good for you specifically is going to vary a shit ton based on those things. when you look up stuff, look up how to do makeup for a certain set of features. figure out what face shape you have, skin types for foundation, etc.
- there’s no one right way to do it - i do a bunch of things that are “technically incorrect” because i’ve tried it the “right” way and it just didn’t work for me. so i figured out something that i liked instead and make that a technique i used regularly. also even though people will say you’re supposed to do certain things, a different technique might yield a different result. as an example, conventional wisdom will say use primer, foundation, then a translucent or setting powder, then a setting spray. recently a very popular technique has been using moisturizer, then setting powder, then setting spray, THEN putting on all your other makeup and supposedly it lasts longer. there’s literally no “correct” way, it’s just whatever works.
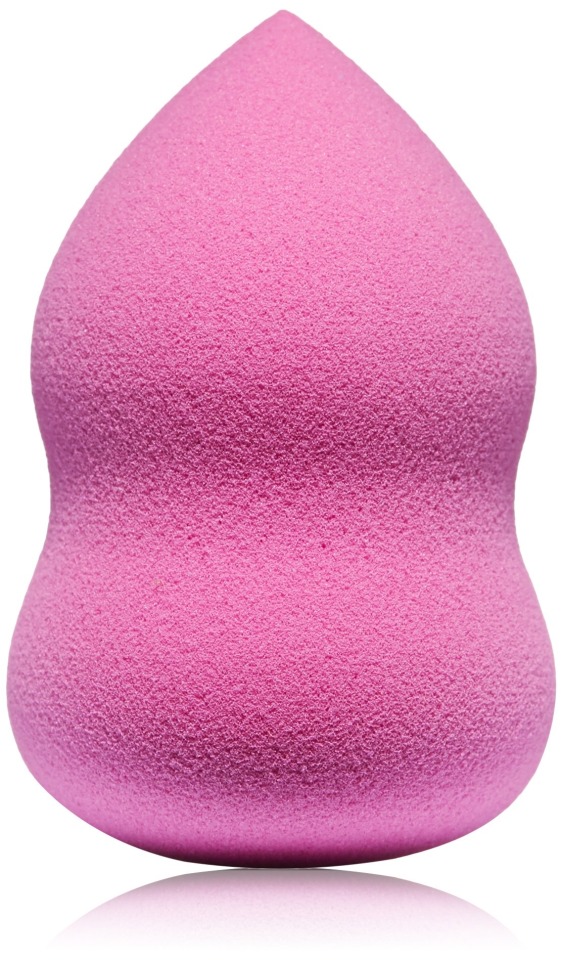
- blend the shit out of everything. this is the one technique which pretty much applies for everyone. blend blend blend blend. i like using a beauty sponge. run it under the tap for a second (literally a second, you want it moist not wet) to wet the sponge and then use dabbing motions to blend your makeup.
- asking for help at makeup stores helps A LOT. i’ve had really really good experiences asking for help at makeup stores even though i was super uncomfortable with the idea at first. i found that a lot of people were judgement free and even very gender affirming even when i was presenting masc. and i live in the south!
okay now to more granular stuff - here’s the basics of what i would consider to go into a “full face” makeup routine - primer, foundation, concealer, highlight/contour, setting. eye makeup would add additional things - eyeliner, mascara/lashes, eyeshadow. lips add additional things as well - lipstick, lipliner. ill try to go through the entire process and add my fav products or two. (i should probably make this into a video series tbh)
1) primer - it protects your skin and makes your makeup stay longer and look better. use it.
- my fav: the ordinary - high fluidity primer
2) color correcting concealer - an optional step for transfemmes like me with darker colored facial hair. using a reddish or orangish color correcting concealer or lipstick over the areas where your facial hair shows through the skin will neutralize the shadow that shows through foundation. add a little bit, sparingly, blend with a sponge.
- my fav: la girl color correcting concealer orange
(the best one of these is made by dragun beauty who is a trans woman…but who did blackface…so don’t buy her shit)
3) foundation - figuring out your color is hard. look up a guide, ask in store, try a bunch of different ones. there’s a difference in coverages. full coverage means its made to cover everything. buildable means you need to apply and blend a few times and is good for if you don’t want heavy coverage everywhere. don’t use too much otherwise you’ll look like a plastic doll. unless you want to look like that then go nuts. blend the shit out of it so that it doesn’t cake up.
- my fav: juvias place bc it’s full coverage and actually has my skin tone as an asian person
4) concealer - this is different from color corrector and i usually do this after foundation. this is just a touch up for any blemishes, dark spots under eyes, pimples, shit like that. just use a tiny tiny dab and blend. this is also hard to get your color right so get help if you can.
- my fav: colourpop concealer, or nars concealer if you’re a fancy bitch
5) blush - i don’t really use blush much but blush is one of those things where you should look up a guide for how your face is shaped. positioning blush in different ways will help shape your face in different ways.
6) contouring - okay this is the hard one. i can’t tell you how to contour your face because this is one that varies a shit ton from person to person. the basic gist of it tho is that you are using a contouring stick, bronzer, or palette to add shadows to your face. when you put on foundation it makes everything an even color and makes you look flat, so contouring is basically drawing those shadows back in to contour your face. you can do this in so many ways even for your own face so imo, you experiment and see how you like it. typical places for contour to go will be under my cheekbones, on my nose bridge, sometimes under my jaw to slim the face.
- my fav: i can’t remember i’ll come back to this one
also i drew this diagram a long time ago to help myself get the idea of where i wanted to put it on my own face and i went from there. the brown was contour and the other color was highlight. i don’t do it like this at all anymore but it helped to get the basic idea at first.
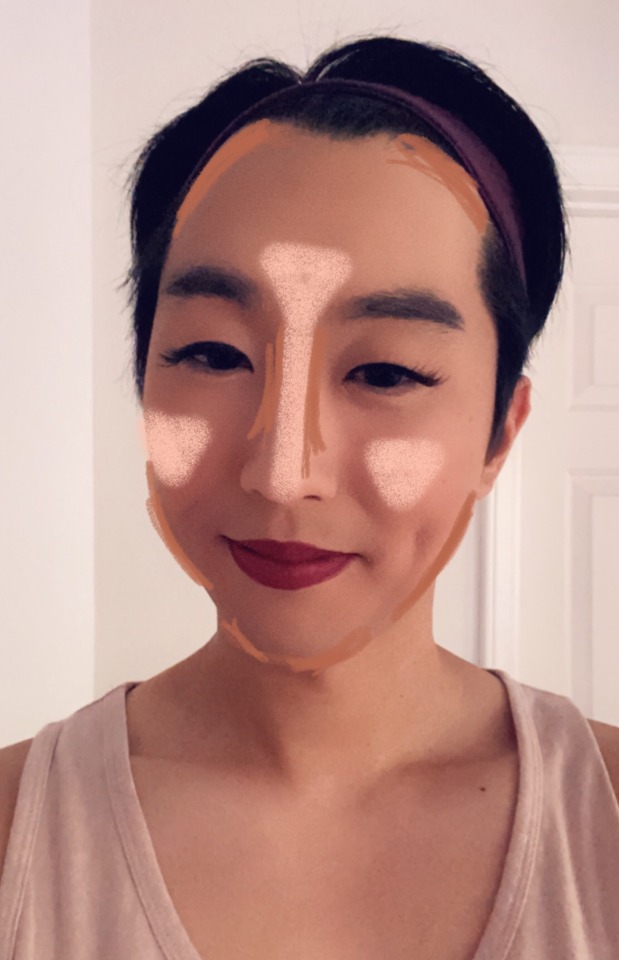
7) highlight - the opposite of contour where you’re making certain parts of your face brighter to contrast the darker parts. typically goes on your cheekbones and nose.
- my fav: watts up by benefit
8) translucent powder/setting powder - okay so this one can either go after foundation, before blush, contour, highlighter, or here. basically it’s a powder that goes evenly over your whole face to help your makeup stay where it is. personally i usually do it after foundation instead of here but either works. basically you take a powder brush (the big floofy ones) and then put it all over lightly.
- my fav: nyx hd finishing powder
9) setting spray - it’s a spray that you put on last to help your makeup stay where it is. shake up the bottle real good and just mist it all over.
- my fav: tarte shape tape stay spray
okay i’m tired now and that’s plenty for now. i’ll update with lip and eye stuff later.
338 notes
·
View notes
Note
I come from a toxic and pathological home… I don't know much about self-care and things like that… can you give me some advice? I would like to start this… I never had a mother to teach me this and I'm on unfamiliar ground… I can't even put on makeup because it was forbidden.
First of all, I'm so sorry that you weren't allowed to experiment with self-care in your upbringing and I think it's great you want to take the initiative to learn now. I started getting into self-care around 13 and I think I can give a fairly simple and affordable run down. *take notes*
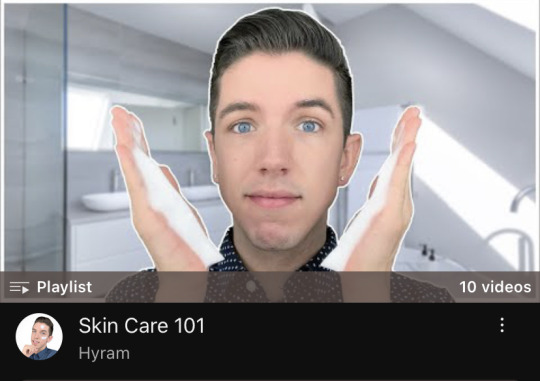
Skincare: The key to skincare is learning what your skin type is (dry skin, oily skin, or combination) and what issue you want to fix (hyperpigmentation, teen acne, etc). Then try to develop a morning and night routine that you do EVERY DAY. The simpler your routine is the better. 5 steps is usually normal. Invest in a good cleanser, exfoliator, moisturizer, serum, and SPF. There's a great YouTuber named Hyram who suggests great products for all different skin types. I suggest watching a few of his videos and taking notes.
Hair: Hair Care is different for everyone. Always look at hair tutorials and wash routines from people who have the same hair texture as you, and same hair struggle as you (length, frizz, split ends, etc.).
Always go for the slightly more expensive hair care products (but it doesn't have to be anything crazy) and try to avoid parabens if you can.
Keep your hair wrapped at night with a bonnet or silk wrap so it's preserved
Wash, Condition, and Moisturize it regularly
Keep it styled even if the style is a simple ponytail. You'll eventually find your signature style.
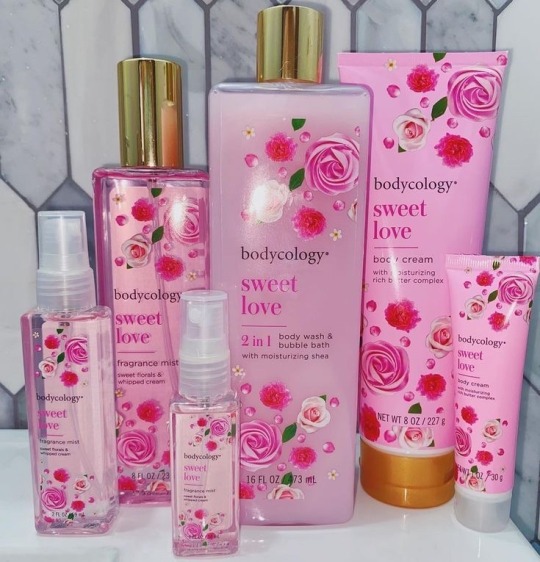
Body/Fragrance: Invest in some smell-good lotions, soaps, body scrubs, and perfumes.
Decide how you want to smell/feel every day.
Some really basic scents are cotton candy, vanilla, and strawberry but you can experiment.
Bodycology and Treehut have really good scents for an affordable price and can usually be found in Walmart or Target.

Makeup: If you're a beginner I'd search "Natural Everyday Makeup" tutorials on YouTube and take notes from women who are the same color as you.
Usually, a little concealer under the eyes, a nice sharpened eyebrow, a little eyeliner wing, mascara, and lip-gloss will suffice for beginners.
You'll need to buy a setting spray so your makeup doesn't melt throughout the day, a beauty blender, and a concealer brush.

Additional Tips
Make an "It Girl" playlist that you listen to in the morning or whenever you're getting ready with music that makes you feel pretty.
Buy a nail filer kit and keep your fingers and toenails filed and polished with a simple clear nail polish.

Dedicate relaxation time to yourself. This can be watching chick flicks on the weekend, or taking yourself out to eat when you have free time. Get used to treating yourself here and there.
I hope this helps and enjoy your journey💕✨

30 notes
·
View notes
Text
Mastering the Art of Makeup Tips and Tricks for a Flawless Look
Enhancing your natural beauty with makeup is an art form, and with the right Makeup Tips And Tricks, you can achieve a flawless look. Here are some key pointers to help you master the art of makeup:
Skin Preparation: Start with a clean, moisturized face. Use a primer to create a smooth canvas for your makeup.
Foundation Match: Choose a foundation that matches your skin tone. Test it on your jawline to ensure a seamless blend.
Concealer Magic: Hide blemishes and dark circles with concealer. Apply in a triangular shape under your eyes for a brighter look.
Blending Basics: Invest in good makeup brushes and blend your foundation and concealer well to avoid harsh lines.
Contour and Highlight: Sculpt your face with contouring and add a touch of highlighter on the high points of your face for dimension.
#Makeup Tips And Tricks#Basic Makeup Tips And Tricks#Makeup Guide#Makeup Tips For Beginners#Makeup Techniques
1 note
·
View note
Text
youtube
Basic Makeup For Office | Beauty Basics | HT Lifestyle
Do you also struggle while applying makeup for work? Today we have just the solution for you all. We are gonna show you basic makeup for the office without overdoing it. So let's star
#makeup for beginners#easy makeup#makeup tutorial#everyday makeup#quick makeup#natural makeup#simple makeup#makeup tips#basic makeup for office#10 minute makeup#5 minute makeup#makeup#makeup magical#makeup hacks#office makeup#office makeup look#office makeup tutorial#makeup for work#work makeup#office makeup for beginners#youtube#Youtube
0 notes
Text
Basic Makeup Tips: A Guide for Beginners
Welcome back! Today, I'm excited to share some of the essential makeup tips I've learned over the past few years. While I'm not a professional makeup artist, I've picked up some valuable insights that I think you'll find helpful. Let's get started!
Prepping your face before applying makeup

1. Cleanse your face using your facial cleanser or a facial pad. This is remove the impurities, dirt and oil from your skin.
2. Secondly, you go in with any serum of your choice. The serum helps to hydrate your skin. I highly recommend the Neutrogena Hydra Boost Serum.
3. Then go in with a moisturizer, I like to use La Roche Posay Double Repair face moisturizer.
4. Lastly, apply a hydrating sunscreen (SPF). I use the Supergoop Play Sunscreen.
~ This last part is optional, but applying primer can be done. Elf Pore Putty Primer is a must!!
Selecting the Right Foundation!
Undertones ૮₍ ˶• ༝ •˶ ₎ა

Choosing the right foundation
ʕ ᵔᴥᵔ ʔ
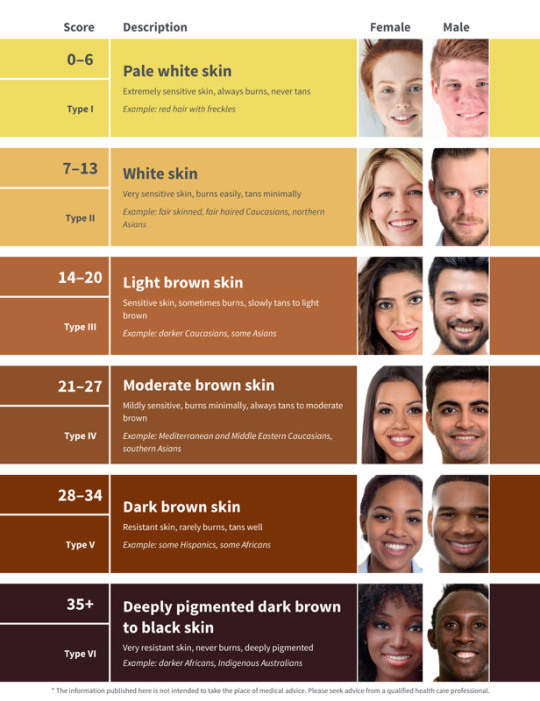
Discover Your Skin Tone Category Using the Six Options Provided in the Image Above!
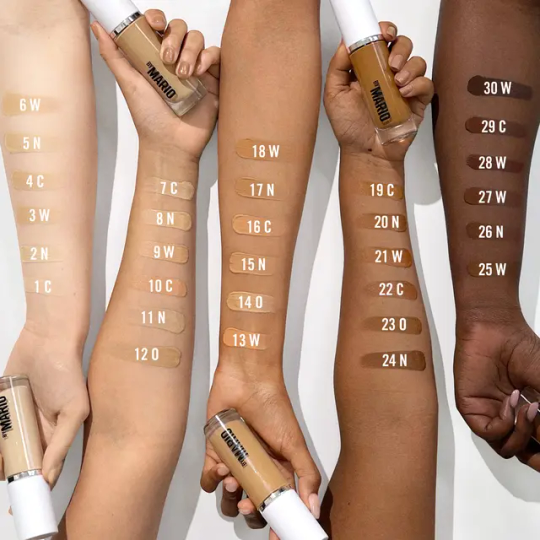
Now, all you have to do is see which color foundation is suitable for your skin!
Color corrector I bought ! ૮ ˶ᵔ ᵕ ᵔ˶ ა

Skin types ଘ(੭ˊᵕˋ)੭* ੈ✩‧₊˚

Choosing the Right Foundation for Your Skin Type ˚ʚ♡ɞ˚
Consider the following tips to pick the appropriate foundation for your skin type:
Oily skin: go for an oil-free matte foundation.
Dry skin: radiant foundation is your best friend.
Combination skin: opt for a hydrating oil-free foundation.
Conclusion of Today's Session!
Thank you for joining us today! I hope you enjoyed our session. Don't forget to come back next Sunday at 11:30 pm for our next meeting !
❤ (ɔˆз(ˆ⌣ˆc)

Stay safe beauties ꒰ᐢ. .ᐢ꒱₊˚⊹
3 notes
·
View notes
Note
how can your sims look so different and unique?? how do you manage that, i'm desperate 😭
Well, i spent a lot of time in the sims 3 and somehow i learned basic principes of how to do different characters. In fact, it's constant developing, i'm always try something new, even if this don't work out, change my sim's faces when i don't see them resemble to their prototypes anymore or their features just don't look right to me.
I can give some tips on how to differ your characters:
Don't afraid to play with sliders. Try to study how they affect the sim's face! Move them a little further, just to see how they work.
Try to make a sim from reference picture. I often do that, but some of my sims doesn't really have a face claim. They're just a product of my imagination :D Also, paying attention to a facial features may help to develop understanding of face proportions and shapes of features which help to create more different sims. I recommend to watch some pinterest boards with close-up faces of models or just different people.
Use different CC. Try to make completely different sim using other cc. For example, you used one skintone multiple times. This time try another one, same goes for eyebrows and other genetic cc.
Use makeup. And i'm talking not about eyeshadows or something like that. There is a lot of makeup such as nosemasks, contouring blushes (which really helps to frame sim's individual face features) eyebags (makes sim's eyes more prominent and realistic) and of course face shine. And don't forget about lips! These small details really helps to bring life-like looking to sim.
I think that's all! This is my general tips for beginners, you can also check this post. It's more expanded and have example pictures. I hope this helps <3
17 notes
·
View notes
Text
Makeup tips
The Basics Always wash your face morning and night to help breakouts and oily skin. Then apply moisturize each time with a moisturizer that works best for you.
Skin Prep 1st Step: Moisturizer 2nd Step: Primer
Base Apply foundation with a beauty sponge, apply concealer to
Above & Below the Brow. Blend a thin line of concealer on top of and underneath the brows to make eyebrows pop and open up the eyes.
The Inner Corners and Under the Eyes.
Across the Bridge and Down the Center of the Nose.
Around the Mouth.
Center of the Chin.
Around Each Nostril.
Apply contour/bronzer to
Apply your sculpting shade to the hollows of your cheeks, the temples, the jaw line, sides and tip of your nose. Never forget to blend, blend, blend!
Apply the Highlighting shade on top of the cheekbones, down the centre of the nose, the lip's cupid bow and your brow bone for candle-lit skin!
Than take a brush or sponge to apply baking powder to under the eyes, jawline, above the lips and anywhere else you'd like
After apply blush to cheek bones and tip of nose,
Eye makeup Apply eye shadow primer to eyelids
With a smaller makeup brush apply a light shade of your choice of eye shadow, onto your eyelid. than with a darker shade than before apply to the crease of your eyelid. If you'd like you can extend the eye shadow further. Add highlighter or a shimmer eye shadow to your eyelid that matches the color of eye shadow for a glowier look.
With eyeliner its a different story, there are many different eye shapes which all of them are beautiful. If you want eyeliner you can look at videos/tutorials to find a good liner look that works best for you.
Personally I don't know much about brows but for mine I apply eyebrow gel then fill them in with brown eye shadows. For more information for brows theres youtube, tiktik, twitter, and many other resources.
Add highlighter to cheekbones and temples, down the bridge of your nose, under brows, the inner corners of eyes, and above the cupid's bow. Do keep your other makeup like foundation, blush and bronzer softly matte and shimmer free.
After you are done and happy with your look spray setting spray to keep your makeup looking good for longer.
I hope this helps any makeup beginners or anyone trying to find a different way to do their makeup.
This is my first post and ive never had a tumblr or anything similar to this. Hopefully you like this post and I will post more different types of posts and more makeup tips.
If you have any suggestions, feedback, or comments feel free to tell me.
Have a nice day
6 notes
·
View notes
Note
I have never worn make up before! I like to look natural. What are your tips for a beginner on where to start? What are the basics I would need and how/where do I apply it on my face?
always start with good skincare!! cause if your skin is prepped well then whatever you put on top will look good. so a cleanser, moisturized, spf! exfoliator if you have dry skin. a glowy spf like the elf or super goop glowy ones is a great base to have for makeup.
i'd use a light concealer and a bit of brow gel to start! concealer to go under your eyes to cover up any dark circles and make you look more awake. brow gel just to help shape them and therefore shape your face. once you get comfortable with that, i'd add mascara and a bit of blush for your cheeks (can use on the eyes too!!)
3 notes
·
View notes
Last Seen Blogs

girlsleotards-blog
Girls Gymnastics Leotards

stardewpastel
¯\_(ツ)_/¯

yilbasindayagankar
ehvenişer🏳️🌈

startheskeletons
Daughter Of Spiders AU

l2nhost-blog
L2N Host & Domain Services