#best easy photo editing software
Text
I've seen a number of people on here proclaim that you should not, under no circumstances, take photos at a protest, but: Sharing photos of protests is a great way to amplify the impact of collective action, raise awareness on important issues, and encourage more people to participate.
But: We also have to keep in mind that surveillance is on the rise, including the use of facial recognition tech, which can put people at risk.
So here is a quick basic guide, courtesy of DigitalRightsWatchAU, to protecting people's biometric data when posting protest photos:
Conceal or obscure people’s faces in photos
Before you upload photos from protests to social media, remove biometric data by concealing or obscuring people’s faces and using proper communication channels.
Use Signal.
Signal is a great encrypted messaging app that protects your communications. It also has an in-built feature to blur out people’s faces.
We strongly recommend using Signal to communicate with people white protesting (and anytime, really!), and this added feature makes it easy to protect the identities of people in your photos.
Be selective – choose photos that don’t show people’s faces.
With some careful photography and curation, you can upload photos that capture the scale and energy of a protest without revealing sensitive information — no need to edit them!
Here are some ideas:
take photos at a distance, capturing the crowd rather than individual details of faces,
position yourself behind the march, showing only the backs of heads,
focus on signs, flags and other details to emphasise the protest vibe without showing people’s faces.
Remember it’s good practice to ask people before taking their photo whenever you can. You can also explain to them that you just want to get their sign or outfit but not their face – let them know you want to protect their privacy!
Extra tips:
Doing this does not remove the metadata from your image. Image metadata is generated automatically and usually includes details including the time, date, and GPS location, and information about the type of phone used – this can be used to pinpoint where you were and when. To easily remove metadata, take a screenshot on your device and delete the original.
For extra protection, delete the original photos that show people’s faces from your phone after you have made a version that obscures the faces. Even if you don’t intend to upload them online, if your device is compromised or unlocked and you have the originals sitting there, you’ve done all that work for nothing!
What about videos? Videos are trickier to edit to hide people’s faces and may require additional time, effort and software – this isn’t always possible while you’re on the go! We suggest focusing on minimising capturing faces in the first place when recording video footage.
Focus on harm minimisation rather than perfection. Taking protest photos without revealing people’s faces can be hard – there are a lot of people moving around which makes it difficult. The goal is to minimise sharing others’ biometric information as much as possible. Just try your best!
When you want to capture details: recording incidents
Recording incidents such as use of violence by law enforcement can be a powerful tool of accountability. It pays to be prepared.
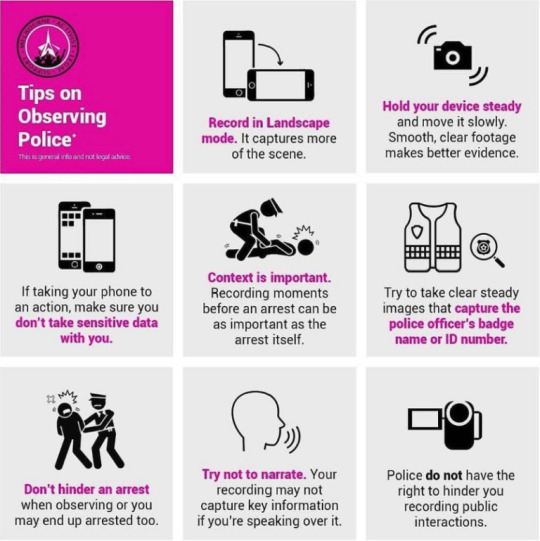
Here are some tips from Melbourne Activist Legal Support on observing police at protests:
Record in landscape mode. It captures more of the scene.
Hold your device steady and move it slowly. Smooth, clear footage makes better evidence.
If taking your phone to an action, make sure you don’t take sensitive data with you.
Context is important. Recording moments before an arrest can be as important as the arrest itself.
Try to take clear steady images that capture the police officer’s badge name or ID number.
Don’t hinder an arrest when observing or you may end up arrested too.
Try not to narrate. Your recording may not capture key information if you’re speaking over it.
Police do not have the right to hinder you recording public interactions.
You can also check out the resources from Witness for in-depth guides to recording incidents to protect and uphold human rights. You can also get advice and tools from the National Justice Project’s CopWatch.
268 notes
·
View notes
Note
hii i luv your work soo much and also the headers and the stuff you make is rlly good 😻 i was wondering if it’s too difficult to make the headers etc? specially the ones that are more like gifs? and also is it too hard to find the images? bc honestly i haven’t seen a lot of them, just wondering! i get it if you don’t want to share i just genuinely think that the work is rlly rlly good<3 (sorry for such a long ask omgg)
Omg thank you so much hi hi 🥹🥹💞💞💖💖🌸🌸 first of all thank you so much for liking my work and supporting me, I so so appreciate it ✨✨🫂🫂💐💐 And omgggg you’re making me BLUSH thank you thank you thank you for the kind words 😭😭🫂💞💞 I love when people compliment my works it makes me feel like I’m doing something right 😫💐💐 flowers for you for being so great ✨💐💐🌷🌷🌹🌹🌸🌸
To answer your question, the dividers and headers are actually very easy to make. The animated dividers I make aren’t difficult per se, they just involve a few more steps than making a normal divider does. As for my animated headers that I use for my fics or masterlists and what not those are also pretty easy. I’ll try to explain a little more about what I use in depth below. If you would like a detailed walk through explaining how I make them I could do that as well 💕 Prepare yourself, there’s a lot 😭💖

⋆ ˚。⋆୨୧˚ 𝐀𝐏𝐏𝐒 / 𝐖𝐄𝐁𝐒𝐈𝐓𝐄𝐒 𝐈 𝐔𝐒𝐄 — Picsart, Pinterest, PicCollage, Vita, Polarr, GIPHY, Photopea, Etsy, DeviantArt, Phonto, ezgif.com, onlinegiftools.com, Iloveimg.com, various fancy font generators (I don’t use these anymore, I use an app now for fonts, but this is what I used to use the most), various sparkle emoji combos + decorative text ( I use this one a lot + there are a lot of symbol apps on the App Store you can download, I have two apps that I use from time to time )
. ݁₊ ⊹ . ݁ ⟡ ݁ . ⊹ ₊ ݁. . ݁₊ ⊹ . ݁ ⟡ ݁ . ⊹ ₊ ݁. . ݁₊ ⊹ . ݁ ⟡ ݁ . ⊹ ₊ ݁.
⊹ ࣪ ˖ 𝑷𝒊𝒄𝒔𝒂𝒓𝒕 ⊹₊ ⋆ This is a photo editing service / app I use to make regular dividers. They have a lot of aesthetic / cute stickers and pngs like the ones I use in a lot of my dividers. They have a transparent background option I love that makes it easy to make a divider. You can save the stickers you like to a collection and follow artists / users you like as well. I 10/10 recommend this one. They also have a bunch of photo editing software like cropping, retouching, etc. if you’re into that.
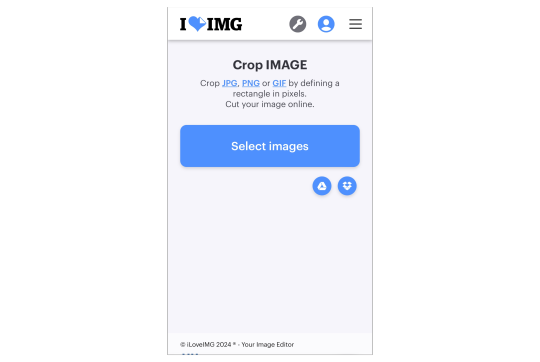
.𖥔 ݁ ˖ 𝐂𝐎𝐍𝐒 — You have to buy Picsart Pro to use a lot of the “pro quality” services, and the better quality stickers not made by an individual user (I.e. stickers Picsart itself has created) are not accessible to users not subscribed to Pro. Also, when you crop an image Picsart has a certain limit to how thin it can go, so I use an image cropping website I mentioned above Iloveimg.com. I only use Picsart for divider making purposes though so I don’t have to worry about allat. Not compatible with animation / gifs

. ݁₊ ⊹ . ݁ ⟡ ݁ . ⊹ ₊ ݁. . ݁₊ ⊹ . ݁ ⟡ ݁ . ⊹ ₊ ݁. . ݁₊ ⊹ . ݁ ⟡ ݁ . ⊹ ₊ ݁.
⊹ ࣪ ˖ 𝑬𝒕𝒔𝒚 ⊹₊ ⋆ This is one of my favorite shopping apps in general. If you don’t know about Etsy it’s a small business / individually owned business kind of shopping app. There’s a lot of different stores / sellers that sell a bunch of different things. It’s a good place to buy dividers for very cheap, less than $5 dollars, I’ve also bought pngs / stickers as well. I’ll buy a divider pack from time to time and edit them however I please. I never just buy a divider pack and claim it as my own on Tumblr, I always edit them in some way that fits more to what I want. It’s just a good starting point in my opinion. Of course, you can probably find simple dividers online, only you know what’s best for you. Also, this is just a good place for anything web related in general ( they have sticker packs, dividers, procreate brushes, decorative elements, really anything you want for a relatively small price)

. ݁₊ ⊹ . ݁ ⟡ ݁ . ⊹ ₊ ݁. . ݁₊ ⊹ . ݁ ⟡ ݁ . ⊹ ₊ ݁. . ݁₊ ⊹ . ݁ ⟡ ݁ . ⊹ ₊ ݁.
⊹ ࣪ ˖ 𝑷𝒉𝒐𝒏𝒕𝒐 ⊹₊ ⋆ This is an app for fonts. Unlike the usual fonts you see in fancy font generators (𝔱𝔥𝔦𝔰, 𝓽𝓱𝓲𝓼, 𝚝𝚑𝚒𝚜, 𝐭𝐡𝐢𝐬, 𝒕𝒉𝒊𝒔, etc.) Phonto lets you upload your own fonts to use on pics. Using font websites you can upload whatever fonts you like in just a couple seconds. I personally like to use Dafont.com for my fonts. You can also use dingbat fonts / decorative element fonts. Not compatible with animation / gifs

. ݁₊ ⊹ . ݁ ⟡ ݁ . ⊹ ₊ ݁. . ݁₊ ⊹ . ݁ ⟡ ݁ . ⊹ ₊ ݁. . ݁₊ ⊹ . ݁ ⟡ ݁ . ⊹ ₊ ݁.
⊹ ࣪ ˖ 𝑷𝒊𝒏𝒕𝒆𝒓𝒆𝒔𝒕 ⊹₊ ⋆ Who doesn’t know Pinterest?? Literally my favorite app ever. I use Pinterest for image inspo / my aesthetic images. Here’s my Pinterest if you’re curious. This is besides the point but I used to be a Wattpad girly so I have a lot of boards relating to my past OC’s and wattpad stories (like 2016) 😭💕 You can search up literally anything / any aesthetic and the pictures / gifs that relate to it will pop up. Very easy to use and so much fun to make your own boards and stuff. I spend hours organizing my pins, I need to get back into it tbh 😿
.𖥔 ݁ ˖ 𝐂𝐎𝐍𝐒 — Users upload a lot of fan made art that isn’t always crediting the original artists who made it. I have found some jjk fan art I use for my headers but no source as to who the original creator is. A lot of profiles do give credit tho so that’s good.

. ݁₊ ⊹ . ݁ ⟡ ݁ . ⊹ ₊ ݁. . ݁₊ ⊹ . ݁ ⟡ ݁ . ⊹ ₊ ݁. . ݁₊ ⊹ . ݁ ⟡ ݁ . ⊹ ₊ ݁.
⊹ ࣪ ˖ 𝑷𝒊𝒄𝑪𝒐𝒍𝒍𝒂𝒈𝒆 ⊹₊ ⋆ This is the same service made by the people who created Picsart. I use this for many purposes. I mainly use it to combine my animated gifs with still images and combine animated dividers together with other dividers. To be honest it’s hard to explain what I use it for specifically but it’s just good for combining gifs and still images into one.
.𖥔 ݁ ˖ 𝐂𝐎𝐍𝐒 — I don’t think there is a transparent background option, so I have to use a certain website mentioned above to remove gif backgrounds. You also can’t crop the image and unless you pay for no watermark it gives you one. It saves animated dividers / gifs as videos, so I go to Ezgif to make it into a gif and crop the image to remove the watermark. Again, this one is a little hard to explain.

. ݁₊ ⊹ . ݁ ⟡ ݁ . ⊹ ₊ ݁. . ݁₊ ⊹ . ݁ ⟡ ݁ . ⊹ ₊ ݁. . ݁₊ ⊹ . ݁ ⟡ ݁ . ⊹ ₊ ݁.
⊹ ࣪ ˖ 𝑽𝒊𝒕𝒂 ⊹₊ ⋆ This is a free app I use that’s a rip off of the “real app” I used to have. The “real app” started charging for its services and so I moved to this one. It’s completely the same and FREE. This is where I apply text to my gifs and add the motion to it. Like how my masterlist header is, where it spins and flips, this is the app where I apply those effects. Side note, this is a good starting app for making edit videos like you see on Tiktok. You can turn off the watermark for free.
.𖥔 ݁ ˖ 𝐂𝐎𝐍𝐒 — This app also turns gifs / animations into a video when you go to save it, so again I go to Ezgif to turn it back into a gif.

. ݁₊ ⊹ . ݁ ⟡ ݁ . ⊹ ₊ ݁. . ݁₊ ⊹ . ݁ ⟡ ݁ . ⊹ ₊ ݁. . ݁₊ ⊹ . ݁ ⟡ ݁ . ⊹ ₊ ݁.
⊹ ࣪ ˖ 𝑷𝒐𝒍𝒂𝒓𝒓 ⊹₊ ⋆ This is my favorite filter app for photos. Has very aesthetic filters that I use for my still images and as of recently my Pinterest boards as well. Not compatible with animation / gifs

. ݁₊ ⊹ . ݁ ⟡ ݁ . ⊹ ₊ ݁. . ݁₊ ⊹ . ݁ ⟡ ݁ . ⊹ ₊ ݁. . ݁₊ ⊹ . ݁ ⟡ ݁ . ⊹ ₊ ݁.
⊹ ࣪ ˖ 𝑮𝒊𝒑𝒉𝒚 ⊹₊ ⋆ I use this app solely for its stickers. You can find sparkles, butterflies, hearts, anything you want with a transparent background and turn it into a divider. I use this app mostly for gathering animated stickers to make my animated dividers.

. ݁₊ ⊹ . ݁ ⟡ ݁ . ⊹ ₊ ݁. . ݁₊ ⊹ . ݁ ⟡ ݁ . ⊹ ₊ ݁. . ݁₊ ⊹ . ݁ ⟡ ݁ . ⊹ ₊ ݁.
⊹ ࣪ ˖ 𝑷𝒉𝒐𝒕𝒐𝒑𝒆𝒂 ⊹₊ ⋆ This is my go-to for applying effects / filters to gifs or animations. I use this to add filters to my animated headers. I download PSD’s from DeviantArt and use those filters for my gifs. This is not an app, just a browser I’ve added to my Home Screen. I recommend using on a computer because there’s a lot of stuff on the screen and you’ll want to see it all spread out. I use it on mobile only because I know which buttons I need to press so it’s not a problem.
.𖥔 ݁ ˖ 𝐂𝐎𝐍𝐒 — You have to upload your own filters to be able to add one to a gif. Once you open up the site it can be very overwhelming and confusing with all the buttons and drop downs and yada yada. Photopea is like an animations version of photoshop. I recommend searching for a tutorial, or if requested I can personally make a separate post showing you how to add filters to a gif.

. ݁₊ ⊹ . ݁ ⟡ ݁ . ⊹ ₊ ݁. . ݁₊ ⊹ . ݁ ⟡ ݁ . ⊹ ₊ ݁. . ݁₊ ⊹ . ݁ ⟡ ݁ . ⊹ ₊ ݁.
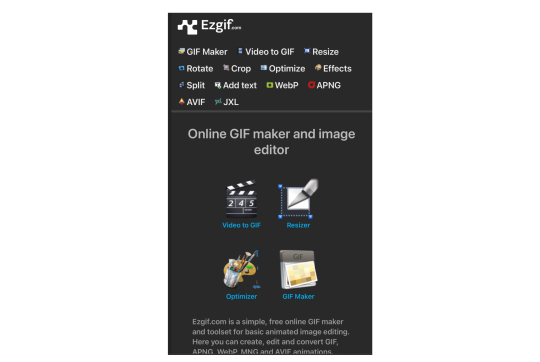
⊹ ࣪ ˖ 𝑬𝒛𝒈𝒊𝒇 ⊹₊ ⋆ my go-to website for literally anything gif related. Cropping, removing frames, optimizing a gif, making a gif, turning a video into a gif, and many more. I even use the effects tab from time to time to add a border around my gifs (like the one around the Sugar Water Series header) There’s other stuff you can do of course, I recommend checking it out, I’ve been using it for years.
. ݁₊ ⊹ . ݁ ⟡ ݁ . ⊹ ₊ ݁. . ݁₊ ⊹ . ݁ ⟡ ݁ . ⊹ ₊ ݁. . ݁₊ ⊹ . ݁ ⟡ ݁ . ⊹ ₊ ݁.
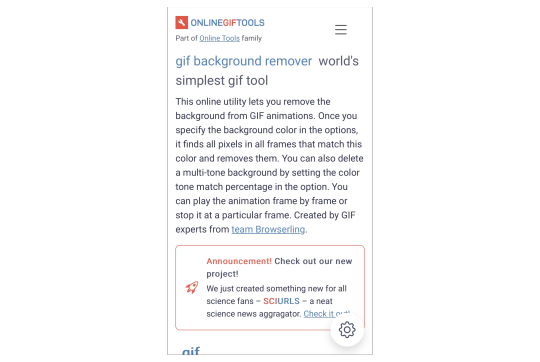
⊹ ࣪ ˖ 𝒐𝒏𝒍𝒊𝒏𝒆𝒈𝒊𝒇𝒕𝒐𝒐𝒍𝒔 ⊹₊ ⋆ This is a browser I use to remove the background from gifs.
.𖥔 ݁ ˖ 𝐂𝐎𝐍𝐒 — It doesn’t do the best job at removing a gif background unless it’s a solid color. I always do solid black and it removes it pretty well. If your background is white it will have a hard time differentiating the gif from the white background and will clip out parts of the gif and make it choppy. I recommend having a plain black background as that works best for me. Also it just recently had an update where you need to wait 10 seconds before you can download the finished product. It also claims you can only use it a certain amount of times a day but tbh I’ve used it a bunch in one day and never seem to have a limit. So idk. Like I said this update is recent. I guess a lot more people started using it and now they want to charge people.
. ݁₊ ⊹ . ݁ ⟡ ݁ . ⊹ ₊ ݁. . ݁₊ ⊹ . ݁ ⟡ ݁ . ⊹ ₊ ݁. . ݁₊ ⊹ . ݁ ⟡ ݁ . ⊹ ₊ ݁.
⊹ ࣪ ˖ 𝑰𝒍𝒐𝒗𝒆𝒊𝒎𝒈 ⊹₊ ⋆ This is the browser I mentioned in the picsart section where I crop really thin images. Does not have a limit on how thin you can make an image. I’m not positive but I’m pretty sure this is not animation / gif compatible.
. ݁₊ ⊹ . ݁ ⟡ ݁ . ⊹ ₊ ݁. . ݁₊ ⊹ . ݁ ⟡ ݁ . ⊹ ₊ ݁. . ݁₊ ⊹ . ݁ ⟡ ݁ . ⊹ ₊ ݁.
⊹ ࣪ ˖ 𝒇𝒐𝒏𝒕 𝒈𝒆𝒏𝒆𝒓𝒂𝒕𝒐𝒓𝒔 ⊹₊ ⋆ ONE TWO THREE
. ݁₊ ⊹ . ݁ ⟡ ݁ . ⊹ ₊ ݁. . ݁₊ ⊹ . ݁ ⟡ ݁ . ⊹ ₊ ݁. . ݁₊ ⊹ . ݁ ⟡ ݁ . ⊹ ₊ ݁.
⊹ ࣪ ˖ 𝒔𝒚𝒎𝒃𝒐𝒍 𝒅𝒆𝒄𝒐𝒓 ⊹₊ ⋆ ONE TWO THREE FOUR FIVE
. ݁₊ ⊹ . ݁ ⟡ ݁ . ⊹ ₊ ݁. . ݁₊ ⊹ . ݁ ⟡ ݁ . ⊹ ₊ ݁. . ݁₊ ⊹ . ݁ ⟡ ݁ . ⊹ ₊ ݁.
⊹ ࣪ ˖ 𝒉𝒐𝒏𝒐𝒓𝒂𝒃𝒍𝒆 𝒎𝒆𝒏𝒕𝒊𝒐𝒏𝒔 ⊹₊ ⋆ Evernote (a notes organizing app I use to organize my fics + I love it so so much), Amino (can find clubs / communities dedicated to bio decor & symbols), Gif Toaster (the og app I used in the very beginning to apply text to gifs), Canva (good stickers / elements + can find aesthetic / cute stickers with keywords on Pinterest), Videoleap (a video editing software I used to use), Remini (an app that upgrades the quality of an image), Symbol Pad & Symbol (apps I use for individual symbols) Snow (has cute animated effects I used to use sometimes a long time ago), VLLO (the app I used before Vita that charged for some of its services), DeviantArt (where I get all of my PSD’s + they have a lot of stuff you can use, pngs and whatnot, I just don’t really use it for those purposes)

51 notes
·
View notes
Text
Tutorial: Transforming wsp. Files into png. Files in TSRWorkshop
Simmerit ask me if it's possible to export wsp. files as image files to use in photo editing softwares, and while I was telling them that it's not possible to do with a program or plugin (to the best of my knowledge), I remembered that, once upon a time, I made png. files from wsp. files. However, the method I applied is kind of a workaround that has to be executed in the Textures tab in TSRW. It's quite easy to do as well, but as I suck at explaining things with words, I sat down to do a little photo tutorial. It presumes that you already know how to work with TSRWorkshop!!!

Step 1: Select a random object, the plainer the better. I've chosen the room divider from 'Town Life Stuff' because it has no Overlay and Specular textures, which is convenient because I don't have to make these textures empty myself. It's also recommended that the textures of your chosen mesh are in a square format and that TSRW exports the diffuse map in a 512x512 resolution image.

Step 2: Export the Mask texture, fill it with red color in your photo editing software and import it again. Do the same with the Multiplier texture, just fill it with grey color.
Please note: By lightening or darkening the grey of the multiplier, you can affect the color temperature of your pattern, meaning that if the grey is very dark, your pattern will be very dark as well.

Step 3: Select the pattern you like to export. I've picked the crackled paint.

Step 4: Apply the pattern in the Pattern tab, but only to the first pattern group, Pattern A.
Please note: In most cases, it's best to keep the preset tiling of your chosen object to get the "basic look" of the pattern.

Step 5: Set all of the other patterns in the tab to false. The object itself might look weirdly shaded now, but that doesn't matter. All that I care about is exporting the crackled paint pattern. ;)

Step 6: Export the diffuse map as usual by selecting the folder you want to put it in.

Step 7: Assign a name to the file.

Step 8: Et voilà! The crackled paint is ready to start its career as a png file.


--- Edited to add footnotes to Step 2 and Step 4 and to add three examples of the crackled paint pattern depending on the grey tone of the Multiplier and the tiling of the pattern . ---
Disclaimer: This is my first tutorial. If I left out an important step, I apologize. If I didn't use the correct technical terms, I apologize. If there is already such a tutorial, I apologize. Feel free to straighten out any errors. Feel free to get back to me if there are any other problems.
43 notes
·
View notes
Text
Ask response:
"If you answer this ask (you don't have to), can you block my name? I'd rather be anonymous, but I wanted to ask if you know of any good places to host media like Discord? Or just place where you can leave and label the stuff? Because I have discord servers that contain my own story ideas and pictures to go alongside it, and while I can store it all on a USB, I'd rather have it all in one place where I can access. Sorry, I know I'm not really phrasing this well, but do you know of anywhere you can store ideas, text, pictures, links, etc, that are simple and easy to use? Like I can load it up, log in, or whatever place a picture I have for a certain story full HD, and it stays there forever until I delete it never looses its quality or the text I place can be edited and added to"
My apologies for the inconvenience of not having anon asks on, I got hazed by some people back in the Homestuck days and once was enough. Some people are cruel cowards and I won't subject myself to such harassment again.
There's several. I recommend using multiple sources:
Google Drive. Basic space is free, but it's Google. Storage is at least cheap, if you need more. I won't link this.
Dropbox. The OG online storage backup. Cheap.
OwnCloud. It's simple to get up and running. There's a cool markdown text app called qownnotes that can hook into this, too!
Github and its competitors. You can make a repository with all your stuff and folders, mark it private.
Use a wiki service. There's a few FOSS wiki solutions! DON'T USE FANDOM!!
Neocities. If you pay 5$ a month, you're doing a good deed and you can make your own funky website, too.
Archive Of Our Own, aka Ao3 for your text. You can set it to only you can see it! If you have hosting space, you can actually fork the software for it! It's an archive! It's what it's for! It has an original work section!
BACK UP YOUR STUFF LOCALLY! Big local storage has gotten way, way more affordable. You can get a 2 tera solid state external drive for under 120 dollars, a spinny disk external drive for under 70$. If you don't want to use Amazon, check out Best Buy or a local computer shop for options.
You're most likely gonna use money. I know money's really, really tight for a lot of people and the situation just plain sucks. I can't do much but offer options for people to ponder.
My recommendation is to back up your stuff to a physical location, and to rent online storage space with multiple vendors. If you don't mind using google for now, use both GDrive and Dropbox for simplicity. If you don't mind doing more and learning some things, use Dropbox with OwnCloud, and post your text to Ao3.
I do NOT recommend Imgur for photo backup.
I do NOT recommend Apple services unless you already have an iPhone/Mac device.
12 notes
·
View notes
Text
That's a wrap.
2023 is on its death bed and I'm both happy and sad about that. Personally, this year has sucked on so many levels and for so many of my loved ones. But four months ago I published my first title under Addison Acres and so my foray into the world of M/M publishing began.
It has not been easy. It was a hell of a learning curve, and I still feel out of my depth some days. It's hard bloody work. I work full-time and I also study part-time so it's not like I can sit and write all day (as much as I wish I could). I needed to take the leap though because if I kept on saying 'I just don't have the time' then it was never going to happen.
I've published 2 shorts and a novella on Smashwords and I think I've done okay with them. To date I've sold 768 copies. Yes, some of them have been freebies (Draft2Digital counts those in total books sold) but hey, I'm pretty happy with those numbers. Have I made millions of dollars? Pfft, no. Have I made thousands? Yeah, nah. But I've made a about $700USD so far.
Yeah, I don't have a problem talking about stuff like this. I know a lot of people are very hush hush about money but one thing I've discovered coming into this gig is that there's very little data to measure against. Who knows if this means I've been successful? I fucking don't! But maybe another indie author will see this and go 'Hey, that's similar to what I managed' or 'I made more than that so I'm doing really well!'. So yeah, I'm happy to throw out my figures if it'll help someone else. I'm not raking in the cash, and I haven't had my first title become a crazy best-seller and I'm suddenly playing with the big kids. I'm still very much a baby in this industry, finding my way.
Ultimately, yes I got into this publishing gig to make a few extra bucks. The cost of living has sky-rocketed and my job does not pay well. I adore it though so I needed to do something to supplement what I make. This isn't going to pay off my mortgage but it's paid for a new water pump for our rainwater tank and a delivery of hay for the alpacas. I've also re-invested some of my royalties into my writing. I've purchased the Atticus software and I got a bundle of photos from Depositphotos to use for book covers.
There's still a lot I need to do. I have yet to set up a newsletter, which is much to my detriment. I feel like I need to have a NL magnet first (which is the term used for a free story readers get when they sign up for your newsletter). I feel like no one will sign up for nothing so I've not set one up yet, but I have no idea what to write for the magnet...
I've been doing a lot of promo work on FB with joining release parties and giveaways but it's hard work. The marketing side of things takes up a lot of time, which yeah, I don't have a lot of. I did set up an Instagram account but I've hardly used it as it's very, very full on and I haven't really had the spoons. I know I need to invest more time in that, and I will try in the New Year but we'll see how full the cutlery drawer is first.
I also made the choice to do Tumblr instead of Tik Tok. Probably a very stupid choice since BookTok is huge and people get a lot of exposure on there. Why didn't I? Well, firstly, I'm really not very good at making videos and editing them. It's so very time consuming. Secondly, I like Tumblr. Is it a dumpster fire? Yes. Am I a bin chicken masquerading as a human? You betcha. So, yeah, I feel comfortable here. But I know I need to invest in more time here also.
Anyway, next year is a new year. I am currently working on a project that I've told no one about because I feel if I do, I will jinx myself and my motivation will fuck off to the moon. So, there is something in the works for publishing maybe in February. I'll be looking for beta readers once I've gotten it finished so if you're interested, hit me up.
I've also created a new logo because I haven't really done that and I figured I really should. I've made 4 variations to use for different situations and I really like it. It's pretty.

Anyway, I've rambled enough. Just wanted to do a little wrap up for the year and to prove that I'm not dead lol
Enjoy the final days of 2023 and I shall catch you all on the flip side.
9 notes
·
View notes
Text
Yvette Heiser - Phone Photography Essentials without Formal Education
In today's digital world, the art of photography has become more accessible than ever. You no longer need a formal education or expensive camera equipment to create stunning images. With advancements in smartphone technology, your phone can be a powerful tool for capturing professional-quality photos. Here’s everything you need to know to excel in phone photography without a formal education.

Understanding Your Phone’s Camera
Before diving into photography, it’s essential to understand the capabilities of your phone’s camera. Modern smartphones are equipped with high-resolution sensors, multiple lenses, and advanced image processing software. Take some time to familiarize yourself with the various settings and features available on your phone's camera, including HDR, portrait mode, night mode, and manual controls for ISO, shutter speed, and white balance. For more detailed insights, consider exploring resources like Yvette Heiser Texas – All You Need to Know about Phone Photography.
Mastering the Basics of Photography
Even without formal education, you can learn the fundamental principles of photography. Start with the basics:
Composition: The rule of thirds, leading lines, and framing are essential techniques that can help you create balanced and visually appealing photos.
Lighting: Excellent lighting is essential for taking outstanding photos. Natural light is your greatest ally, so it's important to learn how to use it effectively. Understand the differences between soft and hard lighting and how to leverage shadows and highlights to enhance your images.
Focus and Exposure: Ensure your subject is in sharp focus. Most smartphones allow you to tap the screen to set the focus point. Adjusting exposure can help you manage the brightness and contrast of your photos.
Leveraging Photography Apps
One of the advantages of phone photography is the plethora of apps available to enhance your images. Here are a few must-have apps:
Editing Apps: Tools like Adobe Lightroom, Snapseed, and VSCO provide robust features for tweaking exposure, contrast, saturation, and other elements. They also come with presets and filters that can add unique and creative touches to your photos.
Camera Apps: Apps like ProCamera and Camera+ offer advanced manual controls, allowing you to fine-tune settings like ISO, shutter speed, and white balance.
Special Effects: Apps such as Lens Distortions and Afterlight can add unique effects and overlays to your photos, helping them stand out.
Building a Strong Portfolio
Your portfolio is your introduction in the photography world. Create a diverse collection of your best work to showcase your skills and style. Include different subjects such as landscapes, portraits, and macro shots. Regularly refresh your portfolio with updated and enhanced photographs. Sharing your portfolio on social media platforms like Instagram, Facebook, and Pinterest can help you reach a wider audience and attract potential clients.
Networking and Marketing
Building a successful photography career requires more than just taking great photos. Networking and marketing are essential components:
Networking: Join online photography communities, attend local meetups, and participate in photography challenges. Networking with other photographers can lead to collaborations, referrals, and learning opportunities.
Social Media Marketing: Use social media to market your photography services. Regularly post your work, engage with your audience, and share behind-the-scenes content. Consider creating a website to establish an online presence and make it easy for clients to find and contact you.
Continuous Learning and Experimentation
Photography is an ever-evolving field, and staying updated with the latest trends and techniques is crucial. Follow industry leaders, read photography blogs, and watch tutorial videos. Don’t be afraid to experiment with new styles and subjects. Continuous learning and experimentation will help you grow as a photographer and keep your work fresh and innovative.
Conclusion
Excelling in phone photography without formal education is entirely achievable with dedication and practice. By understanding your phone’s camera, mastering photography basics, leveraging apps, building a strong portfolio, networking, and continuously learning, you can create stunning images and establish a successful photography career. Yvette Heiser- Is it possible to start a career in photography without formal education? Embrace the journey, and let your creativity shine through your lens!
#wedding#moments#camera#pictures#photographer#photography#childphotography#yvette heiser#photographytips#events
6 notes
·
View notes
Text
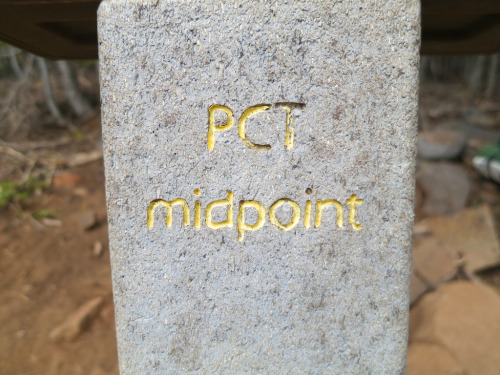
The Ever-Changing Length of the PCT
The most recent edition of the PCT's "Trail Dirt" tackled the mystery of the PCT length . . . it has been a topic that has been a curiosity also explored on this website -- https://pcttrailsidereader.com/post/618834872879939586/it-looks-authoritative-and-permanent-but-the The midpoint looks so official but as this article explains, the length of the trail is constantly changing . . . hence moving the midpoint. However, the marker stays put.
Easy, 2,650 Miles, right? Well… not quite.
By Galen Keily
The question of the PCT’s length comes up often, with guidebooks, phone apps, and other sources across the internet offering varying figures. In recent years, PCTA has come a long way in better tracking and calculating distance. While we regularly reference the rounded figure of 2,650 miles as shorthand for the trail’s length, our current best estimate places it at approximately 2655.8 miles. It’s complicated because the length actually varies year by year, and homing in on highly accurate mileage for a trail that spans thousands of miles can pose significant challenges. We know that trail mileage matters a lot to PCT trail users. Read on to discover some of the complexities involved in determining the true length of the PCT.

Northern Terminus, Photo by: Ryan Weidert
It Moves!
Sometimes, the trail gains a mile or two, or sometimes, the trail shaves off miles (you’re welcome thru-hikers!) You might be thinking… how does this happen, isn’t the trail already on the ground? While true, PCTA, alongside managing agencies and dedicated trail crews, continually refines and optimizes the trail’s route. These efforts range from minor adjustments to larger-scale relocation projects aimed at enhancing the overall trail experience. For instance, routine maintenance often involves realigning sections of the trail to improve sustainability, such as adding switchbacks or adjusting trail tread within the existing corridor. These alterations might end up making the trail a bit longer or shorter, typically on the order of hundreds of feet. Pretty small potatoes when looking at a trail that crosses thousands of miles. Other times, the PCT undergoes bigger relocation projects based on a process called Optimal Location Reviews (OLR). These relocations can be significant and can take years to complete. These projects aim to relocate the PCT to a location better suited to providing a natural setting, scenic beauty, and safe public access, among other things. As a result of these projects, the trail’s length may fluctuate by several miles. But they also end up making the trail safer and more enjoyable for all.
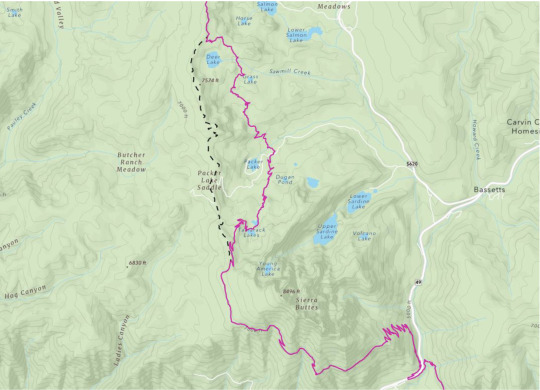
The Sierra Buttes Relocation – Old decommissioned PCT shown in dashed black line, current PCT in maroon.
What’s so hard about miles?
Calculating distance across such a large geographic extent is challenging. Even minor inaccuracies that are repeated hundreds of thousands of times compound errors, resulting in significant discrepancies in overall mileage. For example, if each point in our PCT dataset were off by 1ft, the margin of error would be over 200 miles. Additionally, the translation from a three-dimensional Earth to a two-dimensional map necessitates “projecting” data in GIS (Graphical Informational System) software, which can introduce different types of accuracy loss. However, advancements in technology offer us promising avenues for improvement, such as using LiDAR (laser scans of the earth) to more precisely capture and map changes to the trail.
A little bit about the data
PCTA’s current iteration of PCT mapping data is built upon data that was donated to the organization from the Halfmile Project. You may have heard of Halfmile, he and his team are kind of a big deal. The resulting data from this project’s multi-year effort was the best, most accurate data for the PCT of its time. Volunteers in the project mapped thousands of miles of trail with survey-grade custom and commercial GPS units and spent tremendous amounts of time analyzing, processing, and curating the results.

Halfmile, using his iPhone to control the Long Distance Geo Logger. The blue GPS unit is in the lower black side pocket of his pack. You can see coiled cable right above it.
Building on this legacy, PCTA now builds upon that same highly accurate data from Halfmile, revised to account for re-routes and trail reconstruction that have happened since PCTA assumed control of the data. We maintain our PCT Centerline (the line data for the trail’s location) and Mile Markers (points every tenth or half mile), with new versions released on an annual basis, usually in January. The data is displayed on our Interactive Map and made available on our PCT Data webpage, freely available for download in a variety of formats. By fostering an environment of transparency and accessibility, we empower trail users, app developers, and agency partners alike to utilize this standardized dataset, facilitating seamless communication and navigation along the trail.

Graceland takes an emotional moment at the Northern Terminus after an adventure of a lifetime. Photo by: James Townsend
Conclusions
As we continue to monitor changes, refine our modeling of the PCT, and offer it to users in new ways, we realize that our data remains imperfect. Digitally representing the complexities of the natural world always is. Despite this, the Association’s renewed prioritization of data management, built upon the invaluable foundation set by the Halfmile project, marks significant progress in this work. We recognize that our path toward data accuracy is ongoing and that we’re by no means at the finish line (approx. 2,655.8 ), but we’re always improving, collaborating, and working to celebrate the intricacies of the PCT in this unique aspect of our work.
Author: Galen Keily

4 notes
·
View notes
Text
How to Upload Video to He Tuber: A Step-by-Step Guide
Uploading a video to He Tuber can be a daunting task for beginners. However, with the right guidance, it can be a smooth and easy process. In this article, we will guide you through the steps of uploading a video to He Tuber, so you can share your content with the world.
First, it's important to have a HeTuber account. If you don't have one already, you can create one for free. Once you're signed in, click on the camera icon in the top right corner of the screen. This will take you to the upload page, where you can select the video file you want to upload.
Before uploading your video, it's important to make sure it meets YouTube's guidelines. This includes ensuring that it's not too long, doesn't contain copyrighted material, and doesn't violate any community guidelines. Once you've confirmed that your video meets these requirements, you can proceed with the upload process. By following these simple steps, you'll be able to share your content with millions of viewers on YouTube.
Creating an Account
Sign-Up Process
To upload videos on He Tuber, users must first create an account. The sign-up process is straightforward and easy to follow. Users will need to provide their email address, username, and password to create an account.
After filling in the required fields, users will need to verify their email address by clicking on the verification link sent to their email. Once the email is verified, users can log in to their account and start uploading videos.
Profile Setup
After creating an account, users can set up their profile by adding a profile picture, a cover photo, and a bio. The profile picture and cover photo are essential components of a user's profile as they serve as the first impression for viewers. Users should choose a profile picture and cover photo that are relevant to their channel's content.
In the bio section, users can describe themselves and their channel. It's important to keep the bio concise and informative, highlighting what viewers can expect from the channel. Users should also include links to their social media accounts and website (if applicable) to help viewers connect with them outside of He Tuber.
Overall, creating an account and setting up a profile on He Tuber is a simple process that can be completed in just a few minutes. By following these steps, users can start uploading videos and building their audience on the platform.
Preparing Your Video
Before uploading a video to He Tuber, it's important to make sure it meets certain requirements and is edited and enhanced to the best of your ability. This section will cover those aspects of preparing your video.
Video Requirements
He Tuber has certain requirements for the videos that can be uploaded to the platform. These requirements ensure that the videos are of high quality and can be easily viewed by viewers. Here are the video requirements for He Tuber:
File size: Videos must be less than 128GB in size.
Length: Videos can be up to 12 hours long.
Resolution: He Tuber supports resolutions up to 8K.
Format: Videos must be in one of the following formats: MP4, AVI, WMV, MOV, MPEG, FLV, 3GP, and WebM.
Aspect ratio: He Tuber supports aspect ratios from 16:9 to 4:3.
Make sure your video meets these requirements before uploading it to He Tuber.
Editing and Enhancements
To make your video stand out on He Tuber, it's important to edit and enhance it to the best of your ability. Here are some tips for editing and enhancing your video:
Use a good video editing software: There are many video editing software options available, both free and paid. Choose one that suits your needs and skill level.
Cut out unnecessary footage: Make sure your video is concise and to the point. Cut out any footage that doesn't add value to the video.
Add transitions: Transitions can make your video look more professional and polished. Use them sparingly and appropriately.
Add music and sound effects: Music and sound effects can enhance the mood and tone of your video. Make sure they are appropriate and not too distracting.
Use color correction: Color correction can make your video look more vibrant and appealing. Use it to correct any color issues in your footage.
By following these tips, you can make sure your video is edited and enhanced to the best of your ability before uploading it to He Tuber.
Uploading the Video

Uploading a video to He Tuber is a simple process that can be done in just a few easy steps. In this section, we will guide you through the process of uploading a video to He Tuber.
File Selection
Before you can upload a video to He Tuber, you need to select the video file you want to upload. To do this, click on the "Select File" button on the upload page. This will open a file browser window that will allow you to select the video file you want to upload.
Once you have selected the file, you will see a progress bar that shows the upload progress. The length of time it takes to upload the video will depend on the size of the file and the speed of your internet connection.
Upload Options
After you have selected the video file, you will be presented with a number of upload options. These options allow you to customize the video's title, description, and tags. You can also choose whether you want the video to be public or private.
It is important to note that He Tuber has strict guidelines regarding the content that can be uploaded to the platform. Make sure that your video complies with these guidelines before you upload it.
In conclusion, uploading a video to He Tuber is a simple process that can be done in just a few easy steps. By following the instructions above, you can upload your video to He Tuber and share it with the world.
Video Details
Title and Description
When uploading a video to He Tuber, it is important to provide a clear and concise title and description. The title should accurately reflect the content of the video and be attention-grabbing to entice viewers to watch. The description should provide additional information about the video, such as the topic or purpose, and can include links to relevant websites or social media accounts.
Tags and Categories
Tags and categories help viewers find your video when searching on He Tuber. Choose tags that accurately describe the content of your video, and use relevant categories to make it easier for viewers to find your video. It is important to select tags and categories that are appropriate for your video to avoid misleading viewers.
Thumbnail Selection
The thumbnail is the image that viewers will see when browsing videos on He Tuber. It is important to select a thumbnail that accurately represents the content of your video and is attention-grabbing to entice viewers to click and watch. You can choose a thumbnail from the video itself or upload a custom thumbnail. It is recommended to use a high-quality image with clear and easy-to-read text if applicable.
Overall, providing accurate and attention-grabbing video details is crucial when uploading a video to He Tuber. By following these guidelines, you can help your video stand out and reach a wider audience.
Publishing Your Video
Once you have finished editing your video and are ready to share it with the world, it's time to publish it on He Tuber. Here are some important things to keep in mind when publishing your video.
Privacy Settings
He Tuber offers several privacy settings for your video. You can choose to make your video public, private, or unlisted. Public videos can be seen by anyone on the platform, while private videos can only be seen by people you invite. Unlisted videos can be viewed by anyone with the link, but they won't show up in search results or on your channel page.
When choosing your privacy settings, consider who you want to see your video and how you want it to be discovered. If you're uploading a personal video for friends and family, a private or unlisted setting may be best. If you're creating content for a wider audience, a public setting may be more appropriate.
Scheduling Release
If you want to publish your video at a specific time in the future, you can use He Tuber's scheduling feature. This allows you to set a date and time for your video to be published automatically.
Scheduling your video release can be useful if you want to build anticipation for your content or if you want to make sure your video goes live at a time when your audience is most active. It can also help you stay organized and plan your content strategy in advance.
To schedule your video release, simply select the "Schedule" option when uploading your video and choose the date and time you want it to go live.
By following these tips for publishing your video on He Tuber, you can ensure that your content is seen by the right audience and at the right time.
2 notes
·
View notes
Text
Ok so for all my windows using friends. We all know that new windows photos is dreadful and extra slow and bloaty on slower computers. There is a better solution for photo viewing on your PC, and as an added bonus this comes with a photo managing app that does many of the same things as adobe bridge. Oh and it's free.
What is this stunning software you ask?
Great question! Back in 2002, Google created a nifty piece of software known as Picasa Photos. They eventually killed this software in 2016 to focus on the infinitely more spying Google Photos (I'm not kidding about Google photos having privacy issues. They literally got sued over this in my home state of IL for violating our biometric privacy laws. I got paid $500 from Google for this btw). Moving on, Picasa slapped and that's why they killed it. Fortunately I am not the only Picasa Photo Viewer 3 enthusiast on the internet and there are others who saved the installation exe files. That said, I have helpfully found one that works which you can now download from my google drive here. Note that you cannot use the Google Photos/Google Account related options in the software anymore as Google has discontinued support for it.
Picasa has it all for the person who needs a good photo organizer:
finds ALL photos in your documents, downloads, and pictures folders for you.
ability to open and edit camera raw files
ability to add tags to photos, sort into folders, locate in the system etc.
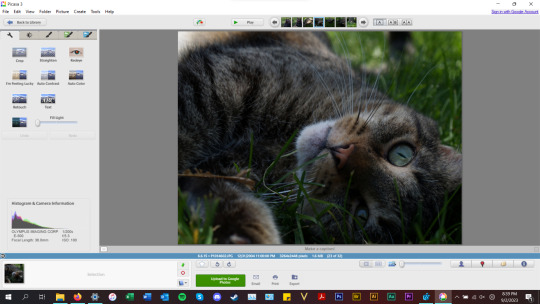
basic photo editing tools with a good histogram. one of the best editing tools they have, which I would argue is almost on par with a tool from the adobe camera raw editor is the "neutral color picker" tool, where you can select an area in the picture to set a custom white balance in the image (easiest, best color correction). Also contains a primitive healing brush tool.
very good at red eye removal. I used that feature a lot back in 2005.
good printing options (easy to print multiple copies of the same photo on the same page in a variety of standard sizes.
ability to create a photo collage with multiple photos or a photo slideshow video
sort by person tool
lots of fun filters to apply to images if that's your thing.
add custom geotags to photos using another dated google product, google earth.
create a gift cd of photos or create poster sized versions of your photos that print over multiple sheets somewhat like the rastrabator.
the image viewer part is slick, lightweight and fast unlike windows photos. It allows you to quickly arrow key through your photos in a very nice way.
Allow me to show you some screenshots of this glorious piece of abandonware.
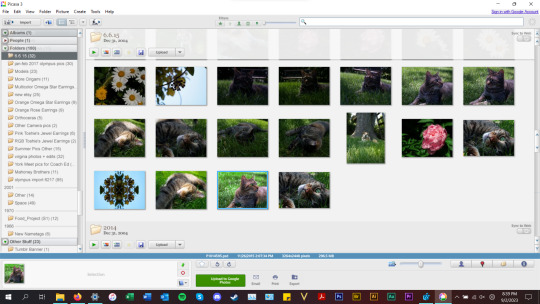


anyways, tldr; this piece of abandonware is the best, most glorious free photo viewer for windows, and as a person who's been using it for the last 18 years I highly recommend it to everyone who does not have adobe PS & Bridge and also anyone with windows who wants a quick way to preview photos in their folders.
2 notes
·
View notes
Text
Clipping Path: An Essential Tool for E-Commerce Photo Editing Services
Images play a crucial role in today's digital world, especially in industries such as E-commerce Image Editing Services, advertising, and graphic design. In the world of visual content, the quality and presentation of images can make or break a business's online presence. That's where image editing techniques come into play, and one of the fundamental tools used by proficient content writers and graphic designers is the clipping path.

A clipping path, in simple terms, is a technique used to remove the background of an image or isolate a specific object from its surroundings. It involves creating a vector path around the object's edges using specialized software like Adobe Photoshop. This path then acts as a mask, allowing the designated object to be placed on any background or integrated seamlessly into various designs.
Importance in Image Editing
Clipping path is a crucial aspect of image editing as it provides precision and flexibility in handling images. It enables content writers and designers to manipulate images, remove unwanted elements, and enhance the overall visual appeal, making it an indispensable tool for creating compelling content.
Types of Clipping Paths
Basic Clipping Path
The basic clipping path service is the foundation of all clipping paths. It involves creating a simple outline around an object with straight edges, making it ideal for objects with simple shapes like books, smartphones, or boxes.
Compound Clipping Path
The compound clipping path comes into play when an object has multiple holes or embedded transparency. This type of path requires more intricate techniques to ensure a seamless background removal services, commonly used for jewelry or complex product images.
Complex Clipping Path
The complex clipping path is the most intricate form and is used for objects with intricate shapes or multiple edges. Examples include furry animals, intricate clothing, or detailed machinery.
How Clipping Path Works
Tools and Software
To execute a clipping path, you need software equipped with suitable tools, and Adobe Photoshop stands out as the industry standard. The Pen Tool, in particular, plays a vital role in creating precise paths.
Step-by-Step Process
1. Open the image in Adobe Photoshop.
2. Select the Pen Tool and carefully trace the object's outline.
3. Create a path around the object, ensuring smooth curves and accurate edges.
4. Once the path is complete, apply the clipping path to isolate the object.
Advantages of Clipping Path Services
Photo Retouching
Clipping path services allow for easy photo retouching, enabling writers and designers to enhance the appearance of products or models by removing imperfections.
Background Removal
By removing the background using clipping paths, content writers can place objects on various backgrounds, creating a consistent and visually appealing look.
Creating Unique Image Effects
Clipping path services enable designers to apply various effects and filters to isolated objects, enhancing their visual impact.
Industries Using Clipping Path
Ecommerce Photo Editing Services
E-commerce Photo Editing Services websites heavily rely on clipping path services to present their products with clean and professional images.
Advertising and Marketing
In the advertising and marketing industry, Best Clipping Path Services are employed to create eye-catching visuals for promotional materials.
Graphic Design
Graphic designers use clipping paths to compose stunning layouts and designs, combining different elements seamlessly.
Photography
Photographers utilize clipping path techniques to improve their images and create unique effects during post-processing.
Choosing the Right Clipping Path Service Provider
Experience and Expertise
Look for service providers with a proven track record and expertise in handling various types of clipping paths.
Turnaround Time
Consider the turnaround time offered by the service provider to meet your project deadlines.
Pricing
Compare prices from different providers to find the right balance between quality and affordability.
Customer Reviews
Read customer reviews and testimonials to gauge the service provider's reliability and customer satisfaction.
Tips for DIY Clipping Path
Using Adobe Photoshop
Familiarize yourself with Adobe Photoshop and its Pen Tool to master the art of creating clipping paths.
Pen Tool Mastery
Practice using the Pen Tool to achieve smooth curves and accurate paths.
Refining Edges
Pay attention to refining edges to ensure the isolated object blends naturally with its new background.
Avoiding Common Mistakes in Clipping Path
Rushing the Process
Take your time to create precise paths and ensure high-quality results.
Ignoring Fine Details
Pay attention to small details, as they can make a significant difference in the final output.
Overdoing or Underdoing the Path
Maintain a balance between removing unnecessary elements and preserving essential details.
Future Trends in Clipping Path
AI and Machine Learning in Image Editing
The integration of AI and machine learning algorithms will revolutionize the image editing process, making clipping paths even more efficient and accurate.
Interactive Image Backgrounds
In the future, interactive image backgrounds may become a trend, enabling users to customize the visual environment of products.
Conclusion
Clipping path is an indispensable tool for content writers, designers, and photographers alike. Its ability to isolate objects, remove backgrounds, and create stunning visuals makes it a must-have in the world of image editing. Whether you opt for How to outsource clipping path service or decide to master the technique yourself, the impact of this tool on visual content creation cannot be overstated.
2 notes
·
View notes
Text
What is the Best Cricut Software in 2023?

Cricut is a powerful and versatile machine that can precisely cut and craft different materials. To help out crafters, Cricut also offers a graphics designing tool called Cricut Design Space. It features a user-friendly interface that is very easy to use and is compatible with multiple devices such as mobile, laptop, PC, and tablet.
As a bonus, the app is free, and you can download it directly from Cricut’s official website. However, you can also use the software if you are unsatisfied with the Design Space. If you are wondering which software is compatible with your Cricut, you don’t need to look further. In this blog, we have the best Cricut Software, along with its pros and cons.
OPTION ONE: ADOBE PHOTOSHOP
Adobe Photoshop is the world’s best photo editing and graphic design software without introduction. Hobbyists and professional designers widely use it to create paintings, drawings, and animations. Photoshop is also used to edit and retouch digital images, and it is quite good at vector art. It’s a robust editing toolkit that helps users to create complex designs from plain elements. When graphic designers need to create bitmaps in multiple layers or handle image masking, they turn to Photoshop.
Photoshop automatically saves your projects to the cloud. Besides the standard function, Photo Shop offers live streaming, project tracking, data storage management, and offline access. It also lets you invite other people to edit files so you can collaborate with team members on various projects. Although it’s not the most affordable software, the value that it brings to the table is hard to beat.
REASONS TO GO FOR IT
Powerful web design tool
Cross-platform Integration
Intuitive interface
A wide array of high-quality templates
REASONS TO AVOID IT
Expensive
OPTION TWO: ADOBE ILLUSTRATOR
For professionals and artists, Adobe Illustrator is the best Cricut software. Adobe Illustrator is a vector graphics program that allows you to create anything, such as text, shapes, and symbols, for your projects. Like Photoshop, it also lets you create complex and beautiful patterns. Use the preset workspace to customize your workforce. Although beginner-friendly, its extensive tools let you create precise and intricate models compatible with the Cricut machine.
Illustrator allows you to use multiple artboards; this feature is handy when working on projects with multiple items. Various plugins expand Adobe Illustrator’s capabilities. These plugins let you create your own custom fonts. If you need software that works well and lets you create anything, and if you’ve no problem paying for it, then Adobe Illustrator is the most suitable option.
REASONS TO GO FOR IT
Compatible with different OS
An extensive set of tools can be further expanded using plugins
Best for creating new shapes
Countless shortcuts
REASONS TO AVOID
Have to pay a monthly fee.
OPTION THREE: GIMP
Although Photoshop is a great software that lets you create everything, its only drawback is its cost. If you want a free alternative to Photoshop, you can opt for GIMP. Like Photoshop, GIMP is free software that offers various features for editing images and creating original illustrations from the ground up. Its extensive brush-based tools range from the clone/heal brush to the brush/burn tool.
These brush-based tools come in handy when working with large, high-resolution images. Most people use GIMP as a photo editor, but it can also be used for graphic designing. GIMP lets you add and edit text, move and control images. It also lets you configure contrasts and curves. GIMP is one of the best Cricut software for beginners who want to create awesome art.
REASONS TO GO FOR IT
User-friendly and customizable interface
Supports different formats
Lots of drawing tools
Advanced processing of graphic files
Multiple drawing tools
REASONS TO AVOID
Can’t handle CMYK color space
OPTION FOUR: CORELDRAW
Those looking for an alternative to Adobe Illustrator don’t need to look any further. CorelDraw is a full-fledged design program that lets you create everything. The program was originally designed as a rival to Adobe Illustrator. Both are great tools for vector designing and cost the same. But unlike Adobe Illustrator, where you must pay monthly, CorelDraw allows you to join for a monthly cost or pay an up-front fee.
CorelDraw gives you access to hundreds of pre-designed templates, which you can use to create stunning designs. It also lets you create designs from scratch with a few clicks. With a simple right-click, you can create complex designs and vectorization. You can design your graphics, convert them to SVG, and then send it to Design Space. CorelDraw’s extensive library of plugins is specially designed for cutting machines such as Cricut. Opt for its trial version if you still decide to go for CorelDraw.
REASONS TO GO FOR IT
Simple and user-friendly interface
A free trial version is available
Works great for vectorization
Offers a range of membership types
REASONS TO AVOID IT
It doesn’t offer tools to create HDR or panoramas.
OPTION FIVE: INKSCAPE
Inkscape is another great alternative to Adobe Illustrator, but unlike Illustrator and CorelDraw, it’s free. Its interface is straightforward, so you will quickly get the hang of it, even if you are a beginner. Inkscape is an open-source vector graphics editor which uses SVG as its primary file type.
Although Inkscape is prone to lag, it can run on low-end laptops and tablets. With Inkscape, you can customize virtually everything- colors, lines, grid, icon type, and other elements. Designers use it to create logos and banners. You can also convert raster images into vectors and save, import, and export your projects in various formats.
REASONS TO GO FOR IT
Beginner-friendly interface
It’s free
Flexible drawing tools
It lets you generate and edit SVG files
Exports in PNG and PDF
REASONS TO AVOID
Poor text editing instruments
#Cricut Software#cricut#art and craft#cricut.com setup windows#design cricut.com download#cricut.com design space#cricut.com/setup#cricut setup
6 notes
·
View notes
Text
AI Best tools and software
AI best tools and software
AI best tools and software, an article that illustrates some useful AI new resources and various websites that offer all kind of applications and web templates.
In this article, we will take a look at some of the most promising AI technologies, and free software that are worth watching out for in 2023. Artificial Intelligence (AI) has been growing at an unprecedented rate, and with new technologies emerging every day, it has become difficult to keep up with the latest trends. From text AI to image AI, AI technologies have penetrated every aspect of our lives, making them easier, more convenient, and more efficient, therefore don't miss our guide posts to be always well informed on the latest tools and platforms.
https://gptgo.ai Search and ChatGPT at the same time. You do not hear wrong, GPTGO is a combination of GG search and ChatGPT in 1 search, You just search as usual, GPTGO will return both ChatGPT results besides helping your information search performance increase significantly.
https://lexica.art Lexica. If you’re one who’s looking for inspiration for your next AI-generated artwork, you should check out this website called Lexica. Artificial intelligence art generators are cool, but it can take a while to generate art, and you might eventually run out of ideas. Lexica is here to save the day, with an extensive gallery of AI art to browse through.
https://andisearch.com Andi is search for the next generation using generative AI. Instead of just links, Andi gives you answers – like chatting with a smart friend and can also create a summary of the website you are going to visit. It’s a smart search assistant. The more detailed your question, the better it can help. It’s an AI search engine that gives you links, information and answers to your questions. It is free and anonymous to use.
https://you.com You.com is a search engine built on artificial intelligence that provides users with a customized search experience while keeping their data 100% private. The AI search engine you control. Getting Started Everything you need to get the most out of your search on you.com Try it today.
https://www.perplexity.ai Perlexity Open Search. Perplexity AI unlocks the power of knowledge with information discovery and sharing. It is an answer engine that aims to deliver accurate answers to questions using large language models. The new AI-powered chat tool that works like a powerful search engine and can show you the source of your search.

Search and ChatGPT
https://genial.ly Genial CV. Academic Presentation. Online Education Guide. Explore templates. A winning platform with many uses. Business. Education. University. Design. All kinds of projects. Your content might be nice, but it will only engage your audience if it is interactive. Forget going unnoticed, and connect with your audience. Make incredible interactive lessons with Genially teaching templates. The slides, online games and classroom resources are ready-made and easy to customize: no design skills needed!
https://magicstudio.com Magic Studio - Powered by AI, A magic wand for your pictures Create amazing Product Photos in minutes Goodbye to expensive photoshoots Try Now for FREE Create stunning Profile Pictures with AI Profile Pictures that make you look awesome! Create your profile NOW Make pictures with words, remove unwanted things from pictures in seconds.
https://magicstudio.com/it/magiceraser Magic Eraser: Remove unwanted things in seconds. Upload, mark the bit you need removed, download Free to use. No signup required! Drag and drop OR Click to upload Supported formats: JPEG, PNG Some examples: Many pictures? Edit them all at once.
https://lachief.io Best AI Tools That Will Make Your Life, Job and Academics Much Easier. TypingMind AI A chatgpt chatbot with better response time and UI. AI Mobile Device App Like ChatGPT AI that can help you answer any question updated a day ago.
https://www.prepostseo.com Pre Post SEO: Online SEO Tools Empowering 95+ Free Online Tools With Over 95 Online Tools, PREPOSTSEO Helping Millions of Webmasters, Students, Teachers & SEO Experts Every Month. ADVERTISEMENT Plagiarism Checker Article Rewriter Paraphrasing Tool Text Summarizer Grammar Checker Domain Authority Checker Random Address Generator.

AI tools and software
https://gumroad.com Gumroad was created to help you experiment with all kinds of ideas and formats. Sell your Top 10 lists Sell your crypto tips Sell your fractal pack Sell your keto cookbook Sell your C4D scenes Sell your new emojis Seriously, sell anything!
https://filehippo.com FileHippo.com - Download Free Software The latest versions of the best software Hand picked software titles - only the best! Tested for malware, adware and viruses No added bundles or toolbars Latest updates 5,409,213,839 Downloads Served 2 Minutes Ago Last Update Check 43,484 Program Versions Listed Categories Browsers Office & News Desktop.
https://academy.hubspot.com What is HubSpot Academy? Globally Recognized Certifications Join the 165,000+ professionals who've grown their careers by getting certified with HubSpot Academy. Inbound Attract leads, engage prospects, and delight customers using the inbound methodology. Social Media Extend your reach and generate leads with a multi-channel social media strategy.
https://www.futuretools.io Future Tools - Find The Exact AI Tool For Your Needs "FutureTools Collects & Organizes All The Best AI Tools So YOU Too Can Become Superhuman!" AI Detection Aggregators Avatar Chat Copywriting Finance For Fun Gaming Generative Art Generative Code Generative Video Image Improvement Image Scanning Inspiration Marketing Motion Capture Music Podcasting.
https://ninite.com Ninite - Install or Update Multiple Apps at Once ninite.com/accessible Install and Update All Your Programs at Once No toolbars. No clicking next. Just pick your apps and go. Always Up-to-date You don't have to watch for updates. Our bots do that. Here's what's new: Visual Studio Code updated to 1.77.0. Friday at 3:44 am Super updated to 10.0.1250.

Lachief Io Tools
https://invideo.io Free Video Editor for Easy Online Video Editing Create professional quality social media ads, promos videos, and much more for your business with InVideo's online video editor. With 5000+ easy-to-edit templates, bundled stock media & music, and intuitive editing you'll create more videos, more quickly than ever before.
https://www.you-tldr.com Get the TLDR of any YouTube Video in seconds Effortlessly Summarize, Download, Search, and Interact with YouTube Videos in your language. Get easy to read transcripts of your favorite Youtube videos with our productivity boosting.
https://www.oxolo.com Create Video Ads In One Click. Oxolo has by far the best marketing ROI for e-commerce. STEP 1 Enter URL Go to your e-commerce website. Copy your product listing's URL and paste it into Oxolo. We'll summarize your unique selling points into a video script. STEP 2 Fast Video Creation Oxolo does all the heavy lifting – writing and storyboarding, as well as adding the right actor, voice-over, music, and imagery.
https://nicepage.com 10,000+ Awesome Templates Of 2023 Select from over 10,000 templates from the portfolio, business, fashion, technology, education, blog, and other trending themes. All templates are fully responsive and available for free. Last Updated: Apr 01, 2023 Digital Financial Services We Develop Business Together Modern Brand How To Choose A Trainer.
https://www.browse.ai Browse AI Prebuilt Robots let you set a monitor on Indie Hackers to receive emails at a preferred time with top posts or articles to keep up with the community. Monitor Google Maps search results Monitor Google Maps search results and get a notification when any places are added, removed, or changed/renamed. Monitor organic Google search results.

Magic Studio Online Tools
https://looka.com Looka is your personal designer Looka gives you everything you need to launch your brand and look great from day one. The best part? Artificial intelligence does the heavy graphic design lifting, you have the creative control. 1. Logo designs Instantly generate 100s of custom logo mockups.
Don’t miss these other great posts:
AI guide to web resources
Web software free guide
Blog links and resources
English culture guide map
Best quotes and aphorisms on AI
100 best quotes and aphorisms
100 golden quotes and aphorisms
100 memorable quotes and aphorisms
100 great quotes on love
Great and famous philosophy quotes
Essays with quotes
Quotes by authors
Quotes by arguments
Thoughts and reflections
News and events
Read the full article
#AI#art#Best#bot#chatgpt#editing#engine#free#Gptgo#lexica#magic#marketing#Mobile#online#perplexity#pps#productivity#remover#robot#search#SEO#software#studio#templates#tools#video#web#youtube
3 notes
·
View notes
Text
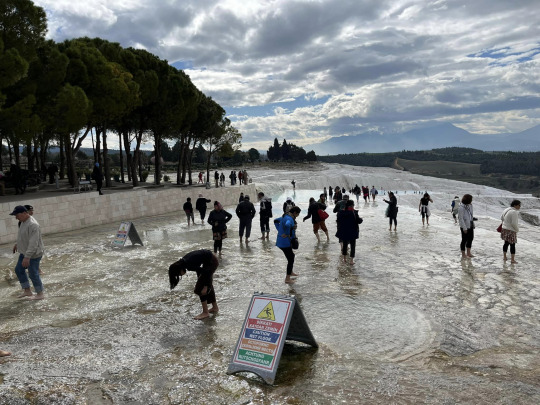
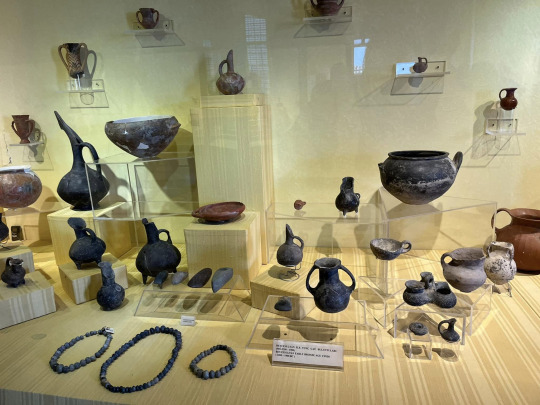
Hot Airing over Antiquity
Despite our chances of soaring over the Cappadocia region in hot-air balloons being dashed by the poor weather, we still had one last opportunity in Pamukkale. It might not have caverns and deep gullies, but it was still impressive to hover over the ‘Cotton Castle’ in all its limestone glory. And also take in the ancient city of Hierapolis via air.
Nothing screams adventure more than looking upon an ancient amphitheatre from above. Or, you know, running the risk of dropping your phone and losing all evidence of your overseas trip. But, I hear you, dear reader, say, it’s all about the experience, right?
Wrong! Here in the internet age, if there are no pictures, it’s doubtful it even happened. And even WITH photographic proof, editing software makes it easy to question EVERYTHING. Coupled with the fact that I hate taking pictures of myself? Why, it could be easily claimed that I stole all my photos from Google.
I didn’t, of course (what kind of travel blogger would do that), but it’s something easy that detractors can claim. Not that I have any detractors. My little corner on the internet is rarely frequented and when it is, it’s mostly by people I already know in real life. Which is exactly how I like it!


Regardless, the trip up in the air was quite smooth. We were up in the air and I didn’t even feel a thing. Best of all, we didn’t crash land. Nor did we become a ball of flame that hurtled to the ground in a fiery explosion. I might not have liked being bombarded by fossil fuel natural gas every time the pilot fired up...well, the fire...but I am thankful for getting an opportunity to take to the skies and look down at all the unworthy ants crawling down beneath me.
Delusions of grandeur, thy name is Kyndaris!
Once we landed, we packed hurriedly into the minivan and headed straight back to our hotel. And it was here that I bid a silent farewell to my Malaysian ballooning companions. I might not have gotten any of their names but I did overhear most of their conversations as they called family and friends while riding up in the balloon. And while I was very tempted to make my known in at least half of their calls, I resisted the urge.
So kind of me! So magnanimous!
All right. I think that’s enough self-aggrandising from me. Back to detailing my actual exploits while on holiday.
After returning to hotel, I went back to the room that I shared with Popo and readied to luggage to bring down to the coach. Then it as off to actually explore Hierapolis by foot. Or, more technically, as a chauffeur for Popo and her friend as I drove around on a modified moped.
The name, Hierapolis, is Greek in nature and according to the information board that I took at the site, means ‘Sacred City.’ It was presumably founded by one of the successors of Alexander the Great. In 188BC, it was passed into the hands of the Kings of Pergamon before becoming one of the wealthiest cities during Roman times. At the sight, there was plenty to see including a ruined temple of Apollo and a statue dedicated to Pluto, or Hades. I only recognised him because of the three-headed guardian to the Underworld, Cerberus, that stood at his side.
The city also featured many iconic Roman buildings including baths, gymnasium and theatre. I certainly knew that my 17-18 year old self would have been leaping for joy if I’d visited then, giving my interest in Ancient History and, in particular, the Flavian period of the Emperors.
Young children might be able to tell me in excruciating detail about their favourite dinosaurs. I will respond with my own rant upon my supposed subject of expertise - the Julio-Claudian emperors and the Flavian dynasty, which followed after Nero and the Year of Four Emperors.
History aside, it ought to be known that despite being the Sacred City of antiquity, Hierapolis was abandoned following an earthquake in about 616 AD that left only a few crumbling buildings in its aftermath. Despite this, there are signs of Seljuk presence in the ruins. Which would indicate that people had still frequented the site up until 400 years after the devastating quake.
But because of that, the city was almost pastoral in appearance with swaths of green covering the ruins. What made Hierapolis so special for us, though, was the ‘Cotton Castle’ that the city was built atop on. Layered all in white, the city was favoured with warm thermal waters that bubbled to the surface and which were rich in minerals. Over the years, it had covered the cliff tops in a layer of white limestone. And even in this modern age, those thermal waters continue to gurgle, which Popo got to enjoy by dipping her toes in.


There was also a swimming pool with sunken columns at the city that visitors could pay to enter.
Talk about taking advantage of what mother nature has given you! I however, simply enjoyed admiring the scenes of Europeans floating in the warm waters before inspecting the adjacent museum where displays of old pottery and statues could be seen. There were even carved reliefs depicting the coronation of Septimius Severus, a Roman Emperor, by the Goddess Nike and one that saw Dionysus, the Greek God of Wine and Debaurchery, partying hard with nymphs, centaurs, satyrs, the cherubic Eros and Pan.
After drinking in our fill of the city, we had a quick lunch in what felt like a communal cafeteria that stunk of oil before heading back on the road. This time we were headed westward to the Aegean Sea! Kusadasi, here we come!


2 notes
·
View notes
Text
Top 10 tools graphic design

Adobe Creative Suite — This software package includes Adobe Photoshop, Illustrator, and InDesign, which are essential tools for any graphic designer.
Sketch — This vector graphics editor is popular among UI and web designers. It has a clean and intuitive interface and a wide range of plugins and integrations.
Canva — This online graphic design tool is perfect for creating social media graphics, posters, and other marketing materials. It has a user-friendly drag-and-drop interface and a wide range of templates and elements.
Procreate — This iPad app is a powerful digital illustration tool. It has a wide range of brushes, layers, and other features that make it a great option for digital painting and sketching.
Affinity Designer — This vector graphics editor is a great alternative to Adobe Illustrator. It has a similar interface and a wide range of tools, and it’s more affordable than Adobe’s software.
Inkscape — This open-source vector graphics editor is a great option for those who are on a budget. It has a similar interface to Illustrator and a wide range of tools and features.
Adobe XD — This user experience design tool is great for creating wireframes, prototypes, and interactive designs. It has a simple and intuitive interface and a wide range of plugins and integrations.
CorelDRAW — This vector graphics editor has a wide range of tools and features, and it’s a great alternative to Adobe Illustrator. It’s also more affordable than Adobe’s software.
Adobe Lightroom — This photo editing software is great for photographers who want to enhance their images. It has a wide range of tools and features and it’s easy to use.
GIMP — This open-source image editing software is a great alternative to Adobe Photoshop. It has a wide range of tools and features and is perfect for those who are on a budget.
These are some of the top tools for graphic design that are widely used by professionals and amateurs alike. Each tool has its own strengths and weaknesses, so it’s important to choose the one that best suits your needs and skill level.
2 notes
·
View notes
Text
How to Print Your T-shirt in a Few Minutes ( for Beginners) in 2022

We all want to print our shirts and other clothes, but it seems that it takes too long to do so. With a few clicks and a few minutes,
you can print your t-shirts however you like. It's a quick and simple process that only requires printing and some paper.
A lot of people don't know that there are many different ways to print your t-shirt. Place.it.com will help you to print your t-shirts in a few minutes
in this beginner’s guide, we will show you the most important steps and the best ones to print your t-shirt in a few minutes.
Click here to get a free Card gift
let’s start.
Here is what you’ll learn in this guide.
Choose t-shirt design
Choose a template or create your own
Upload your design
Add text or graphic
Preview and printing
Choose a t-shirt design:
There are so many different T-shirt designs out there that it can be hard to decide which one to buy. Luckily, there are a few things you can do to help you choose the right one.
First, think about what message you want your T-shirt to communicate. Are you looking for a funny T-shirt that will make people laugh, or are you looking for a more serious design that will reflect your political beliefs?
Click here to get a free Card gift
Additionally, think about what type of T-shirt you want. Do you want a T-shirt that is plain and simple, or do you want one that is flashy and designed to stand out?
Choose a template or create your own:
When it comes to designing your own t-shirt, there are a few things to keep in mind. First and foremost, make sure that the design is original and catchy. Secondly, consider the size and shape of the shirt. And finally, choose a template that's easy to use.
choose a template from here
If you want to create your own t-shirt, there are a few different templates that you can use. Popular templates include GIMP and Inkscape. Both of these programs are free to use, and both offer a wide range of helpful tools.
Click here to get a free Card gift
Upload your design:
upload your design t-shirt and make some fashion statements with your own personalized shirt! There are many different ways to create a design for your t-shirt, including using graphics software or online design tools.
Upload your design from here
You can also create your own designs using different colors, fonts, and patterns. Once you have your design complete, you can print it out or use an online t-shirt printing service to have it made into a shirt.
Whether you are looking to show your support for a favorite team or just want to look stylish, a design t-shirt is a great way to get your message out there.
Click here to get a free Card gift
Add text or graphic :
Adding text or graphics to your t-shirt can add a personal touch and make your shirt unique. There are a few different ways to add text or graphics to your shirt. You can use a printer, a desktop publishing program, or a photo editing program.
To print text or graphics, use a printer. To print text or graphics from a computer, use a desktop publishing program. To print text or graphics from a photo editing program, use the "Print" option from the "File" menu.
Add graphic from here
To add text or graphics to a shirt using a desktop publishing program, you will need a T-shirt printer and a T-shirt printer paper.
Preview and printing :
review and the print T-shirt printing is a great way to get your T-shirt printed quickly and cheaply. You can choose to have your T-shirt printed directly to your specifications, or have a shirt printing company print it for you and then do the final printing and finishing yourself.
Print Now From Here
There are a few things to keep in mind when printing your own T-shirt. First, make sure that the print quality is good enough that you're happy with it.
Second, make sure that the shirt printing company you choose is experienced in printing T-shirts. Finally, make sure that you get a good deal on printing.
Click here to get a free Card gift
Envato Elements
Constant Contact
Place It
#printmaking#design#t shirt#online tutoring#3d printing#t shitrt#3d modeling#graphic design#fashion#on demand
3 notes
·
View notes
Text
Learn to Choose the Best Second Hand Laptop for Your Needs

In today's digital era, owning a laptop is essential for work, education, and personal use. On the other hand, purchasing a new laptop can be costly. Fortunately, the market for second hand laptops and refurbished laptops offers an excellent opportunity to acquire high-performance machines at a fraction of the cost. But how can you pick the ideal secondhand laptop for your requirements? This guide will assist you in making an informed choice when looking to buy secondhand laptops in India.
1. Identify Your Needs
Before purchasing a second-hand laptop, it's important to define your requirements. Ask yourself:
Do you need a laptop for basic tasks like web browsing and word processing?
Will you use it for gaming, video editing, or graphic design?
Are you seeking portability or a powerful processor?
By understanding your needs, you can narrow down your options and avoid overpaying for features you won’t use.
2. Research Laptop Models
However, how can one select the ideal used laptop for their requirements? Here is a tip to assist you in choosing wisely when looking for used laptops in India. Different brands offer various advantages:
MacBooks: Renowned for their elegant appearance and seamless operation. If you’re looking for a refurbished MacBook Air, it can be a great option for portability and long battery life.
Dell, HP, and Lenovo: Well-liked options for both casual and business customers. These brands offer a variety of models that range from budget-friendly to high-end options.
Retechie provides a large assortment of used and refurbished laptops to meet various needs.
3. Check the Condition of the Laptop
One of the biggest concerns when buying a second-hand laptop is its condition. Here’s what to check:
Battery health: A weak battery can be a dealbreaker, especially if portability is important.
Keyboard and trackpad: Ensure they are functional, as replacing these can be costly.
Screen condition: Look for any dead pixels, scratches, or cracks.
Ports and connectivity: Check all USB, HDMI, and other ports for proper functioning.
Storage and RAM: Depending on your usage, you might need more storage or memory. Consider upgrading these components if necessary.
If you’re buying a refurbished laptop, many of these concerns may be addressed as they are professionally restored to like-new condition.
4. Verify the Seller’s Reputation
Purchasing a secondhand laptop from a reliable vendor is essential. Always:
Check for endorsements or reviews from prior customers.
Ensure the seller offers a warranty, which provides some peace of mind.
Check for a return policy in case the laptop doesn’t meet your expectations.
At Retechie, we ensure all our refurbished laptops undergo thorough testing and quality checks before reaching our customers. Plus, we offer warranties to protect your purchase.
5. Compare Prices
One of the major advantages of buying a second-hand laptop is the price savings. However, it’s essential to compare prices across different sellers to ensure you're getting a good deal. Look for value in terms of performance, warranty, and overall condition rather than just going for the cheapest option.
Retechie guarantees that you receive the most value for your money by providing reasonable rates on secondhand laptops in India.
6. Consider Future Upgrades
When buying a second-hand laptop, you might want to upgrade certain components down the line. Before making a purchase, check if the laptop allows easy upgrades for:
RAM: For smoother multitasking.
Storage: If you need more space for files, photos, and videos.
Battery: In case you need to replace it for longer usage.
7. Test Before You Buy
Before completing the transaction, try the used laptop if at all possible. Run basic software applications, check the webcam, speakers, and Wi-Fi connectivity, and ensure there are no overheating issues. Testing makes sure the laptop fulfills your needs and is completely working.
Conclusion
Buying a secondhand laptops can be a cost-effective way to meet your computing needs without breaking the bank. Whether you’re looking for a refurbished MacBook Air or a used laptop for basic use, the key is to do thorough research and purchase from a trusted source. At Retechie, we pride ourselves on providing high-quality refurbished laptops and used laptops in India to suit various needs. Check out our collection of refurbished laptops and make an informed choice today at Retechie.
#Refurbished Laptops#Buy used laptop#Second hand laptop#Second Hand Laptops#refurbished laptop#Used laptop#Used laptops#Used laptops in India#Retechie
0 notes
Last Seen Blogs

carrierelyeatumbls
Carrie Relyea Tumbls

saeedbwoy
Untitled

bikeonrentinrishikesh
Untitled

maotranslates
mao! 猫老师
manorockoficial
MANO ROCK