#book cloth
Text
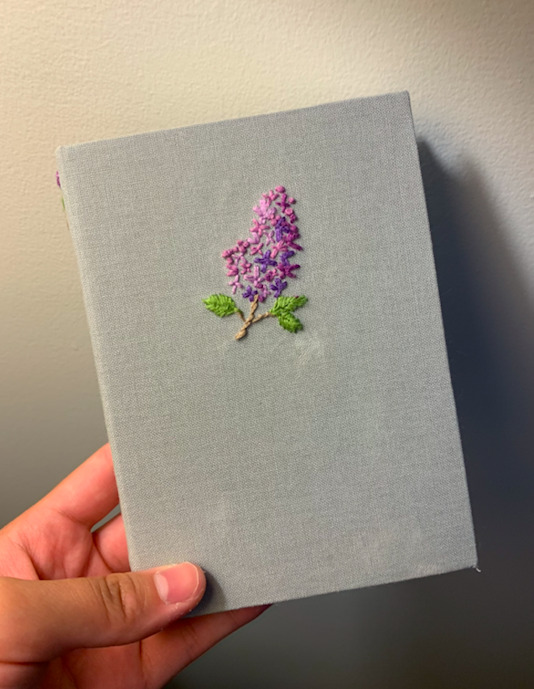
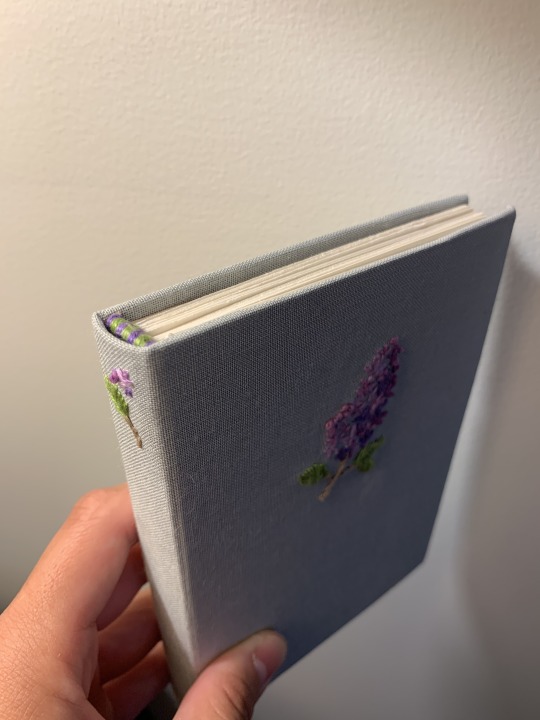
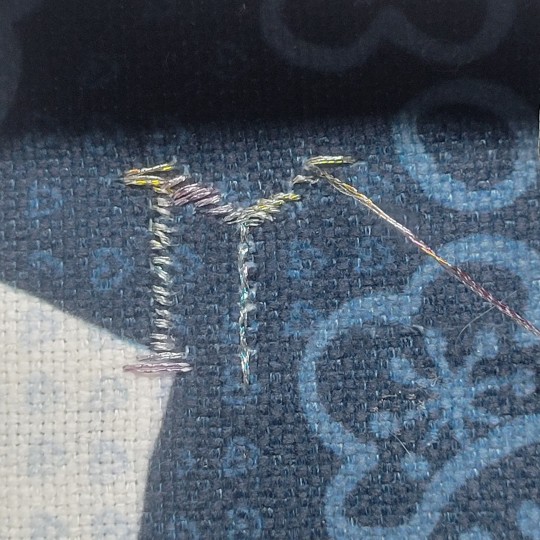
I made this book as a wedding present for my friends--I'm debating whether to try to get their loved ones to draw/write notes in it at the wedding, or to leave it blank for them to fill.
Embroidering the book cloth was easier than expected, but daunting since I only had enough of the cloth to make this one book. There are a few imperfections here and there (try not to look too closely at the glue stains on the cover...), but I'm hoping they'll like it!
#this is the one time i'm glad neither of them are on tumblr#books#book binding#case binding#crafts#embroidery#book cloth#lilacs#diy#mine
117 notes
·
View notes
Photo
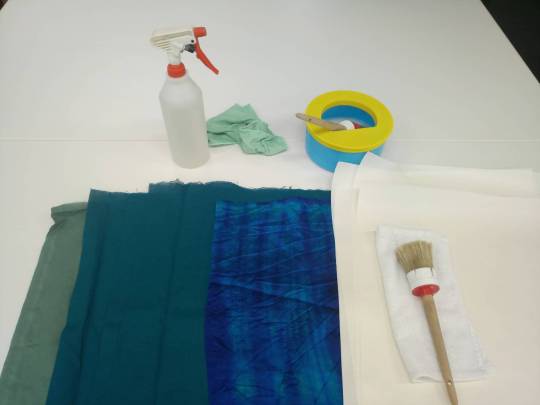
Making paper backed cloth for bookbinding
I tried my hand recently on making my own book cloth, not because I can’t get any, but because there are so many fun patterns and colours around. To be honest, I expect bought book cloth to be superior for all the ways it’s finished to be more resilient towards dirt and and such, but that doesn’t say self made cloth is bad at all!
There are different ways to achieve a paper backing, I went for the backing with paper and starch paste because
a) if I mess up I can always do it over no harm done, no material lost
b) I have my doubts about the durabilty of heat activated glues and their durability
c) using paste is just so much cheaper
So first up was cooking starch paste.
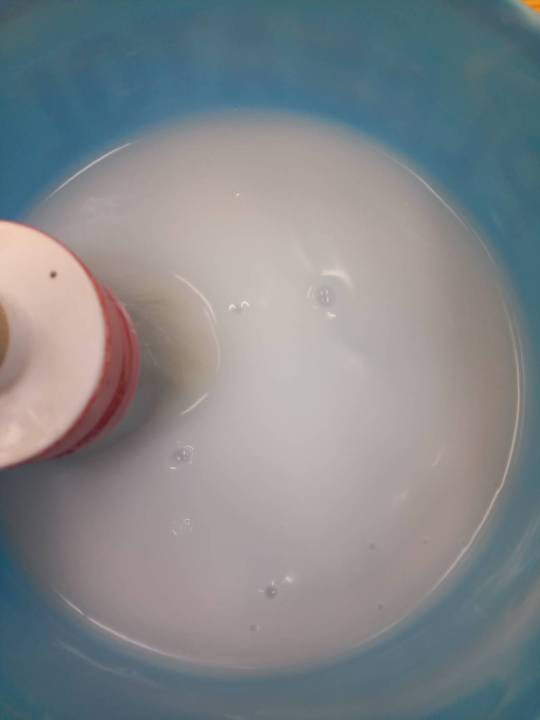
I don’t have a ratio for that. I put a spoon of starch into a pot, add some water to get rid of any lumps and let it soak a few minutes (usually just long enough to get some water boiling), then I slowly pour over the boiling water while stirring the starch and at some point it turns from white to translucent and lumpy and I stop when there’s a certain thickness.
When the paste has cooled it press it through a mesh and add some more water as needed. (It’s usually rather thick at that point.)
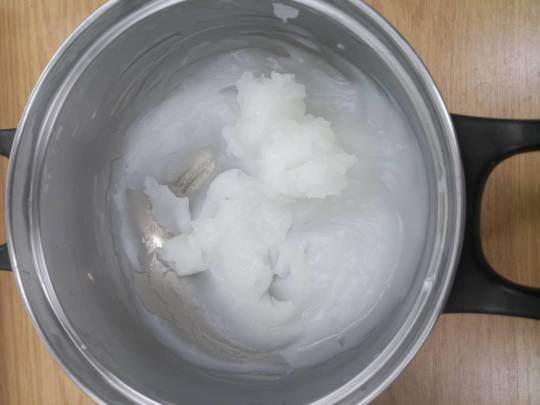
(and yes, my mesh is a nylon sock. I don’t own a fancy horeshair sieve and this stores much easier)
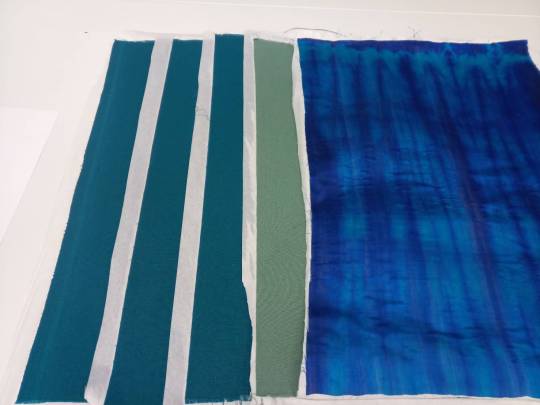
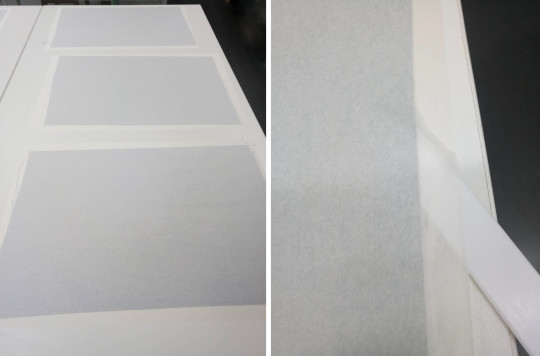
Then I prepared my cloth and the paper I was going to use for backing. The final sheets have the warp and the grain direction run parallel for better usage and less warping (at least that’s the theory, I have yet to use that selfmade cloth to find out).
The limiting factor here was the width of the web of tissue paper I used. Because I also need the paper to be 2,5cm -5cm larger than the piece of fabric in order to get a smooth sheet of book cloth. Having around 5cm for an edge makes it far easier to get the paper on the cloth even if there is a little skew.
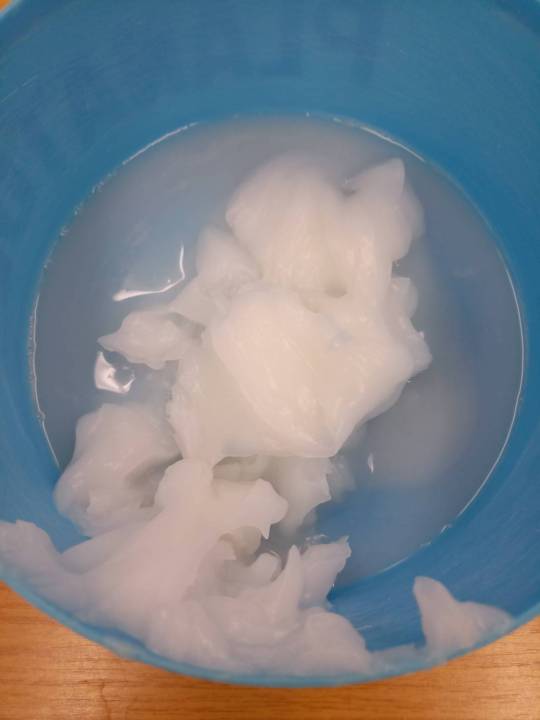
I moistened the pre-washed, but un-ironed fabric (I have some cotton and synthetic fabric, none of them are elastic) and smoothed it down to a flat surface that won’t be needed for a couple of hours (preferably over night).
Glas would be best but I didn’t have that, so I picked two work benches for that.
I used plenty of water, which was a good thing, I’d say because even when smoothed down, a bit more water made the synthetic fabric wrinkly again.
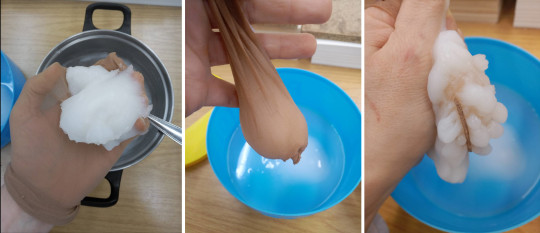
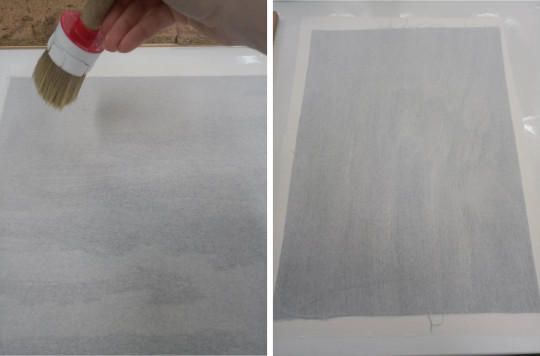
I sprayed the later front side, turned the cloth around and sprayed the backside. Brushed the water in with a clean brush until the fabric clung smooth to the surface.
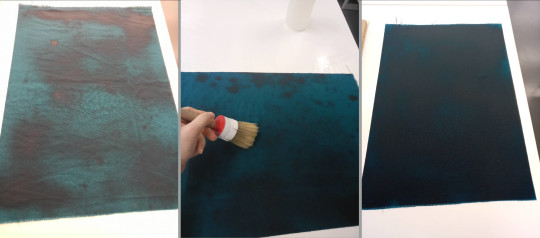
Then I spread the paste on the paper and put it on top of the backside of the fabric, brushed down the paper on top of the cloth with a clean and dry brush to get rid of any airbubbles. Starting in the middle of the fabric and brushing along the long side to the sides to push out the air. Then I gave it a brush down along the short side too. (the slightly brighter stretches of paper on the left are where the air is still caught under the paper, on the right is the paper all smoothed down)
Sometimes I had to lift the edfe of the paper carefully to let out some air or get rid of a too large wrinkle that was building up in the paper.
I weighed the cloth and paper down with blotting paper and blotting board as well as some wooden boards, but only to make them dry faster.
In consideration of the table surface I cut only one corner loose after the coth had dried and loosened the rest by running a very flat bone folder all around the edges.
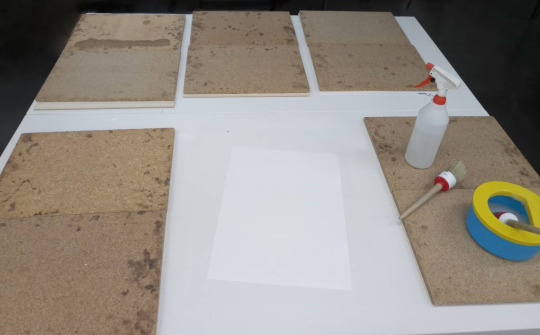
I had great success with the cotton fabric. only minimal bleed through of paste at the edges and a slight smudge in the middle of one sheet.
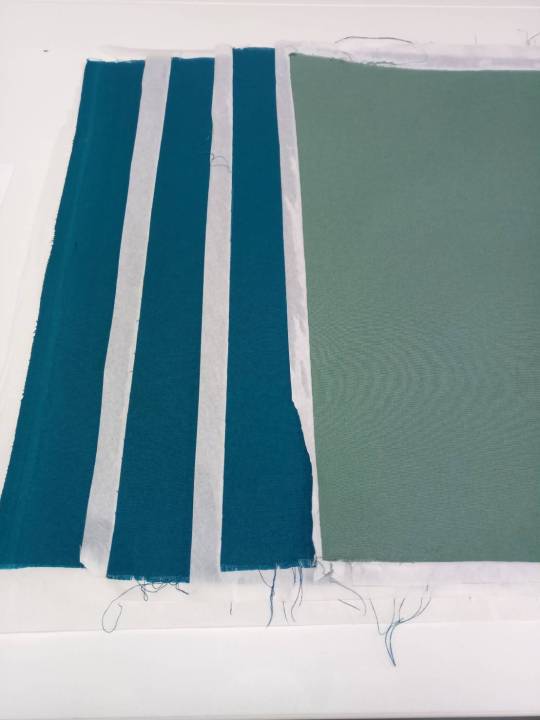
the synthetic fiber... not so much. While others before that one had taken well to the paste, the one with those shades of blue and purple did not. it was a mess to smooth down and apparently not smooth enough. when I pried it loose it was all bubbly and a lot of fabric was not adhered to the paper backing.
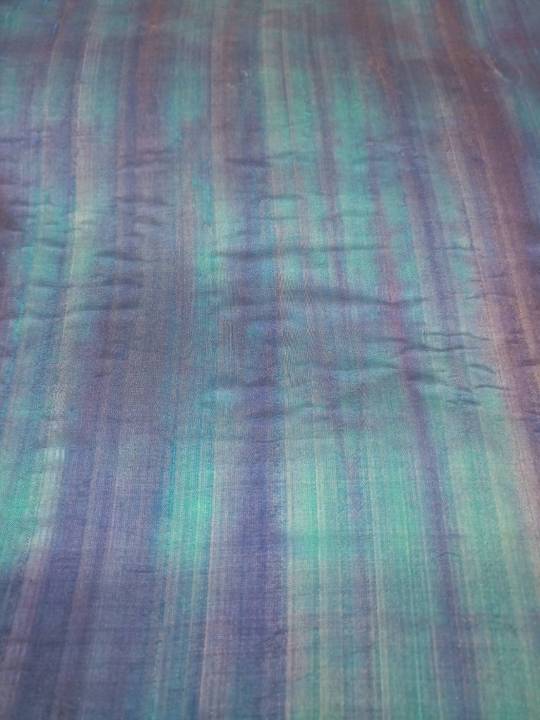
I scrapped that one, I pulled the paper off, washed it out again and this time pressed it while drying, so it would be smooth before the next attempt.
Cleaning up the surface was easy by the way. It was all plastered with dried starch paste, but I simply sprayed it with water, let it sit for a bit and wiped it off. No scrubbing needed at all.
#bookbinding#paper backed cloth#book cloth#making starch paste#cotton cloth#synthetic fiber cloth#again this has gotten more lengthy than I anticipated...
56 notes
·
View notes
Text
Awesome! It’s my friend Melissa talking about the Poison Book project!
#conservation#preservation#library#bookbinding#arsenic#poison book#poisonous#libraries#old books#green#book cloth#don’t lick books#1800s#1850s#1840s#victorian
32 notes
·
View notes
Text
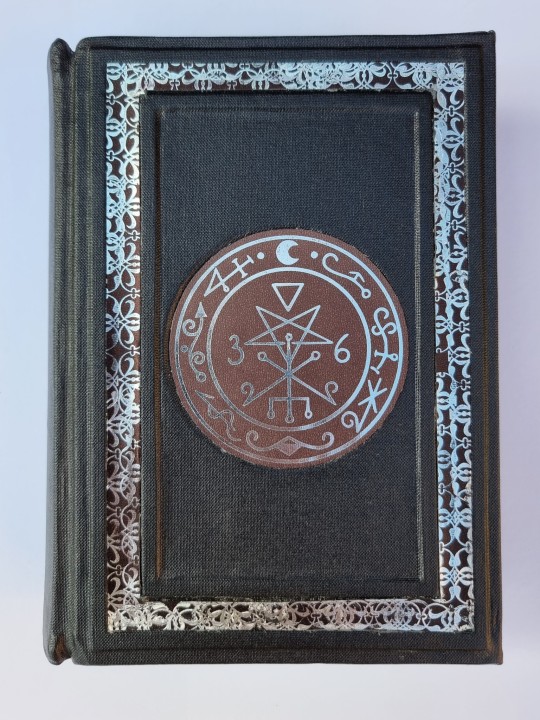
Book of Lilith. This a smaller and less detailed one I'm currently working on.
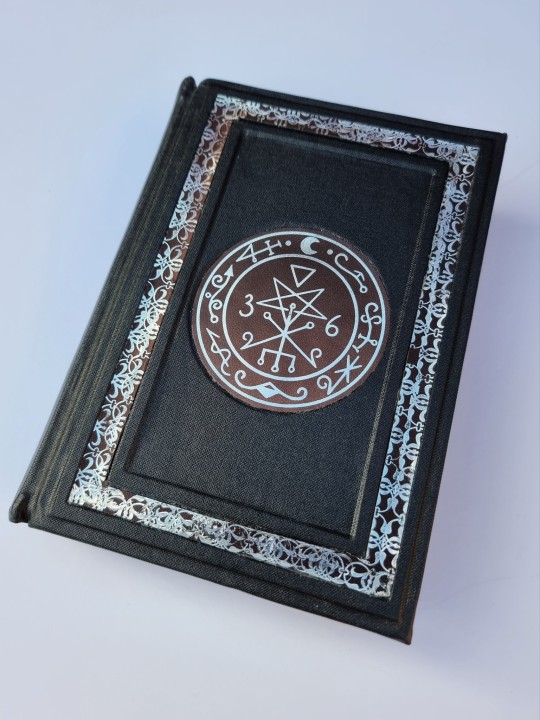

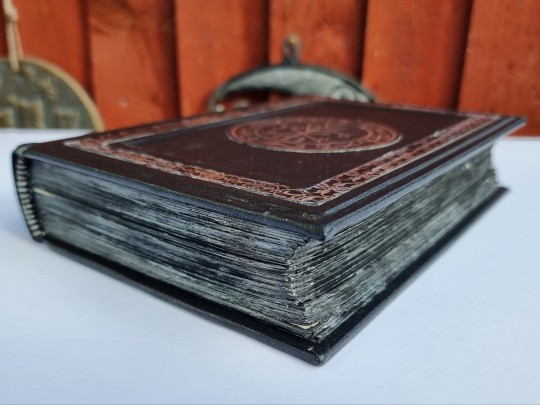
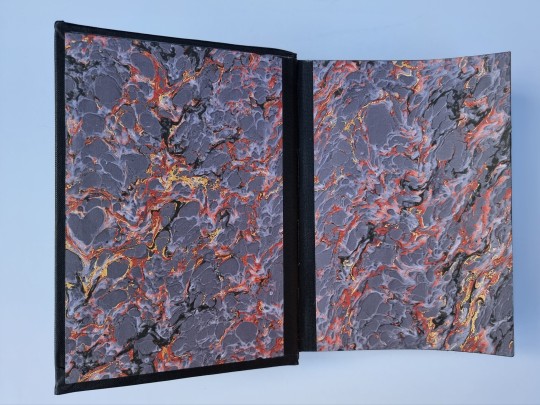
#booksbooksbooks#bookbinding#handmade#hand crafted#notebook#journal#seal of lilith#book cloth#leatherbound#leather journal#grimoire#spellbook#wiccan#witchcraft
9 notes
·
View notes
Text
Image Transfer
This week, our Printmaking blogger Becca, shares a very interesting process of image transferring onto homemade paper. Make sure you check out her blog to learn how she did this, and the materials that she used to achieve this.
#MarywoodArt

View On WordPress
#Art#Book cloth#Handmadepaper#Illustration#Image Transfer#inspiration#Marywood Art#Marywood Art Department#Printmaking#sew#Where Creativity Works
0 notes
Text

just some designs mainly created because I wanted to draw hakama and then it spiral out from there
bald zuko under the cute
#avatar the last airbender#atla redesigns#atla#atla fanart#atla zuko#atla azula#atla sokka#atla katara#atla aang#avatar aang#toph beifong#my art#I also have some wip designs for summer clothes for most of them and before anyone says anything for the fire nation theyre thai inspired#doing research for this spiraled into reading 3 fairly big books in the span of 2 weeks just cause#i ALSO have adult designs cooking#this was really inspired by all the girls on campus in their hakama a few weeks ago...wahhh so pretty
8K notes
·
View notes
Text
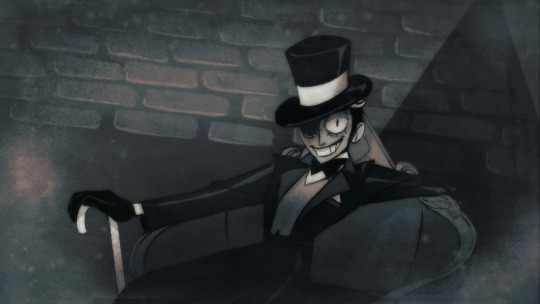
you cant tell me bill was around during the victorian era and not expect me to feel some kind of way
#bill cipher#the book of bill#gravity falls#the book of bill spoilers#kinda#not really#drawing this made me realize i basically already drew him in like pseudo victorian clothing when i designed the twink
3K notes
·
View notes
Text
My favorite thing about Annabeth is her wardrobe.
Cause like, Rick simplifies her clothes in a way a man would, and you can tell.
Cause in EVERY book, from The Lightning Thief to Chalice, she’s in the goddamn CHB shirt. With like some shorts or cargo pants. Nothing more, nothing less.
He’s made improvements over the years, giving her some other clothes. But he’ll always come back to old faithful.
Like, he most definitely did it on accident, but he made her so Adam Sandler and I love it
#and she def walks around in basketball shorts and a wife beater#+ the fact that she probably steals Percy’s clothes#like don’t get me wrong she looks awesome#I just think it’s funny#and with Rick’s books you can tell by the fashion that it’s a man writing#AND SHES THE ONLY ONE#besides Jason#Jason also only wears his purple t-shirt#I’m pretty sure he died in it#but everyone else has a sense of fashion#even if it’s a little bit#I love her#she’s so Adam Sandler coded#percy jackon and the olympians#pjo series#pjo hoo toa#pjo tv show#heroes of olympus#pjo#percy jackson#annabeth chase
4K notes
·
View notes
Text

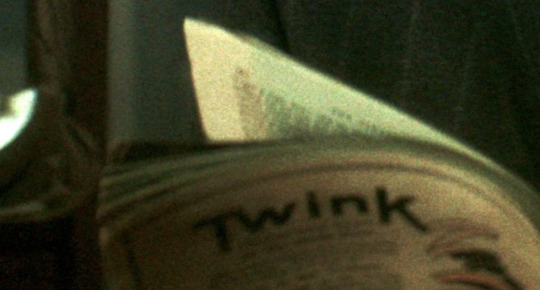
WHY. does the book say twink on it. hello. am i reading this right
#dead boy detectives#dead boy detectives spoilers#edwin payne#dc#he's a twink yes but the book???? hello????#rex speaks#edit: ITS A PERIOD APPROPRIATE AD FOR CLOTHING DYE NAMED TWINK. HELP#MORE INFO IN THE REBLOGS!!!!!
5K notes
·
View notes
Text
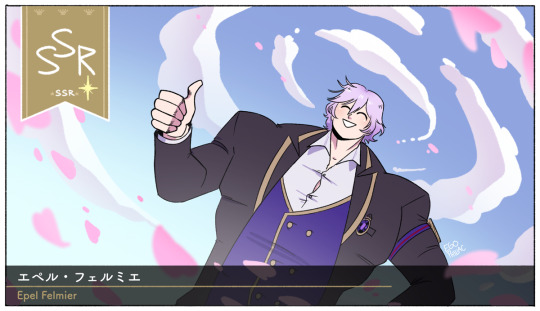
we were fucking ROBBED
#art#twisted wonderland#twisted wonderland spoilers#twisted wonderland episode 7 spoilers#twisted wonderland book 7 spoilers#twisted wonderland episode 7 part 8 spoilers#twisted wonderland book 7 part 8 spoilers#the only ssr i'll whale for#oh my god i loved this update. holy shit#got some ~compositions~ in mind so i'll get to the more serious stuff later#in the meantime those first couple of chapters genuinely made me question if i was perhaps trapped in my own absurd dream or not#the whole-ass video just DROPPED in there idia how long were you WORKING on that#don't forget to like and subscribe! :)#i demand that all cutscenes be animated in that style forevermore#i also demand that all clothing changes henceforth be done via magical girl transformation phrase#not just in the dreamworld. all of them.#DREAM~~~~~FORM~~~~~CHAAAA~~~~NGE#also savanarook was so unexpectedly precious! i want to protect him.#augh there's SO MUCH and i am SO PLEASED with all of it#anyway i guess we're going to be going through everyone's dreams after all!#and it's going to be a THING!!!!!!!! CLOSURE AND SELF-ACCEPTANCE FOR EVERYONE#(insert 'it's all coming together' meme)#man i hope 'please watch this video' remains a running gag it's AMAZING#also i cannot believe#i cannot BELIEVE#that the plan is actually literally#defeat malleus by inviting everyone else to the party except him#HIS ULTIMATE WEAKNESS#malleus doesn't get to be in smash bros
6K notes
·
View notes
Text


Vintage book covers
5K notes
·
View notes
Text
Starting!
I know, it looks like trash, but trust me, I know what I'm doing!
1 note
·
View note
Text
Two Reddit posts of bookbinding a guy did did with CCM and Reebok NHL jerseys.
What to do with old hockey jerseys that don’t fit me anymore? Create new sketchbooks with the jersey material.
A year ago I made books with hockey jersey covers. Back at it again this year.
0 notes
Text


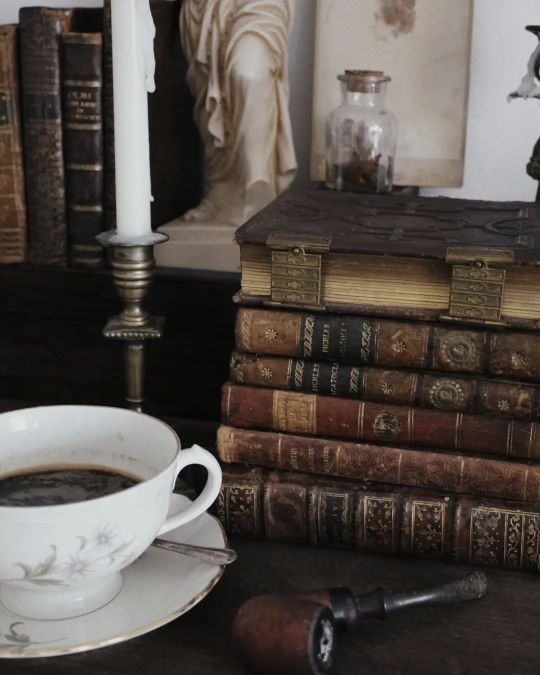

Instagram credit: matildascabinet
#dark academia aesthetic#dark academia#bookaholic#old books#bookblr#dark academic aesthetic#dark academia vibes#vintagedecor#vintage clothing#vintage aesthetic#vintage style#vintage academia#woman writers#writing#classic literature#literature#piano
3K notes
·
View notes
Text

Late happy birthday to my birthday boy
#percy fanart#percy jackson#estelle blofis#percy older brother#percy pjo#pjo headcanon#book percy#pjo hoo toa#percy jackon and the olympians#heroes of olympus#I headcanon that Estelle wears Percy´s old clothes cuz she wants to be just like him#did the math and he would be around 24 in this what is going on
2K notes
·
View notes
Text

My page for @sheikahzine; about Impaz's duty to her village, empty of people and full of memories.
[id in alt text]
#legend of zelda#loz#twilight princess#loz tp#i'm still reeling that someone sent me an ask about this one.. that they took the time to find my tumblr and tell me they liked it#it really meant a lot; thank you to anyone that stops to leave comments like that. they make me happy#but yeah! here's the usual symbolism ramble:#i thought it'd be cool to have the 'spirits' flowing one way and the cats walking through them the other way#to kinda show the difference in life inhabiting the village in the past and present#link's face is covered because impaz was just waiting for 'the hero' so his clothes are what matters; not his face#and it (hopefully) gives a surreal and intangible sense to 'the hero' she could only hope would actually show up#you can feel free to interpret the glowy blue sheikah as ghosts or just as memories of the past! i couldn't decide either way#the one on the bottom left is oot impa since she's implied to be the village founder. so i guess she would be a ghost actually?#fan art#my art#project stuff#and ahhh the book-- everyone's stuff is so beautiful!!#especially the writing. some of the fics made me really tear up and some were so fun and clever. i really love them#a lot of them captured the sheer burden of the role of the sheikah; all of the time and grief and doubt#i know i always say this stuff about every project but. the people i get to work with in these are truly so skilled every time
4K notes
·
View notes
Last Seen Blogs

longlivechloeking
Long Live Chloe King

medieval-murder-cats
Ye Old Murder Cates

erwinerwan
3rwin3rwan

rosesmit1030
Untitled
80smen
🔪