#camera tutorial
Explore tagged Tumblr posts
Visit Tumblr Blog
Explore Tumblr blogs with no restrictions, modern design and the best experience.
Last Seen Tumblr Blogs


Fun Fact
Tumblr Inc. has $15.1M in annual revenue.
Text

Achieve Perfect Product Photos with These Settings
Struggling with product photography? Learn the best camera settings to capture perfect shots every time!
1 note
·
View note
Text

HOW TO SET/CHANGE THE TIME ON THE Y2000 MINI CAMERA By Regis Casillas
Chances are, if you've been on Amazon, AliExpress, Wish, Temu, etc., you've seen these "mini cameras". This particular one is called the Y2000, which is a 640x480 keychain camera with surprisingly decent image quality.
By default the camera sets the date to sometime in 2067, so this will need to be set manually. This wouldn't be an issue if the camera didn't force a timestamp onto the images and videos you took. The instructions for the Y2000 camera cites that to change the time, you'll need to use "an included CD" to change the time. This may have been true when the device was launched years ago, but my version (purchased November 2024) didn't include one. And I couldn't find the supposed program online after countless digging on Google.
**SO HERE'S HOW YOU WOULD CHANGE THE TIME ON THE Y2000 CAMERA**
The first step is to make sure you've used an SD card with the camera prior. This will create a file called "TIME.txt" on the root of the SD card. Then connect your camera to your PC or insert the SD card into your PC.
Do NOT open the "TIME.TXT" file with Notepad, otherwise you'll end up with scrambled characters. Instead, open the file up with Notepad++
Once you open the file, you'll see "2017-03-08 12:12:12" along with "NUL NUL NUL...." Do NOT touch the "NUL" part, instead you're going to want to edit the written date to the current date. The date is formatted in YYYY-MM-DD and the time is formatted in Military format (23hr:59min:59sec).
Once you've set the time, save the document and put the SD card back into the camera, or disconnect it from your computer, and power the camera on by holding the button
The next time you take a photo, the forced time stamp should show the correct date.
#camera#minicamera#y2000#aliexpress#aliexpress camera#mini camera#how to#howto#tutorial#camera tutorial#change time#photography#images#cameras#cheap cameras#spy camera
0 notes
Text


More photos from my digital camera (7.2 megapixels)
#thought it had been a while#one of my favourite shirts#my girlfriend bought this crt tv#so she could watch sewing curtains tutorials#on a vhs#it’s super nostalgic I haven’t tapped on a screen and heard the ding in so long#y2k#y2k aesthetic#y2k style#y2k nostalgia#y2k icons#2000s web#old web#2000s#early 2000s#2000s internet#crt tv#vintage games#digital camera photo#digital camera
897 notes
·
View notes
Text
i caved and got dbh for my pc (despite already having it for my console) and honestly it's nice to be able to have have my monitor so close to me and be able to really just stare at all the details in the gallery (i may have spent an obscene amount of time staring at each character model)
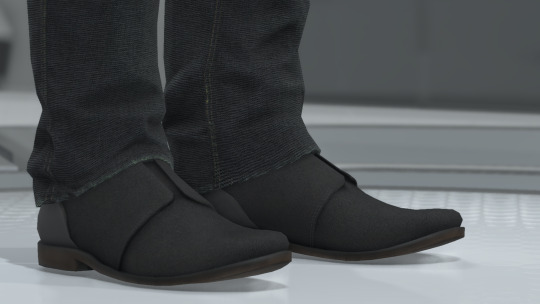
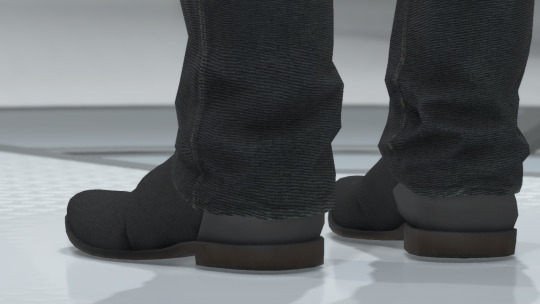
here's some details i noticed about connor's model
firstly, wtf is going on with his shoes. like does it have laces???? is it just a slip-on??? I WANT TO KNOW WHAT THE TOPS OF THE SHOES LOOK LIKE. also why are his jeans unhemmed?????
at the bottom of his jacket there's the two little dark grey rectangles that honestly i never really noticed and i don't think i've ever included it in my art bc my brain just erases them from my brain. it's such a random design choice and i can't decide if i hate them or not.
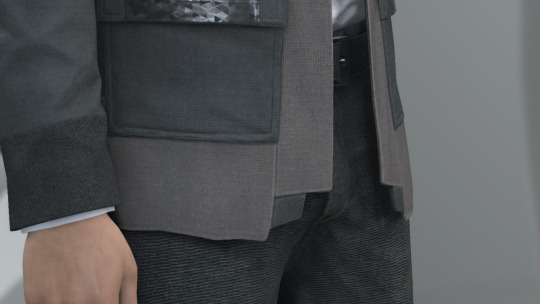
also why tf does he have two random button holes on the front of his jacket??? his jacket doesn't have buttons???? i cannot fathom why these exist or what their purpose is
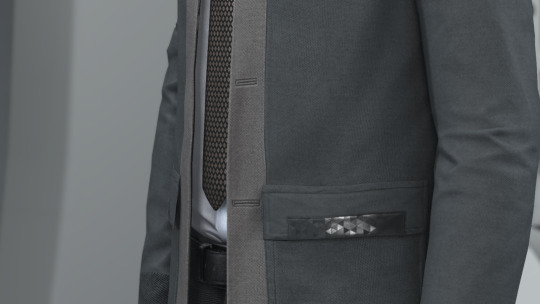
never really took the time to analyze connor's jacket so closely and i love the detail of the different materials on his jacket. like the tessellated triangle motif throughout his jacket clearly being some sort of synthetic material compared to the cotton/wool fibers
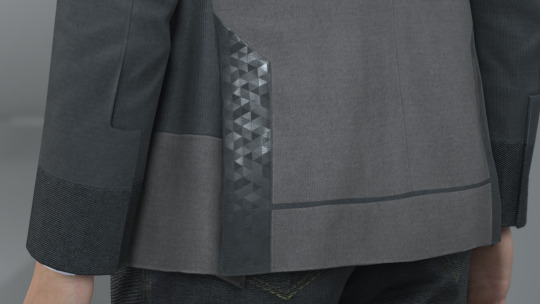
also i love the seam detail on his sleeve? like i love how it's not just one straight line but adds more shape and design to his cuff.
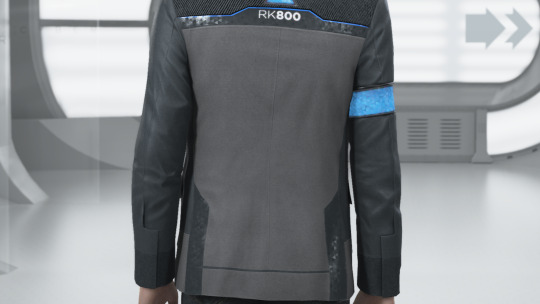
i love the texture on the top back half of connor's jacket. it reminds me of carpet or those really textured couches. it's like some type of corduroy likely or something. i wanna touch it. also the cyberlife branding right under the ANDROID text how did i never notice that??

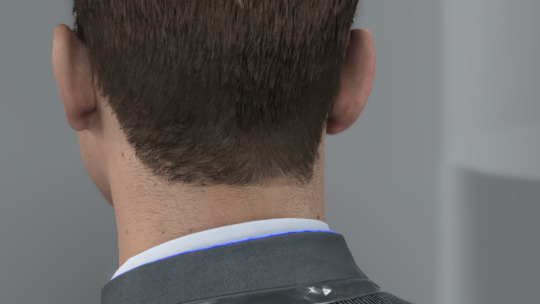
if you look at the inner lining of his white collar, it has a darker liner on the inside. i don't think you typically see that on white button-ups???
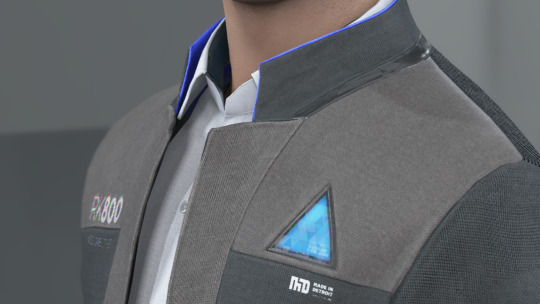
lastly LOOK AT HIS NECK MOLES. HE'S GOT SO MANY LITTLE NECK MOLES. and after extensive zooming in and out and looking at it from all angles, i have determined that he has a little tiny mole on the back of his right ear on the rim. idk if you can see it in these screenies BUT IT'S THERE I SWEAR TO YOU. he's also got the little divot some ppl have on their ears near the top of his ear.

anyway, uhm, yeah i totally haven't spent more time staring at the character models than i have spent playing the actual game
i was also staring at kara's and markus' models and might post my thoughts observations on those at another time. but for now we got connor.
#duda if you're reading this just know i am 1000% going to consult you on how to take screenies bc the in-game camera is ass#also nine if you are reading this imma ask you too and ask you for a tutorial on how to add your mods to the game bc ANDROID HANDS#mine#reference#connor#dbh screenshots#dbh reference#dbh connor#connor rk800#detroit become human#detroit: become human#d:bh#dbh
518 notes
·
View notes
Text
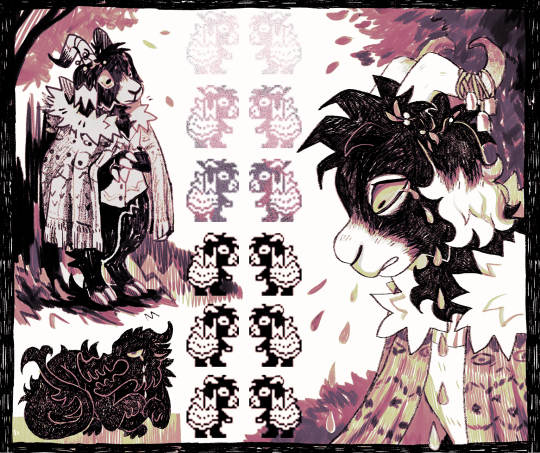
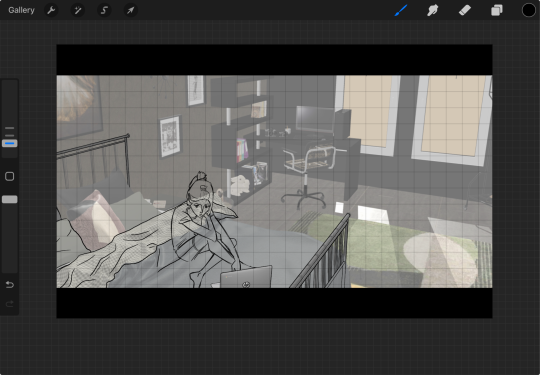
more svanhildr - trying new things, like a brave boy
#my art#anthro#furry#illustration#oc#svanhildr#dysterel#i have so many great brushes i never use for no reason so i'm expanding my horizons and using like 10 brushes instead of 3#and i used the pencil tool for the first time so i could make a sprite of svanhildr#btw don't do pixel art without looking at multiple tutorials first. worst mistake of my life#i think my blobby indeterminate sprite daughter looks great though#also has anyone seen brass eye and if so have you seen when the posh reporter lady is walking to the prison#and she turns to the camera and says something like “i'm going going inside now. like a BAD boy”#anyway it gets me every time and writing brave boy made me remember it
2K notes
·
View notes
Note
I can't express how much I LOVE the way you draw hands! They are just absolutely amazing and so SO expressive. Do you have any advice on how to improve? (other than the obvious, "practice", lol)
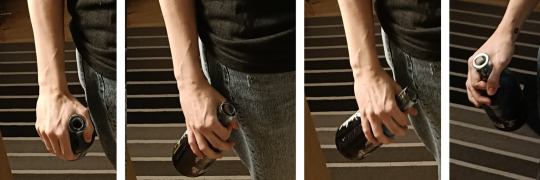
THANK YOU!! Hands are my #1 favorite thing to draw and i love using them and touching to enhance the feeling of a drawing so that makes me so happy to hear!! lol not the dreaded 'just practice' - I tried to put together an impromptu example for you: I’ve always loved drawing hands and include them in my art a lot but I can say for certain that there was a huge boost in my abilities when i started tracing from real life images to better understand the way fingers curve and deform around objects, especially - I’ll take a reference picture or two, trace, figure out which looks better and then try to re-draw it:
You want to draw a character holding a bottle? Alright, find an object that’s about the size you want, get your camera (a shitty res phone camera will do in my case), and get to it!
I like to do some variations because sometimes things just look *goofy* when you have simpler lines depicting them, so here’s 4 different ones:
Alright, next step - rough lines over to see how it translates to 2d:
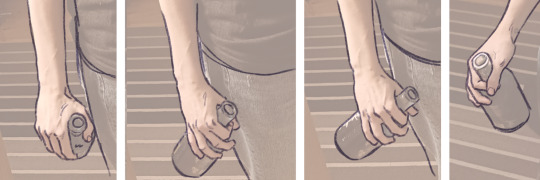
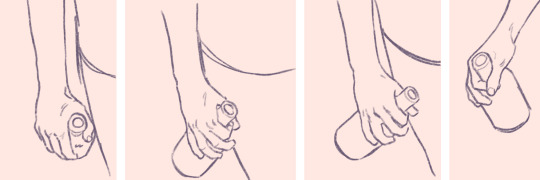
#1 looks goofy so that one's out - I like #2 the best but the grip'll translate better if I close the grip of the two first fingers, so I'll do that (or retake the picture) and then re-do it on my own while eyeballing the reference i just made (I usually just draw the lines for hands directly but if i'm having trouble i break it down into rough shapes first) :

Think of it kind of like building a neat little reference library in your own brain - next time I want to draw a hand holding a bottle I can think back on this and what I picked up :)
Thanks again, hope this helps!
#Art tutorial#I guess???#my phone camera is filled with weird reference photos of myself for this exact purpose lol#Not the *best* hand I've ever drawn but I figured the example worked better w something that would be difficult (:#my art
71 notes
·
View notes
Text

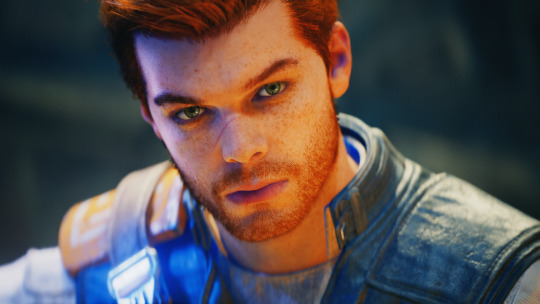

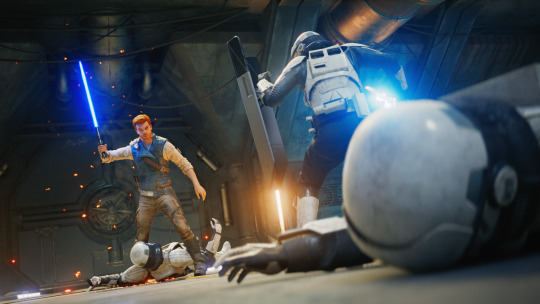
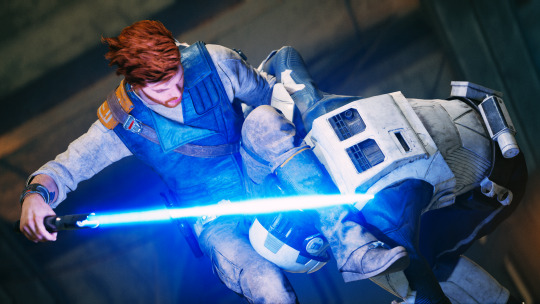


"Stop the Jedi!"
#all combat tutorials should make you feel this cool#star wars jedi survivor#jedi survivor#cal kestis#photomode (camera mod)#star wars#coruscant
133 notes
·
View notes
Text
Pro tip: if youre broke but want an easier way to make backgrounds, theres an app/website called homebyme thats free ✨️✨️
#elodie room reveal (sorta)#i just wish there were more camera and poster options because thered definitely be more here#élodie desrosiers#mlb oc#miraculous ladybug#mlb#my art#artists on tumblr#oc#art tips#art tutorial
24 notes
·
View notes
Text
im just cackling thinking how Raven have to scale literally everything in base because shit's so tall and she's tiny
#thankfully she love scaling walls and tall things for no reason#Ghost being one of it#imagine if Johnny was making tiktok videos and then ask Raven for ideas#so she does those “tutorial” on how to reach the tallest cabinet without asking for help from anyone#and she does this super specific manouver and leg placement to get to the top#going “see? dont need no one”#or take a knife to stab on a surface and use it as a stepping plate or holding plane#random knife spot on the wall is alr a common sight so use that to your advantage moment#unless Price is around#then she'll still ask him to help her take stuff#takes Johnny's camera to zoom in Price's happy trail when his arm go up cuz the shirt goes up#Raven: there's a time for everything#LMAO#gummmyspeaks#[oc]Raven
20 notes
·
View notes
Text
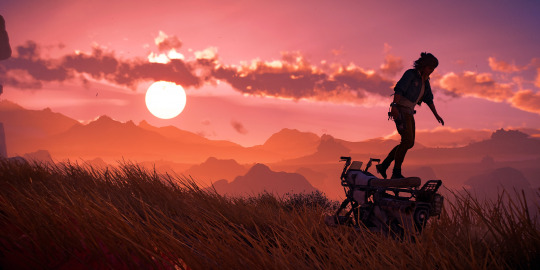
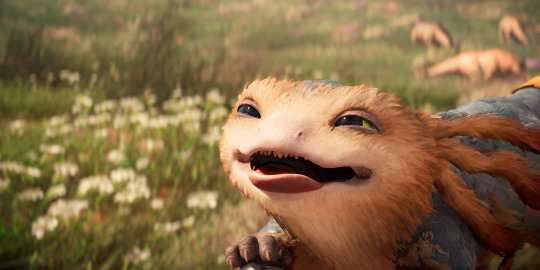
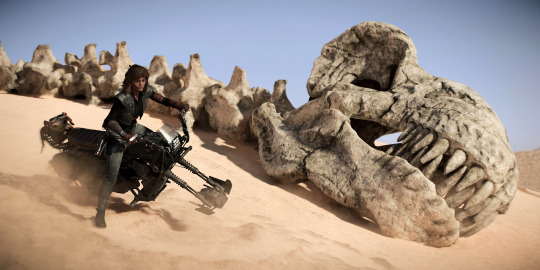
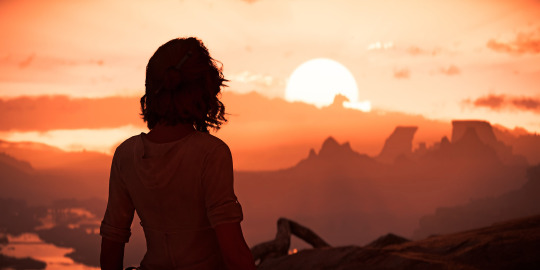
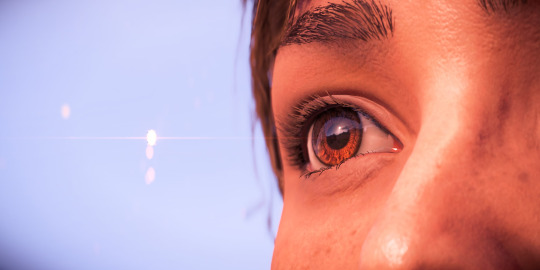
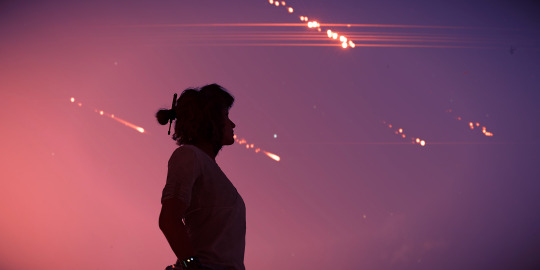
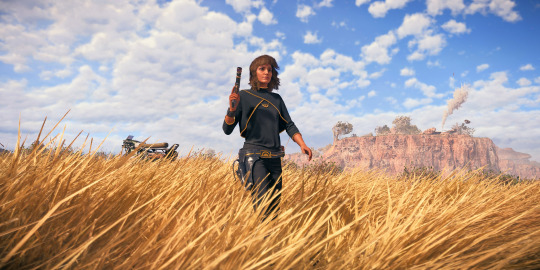
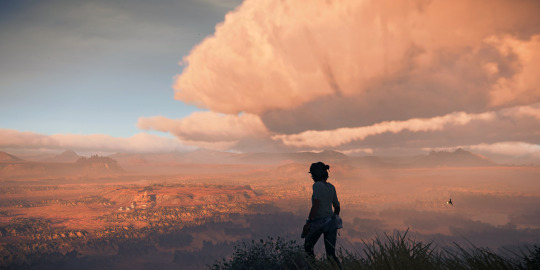
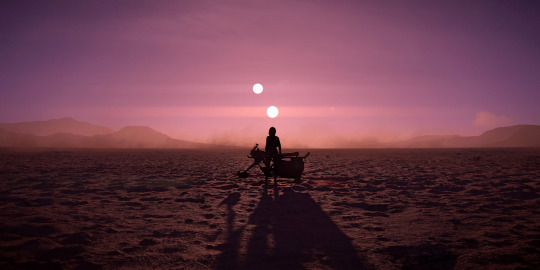
star wars outlaws
#star wars outlaws#kay vess#nix#did a brief detour into this game it isn't bad! but certainly lacks in polish for core loops. tutorialization pipelines are ass also#performance - also ass. had to play quality on ps5 for it to have any clarity at all. but the open world is gorgeous#and it certainly nails the very narrow target of horse girl star wars fantasy (ripping across tatooine on a speeder with a little Guy)#nix is everything I love him. modern star wars rarely captivates me but they do know how to do lil guys real well#my photos#star wars#also-also. would be remiss not to mention. never played a game with unregulated scope creep this noticeable before. it's baffling#I KNOW people crunched on this it's in the walls in the floorboards it's everywhere. unmitigated hodge podge of mechanics and pillars#and those pillars are often unbalanced between each other. storytelling payloads are an issue too. there's pre-rendered in-engine cutscenes#real-time in-engine cutscenes. and digic-produced full CG cutscenes. and their placement and prioritization feels insane and inscrutable#like three different teams were working on the game at the same time and never in congress or coordination#it also suffers from the open world 4th and 5th priority narrative payload issues - many secondary and sometimes even primary questgiving#and expository dialogues are in-game zoomed camera lipsync exchanges. or flavor text#on the other hand - surprisingly deft mission design itself? side quests reward either cosmetics or actual unlockable deployable skills#it has fleeting genes of a metroidvania spread across a wide open world in that sense. but only fleeting. the rep system is a smokescreen#and progression in general has a very open and unsatisfying end to it. this game needed less scope and maybe no space stuff at all#the resulting resource allocation adjustment would truly make for a captivating open world adventure. as it stands it feels like#a product of overworked people misusing mismanaged budgets and managing to sprinkle some love into it regardless#games should never be good on the merit of their perceivable seasoning of overwork and passion. that really only bakes a sadness cake
41 notes
·
View notes
Text
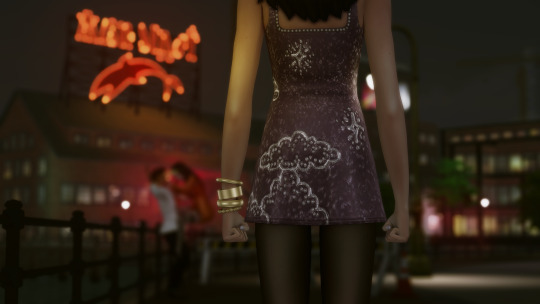
I thought it might be fun to do a little behind the scenes for the last story post! You guys might be surprised how little actual editing was involved. I mainly just crop, add brightness and saturation, clean up any small bits of clipping or weirdness that bother me, and then add captions! Do you want to know what actually took me the longest?
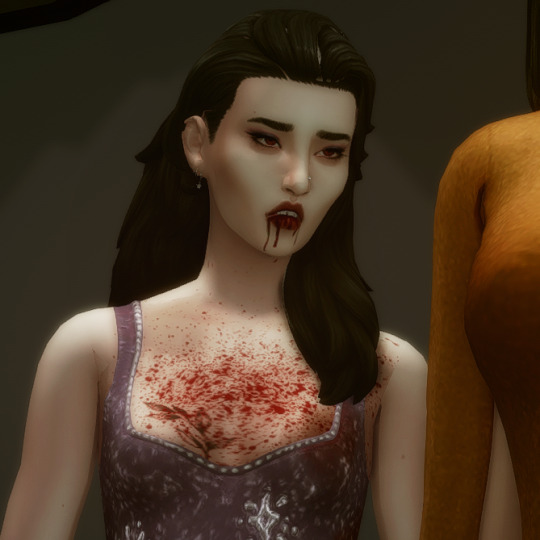
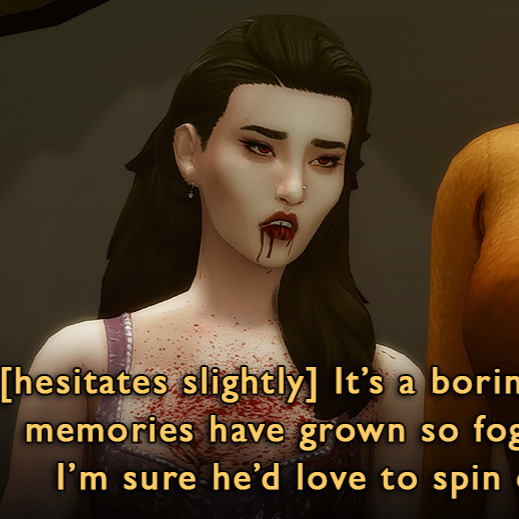
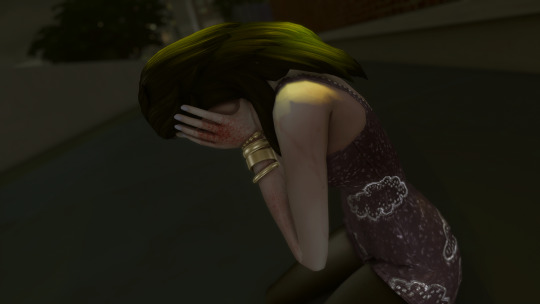
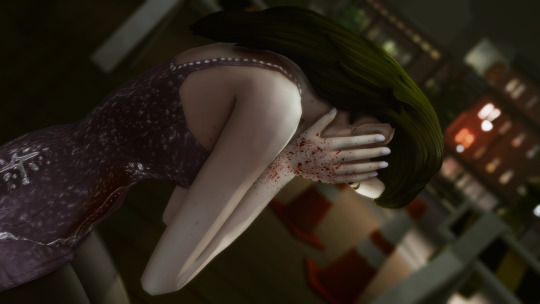
This hair had some problem areas that showed up in live mode but not CAS. It's such a tiny thing, but it annoyed me, so I had to touch it up in nearly every screenshot. Luckily, the darkness of her hair means I didn't have to do a perfect job.
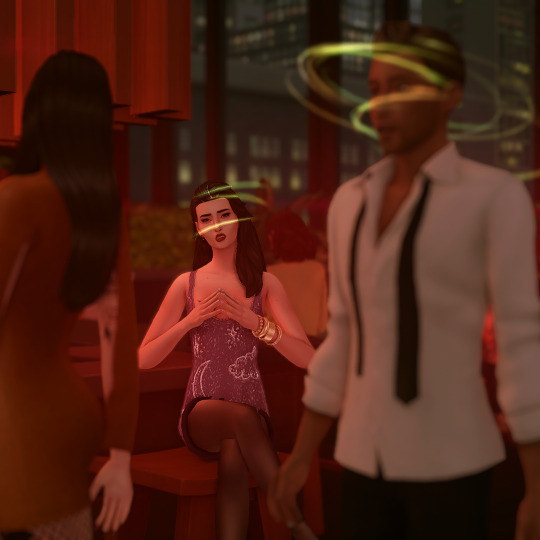
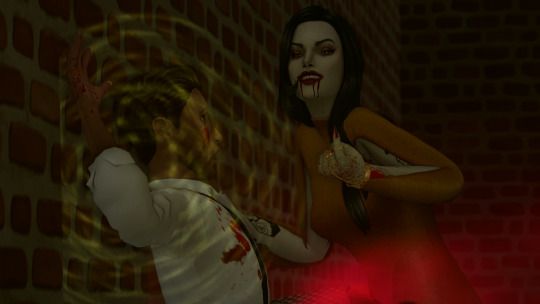
The effects were all done in-game. Lilith has the alluring visage vampire perk, which creates the red haze and mind control spiral. Unfortunately, Helena crossed her path too closely, and rather than set the shot up again I used the clone brush in Photoshop to edit out the effects around her head (vampires who can successfully do mind control on other vampires are exceedingly rare). By the way, I later figured out a quick and dirty method for dispelling unwanted visual effects on a Sim is to remove buffs in MCCC.
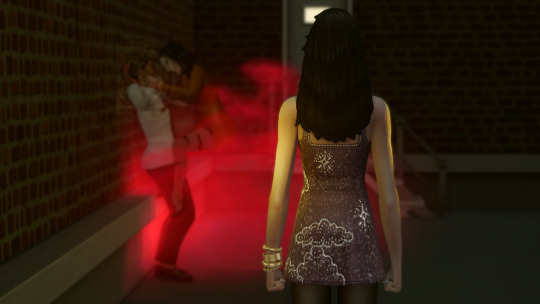
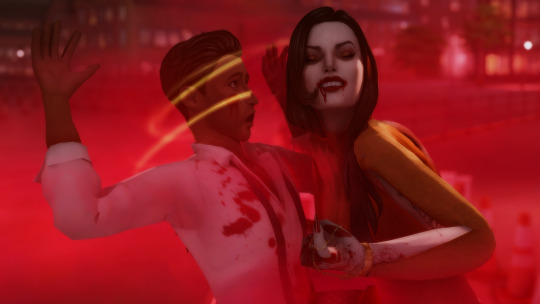
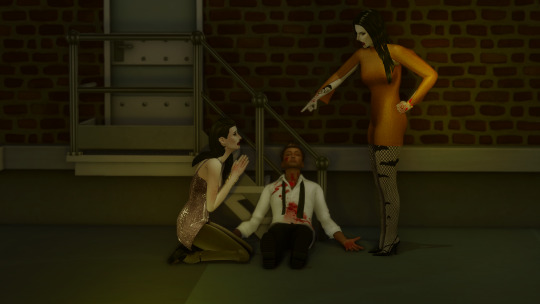
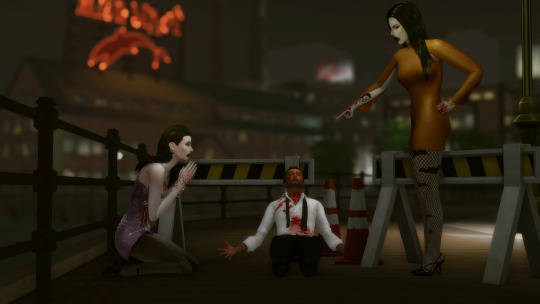
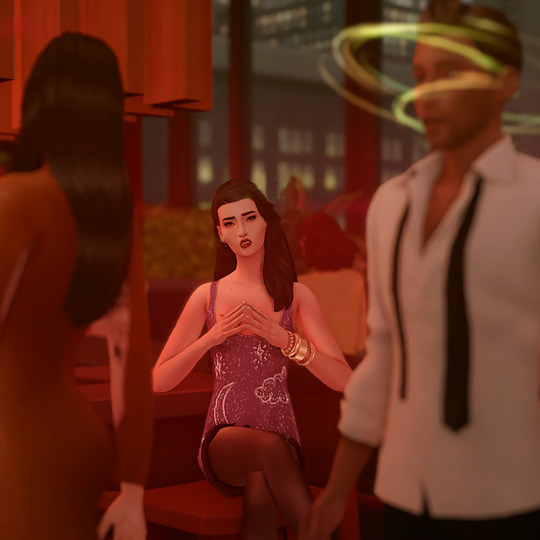
As I've mentioned, I had to shoot the attack scene twice. The first attempt was too dark, the location wasn't very visually interesting, I was in an area of San My where I had less camera control, and I used the Effects Player, which ended up being less eye-catching (hey, sometimes vanilla is the best option!). They would have worked to get the point across, but I think you can really see how I learned and improved upon my vision!
These comparison shots are all uncropped and unedited, by the way. Reshade/Relight truly does the heavy lifting. I've also gotten better at finding an angle I like and sticking with it, even if that's only because I don't want to adjust Relight all over again, lol! Speaking of angles, that last shot was done using the Dutch angle trick I learned in this tutorial by @surely-sims! First-person camera is actually super useful for storytelling. If you don't already know about this head-turning trick, it'll change your life. It comes in clutch for changing the eye line of a posed Sim since I'm not always great at getting that right in Blender.
Anyway, I don't know if anyone will find this super helpful or interesting, but I'm always open to questions about taking and editing screenshots, even though I feel like most of what I know has just been absorbed through osmosis and trial and error!
#ts4#sims 4#the zhaoverse#long post#i didn't even talk about the gifs but they were as simple as simple gets lol#i just saved the camera position in tab mode (ctrl + 5-9)#took two pictures from that angle#and then faded one shot into the other#all you need is the most basic gif making tutorial you can find#i use photoshop but i'm sure there are easier ways to do it#blood tw#*tbw
64 notes
·
View notes
Text
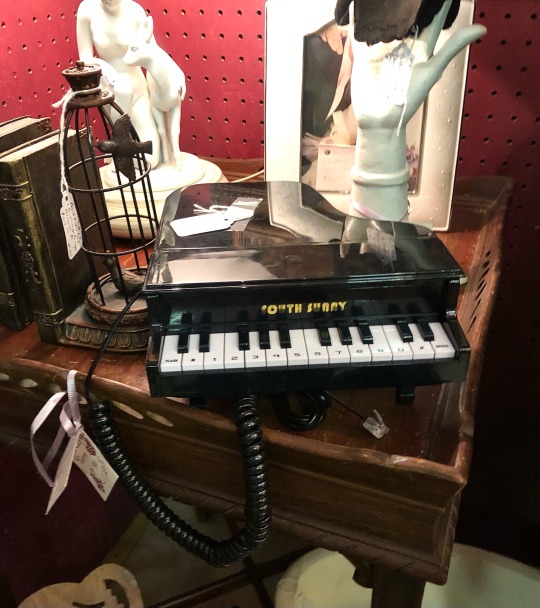
piano phone 🎹 ☎️
#thrift finds#antiques#flea market#goodwill#retrocore#trinkets#kidcore#weirdcore#clowncore#vintage#piano#piano music#piano tutorial#pianoplayer#music#musical instruments#instrument#kitsch#vintage kitsch#kitschy#vintage design#vintage decor#vintage phone#old phone#antiquing finds#antique#vintage camera#vintage clock#vintage magazine#vintage fashion
48 notes
·
View notes
Note
I noticed in the art fight batch you posted that it looks like scanned pencil lines coloured in, if so, how do you get them so clean n crisp for colouring if I may ask :0
Sure! I actually don't have a scanner so I just take pics with my phone lol. This is what it looks like after I mess with the settings in my camera roll, honestly my pics are pretty crunchy but I think it adds charm LOL I just clean them up in photoshop as needed
Then I put it in photoshop to fix the values a little more and clip out around the character, I don't really have a formula for this I just mess with the contrast and levels etc. I think it helps that I sketch these first with a harder pencil then go over the lines with a softer one so I can crank the contrast and the messier lines fade a bit naturally, though my art is just messy either way so I don't really mind lol. Sometimes I go and touch things up by hand as well by painting over lines I don't want
Then I add flats on a multiply layer, then shading. Also a color overlay above the pencil lines so they arent grey
Then on a layer on top I "enhance" it I guess and render a bit, will vary depending on whatever I think the pic needs but usually I'll draw over outlines and paint over anything that's still too rough. For all this (as well as coloring/shading) I just use a regular soft round brush

#caramel-bites#ask#art tutorial#honestly my phone camera isnt even good but if you can get decent lighting its fine ngl
267 notes
·
View notes
Text
I've been considering if I should make video tutorials about makeup for people with low spoons who just want to learn how to use concealer without having to trawl through the dumpster fire of the current makeup trends, which is a very bold idea for someone who considers deleting her Tumblr blog every time one of her posts blows up and has, in fact, done exactly that in the past.
#i follow a few makeup influencers on youtube#and I haven't seen a decent#in depth tutorial in YEARS#And a tutorial about simple non expensive makeup in even longer#and something that doesn't require a ton of effort in... ever#everybody is selling something#i want to be the grandma who does a two minute tutorial about knitting#and it's all explained neatly and easily#but alas#i look terrible on camera and don't want people to be idiots in my inbox#which is impossible#makeup
23 notes
·
View notes
Note
Have you got any tips for making a VN? They’ve always Interested me but I’ve never really bothered with one:)
for like planning, motivation, or the literal mechanics of it? if ur talking about a google slides VN, then i can help a little HAHA but...i recommend a video... i think there are prob tutorials online?! i kinda just opened google slides and figured it out myself but yk. HAHA
i think you should get very familiar with google slides. LOL. learn how to make shapes, transparent shapes, how to fit images, how to adjust colors/opacity/etc, how to use animations, how/what to link so things go to the right page. . .
always keep a few "asset" slides too. like with the textbox(which should already have the nameplate and text on it). once you have that, it'll be very easy to copy/paste it onto diff slides so that everything remains consistent and its not jumping around!
for sprites, i had a REALLY HARD TIME MAKING THEM LAYER PROPERLY LOLLLLL. i cant even remember how i did it, but i think it was like...
i had 6 versions of each sprite. make sure when you download them, they fit the size of your canvas as much as possible - otherwise youll be stuck with shitty cropping that makes it harder to keep them perfectly layered for seamless expression changes.
when you put them into google slides, it's kind of annoying cuz itll perfectly layer 3, and then randomly place the other two on the page. so youll just have to delete those and re-insert them...hope it works... it took a lot of trail and error for me cuz i couldnt understand why it was messing up so much LOL.
idek what else to say. it was truly a pain in the ass. will be doing it again though
#asks#LOL#ill try to find a tutorial online and post it...#or maybe ill make my own tut? but i dont like to talk on camera . . or explain . . . and im hella awkward verbally . . . LOL#<- literally does competitive speech. cant talk for the life of me.
13 notes
·
View notes
Text

Welcome to my Little CharLI and VP spotlight tutorial I will be going over a few things I have learned since starting Virtual Photography in the hopes I can help out people unfamiliar with CharLI and want to learn how to light there model, make characters look at each other and how to use AMM to help get that perfect shot.
I'm not an expert but I have improved alot since I starting using these simple tips I will share with you.

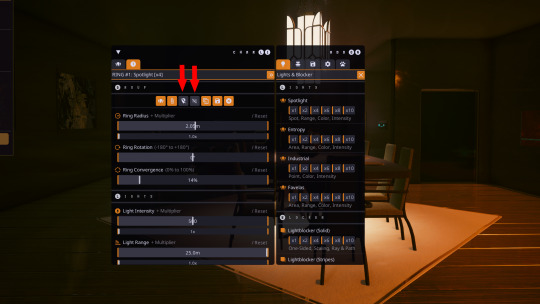
Here is what CharLi looks like when you open it, it may seem a little overwhelming at first but once you get used to what does what, its prety simple to use
I'm going to be sharing how I use spotlights in this tutorial so don't worry about the other lights for now.
first of all I usually only use a single, or a set of 4 or 8 spotlights in my shots, you can use more of course.

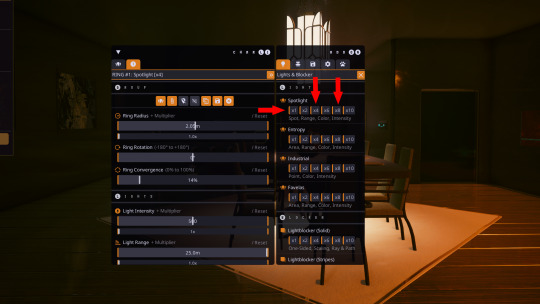
this is what the spotlights look like, they are in two parts, the main spotlight mesh, this is the physical spotlight that emits the light, and the pink triangle (Pin) this gives you an indication of there height for reference, this is useful when you are getting your lights in position as you can physically see them to get them in the right spot.

Here you have your radius, this is how close the spotlights are to your model,
your rotation this does as it says and rotates your lights around your model,
your intensity is how bright your lights are. each as two sliders, the top is subtle the bottom will be more extreme.
For example with radius if I use the top slider it moves the lights further away but only a little, if I use the bottom slider it will move them even further away. be careful as you can push them so far away light no longer hits your model or they disappear through walls. so its a little trail and error.

Here you have colour, position and angle
colour - is self explanatory, you can use the red, green and blue sliders to change the colour of your lights, it can be a bit of trail and error to get the colour you want
Position - you can adjust your lights position in the X, Y and Z axis i.e to the left, right or up or down.
Angles - tilt you lights to the left, right or up or down
Ok now we know the basics of what does what.
There is more stuff you can adjust but I'm still learning so we will only be covering what I use and know which is the basics
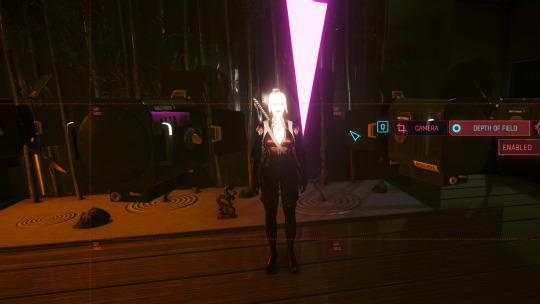
When you first spawn in spot lights, they will likely be to close to your model and the light will be a little too bright, so once you spawn them in we can make a few quick adjustment to there radius and light intensity to make that lighting a little less harsh.

See how much better this looks already? a good tip I follow is to lower your exposure in Photomode down, then bring up lights with CharLi so you have a better control of the light on your model.
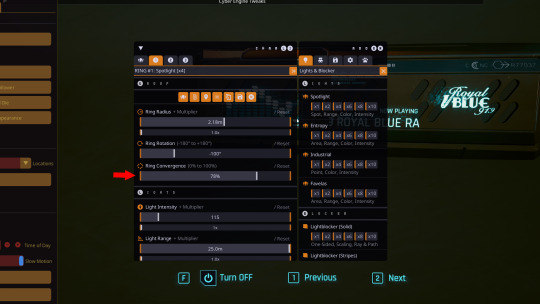
multiple spotlights spawn in a ring around your model, if you want to use different colour lights ect, I usually converge my lights so they are closer together then rotate them to one side of the model.

Once I have my coloured lights in position I duplicate them, this duplicates all settings from light intensity, radius, colour ect, then I use the rotate function to bring the duplicate lights to the other side of the model and adjust my colours.

here I have made the left lights pink and the right lights a pale blue. looks kind of cool right?
I noticed when having lights on either side, the middle of her face was not lit so I added a single spotlight in front to give her face some light. I also zoomed in using the FOV slider in Photomode. you can zoom with the scroll wheel but this can result in some distortion like making her head look bigger than her body at some angles. using the FOV slider gives you much better quality and far less distortion.
Once you are happy with your lights positions you may find the lights are in the way when trying to get your shot as at some angles the lights will be in the shot blocking your model. to solve this you can hide the mesh and pin we talked about earlier with these icons here. this will hide the lights while still lighting your model. giving you more freedom to get that perfect angle.
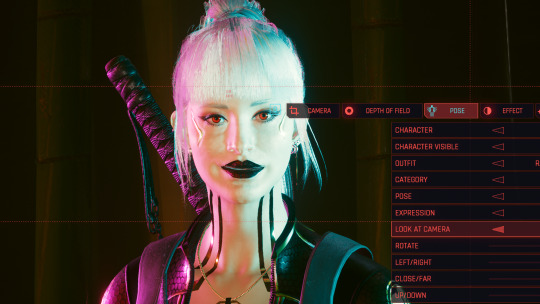
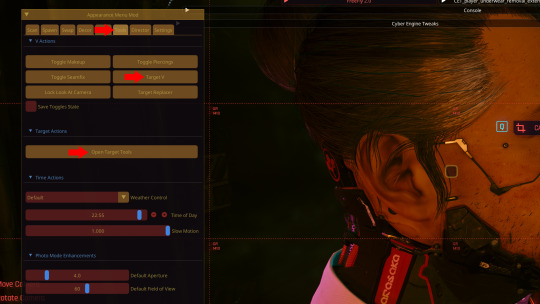
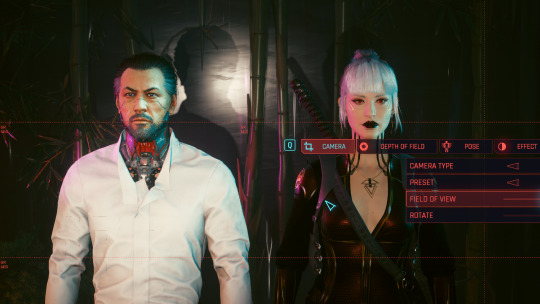
you know when you click look at camera in Photomode the body twists with the head, spoiling some poses and causing clipping ect. well with AMM you can make it so only the eyes look or only the head does.

using AMM if you head to tools, then either target your replacer or V then toggle if you want just the head to tilt to look at camera or just the eyes.


Here I have toggled just eyes so now Raven will track me with just her eyes rather than rotating her torso and head as well. if you want to swap to just the head, open AMM select just the head. then close AMM you will need to then toggle the look at camera of and on for it to change.
Another thing to bare in mind is when and if you decide to change the rotation or position of your model in Photomode. your lights will follow V so sometimes this can change your lighting. you may need to adjust rotation ect to get them back where you want them so bare that in mind if you adjust your models position after you have your lights in place.

simply use the tabs at the top to select each light and make any adjustments you need to get your lights back where you want them. un toggle hide mesh or pin if you hid them to make it easier to see where they are when making adjustments then you can re hide them when your done.

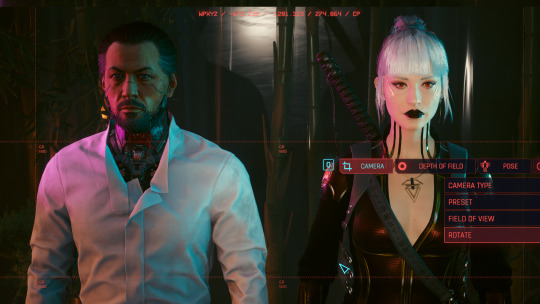
Lets say you have a replacer spawned and you want your characters to look at eachother. this can be done using the look at camera feature with a little help from AMM
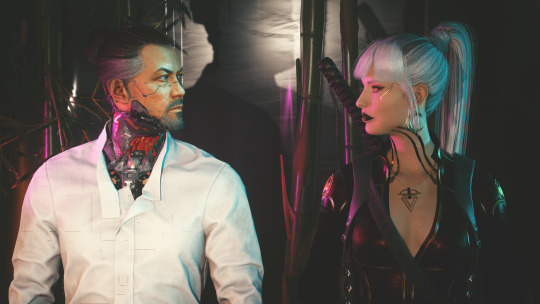
open AMM and go to tools, now depending on who you want to look at who will decide who to target. in this example I will show both. first I will target Raven (V) and select head only for look at camera. then close AMM. I will rotate the camera to the other side of my replacers head then select V and look at camera. then open AMM and target V. then open Target tools and you should have an option to freeze target.

once you freeze the target close AMM and you will see her head will stay in position and is now looking at Goro

Bare in mind once you freeze a target this way you can not unfreeze despite that being a button, If u change pose while frozen it can get pretty cursed pretty quick. its a pain in the ass. some poses you can swap to without it getting to cursed but again its trail and error. if you need to change pose ect you will have to exit Photomode and re-enter it to unfreeze it can be prety time consuming. if there is away around this I'm unaware of it currently feel free to share if you know.
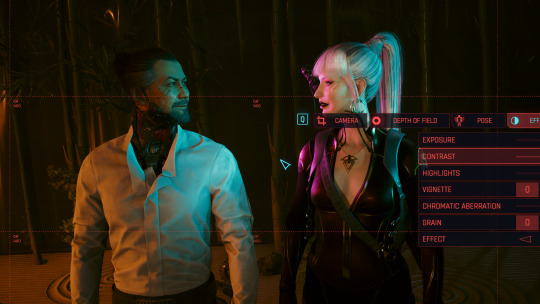
Here I repeated the look at camera trick with Goro so now my models are looking at each other yay
another thing to bare in mind with CharLi is the lights focus on V so you will notice here Goro is not as well lit as Raven. Spawning more lights and adjusting there position with X, Y and Z will come in handy here. it can take some experimenting though.
Here I have added additional lights and positioned them on Goro so he now has light to.

Here we have taken a photo after doing all our adjustments to lights, there position and making our models look at each other. sometimes there will be an error where it will go darker then you want when you hit space to take your shot. I think its called auto exposure error or something basicaly its the game being poopy its annoying but sometimes unavoidable so you may need to keep adjusting your lights and taking shots until the game behaves.
One final thing I like to do when tweaking my shots in photoshop. I usually adjust exposure. offset and contrast to make the pic really pop
Here I have adjusted the offset up a little and tweaked the contrast up a little. it really softens blacks and the light and makes the pic look better in my opinion.
And there you have it. all the tips and tricks I have learned while doing Virtual Photography. I hope this helps peeps out that want to get into VP.
If you have any questions regarding anything I have said my Asks are always open. I'm happy to talk you through stuff if you need some help. I'm also willing to do screen share discord calls to help you follow along or show you in real time how to do stuff if your interested in something like that drop me a DM.

🚫 Do Not Re-Upload/Edit My Shots/Art Without My Permission🚫
[Pillowfort][Instagram][Tumblr][AO3][Nexus][Ko-Fi]
#cyberpunk 2077#cyberpunk 2077 photomode#virtual photography#photomode#CharLi#lighting#vp tutorial#vp resource#AMM#amm tutorial#look at camera#vp tips#tips#tricks#tutorials#dreads tips#cp77 photomode 1 o 1#in game photomode#how to use amm with vp
19 notes
·
View notes