#craft in progress
Explore tagged Tumblr posts
Visit Tumblr Blog
Explore Tumblr blogs with no restrictions, modern design and the best experience.
Last Seen Tumblr Blogs


Fun Fact
25% of US internet users with an annual income of $80-100K use Tumblr.
Text
Update on the moondrop hat I've been working on. It's going good so far. I'm using a 5mm size yarn.

I still need to make and sew on more stars. Also got white somewhat fluffy yarn for the rim of the hat.
Biggest lesson I've learned so far while experimenting, if you're going to sew in stars. Make sure the yarn you use for the stars, is the same size yarn that you use for the hat. Or else the star will look weird.
#my art#crafts#crochet#crochet yarn#yarn#yarn crafts#craft ideas#fnaf moodrop#fnaf moon#fnaf security breach#fnaf#update#craft in progress#moondrop#maybe future cosplay#yarn crochet
41 notes
·
View notes
Text


so like imagine Undertale characters but they're all crafts supplies (Undyne and Alphys) (Toriel and Asgore) (Frisk and Flowey) (Napstablook and Mettaton)
#maybe the start of an AU? ive been thinking about it for a while...#i have thought about why each character is the supply they are and how their relationships with other characters also play into it grahhhh#something something arts-and-craftstale#craftstale#<- name is work in progress...#Sans is a sticky note and Papyrus is a marker :]#undertale#sans undertale#sans#papyrus#papyrus undertale#sticky note sans#marker papyrus#undertale au#utmv#cheese draws#undertale arts and crafts#undertale arts & crafts
10K notes
·
View notes
Text
People in the tags of my other diy bottle caps pins post pointed out there was a version without glue so I'm gonna explain it as well even if it's more well-known

you need
bottle caps (the ones made of metal obv)
pliers
safety pins
pull tabs (torn from drink cans)

pinch the edge of the cap and fold it towards the bottom side of the cap in one place, then do it again a second time on the opposite side

trap a safety pin under the pull tab but over the folded sides of the cap. make sure it's still possible to open and close the safety pin. you might have to slightly bend the tab in the middle to make room for the safety pin

pinch the edge of the cap and fold it towards the bottom side of the cap again in order to trap the pull tab under it

continue folding and flattening the cap until the pull tab holding the safety pin is completely trapped. unless you're very very lucky, the other side won't be perfectly round nor perfectly flat, but still! congrats! you made a diy button/pin with stuff you mostly found on the ground!


now paint the other side with whatever you like and varnish it and stuff. have fun be free
1K notes
·
View notes
Text
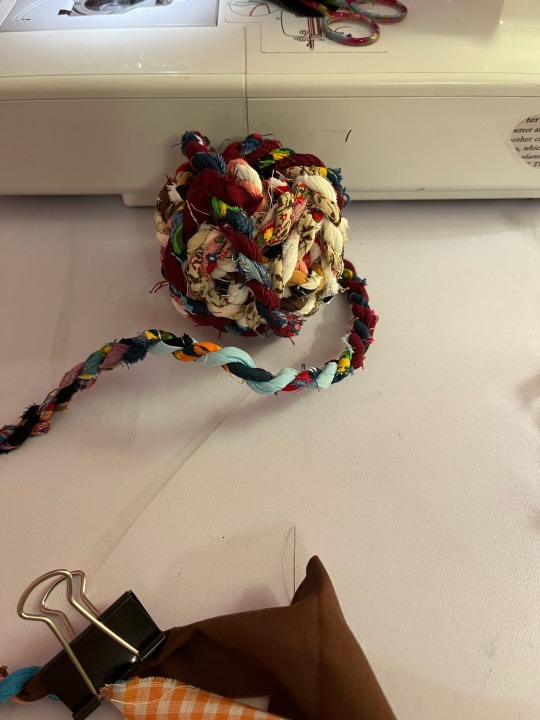
I Got about 5 yards of fabric twine in this ball and it’s smaller than a tennis ball. It’s a work in progress, I’m gonna make it as big as a basket ball. Stay tuned.
(Part 2)
#fabric#fabric twine#crafts#crafting#hand made#hand spun yarn#diy#craft in progress#my crafts#my projects#I’m thinking about making this into a woven basket to keep my fabric scraps in#I’ve got them all ziplock bags and plastic storage bins right now#stay tuned#fun craft#no waste#recycled
1 note
·
View note
Text


Lil animal heartslabyul I made out of paper :D
#i think making ace a rat/moise was a good idea lol#matches riddles cat#i made chenya a merman cuz i thought “thats probably the natural progression in this situation:#heartslabyul#my art#art#twst wonderland#disney twst#twst fanart#twisted wonderland#twst art#cater diamond#deuce spade#ace trappola#trey clover#riddle rosehearts#twst chenya#paper craft
917 notes
·
View notes
Text
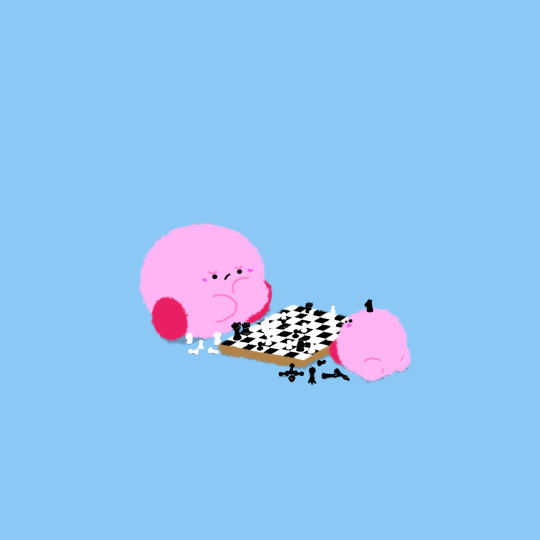
#kirby#request#kofi commission#cuccicakes#daily kirby#my art#digital#hal laboratory#nintendo#I am still extra sick!#but I am well enough to finally get to this other commission I agreed to literally the day I got extra sick!#and make a couple doilies for the craft fair in december!#which is progress.#after basically doing Nothing for the better part of 7 days.
5K notes
·
View notes
Text


I promised to post some pictures of the big blue star hexie quilt laid out on the floor yesterday and then forgot to do it. The quilt is now so big I had to turn it the other way so it would fit in the room. It is not easy to get a picture of the whole thing. I stood on a stool and held my phone up by the ceiling to take the full shots. The stool made a loud crack under me as I did that and I thought maybe I should not be doing this while home alone. I climbed down pretty quickly. Anyway, one more side panel to go and then I will attach them all to the middle. Then I have to decide on the final border. Progress will slow from here on in while I work my way through my UFO pile. All five quilts on my UFO pile require quilting which I will have to do by hand.
#crafts#patchwork#quilting#english paper piecing#big blue star hexie quilt#progress May 2025#side panel 3 completed#hexies#quilts
233 notes
·
View notes
Text


Needle felted lagiacrus update
dude looks a little fuzzy cause I haven't trimmed him
#モンハン#monster hunter#needle felting#felting#crafts#fiber art#textile art#work in progress#this little guy made me learn how to shade stuff#I'm really liking how he's looking#also I cannot forget the comment someone made me on bluesky lol#I posted him and one dude told me: ''man this is the only way he's comming back'' lmao!#I honestly want plesioth back more than lagi; I'm sorry lagibros#''then why are you felting lagiacrus instead of plesioth?'' you may ask#gimme some time; I'm still thinking what to do with Plesioth
529 notes
·
View notes
Text
Haven't been posting for a while because a lot of sad, family-related stuff happened in my life recently. But the world rolls on and so do I - and embroidery is my sanity anchor.
Therefore, please enjoy the progress of the last two weeks or something:

I'm getting anxious to start pulling the canvas from underneath the embroidery already, but I want the whole thing complete before I do.
And here's side-by-side comparison of the previous photo vs current:

#handmade#embroidery#cross stitch#sdv fanart#sdv embroidery#fiber crafts#stardew fanart#work in progress
455 notes
·
View notes
Text
Not much of an update today, worked on filling out the anomaly thing-y and started texture on the silhouettes (which I forgot to take a picture of, will post tomorrow!)
I'm anticipating quite a lot of detail work so I am glad to have basic shapes down so I can really start to get creative with it!


*Jayce Approves*
#arcane#jayvik#jayce talis#viktor arcane#embroidery#fiber crafts#jayvik fanart#jayvik art#jayce x viktor#work in progress#embroidery art#in all timelines in all possibilities#hextech
370 notes
·
View notes
Text

squares progress: 100/300!
i got another shade of purple so now ive been able to make some squares with the blue thatll be the end of the spectrum. ive been having a lot of fun with color combos and the ◇ shape and diagonal stripe patterns recently.
ive made at least a square a day every day since i got my loom so progress has been steady!
#ive doubled my progress since the first pic so wanted an updated picture. i look at it for motivstion :)#fiber crafts#zoom loom#weaving#my squares#it was nice enough out to take the pic outside in the sun... guys the sun is what youre based on did you know that??
164 notes
·
View notes
Text
Making some leaves to put on the hems of the shawl

The tutorial i found ended up being great for this. Simple enough once you understand it and it makes an entire leafy vine. Will say though, i am 98% sure i missed a step somewhere, but im too far deep to do something about it.
This is the tutorial I used by Elena Rugal,
youtube
177 notes
·
View notes
Text
Hello 👋 I am working very slowly on a thread painting of a Thrawn comic panel but haven't posted about it over here. I haven't done anything like this before so it is an experimental process. Anyway, here is a post about my adventures so far:
1) Sourcing materials
A spontaneous trip to the craft store with comic in hand for adequate colour matching


2) Drawing my outline from reference onto soluble adhesive fabric
I began by doing the lineart in outline stitch. At this point, I also started the line shading from the comic lineart but quickly realised embroidery isn't like drawing at all and the colour needs to go down first! So you'll note those chin shade lines got unpicked and only thick lineart remained while I do colour!

3) Eyeball time!!
Although I planned to do all the lineart first, I really wanted to see how the colour would look so I jumped in and did one of his eyes to give me a bit of dopamine. This is a combo of outline stitch and satin stitch.

4) Blue!!!!
This is where I am currently at! In further search of dopamine, I continued onto the skin around his eye. At this point, I realised I needed a fourth shade of blue but luckily had a nice navy already that worked quite well.
I am likely going to redo the black shade lines - I tried to replicate them from the comic but I'm not sure they work that well. Might just need to adjust their direction a bit more. I will actually return to doing the lineart now before my pencil marks fade away.

#thrawn#star wars#Mitth’raw’nuruodo#grand admiral thrawn#embroidery#fiber art#crafts#thrembroidery#work in progress#thread painting#timothy zahn#fan art#comic#thrawn comic
233 notes
·
View notes
Text
Someone on discord asked how I was making pins with bottle caps so here goes nothing
you need
bottle caps (the ones made of metal obv)
pliers
safety pins
paper
glue
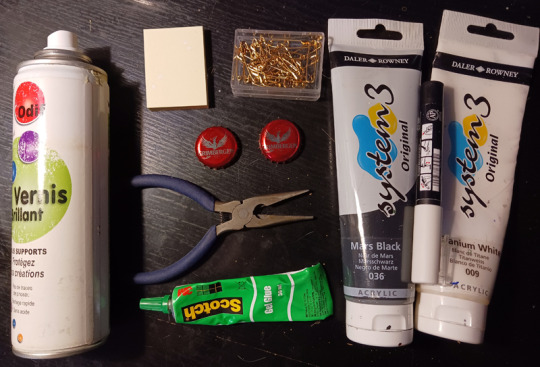
optional acrylic paint
optional paint varnish (the kind you would spray on top of an acrylic painting)
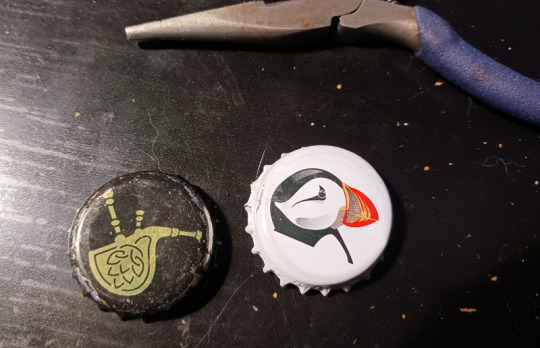
I'm only saying "optional" because sometimes you just like what's already printed on the bottle cap. I mean look at this puffin, it's so cute. But you should probably spray the print with varnish anyway if you don't want it to disappear too quickly (that cap on the left was in my pocket for like 3 months and the print has already disappeared around the edge)
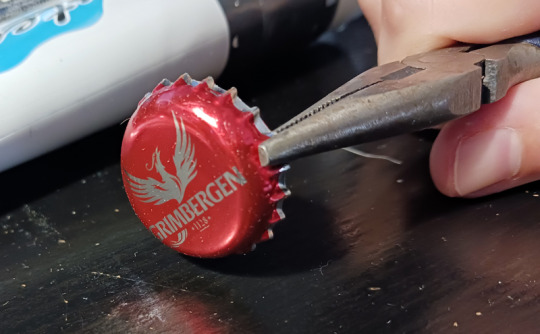
pinch the edge of the cap with the pliers and turn it slightly toward the top side of the cap. Continue to do so around the entire cap but don't try to flatten it all in one go cause it's kinda hard. It should only take two minutes or so anyway
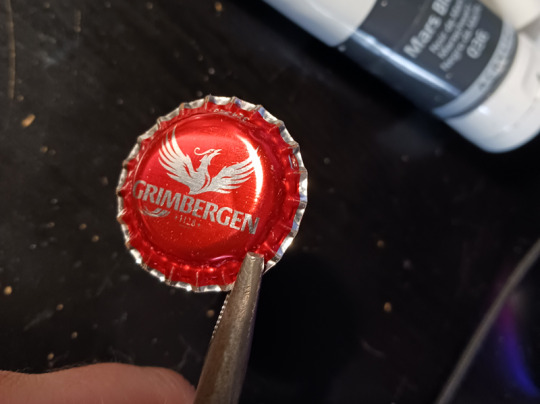
almost there
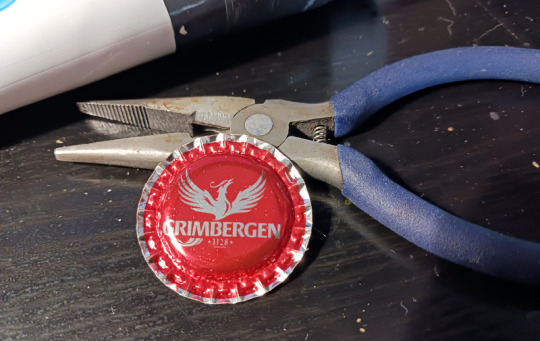
there, it's flat now. If you want to paint or write something on it, add a couple of layers of acrylic paint on it before you paint/write what you actually want on the pins
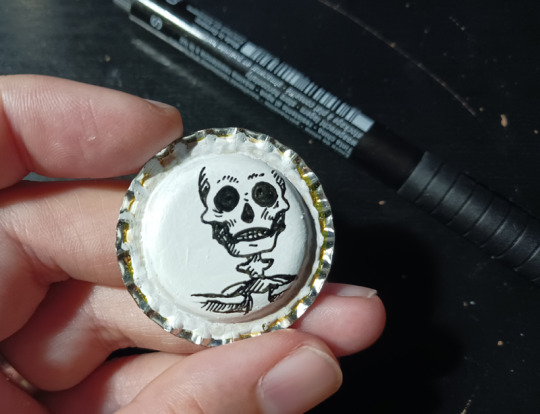
I wanted skeleton parts on mine because I saw someone with pins like that and idk where they bought them
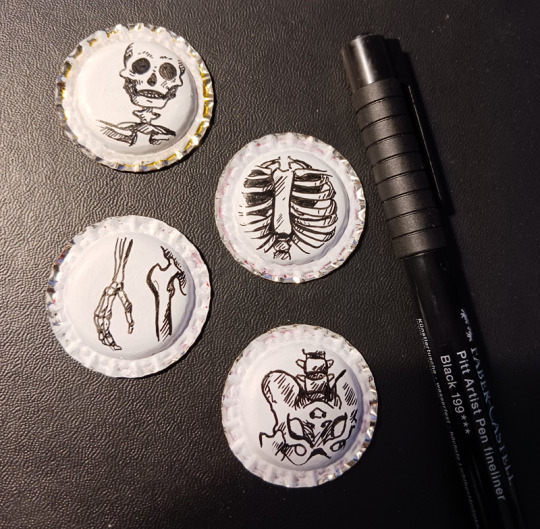
I drew them with a Pitt pen on top of 4 layers of white acrylic
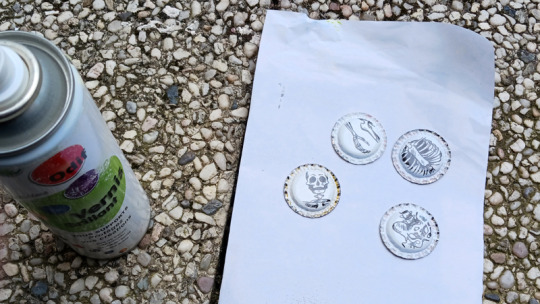
spray a coat of varnish on them but PLEASE do that outside, you do NOT want to breathe that stuff. Then wait a few hours for it to dry
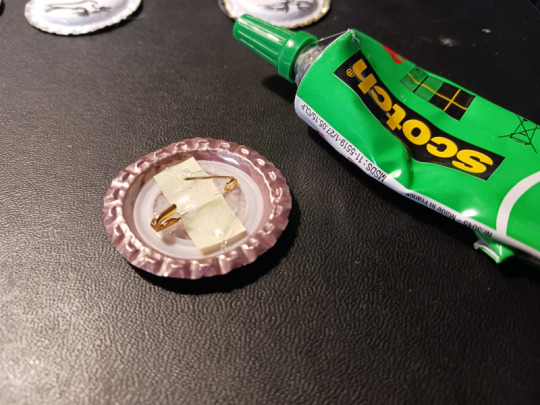
on the back, add 1) glue 2) one safety pin 3) a thin paper across the pin - squish the paper against the wet glue. When it's dry, add another layer of glue on top. Just drown the back of the pin in crystal glue otherwise it's gonna break too easily. Just make sure the safety pin can still open and close easily
let it dry until the next day just to be sure. Tug on the safety pin a bit to make sure it's glued correctly
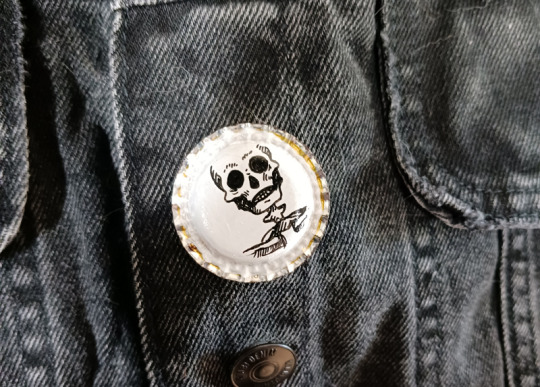
congrats you've made pins with bottle caps
2K notes
·
View notes
Text

An excuse to create another "fuck you" bouquet? Don't mind if I do. 👀
397 notes
·
View notes
Text
Guys. Guysss. Took me 3 weeks but I finished the sculpting 🤩🤓


Now I get to paint it (awesome) while hoping it'll continue to go well (mildly stressful). Ah, the rollercoaster of making art 🙃
Some closeups and a video under the cut, for ✨funsies✨


Ps. The light is a random led fairy light I had, the battery box is covered in clay and the cable is inside a tentacle 🙃
#sculpting#sculpture#air drying clay#still a wip but one part of it is done#wip#ofmd#stede bonnet#ed teach#fan crafts#ofmd fanart#gentlebeard#the kraken and the lighthouse#work in progress#our flag means death#fan art#pennybunpirate's lighthouse
322 notes
·
View notes