#disable hardware acceleration
Explore tagged Tumblr posts
Visit Tumblr Blog
Explore Tumblr blogs with no restrictions, modern design and the best experience.
Last Seen Tumblr Blogs


Fun Fact
130K people were victims of a chain letter scam that affected Tumblr in May 2011.
Text
How To Enable Or Disable Hardware Acceleration In The 360 Secure Browser
youtube
How To Enable Or Disable Hardware Acceleration In The 360 Secure Browser | PC Tutorial | *2024
In this tutorial, we'll guide you through the process of enabling or disabling hardware acceleration in the 360 Secure Browser on your PC. Hardware acceleration can improve browser performance or help resolve issues with rendering. Follow this step-by-step guide to optimize your browsing experience. Don’t forget to like, subscribe, and hit the notification bell for more 360 Secure Browser tips and tricks!
Simple Steps:
Open the 360 Secure web browser.
Click on the 3 bar hamburger menu in the upper right corner and choose "Settings".
In the left pane, click on "Advanced" to expand it the section, then choose "System".
In the center pane, toggle on or off "Use Hardware Acceleration When Available".
#360 Secure Browser#enable hardware acceleration#disable hardware acceleration#hardware acceleration settings#360 Secure tutorial#optimize browser performance#browser settings 360#360 Secure PC#browser tips#hardware acceleration guide#improve browsing speed#troubleshoot 360 Secure#browser optimization#360 Secure 2024#tech tutorial 360 Secure#Youtube
0 notes
Text
firefox just started doing this too so remember kids if you want to stream things like netflix or hulu over discord without the video being blacked out you just have to disable hardware acceleration in your browser settings!
158K notes
·
View notes
Text
Agh Discord updated and I hate it and also my screen keeps blacking out and glitching while trying to watch Youtube this morning :C
#yes I've tried disabling hardware acceleration and it doesn't do anything#yes I've updated my GPU driver#seems nobody has any solutions beyond those#personal
0 notes
Text

it's a 15 year old mid-ish low-ish range laptop. it should be perfectly playable but it's the GPU that makes it run poorly, integrated graphics in 2010 was certainly not suitable for gaming at the time.
but it's kinda funny because although it runs at like 20fps the CPU usage is less than 15%, just because it's so severely bottlenecked by the GPU.
in fact, in half life 1 I get around 40fps using the GPU. by using software rendering, I get 30fps. software rendering, mind you, essentially just makes the CPU *act* as a GPU, and is insanely slow.
20 fps in half life 2 with lowest settings let's goo
#the GPU can only decode 1080p h264 video up to 40fps according to wikipedia#in my experience its closer to like 20fps#but by disabling hardware acceleration for video playback i can get 60fps#though then it makes the fan turn into a jet#and any other thing that happens causes stutter#whereas on the gpu its pretty consistent#and the fan barely runs
14 notes
·
View notes
Note
crazy (possibly stupid) question. do you watch mash on a streaming service if so how do you screenshot it ??????
i watch and screenshot on my own Legally Acquired copy of mash so theres no issue there. i will direct u to google search disable hardware acceleration on chrome and that will let u take screenshots of anything without it blacking out :-)
22 notes
·
View notes
Text
Just a little push
The conflict between Humanity and the United Federation was in it's early slow stages. After the rather unexpected attack on the symbolic Death Kebab there was a lot of buzz and light skirmishes in the nearby systems, but no noteworthy confrontation.
The placement of the Death Kebab was provocative by design, and with both sides so far away from one another, there could not be any mass fleet formation without plenty of advance notice. Special operations units, however, are everywhere.
Unlike Humanity, who currently only has Earth as a planet under their direct control and with a notable population, the Federation is vast - core worlds surrounded by buffer manufacturing and agriculture and all manner of other production focused systems, which themselves are further surrounded out by new colonies, annexed planets, "contract" aka slave worlds.
Getting close to Earth without being spotted by any number of civilian organizations is nigh impossible, and when you count the military intelligence and surveillance networks, there's hardly an atom that remains unregistered. Certain people with, let's say, less than honest intentions, still manage to find ways to keep their activities hidden. For a while at least.
These kinds of skills, when employed by a trained operative with the highest grade equipment, make them virtually invisible everywhere else. A poorly guarded third-rate mining colony? Why, with just a little preparation, you could float an entire Dreadnought up to their atmosphere before they noticed. Assuming they would even care after offering a slightly more lucrative deal than the Federation.
For this particular mission, however, they would care.
Vrontaria was a very productive system with nearly a dozen orbital shipyards and hundreds of mining, processing, and export operations that account for roughly 4% of the entire Federation military hardware supply, and nearly a fifth of all their capital ship production. Thus, it was quite heavily guarded, with every nearby system monitored for any suspicious activity.
What they didn't monitor all too well were the mostly useless planets and moons within the Vrontaria system itself. Of particularly little interest was the resident gas giant - Omk.
And why would anyone bother regularly scanning the interior of a gas giant for foreign matter, everyone knows entering the "atmosphere" of a gas giant will just crush everything. Right?
*glances sideways*
:D
It took the better part of a month, but the special unit managed to covertly install about five thousand gravitational pulse thrusters and all necessary power generators within the upper layer of Omk, but just far enough below the storms to make their activity not make any visible change. For comparison, one such thruster can accelerate an entire Dreadnought. Slowly, sure, which is why they have at least 6 to be able to maneuver, and Omk was not the largest gas giant in the Galaxy, about two thirds of Jupiter.
So, one day not long after, someone on Ja'Ulnika, the main planet of the Vrontaria system, noticed that Omk was a little bit further along its orbital path than it should be.
Concerning.
Then they took more precise measurements and realized it was going faster than before.
Very concerning.
Finally, they had someone go up to it and then they noticed all of the thrust force coming from one side of it, changing its orbit to get far too close to Ja'Ulnika for comfort.
Panic inducing to say the least.
By the time a full force of combat ships arrived to sort out this mess and start disabling all these planet-moving thrusters, scans showed they had self-destructed. Even if they had the ability to retrieve anything from the inside of a gas giant, at this point it would be worthless scraps.
The final orbit of Omk would put it on a course to capture Ja'Ulnika in its gravitational well in two years time and take it along for a joyride to orbits outside the habitable zone, rendering it inhospitable in around 5-6 years. Not to mention the carnage tides would cause on a world without its own moon. Or any other catastrophic events that might occur when a planet is essentially kidnapped into a becoming moon.
Wars are fought on many fronts. inevitable devastation and unavoidable future reduction in capacity force you to act in ways you would rather not. Sometimes creating a logistical nightmare that your enemy has to deal with no matter what can be the greatest killing blow that a swift and spectacular showdown space battle could never be.
#humans are space orcs#humans are space oddities#humans are space australians#humans are deathworlders#humanity fuck yeah#carionto
87 notes
·
View notes
Text
Oh yeah to my point about found family and polycules this movie is literally what this is from:

Just watched Neon City and it's pretty fun.. It's basically a Mad Max clone kind of post-apocalyptic convoy movie with Michael Ironside as the lead and some chick named Vanity who the movie was probably gonna be some vehicle for, and has a bizzare technicolor radiation sequence and almost-as-bizzare hot springs/bath scene.. it's also very found family lol I recommend it for anyone who likes post apocalypse movies with a little jank or is in a fugue state like me, whether high or dissociating from 113° weather cause it's central CA (haha kill me)
#neon city#post apocalyptic#apocalypse movies#movieposting#michael ironside#vanity#apparently she's the lead#mad max ripoffs#found family#psychedelic movie sequence#tech related shit#screenshot blocking#disable drm content and hardware accelerator#firefox users#listen to my words boy#resources#polycule
2 notes
·
View notes
Text
GIF Tutorial
This is going to be a long post, so I'm going to place the majority of it under the cut.
Disclaimer - There are many ways to make gifs, and this is just one way to make them - it's the process that I have figured out works best for me. I am in no way claiming that this is the "definitive" or "best" way to make gifs. There are probably other, better ways to do things, but because people have asked how I do it, I am sharing my process.
Introduction I use a Mac. I am assuming most of this will also be applicable to those of you using Windows as well. This tutorial is divided into three parts. Here is a video of the following process as well: https://www.youtube.com/watch?v=lBRbWC-iMOM
Actions I use three Actions, that you can download here through my Google drive, if you want. A tutorial for how to install Actions in Photoshop can be found here.
Photoshop Layout I use Photoshop CC, but I used Photoshop CS5 for years, got used to it, so when I upgraded to CC, I arranged it to resemble what I was used to.
I have the following windows open:
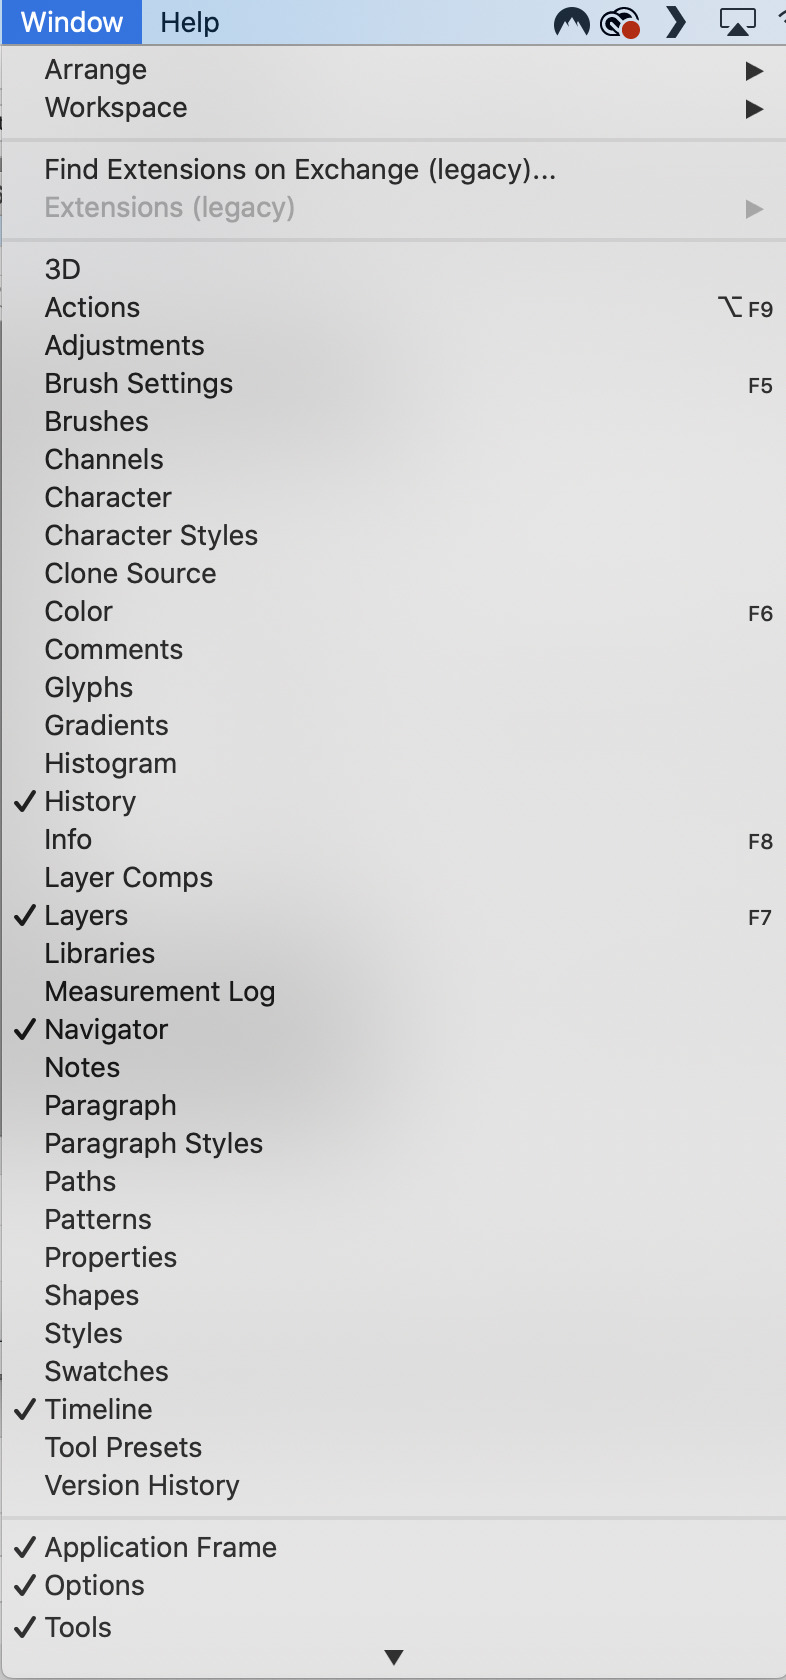
And they are arranged like this:
PART ONE - CLIPPING Part 1 consists of using a screen recorder (i.e., Quicktime) to make short clips of scenes or parts of a scene that you want to make gifs of. I have a Mac, so Quicktime is what I use. For Windows users, I’m sure there are equivalent alternatives that are just as good. Years ago, when I was first starting to make gifs, I frequently heard people refer to KMPlayer as what they used, so that might still be a good option for you if you are a Windows user. The most important part is that it takes high-quality recordings, with as little detail and quality loss as possible.
With this screen recording method, you can make screen recordings of video files that are stored locally on your computer (I use VLC to play videos), or streaming on sites like YouTube, Amazon Prime, Hulu, Disney+, HBO, etc. No downloading of the video is necessary. For some of those websites, if you have trouble with getting it to work, you may have to disable your browser’s hardware acceleration. This process is described here (https://www.theverge.com/23715928/netflix-amazon-prime-screenshot-mac-windows-how-to).
I record the clips with sound, to make it easier to transcribe/write out the dialogue in Photoshop later. When I have recorded all the clips I want, I put the clips into my folder where I store all my clips, and into another folder that is labelled with the episode number so I can remember where each clip came from in order to properly label them later when the time comes to upload them to Tumblr.
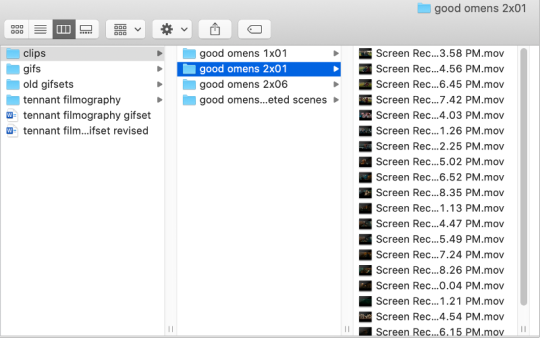
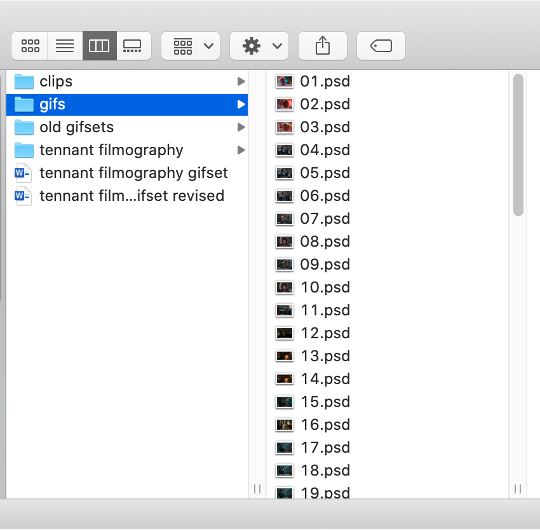
Example: A folder containing clips from Good Omens 2x01
PART TWO: EXTRACTING/MAKING GIFS FROM THE CLIPS
Open video file in Photoshop To do this, click on File > Import > Video Frames to Layers
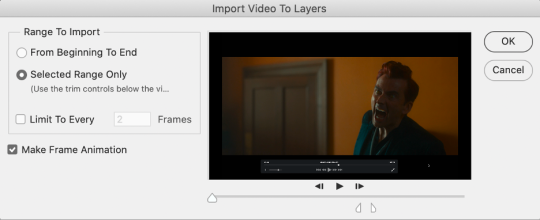
Use the markers to select roughly where you want the gif to begin and end.
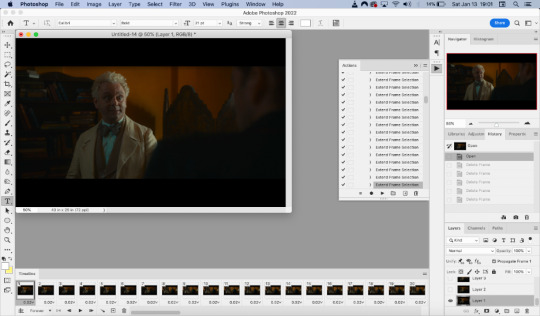
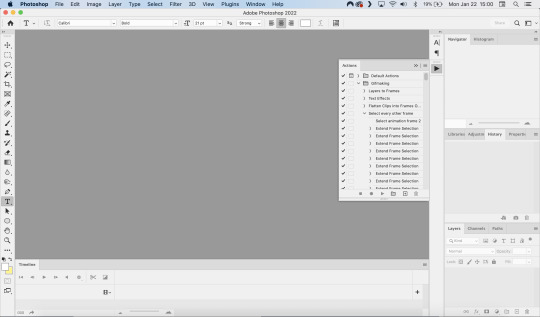
With videos that have been clipped with Quicktime (not sure about other programs), the vast majority of the time there are twice as many frames as needed – every other frame is a duplicate. For a smaller gif size and smoother playback, I delete every other frame in the timeline box at the bottom of the screen. I used to do this manually (very time consuming), but now do it with the use of an action that I created that will automatically select every other frame. Downloads and installation instructions for all the actions I use are available above.
To use an action, click on the title of the action, then click the play button at the bottom of the window.
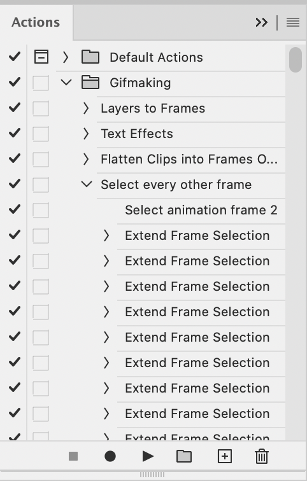
I often get an error message that says “The command ‘Extend Frame Selection’ is not currently available”, but it still works. Just click “stop” and every other frame will be selected.

Click the trash can icon in the timeline window to delete the selected frames.
At this point, you will have half as many frames in your timeline as you did before. You will also likely have extra frames at both the beginning and end of the timeline that you don’t want to be part of the gif – from the previous shot, for example. You can delete those now.
This next step is optional: There will still be some duplicate frames in the timeline that were not deleted earlier. It is not strictly necessary to delete these, and I see many gifmakers who don’t get rid of them. It’s usually not all that noticeable. However, because I’m a bit of a perfectionist, I always go through the timeline frame-by-frame and delete each duplicate. This ultimately will reduce the gif’s file size and make the movement in the gif appear much smoother. I usually find that every fourth or fifth frame is a duplicate. Unfortunately, it’s not always consistent, so using an automated action would not work to make this process go faster.
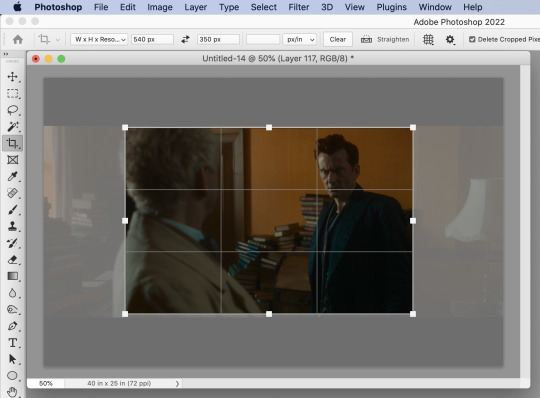
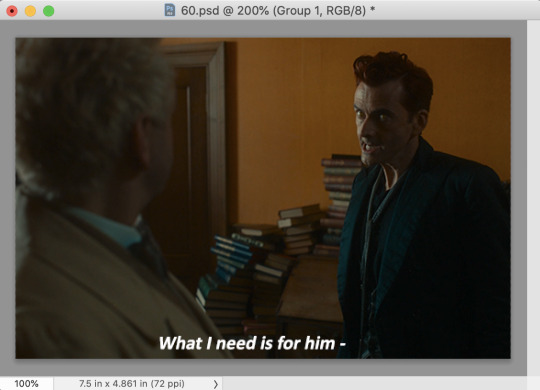
Cropping Once this part is complete, I select the crop tool. I usually make my gifs 540px wide by 350px high. You can change the height to whatever you want, but Tumblr’s max width is 540px. I find the aspect ratio of 540x350px usually allows gifs to feel large, while at the same time not cutting off too much of the sides. Depending on the type of gif I’m making I may adjust this, but generally, if I’m giffing a scene from a TV show or movie, I stick with my standard 540x350px dimensions.
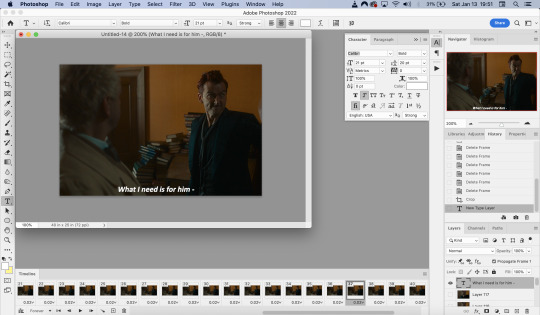
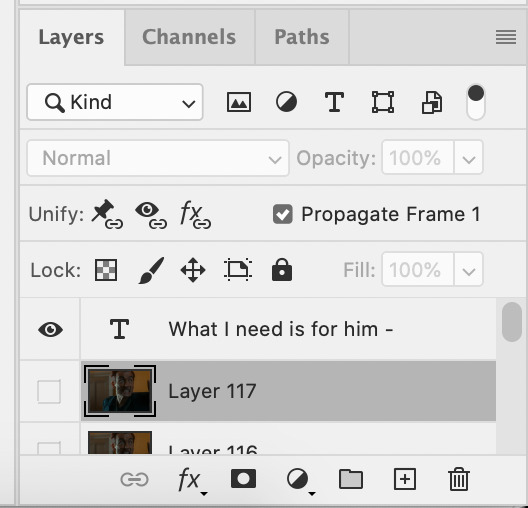
Adding Text Next, I add text. Select the text icon. In the layers window, make sure the top layer is selected, otherwise the text will not show up when you start typing.
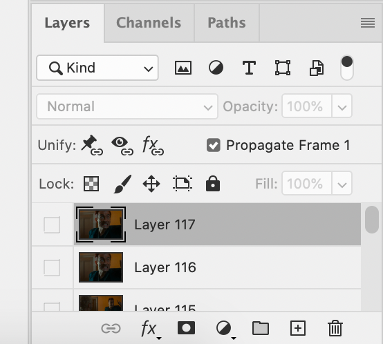
The top layer is selected
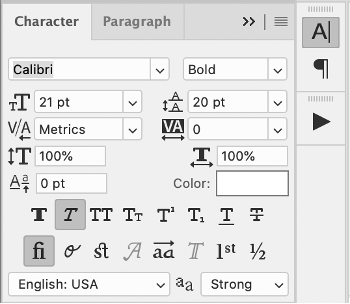
These are the font settings I currently use:
If I am just making one gifset, or one or two gifs, I’ll go straight on to the next steps. However, if I’m making a large amount of gifs, I save the gif right now, close out of it, and repeat the steps in this section for the next gifs, so I eventually have an entire folder of “raw” unedited photoshop files that have been cropped and captioned, and just need to be colored, have text effects added, and be sharpened. For me personally, I find I make gifs more efficiently by doing it in this “batch” style process.
All cropped and unedited gifs (psd files)
PART 3: COLORING, EFFECTS, & SHARPENING
Coloring I do plan on making a separate tutorial on this at some point, but will include a brief summary here. When it comes to coloring, I generally tend to go by a “less is more” attitude. I am not by any means great at coloring, but nonetheless I’ll explain the types of adjustment layers I typically use.
Note: Before making any adjustments, make sure you have the layer directly underneath the text layer selected, as shown in the screencap below, otherwise it will also apply those adjustments to the text, which makes it look weird.
I start with a Curves layer to change the overall brightness/contrast, then a Levels layer to adjust the shadows and highlights, and then a Brightness/Contrast layer to do some final minor tweaks. The only time I ever reuse gif coloring is when they are from the same scene with the same colors, lighting, backgrounds, etc. Every other time, I tailor the adjustment layers to the specific gif.
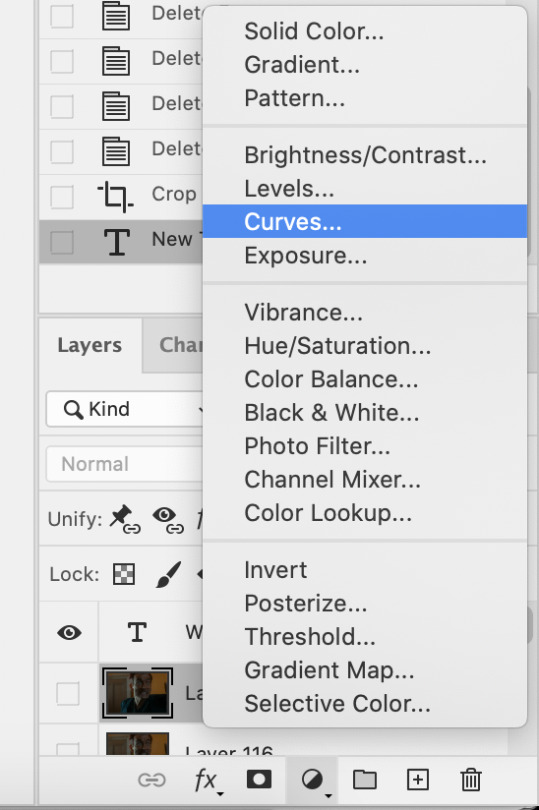
You can add adjustment layers by clicking the half light/dark circle on the bottom of the Layers window.
How the gif looks with both a Curves layer and Levels layer
Before adding the adjustment layers
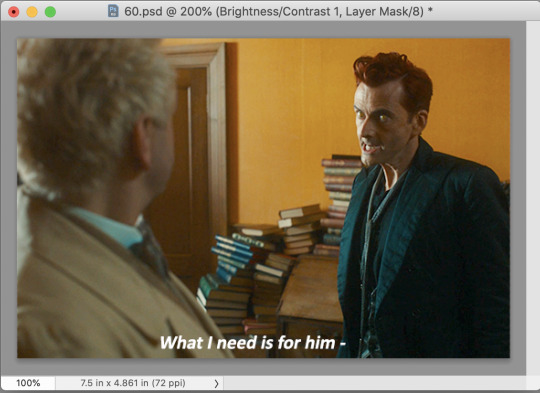
After adding the adjustment layers
A lot of the time, I'll just stick to adjusting the lighting. However, if the colors look gross, or if they are over/undersaturated, I’ll add a Color Balance layer and play around with the settings on that, or use a Hue/Saturation layer and increase/decrease the saturation of specific color channels. It really depends on what you’re going for, and what you think looks good. There is no one “right” way to color a gif.
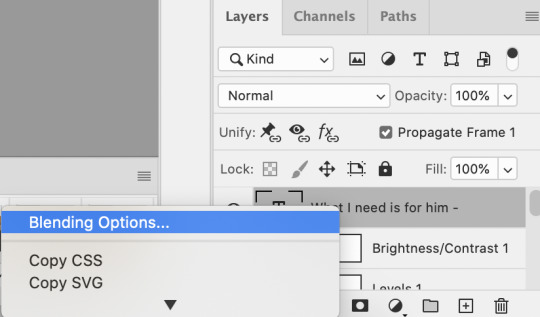
Text Effects If you are using the Actions I included in the download, you can just run the "Text Effects" action with the text layer selected, and it will do the following automatically. If not, you can do it manually by doing the following.
Right click on the text layer in the Layers window and click on Blending Options.
I use a stroke and drop-shadow on my gifs. Here are the settings I use.
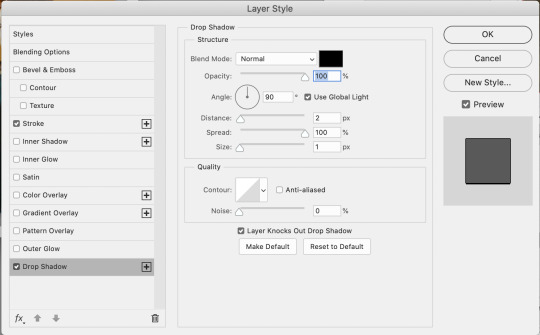
Drop Shadow settings
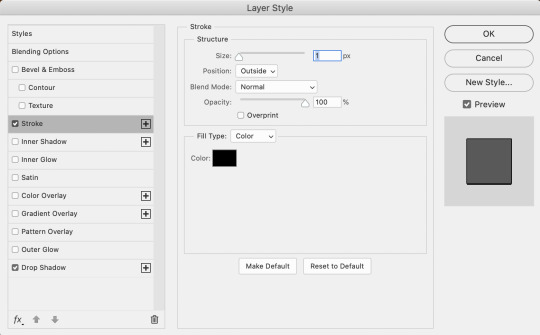
Stroke settings
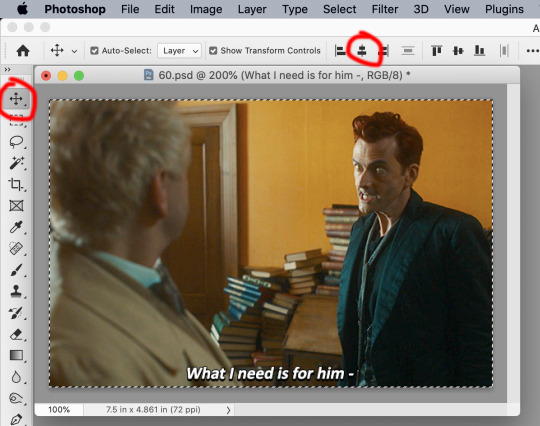
Next, to center the text, click on the text layer. With the text layer selected on the Layers window, Select All by clicking ctrl+a (Windows) or command+a (Mac). Then click on the "Align horizontal centers" icon in the “Move tool” option menu.
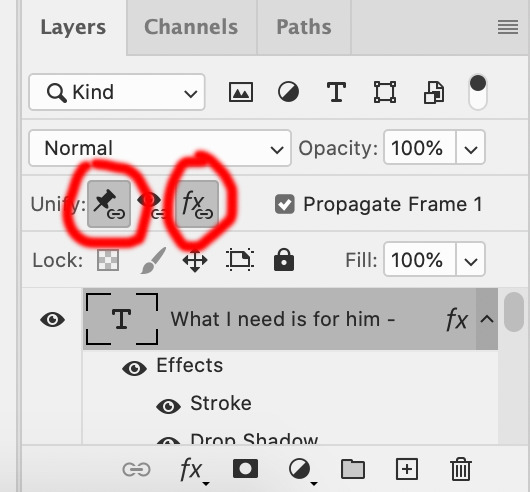
Important – in the Layers menu, make sure the buttons “Unify layer position” and “unify layer effects” are clicked an enabled for the text layer.
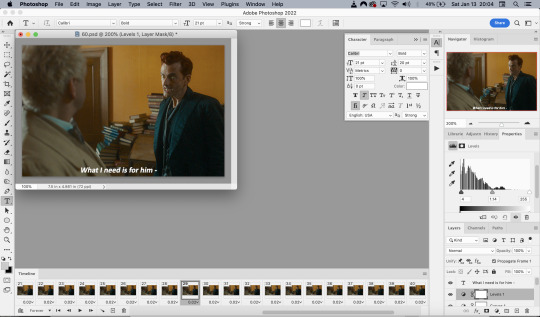
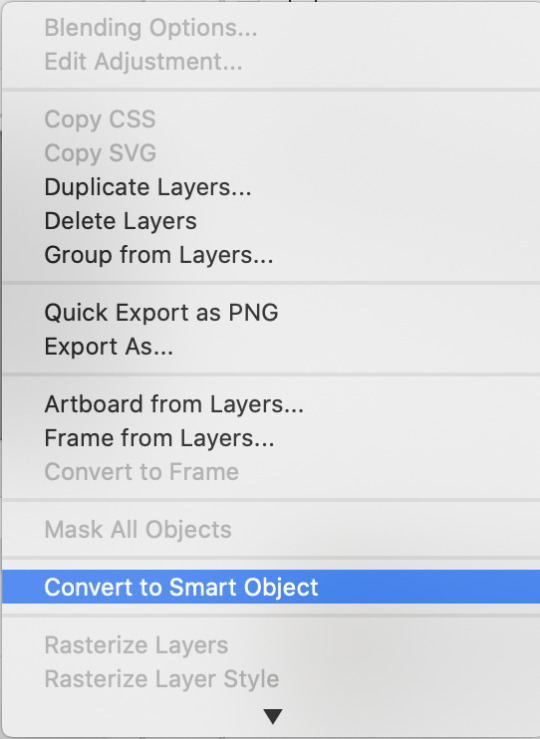
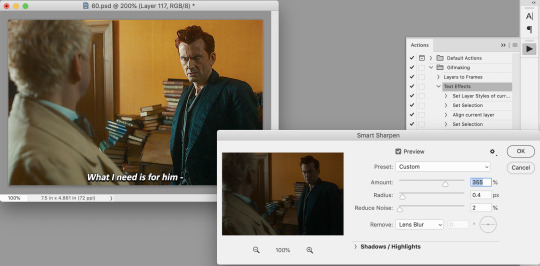
Sharpening Select all the frames in the Timeline window. Then in the lower left-hand corner click “convert to video timeline.”

In the Layers window, select all of the frame layers (do not include the text layer or adjustment/coloring layers in the selection) and right click on it. Select “Convert to smart object.”
Select Filter > Sharpen > Smart Sharpen. In the same way that coloring can differ depending on the gif, the ideal settings for sharpening can also differ from gif-to-gif. It can really depend on the quality of the source of the gif, like whether it’s HD or not. These are the settings I’m using for the current gif:
If you are using Actions, you can run the "Layers to Frames" Action. If not, do the following:
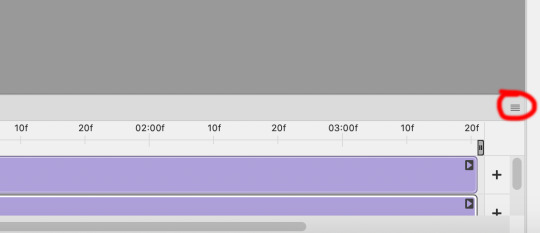
Click on the button circled in red
It will open up this menu. Click on "Flatten frames into clips"
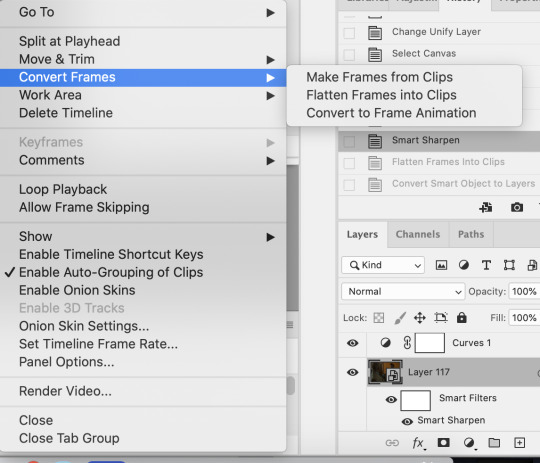
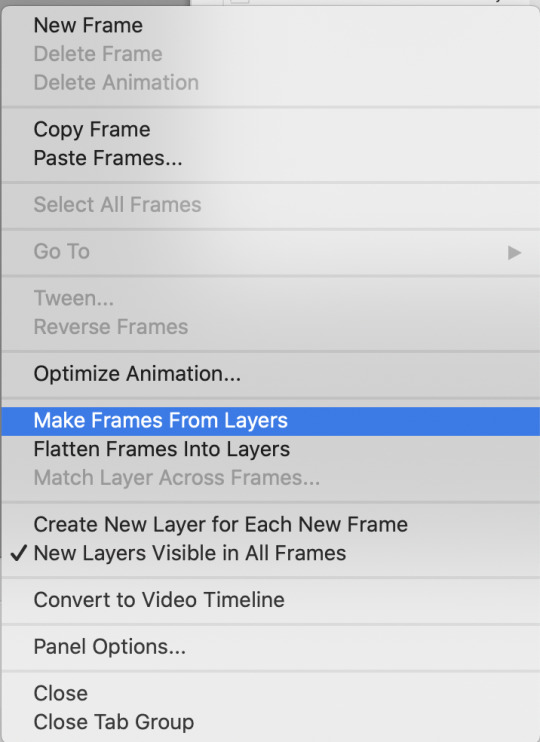
Click the button circled in red, then click "Make frames from layers"
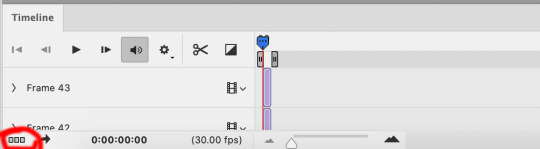
Delete the first couple of "junk" frames
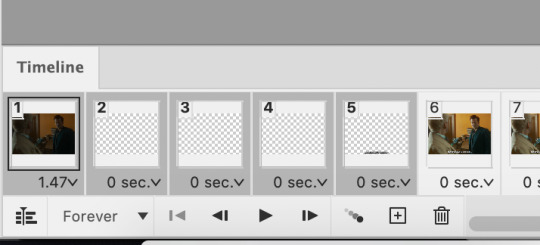
Select all of the frames. Right click on the "0 sec." to change the frame rate. I usually use 0.05, but it might depend on the gif itself.
Exporting Click on File > Export > Save for Web (Legacy)
I cannot add another screencap because I've reached Tumblr's max for this post, but here are the settings I use: Selective Diffusion 256 Colors Dither 100%
You may find that when you try to export your gif, the file size is too big. Tumblr’s gif file size limit is 10mb – try to make it under that – even anywhere in the 9.9mb range. As long as it’s under 10mb, it should work.
To get gifs that are too large to fit under the limit, I usually end up deleting frames from the beginning or end of the gif. If you’re using the 540x350px dimensions, I typically find that the average number of frames I can fit into one gif is between 80-90. Depending on the colors in the gif, it’s sometimes more, sometimes less.
72 notes
·
View notes
Note
To film the livestream you need to disable hardware acceleration in your browser so you can screenshot/record the screen, then when I did it for wad I just used obs to record and that worked well, obs is pretty self explanatory just Google a basic tutorial to use it. There shouldn't be too much hassle!
thank you! when using obs do i have to be on the same screen always or can i record one tab and switch between tabs
7 notes
·
View notes
Note
okay hello I keep watching your beautiful AMVs and I'm trying to make one right now and I was wondering if you'd be so kind as to offer tips on where you get your clips from? The video quality is INCREDIBLE but there are certain scenes (especially from The Man Who Would Be King) that I can only find on YouTube very grainily. Love your edits so much, thank you for making them!!!!


AKFNFKSHFKFK HIIIIII 💞 okay so! to get by the black screen on netflix, i go to my browser settings (i use firefox but i used to use chrome and it worked the same way) and search for “hardware acceleration” and make sure it’s disabled. once that’s done, it should screen record no problem!
10 notes
·
View notes
Text
FYI, If you're watching things on streaming services (like The Legend of Vox Machina) and you can't screenshot or screenshare because it goes black, that's caused by hardware acceleration in your web browser and can be turned off.
This article details how to disable hardware acceleration in Discord and multiple web browsers. It's a very simple setting to just toggle.
Once you disable this, screenshotting will work just fine and you can have a screensharing watch party with your friends over Discord.
Also please switch to Firefox because chromium-based browsers including Chrome, Opera, Vivaldi, and Edge are getting increasingly hostile to user rights (in everything, but especially media playback). Firefox is the only browser out there focused on users over corporations.
Amazon will artificially lower the video quality to 1920 × 1080 on Firefox specifically because it blocks Amazon’s invasive video DRM. But that resolution is just fine, and fuck Amazon.
12 notes
·
View notes
Note
Hellooo I love your blog! How do you get clips for your videos and such? I thought Disney+ blocked all of that kinda stuff so I've been having to just stalk YouTube and hope the clips I need have been uploaded on there. (I need to make Syril AMVs - there are not enough of them)
Aaah thank you! And you're right, there's no legal way to create clips from Disney+ content 😉
If you only want to take screenshots: Disable hardware acceleration in your browser settings (works for me, at least in Firefox)
But for entire video clips, you'll probably have to sail the high seas 🏴☠️
4 notes
·
View notes
Text
If your windowed or borderless windowed games have been showing up as black screen as of late, try disabling hardware acceleration in Discord.
5 notes
·
View notes
Text
Tutorial: Netflix screencaps
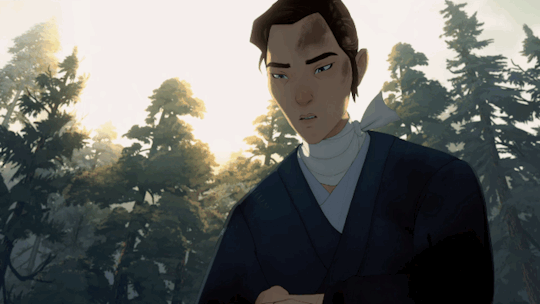
So as promised a tutorial for Netflix screencapturing both video and images. Just in case a disclaimer: I do not posses of Blue eye samurai idea, plot, scenario, animation nor anything. I simply make pictures for fangirling. I do not sell it to anybody nor making a pirate content. If you want to watch this amazing show get Netflix subscription, ok?
Now let's start the tutorial :)
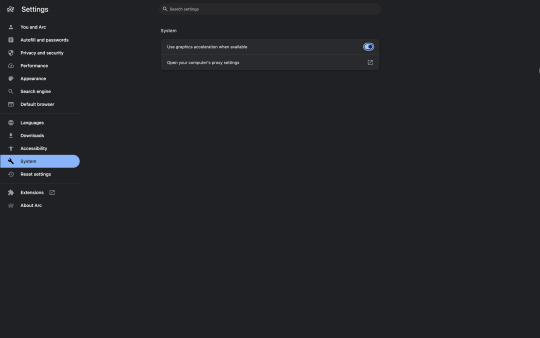
First to make it able capturing screen on Netflix you have to disable hardware acceleration in your browser. Go to settings -> system. There you can find this setting. Any chromium browser has this setting. You can find those in Google Chrome, Arc, Brave and etc. In my case it's Arc browser.
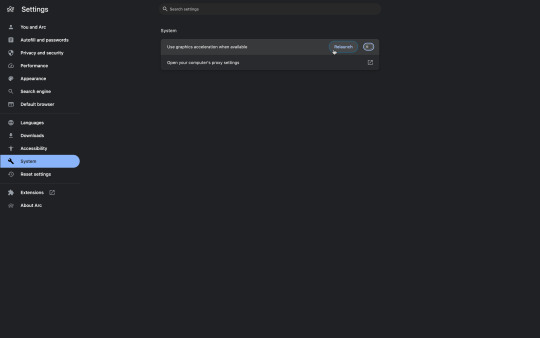
2. Disable the acceleration and relaunch browser
3. After relaunching go to Netflix and capture a wanted scene. For screenshots I use macbook shortcut cmd+shift+3 and cmd+shift+5 for video capturing. Be aware that without graphics acceleration your machine will hit up significantly, so be careful. Also while capturing the screen you could find the picture became more pixelized. In both cases switch acceleration on again, relaunch your browser, then enter settings and disable it again to continue the process.
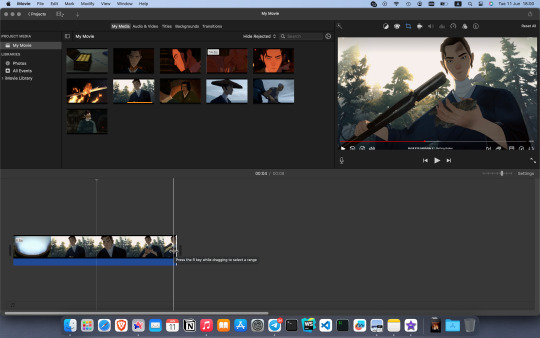
4. Now when we've got a video fragment it should be edited. I use IMovie. Just drug'n'drop a video fragment and edit as you like
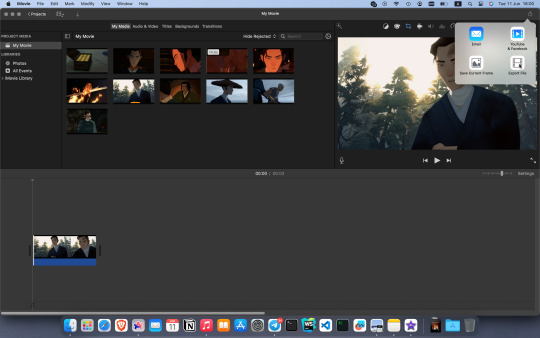
5. After editing is finished export the file by clicking on an export icon in the top right and save an .pm4 file
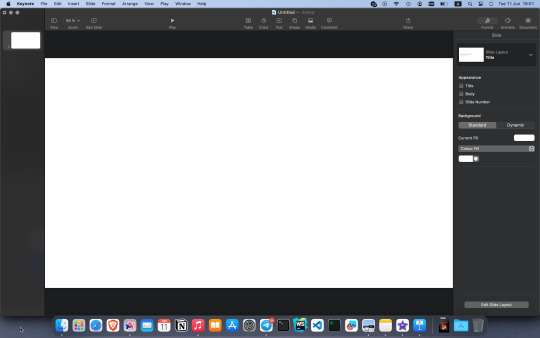
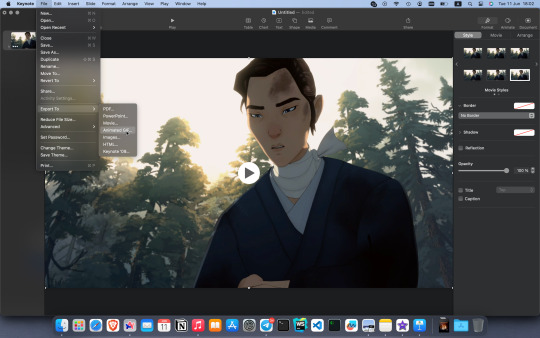
6. Now we want to make a gif out of our .mp4 file. I do that through Keynote which looks like some kind of perversion for me tbh but i just find it faster for me. You could use any other tool If you prefer. Now launch Keynote, create a new project with simple white page. Then delete all the text from the slide
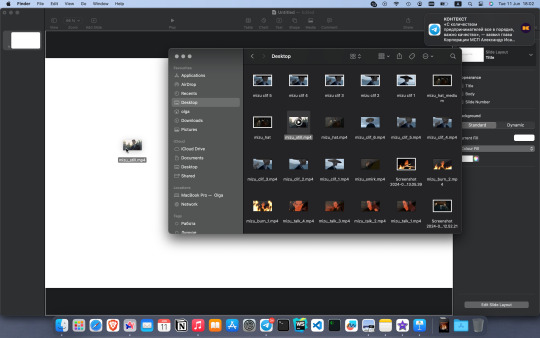
7. Now drug'n'drop into the slide an mp4 video fragment you edited

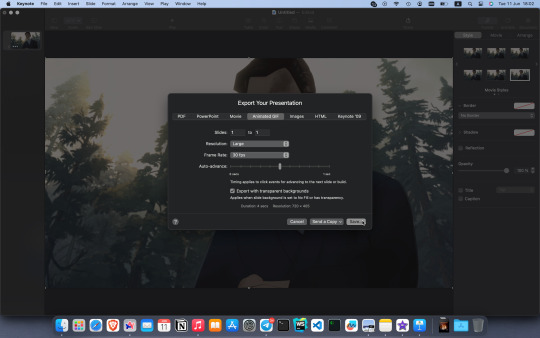
8. The last thing - export it as gif through File -> Export To -> Animated GIF. And that's all basically.
Enjoy your gifs :)
15 notes
·
View notes
Note
I prefer good quality download rips, but pro tip for screen recording streaming content: in my experience Chrome works best. Once hardware acceleration is disabled it just shows up. Firefox is able to do it as well with a similar setting change, but only works on Windows (maybe Linux too, never tried on my Linux systems, but I can confirm Firefox on macOS does not like trying to escape DRM blackouts lol)
The hardware acceleration option should also apply to other Chromium based browsers!
AAAHHH no wonder it was an absolutely dogshit experience trying to gif anything on max, while using Microsoft edge. Noted for both me and the nonny !!
5 notes
·
View notes
Text
Cloning on the Seven Stations
I’ve had the urge to make this post for like a week now so here goes. My disorganized worldbuilding thoughts on clones and cloning on the Seven Stations :)
Note: the word “donor” refers to the person the clone was cloned from, their genetic donor.
Clones
Clones are… just people, really. They don’t share memories with their donors, or anything except genetics really. They’re essentially artificial identical twins in terms of relation. Of course, the nobles don’t see them that way lol.
Legally, clones are classified as property of their donor. They have no human rights and are often used as slave labour or exposed to dangerous radiation to be killed for their magic. Escapee clones are to be returned to their donors immediately. It is essentially legal to do anything you’d like with one of your clones, although the nobles might frown on it if it’s weird.
Clones are identified through a combination of magic (clones do not have the same magic(s) as their donors and so cannot demonstrate them) and through fingerprinting.
The Cloning Process
This is the interesting part :)
Cells for cloning are usually taken from a cheek swab and usually retaken yearly (or less if the donor makes clones less frequently than yearly). The process is harmless and minimally invasive.
The donor DNA is then replicated and inserted into a zygote cell that’s been manually printed for this purpose. The cell is then put in a growth chamber to grow into a clone.
A series of hormonal treatments is used to accelerate clone aging drastically. Progress from a single cell to an infant is done in about a week. Another three ish weeks are used to grow the clone to the age of 20. After this, aging can be done at a pace of about fifteen years in a week.
During this time, electrical nerve stimulation, constant nutrients, and hormones are used to ensure that the clone’s body and brain are aged properly. A clone grown to the age of, say, 25 and imprinted properly (more on that in a moment) is no different from an amnesiac naturally-aged human of 25.
Imprinting
Clones are typically imprinted during the cloning process with what are called imprints - select brain and knowledge paths that are directly wired into their brain rather than being taught naturally. These contribute to the brain development of the clone and allow them to function comfortably once they are taken out of the cloning vat.
The imprints include:
Motor function (including but not limited to eyes tracking and ability to walk)
Language (typically only spoken, most clones are not taught to read or write)
The ability to eat, drink, use the bathroom, and bathe independently (both knowledge and motor paths)
Use of many basic objects (such as doors and tablets)
Basic arithmetic
Social cues (such as the ability to tell when someone is angry)
Personality (most clones are imprinted to be docile and obedient)
Many freed clones object to the process of artificially accelerating clone aging and imprinting, particularly the personality imprint. Note that the personality imprint does not prevent a clone from experiencing anger or fighting the injustice of their mistreatment - it tends to simply make them shy and quiet.
Defects and Misprints
Obviously the cloning process is imperfect. Clones whose “defects” are considered severe are typically killed, while those with mostly unnoticeable ones are left alone.
Improper connections from the devices supplying nutrition and signals to limbs and other parts can lead to deformities in limbs - in severe cases, the clone may be missing a limb, while in other cases, they may merely have a weaker limb. Parts of the body tangled improperly in the hardware can also lead to visible deformities. (Please let me know if “deformities” isn’t the word to use here, I’ve seen some disabled people use it so I’m using it, but if there’s a more respectful term I’m happy to modify this post.)
Clones can also have their genetics copy improperly. Most cases of improper copying are unnoticeable, but, occasionally, significant changes occur. These are typically not considered a cause for alarm unless significant.
Misprints are a special category of “defective” clones, referring specifically to clones whose imprints (one or more) copied improperly. This can result in everything from a slight lisp to the way a one speaks to complete inability to move one’s own body. A misprint clone is still more than capable of learning to do the things that did not print correctly, but they must learn them manually over time.
There are two misprint clones in the story, both of whom are somewhat exceptional cases. Rhys is a misprint due to being taken out early - as a Ricinus clone, he was supposed to be aged to 53, but he was taken out at the age of 25. His language and motor control imprints misprinted, leaving him with poor manual dexterity and a small vocabulary. Cassie is also a misprint - she suffered an extremely rare complete personality misprint, making her a complete blank slate when she emerged from her vat. She instead learned her personality from the people around her, primarily the guards.
I hope this is interesting! I’ve been really worried to post this because I’m afraid of being judged for it (some of the ways they treat clones are super fucked up and I know this) but I wanted to share it with y’all. I hope you like it :)
7 notes
·
View notes