#diy otherkin
Text
Craft ideas for non-humans
Hey! Im super bored so I made this list full of crafts otherkin can do. Feel free to add on! This list includes some links to tutorials and supplies!!
Yarn tails- Tutorial
No sew animal ears- Tutorial
DIY antlers- Tutorial
DIY fairy wings- Tutorial
DIY Bird/Angel wings- Tutorial
Paper claws- Tutorial
DIY hoof shoes- Tutorial
DIY horns- Tutorial
Paint a cat mask- Buy one here!
Paint a dino mask- Buy one here!
Fangs- Tutorial
Decorate a collar
Make tags for a collar
#therian pride#puppyboy#puppykin#caninekin#therian#dogkin#therianthropy#alterhuman#dog therian#canine therian#alternative#kinnie#kinblr#Otherkin crafts#kin#diy otherkin
2K notes
·
View notes
Text
Yall who liked my last post are missing the rest of my pants fr😔
Here more of my old patches and I'm painting some right now!
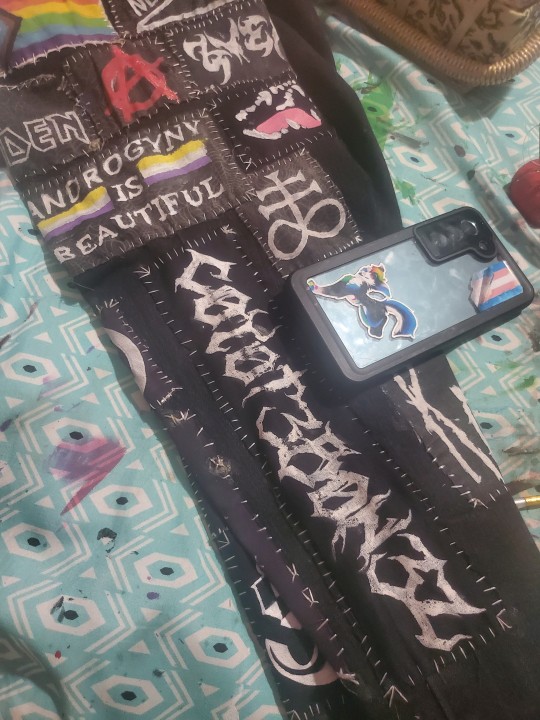
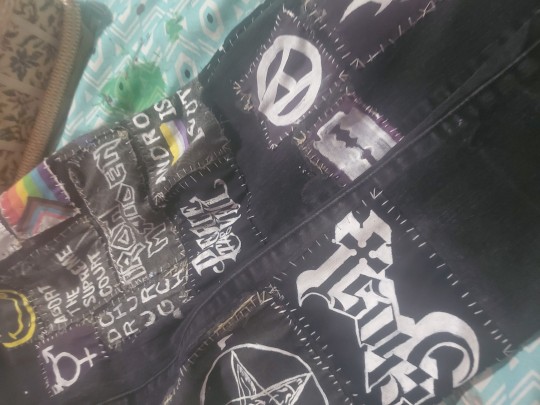
Making some otherkin patches, as well as these! (Though some of them I changed my mind about)

#canine kin#canine therian#wolfkin#werewolfkin#dogkin#dog therian#therianthropy#otherkin#nonhuman#diy punk#crust punk#punk patches#punk style#punk diy#alt diy
60 notes
·
View notes
Text
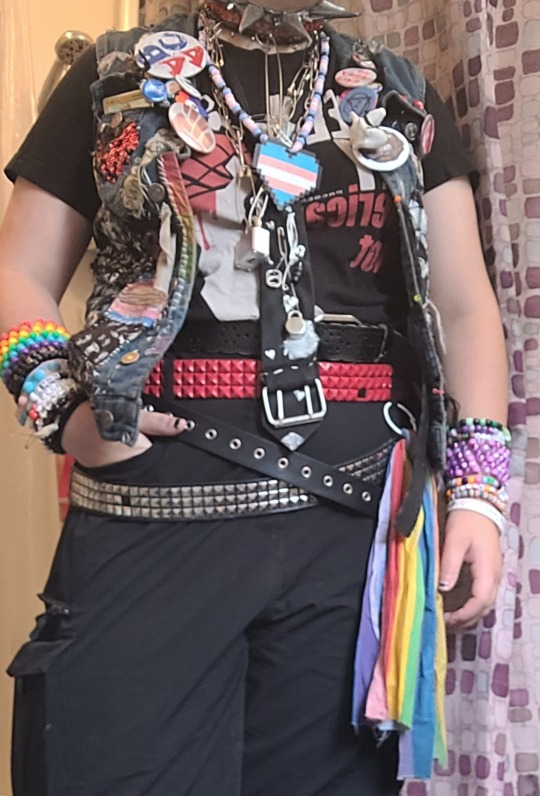
Tried to go for more of a scene look today :P I think it turned out pretty ok! What do yall think?
Song of the day:
Stories of the day:
1st assembly of the year today so schedules gonna be fucked up! But im excited to sit by my friends lolz
Mf still w0nt text me back!1!! Kinda mad but u don't think I really care anymore lol
Also, i just love my ELA teacher! We so have the ela-teacher-finds-the-hyperfixated-on-writing-and-books-autistic-kid vibes it's great she's giving me some really good recommendations!1!!1!
#punk rock#scenecore#emo scene#hardcore punk#punk music#diy punk#therian#otherkin#queer#ootd#school#writing#reading#punk fashion#punk#Spotify
131 notes
·
View notes
Text
super easy realistic tail tutorial!
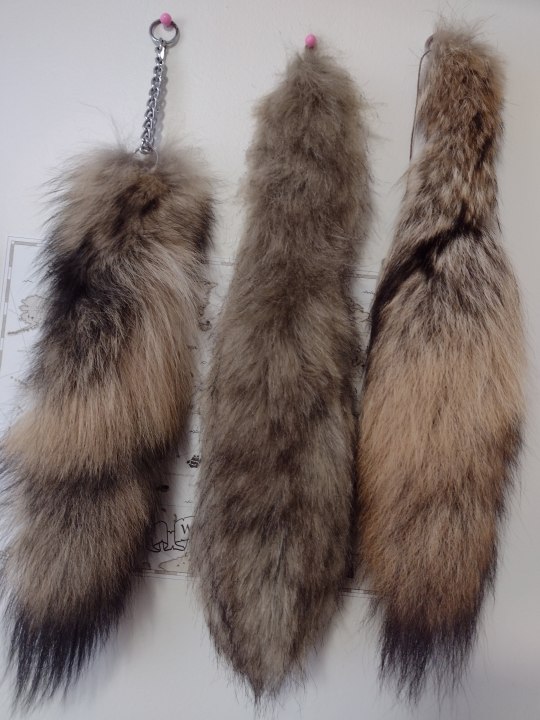
A Therian that doesn’t want a taxidermy tail but still wants realistic look and feel? Or just need a quick tail for a costume and don’t want to spend money/get one of those ugly Walmart tails? This is a super easy tail tutorial, using scrap material and very basic sewing skills that I also direct how to do if needed. It can be completed within an hour if you already have basic sewing skills, and will only take 3 hours max even if you’ve never sewn before! The end result moves like a real tail and looks like a real tail if you use realistic fur.
I make a wolf tail, but this method can be used for almost any animal with fur.
Possible TW- Real taxidermy tails shown, and an up close picture of the leather in a tail for reference
The middle tail is the fake one I made in this tutorial, next to my tanned coyote tails.
YOU WILL NEED
Scissors
sewing needle and thread
a strip of fur (i’m using scrap fur from a coat hood and will show how to use that), twice as wide as you want the tail and as long as you want the tail, plus at least 5 inches for doubling it over if you’re making a coyote/wolf tail- for cat tails you won’t need this, for fox tails you will need it twice as long as you want the tail. Ex.- mine was a 5 inch wide, 26 inch fur strip. my tail ended up being 3 inches thick not including the length of the hair and 19 inches long.
optional- seam ripper, they can make it easier but you can just use scissors if you don’t have one

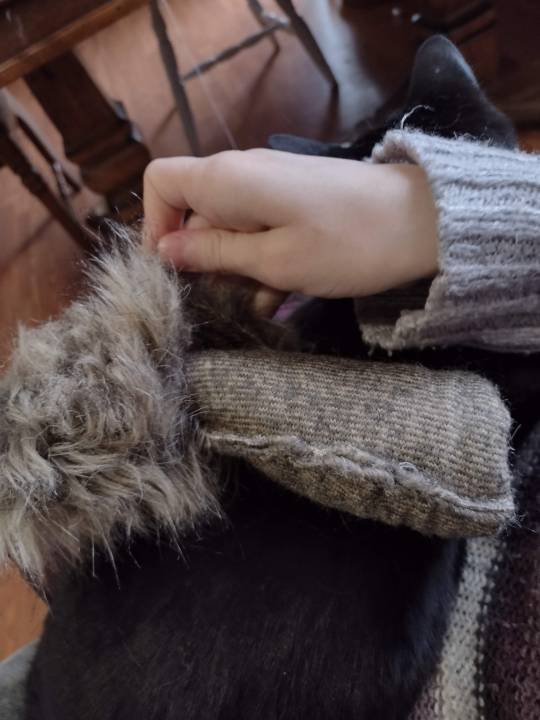
STEP ONE (if using a hood)
cut the fur off of the hood- make sure not to cut any of the actual fur! Leave some of the fabric from the hood on when making the first cut to make sure you don’t cut the fur fabric, or you won’t have enough fur for the tail. Cut close to the fur, but not the fur fabric. Then, cut about half an inch off each end of the fur, where the thick seams are- this is to separate the fur fabric from the hood fabric. now you will be able to remove the fabric of the hood- you can probably just pull them apart but you may have to cut the seams.
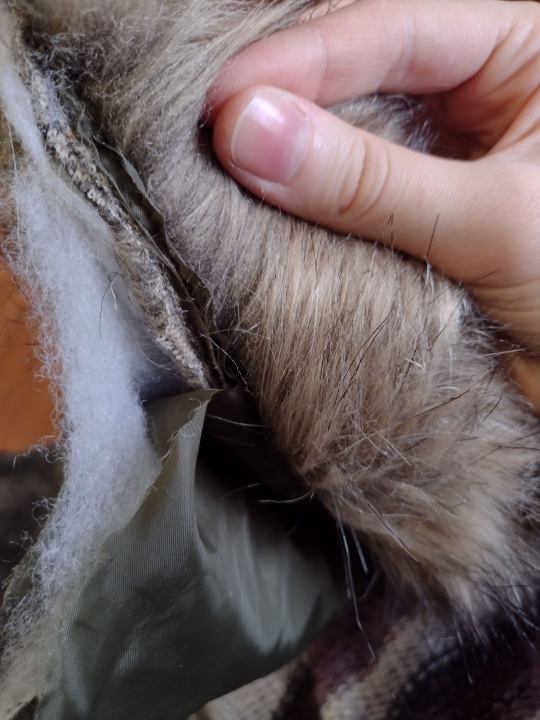


make sure not to cut the fur strands or you’ll have weird square cut fur on the tail!
STEP TWO
-skip to under picture if making a cat tail or one you don’t have to fold widthwise-
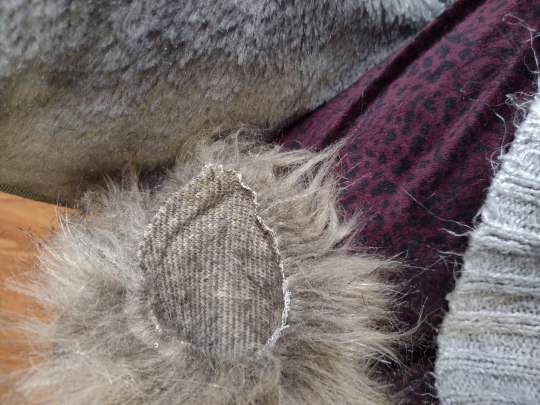
now that you have your fur, mark where you want the bottom of your tail to be- so if you want your tail to be 20 inches long completed and you have to fold the fur halfway up to be thicker at the end than the top (wolf and coyote tails are shaped like that) Then mark at 20 inches. this should leave 10 inches to be folded. Now, to make your tail pointed you will need to cut it into shape. To do this, draw two triangles like so-
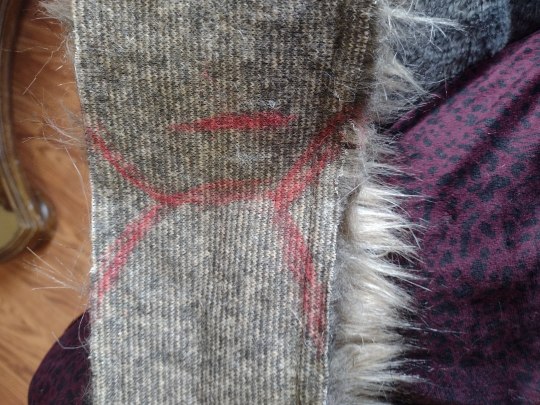
And cut them off. when folded, the tip of the tail should look something like this-

If you’re making a cat tail, fold the fabric lengthwise and cut the corners off! you do not have to fold it horizontally, only vertically.
STEP THREE- skip if making cat tail
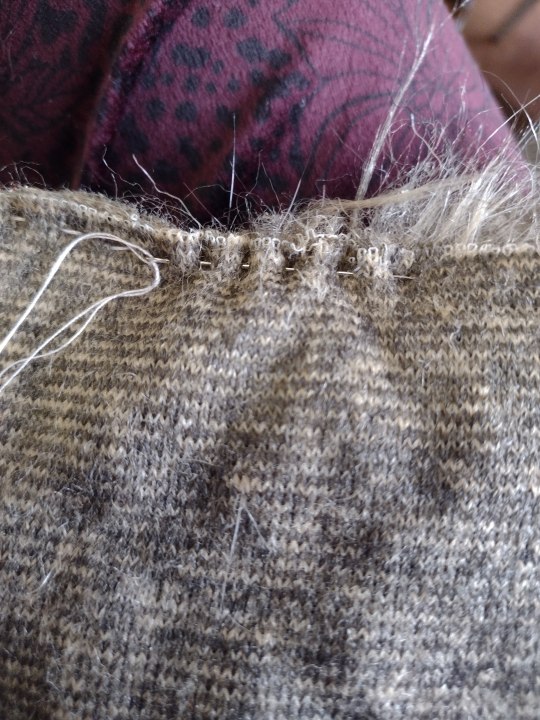
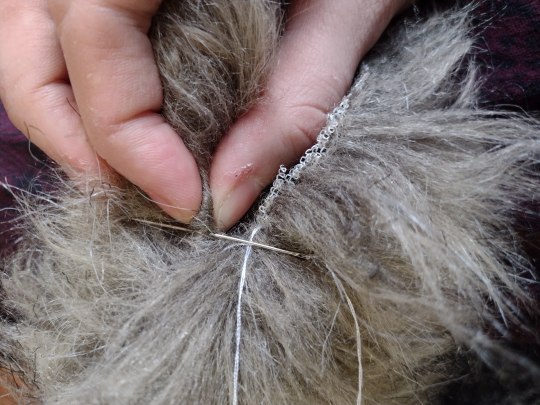
Now you can start sewing! you will want the fur sides in, the fabric side out to sew. it doesn’t have to be sewn well, you won’t see it from the outside at all. Starting from the tip of the tail, use a basic straight stitch, which looks like this-

and is done just by sticking the needle through both layers from one side to the other in a pleated pattern and then pulling the thread through. the fabric should be flat after you pull it through, or you pulled the thread too tight. You can just pull the fabric flat usually, if you have enough thread to go through all the fabric. Make sure you leave about 1/8 inch of the edge of the fabric, or if it frays your sewing can come undone.
continue sewing until you get about 2 inches from the edge of the folded piece, here-
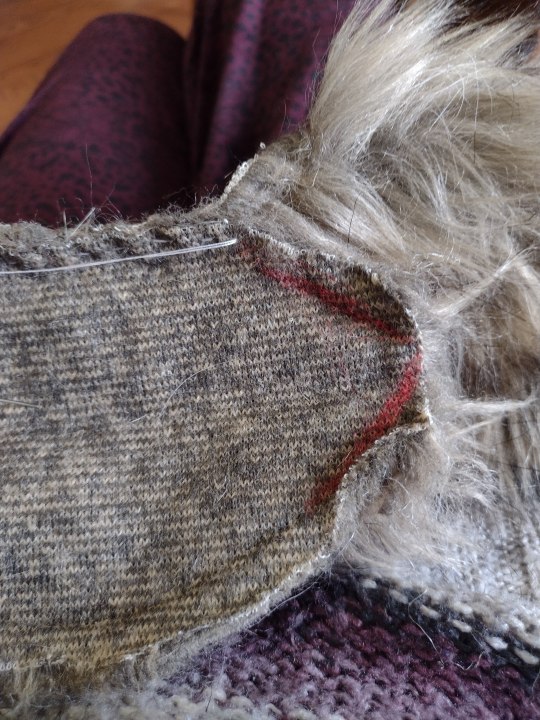
And cut the corners off, so it’s triangular. sew only the one side of the triangle to the side you’re sewing. Now end the stitch, by going through only the top layer of fabric with the needle, pulling the thread only halfway through, and then putting the needle through the thread loop. Then pull it tight. Do this two or three times, then cut the thread. Leave about half an inch of thread on the knot, so if it comes loose it doesn’t completely undo.


repeat on the other side, getting all the way to the end of the folded fabric. If you made a fox tail, then you’re done until Step five because the whole tail is folded like that, there is no skinny part..
STEP FOUR
For the skinny part of the tail, or for the whole tail if making a cat tail, fold the rest of the tail horizontally-

and sew up to the top. Make sure to leave an opening of about 2 inches to flip it right side out!
My cat decided to join me here, so he’s become part of the background XD
STEP FIVE
Flip right side out/ fur side out!
For realistic movement, you DO NOT want to stuff it with anything. Real tails just have a little piece of leather in the center, nothing else-

If you want it to be poseable, you can put wire in the middle. You’ll want to add a dab of hot glue to the ends of the wire so it stays put. The top of the tail will still be open, you will want to sew it closed by folding the very edge of the fabric in and sewing it like that, so you don’t see the edge of the fabric-


sew it shut using that method every stitch. Now you can sew any type of fastener or clip to it to attach it to you. And it’s done!

#wolf therian#therian#coyote therian#werwolf#wolfkin#werewolf therian#werewolf aesthetic#fox therian#Otherkin#dog therian#diy#costuming#furry#sewing#tutorial#tail tutorial#therian tutorial
402 notes
·
View notes
Text
Okay so I've been in a really creative mood lately and I want more dog things! Does anyone have any suggestions and/or examples of things they did for their theriotype?
So far I have:
A dog tag with my name on it
Carhartt shirts with the logo removed so I can embroider a dog paw instead
WIP crochet blanket that is just a bunch of dog paws
Cheapest collar I could find so I can embroider designs on it
I also would like to sew a plushie of a Malinois to have, and maybe make another blanket with a different type of dog related design. It can be in ANY medium as I'm always up for learning new things or taking on challenging projects
#feel free to include pictures of your projects too!#therian#caninekin#dogkin#dog therian#doghearted#therianthropy#canine kin#otherkin#crafts#crafting#diy#entityspeaks
23 notes
·
View notes
Text
I found something neat!
For my fellow dragonkin who like crystals, I found a video for jelly crystals! It's originally from Juns Kitchen, and his videos are relaxing. This video has him making crystals out of agar, and I know my fellow dragons would live this as a snack! Plus it doesn't have to just be crystals, I can see this stuff being carved into various shapes and can be used for various occasions! I'll have to give this stuff a try
youtube
Original Video from Juns Kitchen
#dragonkin#otherkin#dragons#dragon#dragon kin#spiritrambles#youtube#food#crystals#jelly#sweets#not my video#food diy#cooking#The kitties are so cute#Youtube
22 notes
·
View notes
Text
current hyperfixations
south park
sally face
creepypasta
street fighter
punk subcultures
screen acting
the joker... (the way hes portrayed in the movies and how well the actors play him) (joaquin pheonix & heath ledger) (i love them i love them i love them i lo)
if anyone is also into any of these things PLEASE PLEASE PLEASE talk to me about them, if you would like! im here to listen and ramble
#otherkin#alterhuman#therian#therianthropy#dog theriotype#canine therian#canine kin#wolf therian#dog otherkin#otherkin community#screen actors#screen acting#punk diy#punk subculture#street fighter 6#street fighter#sally face#i love creepypasta#creepypasta#jeff the killer#ticci toby#ben drowned#eyeless jack#laughing jack#hyperfixation go brrr#hyperfixation dump#joker 2019#joaquin phoenix#heath ledger#the dark knight
25 notes
·
View notes
Text
it's beautiful
19 notes
·
View notes
Text

I felt inspired today and made a little pixie door out of polymer clay 🥰🌾🍀🧚🏼♀️🍀🪻
8 notes
·
View notes
Note
Hello!! I was wondering if you had any good activities/ideas/tips for a not-deer (predatory deer mimic from internet urban legends) ? Thank you so much!!
This one is one I've been stumped on and working on for a while! Most stories of not-deer are passed down orally, so there isn't much to go off of. Nevertheless, here you go, pal!
--🦌--
Things to do for a not-deer:
Go for a run and work on your mile time! Not-deer are very, very fast
Pull an all nighter
Wake up early and watch the sunrise
Go on an early morning sunrise walk! Or a walk at dusk, right before the sun sets
Depending on if you're a not-deer with claws or not, do your nails! Paint them, file them, sharpen and shape them
Do something that scares you. Get out of your comfort zone!
Do some deer inspired makeup
--🦌--
Crafts for a not-deer:
Make some hoof shoes (tutorial)'
Make some antlers and ears (tutorial)
#not-deer#not deer#alterhuman#therian#therianthropy#otherkin#deer kin#deer therian#deer#otherkin crafts#diy otherkin#otherkin community#otherkind#theriantropy#thank you anon
29 notes
·
View notes
Text
Random tip for therians/gear wearers
You can attach wallet chains directly to things like tail keychains if you’re worried about people pulling/nicking them. I do this all the time just for fashion purposes, but it just occurred to me how it could be useful for folks getting their stuff stolen, especially in crowded spaces like hallways. You can also do this smaller-scale on hats, clothing, bags, etc. with a safety pin/pin button attached to a chain/string/necklace/glasses chain/whatever
#diy tag#alterhuman diy#<- think that’ll be my tag for it? party#therianthropy#therianthrope#otherkin#otherkind#therian gear#alterhuman#otherkinity#therian#otherhearted#fictionkin#fictionkind
17 notes
·
View notes
Text

Dog walk
#cottagepoor#grunge#dirty kid#punk#digital camera#digi cam#me#graveyard#diy punk#losercore#hipster#indie#indie sleaze#therian#Otherkin#alterhuman#lycanthrope#outfit#fashion#red hair#alternative#lgbt
5 notes
·
View notes
Text

A mini heart I made!
It feels like it's triggering a kinmem, but it's so blurry I can't tell.
3 notes
·
View notes
Text
I made Dren's wings from Splice because she's a gender icon
#me#my face#video of me#top surgery scars#dren splice#splice 2009#cosplay#diy#otherkin#gender post#shes an icon#what can i say#ive wanted this for so long#at last#dread stole her wings
3 notes
·
View notes
Photo

Technically I made these a while ago but since I never posted them here...

#werekin#werewolfkin#wolfkin#dogkin#otherkin#alterhuman#gear#pink aesthetic#paw shoes#dog therian#diy
10 notes
·
View notes
Text
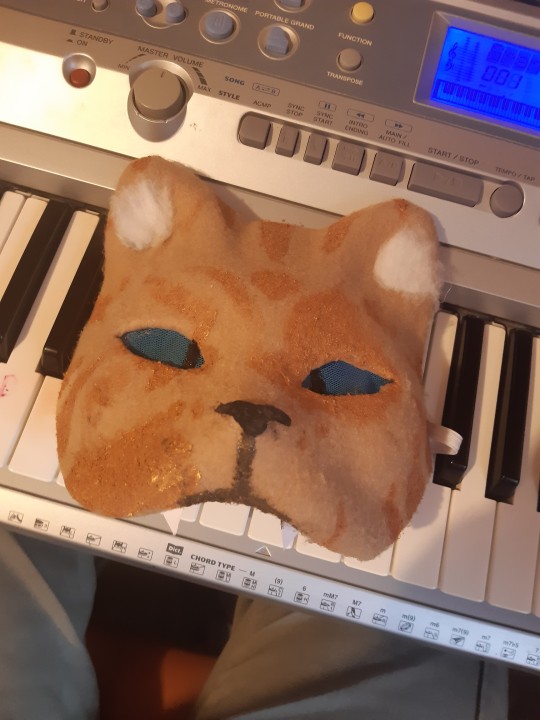
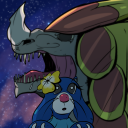
ik i dont post abt it here but im a therian and wanted to show off my mask plans :3


(u can take inspo from them but pls dont just copy them)
for the saint bernard i plan on using cardboard and felt for the ears!!
if enough ppl show interest i'll show the finished products:3 probably gonna show more of them on my tiktok though since this blog is really only dedicated to old men and a silly video game i like lol
#therian#therian community#therianthropy#dog therian#canine therian#saint bernard therian#tiger therian#otherkin#otherkin community#otherkind#doghearted#mask#diy#kinda related tags?#furry#art#artist#arts and crafts#furry community#autistic#autistic community
3 notes
·
View notes
Last Seen Blogs

joanninkshop
Joann Ink
grahamswrath
my thoughts are often not tasty

cherribombart
Cherribombart
27648
五哥 @Hongkong
leilani-and-kass
The World Has Moved On