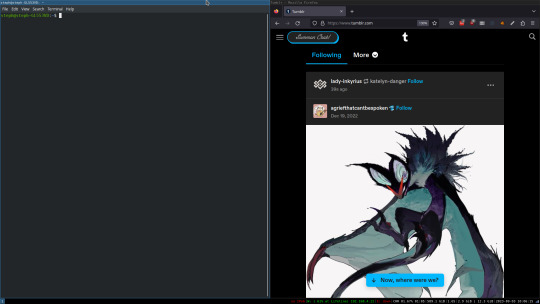
#git project setup
Explore tagged Tumblr posts
Visit Tumblr Blog
Explore Tumblr blogs with no restrictions, modern design and the best experience.
Last Seen Tumblr Blogs


Fun Fact
The Tumblr app for Google Glass was released on May 16, 2013.
Text

Welcome back, coding enthusiasts! Today we'll talk about Git & Github , the must-know duo for any modern developer. Whether you're just starting out or need a refresher, this guide will walk you through everything from setup to intermediate-level use. Let’s jump in!
What is Git?
Git is a version control system. It helps you as a developer:
Track changes in your codebase, so if anything breaks, you can go back to a previous version. (Trust me, this happens more often than you’d think!)
Collaborate with others : whether you're working on a team project or contributing to an open-source repo, Git helps manage multiple versions of a project.
In short, Git allows you to work smarter, not harder. Developers who aren't familiar with the basics of Git? Let’s just say they’re missing a key tool in their toolkit.
What is Github ?
GitHub is a web-based platform that uses Git for version control and collaboration. It provides an interface to manage your repositories, track bugs, request new features, and much more. Think of it as a place where your Git repositories live, and where real teamwork happens. You can collaborate, share your code, and contribute to other projects, all while keeping everything well-organized.
Git & Github : not the same thing !
Git is the tool you use to create repositories and manage code on your local machine while GitHub is the platform where you host those repositories and collaborate with others. You can also host Git repositories on other platforms like GitLab and BitBucket, but GitHub is the most popular.
Installing Git (Windows, Linux, and macOS Users)
You can go ahead and download Git for your platform from (git-scm.com)
Using Git
You can use Git either through the command line (Terminal) or through a GUI. However, as a developer, it’s highly recommended to learn the terminal approach. Why? Because it’s more efficient, and understanding the commands will give you a better grasp of how Git works under the hood.
GitWorkflow
Git operates in several key areas:
Working directory (on your local machine)
Staging area (where changes are prepared to be committed)
Local repository (stored in the hidden .git directory in your project)
Remote repository (the version of the project stored on GitHub or other hosting platforms)
Let’s look at the basic commands that move code between these areas:
git init: Initializes a Git repository in your project directory, creating the .git folder.
git add: Adds your files to the staging area, where they’re prepared for committing.
git commit: Commits your staged files to your local repository.
git log: Shows the history of commits.
git push: Pushes your changes to the remote repository (like GitHub).
git pull: Pulls changes from the remote repository into your working directory.
git clone: Clones a remote repository to your local machine, maintaining the connection to the remote repo.
Branching and merging
When working in a team, it’s important to never mess up the main branch (often called master or main). This is the core of your project, and it's essential to keep it stable.
To do this, we branch out for new features or bug fixes. This way, you can make changes without affecting the main project until you’re ready to merge. Only merge your work back into the main branch once you're confident that it’s ready to go.
Getting Started: From Installation to Intermediate
Now, let’s go step-by-step through the process of using Git and GitHub from installation to pushing your first project.
Configuring Git
After installing Git, you’ll need to tell Git your name and email. This helps Git keep track of who made each change. To do this, run:

Master vs. Main Branch
By default, Git used to name the default branch master, but GitHub switched it to main for inclusivity reasons. To avoid confusion, check your default branch:

Pushing Changes to GitHub
Let’s go through an example of pushing your changes to GitHub.
First, initialize Git in your project directory:

Then to get the ‘untracked files’ , the files that we haven’t added yet to our staging area , we run the command

Now that you’ve guessed it we’re gonna run the git add command , you can add your files individually by running git add name or all at once like I did here

And finally it's time to commit our file to the local repository

Now, create a new repository on GitHub (it’s easy , just follow these instructions along with me)
Assuming you already created your github account you’ll go to this link and change username by your actual username : https://github.com/username?tab=repositories , then follow these instructions :


You can add a name and choose wether you repo can be public or private for now and forget about everything else for now.

Once your repository created on github , you’ll get this :

As you might’ve noticed, we’ve already run all these commands , all what’s left for us to do is to push our files from our local repository to our remote repository , so let’s go ahead and do that

And just like this we have successfully pushed our files to the remote repository
Here, you can see the default branch main, the total number of branches, your latest commit message along with how long ago it was made, and the number of commits you've made on that branch.

Now what is a Readme file ?
A README file is a markdown file where you can add any relevant information about your code or the specific functionality in a particular branch—since each branch can have its own README.
It also serves as a guide for anyone who clones your repository, showing them exactly how to use it.
You can add a README from this button:

Or, you can create it using a command and push it manually:

But for the sake of demonstrating how to pull content from a remote repository, we’re going with the first option:

Once that’s done, it gets added to the repository just like any other file—with a commit message and timestamp.
However, the README file isn’t on my local machine yet, so I’ll run the git pull command:

Now everything is up to date. And this is just the tiniest example of how you can pull content from your remote repository.
What is .gitignore file ?
Sometimes, you don’t want to push everything to GitHub—especially sensitive files like environment variables or API keys. These shouldn’t be shared publicly. In fact, GitHub might even send you a warning email if you do:

To avoid this, you should create a .gitignore file, like this:

Any file listed in .gitignore will not be pushed to GitHub. So you’re all set!
Cloning
When you want to copy a GitHub repository to your local machine (aka "clone" it), you have two main options:
Clone using HTTPS: This is the most straightforward method. You just copy the HTTPS link from GitHub and run:

It's simple, doesn’t require extra setup, and works well for most users. But each time you push or pull, GitHub may ask for your username and password (or personal access token if you've enabled 2FA).
But if you wanna clone using ssh , you’ll need to know a bit more about ssh keys , so let’s talk about that.
Clone using SSH (Secure Shell): This method uses SSH keys for authentication. Once set up, it’s more secure and doesn't prompt you for credentials every time. Here's how it works:
So what is an SSH key, actually?
Think of SSH keys as a digital handshake between your computer and GitHub.
Your computer generates a key pair:
A private key (stored safely on your machine)
A public key (shared with GitHub)
When you try to access GitHub via SSH, GitHub checks if the public key you've registered matches the private key on your machine.
If they match, you're in — no password prompts needed.
Steps to set up SSH with GitHub:
Generate your SSH key:

2. Start the SSH agent and add your key:

3. Copy your public key:

Then copy the output to your clipboard.
Add it to your GitHub account:
Go to GitHub → Settings → SSH and GPG keys
Click New SSH key
Paste your public key and save.
5. Now you'll be able to clone using SSH like this:

From now on, any interaction with GitHub over SSH will just work — no password typing, just smooth encrypted magic.
And there you have it ! Until next time — happy coding, and may your merges always be conflict-free! ✨👩💻👨💻
#code#codeblr#css#html#javascript#java development company#python#studyblr#progblr#programming#comp sci#web design#web developers#web development#website design#webdev#website#tech#html css#learn to code#github
97 notes
·
View notes
Text
A free image hosting solution for AO3 and elsewhere - A Tutorial (mobile-friendly!)
See the demo site made from this template IN ACTION: https://hotlink-archive-template.pages.dev/
This guide is for an easy, mobile-friendly way to host files for hotlinking on AO3 or elsewhere, using github and cloudflare pages.
I've encountered far too many dead links in fanfics and forums simply because a hosting service decided to dump older files, or they decided to change their TOS to no longer allow hotlinking or certain kinds of content (nsfw, fictional graphic content). See Optional Steps for even more options.
This is an easy, barebones way to permanently host images that you don't want deleted unexpectedly or that you can't host elsewhere. (Emphasis on barebones. This will not be a nice portfolio style site. Unless you decide to code that yourself!) You can follow the link above for an example of this type of site.
It is also EASY to upload and use on mobile devices after initial setup!
Tools you will need:
Cloudflare Pages/Workers is a free to use static site hosting service. This will publish your files and make them available online. This will publish your files and make them available online. There is a limit to the amount of data you can upload for free, but you can pay for proper hosting if you want to exceed it.
Github is a code sharing/storage platform. Your files will go here first before being published on Pages. You can edit and upload files through your browser at github.com, or through Github Desktop, a program you install on your computer. There are limits to Github repositories, but they are also generous (suggested 1GB to 5GB per repo).
Basic Setup
1. Create a github account
2. Copy this template repository hotlink-archive-template
Your website will be contained in a repository, a place where all the files and the revision history for your project are stored.
This template repository uses an "Action" (using python) to automatically create a "home" page with an Index of all the files in your repository every time it is updated.
NOTE: I recommend you set your repository to Private. Github's history feature is extensive, so if you have sensitive content or think you might want to delete something later, it will be hard to get rid of it completely once it's been committed and publicly available.
3. Enable Action permissions
In order for the Action script to work, you need to give Actions permission to read and write in your repository.
Within your repository, go to the tab Settings > Actions > General > Workflow Permissions

4. Create a Cloudflare account
5. Create a Pages (or Workers) project and link it to your Github repository
Your Pages project will create the front end of the site where the images will be displayed. You will be able to link those images to other platforms like AO3.
You can create either a Workers or Pages project by going to Add > Pages (or Workers). Name your project WISELY! This name will be your site's URL.
Workers vs. Pages
Workers is subsuming Pages on Cloudflare and now has all the same static hosting capabilities, in addition to its original server-side processing services. If you'd like to, read more about this.
While Workers has similar capabilities, I recommend Pages for this project. Pages has the added bonus of a cleaner URL if you do not have your own domain: “MySite.pages.dev” in Pages vs Workers' “MySite.username.workers.dev”
You will be prompted to import an existing Git repository. You will need to give it access to your Github to do this.

Select the repository on your Github you made for your project, then hit "Begin Setup".
Name your project WISELY! This name will be your site's URL.
You do not need to change any settings on the next page, so hit "Save and Deploy". Your image hosting site will now be live!
The URL will be "https://ProjectName.pages.dev". It may take a few minutes to become accessible.
Now you're done with the basic setup!
How to Add files
You can add any files you want to link to on AO3/elsewhere through mobile, desktop browser, or the Github desktop program!
Here is how to do it on Github.com:
Open up the repository that you made (it can be found at github.com/username/repositoryname). You will see a list of folders and files that are in that repository.
Click into the folder "fan-stuff".
In the top right, go Add file > Upload files and drag in the images you want added. You will need to name the images BEFORE you upload them, as there is not an easy renaming feature within Github's browser interface.
In the Commit changes box, choose a title for what action you are doing. This will help you backtrack uploads if needed.
For example, it could be "Uploaded Batman Art". Make sure it's set to "commit directly to the main branch", then commit those changes. This will upload the files.
Now, if you visit your site, you will see your uploaded image under the "fan-stuff" folder!
To embed/link your image, navigate to your file on your Pages site and copy the URL in the address bar. This URL is what you will use to embed your photo (using HTML or "add image as URL" tools some sites have).
Continue onto More Setup to customize your site and implement more advanced settings. See Tips/Troubleshooting if you're running into problems.
More Setup
Perform site customization/advanced setup with Github Desktop on your PC
Github’s web UI is great, but it has major limitations. I highly recommend that you use Github Desktop during the initial setup, as well as when you want to make major organizational changes to your files/site. Once you have everything set, though, you can use Github in your browser to upload whatever files you want to hotlink at the moment.
Download Github Desktop and “clone” (download a copy of) the repository you made.
This is the best time to rename/rearrange folders + files, etc.
There are other methods in the Troubleshooting section if you need, but Github Desktop is by far the easiest way
see Adding/Renaming Folders for important info on how to properly rename/add folders
see About the Index Page for how to customize your Index pages
Once you’re done editing, “push” (upload) all the changes you made to your online Github repository.
Having some sort of text editor like Notepad++ is useful for editing any code, the automatic color-coding is very helpful. You can edit in plain old Notepad as well, it just won’t look as nice.
About the Index Page
The template repository uses a python Action to automatically create an HTML "home" page with an Index of ALL the files in the folder every time it is updated.
This is particularly convenient for mobile use, as you can upload a file, and the python action automatically updates the Index page.
If you don’t want this, just disable the “create-index” Action and delete the .py files. You can just type in the file locations to get to each file, or you can manually maintain an home/Index page yourself, which isn't hard if you know some basic HTML and can remember to do it consistently.
Also note that if you wish to change any of the content on your Index pages, you must edit the "index.py" file, not the "index.html" file. The "index.html" file gets re-written every time the "create-index" Action is run in order to keep the file index up to date.
Adding/Renaming/Deleting Folders
Disclaimer: This is a bit convoluted because I am extremely unqualified to be working with python OR HTML. There’s probably an easy way to do this, but I don’t have the skill to do it, and most of the stuff here is copied from stuff I found around. If you know a better way to do things, please let me know, it’d make my life easier too!
Adding or renaming folders involves some extra steps.
1. The "index.py" file inside the folder needs to be edited to match the parent folder name.
The place you need to do this is found near the top of the file (highlighted below)

2. Then the outer-most "create-index.py" file needs to be updated to match the new name as well. If you’ve added a new folder, duplicate and adjust the code to match.
The place you need to do this is found at the bottom (highlighted below)

If you don’t need any folders at all, great! Just delete them and their contents! No need to edit any files. (Don’t delete “index.html” or “create-index.py” or “.github/workflows”!)
If you would like to have these folders for later use, leave them as-is and simply edit the index files.
The relevant lines of code at the bottom of "create-index.py" like in the previous step for renaming folders. You may delete this code, or comment it out (using # at the beginning of a line will make it “invisible” to the computer)
Then, add the folder’s name to the “exclusions” list at the top of the "create-index.py" file so that it doesn’t show up on your Index page (highlighted below)

You can also use this same concept to create "invisible" files/folders. Any files/folders included in the "exclusions" list in "(create-)index.py" will not be listed on the Index page, however they can still be found through the direct URL to the file.
On the flipside, this means simply hiding the file/folder from the Index page does not get rid of the file from your site. Anyone who has the URL will be able to find that file unless you remove it, or move its location to change the URL
Tips/Troubleshooting
(Re)name your files before uploading
It’s not possible to rename image/media files on Github’s web UI (it is possible with the local Git program). The "create-index" Action lists out the names of your files exactly, so you will end up with ugly strings of numbers and letters on your Index page if you don't rename them, which is terrible to look at and also plain old CONFUSING to navigate.
So if you're uploading on mobile or through Github on browser, name your files with easy to remember and distinctive filenames before you go ahead and upload them. This makes everything much easier, and it makes your Index page look nice :)
My website isn’t updating when I edit my Github repository!
Check to see if your Pages is retrieving from the correct branch, and if it has automatic deployments enabled.

Can’t see your Github repository when trying to link it on Cloudflare?
Check your Github applications Repository Access settings. Go to your ACCOUNT Settings > Integrations - Applications > Cloudflare > Repository Access

Index action is failing!
Go back to step 3 in Basic Setup and check if you’ve given Actions permission to read and write. If that’s not the issue, check to see if you’ve set up your "index.py" files correctly. The folder names should correspond to the parent folders, and the "create-index.py" file in the outer-most folder should have the correct folder names at the VERY BOTTOM.
How do I rename a folder (or move a file) in Github’s web UI?
It isn’t possible to directly rename a folder in Github’s web UI, doing it using Git on your computer is the most foolproof way to do it. But there is a way (except for media files).
Go into the folder you want to rename and select a file such as “index.html” and enter the “edit” mode.
Go to the file name and backspace until you can edit the parent folder name as well. This will create a new folder with the new name.
You’ll have to do this to every file in the folder until they’re all in the new folder.
Unfortunately, you can’t do this with media files like png/jpg/etc, because entering the “edit” mode on a photo “breaks” it somehow, and bye-bye image :’) (Don’t worry if this happens, just don’t commit the change or roll it back in your history).
Optional Steps
Make deployment (semi-)Manual
You can play with cloudflare and github to make deployment of your site a manual step you have to trigger, instead of automatic with each commit (default setting). This is a safeguard in case you accidentally make a change or delete something from your github, it won't affect your website.
Deploy w/ Branches
You could do a semi-automatic deployment with a "Production" branch on your github that is separate from the branch you edit. This creates an extra step before anything is published on Cloudflare. A safeguard against accidental changes/deletion of sorts :)

Go to Settings > Build tab > Branch Control
Choose your Production Branch (MAIN or CLOUDFLARE) and enable (or disable) automatic deployments
If you choose MAIN, every change you commit to MAIN will be published to Pages
If you choose CLOUDFLARE, any changes you make to MAIN will not show up on your Pages site until you Pull from MAIN to CLOUDFLARE
To Pull changes from MAIN to CLOUDFLARE, go to your github repository
Above your files on the Left, you will see a toggle to choose which branch you are on.
Choose Cloudflare. There will be a message like "This branch is 7 commits ahead of, 2 commits behind main." Click "2 commits behind"
Click "Create a Pull Request". Then click "Merge Pull Request". If everything is correct, this should trigger a build on your Cloudflare
Deploy w/ Github Actions
Or you can create a manual command that you have to enter on github to trigger a deployment on cloudflare. If you're paranoid about anything happening to your site due to a mishap on the Github side, this is a safe choice. Unless you manually trigger the command, your Pages site will be completely untouched no matter if something happens to your repo.
This can be done in many ways, I think the most straightforward is with Deploy Hooks (maybe in conjunction with Actions if you want to make it mobile-friendly), and might be a bit complicated, but not too hard to figure out with some Google-fu.
Here’s some links I think will be useful (note: I don’t use this method, so these haven’t been tested)
Manual trigger action tutorial
How to configure Github webooks
Storing Locally instead of on Github
Although this guide is written with Cloudflare's Github integration in mind, particularly for easy online/mobile access, you can also keep your files locally on your PC and directly upload your assets onto your Pages project. This gives you full control over what happens to your files. (Keeping backups is a good idea. You can still use Github Desktop to do this, just keep your repository on your PC.)
Simply clone/download the repository as it is, customize it as you like, and create a NEW Pages project on Cloudflare, using "Direct Upload" to upload your files
Once you have connected a Pages project with Github, there is no way to change the deployment method to Direct Upload or vice versa. Direct Upload is also not available for Workers.
One thing that will NOT work the same is the "create-index" Action that only works on Github.
I have made a "create-index.exe" that will execute the "create-index.py" files in the exact same way as they would work with the Action. You do not have to install python for this to work (if I did everything right). Simply run "create-index.exe" whenever you make a change and want to update the "index.html" files
Remember, this is EXACTLY THE SAME as the "create-index" Action, meaning you have to edit each "index.py" file when you rename folders, add a folder, want to exclude a file from the Index page, etc. (See Adding/Renaming Folders for how to do this)
Find me on Bluesky. Or if you have a problem, open an Issue on this project :)
I'll try to answer your questions as best I can! But really, I am the most amateur of amateurs and figured this all out using Google, so I might not be of much help ^^;
I also recommend Squidge Images (an offshoot of Squidge.org) as a fairly trustworthy alternative. However, Squidge Images does have some additional rules that Squidge does not, and what crosses the line is at their discretion.
I also posted this over on AO3!
5 notes
·
View notes
Text
Infrastructure for Teamwork, a.k.a. Version Control
Working together on a game is quite difficult. How do you make sure everyone is on the same page?
You could send zips with assets and code between people, but that is slow, cumbersome, and very error-prone.
This is why Source Control software was invented. With Source Control, you can store the project files on a server, and everyone who wants to work on the project files, can download the project from the server. Once they're done with their changes, they send them back to the server. Then the other people can get those changes from the server again.
There are many different Source Control softwares. Probably the best-known one is git. (Source Control, Version Control, Revision Control all mean essentially the same thing.) Git is very good for working on projects that are all just plain-text code. However, it kind of falls flat when it needs to deal with binary assets, like textures, models, and sounds. Unreal Engine Scenes and Blueprints are also binary files. So if you don't use C++, but only Blueprints, basically your entire project is binary files.
This is why I went looking for a different Version Control Software that can handle this better. At my internship, I used Subversion, which is said to work better with binary assets, but in my experience then, it still wasn't exactly great. Though that might also have been due to the fact that they barely used any of its fancier features there.
Unreal Engine itself recommends using Perforce Helix Core. (Perforce is the company, Helix Core is the VCS, but the term "Perforce" is usually used to refer to the VCS itself, due to historical reasons. Source) So I looked into it, and indeed, it seemed very suitable!
So we requested a computer from the XR Lab to use as server for this project, and I installed the Helix Core Server on it.


It was surprisingly easy to install!
I then downloaded the Helix Core Client application on my laptop, and connected to the server. The setup there took a while, because there was a lot to learn. But in the end, I did it!
Sadly, Perforce is not free, so we are forced to use the free version, which is limited to a maximum of five users. We are with ten people, so we had to choose a few "representatives" who would actually put the things everyone made into the project. We requested an educational licence from Saxion, but got told to wait. Now that the project is over, we still don't have it. We also requested an educational licence from Perforce itself, directly, but we have still not got a response. But we made do with the limitations we got.
I wrote a guide for my teammates on how to set up a workspace for the project with Perforce, and improved it multiple times based on user testing and feedback. (I sat next to my teammates while they were following the guide and tried my best to now say anything; to let the guide speak for itself. I would then take note of what went wrong and improved that section of the guide for the next user test.)
Over the months of this project, we all used P4V and Perforce to work together on the project. Due to Perforce's locking system, we never had any merge conflicts! Most of the team actually really enjoyed working with Perforce. Personally, I do miss git, but I acknowledge that for an Unreal Engine project, Perforce is a lot better. And I also found it pretty nice to work with. The documentation was pretty good, and they have a lot of tutorials, guide, and demonstration videos, which have been very helpful during the setup. It's very useful to be able to follow along every single click.
3 notes
·
View notes
Text
Jams post-mortem (sorta)
So, recently I did another 48h jam project. this time remotely, same as the one last year but on site. My setbacks were kinda similar.
The jam is broken down into 3 days from 12pm to 12pm.
1 day:
theme announced
branstorming
taking template/old project and trying to adjust it - i always run into some issues there because i was trying to implement a new feature that works for the theme, but that i didn't try before. or I spent time cleaning up pc space, or editing the template, or seeking old projects for the bits i can use etc. and i basically ended both times with wasting time and realising i need to shrink the scope of the project.
2 day:
the idea is chosen (but the scope is big anyway)
somehow this day i work thorugh the parts i know, but sidetrack into environment design and completely forget aobut other aspects=no urgency.
on 2nd jam i wasted time figuring out how to use twinmotion for landscape. it didn't work properly and i had to fully delete it=waste of time
depending on my schedule outside the jam, this day turns into an all-nighter from the last day.
1st jam i wasted a lot of time setting up itch.io page that wasn't needed for that jam, editing video gameplay etc. this jam it was needed and video was desirable but i could post it after deadline. so at least i could prioritize here & also set up the page as i was going, which helped me to see the ongoing scope.
2nd jam tried to use foliage for landscape. it ended up causing issues with packaging, so i had to delete it. i probably wasted at least an hour on just messing with foliage and multiple hours on packaging over and over with different settings.
= i shrunk time in a way, but also got too confident adding up. in 1st jam i added up new features because i lacked experience how long/fast 48h jam would go. On site time was wasted on socializing, setting up space, travel etc. Remotely time was spent on work because it wasn't my days off, trying to figure out the theme and researching & i just woke up later than the jam started on both days due to work schedule.
core difference in setup: I could utilize multiple screens at 2nd time & workplace was comfortable and warm. I still ended up with a lot of neck pain etc due to locked-in posture i get when i over-concentrate lol.
Perhaps the amount of actually working was the same.
I have some templates and projects i can adapt, but i have no version changes documented properly, so i end up adding stuff that's fixed in some other project and not template.
Things to improve on:
version control something, git or i dunno. my projects folder is a mess and it takes up space.
prep/review ahead og jam fully template
disc space +hardware updates
Jam results comparison:

#gamejam#game jam#post mortem#postmortem#solodev#devlog#unreal engine 5#unreal engine#indiedev#gamedev#game development
4 notes
·
View notes
Text
Choose the Right Azure DevOps Services For Your Needs

To compete in today's business landscape, having a hold on the right tools with major technological trends is a way to achieve excellence and growth. Azure DevOps provides a solid programmable framework for easing software development in this trait. Whether managing a small project or working on more elaborate enterprise-scale workflows, choosing the right Azure DevOps services can mean the difference between the successful management of your operations or deadlock. Through this article, let’s get deeper to understand what Azure DevOps stands for and how Spiral Mantra DevOps consulting services can make your workflow seamless.
Azure DevOps proffers a set of tools aiming to build, test, and launch applications. These different processes are integrated and provided in a common environment to enhance collaboration and faster time-to-market. It always takes care to promote teamwork, as it's a cloud-based service that we can access at any time from anywhere aspiring to provide a better quality of work. It creates a shared environment for faster day-to-day work without replicating physical infrastructures.
At Spiral Mantra, you can hire DevOps engineers who concentrate on delivering top-notch Azure DevOps services in USA. We are best known for providing services and a special workforce to accelerate work.
Highlighting Components of Azure DevOps Services at Spiral Mantra
Spiral Mantra is your most trusted DevOps consulting company, tailored to discuss and meet all the possible needs and unique requirements of our potential clients. Our expertise in DevOps consulting services is not only limited to delivering faster results but also lies in offering high-performing solutions with scalability. You can outsource our team to get an upper hand on the industry competition, as we adhere to the following core components:
1. Azure Pipelines: Automates the process of building testing and deployment of code across popular platforms like VMs, containers, or cloud services. CI CD is useful to help developers automate the deployment process. Additionally, it gains positive advantages with fewer errors, resulting in delivering high-quality results.
2. Azure Boards: A power project management tool featuring the process of strategizing, tracking, and discussing work by clasping the development process. Being in touch with us will leverage you in many ways, as our DevOps engineers are skilled enough to make customizations on Azure Boards that fit your project requirements best.
3. Azure Repos: Providing version control tools by navigating teams to manage code effectively. So, whether you prefer to work on GIT or TFVC, our team ensures to implement best version control practices by reducing any risk.
4. Azure Test Plans: In the next step, quality assurance is another crucial aspect of any software or application development lifecycle. It stabilizes to provide comprehensive tools useful for testing while concentrating on the application's performance. We, as the top Azure DevOps consulting company, help our clients by developing robust testing strategies that meet the determined quality standards.
Want to accelerate your application development process? Connect with us to boost your business productivity.
Identifying Your Necessity for Azure DevOps Services
It might be tempting to dive right into what Azure DevOps services you’ll need once you start using it, but there are some important things to be done beforehand. To start with, you’ll have to assess your needs:
Project scale: Is this a small project or an enterprise one? Small teams might want the lightweight solution Azure Repos and Azure Pipelines, while larger teams will need the complete stack, including Azure Boards and Test Plans.
Development language: What language are you developing in? The platform supports many different languages, but some services pair better with specific setups.
CI/CD frequency: How often do you need to publish updates and make changes? If you want to release new builds quickly, use Azure Pipelines, while for automated testing, go with Azure Test Plans.
Collaboration: How large is your development team? Do you have many people contributing to your project? If so, you can go with Azure Repos for version control and, on the other hand, Azure Boards for tracking team tasks.
Choosing the Right DevOps Services in USA
Deciding on the best company for your DevOps requirement can be a daunting task, especially if you have no clue how to begin with. In the following paragraph, get through the need to fulfill while selecting the right agency to make your things work in line.
1. For Version Control
If your project has more than one developer, you’ll probably need enterprise-grade version control so your team can flawlessly work on code. Azure Repos is currently working for both Git and TFVC as the basis for your version control system. If you have a distributed team, then Git is the best choice. If your team prefers working in a centralized workflow, then TFVC may be a little easier. If you’re new to version control, Git is still a pretty good place to start, though. The distributed nature of Git makes it easy for anyone to get up and running with version control.
2. For Automated Tasks (Builds and Deployments)
Building, testing, and using your code in an automated way will keep you going fast and in sync. That’s why running Azure Pipelines on multiple platforms allows CI/CD for any project. The platform also provides the flexibility your team needs to deploy their application to various environments (cloud, containers, virtual machines) as you want your software to be released early and continuously.
3. For Project Management
Now, getting that work done is another thing. A project isn’t just about writing code. Doing release notes requires at least one meeting where you need to understand what’s fixed and what broke. Tracking bugs, features, and tasks helps keep your project on track. Azure Boards provides Kanban boards, Scrum boards, backlogs for managing all your project work, and release boards used to track work for a specific release. You can even adjust it to map to existing workflows used by your team, such as Agile or Scrum.
4. For Testing
Testing is another crucial step to make sure your application behaves as expected with the validation steps or predetermined conditions. You can enable manual testing, exploratory testing, and test automation through Azure Test Plans. This will allow you to integrate testing into your CI/CD pipeline and keep your code base healthy for delivering a more predictable experience to your users.
5. For Package Management
Many development projects use one or more external libraries or packages. Azure Artifacts enables the capture of these dependencies so your team can host, share, and use these packages to build complex projects. It massively reduces the complexity of maintaining a depot of packages so your developers can access them for the development process.
How does the Spiral Mantra Assist? Best DevOps Consulting Company
Spiral Mantra’s expert DevOps services will help you fasten your development process so you can get the most out of the process. Whether it’s setting up continuous integration, a CI CD pipeline, configuring version control, or optimizing any other aspect of your software process through boards or any other aspect of your software process, call Spiral Mantra to make it happen.
Partner with Spiral Mantra, and with our team proficient at using Azure DevOps for small and large projects ranging from your start-up to large teams, you can ensure success for your development projects.
Getting the Most from Azure DevOps
Having found the relevant services, you then need to bring these together. How can you get maximum value out of the service? Here's the process you might consider.
⦁ Azure Repos and Pipelines: To initiate the process, set up version control and automated pipelines to boost the development process.
⦁ Add Boards for Big Projects: Once the team has grown, add Azure Boards for task, bug, and feature request tracking for teams using pull requests.
⦁ Testing Early: Use Test Plans to engage in testing right at the beginning of the CI/CD pipeline and pick up the bugs early.
⦁ Managing Packages with Azure Artifacts: If your project requires more than one library, then set up for Artifacts.
Conclusion
The process of developing software will become easier if you choose the right DevOps consulting company to bring innovations to your business. Spiral Mantra is there to support you with the best DevOps services in USA according to your budding business requirements and provides you with guidance to enhance your workflows of development operations.
1 note
·
View note
Text
A friend of mine asked me recently to detail my Linux setup, and after thinking about it for a bit, I realized that this is essentially a personality quiz for the Linux users I thought I would detail it here as well.
I no longer have a desktop computer at all. I have two older generation "gaming" laptops and three Raspberry Pis. I'm going to go through in the order I got them:
Laptop #1:
[Purchased New in 2016] Acer ROG 7th Gen i7, 16GB Ram, nVidia 1050Ti Mobile, Internal 1TB HDD, external 2TB HDD
This was originally a windows laptop when I got it back in 2016, but in 2021 I was tired of the long windows boot times on the the HDD and was much more familiar with Linux due to several years experience doing webserver admin work.
I use Ubuntu LTS as my base. It's easy, it's well supported, it's well documented, and the official repos have just about everything I could need. The only thing I've really had to add myself is the repo for i3, but we'll get to that in a bit. I also chose Ubuntu because I already had my first two Raspberry pis, and both were running Raspbian, so using a debian based kernal meant that it wouldn't be much of a change when ssh'ing into them.
That said, I've never really liked the default Ubuntu desktop. Gnome3 is slow and full of too many effects that don't look especially nice but are still heavy to execute. Instead I loaded up KDE plasma. You can download Kubuntu and have them to the setup for you, but I did it the hard way because I found out about Plasma after installing Ubuntu and didn't want to start from scratch.
My plasma desktop looks like this:

Of my two laptops, this one is in the best shape. It's the one that I usually take with me on trips. With the dedicated GPU it can do some light gaming (it did heavier gaming on windows, but due to emulation layers the performance is just a little worse these days, Linux gaming isn't perfect), the screen hinge has never been an issue, and it's on the lighter side of gaming laptops (which is not to say that it's light). For that reason, I often find myself actually using it on my lap, in airports, at people's houses, on my own couch typing this up.
For this reason, I started looking into ways to better keep my hands on the keyboard, rather than having to drift down to the track pad, which is my least favorite part of this laptop. During that research I discovered i3. If you're not familiar i3 is a Linux Desktop Environment that is entirely keyboard driven. https://i3wm.org/
To be fair, it's less of a desktop environment and more of a keyboard driven window manager, as it doesn't have a "desktop" per se. Instead when you log into it, you simply get a black status bar at the bottom of the screen. It doesn't even black out the login screen, so if you don't know what to look for, you might think the whole thing has hung. But, the big benefit of this is that the whole thing is lighting fast for a DE. It doesn't waste any resources on effects or really anything that you don't need. But it's really nice for window tiling and task switching without having to get the mouse involved. This is great for productivity (if you're into that), but it's also just convenient for working on a gaming laptop, which might be balanced such that if you take your hands off of it, it might topple off your lap.
This laptop is my primary project computer. It has all my git repos and scripts for doing things like renewing my website's ssl certs. I also run game servers on it for Minecraft. I'm probably going to spin up a Valheim server on it in the near future too. Especially now that the process has improved somewhat.
Raspberry Pi #1:
[Gifted New in 2016] Raspberry Pi 3b, 4GB RAM, 32GB SD card
This one is my oldest RPi. It's had a lot of roles through the years, including an early version of the vogon media server during initial development in 2020. It's run headless Raspbian for a good three or four years now. Currently it's configured as a web server/php scripted web crawler and a pi-hole DNS server. My router currently refuses to use it as a DNS server without bringing the whole network down, but I will on occasion manually switch devices to it when I'm running especially ad-ridden applications.
There's not too much to say about this one. It's stable, I almost never have problems with it. I frequently use it for things that I want running in the background because they'll take too long and I don't want them blocking up one of my other computers.
Laptop #2
[Gifted Used in 2020] Asus Predator 7th Gen i7, 16GB Ram, nVidia 1080 Mobile, 2 internal 256GB SSDs, External 2TB HDD
This one runs windows 10 still. I use this primarily for gaming. The screen hinge is an absolute joke, and replacing it involves replacing the entire screen bezel assembly, which I can absolutely do, but is such a pain that I haven't gotten around to it in the 3 years I've owned this laptop.
There's nothing really special about this one, other than that when both laptops are at my desk, I use a KVM switch to swap my external monitor, keyboard, and trackball between the two computers.
Raspberry Pi #2:
[Gifted New in 2020/21] Raspberry Pi 4b, 4GB Ram, 16GB SD card, 2 120GB USB Sticks, External 2TB HDD
This is my media server. I got it for Christmas 2020 (or 2021, I don't actually remember which because 2020 was a hard hard year). It runs Rasbian, the full OS, with the desktop environment disabled from booting via the command line. It runs PHP 8.2, MariaDB, Apache2, and MiniDLNA to serve the content via my Vogon Media Server.
If you can't tell from the above storage, I'm running the USB ports well past the power delivery they are rated for. The webserver and OS are on the internal storage, so functionally this just means that sometimes the media disappears. I need to build a migration script to put the contents of the two USB sticks on the external storage, as there is more than enough room, and if I can put the HDD in an enclosure with dedicated power, that will solve the issue. But that's at least a hundred dollars of expense, and since the server only has 1, maybe two users at a time, we've been limping along like this for a few years now.
Raspberry Pi #3:
[Purchased New in 2023] Raspberry Pi 4b, 8GB Ram, 16GB SD card
This is the newest Pi. Work gave me a gift card as a bonus for a project recently, so after weighing the pros and cons of getting a VR headset, I settled on setting up a retro gaming tv box. Currently it's running Batocero Linux and loaded up with classic game roms up through the PSX. Though, I would really like to use it as a tv client for the media server. I've upgraded the devices in the living room recently, and there's no longer a dedicated web browser we can use without hooking up one of our laptops. I've got a spare 128GB SD card in the office, so I'm strongly considering getting a wireless mouse and keyboard and setting it up to dual boot between Batocero (which is convenient because it can be navigated with just a controller), and Raspbian. I think I'd set Batocero as the default in Grub, and then if I want to use Raspbian I'd need to have the keyboard handy anyway.
Maybe I'll get one of those half-sized keyboards with the trackpad built in.
Speaking of controllers. I use an 8BitDo Pro 2 controller, and I've been super happy with it since purchase: https://www.8bitdo.com/pro2/
So that's the setup. I have entirely too many computers for any one person, but I included the dates when I got them to show that a number of these have been around for a long time, and that part of the reason I have so many now is that I've put a lot of time into ongoing maintenance and repurposing.
If you've read this far, I'd love to hear about your setups. You don't have to reblog this, but please tag me if you detail yours.
5 notes
·
View notes
Text
Technical Role of an Odoo Implementation Partner in ERP Rollout Across the US

Deploying Odoo ERP in the US requires more than module configuration—it demands backend development, secure cloud deployment, and logic-driven integration. A qualified Odoo implementation partner takes responsibility for designing, customizing, and scaling ERP environments tailored to US business processes.
With technologies like Python, PostgreSQL, XML, and REST APIs, ERP projects are built from code. Each automation rule, view configuration, and data integration point is written, tested, and deployed under strict technical standards.
Understanding the Technical Execution
Any Odoo implementation service in us begins with a technical audit. Partners review current infrastructure, define data models, and plan module development. Backend logic is written in Python using Odoo's ORM, while user interfaces are customized using XML and Web.
For US businesses, compliance requires more than field mapping. Implementation teams must integrate tax APIs, configure state-based payroll, and localize financial reports. These are not generic templates—they are custom-built scripts and secured logic blocks maintained via Git.
Every Odoo implementation service in us must cover these tasks to ensure technical success and operational reliability.
Secure PostgreSQL queries with constraints
Workflow automation using backend triggers
API layers for US-based POS and payment apps
Role-based access configuration per department
Scheduled data backups and rollback planning
Study Case: Multi-State Retail Company
A retail company with stores across five US states required unified ERP integration. The Odoo implementation service in the US involved developing modules for localized tax logic, integrating legacy POS with token-based REST APIs, and deploying the entire stack using Docker on AWS. Backups, user permissions, and multi-location inventory rules were managed directly through backend logic jobs.
Performance Metrics from Deployment
90+ custom modules aligned to operations
3-week deployment including testing and rollback setup
2x faster report generation after DB optimization
100% automated invoice flows via backend rules
99.9% uptime achieved via container scaling
"Implementation success doesn’t come from templates—it comes from writing the correct logic and deploying it reliably."
Choosing a capable Odoo implementation partner ensures that the ERP system is not just installed but technically sound. When running an Odoo implementation service in us, success comes from enforcing security, building scalable modules, and integrating every logic layer properly. From infrastructure to automation, every component must work in code—because that’s where ERP truly lives.
0 notes
Text
Quick Guide: Deploy TYPO3 with Platform.sh in 7 Steps
Don’t know how to install TYPO3 on Platform.sh? If you're a TYPO3 beginner or developer, installing TYPO3 manually by configuring Apache, PHP, and MySQL can be confusing and time-consuming. With Platform.sh, you can install TYPO3 on Platform.sh in just a few clicks with no server headaches, no manual setup, just fast and flexible TYPO3 hosting ready to go.

Why Choose Platform.sh for TYPO3
Platform.sh is a modern hosting solution that supports TYPO3 version 13, works well with Composer, and provides features like:
Git based deployments
Environment cloning
Automatic scaling
Integrated tools for developers
Step 1: Sign Up on Platform.sh
Create a free trial account on Platformsh. It allows you to test the full TYPO3 setup without upfront payment.
Step 2: Install the Platform.sh CLI Tool
Download and install the Platformsh Command Line Interface. This tool helps you create projects, deploy code, and manage environments directly from your terminal.
Step 3: Use the TYPO3 Template
Platformsh provides an official TYPO3 template preconfigured with Composer, PHP, MariaDB, Redis, and other TYPO3 requirements. You can access the template from GitHub and clone it to your system.
Step 4: Initialize and Create Your Project
Run the CLI command to create a new project using the TYPO3 template. Select a region and plan. The CLI will guide you through this step. Once the project is created, you can move into the project directory.
Step 5: Deploy the TYPO3 Project
Push your code using the CLI. Platformsh automatically detects the configuration and builds the TYPO3 application. It installs all dependencies through Composer and sets up the database.
Step 6: Access TYPO3 and Complete the Setup
After deployment, Platformsh provides a secure site URL. Open it in your browser and follow the TYPO3 web installer steps. Create an admin account and configure basic site settings.
Step 7: Manage and Develop with Confidence
You now have a working TYPO3 site hosted on Platformsh. Use the powerful features like:
Creating branches for testing
Isolated development and production environments
Custom domain support
Integration with Git and CI tools
Final Thoughts
Platform.sh takes away the pain of manual server configuration. It is built for modern TYPO3 development, offering speed, flexibility, and stability. Whether you are a beginner or an advanced developer, Platform.sh gives you full control of your TYPO3 environment with minimal setup effort.
0 notes
Text
Looking for code review tools? Code review process can surely be improved by use of appropriate source code review tool. When we use tools for code review many mundane tasks are eliminated. A code reviewers job is focused on better quality issue finding when its supported by best code review tools. When a review is performed, its important to keep track of findings in review. In large team, changes can be difficult to track. Most of these online code review tools will reduce the burden of tracking and remembering things thereby ensuring better quality software. It is a proved fact that software development is not an easy task. If the programmer makes a minute mistake, it can become very hard for the software to work accurately. With a tiny mistake in software, the company can lose thousands of dollars and the security of the software can be breached. So, it is necessary to detect each and every error in the program before the software can be deemed complete. The main function of code review tools is to detect these mistakes and inform the programmer to correct the issue. The following are some code review tools which are used by programmers for improving code review process during their software development lifecycle. Github Github code repository also comes with a very powerful code review setup that can be used on web browser. This is probably the most popular way to do code review on open source projects. Gemit Gemit can be defined as a web based code review system which facilities online code reviews by using Git version control system. The code review becomes easier as it shows changes in a side by side display. Review Board Review Board makes the code review easy and saves your money, time and efforts. It helps you to focus on the creation of great software. Also, the company updates the features of this code review at regular intervals. Rhodecode Rhodecode enterprise code approval system ensures the highest standard of code in any software with tough parameters. With strictest peer code review tools, it removes lot of issues from the source code. Rietveld This is one of the best code review tool from Google wherein users can discuss the defects in the code and review the code. Crucible Crucible peer code review can be equated with quality code review which also discusses the changes which can be done, furthermore it identifies the defects in the code. Review Assistant Review Assistant can be defined as the code review plugin for visual studio to create various review requests and offer a response inside system. This code review supports various platforms such as Perforce and GIT. Barkeep Barkeep is a fast and intuitive way of reviewing codes. With Barkeep, coders can view diffs or write comments. Collaborator Collaborator can be defined as one of the best code review tools which helps the development, testing and management for creating and reviewing the source code for any team. It also allows peer code reviews for the team. Codestriker Codestriker can be defined as the open-source web application which provides support for online tools for code review. It supports the traditional document review as well as diffs which are generated by the SCM system. Code Review Tool The code review tool allows collaboration of the team for reviewing the code in an efficient and easy manner. It is done by the removal of overheads which are normally associated with the regular format of code inspection. Malevich can be defined as a point and click, web based code analysis tool which has been designed for small teams and individuals. The main goal of the source code review tool is to reduce the cost of making comments. PeerReviewPlugin This source code review software uses a plugin system for an integrated distributed peer review system to detect the errors in software code. The system provides a user-friendly web based environment as well. Review Assistant Review Assistant is the source code review tool which creates the review requests and its responses inside Visual Studio.
It also supports various platforms such as Git and Mercurial. Legacy / Retired Tools Archive This section has list of legacy tools that were mentioned on the page earlier but no longer actively maintained by the tool owners or have been remvoed completely. Codeplex It provides a complete solution for team system code reviews, and this tool and has become very popular with programmers. This code review tool uses the benefits of team system for reducing waste. Malevich Codebrag This is a simple code review tool which is open source and features a code review workflow which is non-blocking. Codifferous Codifferous can be described as one of the code review tools which is used by busy software developers. Once your code is imported from BitBucket or Github, the software reads the code in a jiffy.. Pfabricator Pfabricator can be defined as an open source software engineering platform which includes various open source web applications. These web applications assist software companies for building better software. Veracode Code Review The software is proficient in the examination of computer codes in the development phase of software. It has been developed and designed specially to find and fix the mistakes. Article Updates Article Updated on September 2021. Some HTTP links are updated to HTTPS. Updated broken links with latest URLs. Some minor text updates done. Content validated and updated for relevance in 2021.
0 notes
Text
Hire JavaScript Developer: Why It’s the Smart Move for Your Next Project
If you're building a modern website, web app, or even a full-scale SaaS platform, there's one programming language you can’t ignore JavaScript.
Whether it's frontend frameworks like React and Vue or backend with Node.js, JavaScript dominates the full-stack development scene. But to make the most of this powerful language, you need the right talent. In other words, you need to hire a JavaScript developer who knows their way around clean code, performance optimization, and scalable architecture.
In this blog, we’ll break down what JavaScript developers do, where they fit in your project, what skills to look for, and how to hire the right one (freelance or full-time).
Why JavaScript?
Let’s start with the obvious question why JavaScript?
Because it’s everywhere.
Frontend: JavaScript powers interactivity on the web using libraries like React, Angular, and Vue.
Backend: Thanks to Node.js, developers can build server-side apps using JavaScript.
Mobile: Frameworks like React Native allow building cross-platform mobile apps.
Real-time Apps: Perfect for chat apps, games, and collaboration tools.
SaaS & Web Apps: Almost every modern SaaS platform has JavaScript at its core.
In short, JavaScript is full-stack friendly, fast, scalable, and supported by a massive ecosystem.
Who is a JavaScript Developer?
A JavaScript developer is someone who specializes in writing, testing, and debugging JavaScript code that powers web interfaces, APIs, or even native mobile apps.
There are three common roles:
Frontend JavaScript Developer – Focuses on UI/UX, responsive layouts, and interactivity.
Backend JavaScript Developer – Builds server-side logic, APIs, databases using Node.js or frameworks like Express.js.
Full-Stack JavaScript Developer – Handles both frontend and backend using a unified JS-based stack (think MERN: MongoDB, Express, React, Node).
Key Skills to Look for When You Hire a JavaScript Developer
Not all JavaScript developers are created equal. Here’s a checklist of must-have skills, depending on your project:
Core JavaScript (ES6+)
Understanding of variables, arrays, loops, classes, promises, async/await, etc.
Frontend Frameworks
Experience in one or more: React.js, Angular, Vue.js, Svelte.
Backend with Node.js
Knowledge of Express, REST APIs, real-time communication (WebSockets), etc.
Version Control
Git/GitHub proficiency for code collaboration.
Testing Tools
Jest, Mocha, Cypress for unit and integration testing.
Database Integration
Working knowledge of MongoDB, MySQL, PostgreSQL.
Deployment & DevOps (Bonus)
CI/CD, Docker, cloud platforms like AWS or Vercel.
Communication & Teamwork
Clean coding is important, but so is the ability to explain, collaborate, and document.
When Should You Hire a JavaScript Developer?
You should consider hiring a JavaScript developer if you are:
Building a custom website or web app
Creating a SaaS or PWA
Developing a single-page app (SPA)
Planning a real-time chat or collaborative tool
Migrating from legacy tech to modern JS stack
Wanting to scale your product fast with clean, maintainable code
Whether it's a new startup idea or expanding an enterprise solution, JavaScript developers bring agility and performance to the table.
Freelance vs In-House vs Remote JavaScript Developer
Here’s a quick comparison to help you decide which hiring model suits you best: Model Pros Cons Freelancer Cost-effective, short-term, flexible Less control, variable quality In-house Aligned with company vision, full-time Higher cost, longer onboarding Remote Dedicated Developer Balance of quality and cost, flexible hours Needs project management setup
If you're a startup or mid-size business, hiring a remote or dedicated JavaScript developer from a trusted service provider gives you the best of both worlds.
Interview Questions to Ask a JavaScript Developer
Here are a few practical questions to evaluate their skill:
Explain the difference between == and === in JavaScript.
What’s event bubbling and how do you stop it?
How does async/await work under the hood?
What is a closure? Can you give a real-world use case?
How would you handle error logging in a Node.js app?
Have you worked with RESTful APIs or GraphQL?
These help you assess both foundational knowledge and practical experience.
Where to Hire JavaScript Developers
You have several options depending on your budget and project urgency:
Freelance Platforms: Upwork, Freelancer, Toptal
Job Boards: LinkedIn, Indeed, Stack Overflow Jobs
Tech Communities: GitHub, Reddit, Dev.to
Software Development Companies: (like us at HashStudioz 👋)
If you’re looking for pre-vetted developers with proven project experience, hiring through an established development partner is a faster, safer route.
Why Hire from HashStudioz Technologies?
At HashStudioz Technologies, we offer flexible engagement models to help you hire dedicated JavaScript developers who are:
✔️ Experienced in modern JS frameworks (React, Node, Vue, etc.)
✔️ Aligned with your time zone and communication style
✔️ Equipped with Agile development practices
✔️ Available for full-time, part-time, or project-based roles
Whether you're a startup, SME, or enterprise, we provide scalable developer support that fits your workflow and budget.
Final Thoughts
Hiring a JavaScript developer is one of the smartest investments you can make for your tech project. From interactive frontends to scalable backends, they bring versatility, speed, and functionality to your digital product.
But hiring the right talent is just as important as choosing the right technology. So be clear about your project goals, evaluate skills thoughtfully, and partner with a trusted provider.
#javascript development#javascript#coding#javascript developer#javascript development firm#hire javascript developer
0 notes
Text
Top 10 Tools Every Web Developer Should Know
Web development in 2025 is fast, collaborative, and constantly evolving. Whether you're a beginner or a professional, using the right tools can make or break your development workflow. From writing clean code to deploying powerful applications, having a smart toolkit helps you stay productive, efficient, and competitive.
At Web Era Solutions, we believe that staying ahead in the web development game starts with mastering the essentials. In this blog, we’ll share the top 10 tools every web developer should know — and why they matter.
1. Visual Studio Code (VS Code)
One of the most widely used code editors for web developers is Visual Studio Code. It's lightweight, fast, and highly customizable with thousands of extensions. It supports HTML, CSS, JavaScript, PHP, Python, and more.
Why It’s Great:
IntelliSense for smart code suggestions
Git integration
Extensions for everything from React to Tailwind CSS
Perfect for front-end and full-stack development projects.
2. Git & GitHub
Version control is a must for any developer. Git helps you track changes in your code, while GitHub allows collaboration, storage, and deployment.
Why It’s Great:
Manage code history easily
Work with teams on the same codebase
Deploy projects using GitHub Pages
Essential for modern collaborative web development.
3. Chrome DevTools
Built right into Google Chrome, Chrome DevTools helps you inspect code, debug JavaScript, analyze page load speed, and test responsive design.
Why It’s Great:
Real-time DOM editing
CSS debugging
Network activity analysis
Crucial for performance optimization and debugging.
4. Node.js & NPM
Node.js allows developers to run JavaScript on the server-side, while NPM (Node Package Manager) provides access to thousands of libraries and tools.
Why It’s Great:
Build full-stack web apps using JavaScript
Access to powerful development packages
Efficient and scalable
Ideal for back-end development and building fast APIs.
5. Figma
While not a coding tool, Figma is widely used for UI/UX design and prototyping. It allows developers and designers to collaborate in real-time.
Why It’s Great:
Cloud-based interface
Easy developer handoff
Responsive design previews
smoothly connects the design and development phases.
6. Bootstrap
Bootstrap is a front-end framework that helps you build responsive, mobile-first websites quickly using pre-designed components and a 12-column grid system.
Why It’s Great:
Saves time with ready-to-use elements
Built-in responsiveness
Well-documented and easy to learn
Perfect for developers who want to speed up the front-end process.
7. Postman
Postman is a tool for testing and developing APIs (Application Programming Interfaces). It’s especially useful for back-end developers and full-stack devs.
Why It’s Great:
Easy API testing interface
Supports REST, GraphQL, and SOAP
Automation and collaboration features
Critical for building and testing web services.
8. Webpack
Webpack is a powerful module bundler that compiles JavaScript modules into a single file and optimizes assets like images, CSS, and HTML.
Why It’s Great:
Speeds up page load time
Optimizes resource management
Integrates with most modern frameworks
Essential for large-scale projects with complex codebases.
9. Tailwind CSS
Tailwind CSS is a utility-first CSS framework that lets you style directly in your markup. It's becoming increasingly popular for its flexibility and speed.
Why It’s Great:
Eliminates custom CSS files
Makes design consistent and scalable
Works great with React, Vue, and other JS frameworks
Favored by developers for clean and fast front-end styling.
10. Netlify
A cutting-edge platform for front-end apps and static websites is Netlify. It facilitates continuous integration and streamlines the deployment procedure.
Why It’s Great:
One-click deployments
Free hosting for small projects
Built-in CI/CD and custom domain setup
Great for deploying portfolio websites and client projects.
Final Thoughts
Mastering these tools gives you a strong foundation as a web developer in 2025. Whether you're coding solo, working in a team, or launching your startup, these tools can dramatically improve your development process and help deliver better results faster.
At Web Era Solutions, we use these tools daily to build high-performance websites, scalable web applications, and full-stack solutions for businesses of all sizes. If you're looking to build a powerful digital presence, we’re here to help.
Ready to Build Something Amazing?
Whether you're a business owner, entrepreneur, or aspiring developer, Web Era Solutions offers professional web development services in Delhi and across India.
Contact us today to discuss your project or learn more about the tools we use to build modern, high-performance websites.
For a free consultation, give us a call right now or send us a mail!
0 notes
Text
Java Full Stack Training Institute in Saravanampatti – Qtree Technologies
Are you looking to build a rewarding career in software development? Want to master both front-end and back-end technologies using Java? Look no further! Qtree Technologies, the leading Java Full Stack Training Institute in Saravanampatti, Coimbatore, is your one-stop destination for industry-relevant training, hands-on coding, and job-ready skills.
Why Java Full Stack Development?
Java Full Stack Development is one of the most in-demand skills in the IT industry. A Full Stack Java Developer is equipped to handle both the front-end (user interface) and back-end (server/database) parts of a web application, making them highly valuable to companies of all sizes.
What You Learn in Java Full Stack:
Front-End Technologies: HTML, CSS, JavaScript, Bootstrap, React or Angular
Back-End Programming: Core Java, Advanced Java, Spring Boot
Database Management: MySQL, MongoDB
Version Control & Deployment: Git, GitHub, Jenkins, Docker
Becoming a full stack developer not only makes you versatile but also opens doors to top job roles like Software Engineer, Java Developer, Web Developer, and more.
Why Choose Qtree Technologies?
As a reputed Java Full Stack Training Institute in Coimbatore, Qtree Technologies has trained and placed thousands of students in top MNCs. With a focus on practical, job-oriented learning, we are committed to making you a skilled full stack developer from scratch.
Key Highlights of Our Java Full Stack Course:
✅ Industry-Experienced Trainers Our faculty comprises certified professionals and real-time developers who bring real-world coding experience into the classroom.
✅ Hands-on Live Projects We ensure that you learn by doing. Our course includes multiple mini-projects and a final capstone project to build your portfolio.
✅ Updated Curriculum Our course syllabus is regularly updated to align with industry trends and includes the latest frameworks like Spring Boot and React JS.
✅ Job-Oriented Training From writing clean code to cracking technical interviews, we prepare you for the complete job cycle.
✅ Flexible Timings & Online Batches We offer weekday, weekend, and fast-track options along with online training for your convenience.
✅ 100% Placement Support Our dedicated placement cell provides resume building, mock interviews, and connects you with top hiring companies.
✅ Affordable Fee Structure Learn Java Full Stack Development at an affordable price without compromising quality.
Who Can Join?
Our Java Full Stack Developer course is suitable for:
Fresh Graduates (B.E., B.Tech, B.Sc., BCA, MCA, etc.)
Working Professionals wanting to upskill
Freelancers & Entrepreneurs developing web apps
Anyone passionate about building full-fledged web applications
Course Modules Overview
Here’s a snapshot of what you’ll learn at Qtree Technologies:
1. HTML5, CSS3, and Bootstrap
Responsive web design
Creating attractive UI layouts
2. JavaScript & DOM Manipulation
Event handling
API interaction
3. React JS or Angular (Student Choice)
Component-based architecture
Routing and state management
4. Core Java
OOPs Concepts
Collections, Multithreading, Exception Handling
5. Advanced Java (JDBC, Servlets, JSP)
Connecting to databases
Server-side scripting
6. Spring Framework & Spring Boot
Dependency Injection
REST API development
Security and Microservices basics
7. Database
MySQL queries, joins, normalization
MongoDB (for NoSQL basics)
8. DevOps Tools
Git, GitHub, Maven
Basic CI/CD setup
9. Final Project
End-to-end application development
Hosting on cloud or GitHub
Career Opportunities After Course Completion
With Java Full Stack skills, you can pursue roles like:
Java Full Stack Developer
Front-End Developer
Back-End Developer (Java)
Web Application Developer
Software Engineer
Companies like Infosys, TCS, Wipro, Cognizant, Accenture, and startups are actively hiring full stack developers.
Salary Range: ₹4 LPA to ₹12+ LPA based on your skills and experience.
What Our Students Say
“Qtree Technologies provided me with the best Java Full Stack training. The trainers are excellent, and I got placed immediately after the course.” — Vikram Raj, Full Stack Developer at Cognizant
“Their practical sessions and project-based learning gave me real confidence to face interviews and get into the IT industry.” — Nisha M, Software Engineer at Capgemini
Visit Us Today!
If you're looking to join the best Java Full Stack Training Institute in Saravanampatti, your journey starts at Qtree Technologies.
📍 Address:
Qtree Technologies No 126/3, 2nd Floor, Upstairs of Ramani Mahindra SUV Showroom, Mahaveer Towers, Poonthottam Nagar, Ramanandha Nagar, Saravanampatti, Coimbatore, Tamil Nadu – 641035
📞 Contact: 84899 54222
🌐 Website: www.qtreetechnologies.in
0 notes
Text
Master the Digital Future with Artifact Geeks: DevOps Training in Jaipur & WordPress Online Course
In today’s rapidly evolving digital world, technology continues to redefine how we work, connect, and grow. Businesses, startups, and even individuals need up-to-date tech skills not just to survive—but to thrive. At Artifact Geeks, we are committed to equipping you with the practical knowledge and tools you need to succeed in tech, whether you're an aspiring developer, digital marketer, or IT professional.
Our two most sought-after programs—DevOps training in Jaipur and our industry-recognized WordPress online course—are designed to empower learners with the latest skills in web development and IT operations. Whether you're in Jaipur or learning remotely from anywhere in the world, Artifact Geeks has a path tailored for you.
Why Choose Artifact Geeks?
Artifact Geeks is not just another training institute. We focus on practical learning, real-world projects, and industry-relevant curriculum. Our mentors are experienced professionals who bridge the gap between theory and application. We offer both classroom and remote learning options so you can train at your own pace and convenience.
We’re proud to offer:
Hands-on projects
Certification upon completion
Small batch sizes for personalized attention
Career support and interview preparation
Affordable pricing with EMI options
DevOps Training in Jaipur – Get Future-Ready with Cloud and Automation Skills

DevOps is one of the most in-demand tech skills today. As businesses continue to adopt cloud computing, automation, and continuous deployment models, DevOps engineers have become central to agile operations and modern software development.
Our DevOps training in Jaipur is designed for IT professionals, developers, system administrators, and fresh graduates looking to build a future-proof career.
🔧 What You’ll Learn in Our DevOps Course:
Introduction to DevOps and the software development lifecycle (SDLC)
Linux fundamentals and shell scripting
Version control with Git and GitHub
Continuous integration/continuous delivery (CI/CD) pipelines
Tools like Jenkins, Docker, Kubernetes, Ansible, Terraform
Cloud platforms: AWS basics and deployment
Monitoring and logging tools: Nagios, Prometheus, Grafana
Real-world DevOps projects and case studies
🏆 Why Join DevOps Training in Jaipur at Artifact Geeks?
Industry Experts as Trainers: Learn from working professionals who have built and managed DevOps pipelines for real companies.
Live Projects: Work on real-time deployments and CI/CD workflows.
Certification: Get certified with an Artifact Geeks DevOps badge, which adds credibility to your resume.
Placement Assistance: We offer resume reviews, mock interviews, and connections with hiring partners across Jaipur and India.
Whether you're looking to upskill, switch careers, or land your first tech job, our DevOps training in Jaipur gives you the tools and confidence you need.
WordPress Online Course – Build Beautiful, Functional Websites Without Coding
Looking to start a blog, launch a portfolio, or build an eCommerce website? WordPress is your go-to solution. Powering over 40% of websites globally, WordPress is the most accessible and powerful content management system (CMS) out there.
At Artifact Geeks, our WordPress online course is perfect for beginners and intermediate learners who want to design, build, and manage websites with ease—even if they don’t have a technical background.
🌐 What You’ll Learn in Our WordPress Online Course:
Introduction to WordPress, domain registration, and hosting setup
Installing WordPress manually and using one-click tools
Understanding the WordPress dashboard and settings
Choosing and customizing themes
Installing and configuring plugins
Creating and organizing content: pages, posts, menus
Setting up contact forms, galleries, and SEO plugins
Building a blog, business site, or WooCommerce store
Website security and performance optimization
💡 Why Artifact Geeks is the Best for WordPress Learning?
Beginner-Friendly Modules: Designed for people with little or no coding experience.
Self-Paced Learning: Study at your own pace with full access to recorded sessions and downloadable resources.
Live Mentor Support: Weekly Q&A sessions with WordPress experts.
Real Projects: Build your own website from scratch during the course.
Affordable Pricing: Get high-value training without breaking the bank.
Whether you're a freelancer, entrepreneur, or content creator, our WordPress online course gives you the skills to take control of your web presence—without relying on expensive developers.
Who Can Benefit from These Courses?
Both of our flagship programs—DevOps training in Jaipur and the WordPress online course—are designed to serve a wide variety of learners: Learner Type DevOps Course WordPress Course IT Professionals ✅ Advance your career with automation ❌ Not the primary audience College Students ✅ Gain industry-relevant skills ✅ Build a personal website or blog Entrepreneurs ❌ Not relevant unless tech-specific ✅ Create your own business website Freelancers ✅ Add DevOps as a skill ✅ Offer WordPress services to clients Career Changers ✅ Enter the tech domain with demand ✅ Transition to freelance or design work
What Our Students Say
Ankur Mehta – DevOps Learner, Jaipur "The DevOps training at Artifact Geeks was detailed, structured, and hands-on. I landed a job at a startup in just 3 months after completing the course."
Ritika Singh – WordPress Student, Remote "As a graphic designer, I wanted to offer website design too. The WordPress course helped me build websites for clients without needing to code. Highly recommend it!"
Rahul Bansal – Freelancer "Thanks to both courses, I now offer DevOps consulting and WordPress website packages to small businesses. Artifact Geeks gave me the foundation I needed."
Why Learning with Artifact Geeks Makes a Difference
What sets us apart from the rest is our commitment to skill-based education and career transformation. Here's why learners love us:
Hands-On Learning: Not just theory—our focus is on real-world implementation.
Flexible Access: Whether you're learning from Jaipur or New York, our LMS (Learning Management System) keeps everything organized and accessible.
Mentor Support: One-on-one sessions, career advice, and direct feedback from professionals.
Community Access: Join a growing community of tech learners and freelancers.
Enroll Now and Shape Your Digital Future
Whether you’re passionate about cloud computing, automation, and infrastructure, or you dream of building stunning websites that reflect your personal or business identity—Artifact Geeks has the right course for you.
🎯 Choose DevOps training in Jaipur for a future-proof tech career. 🎯 Take the WordPress online course to build, manage, and launch your own websites.
Get in Touch Today
📞 Call: [9024000740] 🌐 Website: [https://artifactgeeks.com/] 📧 Email: [[email protected]] 📍 Location: Jaipur, Rajasthan, 302034
0 notes
Text
What Tools and Software Do I Need to Begin a Python Programming Online Course?

Introduction
Are you ready to begin your Python programming journey but unsure what tools to install or where to begin? You're not alone. Starting a new skill, especially in tech, can feel overwhelming without proper guidance. But here's the good news: learning Python online is simple and accessible, even for absolute beginners. Whether you're aiming to automate tasks, analyze data, or build applications, enrolling in a python course with certificate ensures you get structured guidance and industry-relevant tools. Knowing the right setup from day one makes the process smoother. In this guide, we’ll walk you through all the essential tools and software you need to succeed in your Python online training with certification.
Why Choosing the Right Tools Matters
Choosing the right setup from the beginning can significantly influence your learning curve. According to a Stack Overflow Developer Survey, Python continues to be one of the most loved programming languages, largely due to its simplicity and extensive tooling support. The correct tools:
Boost your productivity
Help you debug errors more easily
Enable seamless hands-on practice
Create a professional development environment
Let’s explore what you need to get started.
Computer Requirements for Python Programming
Before diving into software, ensure your computer meets the minimum requirements:
Operating System: Windows 10/11, macOS, or Linux
Processor: At least dual-core (Intel i3 or equivalent)
RAM: Minimum 4GB (8GB preferred)
Storage: 5-10 GB free space for installations and projects
You don’t need a high-end machine, but a stable and responsive system will make the experience smoother.
Python Installation
a. Official Python Installer
To get started with your Python programming online course, you must first install Python itself.
Visit the official Python website: https://www.python.org
Download the latest version (preferably Python 3.11+)
During installation, check the box that says "Add Python to PATH"
Once installed, verify it by opening your terminal (Command Prompt or Terminal) and typing:
python --version
You should see the version number printed.
b. Python via Anaconda (Alternative)
If you’re interested in data science or machine learning, Anaconda is a robust option. It includes Python along with pre-installed libraries like NumPy, pandas, and Jupyter Notebook.
Download from: https://www.anaconda.com
Code Editors and Integrated Development Environments (IDEs)
Choosing a development environment can impact your workflow and how easily you understand programming concepts.
a. Visual Studio Code (VS Code)
Free, lightweight, and beginner-friendly
Supports extensions for Python, Git, and Jupyter
IntelliSense for auto-completion
Integrated terminal
b. PyCharm
Available in Community (free) and Professional versions
Built-in debugging and version control support
Project-based management
c. Jupyter Notebook
Best for interactive learning and data visualization
Supports markdown + Python code cells
Ideal for data science and machine learning
d. Thonny
Built for beginners
Simple interface
Easy to visualize variables and code flow
Command Line Interface (CLI)
Understanding how to use the terminal is important as many tasks are faster or only available through it. While you're enrolled in the best Python online training, you'll often need to interact with the terminal for running scripts, managing environments, or installing packages.
Windows users can use Command Prompt or PowerShell, whereas macOS/Linux users should use the built-in Terminal.
Basic commands like cd, ls, mkdir, and python help you navigate and run programs easily.
Package Managers
a. pip (Python's default package manager)
You’ll often need third-party libraries. Use pip to install them:
pip install package_name
Example:
pip install requests
b. Conda (Used with Anaconda)
Useful for managing environments and dependencies in complex projects:
conda install numpy
Version Control Tools
a. Git
Git is essential for tracking changes, collaborating, and managing your code.
Install Git from: https://git-scm.com
Create a GitHub account for storing and sharing your code
Basic Git commands:
git init
git add .
git commit -m "Initial commit"
git push origin main
Virtual Environments
To avoid conflicts between projects, use virtual environments:
python -m venv myenv
source myenv/bin/activate # macOS/Linux
myenv\Scripts\activate # Windows
This isolates dependencies, making your projects clean and manageable.
Python Libraries for Beginners
Here are some essential libraries you'll likely use during your Python online training with certification:
NumPy – Arrays and numerical computing
pandas – Data analysis and manipulation
matplotlib/seaborn – Data visualization
requests – Making HTTP requests
beautifulsoup4 – Web scraping
Install using:
pip install numpy pandas matplotlib requests beautifulsoup4
Online Code Runners and IDEs
If you don’t want to install anything locally, use cloud-based IDEs:
Replit – Create and run Python projects in the browser
Google Colab – Ideal for data science and machine learning
JupyterHub – Hosted notebooks for teams and individuals
Optional but Helpful Tools
a. Docker
Advanced users may use Docker to containerize their Python environments. It’s not essential for beginners but it's good to know.
b. Notion or Evernote
Use these for taking structured notes, saving code snippets, and tracking progress.
c. Markdown Editors
Helps you write clean documentation and README files:
Typora
Obsidian
Sample Beginner Setup: Step-by-Step
Here’s a simple roadmap to set up your system for a Python programming online course:
Download and install Python from python.org
Choose and install an IDE (e.g., VS Code or Thonny)
Install Git and set up a GitHub account
Learn basic terminal commands
Create a virtual environment
Practice using pip to install libraries
Write and run a "Hello, World!" program
Save your project to GitHub
Real-World Example: Learning Python for Automation
Let’s say you want to automate a repetitive task like renaming files in bulk.
Tools Used:
VS Code
Python (installed locally)
OS and shutil libraries
import os
import shutil
folder = '/path/to/files'
for count, filename in enumerate(os.listdir(folder)):
dst = f"file_{str(count)}.txt"
src = os.path.join(folder, filename)
dst = os.path.join(folder, dst)
shutil.move(src, dst)
Within a few lines of code, you can automate time-consuming work. That’s the power of Python.
Common Pitfalls to Avoid
Not Adding Python to PATH: Causes terminal errors
Skipping virtual environments: Leads to dependency issues
Overloading with too many tools: Stick to the basics until you're comfortable
Conclusion
Starting a Python programming online course doesn’t require expensive hardware or dozens of tools. With the right setup Python installed, a good IDE, and some essential libraries you’re all set to begin coding confidently. Enrolling in the best python course online ensures you get the right guidance and hands-on experience. Your journey in Python online training with certification becomes smoother when your environment supports your growth.
Key Takeaways:
Use Python 3.11+ for latest features and compatibility
VS Code and Thonny are excellent beginner IDEs
Learn terminal basics to navigate and run scripts
Use pip or Conda to manage Python packages
Version control your code with Git and GitHub
Take the first step today, install your tools, write your first program, and begin your journey with confidence. The world of Python is waiting for you!
0 notes
Text
The Rise of Jamstack and How It’s Changing Web Development
Web development is evolving fast—and one of the most game-changing shifts in recent years has been the rise of Jamstack. What started as a modern architecture for static websites has grown into a movement that’s transforming how developers build, deploy, and scale digital experiences.
Forward-thinking businesses are now turning to Jamstack for its speed, scalability, and security. And the smartest Web Development Company teams are adopting this approach to future-proof client projects and deliver better performance across the board.
So what exactly is Jamstack? And why is it taking the development world by storm?
What Is Jamstack?
Jamstack is a web development architecture based on three core components:
JavaScript (handles dynamic functionalities)
APIs (connects to services or databases)
Markup (pre-rendered static HTML)
Unlike traditional monolithic setups (like WordPress or PHP-based platforms), Jamstack sites decouple the front-end from the back-end. This means content is often served as static files via CDNs, while dynamic features are handled through APIs or serverless functions.
Popular Jamstack tools and frameworks include:
Next.js, Gatsby, and Nuxt.js
Netlify and Vercel for deployment
Contentful, Sanity, or Strapi as headless CMS options
Why Is Jamstack Gaining Popularity?
1. Speed Like Never Before
Jamstack sites are blazingly fast because most of the content is pre-rendered and distributed via a CDN. Users don’t have to wait for server-side processing—everything loads instantly.
This makes a massive difference for:
Page load times
Core Web Vitals scores
Bounce rates and conversions
2. Enhanced Security
Since Jamstack sites don’t rely on traditional server-side logic or databases during runtime, the attack surface is significantly reduced. There’s no server to hack, no plugin to exploit, and no direct database exposure.
This makes it ideal for projects that need:
High security standards
Less maintenance
GDPR or HIPAA-compliant structures
3. Scalability on Demand
Jamstack apps scale effortlessly because they serve static assets through globally distributed CDNs. Even during traffic spikes, there’s no performance bottleneck.
For eCommerce stores, product launches, and viral campaigns, this reliability is a major advantage.
4. Developer Flexibility and Workflow Improvements
Jamstack supports a modern developer experience, including:
Git-based workflows
Atomic deployments (rollback-friendly)
CI/CD pipelines
API-driven integrations
This speeds up collaboration, reduces deployment risk, and improves productivity across teams.
5. Seamless Headless CMS Integration
In Jamstack, content is usually managed via a headless CMS. These platforms allow content teams to edit without touching code, while developers fetch that content via API and build rich front-end experiences.
This separation of concerns allows:
Non-technical users to manage updates
Developers to focus purely on performance and design
Faster iteration across all content layers
Real-World Use Cases of Jamstack
Jamstack isn’t just theoretical. It’s being used across industries:
Startups use it for MVPs and marketing websites that need to launch fast.
eCommerce brands build storefronts with frameworks like Next.js + Shopify API.
Agencies and freelancers create client sites that are secure, low-maintenance, and high-performance.
SaaS platforms leverage Jamstack for landing pages and docs that integrate seamlessly with user dashboards.
How It’s Changing Web Development
Jamstack is redefining what “modern development” means:
From backend-heavy to API-driven: Teams can now plug in services (auth, payments, search) without building from scratch.
From slow deploys to continuous deployment: With Git hooks and serverless functions, updates go live in minutes.
From monoliths to micro-frontend architecture: Developers can build apps as modular blocks, making scaling and testing easier.
These shifts are pushing developers—and their clients—towards a future where performance, modularity, and user experience are prioritized from the start.
Conclusion
Jamstack is not just a trend—it’s a fundamental shift in how websites and apps are built. By embracing static-first, API-driven architecture, it empowers brands to deliver faster, safer, and more scalable digital experiences.
A forward-looking Web Development Company will know how to leverage Jamstack for your specific needs—whether you're launching a fast-loading landing page, a content-rich blog, or a dynamic eCommerce platform.
As the web continues to evolve, Jamstack offers a leaner, smarter way to build—and stay ahead of the curve.
0 notes
Text
0 notes