#how to create html email in gmail
Explore tagged Tumblr posts
Visit Tumblr Blog
Explore Tumblr blogs with no restrictions, modern design and the best experience.
Last Seen Tumblr Blogs


Fun Fact
In Q3 of 2020, 31% of US users access the Tumblr app daily.
Text
ever wonder why spotify/discord/teams desktop apps kind of suck?
i don't do a lot of long form posts but. I realized that so many people aren't aware that a lot of the enshittification of using computers in the past decade or so has a lot to do with embedded webapps becoming so frequently used instead of creating native programs. and boy do i have some thoughts about this.
for those who are not blessed/cursed with computers knowledge Basically most (graphical) programs used to be native programs (ever since we started widely using a graphical interface instead of just a text-based terminal). these are apps that feel like when you open up the settings on your computer, and one of the factors that make windows and mac programs look different (bc they use a different design language!) this was the standard for a long long time - your emails were served to you in a special email application like thunderbird or outlook, your documents were processed in something like microsoft word (again. On your own computer!). same goes for calendars, calculators, spreadsheets, and a whole bunch more - crucially, your computer didn't depend on the internet to do basic things, but being connected to the web was very much an appreciated luxury!
that leads us to the eventual rise of webapps that we are all so painfully familiar with today - gmail dot com/outlook, google docs, google/microsoft calendar, and so on. as html/css/js technology grew beyond just displaying text images and such, it became clear that it could be a lot more convenient to just run programs on some server somewhere, and serve the front end on a web interface for anyone to use. this is really very convenient!!!! it Also means a huge concentration of power (notice how suddenly google is one company providing you the SERVICE) - you're renting instead of owning. which means google is your landlord - the services you use every day are first and foremost means of hitting the year over year profit quota. its a pretty sweet deal to have a free email account in exchange for ads! email accounts used to be paid (simply because the provider had to store your emails somewhere. which takes up storage space which is physical hard drives), but now the standard as of hotmail/yahoo/gmail is to just provide a free service and shove ads in as much as you need to.
webapps can do a lot of things, but they didn't immediately replace software like skype or code editors or music players - software that requires more heavy system interaction or snappy audio/visual responses. in 2013, the electron framework came out - a way of packaging up a bundle of html/css/js into a neat little crossplatform application that could be downloaded and run like any other native application. there were significant upsides to this - web developers could suddenly use their webapp skills to build desktop applications that ran on any computer as long as it could support chrome*! the first applications to be built on electron were the late code editor atom (rest in peace), but soon a whole lot of companies took note! some notable contemporary applications that use electron, or a similar webapp-embedded-in-a-little-chrome as a base are:
microsoft teams
notion
vscode
discord
spotify
anyone! who has paid even a little bit of attention to their computer - especially when using older/budget computers - know just how much having chrome open can slow down your computer (firefox as well to a lesser extent. because its just built better <3)
whenever you have one of these programs open on your computer, it's running in a one-tab chrome browser. there is a whole extra chrome open just to run your discord. if you have discord, spotify, and notion open all at once, along with chrome itself, that's four chromes. needless to say, this uses a LOT of resources to deliver applications that are often much less polished and less integrated with the rest of the operating system. it also means that if you have no internet connection, sometimes the apps straight up do not work, since much of them rely heavily on being connected to their servers, where the heavy lifting is done.
taking this idea to the very furthest is the concept of chromebooks - dinky little laptops that were created to only run a web browser and webapps - simply a vessel to access the google dot com mothership. they have gotten better at running offline android/linux applications, but often the $200 chromebooks that are bought in bulk have almost no processing power of their own - why would you even need it? you have everything you could possibly need in the warm embrace of google!
all in all the average person in the modern age, using computers in the mainstream way, owns very little of their means of computing.
i started this post as a rant about the electron/webapp framework because i think that it sucks and it displaces proper programs. and now ive swiveled into getting pissed off at software services which is in honestly the core issue. and i think things can be better!!!!!!!!!!! but to think about better computing culture one has to imagine living outside of capitalism.
i'm not the one to try to explain permacomputing specifically because there's already wonderful literature ^ but if anything here interested you, read this!!!!!!!!!! there is a beautiful world where computers live for decades and do less but do it well. and you just own it. come frolic with me Okay ? :]
*when i say chrome i technically mean chromium. but functionally it's same thing
461 notes
·
View notes
Text
Web App vs. Website vs. Mobile App: Understanding the Differences
In today's digital age, the choice between a web app, website, or mobile app can significantly impact the success of your online presence. Understanding the differences between these options is essential for making informed decisions about your project. In this article, we'll break down the distinctions and explore how ManiWebDev can help you navigate this digital landscape.
Website 🌐
Websites are the digital storefronts of the internet. They primarily serve informational and static content, making them ideal for sharing knowledge, establishing an online presence, or showcasing your business. Key characteristics include:
📚 Primarily informational and static.
🌍 Accessed via web browsers on various devices.
💻 Built with web technologies like HTML, CSS, and JavaScript.
🚀 Examples: Blogs, news sites, company homepages.
Web App 🚀
Web applications, or web apps, are dynamic and interactive platforms accessed through web browsers. They go beyond static content, offering functionalities such as user interactivity, data processing, and real-time updates. Key characteristics include:
🔄 Interactive and dynamic web-based applications.
🌐 Accessed through web browsers.
🛠️ Built with web technologies and often backend technologies.
📊 Examples: Online email clients (e.g., Gmail), project management tools (e.g., Trello).
Mobile App 📱
Mobile applications, or mobile apps, are software programs designed specifically for mobile devices. Users download and install them from app stores like iOS's App Store or Android's Google Play Store. Key characteristics include:
📲 Software applications designed for mobile devices.
📥 Downloaded and installed from app stores (iOS, Android).
🛠️ Developed with platform-specific languages (e.g., Swift, Java).
🎮 Examples: Games (e.g., Angry Birds), social media apps (e.g., Instagram), navigation apps (e.g., Google Maps).
Choosing the Right Solution
The decision between a website, web app, or mobile app depends on your project's goals, target audience, and functionality requirements. It's essential to assess your unique needs and work with professionals who can guide you through the process.
How ManiWebDev Can Help
ManiWebDev is your partner in navigating the digital world. we specialize in creating captivating web experiences, dynamic mobile applications, and feature-rich web apps. Our expertise includes a wide range of web technologies, including HTML, CSS, JavaScript, React, Node.js, and more.
Here's how we can assist you:
Custom Development: We tailor solutions to match your project's specific requirements, whether it's a website, web app, or mobile app.
User-Centric Approach: We prioritize user experience, ensuring that your digital platform is user-friendly and engaging.
Cutting-Edge Technology: Our team stays at the forefront of emerging technologies and industry trends, guaranteeing that your project benefits from the latest advancements.
Comprehensive Services: From design to deployment and maintenance, we provide end-to-end services to bring your digital aspirations to life.
Conclusion
Understanding the differences between websites, web apps, and mobile apps is crucial for making informed decisions about your online presence. ManiWebDev is here to guide you through this journey, offering custom solutions tailored to your needs. Whether you're looking to build a website, a dynamic web app, or a mobile app, we have the expertise to bring your vision to reality. Reach out to us today and embark on a journey to enhance your digital presence.
If you have any questions or would like to discuss your project further, don't hesitate to contact us. Your success in the digital world is our priority!
2 notes
·
View notes
Text
Professional Email Signatures in 5 Minutes? Yep, Here’s How I Did It.
I wanted to step up my email game without hiring a designer. So I went on a mini-mission to test signature generators, and here’s what I found:
Zoviz Email Signature Generator The absolute easiest and best-looking result. I just entered my name, title, added my social links and logo, and Zoviz created a clean, professional email signature instantly. It even gives you the HTML version so you can paste it right into Gmail, Outlook, or wherever you’re emailing from. It seriously makes you look legit and branded.
WiseStamp Great features, but felt a little heavy for my needs and has a premium wall for some designs.
HubSpot Signature Generator Basic but functional. Works for minimal styles but lacks design personality.
Mail-Signatures.com Good for basic corporate use, but the templates feel outdated.
0 notes
Text
How to Use ContactFormToAPI to Connect Your Static HTML Forms to Zapier
In the modern web development landscape, building fast, secure, and serverless websites is more popular than ever. Static sites are blazing fast, cost-effective, and often hosted on platforms like GitHub Pages, Netlify, or Vercel. But one lingering challenge remains: how do you handle form submissions without a traditional backend?

Enter ContactFormToAPI, a powerful no-code solution that connects static HTML forms directly to any API endpoint, including Zapier. By bridging this gap, you can easily automate workflows, capture leads, and integrate with countless apps—without spinning up a backend or writing server-side logic.
In this guide, we’ll walk through how to use ContactFormToAPI to connect your static HTML forms to Zapier, so you can trigger zaps every time someone submits a form on your website.
What You'll Need
A simple HTML website or static site (can be hosted anywhere)
A Zapier account (free or paid)
A ContactFormToAPI account (free tier available)
Step 1: Create Your HTML Form
Here’s a basic contact form you might include in your HTML site:
<form id="contactForm" method="POST" action="https://contactformtoapi.com/api/YOUR_UNIQUE_ENDPOINT">
<input type="text" name="name" placeholder="Your Name" required>
<input type="email" name="email" placeholder="Your Email" required>
<textarea name="message" placeholder="Your Message" required></textarea>
<button type="submit">Send</button>
</form>
Note: You’ll replace YOUR_UNIQUE_ENDPOINT with the actual endpoint provided by ContactFormToAPI. We'll set that up next.
Step 2: Create a Zap in Zapier
Zapier is an automation platform that connects your apps and services. Our goal here is to make a Zap that triggers when a form is submitted via ContactFormToAPI.
1. Log in to Zapier
Visit zapier.com and sign in.
2. Create a New Zap
Click the “+ Create Zap” button.
3. Set the Trigger App to "Webhooks by Zapier"
Select Webhooks by Zapier as your trigger app.
Choose Catch Hook as the trigger event.
Zapier will now generate a unique webhook URL. Copy this URL—we'll use it in the next step.
Step 3: Set Up ContactFormToAPI
Go to the Contact Form to Any API and sign in or create a free account.
1. Create a New Form Endpoint
Click “New Form” or “Create Endpoint.”
Name your form (e.g., "Zapier Contact Form").
In the Webhook URL, paste the Zapier webhook URL you copied earlier.
(Optional) Enable reCAPTCHA or set a redirect URL after submission.
Click Save to generate your unique endpoint URL.
2. Update Your HTML Form
Replace YOUR_UNIQUE_ENDPOINT in your form’s action attribute with the new endpoint URL provided by ContactFormToAPI.
Example:
<form action="https://contactformtoapi.com/api/abcd1234">
3. Test the Form Submission
Fill out and submit the form on your website.
Zapier should detect the test data, and you’ll be prompted to move to the next step in building your Zap.
Step 4: Configure the Zap Action
After Zapier catches the hook, you'll configure what happens next:
1. Choose an Action App
Select any app where you'd like the form data to go:
Gmail (send email notification)
Google Sheets (log new entries)
Slack (send a message to a channel)
Notion, Trello, Airtable, Mailchimp, etc.
2. Map the Form Fields
Zapier will show the form fields (name, email, message). Match these fields with the action app's fields.
3. Turn On Your Zap
Click Publish Zap to activate it. Your static form is now fully connected!
Real-World Use Cases
Here are some creative ways you can use ContactFormToAPI + Zapier:
Newsletter Signup: Collect emails and add them to Mailchimp.
Support Form: Create a ticket in Trello or Zendesk.
Lead Generation: Send qualified leads directly to your CRM.
Job Application Form: Upload applicant details to Google Drive and notify HR in Slack.
Survey Feedback: Append responses to a Google Sheet for analysis.
Benefits of Using ContactFormToAPI with Zapier
No backend needed: Eliminate server setup and maintenance.
No-code friendly: Ideal for marketers and designers.
Fast setup: Get working forms live in minutes.
Highly flexible: Connect with over 5,000 apps via Zapier.
Security ready: Includes spam protection and HTTPS by default.
Tips for Success
Use reCAPTCHA v2 to protect your forms from bots.
Set up redirect URLs for a smoother user experience.
Add error handling by showing fallback messages if the form fails.
Log form data to a Google Sheet as a backup.
Conclusion
Thanks to ContactFormToAPI and Zapier, static websites can now have fully functional, automated forms without a backend. Whether you're building a landing page, portfolio, or marketing site, this powerful combo enables you to collect and route form data with ease.
0 notes
Text
Web Application Development,
Web Application Development,
Web application development has transformed the way businesses operate and how people interact online. Unlike traditional websites, which are typically static and provide limited functionality, web applications are dynamic, interactive, and provide a range of functions directly to users within their browser. This guide explores what web application development entails, the stages involved, popular frameworks and technologies, and best practices to ensure a successful application.
What is a Web Application?
A web application is a software application that runs on a web server, accessed via a web browser, and allows users to interact with it over the internet. Examples include email services like Gmail, social media platforms like Facebook, e-commerce sites like Amazon, and productivity tools like Google Docs. Unlike traditional desktop applications, web applications are accessible anywhere, on any device with an internet connection, offering a seamless and consistent experience.
Key Components of Web Application Development
Front-End Development:
The front end (client side) is where the application interacts with users, handling elements like design, layout, interactivity, and user experience (UX).
Technologies: HTML, CSS, JavaScript, and frameworks like React, Angular, and Vue.js.
Back-End Development:
The back end (server side) manages data storage, business logic, and interactions with the database.
Technologies: Node.js, Python (Django/Flask), Ruby on Rails, PHP, and Java (Spring).
Database Management:
Databases store and manage data for the application, allowing it to retrieve and store information seamlessly.
Technologies: MySQL, PostgreSQL, MongoDB, and Firebase.
Web Servers and Hosting:
Servers host the application, enabling it to be accessible over the internet.
Technologies: Apache, Nginx, and cloud services like AWS, Azure, and Google Cloud.
Phases of Web Application Development
Requirement Gathering and Analysis:
Identify user needs, business goals, and technical requirements. This phase includes defining core functionalities, understanding the target audience, and creating an initial project scope.
Planning and Design:
Based on requirements, design the architecture and layout. Wireframes, prototypes, and mockups are created to visualize the final product.
UI/UX design focuses on user-friendliness, accessibility, and aesthetic appeal.
Development:
Coding the front end, back end, and database, following best practices for clean, scalable, and maintainable code.
Testing and Quality Assurance (QA):
Rigorously test the application for functionality, usability, performance, security, and compatibility across browsers and devices.
Deployment:
Once tested, the application is deployed to a web server. Continuous Integration and Continuous Deployment (CI/CD) tools can automate this process.
Maintenance and Updates:
Regular updates, bug fixes, and enhancements are essential for keeping the application secure, up-to-date, and responsive to user needs.
Popular Web Application Frameworks and Technologies
Front-End Frameworks:
React: Developed by Facebook, React is popular for building interactive UIs and single-page applications (SPAs).
Vue.js: A progressive framework ideal for creating lightweight, flexible applications.
Angular: Google’s powerful framework is used for building enterprise-grade applications.
Back-End Frameworks:
Node.js and Express: Known for speed and scalability, ideal for JavaScript developers.
Django: A Python-based framework known for its "batteries-included" philosophy and ease of use.
Ruby on Rails: Provides simplicity and convention-over-configuration, popular for quick development.
Full-Stack Frameworks:
Meteor: A full-stack JavaScript framework that enables real-time updates and rapid development.
MEAN and MERN Stacks: Collections of JavaScript frameworks (MongoDB, Express.js, Angular/React, Node.js) used for full-stack applications.
Best Practices for Web Application Development
Prioritize User Experience (UX):
Ensure the design is user-friendly, intuitive, and responsive across devices.
Emphasize Security:
Use HTTPS, secure databases, data validation, and guard against SQL injection and XSS attacks.
Optimize Performance:
Minimize HTTP requests, compress files, leverage caching, and use Content Delivery Networks (CDNs).
Version Control:
Use tools like Git to manage and track code changes, enabling collaborative development and rollback capabilities.
Testing and Debugging:
Conduct unit, integration, and end-to-end testing to prevent bugs and performance issues from reaching users.
Stay Up-to-Date with Trends:
Web development is constantly evolving, with new frameworks and best practices emerging frequently. Staying informed helps improve code efficiency, security, and user satisfaction.
Future Trends in Web Application Development
Progressive Web Applications (PWAs):
PWAs offer an app-like experience within a web browser and work offline, bridging the gap between mobile and web applications.
Artificial Intelligence (AI) and Machine Learning (ML):
AI and ML can enhance personalization, automate processes, and improve user engagement through chatbots and recommendation systems.
Voice Search Optimization:
Integrating voice search functionality is increasingly essential as more users rely on voice-activated devices.
Single Page Applications (SPAs):
SPAs, which load a single HTML page and dynamically update as the user interacts with the app, offer faster load times and smoother transitions.
Blockchain Integration:
Blockchain technology offers a way to enhance security, transparency, and traceability in web applications.
Conclusion
Web application development is a powerful tool for businesses and individuals seeking to provide a high-quality, accessible, and interactive experience for users. By understanding the foundational components, choosing the right technologies, following best practices, and staying informed on future trends, developers can create robust, efficient, and successful web applications that cater to the needs of a growing digital world.
4o
0 notes
Text
Website Vs Web Application: Which one Should you Choose
Most of us have scrolled through some or other website and used it to serve our purpose. For some it might be reading some useful information. Maybe you stumbled upon a blog sharing captivating stories or a business site showcasing its services. Those are classic examples of websites, providing static content and information, perfect for establishing an online presence or sharing knowledge.
Many times, you use online banking platforms for transferring funds or tracking expenses. Or perhaps you're immersed in a social media network, connecting with friends and sharing updates in real-time. These are not just websites; they're dynamic, interactive web applications designed for specific tasks and user interactions.
But how do you know which one suits your needs best? That's where this thorough assessment comes in. We'll dissect the differences, features, and other elements to help you make an informed decision about whether to select a website or a web application. So, buckle up as we navigate through the digital landscape, and uncover the perfect fit for your online presence.
What is a Website?
A website is a collection of web pages working as a network and hosted under a single domain, accessible via the internet, essential for creating and maintaining a digital presence. Constructed with HTML for structure, CSS for styling, and JavaScript for interactivity, websites offer a reliable platform for displaying content. By offering a centralized online location, websites help organizations to establish credibility, reach a global audience, and maintain a consistent and accessible digital identity.
What is a Web Application?
You might have used applications such as Trello that function through a web browser and connect to a web server over the internet or an internal network. These are web applications that help users to perform tasks and access services online without needing to install software locally. Technically, web applications leverage server-side code to manage backend operations and client-side code to present data and facilitate user interaction. Common examples of web applications are online banking portals, email services like Gmail, content management systems, and virtual learning environments.
Read more
0 notes
Text
How to send email from localhost using PHP

In this tutorial, we will learn how to send an email from localhost using PHP and Gmail. In the PHP web application, mail() function used to send the mail. But mail() function will not work in the localhost environment. In this tutorial, we will send an email from the localhost system using PHP and Gmail.
In this tutorial, we will use PHPmailer to send email from the localhost using PHP. The PHPmailer library provides the way to send an email from localhost with the SMTP server using PHP. We will use the Gmail account as an SMTP server to sending the email from localhost. Before using the Gmail SMTP server we need to configure the setting in our Gmail account.
Click: https://phpgurukul.com/how-to-send-email-from-localhost-using-php/
Login into your google account.
Go to the security page.
<?php
use PHPMailer\PHPMailer\PHPMailer;
use PHPMailer\PHPMailer\Exception;
require ‘vendor/autoload.php’;
$mail = new PHPMailer;
if(isset($_POST[‘send’])){
// getting post values
$fname=$_POST[‘fname’];
$toemail=$_POST[‘toemail’];
$subject=$_POST[‘subject’];
$message=$_POST[‘message’];
$mail->isSMTP(); // Set mailer to use SMTP
$mail->Host = ‘smtp.gmail.com’; // Specify main and backup SMTP servers
$mail->SMTPAuth = true; // Enable SMTP authentication
$mail->Username = ‘[email protected]’; // SMTP username
$mail->Password = ‘Your_Gmail_Password’; // SMTP password
$mail->SMTPSecure = ‘tls’; // Enable TLS encryption, `ssl` also accepted
$mail->Port = 587; // TCP port to connect to
$mail->setFrom(‘[email protected]’, ‘Your_Name’);
$mail->addReplyTo(‘[email protected]’, ‘Your_Name’);
$mail->addAddress($toemail); // Add a recipient
// $mail->addCC(‘[email protected]’); // Set CC Email here
// $mail->addBCC(‘[email protected]’); // Set BCC Email here
$mail->isHTML(true); // Set email format to HTML
$bodyContent=$message;
$mail->Subject =$subject;
$bodyContent = ‘Dear’.$fname;
$bodyContent .=’<p>’.$message.’</p>’;
$mail->Body = $bodyContent;
if(!$mail->send()) {
echo ‘Message could not be sent.’;
echo ‘Mailer Error: ‘ . $mail->ErrorInfo;
} else {
echo ‘Message has been sent’;
}
}
?>
Explanation of the above code
Include the PHPMailer library and create an instance of this class.
Set SMTP credentials (host, username, password, and port).
Specify sender name and email ($mail->setFrom('[email protected]', 'Your_Name')).
Set recipient email address ($mail->addAddress($toemail)).
Set email subject ($mail->Subject).
Set the body content of the email ($mail->Subject =$subject;).
Use the mail->send() method of PHPMailer class to send an email.
Here is the Full code with HTML Form and PHP Code
<?php
use PHPMailer\PHPMailer\PHPMailer;
use PHPMailer\PHPMailer\Exception;
require ‘vendor/autoload.php’;
$mail = new PHPMailer;
if(isset($_POST[‘send’])){
// getting post values
$fname=$_POST[‘fname’];
$toemail=$_POST[‘toemail’];
$subject=$_POST[‘subject’];
$message=$_POST[‘message’];
$mail->isSMTP(); // Set mailer to use SMTP
$mail->Host = ‘smtp.gmail.com’; // Specify main and backup SMTP servers
$mail->SMTPAuth = true; // Enable SMTP authentication
$mail->Username = ‘[email protected]’; // SMTP username
$mail->Password = ‘Your_Gmail_Password’; // SMTP password
$mail->SMTPSecure = ‘tls’; // Enable TLS encryption, `ssl` also accepted
$mail->Port = 587; // TCP port to connect to
$mail->setFrom(‘[email protected]’, ‘Your_Name’);
$mail->addReplyTo(‘[email protected]’, ‘Your_Name’);
$mail->addAddress($toemail); // Add a recipient
// $mail->addCC(‘[email protected]’);
// $mail->addBCC(‘[email protected]’);
$mail->isHTML(true); // Set email format to HTML
$bodyContent=$message;
$mail->Subject =$subject;
$bodyContent = ‘Dear’.$fname;
$bodyContent .=’<p>’.$message.’</p>’;
$mail->Body = $bodyContent;
if(!$mail->send()) {
echo ‘Message could not be sent.’;
echo ‘Mailer Error: ‘ . $mail->ErrorInfo;
} else {
echo ‘Message has been sent’;
}
}
?>
<!DOCTYPE html>
<html lang=”en”>
<head>
<meta charset=”utf-8">
<meta name=”viewport” content=”width=device-width, initial-scale=1, shrink-to-fit=no”>
<title>How to send email from localhost using PHP</title>
<link rel=”stylesheet” href=”https://fonts.googleapis.com/css?family=Roboto|Courgette|Pacifico:400,700">
<link rel=”stylesheet” href=”https://stackpath.bootstrapcdn.com/bootstrap/4.5.0/css/bootstrap.min.css">
<link rel=”stylesheet” href=”https://maxcdn.bootstrapcdn.com/font-awesome/4.7.0/css/font-awesome.min.css">
<script src=”https://code.jquery.com/jquery-3.5.1.min.js"></script>
<script src=”https://cdn.jsdelivr.net/npm/[email protected]/dist/umd/popper.min.js"></script>
<script src=”https://stackpath.bootstrapcdn.com/bootstrap/4.5.0/js/bootstrap.min.js"></script>
<style>
body {
color: #000;
background: #fcda2e;
font-family: “Roboto”, sans-serif;
}
.contact-form {
padding: 50px;
margin: 30px auto;
}
.contact-form h1 {
font-size: 42px;
font-family: ‘Pacifico’, sans-serif;
margin: 0 0 50px;
text-align: center;
}
.contact-form .form-group {
margin-bottom: 20px;
}
.contact-form .form-control, .contact-form .btn {
min-height: 40px;
border-radius: 2px;
}
.contact-form .form-control {
border-color: #e2c705;
}
.contact-form .form-control:focus {
border-color: #d8b012;
box-shadow: 0 0 8px #dcae10;
}
.contact-form .btn-primary, .contact-form .btn-primary:active {
min-width: 250px;
color: #fcda2e;
background: #000 !important;
margin-top: 20px;
border: none;
}
.contact-form .btn-primary:hover {
color: #fff;
}
.contact-form .btn-primary i {
margin-right: 5px;
}
.contact-form label {
opacity: 0.9;
}
.contact-form textarea {
resize: vertical;
}
.bs-example {
margin: 20px;
}
</style>
</head>
<body>
<div class=”container-lg”>
<div class=”row”>
<div class=”col-md-8 mx-auto”>
<div class=”contact-form”>
<h1>Get in Touch</h1>
<form method=”post”>
<div class=”row”>
<div class=”col-sm-6">
<div class=”form-group”>
<label for=”inputName”>Name</label>
<input type=”text” class=”form-control” id=”inputName” name=”fname” required>
</div>
</div>
<div class=”col-sm-6">
<div class=”form-group”>
<label for=”inputEmail”>Email</label>
<input type=”email” class=”form-control” id=”inputEmail” name=”toemail” required>
</div>
</div>
</div>
<div class=”form-group”>
<label for=”inputSubject”>Subject</label>
<input type=”text” class=”form-control” id=”inputSubject” name=”subject” required>
</div>
<div class=”form-group”>
<label for=”inputMessage”>Message</label>
<textarea class=”form-control” id=”inputMessage” name=”message” rows=”5" required></textarea>
</div>
<div class=”text-center”>
<button type=”submit” class=”btn btn-primary” name=”send”><i class=”fa fa-paper-plane”></i> Send</button>
</div>
</form>
</div>
</div>
</div>
</div>
</body>
</html>
PHP Gurukul
Welcome to PHPGurukul. We are a web development team striving our best to provide you with an unusual experience with PHP. Some technologies never fade, and PHP is one of them. From the time it has been introduced, the demand for PHP Projects and PHP developers is growing since 1994. We are here to make your PHP journey more exciting and useful.
Website : https://phpgurukul.com
0 notes
Text
HTML/CSS
Open web technologies (such as HTML and CSS) have three most peculiar particularities compared to other technologies:
Because anyone is meant to be allowed to code an interpreter for those languages (that what browsers are!), people making decisions on those technologies are part of an open consortium of companies (called the W3C), which operates on consensus; therefore they evolve rather slowly.
Reverse compatibility is among the most important values kept in mind when deciding on evolutions, because newest browsers should keep being able to run older websites, and older browsers should be able to access newest websites.
They were not initially designed to make applications or well-designed pages, but just display research documents; while they have come a long way since then, it is visible in the ways things are done. For each of those three reasons, it is quite important, in order to understand what those technologies are made of today, to understand where they come from, and the legacy that comes with them.
At first, there was HTML
A bit of history
HTML and HTTP, the earliest bricks of the web (which he initially called World Wide Web), were invented by sir Tim Berners-Lee when he was working for the CERN in France/Switzerland. (Since the lab is on the border, which country the web was actually invented in is still to this day a controversial topic; also, he is an English citizen, so here is more controversy!)
At that point, the internet was already open to the public, but lacked a common software platform, and this was Berners-Lee’s attempt to bring one to the world.
The difference between the internet and the web?
The web is anything that happens in your browser. When you’re using Skype, you’re using the internet and not the web.
What were people using the internet for before the web: for instance, emails (but not in a browser like Gmail, only with a mail client like Outlook/Thunderbird/Apple’s Mail today), newsgroups (something that still exists but is not mainstream to this day, and feels a bit like today’s forums), …
The problem was: all of those (Skype, emails, …) use their own way to structure the data they send. It would make it very disorganized to make something available somewhere on the internet, like the research papers of Berners-Lees colleagues at the CERN.
So, he came up with two things:
HTTP, a protocol defining how servers and clients can organize their communications together. It is so synonymous to the web, that what we call software web servers today (Apache, nginx, …) are technically HTTP servers, i.e. servers designed to receive HTTP requests and send back appropriate responses following the protocol.
HTML, a markup language to help structure the research papers: what is a title, what is a paragraph, etc. On Christmas in 1990, he put the first web server online, and published the very first web client in a newsgroup, so that people could go see his website. The web was born.
At this point, the need for such a technological stack to make material available online was so obvious, that Berners-Lee was by far not the only one to come up with such an idea. The main difference was that unlike the other proposals, Berners-Lee’s World Wide Web was free and available for all to use. As he famously said: “This is for everyone”.

Industry vendors started to want to use his protocol, so instead of keeping a tight grip on it, he created the World Wide Web Consortium (W3C) in 1994, which company pay a membership to in order to be able to help making the decisions to push those technologies forward. Berners-Lee is still the head of the W3C to this day.
In a nutshell
HTML in a nutshell
HTML is a markup language, which you are expected to be acquainted with from your level 2 project. If you feel like you need a mind-refresher, feel free to check out some tutorials, such as this one:
The breadth of HTML is actually not very large, as it is not meant to include advanced features; getting acquainted on each relevant tag and attribute doesn’t take much time, because there aren’t that many. The part of HTML that is trickiest to go over is probably forms, because there are quite a few possible components (text fields, checkboxes, text areas, … even sliders and color pickers in the most recent HTML specifications!)
The promise of HTML is that you should keep your document as properly structured and semantic as you can; and if you do, it should remain easily accessible to the browsers that will exist in 20 years, while also making it easier to keep your code accessible, performant, and optimized for search engines through time. See:
CSS in a nutshell
CSS (Cascading Style Sheets) were invented by Bert Bos and Håkon Wium Lie, because HTML was getting less and less semantic, and more and more about presentation, which would make it less future-proof and more verbose.
For instance, you could write that: <center><p><font color="red">Hello to <b>all</b> of my visitors!</font></p></center> The fact that a text should be centered, have a certain color, and be represented in bold is part of presentation, and shouldn’t be in the HTML. The fact that it’s a paragraph, however, is part of the structure, and therefore is semantic information. Also, if you needed to make a whole page red, you needed to write <font color="red"> at every single line.
CSS enforces not only semantics in the HTML, but also mutualization of the presentation layer, and therefore less code.
Now, <center>, <font> and <b> are banned in HTML, and we got some more semantic tags, like <strong>, <em>, and more recently, <article>, <section>, <aside>, …
Wondering about the difference between <strong> and <b>? –> https://www.html-5-tutorial.com/strong-and-b-elements.htm
Web development tools
Before diving into your first front-end development project, you should take some time to learn to use the web development tools that are embedded into all modern browsers. Search online how to access the ones for the browser you wish to be using.
Those tools are typically more powerful than just for HTML/CSS development, and also cover JavaScript debugging, tracking HTTP requests, even some performance diagnostic tools sometimes. The HTML/CSS pane usually displays the HTML code as the browser interprets it, on the left (as a tree that you can deploy or fold back), and the CSS rules to the right, which you can edit in place. Of course, all of the edits you’re doing in there are being done in the browser’s memory. If you want to keep these changes, you’ll have to do them in your source code.

Block or inline? Absolute or relative?
One key notion to CSS is in the difference between the block and inline values to the display statement, and also inline-block. The most basic display values:
none, hides the HTML element.
block means it will be fluid (take up the entire width of the browser’s window) and will stack up vertically (top to bottom). It is the default behavior of , , , , … You can add margins and paddings to those.
inline means it will be inside the textual flow of the block. It is the default behavior of , , , , , … You can not add margins and paddings to those.
inline-block is a mix of both: the element will be inside the textual flow of the block, but it will also accept margins, paddings, …
Another key notion is the position statement:
static is the one by default, so you’ll rarely have to explicit it. An element is positioned where it is expected that it should be.
relative will help you position the element relatively to its expected position, for instance 2px higher, or 5px to the left, etc.
absolute will remove the element from the flow of the page, and position it relatively to another block, most often the entire page. For instance, before you change anything else, it will often be at the top left of the page, “flying ” over the rest of your HTML document.
fixed will do the same thing as absolute, but will behave differently when you scroll up or down: absolute elements will scroll with the rest of the page, while fixed ones won’t, and will stay right at the same spot in front of you. More about positions here: https://www.w3schools.com/css/css_positioning.asp
CSS Layouts
Because CSS was never meant to be to do complex layouts, but was meant for “flat” documents, CSS layout went through a bit of history.
Tables and images
Initially, web designers and brands wanted websites to offer “pixel-perfect” like on print. However, this was very difficult to achieve as CSS did not render similarly across browsers, and fonts rendered very differently depending on the OS (which is still the case today, actually). Therefore, the very first “visual” websites were mostly images ordered together in border-less tables. This was obviously a nightmare in performance (huge images + very verbose HTML did not fare well with slow web connections) and in accessibility/SEO (tables are meant for tabular data and are recognized as such semantically, and texts in images were not recognized at text; for instance, they couldn’t be copy-pasted).
HTML frames were also very used at the time, but they fell out of fashion for those same reasons: performance because you’re loading many webpages instead of one, accessibility because it was near impossible to navigate the user from one frame to the other (with the keyboard, for instance), SEO because the URL of a webpage didn’t change when navigating, so some composite pages didn’t even have a navigable URL.
Early web standards
In the late 90s, a group of web developers and designers (most of them were a bit of both) started to evangelize about how it was entirely possible to make built great websites entirely with standards. The “Standard Web Project” was created in 1998 by Jeffrey Zeldman, who subsequently wrote his breakthrough book “Designing with Web Standards”. The book was a list of practical tricks to get each browsers to do what you need them to do.
Keep in mind that each browser still had a very, very different interpretation of CSS back then, so you basically had to develop one CSS per browser. Eventually, browser got more mature, and most code could gradually be mutualized for all browsers. Today, websites that don’t leverage the web standards are very rare.
Some key links from that time:
The Dao of Web Design is an article written in 2000 on A List Apart, the blog Jeffrey Zeldman founded for front-end experts to share their tricks. While most articles from back then have aged pretty badly, since browsers changed so much over the last few years, this one is still very current. It teaches people to let go of pixel-perfect, in order to embrace the goodies contained in web standards. Read it here: https://alistapart.com/article/dao
CSS Zen Garden was created by Dave Shea to showcase what CSS can do. It is basically a single HTML file, on which any one can contribute an original CSS stylesheet, to make it do interesting things. Check it out here: https://www.csszengarden.com
Float layout
As we’ve discussed, natively, HTML stacks fluid blocks vertically. People wanted to stack blocks horizontally too (next to each other), but except for positioning them as absolute (which breaks the flow of the page), the only other way to do it was to make them “float”.
The float statement, which takes left or right (or the default value none) was designed to make medias (like images) float the left or right of the text; and the text would nicely “go around” the image. But people found ways to “abuse” the float statement in order to build complex layouts. The clear statement is float‘s antagonist: it makes an element avoid to float by its previous elements.
More about float and clear: https://www.w3schools.com/css/css_float.asp
Because more recent options are not entirely mature yet, a lot of websites are still being made with floating layout.
CSS Display Table
It took long years for the W3C to have consensus on some layout specifications, and display table is one of the first ones that made it maturity. The idea is to take some HTML that doesn’t contain the <table> element, but make it behave like tables just with CSS. It had been moderately popular, but it never rose to widespread uses, because one could not manage every layout use case this way.
CSS Flexbox
As a far more powerful alternative to CSS Display Table, CSS Flexbox has huge support from the browsers and the industry, despite the implementations in browsers not being 100% consistent in all cases. Many websites and web applications in the industry use CSS Flexbox: some mentors working at Salesforce confirmed that all applications are now built using it; another mentor working on Google Photos confirmed that it is what is being used there too. And for widespread adoption, the most used CSS frameworks are now switching to Flexbox, one by one.
Here is an excellent and fun tutorial for learning Flexbox: https://flexboxfroggy.com
The other ones?
Other CSS layout specifications are in the work at the W3C, such as CSS Grid; but none of them seem near maturity at all at this point. And it can be argued that the support CSS Flexbox is getting could actually be detrimental to them, since the industry seems gradually happy with it.
CSS Media Queries and Responsive Web Design
Another recent interesting piece of recent CSS history is the introduction of the CSS Media Queries, and the concept of Responsive Web Design.
Media queries allow to express that certain CSS rules should only be executed when certain conditions are in place (such as based on the screen’s resolution, or the number of colors a graphics card can handle). But the one condition that started to get very used, is the one allowing to only execute some CSS depending on the browser’s width. As you may have understood, this allows a single CSS codebase for a website regardless of the size of the browser, enabling and disabling some CSS rules when it passes certain width thresholds.
Do you remember Jeffrey Zeldman? (He’s the guy who founded A List Apart, the Web Standards Project, and wrote Designing with Web Standards) He’s part of the people who actually came up with the notion of Responsive Web Design, the idea to use media queries to make a single website adapt depending on the browser’s width.
Media query syntax
It looks like this:
@media screen and (min-width:600px) { nav { float: left; width: 25%; } section { margin-left: 25%; } }
The above CSS rules will only apply when the browser displays the webpage on a screen (as opposed to printed on paper, for instance), and the browser’s window is at least 600px wide.
More about media queries: https://www.w3schools.com/css/css_rwd_mediaqueries.asp
Viewport
Feature phones (the things that came before smartphones) didn’t “zoom pages out” when displaying a non-mobile webpage so that you could see the whole page; you would simply see a corner of the webpage that was the size of your phone’s screen, and had to swipe around to see the rest. When Apple introduced the iPhone in 2007, it introduced the notion of viewport: the width of the phone would, by default, not be displaying the same small width of the webpage; it would display 1024px on a device that really is 320px wide. Instead of swiping around to see each bit of the webpage, you would have to zoom in to read texts. Soon, all other smartphones adopted the same behavior. The way to describe it is: although the screen is 320px wide, its viewport (what it really displays of a webpage) is 1024px wide.
But this would create problems with responsive websites, as you actively want them to display the real width of the screen. Therefore, Apple introduced a HTML tag to override the viewport the browser, which all other browsers implemented later too. This is what developers typically set it as for fluid designs such as responsive web designs:
<meta name="viewport" content="width=device-width, initial-scale=1">
More about the viewport: https://developer.mozilla.org/en-US/docs/Mozilla/Mobile/Viewport_meta_tag
Some links
Many of the CSS concepts on this page are introduced and demoed on this very visual and well-polished website: https://learnlayout.com
“Like the CSS spec, but readable”, according to Kaelig (one of your mentors who is a front-end engineer at Salesforce): https://book.mixu.net/css/
0 notes
Text
How to Create a Coloring Book in CANVA | Earn $2000 Monthly by Creating Coloring Books with CANVA
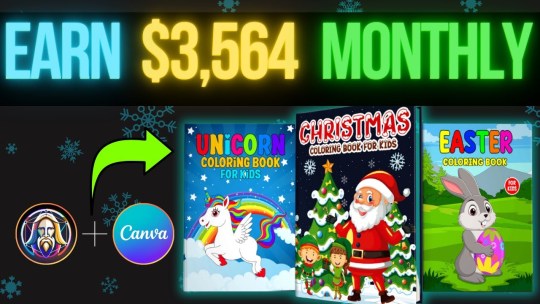
**HTML Headings** In today's tutorial: Creating a Heat Coloring Book in 3 Simple Steps and Earning $2,000 to $5,000 per Month Step 1: Creating the Image for the Coloring Book Using Leonardo AI First, we'll start by creating the image for the coloring book. I'll be using Leonardo AI, a free software. To access the dashboard, go to the Leonard website (link provided in the description) and create an account using your Gmail or email account. Once you've created an account, click on the "Launch App" button to access the dashboard. On the left-hand side of the dashboard, you'll find the "Image Generation" option. I have tried different prompts, but the best result came from a specific prompt that I'll include in the description. You'll need to keep the entire prompt the same, except for the main character. Feel free to change it to anything you want. Leave the negative prompt unchanged. After making the necessary changes, go to the "Finetuned Model" section. Among the different finetuned models, I found that Leonardo Diffusion Excel gave me the best results. On the left-hand side, you can choose up to four images. I'm choosing two here. Make sure "Alchemy Dogle" is turned on and select an aspect ratio of 3:4. Finally, click on the "Generate" button. If you're satisfied with any of the generated images, you can use the "Smooth Upscaling" option to enhance the image quality. Note that this option requires 5 to 8 tokens. Once the image is upscaled, you can download it by clicking on the "Download Image" option. Step 2: Creating the Coloring Page Using Leonardo AI Next, we'll move on to creating the black and white sketch for the coloring page. Again, I have tried multiple prompts, but the best result came from a specific prompt that I'll provide in the description. Paste the chosen prompt and make sure the aspect ratio remains the same (3:4). Out of the different results obtained from trying various prompts, select the image that looks most satisfactory to you. You can upscale the image from the Leonardo AI platform and download it according to the instructions provided earlier. Step 3: Designing the Book Cover and Interior Illustrations Using Canva Now, we'll design the book cover and interior illustrations. To begin, we need to register with Amazon KDP, so click on the provided link and create a KDP account using your name, email ID, and password. After agreeing to the terms and conditions, navigate to the "Help" section and select "Format Your Paperback." In the "Cover Template" option, choose "Paperback," "Black and White," and "White Paper." Set the dimensions to 8.5 inches for width and 11 inches for trim height. Enter a minimum of 24 pages, but it can be more if you prefer. Click on "Calculate" and download the template. To create the book cover, we'll use Canva. If you don't have a Canva Pro subscription, use the link provided in the description to get a free 30-day trial. Once you're on Canva's website, go to "Custom Size" and enter the dimensions 17.43 by 11.25 inches for the cover. Upload the template file that you downloaded from Amazon KDP. In the "Elements" section, select a shape and place it on the cover to frame the design. Adjust the shape's position to cover the desired area. To enhance the image, go to the "Edit" section and apply a filter or make further adjustments using the available options. To add text to the cover, go to the "Text" section and choose a suitable font. You can either use the provided Carson Script font or explore free Disney fonts available on fonts.com. If necessary, upload a font by selecting the "Upload Font" option. To add a Disney princess or other relevant illustrations, use the "Edit Photo" and "Magic Grab" features, if available. Adjust the position of the illustrations and use the "Color" section to modify their appearance. You can also add additional elements to enhance the design. Once the cover design is complete, save the file as a PDF by going to the "Share" option, selecting "Download," and choosing the PDF print format. Now, let's move on to creating the interior illustrations. For the interior illustrations, set the custom size to 8.625 by 11.25 inches and create a new design. Import the previously created designs and position them on the pages. Apply filters and adjustments, if desired, to improve the quality of the illustrations. Save the interior illustrations as a PDF by following the same steps as before. Congratulations! The design process for the heating coloring book is now complete. To publish the book on Amazon KDP, please refer to the official Amazon website for a detailed step-by-step guide. Publishing a book on Amazon KDP involves a series of simple five processes that you need to complete. Now, let's explore an additional way to monetize your skills and earn more from creating coloring books. Many companies outsource the creation of coloring books because they lack the time and resources to do it themselves. By creating coloring books for other companies, you can generate income that can be further used to promote your own books on Amazon KDP. Platforms like Fiverr offer opportunities to sell your services as a book cover or interior illustration designer. Many sellers on Fiverr charge different prices based on the complexity of the designs and the number of pages required. By utilizing this trick, you can earn $2,000 to $5,000 per month by designing coloring books for other companies while also promoting your own books on Amazon KDP. If you're interested in learning about different AI models and tools, visit our website ww.wacpmedia.in. We offer a comprehensive course that covers various AI tools and techniques, and we currently have an early bird offer available. If you enjoyed this tutorial, please consider subscribing to my channel and giving this video a like. I would greatly appreciate it if you shared my content with your friends and family, helping me reach a wider audience. Stay tuned for future tutorials and stay safe. Thank you for your support! Thank you so much for taking the time to read this article. I genuinely appreciate your interest and support. If you enjoyed reading this article and would like to stay updated with similar content, I kindly request you to follow our blog. You can do so by subscribing to our email list, joining our Facebook fanpage, or subscribing to our YouTube channel. By doing so, you will never miss out on any valuable information, updates, or new articles that we share. Thank you again for your time, and I hope to connect with you through our blog's email list, Facebook fanpage, or YouTube channel. **Frequently Asked Questions:** **1. How can I create a Heats coloring book for free?** To create a Heats coloring book for free, you can follow the tutorial mentioned in the passage. It provides step-by-step instructions on using Leonardo AI and Canva to create the book. **2. How can I earn $2 to $5,000 per month using this trick?** The passage mentions that there are two different ways to earn money with this trick. One way is by publishing your own book on Amazon KDP and earning royalties from sales. The other way is by designing coloring books for other companies and charging a fee for your services. **3. Where can I find the necessary tools for creating a coloring book?** For image generation, you can use Leonardo AI, which is a free software. Canva can be used for designing the cover and interior illustrations. Links to these tools are provided in the description of the passage. **4. Do I need to have a paid license for using Canva commercially?** Yes, a paid license (Canva Pro) is required for using Canva commercially. However, the passage provides a link that offers a 30-day free trial of Canva Pro. **5. What are the steps to publish a book on Amazon KDP?** The passage mentions that publishing a book on Amazon KDP involves several steps. However, due to time constraints, the steps are not provided in the passage. Instead, a link to Amazon's official website is provided where you can find the step-by-step process for publishing a book on Amazon KDP. Read the full article
0 notes
Text
Single Page Application (SPA): A Comprehensive Guide for Beginners

Welcome to the world of Single Page Applications (SPAs)! This guide is for you if you’re new to web development or just curious about the newest trends in website design. We’ll explain what SPAs are, why they’re so popular, and how they’re altering the way we use websites in this article.
Single Page Applications load everything on a single page, rather than traditional sites, which load new pages from the server. This makes pages more responsive, smoother, and like the applications we use on our phones. We’ll likewise take a gander at the astonishing innovation that powers SPAs, including JavaScript and structures like Angular and React.
Thus, whether you need to develop your site or simply realize what matters to current sites, you’ve come to the ideal blog. We should start this astounding experience of single-page applications!
What is a Single Page Application
A single-page application (SPA) is a web application or site that connects with the user by dynamically rewriting the current page rather than loading entire new pages from the server.
This approach avoids interruption of the user experience between successive pages, making the application behave more like a desktop application. In an SPA, all necessary code – HTML, JavaScript, and CSS – is either retrieved with a single page load, or the appropriate resources are dynamically loaded and added to the page as necessary, usually in response to user actions.
This leads to a faster, more fluid user experience, as information, as opposed to whole pages, is traded with the server. SPAs vigorously depend on JavaScript and frameworks like Angular, React, or Vue.js to handle client-side scripting.
SPAs have been essential for our online experience for quite some time, and many of them are necessary to our everyday digital interactions. To represent this, think about a few notable instances of single-page applications:
Gmail allows you to open, read, mark as unread, compose, send, and delete emails, all within a seamless interface.
Grammarly offers grammar checks and writing suggestions without needing to navigate away from your text.
Google Maps enables you to search for directions or specific places without the need to reload the entire page.
A Brief History Of Single Page Application
The idea of single-page applications (SPAs) has advanced essentially throughout the long term, reflecting more extensive changes in web technologies and user expectations. The excursion of SPAs started with the coming of AJAX (Asynchronous JavaScript and XML) in the mid-2000s.AJAX was a groundbreaking technology that permitted web pages to refresh content powerfully without expecting to reload the whole page. This intended that web applications, like work area applications, could give a more fluid and responsive user experience.
The genuine momentum for SPAs started with the presentation of advanced JavaScript Frameworks and libraries like AngularJS (introduced by Google in 2010), React (developed by Facebook and released in 2013), and Vue.js (created by Evan You in 2014). These tools made it a lot simpler for developers to construct perplexing, effective, and versatile SPAs.
The rise of HTML5 and CSS3 also played a crucial role, offering more powerful and flexible ways to structure and style web content. Features like local storage, session storage, and history API were particularly important in enhancing the capabilities of SPAs.
Over time, SPAs have become synonymous with modern web experiences, allowing for seamless interactions and transitions, much like native apps. They are particularly popular for building complex, interactive websites and applications like social media platforms, e-commerce sites, and cloud-based software, where user experience and performance are paramount.
What is Single Page Application Architecture? How Does It Work?
Single Page Application (SPA) architecture alludes to how these applications are structured and the way that they work to convey dynamic web content. Dissimilar to traditional web applications, which reload the whole page from the server at whatever point another piece of content is mentioned, SPAs load all the vital HTML, CSS, and JavaScript code with a single page load.
After this underlying stacking, the SPA progressively refreshes the page with new content from the server, creating a more seamless and interactive user experience.
How Single Page Application Architecture Typically Works
Initial Page Load: When the user first requests the SPA, the server sends the essential HTML, CSS, and JavaScript. This includes the structure, styling, and functionality required for the web page.
Browser Rendering: The browser renders this initial page, and the JavaScript creates the application’s structure and logic. This setup lays the groundwork for all subsequent interactions.
User Interaction: When a user interacts with the application (like clicking a link or button), the JavaScript intercepts these browser events. Instead of sending a new request to the server for a full page, JavaScript handles these interactions.
Data Handling: For any new data needed (like loading a new set of items in a list), the application makes AJAX calls to the server. The server returns the requested data, typically in JSON format.
Dynamic Content Update: The JavaScript updates the webpage dynamically with the new data. This is usually done using a JavaScript framework or library, which efficiently handles the Document Object Model (DOM) manipulations to update the content.
Browser History Management: SPAs use the HTML5 History API to update the browser’s history log. This makes it possible for users to use back and forward buttons, bookmark pages, etc., even though new pages aren’t being loaded in the traditional sense.
Advantages of Single Page Application
Single Page Applications (SPAs) offer several advantages that make them a popular choice for modern web development:
Single-time File Load for HTML, CSS, and JS
All essential files (HTML, CSS, JavaScript) are loaded once at the start of an SPA. This implies that the browser does not have to reload the entire page for each user activity, which reduces loading times and improves user experience.
No Extra Queries to Server
After the initial load, SPAs do not require additional page reloads from the server. Any new data needed is fetched using AJAX calls, which only transmit relevant data instead of entire pages.
Functionality in Disrupted or Offline Conditions
SPAs can continue to function even in unstable network conditions or offline, as much of the necessary information is already loaded and stored in the browser.
Fast Processing
Since SPAs only update the required content instead of reloading entire pages, users experience faster interactions and more immediate feedback, which is particularly noticeable in complex applications.
Cross-Platform Compatibility
SPAs are inherently cross-platform apps as they run in web browsers, which are available on virtually all devices and operating systems. This makes them easily accessible across different platforms.
Quick Development
The development process for SPAs can be quicker and more streamlined, as developers can focus on a single-page application rather than handling the complexities of multiple page reloads and navigations.
Chrome-based Debugging
SPAs are typically developed using modern web technologies that are well-supported by Chrome’s developer tools, allowing for efficient debugging and testing directly in the browser.
Top Frameworks for Single Page Applications
ReactJS: ReactJS, created by Facebook, is a declarative, efficient, and adaptable JavaScript library for creating user interfaces. It is well-known for its component-based architecture and virtual DOM functionality, which improves efficiency.
AngularJS: Created by Google, AngularJS is a structural framework for dynamic web apps. It extends HTML with new attributes and binds data to HTML with expressions. AngularJS is known for its two-way data binding feature.
EmberJS: EmberJS is an open-source JavaScript web structure in light of the Model-View-ViewModel (MVVM) pattern. It permits developers to make versatile single-page web applications by incorporating best practices into the framework.
BackboneJS: BackboneJS gives structure to web applications by furnishing models with key-value binding and custom events. It’s known for its lightweight and effortlessness, making it an extraordinary decision for projects where you probably won’t require the greater highlights presented by different frameworks.
VueJS: VueJS is a free and open-source JavaScript model-view-viewmodel front-end framework for creating user interfaces and single-page applications. It is intended to be adopted gradually and emphasizes simplicity and adaptability.
Meteor: Meteor is a full-stack JavaScript platform for developing modern web and mobile applications. It includes a key set of technologies for building connected-client reactive applications, a build tool, and a curated set of packages from the Node.js and general JavaScript community.
Polymer: Developed by Google, Polymer is a lightweight library to develop web-based applications. It helps in creating custom reusable HTML elements and using them to build performant, maintainable apps.
Aurelia: Aurelia is a modern front-end JavaScript framework for building browser, mobile, and desktop applications. It focuses on aligning closely with web platform specifications, using adaptive techniques to stay as efficient as possible.
Handpicked Posts: Top 20+ React Libraries
Single Page Application Examples
Gmail: Google’s email service, Gmail, is a classic example of an SPA. It allows users to interact with their emails (read, send, delete, etc.) without the need to reload the entire page, offering a seamless user experience.
Google Maps: This popular mapping service by Google is another SPA. Users can search for locations, get directions, and explore maps without traditional page reloads, making the experience smooth and efficient.
Facebook: The social media giant uses SPA principles to update users’ feeds, notifications, and messages in real-time, without the need for full-page refreshes.
Twitter: Twitter’s interface, where users can scroll through tweets, interact with them, and post new tweets, operates as an SPA, providing a dynamic, real-time user experience.
Airbnb: The popular accommodation booking platform employs SPA architecture for its seamless searching, booking, and listing management functionalities.
GitHub: The web interface of GitHub, a platform for version control and collaboration, functions as a SPA, especially in repository management and issue tracking.
Netflix: As a streaming service, Netflix uses SPA principles to allow users to browse through movies and series, manage their accounts, and watch content without traditional page refreshes.
Pinterest: Pinterest operates as a SPA, where users can browse, pin, and manage content in a highly interactive environment without full page reloads.
FAQs About Single Page Applications
1. Is Instagram a single-page application?
Yes, Instagram is a single-page application, offering dynamic content loading for a seamless user experience.
2. Is Facebook a single-page application?
Yes, Facebook is a single-page application, especially in how it updates feeds and user interactions without full-page reloads.
3. Why is React called a single-page application?
React is often used to build single-page applications because it efficiently updates and renders components without reloading the entire page.
4. Can I use SPA with CMS?
Yes, you can use a SPA with a Content Management System (CMS); modern headless CMSs are particularly well-suited for integration with SPAs.
Originally published by: Single Page Application (SPA): A Comprehensive Guide for Beginners
1 note
·
View note
Text
How to Convert HTML to PDF with Google Script? - ITMlab
The Google Script is a powerful tool that allows you to automate repetitive tasks in Google. It allows you to create JavaScript-based applications that use Google services. The following code can be used to convert HTML files into PDF:
For more information: How to Convert HTML to PDF with Google Script? - ITMlab
Convert HTML to PDF
Converting HTML to PDF is easy. You can do it yourself, or you can use Google Script to do it for you.
To convert HTML to PDF using Google Script:
Create a new script in Google Drive and name it “ConvertHTML.”
In the “Code” section at the bottom of your script editor window, copy and paste this code:
var docs = SpreadsheetApp.openByUrl( ‘https://docs.google.com/spreadsheets/d/YOUR_SPREADSHEET_ID_HERE’ ); var sheets = docs.getSheets(); var sheet = sheets[0]; var rows= sheet .getRange( ‘A1’).getValues();
1. Create an HTML file that has a table of contents, headers and footers
Before you can convert HTML to PDF, you’ll need to create an HTML file that has a table of contents, headers and footers. Here’s how:
Open Notepad or another text editor on your computer (if you’re using Google Chrome, then we recommend using the built-in Developer Tools).
Type out some basic text like this:
Create a table of contents by adding tags around each major heading in your document; if there are no major headings in your document yet (you haven’t started writing), then type out some more text until there are multiple levels of headings so that we know where our table should begin! For example:
This is my first Heading, This is my second Heading. Make sure these tags are indented with two spaces from each side so that we can tell them apart from regular paragraphs later when we convert them into actual tables!
2. Save the file as an HTML file with a .html extension
Save the file as an HTML file with a .html extension
Make sure you have the right extension. If you don’t, Google will not be able to open it and convert it into a PDF file. You can also save it as a text file and then open it in a browser to see if it works.
3. Open your Google Drive account in your browser and log in if you haven’t done so already.
You need a Google account. If you don’t already have one, go to https://accounts.google.com/signup and follow the instructions to create one.
You’ll need to be signed in to your Google Drive account. If you haven’t done so yet, sign in using your email address or phone number associated with the account (the same credentials used for Gmail).
Sign out of Google Docs if it’s currently open: Click on “File” at top left corner of screen then select “Account settings” from dropdown menu under My Drive section at right side of page; next click on “Sign out” link at bottom left corner of window that appears when hovering cursor over ‘My Drive’ heading before signing back into new window where we will begin creating our script file below this paragraph!
4. Click on the “Script” option in the left-hand sidebar menu at the top of the screen (or click here)
The next step is to click on the “Script” option in the left-hand sidebar menu at the top of the screen (or click here). This will open up a window with some code that looks something like this:
var doc = DocumentApp.openById(‘myDocumentId’);
doc.setHtmlContent(‘Hello World!’);
For more information: How to Convert HTML to PDF with Google Script? - ITMlab
0 notes
Text
Google Analytics Account Setup Made Easy: Expert Tips and Tricks
Welcome to “Google Analytics Account Setup Made Easy: Expert Tips and Tricks!” In today’s digital world, understanding and harnessing the power of data is crucial for businesses to thrive.
Google Analytics provides a comprehensive platform for tracking and analyzing website performance, enabling businesses to make informed decisions and optimize their online presence. Whether you’re a beginner or an experienced marketer, this guide will easily walk you through setting up a Google Analytics account.
From essential configurations to advanced techniques, we’ll share expert tips and tricks to help you make the most of this powerful tool. Let’s dive in and unlock the true potential of Google Analytics!
How to Set Up Google Analytics Account in 10 Steps?

Step 1: Visit the Google Analytics Website
Visit the Google Analytics website by typing “Google Analytics” into your preferred search engine or enter the URL “https://analytics.google.com” in your web browser.
Step 2: Sign In With Your Google Account
If you already have a Google account (such as Gmail), click the “Sign in” button and enter your credentials. If you don’t have a Google account, just click the “Create account” link and then follow the steps to make one.
Step 3: Set Up Your Google Analytics Account
Once you’re signed in, click the “Start measuring” or “Create Account” buttons to set up your Google Analytics account.
Step 4: Fill In Your Account Information
You’ll be presented with a form where you need to provide information about your account. Here’s what each field means:
a. Account Name
Enter a name for your Google Analytics account. This could be the name of your website, business, or organization.
b. Website Name
Enter the name of your website.
c. Website URL
Type in the website address (URL) of your site.
d. Industry Category
Choose the industry that best describes your website.
e. Reporting Time Zone
Select the time zone where your data will be displayed.
Step 5: Configure Data-Sharing Settings (Optional)
You’ll be presented with checkboxes asking for your data-sharing preferences. Please read through the options and select or deselect them based on your preferences. These options determine how Google can use your data. It’s recommended to review each option carefully.
Step 6: Click on the “Create” Button
After completing the form, press the “Create” button at the bottom of the page.
Step 7: Accept the Terms of Service
You’ll be presented with the Google Analytics Terms of Service. Read through them, and if you agree, check the box indicating your acceptance.
Step 8: Get Your Tracking Code
Once you’ve accepted the Terms of Service, you’ll see a page displaying your unique tracking code. This code needs to be added to your website’s HTML to start collecting data. You can copy the tracking code or email it to yourself for future reference.
Step 9: Install the Tracking Code on Your Website
You need to add the tracking code to each website page to track your website’s data. The process varies depending on your website platform. Typically, you must add the code just before your HTML template’s closing </head> tag. Consult your website platform’s documentation or support resources for specific instructions on how to add the tracking code.
Step 10: Verify Data Collection
After adding the tracking code, it may take a few hours for data to appear in your Google Analytics account. To check if the data is being gathered correctly, you can use the “Real-Time” reports in Google Analytics. This will show you the data as it comes in live, so you can see if everything is working as expected. These reports show you what visitors are doing on your website at this very moment.
How to Set Up Google Analytics on Cms-Hosted Sites?
Step 1: Sign Up for Google Analytics
If you don’t have a Google Analytics account, you’ll need to sign up for one. Visit the Google Analytics website (https://analytics.google.com/) and click the “Start for free” button. Follow the instructions to make an account and set up your property.
Step 2: Create a New Property
Once signed in to Google Analytics, click the “Admin” tab at the bottom-left corner. In the “Property” column, click the dropdown and select “Create Property.” Fill in the required details such as website name, URL, industry category, and time zone.
Step 3: Get Your Tracking Code
After creating the property, you’ll be provided with a tracking code. This code is unique to your property and needs to be added to your CMS-hosted site. To obtain the tracking code, click on the “Tracking Info” tab under the “Property” column and then select “Tracking Code.”
Step 4: Add the Tracking Code to Your Cms-Hosted Site
Now, you need to add the tracking code to your CMS-hosted site. The process may vary depending on the CMS platform you’re using. Here are instructions for some popular CMS platforms:
a. WordPress
If you’re using WordPress, you can use plugins like “Google Analytics for WordPress” or “MonsterInsights” to easily add the tracking code. Install the plugin of your choice from the WordPress repository, activate it, and follow the plugin’s instructions to enter your tracking code.
b. Joomla
In Joomla, you can add the tracking code by navigating to the “Extensions” menu, selecting “Templates,” and then choosing your active template. Look for the “Custom Code” section and paste the tracking code in the appropriate field. Save the changes.
c. Drupal
You can use modules like “Google Tag Manager” or “Google Analytics” to insert the tracking code for Drupal. Install the module of your choice, configure it with your Google Analytics tracking ID, and enable it to start tracking.
d. Wix
In Wix, go to the editor of your website, click on the “Settings” gear icon, and select “Tracking & Analytics.” Click the “+ New Tool” button, choose “Custom,” and paste your tracking code into the provided field. Save the changes. Remember to save the changes or publish your site after adding the tracking code.
Step 5: Verify the Tracking Code
To ensure that Google Analytics is correctly installed and tracking data, you can use the “Real-Time” reports in Google Analytics. Log in to your Google Analytics account, then choose your property, and click on the “Real-Time” tab located on the left side of the screen. Open your website in a different browser or device, and you should see your visit recorded in the real-time report if the tracking code is set up correctly.
How to Set Up Google Analytics on WordPress?

Step 1: Create a Google Analytics Account
Visit the Google Analytics website (https://analytics.google.com/) and log in by using your Google account credentials. If you don’t have a Google account, you’ll need to create one.
Once signed in, click the “Start Measuring” button to create a new Google Analytics account.
Step 2: Set Up a Property in Google Analytics
After creating the account, you’ll be prompted to set up a property. A property represents your website within Google Analytics.
Provide the required information, such as your website name, URL, industry category, and time zone.
Choose the appropriate data-sharing settings and click on the “Create” button.
Step 3: Get Your Tracking ID
Upon creating the property, you’ll be taken to the Admin area of Google Analytics.
Click “Tracking Info” under the “Property” section in the Property column.
From the dropdown menu, select “Tracking Code.”
In the “Tracking ID” field, you’ll find your unique tracking ID (e.g., UA-XXXXXXXX-X). Keep this ID handy, as you’ll need it later.
Step 4: Install Google Analytics on WordPress
Log in to your WordPress website’s admin area.
Adding the Google Analytics tracking code can be done in different ways depending on the WordPress theme and setup you have. Here, I’ll explain two common methods.
Method 1: Using a Google Analytics Plugin
Go to the “Plugins” section and click “Add New.”
Search for “Google Analytics” and choose a reliable plugin like “MonsterInsights” or “Google Analytics Dashboard for WP.”
Install and activate the plugin.
Go to the plugin’s settings page (usually found under “Settings” or “Insights”).
Look for the option to authenticate your Google Analytics account.
Follow the provided instructions to connect the plugin to your Google Analytics account.
Once connected, the plugin automatically adds the tracking code to your WordPress website.
Method 2: Manually Add the Tracking Code
Inside your WordPress admin area, click on “Appearance,” and then choose “Theme Editor.”
On the right-hand side, you’ll see a list of theme files. Look for “header.php” or “footer.php” (depending on where you want to insert the tracking code).
Click on the file you want to edit.
Within the file, search for the closing </head> tag (for “header.php”) or </body> tag (for “footer.php”).
Simply copy your Google Analytics tracking code and paste it right above the matching closing tag.
Save the changes.
Step 5: Verify Google Analytics Tracking
After adding the tracking code, verifying if it’s working correctly is important.
In your Google Analytics account, go back to the Admin area.
Under the “Property” column, click on “Tracking Info” and select “Tracking Code.”
Scroll down to the “Status” section, where you should see a message stating
“Receiving Data” or “Tracking Installed.”
Google Analytics may take a few hours to track your website data.
Why do you need Google Analytics? Explain all the steps.

1. Setting up Google Analytics Account
Visit the Google Analytics website (analytics.google.com) and sign in with your Google account.
Make a new Google Analytics account for your website or app.
Provide relevant information about your website or app, such as the name, URL, and industry category.
2. Installing the Tracking Code
After creating your Google Analytics account, you’ll receive a unique tracking code.
Copy the tracking code snippet provided by Google Analytics.
Copy the tracking code into your website or app’s HTML source code, right before the closing </head> tag.
Save the changes and make them live on your website or app.
3. Data Collection
Once the tracking code is implemented, Google Analytics will collect data from your website or app visitors.
It captures information such as the number of visitors, their geographic location, the pages they visit, the devices they use, and their actions.
4. Accessing Google Analytics Dashboard
To access your Google Analytics data, sign in to your Google Analytics account.
You’ll be directed to the Google Analytics dashboard, which comprehensively overviews your website or app performance.
5. Exploring Key Metrics and Reports
Google Analytics offers a wide range of metrics and reports to analyze your data.
Key metrics include sessions (visits), users, pageviews, bounce rate, average session duration, and conversion rates.
Reports cover various aspects such as audience demographics, acquisition sources, user behavior, conversion tracking, and more.
6. Setting Goals and Conversions
With Google Analytics, you can create specific goals to track how many people complete important actions on your website or app. These goals help you measure the success of your site or app.
Goals can include actions like form submissions, newsletter sign-ups, product purchases, or any other desired user actions.
When you set up goals, you can see how well your marketing efforts are working and make improvements to your website or app based on that information.
7. Analysing and Optimising Performance
With the data collected and reports generated by Google Analytics, you can identify patterns, trends, and areas for improvement.
Analyse visitor behavior, identify high-performing pages, understand user flow, and uncover conversion bottlenecks.
Use this information to optimize your website or app design, content, marketing strategies, and user experience.
8. Monitoring Real-time Data
Google Analytics also provides real-time data, allowing you to see immediate visitor activity on your website or app.
Monitor live traffic, track the impact of marketing campaigns, and respond quickly to any issues or anomalies.
9. Utilizing Advanced Features
Google Analytics offers advanced features and customization options to enhance your analytics capabilities.
Features like custom dimensions, segments, event tracking, e-commerce tracking, and enhanced e-commerce provide deeper insights and tracking for specific business needs.
What to Do After You’ve Set up a Google Analytics Account?

1. Define Goals and Objectives
Clearly define your website or app’s goals and objectives. These include increasing sales, driving traffic, boosting engagement, or improving user experience. By having clear goals, you can align your Google Analytics tracking and reporting accordingly.
2. Configure Data Filters
Data filters allow you to customize and exclude specific data from your reports. For example, you can exclude internal traffic (from your organization) or filter out spam referrals. Set up filters to ensure your data is accurate and relevant.
3. Enable E-commerce Tracking
If you run an online store, enable Ecommerce tracking to gain insights into sales and revenue data. This feature allows you to track transactions, revenue, average order value, and other valuable metrics related to your online sales.
4. Set Up Goals
Goals in Google Analytics are specific actions or conversions you want your website visitors to take, such as making a purchase, submitting a form, or spending a certain amount of time on a page. Define your goals and set them up in your Google Analytics account’s “Admin” section.
5. Implement Event Tracking
Events are user interactions on your website or app, such as button clicks, video plays, downloads, or form submissions. Implementing event tracking allows you to measure and analyze these interactions to understand user behavior and engagement.
6. Create Custom Dashboards and Reports
Google Analytics provides customizable dashboards and reports that allow you to visualize your data in a way that suits your needs. Make personalized dashboards to keep an eye on important measurements and use reports to analyze how well things are going across different aspects.
7. Link Google Analytics with Google Ads
If you’re running Google Ads campaigns, linking your Google Analytics and Google Ads accounts enables powerful insights and reporting. It allows you to track the performance of your ads, understand user behavior after clicking on an ad, and optimize your campaigns accordingly.
8. Utilise UTM Tracking
UTM (Urchin Tracking Module) parameters are tags added to your URLs that help track the effectiveness of your marketing campaigns. Implement UTM tracking by adding relevant parameters to your campaign URLs. This lets you identify which marketing channels drive the most traffic and conversions.
9. Set Up Custom Alerts
Custom alerts can notify you of significant changes in your website’s performance. For example, you can set up an alert to be notified of a sudden drop in website traffic or if a specific goal conversion rate increases significantly. This helps you identify and address issues promptly.
10. Regularly Analyse and Optimise
Google Analytics provides you with a lot of information and valuable insights. To make the most of it, it’s important to regularly check and study the reports and data.
This helps you spot trends, patterns, and areas where you can make things better. Use the data to optimize your website or app, make data-driven decisions, and improve your digital marketing strategies.
5 Simple Ways to Use Google Analytics to Study Your Website’s Traffic

1. Track Overall Website Performance
Using Google Analytics, you can easily keep an eye on important things like how many people visit your site, like the number of visitors, sessions, pageviews, and bounce rate on your website. These metrics provide a high-level overview of how your website is performing and can help you identify trends and patterns over time.
By analyzing this data, you can assess the effectiveness of your marketing campaigns, track the impact of changes to your website, and make informed decisions to improve user engagement.
2. Understand Traffic Sources
Google Analytics provides detailed information about the sources of your website traffic. It categorizes traffic into organic search, direct, referral, social media, and paid search. By analyzing these traffic sources, you can determine which channels drive the most visitors to your site.
This information helps you identify successful marketing strategies and optimize your efforts by focusing on the channels that bring the most qualified traffic.
3. Analyse User Behavior With Behavior Flow
Behavior Flow in Google Analytics visualizes the path users take on your website, showing how they move from one page to another. It provides insights into the most popular landing and exit pages, where users spend the most time, and the paths they take through your site.
By understanding user behavior, you can identify areas where users are dropping off or experiencing difficulties. This knowledge helps you optimize your website’s navigation, improve user experience, and increase conversions.
4. Set Up and Track Goals
Goals in Google Analytics allow you to define specific actions or conversions you want users to take on your website. These can include completing a purchase, submitting a form, signing up for a newsletter, or spending a certain amount of time on a page.
By setting up and tracking goals, you can measure the success of your website in achieving these objectives. Google Analytics provides valuable data on goal completion rates, conversion funnels, and users’ steps before reaching a goal. This information helps optimize your website to improve conversion rates and user engagement.
5. Utilise Segmentation and Audience Insights
Google Analytics enables you to segment your website traffic based on various dimensions such as demographics, geolocation, behavior, and technology. By segmenting your audience, you can analyze the behavior and preferences of specific groups of users.
For example, you can compare new visitors’ behavior versus returning visitors or analyze users’ performance from different countries. This data allows you to tailor your marketing strategies, content, and user experience to specific audience segments, increasing the effectiveness of your campaigns.
Conclusion
Setting up a Google Analytics account has become much easier with the help of expert tips and tricks. By following these guidelines, users can navigate the complexities of account creation effortlessly. The expert insights provided invaluable knowledge on optimizing data tracking, configuring goals and filters, and interpreting analytical reports effectively.
This comprehensive approach ensures that you get accurate and useful information. It helps businesses make smart decisions and improve their performance online. With Google Analytics, users can harness data analytics to gain valuable insights into their website’s performance, user behavior, and marketing effectiveness, ultimately leading to enhanced growth and success.
Source Link: Google Analytics Account Setup Made Easy: Expert Tips and Tricks
0 notes
Video
youtube
How to Create HTML Email in GMAIL || HTML Template in GMAIL
#technicalganesh#how to create html email in gmail#how to create html email template#how to create html email#email template design tutorial in hindi#email template html css#html file in gmail
0 notes
Text
hello everyone! with the death of picloadr and now apparently tampermoneky too i’m very happy to say that i’ve found an alternative for both that can be used to keep a promo queue running! i hope i’ve explained everything clearly enough bellow the cut but if you have any questions for need anymore information then i’m only a dm away! PLEASE REBLOG THIS IF IT HELPS, I’M WANTING TO HELP AS MANY FOLK AS POSSIBLE WITH THIS (LASt UPDATED 3rd JAN 2022)
UPDATE - 03/01/22
somethings that have come up in some of the issues i’ve helped resolve:
there sometimes can be a bit of a delay between the queue posting and the new queued post appearing, up to 10 minutes is the longest i’ve heard about so far
if the action isn’t working when first deployed try disconnecting and reconnecting a few times, if problems persist going in to edit the action and changing the trigger from any new post to new photo post can resolve the issue too
so first up! you’re going to want to be signed into tumblr on the account that has the promo blog you’re wanting to use, easy enough and i’m guessing if you’re reading this you know how to do that so no screenshot for this. you’re also going to want to post at least one and draft at least one promo on the blog to have as reference and also to trigger this whole process. once you’ve done that, that’s us done with tumblr for the moment!
now the site we’ll be using to reload our queue is called ifttt (if this then this) and it allows you to set up simple little automations for many sites and a few other things? i’m not too sure. we just need it to work with tumblr and it does!

so first things first you’re going to want to make an account, now you might be able to tell from the start for free button that there is a premium account available but luckily for us everything we want to do is achievable with a free account (unless you want to have more than 5 automations set up, but multiple accounts can do the same).

clicking on start for free brings you to this screen where you’re going to want to click at the text bellow the buttons to sign up with an email. best thing is, it works with the + trick for gmail emails.
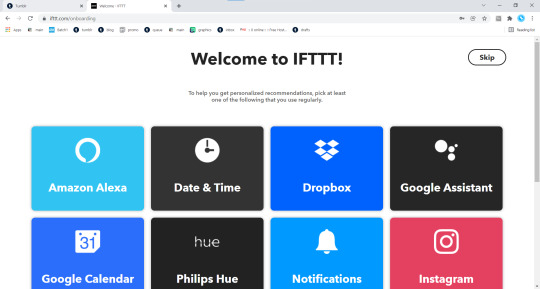
that brings you to this screen and we’re just going to want to ignore all that and click up on the top right to skip right past it for now.
that’ll bring you to here! now it might prompt you with a popup about a trial of the premium version but you’re just going to want to dismiss that and then click up on the top right, create.
and now you click on the add button. which will bring up the screen that will let you connect ifttt to tumblr.
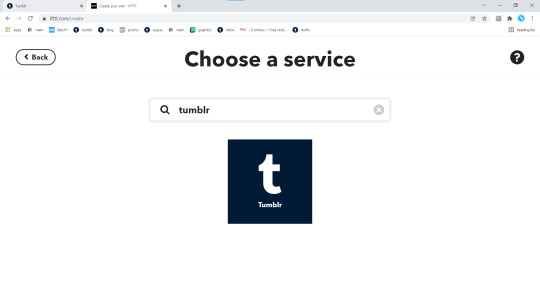
here, you could scroll for an age to find tumblr or just search for it. either way click on tumblr.
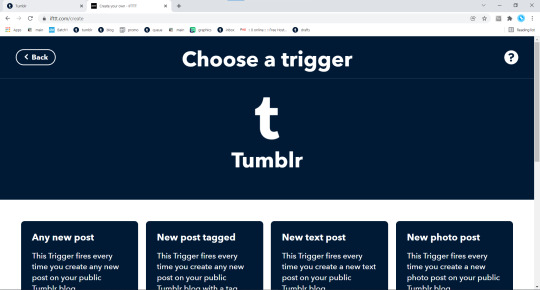
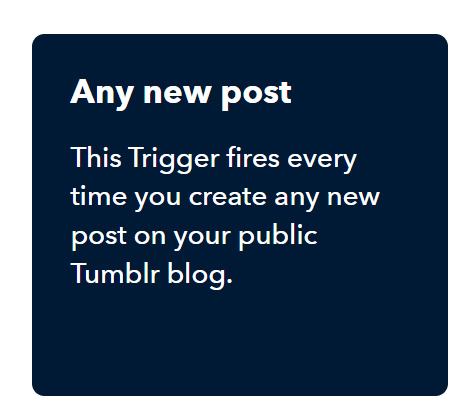
from the options on the screen above you’re going to want to click on this one.
which will then prompt you to connect with tumblr, now the process that follows will be very similar to anyone who used picloadr or any other tool that works with tumblr but i’ll still walk you through it.
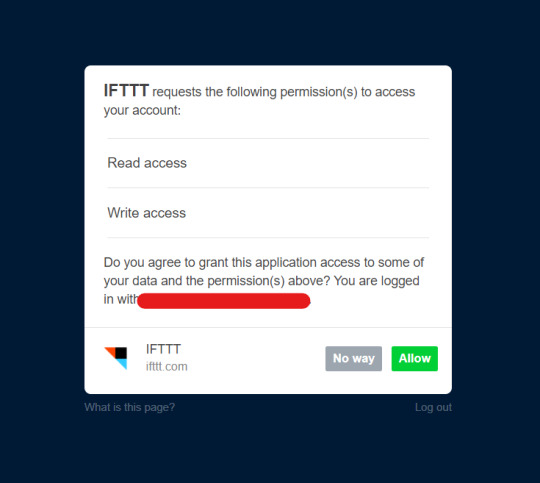
yup! that’s all it is! just one popup where you’re going to want to allow ifitt these permissions.
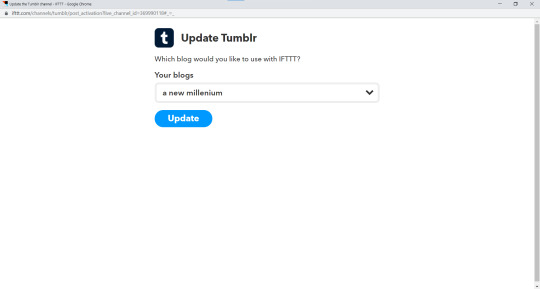
okay, i lied. it wasn’t just one... but this ones easy! all you need to do is select your promo blog from the drop down menu and click update.
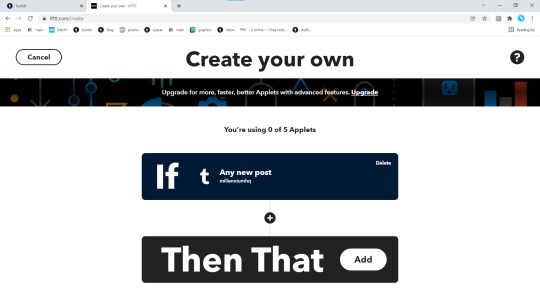
and that will bring you back to here! our first building block is in place, now for our then that and a process that is very similar to picloadr in a lot of ways.
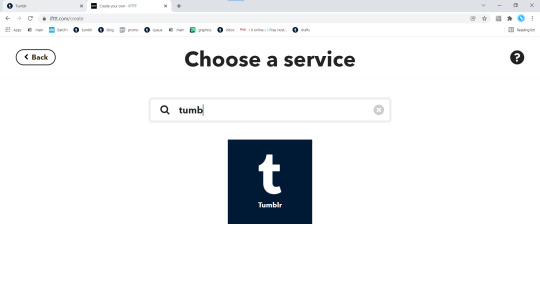
picking tumblr as a service, same as before, you’ll be brought to this screen.
where you’re wanting to pick this option.
which will bring us to this
which will bring you here. and now this is where we return to tumblr to get the image url of your promo graphic from the one you posted earlier.
you’re going to want to paste that url in as shown above, ie. with no curly brackets. and now back to tumblr! now we want to get the html of the post body of your promo.


again you’re going to want to ignore the curly brackets and just paste straight in overwriting everything.
now for the tags, this is pretty much explained on the page but just separate them out with commas and onto the last input
select add to queue from the drop down and then that’s us almost done setting things up!

click create action and it’ll bring you back to here.
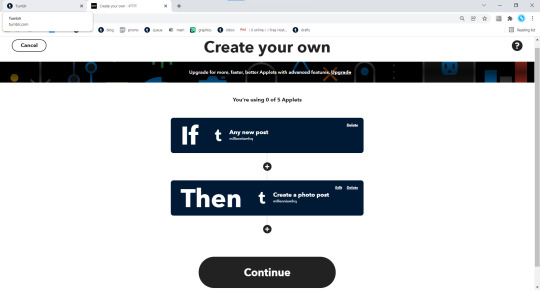
here you can see it all set up! i’ve zoomed out to get it all on one screen but all you need to do now is click continue.

bringing you to this screen, you can keep the default title or type in your own: once you’re happy just click finish and that’s you finished on ifttt.
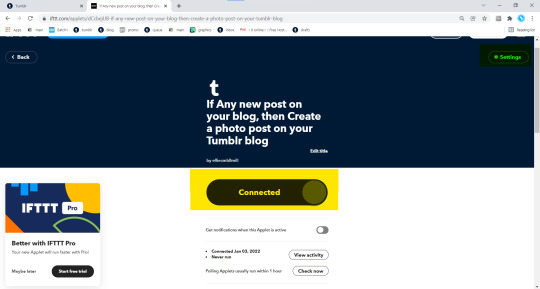
you’ll see this screen once it’s been published, the bit highlighted in yellow is how you can turn it off and on, once triggered you don’t need to do anything to keep it going. and up in the top right, highlighted in green is where you click to bring up the editor for the action.
and now back to tumblr, remember how i said to draft a promo post back at the start? now you’re wanting to post it! once its posted, if you’ve done all this right, you’ll spot a post in your queue! one ifttt just queued up for you!
i really hope this helps folk and again, if you have any questions, don’t hesitate to contact me! if you’re a mutual you can ask for my discord and i can do tech support over on there but i’ll always answer any dms or asks about this.
218 notes
·
View notes
Text
How to Customize Your AO3 Writing HTML Format & More!
Okay! So you want to know how to customize your AO3 HTML writing format/how to navigate AO3 in general—well you’ve come to the right place!
Here I’ll be addressing common errors that happen when navigating AO3 as both a reader and primarily as a writer. I’ll also be giving out some great tips and tricks on navigating AO3—especially when it comes to customizing your AO3 writing. I’m mainly making this because when I was trying to simply publish my stories on AO3 with indentation on my writing format; it was such a HASSLE. Especially going through countless blogs that were really freakin’ old and youtube videos that weren’t at all helpful and/or very confusing. Hopefully today I’ll be able to help you try and alleviate that confusion.
I’m also going to make a youtube video on this in the near future as well as my tumblr guide( if you want to learn how to customize your Tumblr blog(theme, linking things on your bio, navigating certain functions) go ahead click here.
Alright! So let’s say you already have your chapter ready and prepped to be pasted onto the HTML writing format. Here are a few things you need to know before pasting that long written chapter onto the HTML format.
If you have a bunch of indentation on your chapter and go ahead and paste that onto AO3 HTML format—it’d immediately remove all that indentation.
Indentation:
No Indentation:
This is going to happen no matter how much spacing you put in that text on HTML. It’s primarily because HTML is meant to be a bunch of code in between text. There is no code suggesting to create indentations on your text. So you might be asking yourself, well how do I create indentions Seph? Here is how:
^ here is my secret weapon hehe~
Now, before I came across this holy grail of a website(after going through long hours of searching through youtube videos and articles etc) I was manually typing out all of my code onto my stories. It was literal hell(especially because I write very LONG chapters(20k-60k) so I had to physically scroll through my own writing to put code in between text that sometimes didn’t even work when I finally published my story/chapter. The website I’m going to link to you—it’s a website where you paste your work onto the google doc and it’d put the code in FOR YOU. So you don’t have to sit there for hours implementing your own code for indentations, bold text, etc. Here’s how to use the website:
Website link: https://docs.google.com/document/d/19eZnBQ4989Dr17v2ODFgE8QWAo9Oahi4USDNS3hOSvM/copy (as far as I know this website doesn’t have a name but imma just call it the HTML holy grail lolll)
* You’re going to click, “make copy.”
Make sure before you’re clicking, “make copy,” that the gmail you’re signed into is the same one your browser is signed into. So when you go through the process of selecting a google account to sign into—you don’t select a different gmail. If you don’t write your stuff on google docs and for example—use Word—just copy your writing from your Word document and paste it into the website’s google doc. You’d just have to sign into an email anyway lol.
Now when you click, “Make copy,” it’d open to this page. This page has a bunch of instruction you don’t need to read. What you’re going to do is delete all of this text and paste your writing on it. To select all the text:
SHIFT+CMD+A (MAC)
SHIFT+ALT+A (Windows)
Then hit:
Delete (Mac)
Backspace (Windows)
Now that it’s empty, you’re going to go ahead and copy your story:
SHIFT+CMD+A & then CMD + C (MAC)
SHIFT+ALT+A & then ALT + C (Windows)
and paste it to this document.

Now it’s going to look very similar to your own google docs page where you copied your writing from. What you’re going to do next, is click/look for the text that says, “Post to AO3″ which can be found on taskbar above the writing functions next to, “Help.”

When you click this, it’d ask you two things:
and:

Obviously, we want to select, “Prepare for pasting into HTML Editor.” Click that and it’d immediately start running. It will ask you to sign into a google account as well:
Click continue (this is where it’d ask you to sign into a google account):

Here choose your gmail account (for obvious reasons I won’t be showing my email lol):

It’d ask for permission, select— “Allow” below.
It’d immediately run the script and it should look like this:

Everything highlighted in blue is your code. This coding will make your indentations for you as well as make the coding for bold text, italic text, so on and so forth.
Now, you’re going to copy all of this text:
SHIFT+CMD+A :then: CMD + C (MAC)
SHIFT+ALT+A :then: ALT + C (Windows)
and paste it into your HTML editor on AO3 (ofc, delete all the text already on your ao3 editor):

Now all of your writing should look like this—all code and text.
Keep in mind, when you click, “Preview” your indentations/italics/bold text won’t appear. Idk why it doesn’t (ao3 is just wack like that) but when you publish your indentations/bold text/italics, text WILL appear. I guarantee it.

Alright so adding tags/editing your work is very simple:
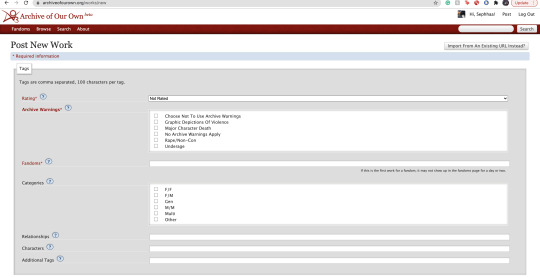
Here is where you’re going to tag all of your work. As you can see, you have a lot of options:

Here is where you start rating your fic. It runs from Not Rated to Explicit. This is primarily to let readers know what type of fic they’re reading before actually clicking on it. It lets younger audiences know not to click it if it’s too mature or too explicit. This also makes it easier for readers to search up stories under whichever rating you choose.

Now the Archive warnings are just extra EXTRA warnings that are more specific. So if your story falls under any of these specific warning tags go ahead and put them—you can also choose not to use the warnings.

The fandom tag is pretty self-explanatory. If you’re confused then you clearly don’t know what AO3 is LOLL. Ao3 is commonly known as a fanfiction site where people will upload fanfics in relation to the fandom they’re writing for. So let’s say I made a fanfic for the anime Death Note, I would type, “Death Note” onto the fandom tag:
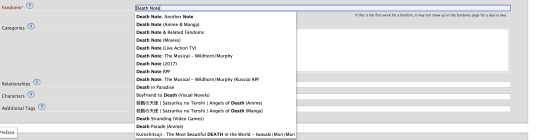
Now the categories tag is very self-explanatory as well, choose the tag pertaining to the relationship of your main characters. For example:
I’m going to use Death Note as my example: both of my main characters and/or ship is L/Light Yagami depending on how both characters identify their genders, in this case both characters identify as male in my fanfic. I would choose the “M/M,” tag. Another example:
If I wrote a BTS fanfic and it’s a x-reader X Park Jimin fic, the x-reader for my fic identifies as female, while Park Jimin identifies as a male in my fanfic so I would choose the “F/M” tag.
If the fanfic you wrote has characters that are nonbinary for example, you can choose the “other” tag.
The trend here is knowing what your characters identify as in your fanfic and applying that tag here.

The relationships tag is where you’d put the main ship tag. So again:
If I wrote a Death Note fanfic, and my main romantic pairing or sexual pairing was L/Light Yagami I’ll type that pairing onto the bar and depending on how popular that ship is, it’d pop up for you.
The characters tag is where you’d put all of your characters by name onto the bar. So going back to the Death Note example, I would put L, Light Yagami, and Misa Aname as my characters. You also have the option to add OC characters as a tag (OC—Original characters.)
Additional tags is just that—additional tags. Here is where you’d list specific tags/concepts pertaining to your fanfic. So my tag list will look something like this:
*Gore
*Violence
*Explicit Sexual Content
*Fluff
etc.
Here is where authors commonly put a bunch of random thoughts/writing. You have to keep in mind—if you want to write your thoughts, for example, “L totally rims Light cuz we all know Light is king of the bottoms” you can’t make your thoughts EXTREMELY long. If your thoughts end up being very long—ao3 won’t let you publish your fanfic unless you fix the tags.
Onwards!
Now, here is where you’re going to put your story title, summary, add any co-creators, beginning notes and end notes. All very self-explanatory. Though, I will come back to beginning notes/endnotes later.
Here is all the extra stuff that I don’t really find a lot of authors using. The only one that has a lot of relevance is the “Language” tag which is very important for obvious reasons. Though the small list of tags/buttons to click on—hold some value. If you have a fanfic that is a series, as an example, you can select this box. If you have a fanfic that has multiple chapters, you’d check off the mark that says “this work has multiple chapters.” When you click this, it’d ask you how many chapters. If you don’t know how long your fic will be, you can simply put a question mark. If you selected the option where your fanfic is part of a series, it’d ask you from what series in your works and/or let you make a new series (if your first work is the first book to said series.) The last option, “Set a different publication date,” is an interesting feature on ao3. This feature lets you prep your works in advance and if you know what exact date you plan on publishing your fanfic, you can put an exact date on that fic for when you want to publish it.
Now work skins, or, “Skins,” is a feature I don’t find a whole lot of people using. I had ended up using it because again—I wanted to create indentations to my work on a HTML format and upon some research I found that someone recommended to use skins and apply them to your work to create those indentations.
You may be asking yourself, “What is a skin/work skin?”
A work skin/skin is a body of code you can customize in a separate window. I don’t know the exact details on how to successfully make this code since I forgot how to properly do it (also I mainly don’t want to go into extreme detail how to make a work skin lol) this work skin can be applied to your writing and modify it in a way where you don’t have to manually add certain features. For example:
I wanted to make indentations for my fanfic on the HTML format. At first I used a work skin with code to do the indentation for me:
Here’s a link where you could learn how to do that: work skin indentation
The issue I found when creating this work skin and applying it to my writing, it made it look really wonky. Now I’m sure you can go ahead and change the settings to the work skin in terms of sizing/spacing etc. But to be honest, that sounds like a lot of work I don’t wanna be doing. If you find yourself successfully using work skins (and you know your way around advance coding) by all means, use work skins to your advantage. As far as I know, work skins also have different functions but I do not know those exact functions. I have the holy grail google docs to make indentations/coding for me lol. Moving on!

Last but not least, we have the privacy section where you’d obviously make your selections based on your preferences. Registered users are users who have actual ao3 accounts. Guests are users who don’t have ao3 accounts. Pretty self-explanatory. You can choose where you want a specific audience to read your fics, register users or guests. Or choose both. Or none at all.

START NOTES/ENDNOTES:
Remember how I mentioned that I would be coming back to beginning notes/endnotes? Here’s why:
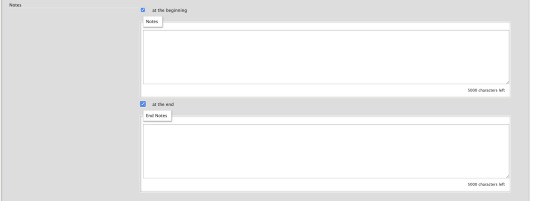
Let’s say you successfully publish your fanfic and it’s a multi chapter fic. A common problem I found myself having and A LOT of other people, when you have multiple chapters and you add endnotes to a specific chapter, your first chapter endnotes appear on that latest chapter you’ve created different endnotes for.
Let me make this clearer:
Let’s say my fic is 10 chapters. In the very first chapter, I added specific endnotes that look like this:

The text: “Leave a comment if you enjoyed the first chapter! Chat with me on my <a href="https://sephhaa.tumblr.com/" rel="nofollow">tumblr</a> Chat with me on my <a href="https://twitter.com/Sephhaa" rel="nofollow">Twitter!</a>” <— this is my endnotes I put for my first chapter.
Now if I go ahead to check my chapters outside of the editor page and then check my latest chapter (in this case is chapter 10):
Both my endnotes for that chapter (chapter 10) and my endnotes for the very first chapter appear on my 10th chapter when only my endnotes for, specifically, chapter 10—should be the only one that readers SHOULD see. My readers should only be seeing chapter 10 endnotes. NOT chapter 10 endnotes AND chapter 1′s notes.
Now you may be asking yourself, “Well, how do I get rid of my first chapter notes on my chapter 10 endnotes? When I go to the editor page, to chapter 10, my endnotes look fine and I don’t see my first chapter endnotes there?” Here is how you get rid of them:

Now, I want you to pay attention to this screenshot. This is a screenshot of my ao3 editor page for my latest fic, “IMPOSTERS.” The reason why I want you to pay attention to this screenshot because I want you to notice a very alarming detail we all gloss over.
We are in the, “Edit Work” page. We are NOT on chapter 1.
Let me break this down:
You know how your first chapter’s endnotes keep appearing on your latest chapters? Yeah, that’s because they’re appearing on every other chapter because you’ve pasted your first chapter’s endnotes on the, “Edit Work” editor page instead of putting your endnotes to chapter 1 and ONLY chapter one.
What you’re going to do is scroll down to your endnotes
*Copy them if you want
*DELETE! the endnotes on the, “Edit Work” page by selecting this little window:

*Make sure to un-click the little blue check mark so it deletes the endnotes.
Go over to your first chapter by selecting the chapter number on the above taskbar:

*Scroll down to your endnotes
*Paste those endnotes you copied in the endnotes box (now these notes will only appear on chapter 1)
And BOOM! No more first chapter endnotes to your latest chapter endnotes:

Keep in mind: what commonly happens is if you see your first chapter endnotes and then you go and publish chapter 6, just know that if you had written notes in the editor page instead of the chapter, will now naturally move on to the next chapter until another update —it’s because your first chapter endnotes will move onto the latest chapter you post. Those first chapter endnotes won’t be applied to every single chapter of yours.
HITS/KUDOS/COMMENTS:
Now, Hits, Kudos and especially comments are very self-explanatory but here are some things I really do love about each feature:

HITS:
Hits are something I really do enjoy about ao3. Main reason being it’s so different compared to every other writing platform for example—Wattpad.
Now I’ve been, up until recently, on Wattpad for 8 years, I started as an original novel writer and then transferred into fic writing (which is hilarious cuz a lot of writers start as the very opposite.)
In saying that, Wattpad is famously known for clicking and rising the amount of views/reads on a story based on the amount of clicks you give that story. What I didn’t like, even as the writer to my own work, if I click my own stories—Wattpad would count those clicks and mark them as reads. So whenever I edit or check my own work, my reads would go up simply by me—as the author— clicking my own story/chapters. It would be extremely hard to know who was actually reading my story and how many of those reads were actually me just clicking my story.
AO3 doesn’t do this. Since you are the author of that fanfic, it doesn’t count you as a reader when clicking your own story.
This is super great and it just gives me an idea of how many people actually went to give my fic a hit.

KUDOS:
Kudos is a great function and I like it a lot because ao3 doesn’t have the option where people can dislike a fic. Ao3 and many writing sites don’t have a “liking” system like Instagram and Facebook. And that’s mainly because ao3 is NOT a social platform. You cannot make social posts on ao3 and while it’d be nice to notify my readers about x, y and z you can just link your social platforms in your end notes. Which is something I’ll get into in a second.
COMMENTS:
Comments are just that, comments. A good feature on ao3 tho is, you as the author can filter comments. I see authors, unfortunately get a lot of hate for x and y ship and/or concept. It happens a lot and it’s complete BS—especially when authors end up orphaning said story so they can get a little peace of mind.
Ao3 has a pretty good filtering system where you can choose to allow certain comments underneath the story/chapters. The only downside to this, you as the author have to manually read through all these comments (which are commonly hate comments) and it can put a mental toll on you. Ao3 has yet to figure out a way where we can block certain users so they won’t be able to comment/read your fic. So if you are someone who has recently came out with a fic and you are receiving some kind of hate—maybe get a friend or close family member to log into your account and filter your comments for you. Otherwise, you’d have to grow a backbone and can take the hate and filter through your own comments.
In saying that, please please be aware to not take every comment personally and surround yourself with good people. What people say doesn’t matter as long as you were happy writing that chapter/pairing/concept. If it means you’d need a minute away from the internet or not check your inbox at all—both options are available to you and you as the writer don’t have an obligation to respond to hate if you don’t want to.

LINKING YOUR SOCIAL MEDIA IN NOTES:
If you had came from my tumblr guide (which I highly recommend if you’re trying to navigate your tumblr) the coding used for adding links to your tumblr bio in that guide is extremely similar to the coding we will be using today in the AO3 beginning notes/endnotes:
Now here is my social media links in my endnotes. You can add social media links to both beginning notes and endnotes (I find they’re placed more commonly in the endnotes) the coding we will be focusing on is:
<a href=“
that is:
<a SPACE href= QUOTATION MARK ( “ )
(really familiar yeah? lollll shoutout to y’all who came from my tumblr guide)
Now, you’re going to want to type this out in your notes window, and then go grab a social link (I’ll just go ahead and use my Twitter social link) simply copy whichever social platform link you want to copy and paste it right after the quotation mark. It’d look a little something like this:
<a href=“https://twitter.com/Sephhaa”
and end it with a quotation mark( “ ) again.
Right after that we need to write more coding and that coding is:
ref=“no follow”
that is:
SPACE ref=QUOTATION MARK( “ ) no SPACE follow QUOTATION( “ )
So your link will now look a little something like this:
<a href=“https://twitter.com/Sephhaa” ref=“no follow”
Now more coding, but this time, we need some type of text so it just doesn’t look like some long ass link in your notes. Here is the code we’re going to use:
> - beginning
</a> - end
that is:
(start) > TEXT </a> (end)
(my text in this case is going to be “>Twitter!</a>”)
(together ofc, for the sake of the example I’m spacing it) Your link should look something like this:
<a href=“https://twitter.com/Sephhaa” ref=“no follow”>Twitter!</a>
Now you can do this with every social media you have to convert it into a link inside your notes/endnotes.

You can tell whether it worked or not if it’s underlined and highlighted.
ADDING IMAGES TO YOUR HTML FORMAT:
Alright! Adding images to your fic is great! Especially if you want to feature some fanart and you want everyone to see it etc. I personally use this feature to add text dividers. Text dividers is what separates my text, for example, if I’m going from one POV to another—I can add a text divider. I’m going to teach you how to add images to your HTML format since it’s a bit complex and takes a little trial and error—especially when it comes to sizing.

Alright so the coding you’re going to use here is this:
<img src="
that is:
<img SPACE src= QUOTATION MARK ( “ )
After that we’re going to use a website that can convert our images into a link:

Postimages.org!: Website Link.
Here is where you can choose an image, the website will convert it and then you can copy the link of your image and paste it to your code:

After converting your image of choice—you’re going to copy the direct link.

Now, once you have copied the direct link you will go back to your coding and paste it after the quotation mark. It should look like this:
<img src=“https://i.postimg.cc/kGfmV3hQ/C6-CF33-E3-8-D9-E-4-E92-B63-F-1-EE2-B5-FA00-AF.jpg" alt="
and make sure you end it with another quotation mark.
Here is the next set of coding:
alt=“
that is:
alt= QUOTATION MARK ( “ )
Then:
width=“100%” (or whatever number you want to put, here I will just put 100)
that is:
width= QUOTATION ( “ ) 100% QUOTATION MARK ( “ )
height=“50%” (or whatever number you want to put, here I will just put 50%)
that is:
height= QUOTATION MARK ( “ ) 50% QUOTATION MARK ( “ )
Your code should now look like this:
<img src=“https://i.postimg.cc/kGfmV3hQ/C6-CF33-E3-8-D9-E-4-E92-B63-F-1-EE2-B5-FA00-AF.jpg"alt=“”width=“100%”height=“50%”
Now you’re going to end the code like this:
/> </p>
that is:
/> SPACE </p>
Now your official image link should look like this:
<img src=“https://i.postimg.cc/kGfmV3hQ/C6-CF33-E3-8-D9-E-4-E92-B63-F-1-EE2-B5-FA00-AF.jpg"alt=“width=“100%”height=“50%”/> </p>
If you select “Preview,” in your HTML editor you can see your image in that window and you can adjust the sizing of the image as much as you like. My image looks something like this when I go to preview:

This sizing is pretty great for fanart sizes. You can use this to also make text dividers but in smaller sizes. Like this:
(I have to fix the spacing but you know what I’m trying to get at lollll)
my text dividers look like that and I use a sizing of 30% for both my width and height. You’d simply use the same steps as the first image. Just change the sizings on width and height and adjust it to a much smaller image so it can appear as a text divider. These images are also set to “center” immediately. I don’t know the the coding to make images not centered(if you want your image on the right/left sides) but if I find them all add them to this guide.

Now I don’t really have a whole lot of tips and tricks but some tips I can give you if you are someone trying to gain some attention to your story.
1). Within your fandom pay attention to which fanfic gets the most hits and look at their concepts/tags. Now I pride myself on originality and you should too but sometimes just seeing what tags/concepts ppl use can give you an idea of what readers are trying to read.
I find that in the VLD fandom, the top grossing ship is Klance therefore if I make a fic with them as my main ship, I know I can except some hits. Ships alone can make readers click on your stories. If you write an uncommon ship, it’s likely you won’t really get a lot of hits but honestly you should write for your own enjoyment and not for the hits. This is coming from a person who makes fanfics that I MYSELF want to read and anyone else reading it is reading my own indulgence lmaoooo.
2). Look at concepts.
Think of yourself as a reader and not a writer when looking at concepts. What are concepts YOU seek out. This could be anything from smut to explicit content. To enemies to lovers, to murder and violence. Fantasy AUs and Touch of Life AUs. Me personally—I always seek out stories that have explicit content, primarily smut cuz I know if the story has smut sometimes the story is written to my unhealthy standards of mature content/explicit content. I also look for uncommon concepts, violence, and my favorite concept is anything with crime.
Those are my preferences as a reader and if you are a writer and writing content that you yourself would like to see in a fanfic, there’s a chance other people like those same concepts too. If you don’t know what concepts you’d like to write or what concepts are out there—look at your favorite fic writers and what concepts they write as a reference. You can also just sit yourself down, in front of a google doc, and think about a fanfic you would like to scroll by and think, “OOO That’s def something I wanna read/add to my bookmarks.”
3). Now, I don’t use this tip/trick that often (cuz again, I don’t really care THAT much about hits/kudos etc.) but it is daunting when you put so much time in a fic and it’s not getting as much hits/kudos as you thought it would. If you think it’s a fic worthy of some attention and you’d like to get your name out there more than use this tip/trick:
AO3 functions in a way where if you publish a fanfic to your designated fandom, it’d appear on the front page of that fandom tag. This is where readers will scroll through and find fanfics they want to read. Since there is so many people who publish their fics daily everywhere in the world—your fic won’t stay on the front page for a long time. Unless it’s a fic with A LOT of hits (I only really see this in the BTS fandom tag, all stories with thousands of hits are on that front page lol) So here is a little secret way to keep your fic on the front page for a much longer time:
Go to your latest chapter on any of your stories or any story in general.
In order to get your story on the front page again, you’d need to copy everything in this chapter. I’m talking about summary, notes, and the entire written chapter. I suggest separating your chapter summary/notes in one google doc and the chapter text in the work section in a different google doc. Mainly cuz it’s easier to use the
SHIFT+CMD+A (MAC)
SHIFT+ALT+A (Windows)
keys. So go ahead and copy everything, paste them to their separate google docs and delete that entire chapter.
Yes. You heard me. Delete the chapter.
It physically hurts me to do this, especially if something goes wrong. Good thing I keep a copy of all my work—AND YOU SHOULD TOO WTH.
Anyway, go ahead and delete the chapter and then go ahead to your story Edit Work and add a new chapter where you’d be re-publishing that specific chapter.
Step 1: Saving Chap Summary/Notes

Step Two: Saving Chapter 10:
Step 3: Deleting Chapter/Latest Chapter on AO3:

(As you can see above, I only have 9 chapters when originally I had 10)
Step 4: Re-Publication:


Step 5: Publication/Post:

You can also take your time and preview it to see if everything looks good.

As you can see my chapter is posted and it looks good! Now if you click on your fandom tag underneath your fic title—it’d take you to the front page of the list of fics posted. You should be able to see your fic on the front page.
As you can see, my fic is the very first one on the list of fics and on the front page of my fandom fic tag.
Some things to keep in mind:
1). While this is extremely helpful in getting people to click on your fic since your fic is on the front page, the downside of using this tip/trick is the fact that the original date you published this chapter will change. So let’s say you published your fic in the summer of 2020 and have long since finished the story and decide to use this trick and republish your work again in order to get on the front page—the date will instead be 2021 on whatever season or month you decide to republish. It feels kind of weird to republish a chapter and/or story when you’ve finished it a long time ago and it will give an impression to readers that you have only JUST finished the book. Now, if the readers decide to follow your social media and know that you had actually finished the series a long ass time ago—then it’d be written off as you editing/revamping the chapter.
In a lot of cases, it’s just you editing/revamping a chapter in the case that the chapter didn’t upload right etc.
2). Depending on your fandom: this tip/trick might not entirely work. While I’m in the VLD fandom and it’s fairly easy to appear on the front page again—I’m also in the BTS fandom and I find that the process is extremely different. While re-publishing my story in the VLD fandom tag I can easily get my story back on the front page—I cannot say the same for my BTS fandom tag primarily because BTS fics are not sought after by how recent fics have been published but by the amount of hits your fic has. The larger amount of hits you have on your BTS fics—the greater your chances are staying on the front page of the BTS fandom tag list. Since my BTS fic has a good amount of hits (499-500) I appeared on the front page but for a very short period of time. Sometimes that’s enough to garner the attention of 1 or 2 readers. And that’s enough for me.
3). Again, I don’t use this tip/trick often (mostly a trick honestly lol it kinda feels like cheating the system a bit) and you should use this sparingly. Not so much to NOT give your fics the attention you want them to have but on your mental health. Numbers are numbers at the end of the day and it matters more to actually like the stories you write and reach out to a few people instead of thousands upon thousands who probably don’t even interact with you as an author. Start small and build your way up. It’s more genuine that way and you can learn how to maneuver things smoothly when you start off small. That and you have more room to make mistakes and get the chance to learn from them instead of receiving hate for them early on.
Welp! That is all for my AO3 guide. I’m sure I’ll come across another tip or trick or SOMETHING and add it here lolll. I’m still fairly new on ao3 (in terms of publishing my own work) and I’m bound to run into errors etc. But I hope this was helpful for you. I really wish there was a guide like this one (updated to at least 2019 or something cuz LORD all the articles/blogs I came across were old as shit and I didn’t even know if their tips/information were still relevant to the new ao3 format etc) So at least I did a service to younger Seph a year or two ago trying to navigate ao3.
If you found this helpful, I also have a tumblr guide on how to customize/navigate tumblr and all things tumblr (in terms of adding links to your bio, how to make a masterlist etc) so if you’d like to see/read that, head on over here. I’ll also be making youtube videos on both these guides in the near future, just for the peeps that need that extra visual and who don’t want to read through this VERY long guide.
If you like this or me, check out some of my work! I am a fanfic writer—I write both anime and BTS content ( primarily VLD(Voltron) fics but I do plan on writing something for Death Note & Inuyasha (cuz there isn’t enough SangoXMiroku content and that’s a crime in of itself) I also plan to write for the MHA fandom soon too! If that’s something you’re interested in head on over to my Masterlist.
Until my next guide!
#How to Customize Your AO3 HTML Writing Format/Navigate AO3#AO3 guide#How to: AO3#AO3 tutorial#How to: Add A Link To My AO3 Notes#How to: Get Rid of First Chapter Endnotes To My Latest Chapter#How To: Make Indents in AO3 HTML Editor#AO3 Tips#AO3 Tricks#Newbie AO3 Friendly#Fic Writer Friendly#How to: Add Images to Your HTML AO3 Format
32 notes
·
View notes
Text
Team Free Will Big Bang FAQ and Rules 2021
Rules
You must be aged 18 or over upon registration in order to take part in this bang. If you lie about your age, you will be banned from all future TFW Big Bangs and other events run by this bang’s mods.
Authors, Artists and Betas will be sent a confirmation email within 48 hours of signing up. You must reply to this email to complete sign up.
What do I create?
Authors:
A story of a minimum of 15,000 words (big bang).
Or a story of a minimum of 5000 words (mini bang).
The story must feature Team Free Will (Dean, Sam and Cas) at the center of the story or Team Free Will 2.0 (Dean, Sam, Cas and Jack).
Or be a real person fanfic (RPF) featuring Jared, Jensen and Misha at the center of the story (Alexander Calvert can also be included as a central character if you so desire).
No story may feature anyone under the age of 16 in an explicit sexual situation, this rises to 18 for RPF.
Your story must be posted in full on your assigned posting day.
See further in the FAQ for more details.
Artists:
For a big bang: a cover and two pieces of art connected to the fic (cover can be derived from main art).
For a mini bang: a cover and a piece of art connected to the fic (cover can be derived from main art).
No art may feature anyone under the age of 18 in an explicit sexual situation.
No explicit art may be posted to Tumblr.
No art can be made of photo manipulations.
Note that this bang runs a no fic left behind policy.
See further in the FAQ for more details
Authors must not discuss their stories publicly on places like social media or Discord servers before claims, unless it is in vague terms to secure a beta reader. You may discuss your story with your beta reader and on the TFWBB Discord server.
All authors and artists must familiarize themselves with the bang schedule.
All authors and artists must make attempts to regularly communicate with each other once paired.
For those taking part, we have created a Discord server. Details about this are available upon bang sign-up.
For more in-depth information on how to be a good bang participant: check out this post on allspnships.
FAQ
What are the differences between mini and big bangs?
Basically how long your story is. The Big Bang has a minimum of 15,000 words, and will receive a minimum of two art pieces from the artist plus a fic cover, while the Minibang has a minimum of 5,000 words, and will receive a cover and at least one piece of art.
Do covers have to be completely separate pieces of art from the rest of the bang’s art?
Covers can be remixes of art already created for the fic. But they need to feature the fic title, the names of the artist and the author(s).
How/where do I submit my draft?
We will provide details about this directly to creators nearer posting time.
How long does my story need to be?
You have two options: for a Big Bang, you need a minimum of 15,000 words. For a Minibang, you need at least 5,000.
What does the focus of my story need to be?
Your story must focus on all three members of Team Free Will: Dean, Sam, and Castiel. This means the story can be Dean/Sam, Dean/Cas, Sam/Cas, Sam/Dean/Cas or gen. If you choose a two-person pairing, the third character must be an equal focus on the story.
We won’t be counting words, but please try to stay within the spirit of the challenge. This is about celebrating Team Free Will characters, so have fun with them.
Since 2018, we have accepted interpretations of Team Free Will that include Jack Kline (Team Free Will 2.0), but everyone must still have equal importance in your story.
Team Free Love (Sam/Castiel/Dean/Gabriel) is not accepted for this bang.
Reader inserts are not accepted for this bang.
We will allow pairings where the four are with other characters, such as Sam/Eileen or Dean/Gabriel, BUT that pairing cannot be the main focus of the story.
Are AUs, crossovers and fusions allowed?
Yes, all are allowed. However, the more obscure the other fandom, the harder finding an artist who knows both will be, so keep that in mind.
What about RPF?
RPF is welcome, but must focus on Jared, Misha, Jensen and (if you want) Alexander, and their relationships with each other. So any combination of these four is welcome, as is a gen RPF where no one’s together. Everyone of these three (or four) needs equal weight in your plot.
What about underage?
Please ensure that all fanfic doesn’t include under 16s depicted in sexual situations—this raises to 18 for RPF. Basically, off the page is fine, but not on the page. All explicit art can only feature characters aged 18 and upwards.
Is it okay to write a sequel or prequel to an existing fic?
No, it needs to be a completely new story.
Can I sign up as both an author and an artist?
Yes, but you cannot claim your own fic.
Can I create additional art for my fic/have other artists make banners and art?
Not until a year after your post date.
May I do photo manipulations for art?
Due to issues of quality with manips in previous years, we have decided that photo manipulations are no longer welcome in the Team Free Will Big Bang.
May I do paper art or use alternative physical mediums like textiles or clay?
Yes.
Covers—can they feature explicit art?
Due to masterposts being posted on Tumblr, covers cannot feature explicit imagery.
Will there be promos? Can I advertise my fic on my Tumblr, Pillowfort, Dreamwidth, Twitter, etc?
There will be a formal promo period available to you during August, once posting dates are known. Promos will be promoted on all our blogs and Twitter. Details on how to promo will be made available in August.
Please do not promote stories ahead of this. You will be welcome to reblog/retweet your promos from our official blogs and Twitter.
Where do I post my fic/art when it’s complete?
All fics must be posted to AO3 and made live on your posting date, with the art embedded in the appropriate scenes if the artist allows.
All art must have a masterpost on either Dreamwidth, Pillowfort, AO3, or Tumblr made live on your posting day. Remember that explicit art should not be posted to Tumblr, unless it is extensively censored.
On or before your posting day, both links must be submitted in a post to the TFW Big Bang Dreamwidth, Pillowfort community and/or Tumblr blog. We will share the posting format nearer the time of posting. We will check over the masterpost, and make it public on the appropriate day on all platforms.
Do I need to link back to my artist’s master art post on my AO3 story?
Yes, all stories must have a link that goes to the art masterpost made by your artist. We advise you add this link in your notes using HTML like:

Will there be an AO3 collection for posted fics and art?
You will be able to add your fics and art to the moderated collection via: tfw_bb_2021.
Do I need a Dreamwidth/Pillowfort/Tumblr/AO3 account to participate?
Artists should have at least one to post their art to, and authors should have at least AO3 to post their fic to. No account besides an email address is required for claims.
Masterpost submissions to Pillowfort or Dreamwidth will require an account on the service you want to use. Tumblr may be submitted to without an account. Submit the fic and art masterpost to your preferred platform and it will be crossposted by the mods.
Due to changes in LiveJournal’s terms of service in April 2017, the bang is no longer being actively run on LJ, though may be promoted there.
Can I write more than one story/collaborate on a story?
Each author can write only one story for this challenge. You are welcome to collaborate on a story, but that counts as your one story.
Can I claim more than one fic to make art for?
The first round of claiming will allow artists to claim only one story. If there are still unclaimed stories 24 hours after the claiming begins, we’ll open a second round for artists to claim a second piece or for artists who didn’t originally sign up to participate. If artists drop out after assignments are set, artists can pinch hit as well regardless of whether they’re already assigned one story.
What do I need to provide for claims?
Fic writers will need to provide drafts that are at least 80% complete (with a beginning, middle and (almost an) end) for claims, along with a summary. Specifics on how to do this will be shared via email ahead of the submissions date.
We will not accept drafts that fail to meet this criteria, as it’s not fair on artists.
What is “no fic left behind”?
If an artist fails to meet art draft check-ins, providing proof of art, when required: they will be removed from the bang and a new artist found for the affected bang story.
The only exception to this is those affected by extenuating circumstances who manage to communicate with their author or the mods—in this instance an extension will be given.
What if something happens in RL and I need to post on a different day or get an extension, or something?
Contact the mods, or get your teammate to contact the mods, or get a friend to contact the mods. Stuff happens and we don’t want our bang to be an extra stress, but you need to let us know that you need help so that we can help you. We can be pretty flexible, so please don’t worry and get in touch. You can reach us at teamfreewillbigbang(at)gmail(dot)com.
How will claims work?
There will be a preview doc with each summary posted at least 48 hours before claims and emailed to artists who have already signed up. When claims open, we will email a link to a Google Form where we’ll ask you to resubmit some of your artist details and your top five picks for doing art. We’ll update the preview summaries with notes on fics as they’re assigned.
Do writers need beta readers?
Yes, all fic needs to be beta read for at least spelling, punctuation and grammar.
If you don’t have a beta reader, you can try asking someone from our beta list to beta for you.
Ask on /r/fandomnatural or you can check out our list of beta readers for the bang. Details of this list will be emailed to authors once available.
May I post a WIP?
Works in progress (WIP) are not permitted to be posted for this bang. Fics must be posted complete (i.e. no serial posting).
You didn’t answer my question
Please contact hit_the_books,majesticduxk and fogsrollingin at teamfreewillbigbang(at)gmail(dot)com.
9 notes
·
View notes