#install jupyter notebook
Explore tagged Tumblr posts
Visit Tumblr Blog
Explore Tumblr blogs with no restrictions, modern design and the best experience.
Last Seen Tumblr Blogs


Fun Fact
Tumblr.com rank in the US is 25.
Text
i just want a lil script that can scrape a spotify playlist and stick all the lyrics into a database that i can do keyword searches on when i need to come up with a title for my fanfic
#unfortunately for me after doing a small amount of research i'm pretty sure this is a thing that a) can be done and b) is within my skillset#con: i read the words 'pip install' and 'jupyter notebook' and wanted to crawl under my desk and die#pro: the spotify python api is called spotipy. SPOTIPY
7 notes
·
View notes
Text
Man goes to the doctor. Says he's frustrated. Says his Python experience seems complicated and confusing. Says he feels there are too many environment and package management system options and he doesn't know what to do.
Doctor says, "Treatment is simple. Just use Poetry + pyenv, which combines the benefits of conda, venv, pip, and virtualenv. But remember, after setting up your environment, you'll need to install build essentials, which aren't included out-of-the-box. So, upgrade pip, setuptools, and wheel immediately. Then, you'll want to manage your dependencies with a pyproject.toml file.
"Of course, Poetry handles dependencies, but you may need to adjust your PATH and activate pyenv every time you start a new session. And don't forget about locking your versions to avoid conflicts! And for data science, you might still need conda for some specific packages.
"Also, make sure to use pipx for installing CLI tools globally, but isolate them from your project's environment. And if you're deploying, Dockerize your app to ensure consistency across different machines. Just be cautious about Docker’s compatibility with M1 chips.
"Oh, and when working with Jupyter Notebooks, remember to install ipykernel within your virtual environment to register your kernel. But for automated testing, you should...
76 notes
·
View notes
Text
The Legendary ThinkPad T480s

I recently got myself an old Lenovo ThinkPad T480s for just $230—a real steal for this iconic machine. The model I got had the i7-8650u and 16GB RAM. Even though it’s about 7 years old, the ThinkPad T480s still holds legendary status among laptop enthusiasts. A quick search on YouTube and you will find a ton of recent videos praising its robust build, exceptional keyboard, and solid performance. There's almost a cult like following for this ThinkPad.


Right after purchasing, I opened up the laptop for some essential maintenance. I disassembled the heat sink/heat pipe/fan assembly and thoroughly cleaned the fan with a brush and compressed air duster. After cleaning off the old thermal paste from the heat sink and CPU using IPA, I reapplied some Kryonaut Thermal Grizzly paste to ensure optimal cooling performance.


Over the next two days, I set it up with Ubuntu and installed a bunch of development tools like Visual Studio Code, Python, Jupyter Notebook, and Arduino IDE. Additionally, I configured VirtualBox to run a Windows 10 Pro VM for flexibility.
To enhance seamless workflow between my ThinkPad and Mac, I configured Syncthing for effortless file synchronization and CopyQ for shared clipboard functionality. For backup, I am using Timeshift for system snapshots and Déjà Dup for user files. Installed Gnome Sushi and Imagemagick to make file preview work like on a Mac. It's also nice that the Ubuntu dock can be configured to look similar to a Mac.
On top of that, I also installed xremap to do some key remapping for things like copy, paste, quit, etc. to make Ubuntu work more like a Mac, just because the Mac is my main machine and all those key strokes are like muscle memory already. Keep having to change as I switch between using the 2 was a real pain.


That’s it, a brand new old ThinkPad. The ThinkPad T480s remains a fantastic laptop even after all these years, providing stellar performance and an exceptional Linux experience. It’s the perfect budget-friendly yet powerful laptop for developers, makers, and Linux enthusiasts alike.

Below are some videos you can check out:
youtube
youtube
2 notes
·
View notes
Text
How you can use python for data wrangling and analysis
Python is a powerful and versatile programming language that can be used for various purposes, such as web development, data science, machine learning, automation, and more. One of the most popular applications of Python is data analysis, which involves processing, cleaning, manipulating, and visualizing data to gain insights and make decisions.
In this article, we will introduce some of the basic concepts and techniques of data analysis using Python, focusing on the data wrangling and analysis process. Data wrangling is the process of transforming raw data into a more suitable format for analysis, while data analysis is the process of applying statistical methods and tools to explore, summarize, and interpret data.
To perform data wrangling and analysis with Python, we will use two of the most widely used libraries: Pandas and NumPy. Pandas is a library that provides high-performance data structures and operations for manipulating tabular data, such as Series and DataFrame. NumPy is a library that provides fast and efficient numerical computations on multidimensional arrays, such as ndarray.
We will also use some other libraries that are useful for data analysis, such as Matplotlib and Seaborn for data visualization, SciPy for scientific computing, and Scikit-learn for machine learning.
To follow along with this article, you will need to have Python 3.6 or higher installed on your computer, as well as the libraries mentioned above. You can install them using pip or conda commands. You will also need a code editor or an interactive environment, such as Jupyter Notebook or Google Colab.
Let’s get started with some examples of data wrangling and analysis with Python.
Example 1: Analyzing COVID-19 Data
In this example, we will use Python to analyze the COVID-19 data from the World Health Organization (WHO). The data contains the daily situation reports of confirmed cases and deaths by country from January 21, 2020 to October 23, 2023. You can download the data from here.
First, we need to import the libraries that we will use:import pandas as pd import numpy as np import matplotlib.pyplot as plt import seaborn as sns
Next, we need to load the data into a Pandas DataFrame:df = pd.read_csv('WHO-COVID-19-global-data.csv')
We can use the head() method to see the first five rows of the DataFrame:df.head()
Date_reportedCountry_codeCountryWHO_regionNew_casesCumulative_casesNew_deathsCumulative_deaths2020–01–21AFAfghanistanEMRO00002020–01–22AFAfghanistanEMRO00002020–01–23AFAfghanistanEMRO00002020–01–24AFAfghanistanEMRO00002020–01–25AFAfghanistanEMRO0000
We can use the info() method to see some basic information about the DataFrame, such as the number of rows and columns, the data types of each column, and the memory usage:df.info()
Output:
RangeIndex: 163800 entries, 0 to 163799 Data columns (total 8 columns): # Column Non-Null Count Dtype — — — — — — — — — — — — — — — 0 Date_reported 163800 non-null object 1 Country_code 162900 non-null object 2 Country 163800 non-null object 3 WHO_region 163800 non-null object 4 New_cases 163800 non-null int64 5 Cumulative_cases 163800 non-null int64 6 New_deaths 163800 non-null int64 7 Cumulative_deaths 163800 non-null int64 dtypes: int64(4), object(4) memory usage: 10.0+ MB “><class 'pandas.core.frame.DataFrame'> RangeIndex: 163800 entries, 0 to 163799 Data columns (total 8 columns): # Column Non-Null Count Dtype --- ------ -------------- ----- 0 Date_reported 163800 non-null object 1 Country_code 162900 non-null object 2 Country 163800 non-null object 3 WHO_region 163800 non-null object 4 New_cases 163800 non-null int64 5 Cumulative_cases 163800 non-null int64 6 New_deaths 163800 non-null int64 7 Cumulative_deaths 163800 non-null int64 dtypes: int64(4), object(4) memory usage: 10.0+ MB
We can see that there are some missing values in the Country_code column. We can use the isnull() method to check which rows have missing values:df[df.Country_code.isnull()]
Output:
Date_reportedCountry_codeCountryWHO_regionNew_casesCumulative_casesNew_deathsCumulative_deaths2020–01–21NaNInternational conveyance (Diamond Princess)WPRO00002020–01–22NaNInternational conveyance (Diamond Princess)WPRO0000……………………2023–10–22NaNInternational conveyance (Diamond Princess)WPRO07120132023–10–23NaNInternational conveyance (Diamond Princess)WPRO0712013
We can see that the missing values are from the rows that correspond to the International conveyance (Diamond Princess), which is a cruise ship that had a COVID-19 outbreak in early 2020. Since this is not a country, we can either drop these rows or assign them a unique code, such as ‘IC’. For simplicity, we will drop these rows using the dropna() method:df = df.dropna()
We can also check the data types of each column using the dtypes attribute:df.dtypes
Output:Date_reported object Country_code object Country object WHO_region object New_cases int64 Cumulative_cases int64 New_deaths int64 Cumulative_deaths int64 dtype: object
We can see that the Date_reported column is of type object, which means it is stored as a string. However, we want to work with dates as a datetime type, which allows us to perform date-related operations and calculations. We can use the to_datetime() function to convert the column to a datetime type:df.Date_reported = pd.to_datetime(df.Date_reported)
We can also use the describe() method to get some summary statistics of the numerical columns, such as the mean, standard deviation, minimum, maximum, and quartiles:df.describe()
Output:
New_casesCumulative_casesNew_deathsCumulative_deathscount162900.000000162900.000000162900.000000162900.000000mean1138.300062116955.14016023.4867892647.346237std6631.825489665728.383017137.25601215435.833525min-32952.000000–32952.000000–1918.000000–1918.00000025%-1.000000–1.000000–1.000000–1.00000050%-1.000000–1.000000–1.000000–1.00000075%-1.000000–1.000000–1.000000–1.000000max -1 -1 -1 -1
We can see that there are some negative values in the New_cases, Cumulative_cases, New_deaths, and Cumulative_deaths columns, which are likely due to data errors or corrections. We can use the replace() method to replace these values with zero:df = df.replace(-1,0)
Now that we have cleaned and prepared the data, we can start to analyze it and answer some questions, such as:
Which countries have the highest number of cumulative cases and deaths?
How has the pandemic evolved over time in different regions and countries?
What is the current situation of the pandemic in India?
To answer these questions, we will use some of the methods and attributes of Pandas DataFrame, such as:
groupby() : This method allows us to group the data by one or more columns and apply aggregation functions, such as sum, mean, count, etc., to each group.
sort_values() : This method allows us to sort the data by one or more
loc[] : This attribute allows us to select a subset of the data by labels or conditions.
plot() : This method allows us to create various types of plots from the data, such as line, bar, pie, scatter, etc.
If you want to learn Python from scratch must checkout e-Tuitions to learn Python online, They can teach you Python and other coding language also they have some of the best teachers for their students and most important thing you can also Book Free Demo for any class just goo and get your free demo.
#python#coding#programming#programming languages#python tips#python learning#python programming#python development
2 notes
·
View notes
Video
youtube
How To Install Jupyter Notebook In Windows [2025]
0 notes
Text
What You’ll Learn in a Data Analyst Course in Noida: A Complete Syllabus Breakdown

If you are thinking about starting a career in data analytics, you’re making a great decision. Companies today use data to make better decisions, improve services, and grow their businesses. That’s why the demand for data analysts is growing quickly. But to become a successful data analyst, you need the right training.
In this article, we will give you a complete breakdown of what you’ll learn in a Data Analyst Course in Noida, especially if you choose to study at Uncodemy, one of the top training institutes in India.
Let’s dive in and explore everything step-by-step.
Why Choose a Data Analyst Course in Noida?
Noida has become a tech hub in India, with many IT companies, startups, and MNCs. As a result, it offers great job opportunities for data analysts. Whether you are a fresher or a working professional looking to switch careers, Noida is the right place to start your journey.
Uncodemy, located in Noida, provides industry-level training that helps you learn not just theory but also practical skills. Their course is designed by experts and is updated regularly to match real-world demands.
Overview of Uncodemy’s Data Analyst Course
The Data Analyst course at Uncodemy is beginner-friendly. You don’t need to be a coder or tech expert to start. The course starts from the basics and goes step-by-step to advanced topics. It includes live projects, assignments, mock interviews, and job placement support.
Here’s a detailed syllabus breakdown to help you understand what you will learn.
1. Introduction to Data Analytics
In this first module, you will learn:
What is data analytics?
Why is it important?
Different types of analytics (Descriptive, Diagnostic, Predictive, Prescriptive)
Real-world applications of data analytics
Role of a data analyst in a company
This module sets the foundation and gives you a clear idea of what the field is about.
2. Excel for Data Analysis
Microsoft Excel is one of the most used tools for data analysis. In this module, you’ll learn:
Basics of Excel (formulas, formatting, functions)
Data cleaning and preparation
Creating charts and graphs
Using pivot tables and pivot charts
Lookup functions (VLOOKUP, HLOOKUP, INDEX, MATCH)
Conditional formatting
Data validation
After this module, you will be able to handle small and medium data sets easily using Excel.
3. Statistics and Probability Basics
Statistics is the heart of data analysis. At Uncodemy, you’ll learn:
What is statistics?
Mean, median, mode
Standard deviation and variance
Probability theory
Distribution types (normal, binomial, Poisson)
Correlation and regression
Hypothesis testing
You will learn how to understand data patterns and make conclusions from data.
4. SQL for Data Analytics
SQL (Structured Query Language) is used to work with databases. You’ll learn:
What is a database?
Introduction to SQL
Writing basic SQL queries
Filtering and sorting data
Joins (INNER, LEFT, RIGHT, FULL)
Group By and aggregate functions
Subqueries and nested queries
Creating and updating tables
With these skills, you will be able to extract and analyze data from large databases.
5. Data Visualization with Power BI and Tableau
Data visualization is all about making data easy to understand using charts and dashboards. You’ll learn:
Power BI:
What is Power BI?
Connecting Power BI to Excel or SQL
Creating dashboards and reports
Using DAX functions
Sharing reports
Tableau:
Basics of Tableau interface
Connecting to data sources
Creating interactive dashboards
Filters, parameters, and calculated fields
Both tools are in high demand, and Uncodemy covers them in depth.
6. Python for Data Analysis
Python is a powerful programming language used in data analytics. In this module, you’ll learn:
Installing Python and using Jupyter Notebook
Python basics (variables, loops, functions, conditionals)
Working with data using Pandas
Data cleaning and transformation
Visualizing data using Matplotlib and Seaborn
Introduction to NumPy for numerical operations
Uncodemy makes coding easy to understand, even for beginners.
7. Exploratory Data Analysis (EDA)
Exploratory Data Analysis helps you find patterns, trends, and outliers in data. You’ll learn:
What is EDA?
Using Pandas and Seaborn for EDA
Handling missing and duplicate data
Outlier detection
Data transformation techniques
Feature engineering
This step is very important before building any model.
8. Introduction to Machine Learning (Optional but Included)
Even though it’s not required for every data analyst, Uncodemy gives you an introduction to machine learning:
What is machine learning?
Types of machine learning (Supervised, Unsupervised)
Algorithms like Linear Regression, K-Means Clustering
Using Scikit-learn for simple models
Evaluating model performance
This module helps you understand how data analysts work with data scientists.
9. Projects and Assignments
Real-world practice is key to becoming job-ready. Uncodemy provides:
Mini projects after each module
A final capstone project using real data
Assignments with detailed feedback
Projects based on industries like banking, e-commerce, healthcare, and retail
Working on projects helps you build confidence and create a strong portfolio.
10. Soft Skills and Resume Building
Along with technical skills, soft skills are also important. Uncodemy helps you with:
Communication skills
Resume writing
How to answer interview questions
LinkedIn profile optimization
Group discussions and presentation practice
These sessions prepare you to face real job interviews confidently.
11. Mock Interviews and Job Placement Assistance
Once you complete the course, Uncodemy offers:
Multiple mock interviews
Feedback from industry experts
Job referrals and placement support
Internship opportunities
Interview scheduling with top companies
Many Uncodemy students have landed jobs in top IT firms, MNCs, and startups.
Tools You’ll Learn in the Uncodemy Course
Throughout the course, you will gain hands-on experience in tools like:
Microsoft Excel
Power BI
Tableau
Python
Pandas, NumPy, Seaborn
SQL (MySQL, PostgreSQL)
Jupyter Notebook
Google Sheets
Scikit-learn (Basic ML)
All these tools are in high demand in the job market.
Who Can Join This Course?
The best part about the Data Analyst Course at Uncodemy is that anyone can join:
Students (B.Tech, B.Sc, B.Com, BBA, etc.)
Fresh graduates
Working professionals looking to switch careers
Business owners who want to understand data
Freelancers
You don’t need any prior experience in coding or data.
Course Duration and Flexibility
Course duration: 3 to 5 months
Modes: Online and offline
Class timings: Weekdays or weekends (flexible batches)
Support: 24/7 doubt support and live mentoring
Whether you’re a student or a working professional, Uncodemy provides flexible learning options.
Certifications You’ll Get
After completing the course, you will receive:
Data Analyst Course Completion Certificate
SQL Certificate
Python for Data Analysis Certificate
Power BI & Tableau Certification
Internship Letter (if applicable)
These certificates add great value to your resume and LinkedIn profile.
Final Thoughts
The job market for data analysts is booming, and now is the perfect time to start learning. If you’re in or near Noida, choosing the Data Analyst Course at Uncodemy can be your best career move.
You’ll learn everything from basics to advanced skills, work on live projects, and get support with job placement. The trainers are experienced, the syllabus is job-focused, and the learning environment is friendly and supportive.
Whether you’re just starting or planning a career switch, Uncodemy has the tools, training, and team to help you succeed.
Ready to start your journey as a data analyst? Join Uncodemy’s Data analyst course in Noida and unlock your future today!
0 notes
Text
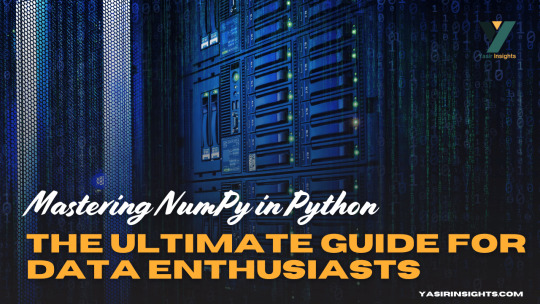
Mastering NumPy in Python – The Ultimate Guide for Data Enthusiasts
Imagine calculating the average of a million numbers using regular Python lists. You’d need to write multiple lines of code, deal with loops, and wait longer for the results. Now, what if you could do that in just one line? Enter NumPy in Python, the superhero of numerical computing in Python.
NumPy in Python (short for Numerical Python) is the core package that gives Python its scientific computing superpowers. It’s built for speed and efficiency, especially when working with arrays and matrices of numeric data. At its heart lies the ndarray—a powerful n-dimensional array object that’s much faster and more efficient than traditional Python lists.
What is NumPy in Python and Why It Matters
Why is NumPy a game-changer?
It allows operations on entire arrays without writing for-loops.
It’s written in C under the hood, so it’s lightning-fast.
It offers functionalities like Fourier transforms, linear algebra, random number generation, and so much more.
It’s compatible with nearly every scientific and data analysis library in Python like SciPy, Pandas, TensorFlow, and Matplotlib.
In short, if you’re doing data analysis, machine learning, or scientific research in Python, NumPy is your starting point.
The Evolution and Importance of NumPy in Python Ecosystem
Before NumPy in Python, Python had numeric libraries, but none were as comprehensive or fast. NumPy was developed to unify them all under one robust, extensible, and fast umbrella.
Created by Travis Oliphant in 2005, NumPy grew from an older package called Numeric. It soon became the de facto standard for numerical operations. Today, it’s the bedrock of almost every other data library in Python.
What makes it crucial?
Consistency: Most libraries convert input data into NumPy arrays for consistency.
Community: It has a huge support community, so bugs are resolved quickly and the documentation is rich.
Cross-platform: It runs on Windows, macOS, and Linux with zero change in syntax.
This tight integration across the Python data stack means that even if you’re working in Pandas or TensorFlow, you’re indirectly using NumPy under the hood.
Setting Up NumPy in Python
How to Install NumPy
Before using NumPy, you need to install it. The process is straightforward:
bash
pip install numpy
Alternatively, if you’re using a scientific Python distribution like Anaconda, NumPy comes pre-installed. You can update it using:
bash
conda update numpy
That’s it—just a few seconds, and you’re ready to start number-crunching!
Some environments (like Jupyter notebooks or Google Colab) already have NumPy installed, so you might not need to install it again.
Importing NumPy in Python and Checking Version
Once installed, you can import NumPy using the conventional alias:
python
import numpy as np
This alias, np, is universally recognized in the Python community. It keeps your code clean and concise.
To check your NumPy version:
python
print(np.__version__)
You’ll want to ensure that you’re using the latest version to access new functions, optimizations, and bug fixes.
If you’re just getting started, make it a habit to always import NumPy with np. It’s a small convention, but it speaks volumes about your code readability.
Understanding NumPy in Python Arrays
The ndarray Object – Core of NumPy
At the center of everything in NumPy lies the ndarray. This is a multidimensional, fixed-size container for elements of the same type.
Key characteristics:
Homogeneous Data: All elements are of the same data type (e.g., all integers or all floats).
Fast Operations: Built-in operations are vectorized and run at near-C speed.
Memory Efficiency: Arrays take up less space than lists.
You can create a simple array like this:
python
import numpy as np arr = np.array([1, 2, 3, 4])
Now arr is a NumPy array (ndarray), not just a Python list. The difference becomes clearer with larger data or when applying operations:
python
arr * 2 # [2 4 6 8]
It’s that easy. No loops. No complications.
You can think of an ndarray like an Excel sheet with superpowers—except it can be 1d, 2d, 3d, or even higher dimensions!
1-Dimensional Arrays – Basics and Use Cases
1d arrays are the simplest form—just a list of numbers. But don’t let the simplicity fool you. They’re incredibly powerful.
Creating a 1D array:
python
a = np.array([10, 20, 30, 40])
You can:
Multiply or divide each element by a number.
Add another array of the same size.
Apply mathematical functions like sine, logarithm, etc.
Example:
python
b = np.array([1, 2, 3, 4]) print(a + b) # Output: [11 22 33 44]
This concise syntax is possible because NumPy performs element-wise operations—automatically!
1d arrays are perfect for:
Mathematical modeling
Simple signal processing
Handling feature vectors in ML
Their real power emerges when used in batch operations. Whether you’re summing elements, calculating means, or applying a function to every value, 1D arrays keep your code clean and blazing-fast.
2-Dimensional Arrays – Matrices and Their Applications
2D arrays are like grids—rows and columns of data. They’re also the foundation of matrix operations in NumPy in Python.
You can create a 2D array like this:
python
arr_2d = np.array([[1, 2, 3], [4, 5, 6]])
Here’s what it looks like:
lua
[[1 2 3] [4 5 6]]
Each inner list becomes a row. This structure is ideal for:
Representing tables or datasets
Performing matrix operations like dot products
Image processing (since images are just 2D arrays of pixels)
Some key operations:
python
arr_2d.shape # (2, 3) — 2 rows, 3 columns arr_2d[0][1] # 2 — first row, second column arr_2d.T # Transpose: swaps rows and columns
You can also use slicing just like with 1d arrays:
python
arr_2d[:, 1] # All rows, second column => [2, 5] arr_2d[1, :] # Second row => [4, 5, 6]
2D arrays are extremely useful in:
Data science (e.g., CSVS loaded into 2D arrays)
Linear algebra (matrices)
Financial modelling and more
They’re like a spreadsheet on steroids—flexible, fast, and powerful.
3-Dimensional Arrays – Multi-Axis Data Representation
Now let’s add another layer. 3d arrays are like stacks of 2D arrays. You can think of them as arrays of matrices.
Here’s how you define one:
python
arr_3d = np.array([ [[1, 2], [3, 4]], [[5, 6], [7, 8]] ])
This array has:
2 matrices
Each matrix has 2 rows and 2 columns
Visualized as:
lua
[ [[1, 2], [3, 4]],[[5, 6], [7, 8]] ]
Accessing data:
python
arr_3d[0, 1, 1] # Output: 4 — first matrix, second row, second column
Use cases for 3D arrays:
Image processing (RGB images: height × width × color channels)
Time series data (time steps × variables × features)
Neural networks (3D tensors as input to models)
Just like with 2D arrays, NumPy’s indexing and slicing methods make it easy to manipulate and extract data from 3D arrays.
And the best part? You can still apply mathematical operations and functions just like you would with 1D or 2D arrays. It’s all uniform and intuitive.
Higher Dimensional Arrays – Going Beyond 3D
Why stop at 3D? NumPy in Python supports N-dimensional arrays (also called tensors). These are perfect when dealing with highly structured datasets, especially in advanced applications like:
Deep learning (4D/5D tensors for batching)
Scientific simulations
Medical imaging (like 3D scans over time)
Creating a 4D array:
python
arr_4d = np.random.rand(2, 3, 4, 5)
This gives you:
2 batches
Each with 3 matrices
Each matrix has 4 rows and 5 columns
That’s a lot of data—but NumPy handles it effortlessly. You can:
Access any level with intuitive slicing
Apply functions across axes
Reshape as needed using .reshape()
Use arr.ndim to check how many dimensions you’re dealing with. Combine that with .shape, and you’ll always know your array’s layout.
Higher-dimensional arrays might seem intimidating, but NumPy in Python makes them manageable. Once you get used to 2D and 3D, scaling up becomes natural.
NumPy in Python Array Creation Techniques
Creating Arrays Using Python Lists
The simplest way to make a NumPy array is by converting a regular Python list:
python
a = np.array([1, 2, 3])
Or a list of lists for 2D arrays:
python
b = np.array([[1, 2], [3, 4]])
You can also specify the data type explicitly:
python
np.array([1, 2, 3], dtype=float)
This gives you a float array [1.0, 2.0, 3.0]. You can even convert mixed-type lists, but NumPy will automatically cast to the most general type to avoid data loss.
Pro Tip: Always use lists of equal lengths when creating 2D+ arrays. Otherwise, NumPy will make a 1D array of “objects,” which ruins performance and vectorization.
Array Creation with Built-in Functions (arange, linspace, zeros, ones, etc.)
NumPy comes with handy functions to quickly create arrays without writing out all the elements.
Here are the most useful ones:
np.arange(start, stop, step): Like range() but returns an array.
np.linspace(start, stop, num): Evenly spaced numbers between two values.
np.zeros(shape): Array filled with zeros.
np.ones(shape): Array filled with ones.
np.eye(N): Identity matrix.
These functions help you prototype, test, and create arrays faster. They also avoid manual errors and ensure your arrays are initialized correctly.
Random Array Generation with random Module
Need to simulate data? NumPy’s random module is your best friend.
python
np.random.rand(2, 3) # Uniform distribution np.random.randn(2, 3) # Normal distribution np.random.randint(0, 10, (2, 3)) # Random integers
You can also:
Shuffle arrays
Choose random elements
Set seeds for reproducibility (np.random.seed(42))
This is especially useful in:
Machine learning (generating datasets)
Monte Carlo simulations
Statistical experiments.
Reshaping, Flattening, and Transposing Arrays
Reshaping is one of NumPy’s most powerful features. It lets you reorganize the shape of an array without changing its data. This is critical when preparing data for machine learning models or mathematical operations.
Here’s how to reshape:
python
a = np.array([1, 2, 3, 4, 5, 6]) b = a.reshape(2, 3) # Now it's 2 rows and 3 columns
Reshaped arrays can be converted back using .flatten():
python
flat = b.flatten() # [1 2 3 4 5 6]
There’s also .ravel()—similar to .flatten() but returns a view if possible (faster and more memory-efficient).
Transposing is another vital transformation:
python
matrix = np.array([[1, 2], [3, 4]]) matrix.T # Output: # [[1 3] # [2 4]]
Transpose is especially useful in linear algebra, machine learning (swapping features with samples), and when matching shapes for operations like matrix multiplication.
Use .reshape(-1, 1) to convert arrays into columns, and .reshape(1, -1) to make them rows. This flexibility gives you total control over the structure of your data.
Array Slicing and Indexing Tricks
You can access parts of an array using slicing, which works similarly to Python lists but more powerful in NumPy in Python.
Basic slicing:
python
arr = np.array([10, 20, 30, 40, 50]) arr[1:4] # [20 30 40]
2D slicing:
python
mat = np.array([[1, 2, 3], [4, 5, 6], [7, 8, 9]]) mat[0:2, 1:] # Rows 0-1, columns 1-2 => [[2 3], [5 6]]
Advanced indexing includes:
Boolean indexing:
python
arr[arr > 30] # Elements greater than 30
Fancy indexing:
python
arr[[0, 2, 4]] # Elements at indices 0, 2, 4
Modifying values using slices:
python
arr[1:4] = 99 # Replace elements at indices 1 to 3
Slices return views, not copies. So if you modify a slice, the original array is affected—unless you use .copy().
These slicing tricks make data wrangling fast and efficient, letting you filter and extract patterns in seconds.
Broadcasting and Vectorized Operations
Broadcasting is what makes NumPy in Python shine. It allows operations on arrays of different shapes and sizes without writing explicit loops.
Let’s say you have a 1D array:
python
a = np.array([1, 2, 3])
And a scalar:
python
b = 10
You can just write:
python
c = a + b # [11, 12, 13]
That’s broadcasting in action. It also works for arrays with mismatched shapes as long as they are compatible:
python
a = np.array([[1], [2], [3]]) # Shape (3,1) b = np.array([4, 5, 6]) # Shape (3,)a + b
This adds each element to each element b, creating a full matrix.
Why is this useful?
It avoids for-loops, making your code cleaner and faster
It matches standard mathematical notation
It enables writing expressive one-liners
Vectorization uses broadcasting behind the scenes to perform operations efficiently:
python
a * b # Element-wise multiplication np.sqrt(a) # Square root of each element np.exp(a) # Exponential of each element
These tricks make NumPy in Python code shorter, faster, and far more readable.
Mathematical and Statistical Operations
NumPy offers a rich suite of math functions out of the box.
Basic math:
python
np.add(a, b) np.subtract(a, b) np.multiply(a, b) np.divide(a, b)
Aggregate functions:
python
np.sum(a) np.mean(a) np.std(a) np.var(a) np.min(a) np.max(a)
Axis-based operations:
python
arr_2d = np.array([[1, 2, 3], [4, 5, 6]]) np.sum(arr_2d, axis=0) # Sum columns: [5 7 9] np.sum(arr_2d, axis=1) # Sum rows: [6 15]
Linear algebra operations:
python
np.dot(a, b) # Dot product np.linalg.inv(mat) # Matrix inverse np.linalg.det(mat) # Determinant np.linalg.eig(mat) # Eigenvalues
Statistical functions:
python
np.percentile(a, 75) np.median(a) np.corrcoef(a, b)
Trigonometric operations:
python
np.sin(a) np.cos(a) np.tan(a)
These functions let you crunch numbers, analyze trends, and model complex systems in just a few lines.
NumPy in Python I/O – Saving and Loading Arrays
Data persistence is key. NumPy in Python lets you save and load arrays easily.
Saving arrays:
python
np.save('my_array.npy', a) # Saves in binary format
Loading arrays:
python
b = np.load('my_array.npy')
Saving multiple arrays:
python
np.savez('data.npz', a=a, b=b)
Loading multiple arrays:
python
data = np.load('data.npz') print(data['a']) # Access saved 'a' array
Text file operations:
python
np.savetxt('data.txt', a, delimiter=',') b = np.loadtxt('data.txt', delimiter=',')
Tips:
Use .npy or .npz formats for efficiency
Use .txt or .csv for interoperability
Always check array shapes after loading
These functions allow seamless transition between computations and storage, critical for real-world data workflows.
Masking, Filtering, and Boolean Indexing
NumPy in Python allows you to manipulate arrays with masks—a powerful way to filter and operate on elements that meet certain conditions.
Here’s how masking works:
python
arr = np.array([10, 20, 30, 40, 50]) mask = arr > 25
Now mask is a Boolean array:
graphql
[False False True True True]
You can use this mask to extract elements:
python
filtered = arr[mask] # [30 40 50]
Or do operations:
python
arr[mask] = 0 # Set all elements >25 to 0
Boolean indexing lets you do conditional replacements:
python
arr[arr < 20] = -1 # Replace all values <20
This technique is extremely useful in:
Cleaning data
Extracting subsets
Performing conditional math
It’s like SQL WHERE clauses but for arrays—and lightning-fast.
Sorting, Searching, and Counting Elements
Sorting arrays is straightforward:
python
arr = np.array([10, 5, 8, 2]) np.sort(arr) # [2 5 8 10]
If you want to know the index order:
python
np.argsort(arr) # [3 1 2 0]
Finding values:
python
np.where(arr > 5) # Indices of elements >5
Counting elements:
python
np.count_nonzero(arr > 5) # How many elements >5
You can also use np.unique() to find unique values and their counts:
python
np.unique(arr, return_counts=True)
Need to check if any or all elements meet a condition?
python
np.any(arr > 5) # True if any >5 np.all(arr > 5) # True if all >5
These operations are essential when analyzing and transforming datasets.
Copy vs View in NumPy in Python – Avoiding Pitfalls
Understanding the difference between a copy and a view can save you hours of debugging.
By default, NumPy tries to return views to save memory. But modifying a view also changes the original array.
Example of a view:
python
a = np.array([1, 2, 3]) b = a[1:] b[0] = 99 print(a) # [1 99 3] — original changed!
If you want a separate copy:
python
b = a[1:].copy()
Now b is independent.
How to check if two arrays share memory?
python
np.may_share_memory(a, b)
When working with large datasets, always ask yourself—is this a view or a copy? Misunderstanding this can lead to subtle bugs.
Useful NumPy Tips and Tricks
Let’s round up with some power-user tips:
Memory efficiency: Use dtype to optimize storage. For example, use np.int8 instead of the default int64 for small integers.
Chaining: Avoid chaining operations that create temporary arrays. Instead, use in-place ops like arr += 1.
Use .astype() For type conversion:
Suppress scientific notation:
Timing your code:
Broadcast tricks:
These make your code faster, cleaner, and more readable.
Integration with Other Libraries (Pandas, SciPy, Matplotlib)
NumPy plays well with others. Most scientific libraries in Python depend on it:
Pandas
Under the hood, pandas.DataFrame uses NumPy arrays.
You can extract or convert between the two seamlessly:
Matplotlib
Visualizations often start with NumPy arrays:
SciPy
Built on top of NumPy
Adds advanced functionality like optimization, integration, statistics, etc.
Together, these tools form the backbone of the Python data ecosystem.
Conclusion
NumPy is more than just a library—it’s the backbone of scientific computing in Python. Whether you’re a data analyst, machine learning engineer, or scientist, mastering NumPy gives you a massive edge.
Its power lies in its speed, simplicity, and flexibility:
Create arrays of any dimension
Perform operations in vectorized form
Slice, filter, and reshape data in milliseconds
Integrate easily with tools like Pandas, Matplotlib, and SciPy
Learning NumPy isn’t optional—it’s essential. And once you understand how to harness its features, the rest of the Python data stack falls into place like magic.
So fire up that Jupyter notebook, start experimenting, and make NumPy your new best friend.
FAQs
1. What’s the difference between a NumPy array and a Python list? A NumPy array is faster, uses less memory, supports vectorized operations, and requires all elements to be of the same type. Python lists are more flexible but slower for numerical computations.
2. Can I use NumPy for real-time applications? Yes! NumPy is incredibly fast and can be used in real-time data analysis pipelines, especially when combined with optimized libraries like Numba or Cython.
3. What’s the best way to install NumPy? Use pip or conda. For pip: pip install numpy, and for conda: conda install numpy.
4. How do I convert a Pandas DataFrame to a NumPy array? Just use .values or .to_numpy():
python
array = df.to_numpy()
5. Can NumPy handle missing values? Not directly like Pandas, but you can use np.nan and functions like np.isnan() and np.nanmean() to handle NaNs.
0 notes
Text
Mastering AI on Kubernetes: A Deep Dive into the Red Hat Certified Specialist in OpenShift AI
Artificial Intelligence (AI) is no longer a buzzword—it's a foundational technology across industries. From powering recommendation engines to enabling self-healing infrastructure, AI is changing the way we build and scale digital experiences. For professionals looking to validate their ability to run AI/ML workloads on Kubernetes, the Red Hat Certified Specialist in OpenShift AI certification is a game-changer.
What is the OpenShift AI Certification?
The Red Hat Certified Specialist in OpenShift AI certification (EX480) is designed for professionals who want to demonstrate their skills in deploying, managing, and scaling AI and machine learning (ML) workloads on Red Hat OpenShift AI (formerly OpenShift Data Science).
This hands-on exam tests real-world capabilities rather than rote memorization, making it ideal for data scientists, ML engineers, DevOps engineers, and platform administrators who want to bridge the gap between AI/ML and cloud-native operations.
Why This Certification Matters
In a world where ML models are only as useful as the infrastructure they run on, OpenShift AI offers a powerful platform for deploying and monitoring models in production. Here’s why this certification is valuable:
🔧 Infrastructure + AI: It merges the best of Kubernetes, containers, and MLOps.
📈 Enterprise-Ready: Red Hat is trusted by thousands of companies worldwide—OpenShift AI is production-grade.
💼 Career Boost: Certifications remain a proven way to stand out in a crowded job market.
🔐 Security and Governance: Demonstrates your understanding of secure, governed ML workflows.
Skills You’ll Gain
Preparing for the Red Hat OpenShift AI certification gives you hands-on expertise in areas like:
Deploying and managing OpenShift AI clusters
Using Jupyter notebooks and Python for model development
Managing GPU workloads
Integrating with Git repositories
Running pipelines for model training and deployment
Monitoring model performance with tools like Prometheus and Grafana
Understanding OpenShift concepts like pods, deployments, and persistent storage
Who Should Take the EX267 Exam?
This certification is ideal for:
Data Scientists who want to operationalize their models
ML Engineers working in hybrid cloud environments
DevOps Engineers bridging infrastructure and AI workflows
Platform Engineers supporting AI workloads at scale
Prerequisites: While there’s no formal prerequisite, it’s recommended you have:
A Red Hat Certified System Administrator (RHCSA) or equivalent knowledge
Basic Python and machine learning experience
Familiarity with OpenShift or Kubernetes
How to Prepare
Here’s a quick roadmap to help you prep for the exam:
Take the RHODS Training: Red Hat offers a course—Red Hat OpenShift AI (EX267)—which maps directly to the exam.
Set Up a Lab: Practice on OpenShift using Red Hat’s Developer Sandbox or install OpenShift locally.
Learn the Tools: Get comfortable with Jupyter, PyTorch, TensorFlow, Git, S2I builds, Tekton pipelines, and Prometheus.
Explore Real-World Use Cases: Try deploying a sample model and serving it via an API.
Mock Exams: Practice managing user permissions, setting up notebook servers, and tuning ML workflows under time constraints.
Final Thoughts
The Red Hat Certified Specialist in OpenShift AI certification is a strong endorsement of your ability to bring AI into the real world—securely, efficiently, and at scale. If you're serious about blending data science and DevOps, this credential is worth pursuing.
🎯 Whether you're a data scientist moving closer to DevOps, or a platform engineer supporting data teams, this certification puts you at the forefront of MLOps in enterprise environments.
Ready to certify your AI skills in the cloud-native era? Let OpenShift AI be your launchpad.
For more details www.hawkstack.com
0 notes
Text
Unleashing Data Science Potential with jups.io
Streamlined Collaboration for Teams
jups.io revolutionizes collaboration for data science teams by enabling real-time editing of Jupyter Notebooks, akin to Google Docs. This feature is invaluable for industries like crypto casino platforms, where data scientists analyze blockchain transactions or user behavior to optimize operations. Teams can debug code, visualize data, or document findings simultaneously, eliminating version control issues. This fosters faster iteration, making jups.io ideal for remote or distributed teams working on time-sensitive projects.
The platform’s cloud-based nature ensures accessibility from anywhere, empowering organizations to streamline workflows and accelerate insights, whether for gaming analytics or financial modeling in crypto-related applications.
Scalability and Flexibility
jups.io scales effortlessly, supporting solo researchers and large enterprises alike. For example, a No KYC casino platform leveraging data science to ensure user anonymity while analyzing trends can allocate additional computational resources for tasks like machine learning or big data processing. Users can tap into libraries like Pandas, TensorFlow, or Scikit-learn, and work in Python, R, or Julia, ensuring compatibility with existing workflows.
This flexibility makes jups.io a go-to solution for diverse projects, from predictive modeling in crypto gaming to compliance-free data analytics in No KYC environments, without hardware limitations.
Enhancing Reproducibility and Sharing
Reproducibility is critical in data science, and jups.io excels by preserving code, dependencies, and outputs in a shareable cloud environment. This is particularly useful for researchers in crypto casino analytics, where transparent methodologies can build trust. Sharing a notebook is as easy as generating a secure link, allowing stakeholders to view or interact with results without local setups.
For educators or consultants in No KYC casino ecosystems, jups.io simplifies teaching or presenting complex data workflows, enabling interactive learning or client demonstrations without installation hurdles.
Security and Reliability
Security is paramount, especially for sensitive data in crypto casino and No KYC casino applications. jups.io employs robust encryption and granular access controls, ensuring only authorized users can access or edit notebooks. This protects proprietary algorithms or user data in gaming platforms. Automatic backups and minimal downtime further enhance reliability, making jups.io a trusted choice for critical analyses or stakeholder presentations.
Why Choose jups.io?
jups.io is a powerhouse for data science, blending collaboration, scalability, and security. Whether you’re analyzing blockchain data for a crypto casino, developing anonymous analytics for a No KYC casino, or tackling unrelated challenges, jups.io empowers innovation. Its user-friendly interface and robust features make it accessible to beginners and experts alike.
As data-driven industries evolve, jups.io stands out as a versatile platform for collaboration and discovery. Visit jups.io today to unlock its potential for your next project.
0 notes
Text
Python for Beginners: A Complete Getting Started Guide
If you're searching for the best Python training in Hyderabad, you're already on the right path to mastering one of the most in-demand programming languages today. Python is known for its simplicity, readability, and versatility, making it perfect for beginners looking to step into the world of coding.
Why Learn Python?
Web development, data science, artificial intelligence, automation, and many other fields use Python. Its beginner-friendly syntax allows you to focus more on learning programming concepts rather than struggling with complex code. Whether you're a student, working professional, or someone looking to switch careers, Python can open doors to endless opportunities.
Setting Up Your Python Environment
Getting started with Python is simple. You can download the latest version from the official Python website and install it on your computer. Along with Python, it's helpful to install a code editor like VS Code or PyCharm for writing and running your scripts. Beginners can also explore online platforms like Replit or Jupyter Notebooks for hands-on practice.
First Steps in Python Programming
Become familiar with variables, data types, loops, and conditional statements. As you build confidence, move on to functions, file handling, and working with libraries like NumPy or Pandas. There are numerous online tutorials, exercises, and projects that can help you apply what you’ve learned and build real-world skills.
Conclusion
Python is a powerful language for beginners and continues to be a top choice among developers worldwide. If you’re serious about learning, enrolling in a structured course can accelerate your progress. For those seeking professional training, SSSIT Computer Education offers the best guidance, hands-on experience, and expert mentorship in Hyderabad to kickstart your Python journey.
0 notes
Text
How to Use an Online Python Compiler for Instant Coding
Online Python Compiler

Python is one of the most popular programming languages, known for its simplicity and versatility. However, setting up a local Python environment can sometimes be challenging, especially for beginners. This is where an online Python compiler comes in handy. It allows users to write, execute, and test Python code directly in a web browser without the need for installations or configurations. In this guide, we will explore how to use an online Python compiler effectively and the benefits of using a free online Python compiler for instant coding.
What is an Online Python Compiler?
An online Python compiler is a web-based tool that enables users to write and run Python code instantly. Unlike traditional offline compilers or Integrated Development Environments (IDEs), online compilers operate within a browser, eliminating the need for downloading and installing Python on a local machine.
Why Use an Online Python Compiler?
Using an online Python compiler offers several advantages:
No Installation Required – You don’t need to download or install Python or any additional libraries.
Access from Anywhere – Since it’s web-based, you can access and run your code from any device with an internet connection.
Beginner-Friendly – Ideal for students and beginners who want to practice Python without dealing with system setup issues.
Instant Execution – Write and run your code immediately without waiting for installations or configurations.
Supports Multiple Versions – Some online compilers allow you to choose different Python versions to test compatibility.
How to Use a Free Online Python Compiler
Using a free online Python compiler is simple and convenient. Follow these steps to get started:
1. Choose a Reliable Online Python Compiler
There are several free online Python compilers available, such as:
Replit
Google Colab
Jupyter Notebook (Online)
Ideone
Programiz
2. Open the Online Compiler
Visit the website of your chosen free online Python compiler and open the Python editor. Most compilers have a user-friendly interface with an input section for writing code and an output section for displaying results.
3. Write Your Python Code
Start by writing your Python script in the editor. For example:print("Hello, World!")
4. Run the Code
Click the “Run” or “Execute” button. The output will be displayed instantly on the screen.
5. Debug and Modify Your Code
If there are any errors, the compiler will highlight them. You can fix the issues and re-run the code immediately.
Conclusion
An online Python compiler is a powerful tool for instant coding, making Python programming accessible and efficient. Whether you are a beginner learning Python or a developer testing small scripts, using a free online Python compiler saves time and simplifies the coding process. Try one today and enjoy seamless Python coding anytime, anywhere!
0 notes
Text
🚀 Ready to Code in Python? Start with VS Code! 🐍
If you’re learning Python or want a smooth coding experience, Visual Studio Code (VS Code) is your best friend! With powerful extensions, debugging tools, and an easy setup, you’ll be writing and running Python code in no time.
✅ Quick setup & installation ✅ Intelligent code suggestions ✅ Built-in debugging tools ✅ Seamless Jupyter Notebook support
Get started today with this step-by-step Python quick start guide: 🔗 Check it out here
0 notes
Text
Become Certified in Data Analytics using Python with Advanto's Professional Course

The Importance of Python Data Analytics Certification
In today's technologically advanced world, businesses depend upon data analytics to make informed decisions. Given that Python has emerged as the most widely used language for data analysis, individuals who hold a Python Data Analytics certification have an advantage in the job market. Advanto's Professional Data Analytics using Python Course aims to help you develop industry-relevant skills and establish yourself as a recognized authority in Python-based analytics.
About the Data Analytics using Python Certification Course Offered by Advanto
The Python Data Analytics course offered by Advanto is an extensive training institute that covers everything from the basics of Python programming to sophisticated data analysis methods. The course is designed to give students the practical knowledge they need to work on analytics projects in the real world.
Key Features of the Course
• Industry-Relevant Curriculum: To meet the demands of the modern market, industry specialists created the course.
• Hands-on Learning: Real-world case studies and practical projects guarantee in-depth comprehension.
• Expert Trainers: Gain knowledge from seasoned experts with extensive exposure to the sector.
• Credential: Obtain an acknowledged credential that improves employment opportunities.
• Job Assistance: 100% Committed career guidance to help you obtain the analytics position of your dreams.
Who Should Enroll in This Course?
This course is ideal for:
The course serves Data Analysts who plan to develop their careers in analytics.
Those working as Business Analysts who want improved technical proficiency.
Software Developers who seek employment as data scientists.
Students at beginner level combined with freshers who want to build industry-level competencies.
Course Modules and Syllabus
Introduction to Python for Data Analytics
Overview of Python programming
The installation of Python requires users to set up Jupyter Notebook.
The students will learn Python fundamentals consisting of variables alongside data types together with looping constructs and functional programming.
Data Handling with Pandas and NumPy
Introduction to NumPy for numerical computing
Data manipulation within Pandas works through its interface.
Technical approaches for handling missing data together with methods for data cleaning
Data Visualization with Matplotlib and Seaborn
Creating plots using Matplotlib
Advanced visualization techniques with Seaborn
Customizing graphs for professional reports
Exploratory Data Analysis (EDA)
Understanding data distributions
Detecting outliers and anomalies
Statistical summary of datasets
Data Pre-processing and Feature Engineering
The approach to managing variables with missing entries alongside techniques for dealing with categories in the dataset
Data scaling and transformation techniques
Feature selection and dimensionality reduction
Machine Learning Fundamentals
Supervised and unsupervised learning serves as an introduction to this section.
Implementing regression and classification models
Understanding model evaluation metrics
Real-World Projects and Case Studies
Working with real datasets
The application of analytics tools helps resolve managerial issues in the field of business
The completion of an entire data analytics project from start to finish includes all its implementations.
Why Choose Advanto for Python Data Analytics Certification?
1. Practical Approach
Advanto’s course is not just about theoretical concepts; it emphasizes hands-on learning with real-world datasets and practical exercises to ensure in-depth understanding.
2. Expert-Led Training
With years of expertise in data analytics and machine learning, the instructors are experts in the field who can provide knowledge about actual business situations.
3. Recognized Certification
Students who have done the course are awarded a certification, which boosts their resume and opens up more career options for the job.
4. Career Support & Job Assistance
Advanto gives complete career support with tools that help learners construct resumes and prepare for interviews while finding suitable top-level data analytics positions.
Career Opportunities after Certification
Python Data Analytics certification allows candidates to transform their career prospects by connecting them to open roles across finance and healthcare as well as e-commerce establishments. The field contains different roles that attract many candidates.
Data Analyst
Business Intelligence Analyst
Data Engineer
Machine Learning Engineer
Data Scientist
Success Stories from Our Learners
Thousands of learners have completed the Python Data Analytics course from Advanto and have landed high-paying jobs in top companies. Our alumni have gone on to work with global tech giants and startups, making significant contributions in the field of data analytics.
How to Enroll in the Advanto software Python data analytics Course?
Step 1: Register Online
Visit our official website and fill out the registration form.
Step 2: Choose Your Batch
Select from multiple batch options, including weekday and weekend classes.
Step 3: Start Learning
Attend live sessions, access study materials, and work on real-world projects.
Conclusion:
Getting a Python Data Analytics certificate from Advanto allows you to speed up your career development as the industry demand for Python data analysts continues to grow. This data analytics course stands as the best selection for breaking into data analytics since it provides students with organized education paired with practical learning under expert supervision.
#advanto software#data analytics using python#best data analytics#best classes for python data analytics#advanto paython classes with data analytics
0 notes
Text
Integrating Python and SAS: A Powerful Combination for Data Science
The demand for data-driven decision-making is growing rapidly, and professionals need the best tools to analyze, visualize, and process data efficiently. SAS (Statistical Analysis System) has long been a leader in statistical analysis and business intelligence, offering robust capabilities for structured data processing. On the other hand, Python has become the go-to programming language for data science, machine learning, and AI applications due to its flexibility and extensive libraries.
By integrating SAS and Python, businesses can leverage the best of both worlds, combining SAS’s structured analytical power with Python’s data science capabilities. This integration is transforming industries by enabling deeper insights, automation, and enhanced decision-making. Whether you're a data analyst, scientist, or business leader, understanding how to connect these two powerful platforms can open up new opportunities for innovation and efficiency.
Why Integrate Python with SAS?
Python and SAS offer distinct advantages that, when combined, create a powerful analytics ecosystem.
Key Advantages of SAS
Structured Data Processing: SAS provides a highly efficient environment for handling large datasets, ensuring structured data processing with reliability and accuracy.
Statistical Modeling: SAS includes advanced statistical analysis tools that are widely used in industries like finance, healthcare, and government analytics.
Enterprise-Grade Security: SAS is known for its robust security features, making it a preferred choice for organizations dealing with sensitive data.
Key Advantages of Python
Flexibility & Open-Source Ecosystem: Python’s extensive libraries like Pandas, NumPy, TensorFlow, and Scikit-learn make it a versatile choice for data science and AI applications.
Advanced Machine Learning Capabilities: Python excels in deep learning, natural language processing (NLP), and predictive analytics.
Visualization & Reporting: Libraries like Matplotlib and Seaborn allow users to create interactive and insightful visual reports.
How Integration Enhances Data Science
By combining the strengths of SAS and Python, businesses can:
Automate Workflows: Use Python scripts to preprocess data, then run statistical models in SAS.
Enhance Analytics Capabilities: Integrate machine learning algorithms in Python with SAS’s statistical tools for deeper insights.
Optimize Decision-Making: Leverage both structured SAS data and unstructured data sources processed through Python for a holistic analytical approach.
For professionals looking to master this integration, SAS Programming Tutorial resources provide step-by-step guidance on leveraging Python with SAS efficiently.
How Python and SAS Work Together
There are several ways to integrate SAS and Python, depending on business needs and technical requirements.
1. SASPy – Python Library for SAS
SASPy is an open-source Python package that allows users to connect to SAS and run SAS code within Python scripts. It bridges the gap between the two platforms by enabling:
Direct execution of SAS commands within Python.
Import and manipulation of SAS datasets in Python environments.
Seamless interaction between SAS procedures and Python functions.
This method is ideal for data scientists who prefer coding in Python but still want to leverage SAS’s structured analytics capabilities.
2. Jupyter Notebook with SAS Kernel
Jupyter Notebook is a widely used tool in the data science community. By installing the SAS Kernel, users can:
Write and execute SAS code directly in Jupyter.
Combine Python and SAS scripts within the same document.
Create interactive data visualizations using Python’s powerful plotting libraries.
This integration is particularly useful for researchers and analysts who require a collaborative, interactive environment for data exploration and reporting.
3. Using REST APIs for SAS Viya
SAS Viya is a cloud-based analytics platform that supports REST APIs, allowing Python applications to communicate with SAS. Businesses can:
Access SAS functions from Python-based dashboards or applications.
Deploy machine learning models built in Python within SAS environments.
Scale big data analytics using cloud-based infrastructure.
This approach is highly beneficial for organizations that require scalable and automated data processing capabilities.
Key Benefits of SAS and Python Integration
By integrating SAS and Python, businesses unlock several advantages:
Enhanced Flexibility
Python’s open-source nature allows for customization and scalability, complementing SAS’s structured analytics.
Advanced Data Processing
Python’s data science libraries enhance SAS’s data handling capabilities, allowing for more complex and faster analysis.
Improved Visualization
Python’s Matplotlib, Seaborn, and Plotly enable richer, interactive reports compared to SAS’s traditional visualization tools.
Powerful Machine Learning
Python’s TensorFlow and Scikit-learn support AI and deep learning, which can be integrated into SAS analytics workflows.
Use Cases of Python and SAS Integration
Many industries benefit from combining SAS and Python for data analytics and decision-making.
1. Healthcare Analytics
Python processes electronic health records (EHRs), while SAS builds predictive models to forecast disease outbreaks.
AI-powered analysis in Python detects patterns in patient data, allowing for early diagnosis and treatment planning.
2. Financial Fraud Detection
Python’s machine learning models analyze transaction patterns for anomalies.
SAS ensures compliance with regulatory standards while improving fraud detection accuracy.
3. Retail Customer Insights
Python clusters customer data for segmentation and personalized marketing.
SAS refines sales strategies based on customer analytics, optimizing demand forecasting.
These real-world applications highlight how Python and SAS together create smarter, data-driven solutions.
Challenges and Best Practices
Despite its advantages, integrating Python with SAS comes with challenges that businesses must address:
1. Version Compatibility
Ensure Python libraries support SAS environments to avoid compatibility issues.
Regularly update SAS and Python packages for smoother integration.
2. Performance Optimization
Use cloud-based SAS Viya for processing large datasets efficiently.
Optimize Python scripts to reduce execution time within SAS environments.
3. Security Concerns
Implement authentication and encryption when transferring data between SAS and Python.
Follow data governance policies to maintain compliance with industry regulations.
Organizations can overcome these challenges by following structured learning paths, such as SAS Tutorial Online, to build expertise in both platforms.
Future of Python and SAS Collaboration
The future of data analytics lies in hybrid approaches that blend different technologies. As AI, big data, and cloud computing continue to evolve, the demand for Python and SAS integration will grow. Businesses that embrace this collaboration will lead in innovation, leveraging real-time analytics, predictive modeling, and automation for better decision-making.
By mastering SAS and Python together, data professionals can build cutting-edge solutions that drive efficiency and business success.
#sas tutorial#sas programming tutorial#python#sas tutorial online#sas and python#sas tutorial for beginners
0 notes
Text
How To Build A Full Stack Application Using Python
For Quick Enquiry: Click Here

Introduction: Building Full-Stack Applications With Python Is Both Thrilling And Rewarding
In today’s tech-driven world, full-stack development is like being the ultimate all-rounder in cricket—you’re a coder who can bowl, bat, and keep the score! Python has become the go-to language for building full-stack applications because of its versatility, simplicity, and robust libraries. Whether you’re a student fresh out of college or a working professional looking for a career switch, mastering full-stack development using Python is an excellent decision. But here's the catch—how do you get started?
For those of you in India, the quest to learn Python might have already taken you on a hunt for the best resources. If you're Googling phrases like "Python Coaching Center Near Me," you’re not alone. Many aspiring developers like you are eager to dive into the world of full-stack development, armed with Python. It’s not just about coding; it’s about learning how to think like a problem solver. And yes, it can be a bit like solving a Rubik’s cube while riding a rollercoaster—fun and nerve-wracking at the same time!
In this blog, we’ll walk you through the first steps of building a full-stack application using Python. Think of it as your beginner’s guide, with a sprinkle of humor and plenty of practical advice. So buckle up and get ready to turn your coding dreams into reality!
Set Up Your Development Environment With The Right Tools
Discover how to set up your development environment efficiently with the right tools. Learn to streamline workflows, enhance productivity, and simplify coding processes. This guide ensures you have everything needed to build and innovate seamlessly, whether you're a beginner or an experienced developer.
1. Choose The Best Python Version For Your Full-Stack Project
First things first—you need the right version of Python. Selecting a Python version is like choosing the perfect spice level for your favorite curry: too mild, and it’s boring; too spicy, and you might regret it later. As of 2025, Python 3.x is the industry standard, so make sure you install the latest version. It comes with all the features you need to build modern applications without compatibility issues.
Installing Python is straightforward. Visit Python’s official website, download the latest version for your operating system, and follow the on-screen instructions. If you're attending a Python Coaching Center Near Me, they’ll likely help you get this part right, saving you the trouble of debugging installation errors.
Once Python is installed, don’t forget to set up pip, Python’s package manager. It’s like your magic wand for installing libraries. Without it, you’ll be stuck manually copying and pasting code, which is about as fun as watching paint dry!
2. Select The Perfect Ide To Write Clean And Readable Code
An Integrated Development Environment (IDE) is your coding sanctuary. Think of it as your workspace, where all the magic happens. Popular IDEs for Python include PyCharm, VS Code, and Jupyter Notebook. Each comes with its own perks. PyCharm, for instance, offers excellent debugging tools, while VS Code is lightweight and customizable.
When choosing your IDE, consider what feels comfortable. Are you someone who prefers a minimalist interface or an all-in-one powerhouse? If you're unsure, consulting mentors or peers from a Python Coaching Center Near Me can be incredibly helpful. Remember, a good IDE will save you hours of frustration down the road.
Setting up your IDE correctly is crucial. Enable syntax highlighting, install relevant extensions for Python, and configure virtual environments. It’s the coding equivalent of sharpening your tools before carving a masterpiece!
3. Create A Virtual Environment To Avoid Dependency Conflicts
Picture this: you’re building an app, and halfway through, you discover that two of your libraries are fighting like siblings over the last piece of cake. Enter virtual environments, the superhero that ensures peaceful coexistence between libraries.
Creating a virtual environment in Python is simple. Use Venv or virtualenv to isolate dependencies for your project. For example, if you’re working on an e-commerce app, all its dependencies will live in a neat little bubble, untouched by other projects.
Virtual environments are particularly useful for beginners learning at Python Classes Near Me because they keep things organized and prevent common errors. Plus, they make transitioning between projects a breeze. Just activate the environment, install the required packages, and you’re good to go.
Plan And Create Your Project’s Backend Architecture
Learn how to plan and create your project’s backend architecture effectively with structured steps and best practices. Master database design, API development, and server management to build scalable, efficient systems. Enhance your backend development skills and turn project concepts into robust, functional realities.

1. Define The Structure Of Your Database For Smooth Operations
A solid backend starts with a well-structured database. It’s like building a strong foundation for a house; if it’s shaky, everything else will crumble. Decide whether you need a relational database like PostgreSQL or a NoSQL database like MongoDB. For most Python full-stack projects, PostgreSQL is a safe choice because it integrates seamlessly with frameworks like Django and Flask.
Once you’ve chosen your database, map out your data models. Think about what entities your application will use—users, products, orders—and define relationships between them. This planning stage might feel tedious, but trust me, it’s worth it.
If you're learning from Python Classes Near Me, chances are they’ll guide you through tools like ERD (Entity-Relationship Diagram) to visualize your database structure. It’s like sketching a blueprint before building a skyscraper—essential and non-negotiable!
2. Set Up Your Backend Framework To Simplify Coding Tasks
Frameworks are the secret sauce of Python full-stack development. Django and Flask are the two heavyweights in this category. Django is like the Swiss Army knife of frameworks—it has everything you need, from authentication to database management. Flask, on the other hand, is lightweight and gives you more flexibility.
Choosing the right framework depends on your project’s complexity. If you’re building a large-scale application, Django’s built-in features will save you tons of time. For smaller projects or custom requirements, Flask is your best bet.
Attending Python Classes Near Me can help you understand the nuances of these frameworks better. They’ll likely have practical exercises to show you how to set up routes, handle HTTP requests, and manage sessions—all critical for backend development.
3. Integrate Apis To Make Your Application Dynamic And Interactive
APIs (Application Programming Interfaces) are like the connectors that bring your app to life. Whether it’s pulling weather data or enabling payment gateways, APIs are a must-have for dynamic applications. Start by integrating simple APIs to fetch or send data between your frontend and backend.
Learning how to work with APIs might seem intimidating at first, but once you get the hang of it, it’s oddly satisfying. Imagine seeing real-time weather updates or livestock prices on your app—that’s the power of APIs!
For those learning at a Python Training Institute in Noida, API integration is often covered in detail. They’ll teach you how to make GET and POST requests, handle JSON responses, and even create your own APIs using frameworks like Django Rest Framework.
Conclusion: Your Full-Stack Journey Begins Here
Building a full-stack application using Python is more than just writing code; it’s about bringing your ideas to life. You’ve taken the first steps by understanding the importance of setting up a proper development environment and planning a robust backend architecture. These foundational steps pave the way for smoother development and fewer sleepless nights debugging errors. Remember, the journey to mastering full-stack development is a marathon, not a sprint. Each step, no matter how small, brings you closer to becoming a skilled developer.
If you’re serious about excelling in this field, never underestimate the value of structured learning. Whether it’s diving into tutorials, exploring documentation, or enrolling in a Python Training Institute in Noida, every bit of knowledge adds to your skillset. These coaching centers not only teach coding but also help you understand real-world applications, making the transition from learner to professional seamless. Plus, let’s not forget the community support you’ll gain—collaborating with peers and mentors can be the game-changer in your journey.
One of the most rewarding aspects of building a full-stack application is seeing it in action. Imagine logging in to a platform you created, where the frontend communicates flawlessly with the backend. That’s the kind of satisfaction that keeps developers hooked. And as you refine your skills, you’ll soon be able to tackle even more complex projects. Just remember, mistakes are part of the process—they’re your best teachers. Embrace them, learn from them, and keep moving forward.
Finally, the world of technology is ever-evolving, and staying updated is essential. Python’s vast ecosystem of libraries and frameworks is constantly growing, making it one of the most exciting languages to work with. Keep exploring, experimenting, and pushing the boundaries of what you can create. And if you ever feel stuck, don’t forget that the resources, including a trusted Python Training Institute in Noida, are always there to guide you. So go ahead—dream big, code smart, and build applications that make a difference!
Also Read This:-
How to Build a Full Stack Application Using Python?
#kvch#Python#FullStackDeveloper#WebDevelopment#Programming#Developer#OnlineCourse#PythonFullStack#PythonCourse#FullStackPython#PythonWebDevelopment#FrontendDevelopment#BackendDevelopment
0 notes
Text
Google Colab vs. Google Data Studio: A Comprehensive Comparison
Google provides a suite of tools to address the diverse needs of data analysis, collaboration, and visualization. Among these, Google Colab (Google Colab) and Google Data Studio (datastudio.google.com) are two standout platforms. While both are robust, they cater to different functionalities and audiences. This article compares their unique features and use cases to help you determine which tool best suits your needs.

1. Purpose and Features
Google Colab
Purpose: Google Colab is a cloud-based coding platform for Python programming, primarily used for data analysis, machine learning, and computational tasks. It is akin to an online Jupyter Notebook.
Features:Write and execute Python code interactively.Pre-installed libraries like TensorFlow, NumPy, and Pandas.Access to GPUs and TPUs for high-performance computation.Real-time collaboration on shared notebooks.
Ideal For:Building and testing machine learning models.Exploring large datasets programmatically.Teaching and learning Python-based data science.
Like That:
FREE Instagram Private Profile Viewer Without Following
Private Instagram Viewer
This Is Link Style
https://colab.research.google.com/drive/1jL_ythMr1Ejk2c3pyvlno1EO1BBOtK_Z
https://colab.research.google.com/drive/1e9AxOP_ELN4SYSLhJW8b8KXFcM5-CavY
Google Data Studio
Purpose: Google Data Studio is a business intelligence tool that turns raw data into dynamic, visually appealing dashboards and reports.
Features:Seamlessly integrate with data sources such as Google Analytics, BigQuery, and Sheets.Create interactive, customizable reports and dashboards.Enable real-time updates for shared insights.
Ideal For:Visualizing marketing and business performance data.Crafting presentations for decision-making.Tracking KPIs and performance metrics efficiently.
Like That:
Free Instagram private account viewer
How to see private Instagram profiles
Private Instagram Viewer Apps
Recover hacked Instagram account
Recover hacked Snapchat account
Use Cases:
https://datastudio.google.com/embed/s/hqgxnNMpaBA
https://datastudio.google.com/embed/s/g8oLu_-1sNQ
2. Target Users
Google Colab
Targeted at data scientists, researchers, and developers proficient in Python.
Requires programming expertise for tasks such as algorithm development and data modeling.
Google Data Studio
Designed for business analysts, marketers, and decision-makers without coding knowledge.
Simplifies data interpretation through easy-to-use visual tools.
3. Data Access and Processing
Google Colab
Allows direct data manipulation using Python scripts.
Supports integrations with Google Drive, APIs, databases, and other sources.
Offers unparalleled flexibility for custom computations and workflows.
Google Data Studio
Focused on visualizing structured data from external sources like SQL databases or CSV files.
Limited in data transformation capabilities compared to coding tools like Colab.
4. Collaboration Capabilities
Google Colab
Enables simultaneous editing and execution of code in a shared notebook environment.
Perfect for team projects involving programming and analysis.
Google Data Studio
Supports collaborative creation and sharing of dashboards and reports.
Real-time updates ensure everyone is on the same page.
5. Performance and Scalability
Google Colab
Free tier provides basic compute resources, including limited GPU and TPU access.
Colab Pro plans offer enhanced runtimes and resource allocation for intensive tasks.
Google Data Studio
Scales efficiently for real-time data visualization.
Performance depends on the complexity of the report and connected data sources.
6. Cost and Accessibility
Google Colab
Free tier includes essential features for most users.
Paid Pro plans add advanced compute options for heavy workloads.
Google Data Studio
Free to use for creating reports and dashboards.
Some integrations, like BigQuery, may incur additional costs based on usage.
Google Colab vs. Google Data Studio: Understanding Their Differences
Understanding the Key Differences Between Google Colab and Google Data Studio
Conclusion
Both Google Colab and Google Data Studio are invaluable tools, but they serve different purposes. Google Colab is tailored for programmers and data scientists needing a flexible coding environment for analysis and machine learning. Conversely, Google Data Studio excels in creating visually engaging reports for business insights. Depending on your workflow, you might find value in using both—leveraging Colab for data preparation and analysis, and Data Studio for presenting insights to stakeholders.
0 notes