#lightroom-action
Explore tagged Tumblr posts
Visit Tumblr Blog
Explore Tumblr blogs with no restrictions, modern design and the best experience.
Last Seen Tumblr Blogs


Fun Fact
Tumblr is available in 18 languages.
Text

TUT♥︎RIAL DE PSD R☺︎SA E ✰ZUL
Olá! Finalmente o tutorial de psd azul e rosa saiu!! Não sou especialista em psd rosa, mas dei meu melhor, espero que consigam entender.
Primeiramente, faremos a base azul e a iluminação.
Depois vamos para a cor seletiva, mexer nas cores amarelo e vermelho.
Amarelo:
ao aumentar o ciano, deixaremos o tom um pouco mais escuro
no magenta, deixaremos o tom mais avermelhado
e diminuindo o amarelo, vamos quebrar o laranja do psd
Vermelho:
adicionando mais do ciano, escurecemos mais ainda o tom
o magenta vai novamente deixar o psd com um tom mais rosado/avermelhado
diminuir o amarelo novamente, vai deixar o psd menos alaranjado


Na matriz/saturação vamos mexer nas cores amarelo e magenta.
Amarelo: só tirar um pouco pra ficar um pouquinho mais rosa (não vi diferença nenhuma fazendo isso, mas fiz do mesmo jeito!)
Magenta: tirar a saturação total e aumentar a iluminação, para acabar com quaisquer resquício de magenta.


EXTRA: Equilíbrio de Cores
Essa camada é só pra dar uma quebrada em tanta vermelhidão, aconselho vocês a fazerem ela entre a camada base.


RESULTADO:


Não copie minhas camadas se for postar o psd, você pode copiar apenas se for para uso próprio!
#♡₊⊹〫fruitail ˚🦖 <𝟹₊∗#🤘🥦 .. tutorials !#tutorial#psd tutorial#psd#psd coloring#action#action photopea#lightroom#psd rosa#soft psd#photopea psd#psd pink
9 notes
·
View notes
Text
Some random but suspiciously familiar doors on one of the central streets of Berlin

Captured by @morerichka
#photo#photoshoot#photography#my photos#photoshop#photographers on tumblr#female photographers#photooftheday#women photographers#unknown photographer#original photographers#spanish photographers#berlin#street style#street art#street photography#streetstyle#street photografie#streetphoto color#street photo club#street photoshoot#photo shoot#point and shoot#lightroom#light photography#lights camera action#light sculpture#lights#angel numbers#doors
8 notes
·
View notes
Text

Become Ungovernable 📍 Montreal
#photography#streetphotography#montreal#sonyalpha#lightroom#photographer#photo#photooftheday#urban photography#tumblr#canada#climate crisis#earth#climate action
3 notes
·
View notes
Text
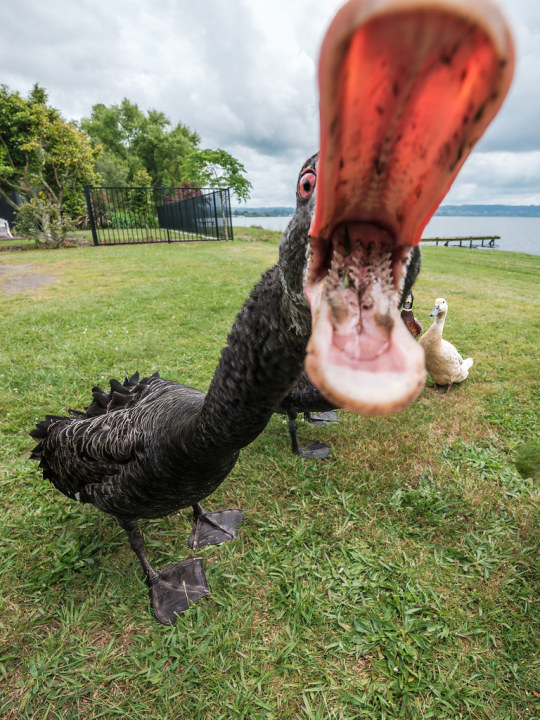
#IFTTT#Flickr#fujifilm#fujixsecrets#xpertcorner#xt3#xf816mmf28rlmwr#raw#adobe#lightroom#newzealand#animal#swan#schwan#tier#weitwinkel#action
8 notes
·
View notes
Text
Transform Your Photos with Lightroom Presets from RGBSpot.com
Enhance your photos effortlessly with Lightroom presets from RGBSpot.com. Our expertly crafted presets are designed to give your images a professional-quality finish with just a few clicks. Whether you're a pro or a beginner, our presets help you achieve stunning results quickly and easily.
Our collection includes a variety of styles, from vibrant color boosts and dramatic lighting effects to vintage filters and sleek modern looks. Each preset is user-friendly and fully customizable, allowing you to fine-tune your edits to match your vision.
Explore RGBSpot.com's Lightroom presets today and take your photography to the next level. Let us help you create beautiful, eye-catching photos that stand out.
0 notes
Text
Photo retouching services
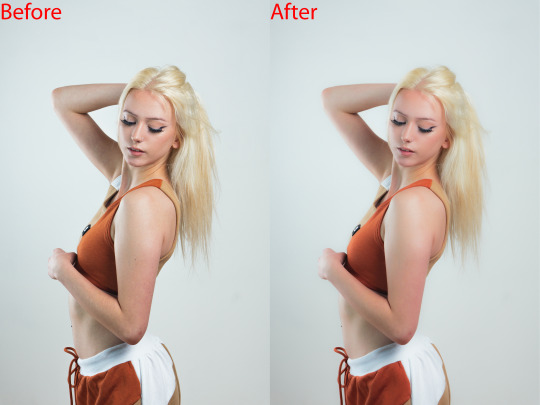
Photo retouching services are offered by many companies and freelancers, and they involve editing digital images to improve their appearance or fix any flaws. These services can range from basic adjustments like color correction and exposure balancing to more advanced techniques such as removing blemishes, reshaping the body, or even adding or removing objects from the image. That's correct! Photo retouching services encompass a wide range of editing techniques to enhance the visual appeal of digital images. These services are commonly used in various industries, including fashion, advertising, e-commerce, and photography. Basic adjustments typically involve correcting exposure, color balance, contrast, and sharpness to improve the overall appearance of the image. More advanced techniques may include skin retouching to remove blemishes, wrinkles, or scars, as well as body reshaping to slim or enhance body contours. Other advanced retouching services may include background removal, adding or removing objects or people from the image, and composite image creation. These services are often used to create visually stunning images for advertising, marketing campaigns, or personal projects. It's important to note that photo retouching services should be done with care and attention to detail to maintain the integrity of the original image while enhancing its visual appeal.
#affinity photo high end retouching#skin smoothing capture one#skin retouching and color grading in photoshop#pixelmator pro skin retouching#face retouching in photoshop cc plugins#one click skin retouching free photoshop action#affinity photo face retouch#capture one skin smoothing#capture one portrait retouching#capture one pro skin retouching#capture one skin retouching#capture one face retouching#masking photo editing lightroom#masking in adobe camera raw#skin smoothing plugin photoshop#skin retouching camera raw#skin retouching capture one#skin retouching and photo masking service
1 note
·
View note
Text
instagram
#hiyatoys#godzilla#godzilla vs kong#ゴジラ#heatray#import#toy photography#photography#burning godzilla#adobe#lightroom#photoshop#bbts#outdoor#action figure#toy#hobby#collection#godzilla king of the monsters#Instagram
1 note
·
View note
Note
queen of ai art <3


I genuinely have no idea what the fuck is in the tap water right now considering these all came in the last ten days from what I suppose are different people considering I blocked the first two… either that or it is one very persistent person or the collective actions of what I assume is probably the world’s most depressing groupchat. Incest anon, come back, I miss you on hindsight.
I don't normally answer mean-spirited questions but these pissed me off recently because of the nature of the accusations. So, let’s get into a long, illustrated lesson including a WIP gallery as to why you shouldn’t rely on “gotcha” AI logic and/or be a little twat, with tips on manual digital scaling, presented in classic Balls style.
Now, the vast majority of my art is traditional, many are quick ‘challenge’ sketches—they are drawn or painted on paper. With many of them, there are progress shots. Sometimes multiple, including fucking gemwork. Sometimes I do silly sketches. I have also been quite open that I’m really focusing on exploring varying styles of portraiture at the moment after an artistic background in watercolour landscapes. A number of you follow my traditional art blog where said landscapes were posted, and you know they’re banging.
Now, I’ve posted *checks notes* like five digital pieces last year from the time I owned a tablet (after which all my work has been trad due to being indefinitely parted from said tablet), and none of them are what you’d call professional quality, considering most of my work is traditional/realist and I am still not very good at stylised or digital drawing. I’ll choose my “best”/most detailed one for the purposes of this impromptu demonstration using the files I do have on me at the moment.
Due to my background in traditional art 👆🏻I always and without fail do my initial sketching by hand, because I find it difficult to get perspective and proportions correct digitally, because I learnt various pencil angling tricks etc… so anything I have drawn digitally that includes people/buildings, I’d do a sketch on paper and scan it, and do the lineart from there.
Here is the sketch, the sketch cleaned up into lineart, shaded values, and a portion of the colour-blocking stage, where I checked to make sure the major colours don’t clash at the borders, thanks to Thingol’s bright orange outfit from hell.

I assume what has been done here is that you or whatever program you’re using has picked up on the below little noisy bits, threads and spirals and decided they’re AI. Let me introduce you to the magic of textural overlays, aka texture stamps/brushes, which I get so impatient with that it becomes quite obvious they’re on there… which works in my favour right now lmao.
Here is me sliding the opacity on and off sections, so you can see what exactly is going on (pillar with marbled effect, thingol skin texture, elrond jacket texture, elrond's remarkable forehead, and the marbled archway):


These aren’t overlaid by my mystery robot sex toy, they are done by hand and there’s around 20-30 different ones in any given piece, some of them (eg skin texture or leaves) are repeated 10-15 times. Using texture brushes or stamps is not a cardinal sin, they are literally sold on this website by the artists who make them. Here is a clip of me just selecting them all in one go, if you’d like that proven for your face eyes as well.
I have no excuses for overblending my colours or leaving sections choppy, I’m just lazy to do painterly detail on stylised digital pieces, and usually just stop after a couple rounds of blending. But if laziness was a crime then most nation-states in this world would not have a functioning government.
Now, the final two stages—because the base for these images are usually scans or photos of my sketches and thus not exactly at the best of resolutions, I upscale in Lightroom. Amusingly, image upscaling is actually normally done by AI either built into Photoshop or plugins—this isn’t exactly generative AI, it’s more an algorithm that breaks down your existing photo and “reconstructs” it at a higher resolution. Hence, many upscaled images are flagged as AI regardless of the manner of upscaling.
I am too stingy to purchase Photoshop, the above plugins can/do use your art to train generative AI even if it doesn’t use it for your image, and I have Lightroom Classic already—upscaling is relatively easy to do here and does not train AI. Here’s a walkthrough:
Open Image > Denoise > Play with Slider > Save as TIFF > Open TIFF > Develop Module > Enhance > Save DNG. Then, work on DNG image re: adding noise/brightness/contrast whatever.
Just a note that the ‘Super Resolution’ feature does actually use (algorithmic, not generative) AI so don’t click on that, just do the normal Enhance. This will increase your image size and resolution without sacrificing detail. However, the file itself would be fucking enormous by this point so you can either compress it yourself or use Canva or whatever.
If you don’t mean those and instead mean these fucking things, jesus fucking christ they’re free graphic design templates with free Illustrator vectors, get a fucking grip, ten days in a charity comms job and you can make these in your sleep while moving the mouse with your pussy.
Here is a collage of some of my other digital works at various stages as well, including pencil/pen sketches, to help you sleep at night:

Please remember that I stopped posting digital art except one charcoal+digital work after I was parted from my tablet in December. If I was really iBalls, I would have continued churning them out surely 😇
Writing
I am not going to even take this seriously because there is clearly no way to explain the concept of writing something in advance to people who clearly type out and immediately send every half-dusted thought the moment it farts itself into their brain.
However, if you are actually sitting in your home in the year 2025, when there is almost definitely litter in your neighbourhood that needs picking and dogs on the Rover app that go unwalked, feeding my fucking writing into whatever fucking AI detector you have that is, in turn, training whatever fucking AI generator it is linked to, simply because of whatever robot you have created in your brain that somehow knows very niche facts about the lifestyle, dialect, speech patterns, culture and politics of a frankly irrelevant town in 1970s Kerala, I genuinely do not wish you a single moment of joy in your life
I have already or will soon be privating some of my artwork considering there are people cheerfully sat there feeding my work to Musk’s field of cows in order to get yourself a good old gotcha against some random Elrondfucker on the Internet — I’m obviously not going to do that to my writing at the moment but please stop letting your actions be driven by your asshole instead of your brain.
As for this one, I initially thought of not being so cocky in my response but considering I either get a version of this like once a month or some fucker goes to another person’s blog to ask them if I’m not tired of people kissing my ass, let me tell you something:
I am not whatever hockey-playing girlboss it was that was a bitch to you in high school and you are now afraid is intruding into your fandom space. She must have sucked I am certain. I am very sorry you had to deal with her. But I am not her. She is not me. I can assure you of this. If you must know, I was a netball girl. In fact, I was netball team captain. If it actually was me, I sincerely apologise for accidentally on purpose fouling you in 2014 because I wanted to win the intra-school friendly and I promise I won’t ever do it again.
And just in general, let me please remind you that I did not curate this audience through purposeful posting of art and literature and tasteful selfies, I did it via the 'Lindircident' post, aka accidentally holding my asshole wide open for the light to shine through two weeks after I made this account and remaining in the same doubled-up position for the six months since.
Tschüss! 🖕
51 notes
·
View notes
Text

Hoje eu vim pra ensinar de uma vez por todas, o raio da base azul!! E essa serve para todo psd, a minha queridinha 🔥
Eu já modifiquei ela muuuuuuitas vezes em toda a minha trajetória fazendo psd, até porque eu não vou lembrar sempre dos mesmos números. A fórmula sempre é a mesma! E obviamente você pode alterar até que goste da base o suficiente.
Com essa base aqui você pode chegar nos psds mais icônicos!!
ILUMINAÇÃO


COR SELETIVA


FINALIZAÇÃO: MISTURADOR DE CANAIS

e pra quem tem curiosidade, ela fica assim:


bem básica, mas cumpre o propósito!
#♡₊⊹〫fruitail ˚🦖 <𝟹₊∗#🤘🥦 .. tutorials !#tutorial#psd tutorial#psd#psd coloring#action#action photopea#lightroom#soft psd#photopea psd
10 notes
·
View notes
Text
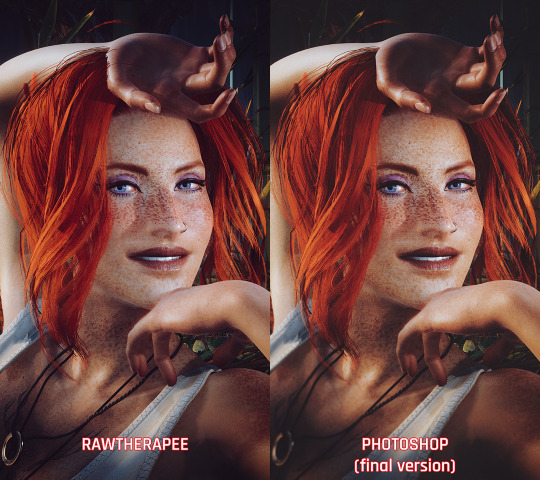
Virtual Photography Process
I got an ask that I posted by accident before being ready, so I'm going to make this a post I suppose fmdlksg Anon was asking about my Reshade Preset for Cyberpunk and what my VP process is, so here it is!
Anon, I don't quite have a VP process. Not in a trademark way anyway. My VP varies wildly across the years and generally speaking I just go with the vibe I feel at the moment!
I've had phases where I would barely do any post-processing at all and only rely on heavy Reshade, I had phases where I'd do some minor color tweaking and add a lot of effects like dust and sparks, and my current one where I do pretty much all my color tweaking in post-process and only really use light Reshade to sharpen the image and make colors pop a bit.

My current Reshade is a tweaked version of a friend's preset. I have an average rig, don't have any Fancytracing, so Reshade is mostly there to sharpen the image, deepen the colors and try to compensate for my GPU's limitations. I forgot to use Otis DOF for this example, but nowadays I don't use any Reshade DOF, and rely only on Otis'. I also only use Otis lights because I can control what each light does a little better than AMM lights, but I used AMM lights a lot when I first was VPing.
It's when the game's closed that I have my fun with colors!
I do my coloring on RawTherapee, which is a free Lightroom. Mostly I make use of the Film Simulation, sometimes layering multiple, sometimes using only one.
I then move to Photoshop which is my last stop and my "correction" phase. I have a huge library of actions and gradient maps I paw around for any last coloring (specially making shadows more matte and less defined), tweak contrast/brightness, and add some blurring and noise (beloved).

I probably have actions/gradient posts reblogged on my repository blog (@halkuonn), I can't point you to a single place because I've been dragging these around for over a decade and across at least 3 computers...
Honestly, don't get too attached to a single workflow with your VP. VP is art and art is meant to be a creative outlet, if you start putting too many rules and step by steps on your personal workflow, you'll probably get frustrated fast.
My current workflow is way lengthier than how I took some of my older VP, but that's because I feel like doing it. I don't necessarily feel like it's better or worse, it's just a different way I've been doing stuff and having fun with VP.

This is from 2022 - I wasn't using Otis Freecam, relied on AMM Lights, and did some mild/low post-processing - things like making the shadows a little bit more purple with Color Balance, and adding A LOT of blur manually because I didn't know how to use any of the DOF shaders. I was using Pinky's Preset back then.

This is from 2023 - the fuck it we ball era. This has like... 0 post-processing. I wasn't using Otis DOF (I don't think it existed yet), but I was already using Otis Lights learned to use the DOF shaders. The only thing I was doing for post-processing is add Noise and slap my signature (which this one doesn't even have lmao). I already had a new Reshade preset from my friend, but didn't really tweak any of it.

From this year! I still wasn't using RawTherapee a lot, but it was the start of my "I'm going to do everything in post-processing" era, with shadows not as dark/contrasted and everything a bit hazy.
So yeah! Don't stress about having a single workflow, or the best workflow, or even the most appropriate Reshade. For me the less I try to be biblical about my VP process, the more I enjoy taking it, and in turn the more satisfied I am with the results.
If you want more of a tutorial, I can try?? doing one?? but really the only thing I have been consistently doing with my VP all these years is slapping some extra blur and adding Noise on PS.
Hope this helps or at least provides some software recommendations / process ideas though!
26 notes
·
View notes
Text
Yvette Heiser - Perfect Self-Portraits: Creative Photography Ideas You Can Learn Quickly
In today’s world of social media and digital expression, mastering the art of self-portraits is more relevant than ever. A perfect self-portrait isn’t just about taking a picture of yourself—it’s about telling a story, capturing emotions, and creating an image that resonates with you and your audience. Inspired by Yvette Heiser – Creative Ideas For Perfect Self-Portraits, these photography tips are designed to help both beginners and enthusiasts elevate their self-portrait game effortlessly.
1. Experiment with Lighting
Lighting can make or break a photograph. For self-portraits, explore natural light by positioning yourself near a window during the golden hour. Soft, diffused light creates a flattering glow, while direct sunlight can add dramatic shadows for a more artistic touch. Don’t hesitate to experiment with artificial lighting, like LED panels, ring lights, or even string lights, for unique effects.
Quick Tip: Use household items like lamps or candles to create moody and atmospheric portraits.
2. Use Props to Add Personality
Props can transform a plain self-portrait into a captivating story. Incorporate items that resonate with your personality or the theme of your photo. It could be a book, a musical instrument, or even a cup of coffee. Props not only enhance the visual appeal but also help convey your individuality.
Quick Tip: Make sure your props enhance the overall composition without dominating or distracting from the main subject.
3. Play with Angles and Perspectives
Angles can significantly alter the mood of your self-portrait. Instead of sticking to traditional front-facing shots, experiment with high angles, low angles, or even side profiles. Using a wide-angle lens can create a unique perspective, while close-ups emphasize facial expressions and details.
Quick Tip: Use a tripod or a sturdy surface to keep your camera steady and experiment hands-free.
4. Incorporate Reflections
Reflections add depth and intrigue to your self-portraits. Use mirrors, water surfaces, or reflective objects like glass windows to create stunning visuals. The layered effect of reflections adds a dynamic quality to your photograph.
Quick Tip: Position the camera to include both your reflection and some surrounding elements for added context.
5. Leverage Negative Space
Negative space—the area around your subject—can make your self-portrait feel more expansive and balanced. Use simple backgrounds or minimalistic settings to highlight yourself as the focal point. This technique works well for both dramatic and serene compositions.
Quick Tip: Experiment with blank walls, open skies, or uncluttered environments.
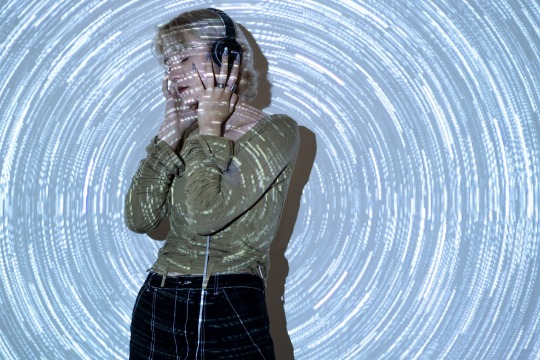
6. Experiment with Motion
Motion in self-portraits adds a sense of dynamism and life. Try tossing your hair, spinning, or walking while the camera captures the action. A slow shutter speed can produce a soft, blurred effect that beautifully highlights motion and adds a dreamy quality to your image.
Quick Tip: Use the timer or remote shutter feature to capture motion without assistance.
7. Focus on Your Eyes
Often called the windows to the soul, the eyes play a crucial role in self-portraits, offering a way to express deep and compelling emotions. Ensure your eyes are sharp and well-lit, as they naturally draw attention.
Quick Tip: Use your camera's focus settings to lock onto your eyes before taking the shot.
8. Explore Post-Processing
Editing is where your self-portrait truly comes to life. Experiment with filters, color grading, and retouching to enhance your image. Software like Adobe Lightroom or mobile apps like Snapseed can make a huge difference in the final look.
Quick Tip: Stay authentic—edit to enhance, not to overdo.
9. Add a Creative Concept
A concept can elevate a self-portrait from good to unforgettable. Think about themes, moods, or stories you want to convey. For example, dress in vintage attire for a nostalgic feel or incorporate bold colors for a vibrant vibe.
Quick Tip: Plan your concept in advance, including wardrobe, props, and background.
Final Thoughts
Perfect self-portraits are a blend of creativity, technique, and personal expression. By experimenting with lighting, props, angles, and editing, you can quickly develop the skills needed to create stunning, standout images. Drawing inspiration from 10 Secrets About Yvette Heiser Photography You Can Learn From TV, you’ll discover new ways to refine your approach and make each shot uniquely yours. Remember, practice is key, and there’s no right or wrong—just your unique perspective.
Now, grab your camera or smartphone, unleash your creativity, and start capturing self-portraits that truly reflect who you are!
#moments#wedding#camera#photographer#pictures#childphotography#photography#yvette heiser#photographytips#events
11 notes
·
View notes
Text

Jump into action ***** Game: Horizon Forbidden West Platform: PC Developer: @guerrillagames Edited with Lightroom
#horizonforbiddenwest#horizonforbiddenwestphotomode#hfw#hfwphotomode#beyondthehorizon#virtualphotography#virtualphotographer#germanvpnetwork
2 notes
·
View notes
Text
50 Free High-Resolution Texture Packs for Designers
New Post has been published on https://thedigitalinsider.com/50-free-high-resolution-texture-packs-for-designers/
50 Free High-Resolution Texture Packs for Designers
The number of options, directions, and aesthetic approaches you can take from simply adding a texture to your work is mind-boggling. Of course, not every design, photo, or video benefits from even the most subtle of textures, but you might be surprised at how a high-resolution texture can bring a design to life.
Knowing when to use a texture and which texture to use comes down to the flow of the design and the priority of information on the page. It is a good idea to keep certain textures in mind while working on a project, but don’t finalize them until you’ve seen the design as a whole.
Texture selection can be an involved and time-consuming process. Firstly, you have to search for that particular texture your design needs, and secondly, you have to test and tweak it to discover the one that actually works.
It is that search process we aim to help you with. We have a huge selection of free high-resolution textures for you today that are just shouting out for use in your next project.
14,000+ Actions, Brushes, and Layer Styles for Photoshop
Photoshop Actions & Brushes, Lightroom Presets, Illustrator Brushes, Procreate Brushes, and much more!
What are Textures?
Textures are visual and tactile elements that can add depth and dimension to your design projects, photographs, or videos. They provide a sensory experience akin to touching a textured surface.
They can range from a concrete wall’s rough, gritty feel to a silk fabric’s soft, smooth appearance. Textures add a layer of realism, creating an engaging visual and emotional connection with your audience.
How Can Textures Enhance Your Projects?
Textures can infuse your designs with visual interest and variety, breaking up monotonous or flat surfaces. Whether working on a website, print material, digital art, or video, textures can make your work stand out.
Different textures can evoke specific emotions. For instance, a wooden texture might convey warmth and rustic charm, while a metal texture could evoke a sense of modernity and strength. Understanding these associations allows you to communicate effectively with your audience.
Textures can add depth to your work, making them more realistic and relatable. This can be particularly important for product presentations or architectural renderings.
Free Paper Textures
10 Ripped Paper Texture Set (By TuomoDesign, PNG)
5 Glued Paper Textures (By Indie Ground, JPG)
6 Free Wrinkle Paper Textures (By Deezy, JPG)
16 Free Vintage Paper Textures (By Nassy Art, JPG)
10 Free Marble Paper Textures (By Nastia Smiyan, JPG)
Free Dirt & Grit Textures
18 Free Grit Textures (By Diego Arriagada, PNG)
Vintage Grit Textures (AI, EPS & PNG)
10 Free Dust & Dirt Overlay Textures (By GraphicsFuel, JPG)
14 Urban Textures (By Nova Design Co, JPG, PNG & EPS)
Free Vintage & Retro Textures
8 Free Vintage Textures (By Flash Graphics, AI & EPS)
10 Vintage Halftone Textures (EPS & PNG)
10 Vintage Noise Animated Textures (By Diego Darriagada, AE)
12 Film Dust Vintage Grunge Textures (By MiksKS, JPG)
24 Authentic 1930s Vintage Postcard Textures (By Spoon Graphics, JPG)
Free Grunge Textures
50 Grunge 4K Textures (By Erkan Kirdar, JPG)
24 Free Grunge Textures (By LTC Shop, PNG)
10 Free Digital Grunge Textures (By Pale Supply, EPS & PNG)
Blackview Free Vector Grunge Textures (By The Designest, PNG & EPS)
5 Subtle Grunge Vectors (By Liam McKay, PNG, EPS, SVG, AI & JPG)
10 Free White Subtle Grunge Textures (By GraphicsFuel, JPG)
Free Grain & Noise Textures
20 Subtle Grain Textures (By Bart Wesolek, JPG & PNG)
10 Film Grain Textures (By Arkadzi Ulitski, JPG)
5 Photocopy Noise Textures (By Indieground Design, JPG &PSD)
Free Abstract & Fractal Textures
10 Vivid Gradient Abstract Textures (By Unio Creative Solutions, AI & PNG)
8 Free Ethnic Abstract Textures (By Creative Veila, PNG)
8 Free Abstract Watercolor Textures (By Creative Veila, PNG & JPG)
5 Holographic Textures (By Indieground Design, JPG)
18 High-Resolution Fractal Textures (By Elliot Pessah, JPG)
Free Stone & Concrete Textures
20 Stone Wall Textures (PSD)
Vector Concrete Texture Pack (By Phil Goodwin, PNG & EPS)
5 High-Resolution Brick & Tile Textures (By Michael Hylton, JPG)
10 Old Wall Textures (By GraphicsFuel, JPG)
10 Marble Textures (EPS & PNG)
10 Free Concrete Textures (GraphicsFuel, JPG)
Free Metallic Textures
12 Free Copper Textures (By The Designest, JPG)
9 High-Resolution Metal Surface Textures (By Orman Clark, JPG)
Free Paint & Graffiti Textures
Free Artistic Paint Textures (By Deezy, JPG)
14 High-Resolution Graffiti Textures (By Orman Clark, JPG)
16 Free Sprayed Vector Texture (By Texture Fabrik, EPS & PNG)
Free Wood Textures
5 Free High-Resolution Wood Textures (By Isaac Gube, JPG)
12 Organic Textures (PSD & AI)
20 Organic Vector Textures (By GraphicsFuel, PSD)
10 Free Withered Wood Textures (By GraphicsFuel, JPG)
Free Wood & Paint Textures (By Eilert Janen, JPG & PNG)
Free Fabric Textures
9 High-Resolution Fabric Texture Pack (By Orman Clark, JPG)
25 Denim Textures (By Bart Wesolek, PNG & EPS)
6 Free High-Resolution Fabric Textures (By Design Instruct , JPG)
Free Black & White Textures
22 Textures on Black Backgrounds (By Media Militia, JPG)
Black & White Seamless Textures (By Timxez, JPG)
Free Miscellaneous Textures
100 Fire & Flame 4K Textures (By Hyperpix, JPG)
Seamless Vector Textures (By Timxez, EPS & PNG)
10 Chalk Textures (AI, EPS & PNG)
7 Plastic Textures (By Alessandro Silva, JPG)
How to Incorporate Textures into Your Workflow
Once you’ve found the textures that resonate with your project, integrating them is a straightforward process. Most photo and video software allows you to overlay textures onto your artwork. You can then adjust their opacity and blending modes to achieve the desired effect.
Remember to consider the context of your project when choosing textures. Whether you’re creating a vintage poster, a modern website, or an artistic masterpiece, textures can be your trusty companions on the creative journey.
By understanding the role of textures and experimenting with their application, you can breathe life into your work and engage your audience on a whole new level.
While it is true that you can use very subtle, unobtrusive textures, you should also keep in mind that some textures can draw the eye more than just a solid color. This means that it’s best to use textures that create contrast and highlight areas of the page that are important.
Related Topics
Top
#000#4K#ai#amp#Art#Color#concrete#course#Design#designers#dust#emotions#eye#flash#Free Templates#Free Textures#High-Resolution#holographic#how#how to#illustrator#it#life#Lightroom Presets#material#media#metal#mind#noise#One
21 notes
·
View notes
Note
Hi Madi!! I hope you’re doing well! I’m on break right now and my current project is learning how to edit my sims photos on photoshop (since I’ve been a lightroom girl for so long). I really admire your editing style so I wanted to ask if you have any advice on which tools/actions to use for a great photo. My main struggle at the moment is that I’ve been playing around with dodge and burn but I can’t seem to figure out how to make it blend well to my photos (hahahah it ends up looking like an unnatural glow or just plain black shadow). Anyway, have a good week! 🤍🪷
Hi, thank you so much & I hope you are doing amazing as well!
With Dodge & Burn in photoshop, less is always more. I always have my brush "exposure" down to 7-9%, and go between all "range" types so Highlights, Midtones and Shadows.
As for tools/actions, I don't use any actions personally. Editing itself, my best tips is to watch YouTube videos on color grading or editing in general. I know that isn't the most helpful answer, but it is how I taught myself since I was 12 and find YouTube to be my biggest helper!
6 notes
·
View notes
Text
Elevate Your Photos with Photoshop Actions from RGBSpot.com
Transform your photos effortlessly with the Photoshop actions from RGBSpot.com. Our carefully crafted actions are designed to make your editing process quick and easy, helping you achieve professional-quality effects in just a few clicks. Whether you're a seasoned photographer or just starting out, our Photoshop actions can bring your images to life.
We offer a wide variety of actions to match any style or project. From vibrant color boosts and dramatic lighting to vintage filters and sleek modern looks, our actions can instantly elevate your photos. Each action is user-friendly and comes with detailed instructions, making it simple to add a professional touch to your work.
Discover how Photoshop actions from RGBSpot.com can enhance your creativity. Browse our collection today and find the perfect tools to bring your vision to life. Let us help you make your photos stand out with our high-quality, easy-to-use Photoshop actions.
0 notes
Text
skin retouching and photo masking service
Welcome to Merchynt's world of creativity, where every image is transformed into a masterpiece! 🎨 Our skin retouching and Photo Masking Service are designed to elevate your photographs to new heights of perfection. Whether you're a photographer looking to enhance your portfolio, a business in need of stunning visuals, or simply someone who appreciates impeccable image refinement, Merchynt is here to exceed your expectations. ✨
Our Photo maskings is not just about editing; it's about crafting enchanting visuals that captivate and inspire. With our meticulous attention to detail and commitment to excellence, we ensure that every image tells a story of beauty and sophistication. 💫
Join the ranks of satisfied clients who have experienced the Merchynt difference. Discover the transformative power of our services and unlock the full potential of your images. 🌟 Trust in Merchynt for unparalleled quality, reliability, and creativity. Let us turn your vision into reality!
#photography#professional editing#skin smoothing#affinity photo high end retouching#high end skin retouching action#skin retouching and color grading in photoshop#pixelmator pro skin retouching#face retouching in photoshop cc plugins#one click skin retouching free photoshop action#affinity photo face retouch#capture one skin smoothing#capture one portrait retouching#capture one pro skin retouching#capture one skin retouching#capture one face retouching#masking photo editing lightroom#skin smoothing plugin photoshop#skin retouching camera raw#skin retouching capture one
0 notes