#shaders used in image 3
Explore tagged Tumblr posts
Visit Tumblr Blog
Explore Tumblr blogs with no restrictions, modern design and the best experience.
Last Seen Tumblr Blogs


Fun Fact
In February 2021, Tumblr had 518.6 million blog accounts.
Text

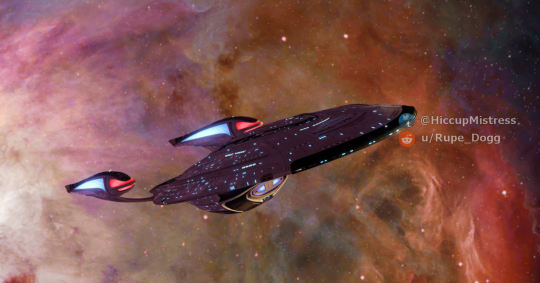
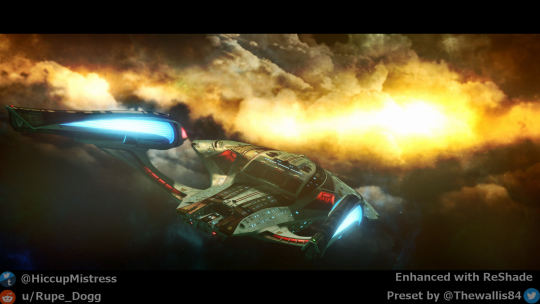
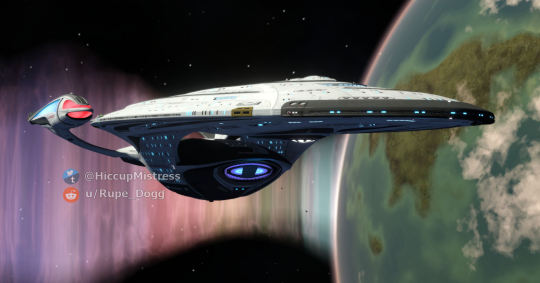
The Enterprise NCC-1701-F. I may be a bit disappointed that she had such a minor role in Star Trek: Picard, but I'm still so grateful she was made canon at all! The Odyssey becoming the canon Enterprise-F is the first step; hopefully one day, we'll see more of her in future shows, novels or comics.
#star trek#star trek online#star trek picard#uss enterprise#virtual photography#shaders used in image 3
22 notes
·
View notes
Text
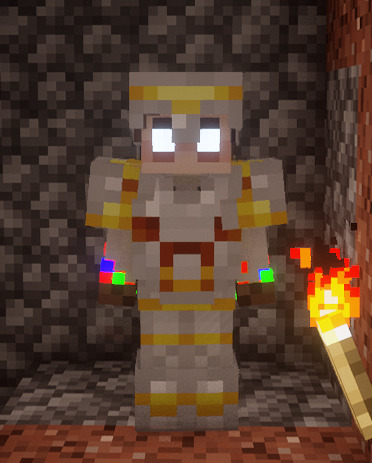


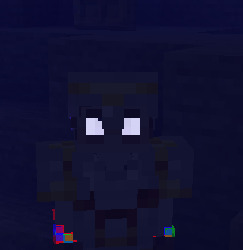
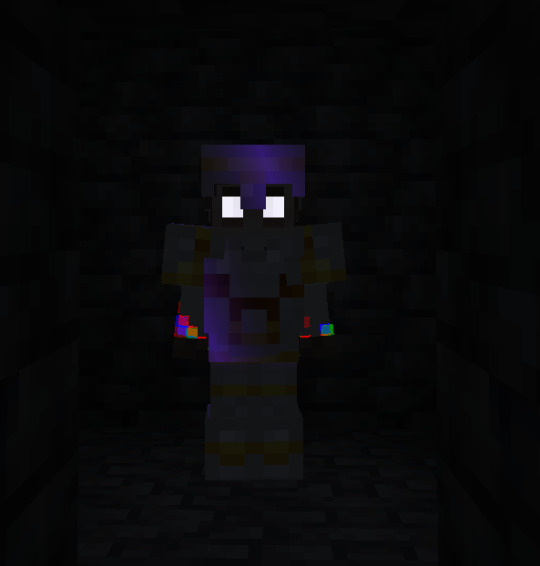

god i fucking love ETF (Emissive Texture Features)
#shader packs used (in order):#bliss. solas. miniature shader (images 3-5). bliss again but in complete darkness this time#miniature is our main driver when it comes to mc shader packs (very minimal has dynamic lighting and emissive textures)#so im STOKED that it supports emissive player skins as well :D#a couple of the other folks on etern1ty added glowy bits to their skins too so we'll get to see those eventually without really even#doing anything different!!!!!#FUCK yeah!!!!!!!!!!!!!!#mc#minecraft#undescribed#modded minecraft adventures with the keys#:D#this is even more fun if ur aware of The Lore
28 notes
·
View notes
Text
FF14 Battle Portrait Tutorial
For the past few weeks I was trying to find a way to recreate the battle portrait from FF14 as there was a few characters that I want to see in that style but don't officially have one yet. I think I got it down more or less (see image below) so I thought it's a good time to share what I did.

First of all, I made a few files that would help make life a little easier. They can be grabbed here .
Note: I did use Reshade to do a bit of work at the screenshot stage to help speed up the process but the same effect can be recreated in Photoshop with a vanilla screenshot. There are a lot of tutorials on how to do comic/cartoon effect in photoshop and those would make good bases to work off of.
Step 1: Take the screenshot with the PortraitBase Shader on. I usually take two screenshots. One with "Comic" on and one with it turned off. This is so that I have more to work with if needed.


Step 2: Drag all the screenshots into photoshop and remove the background. In photoshop, arrange the layer so that the screenshot with the Comic lines visible is on top of the one with the effect off.
Step 3: Duplicate the the layer with the "comic" effect and apply Blur->Gaussian blur (radius 0.5)
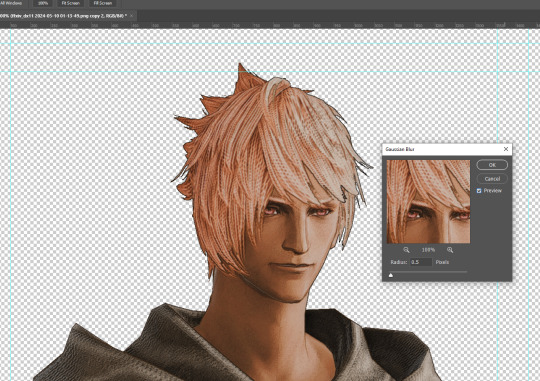
Step 4: Take a look at the hair. In Eric's case, It still doesn't look blur enough to me so I used the blur tool and blurred it a bit more
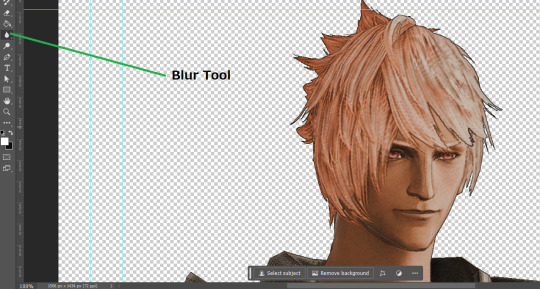
Step 5: Create a new layer above the layer in the previous step and use the brush tool to start outlining the edges. Where to outline is up to you but the idea is to make edges defined so that it looks more like a drawing.

Step 6: Duplicate the outline layer and then hide that layer. Step 7: Merge everything under the outline layer. Step 8: Drag and drop the "Texture.png" into the project and Clip it to your character layer. Set the blending of the texture to "soft light". Step 9: Drag and drop the "stroke Texture.png" into the project and Clip it to your character layer. Adjust the size till you are happy then set the blending to "overlay". Step 10: Adjust the opacity settings of both texture layers until it looks good to you.
Step 11: Click on your character layer and go to image->Adjustments->Hue/Saturation (note: you will see I dragged in the official Hades portrait as a point of reference to work off of). Adjust the saturation till you are happy.
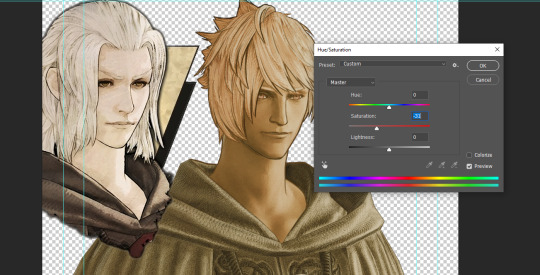
Step 12: Go to image->Adjustments->Color Balance and adjust the color till you are happy. In this example, since Eric is also wearing the Sophist robe, I tried to match that color to Hades' Sophist robe color.
Step 13: Once you are happy, drag the "Template.png" into the project and scale that to the size you want. Make sure it is completely covering the character. If it's not, you can just use paint more of it with the brush tool to extend it till it covers everything.

Step 14: Hide the "template.png" layer and select your character layer. Use the magic wand tool to select the outside of the character.
Step 15: With the selection still selected, click on the "Template.png" layer and press delete on your keyboard. You should now be left with a blank in the shape of your character.

Step 16: Drag the"Template.png" layer to be below your character layer. Then click on your character layer and clip it.
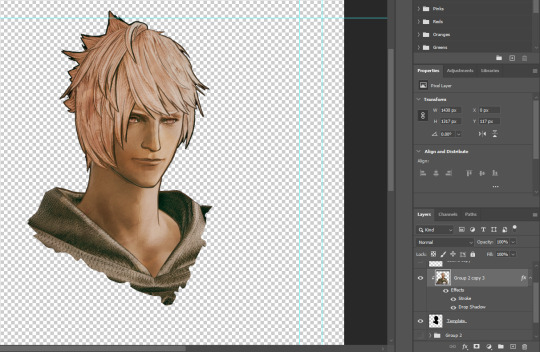
Step 17: Click on the "Template.png" layer and add a 2px stroke and shadow to it.
Step 18: Drag "Back_Deco.png" into the project and place it behind your character. Scale it till you are happy with it.
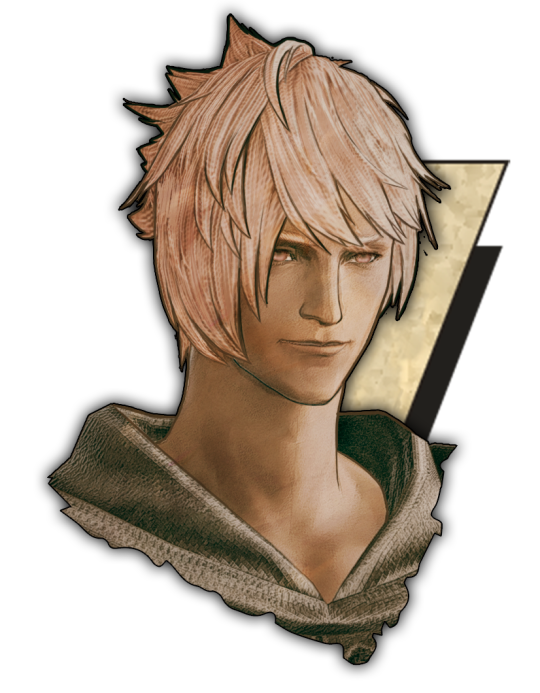
And that's it! Now you can recreate portraits for any NPCs that you want (in theory). A lot of it is also fine tuning to what you want but this should at least give you a decent base to work off of :)
2K notes
·
View notes
Text
Happy 2 Year Anniversary!!!

This lovely little guy stems from @angelpuns Kid-Leo au! This illustration was made in Blender 3d and it was a lot of fun modeling Kid-Leo into 3d glory!
Behind the scenes under the cut:
Everything starts with a sketch and for me I had two options;
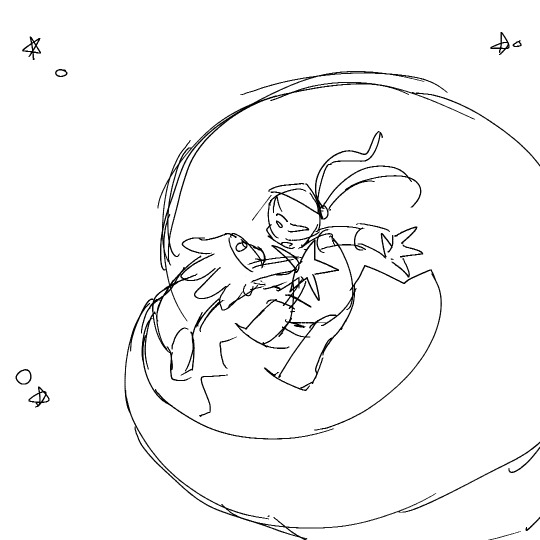
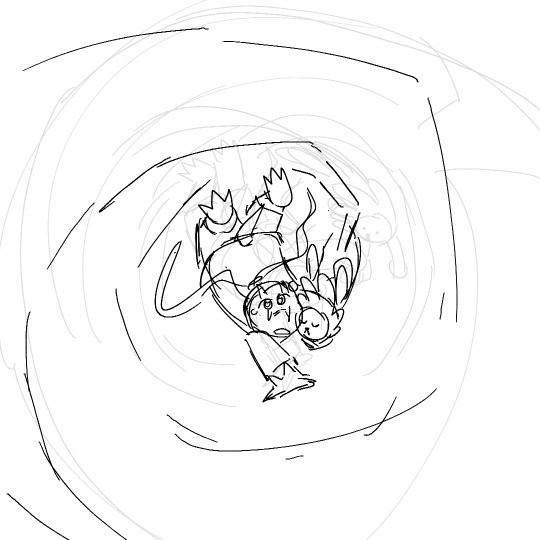
It was hard choosing which one; but I ultimately went with the one on the right as I felt like the posing would be a lot more fun to play around with in 3d!
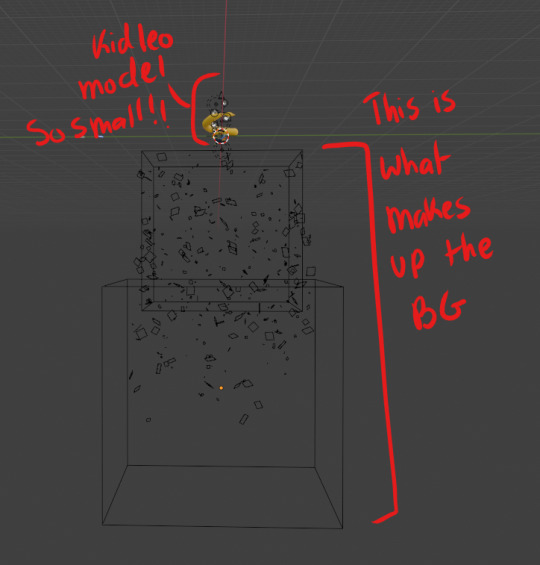
Speaking of 3d; check the viewport view!
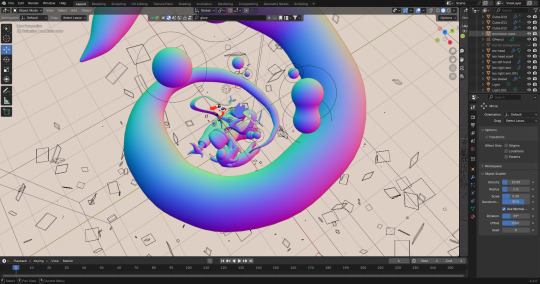
Yup; this is what it looks like before I add all the fun textures and what not. For my fellow blender nerds the final image was rendered in cycles at a sample of 500 with denoise OFF. I wanted the final vibe to feel like a game magazine so I like to render with the intention of having that dithering effect prepacked in there.


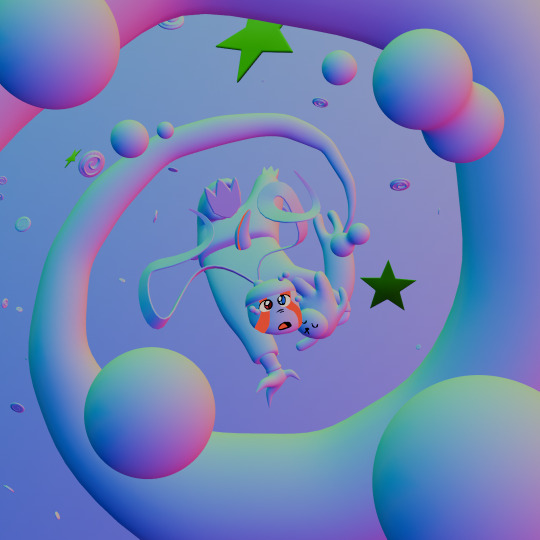
Tasty right? Well; you can't have Kid Leo without some stars to fill the void! After making my initial model I used particle systems to add floating stars and cookies that I modeled into the background. I especially love how the stars distort within the glass texture of Leo's tears :3
The blue background is simply a giant cube with a volumetric scatter shader to simulate fog; This part is what gave me the most trouble as I'm so indecisive that I didn't know what blues to go with! Eventually I settled for a darker blue as it really helped Leo's green skin POP. When it comes to art I always pay close attention to values.
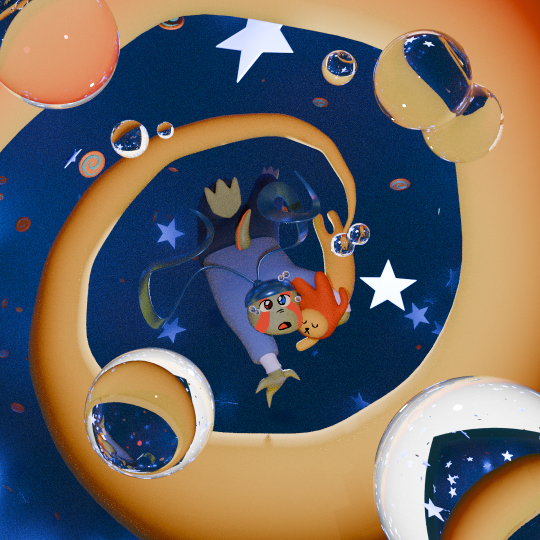
Finally I pulled this baby into clip studio paint for the final touches; aka chromatic aberration and giving it a viewfinder border and then WABAM!
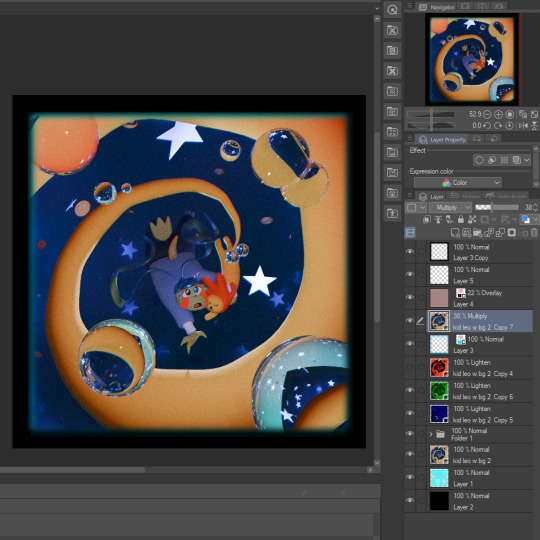
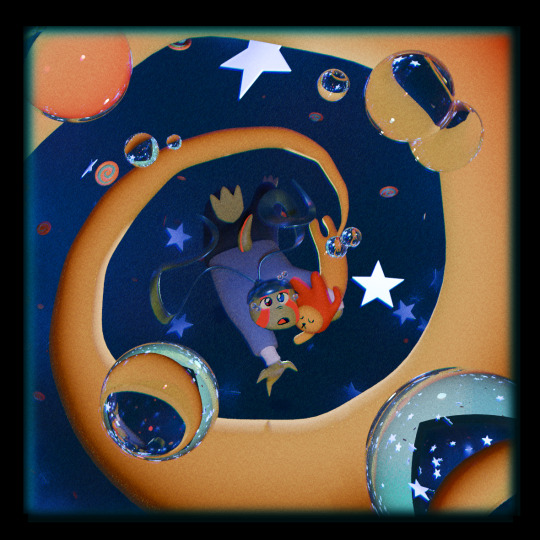
You've got yourself a Kid Leo.
This was a lot of fun. I've been making illustrations in Blender for a hot minute now but haven't shared or posted them due to wanting to make posts like this one explaining everything I did. That May 20th deadline really kicked my butt into high gear. In total I'd say I put about 10 hours of worktime into this; starting the day this dtiys was announced. Getting this done was all I could think about for a hot minute lol.
Final thoughts? This comic has been a real joy to follow and I can't wait to see what happens next. It's been so cool seeing how much the comics art has improved since the beginning and I really admire the dedication to giving us a Leo-centric story to enjoy. Here's to the next chapter!
#kidleo2yranniversary#art#digital art#blender#rottmnt#rottmnt leo#blender 3d#clip studio paint#kid leo au
206 notes
·
View notes
Text
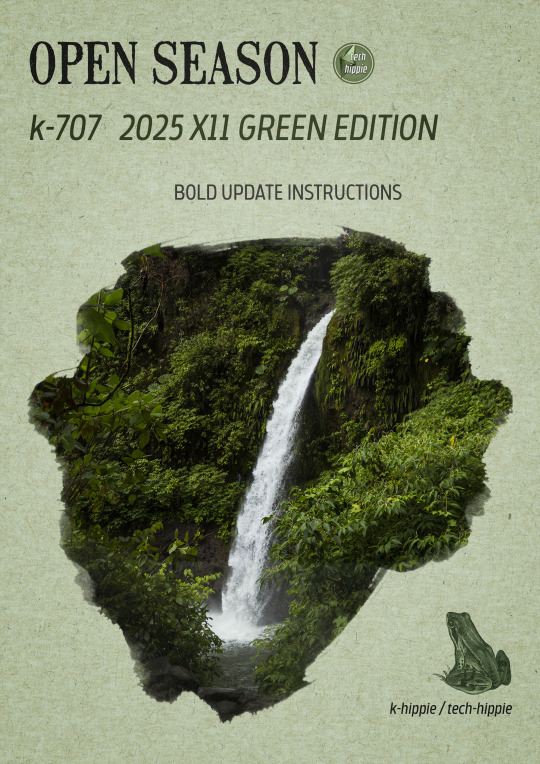
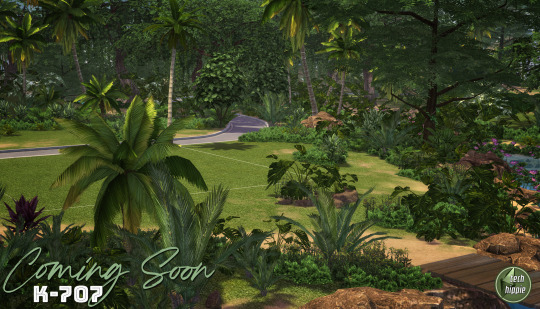
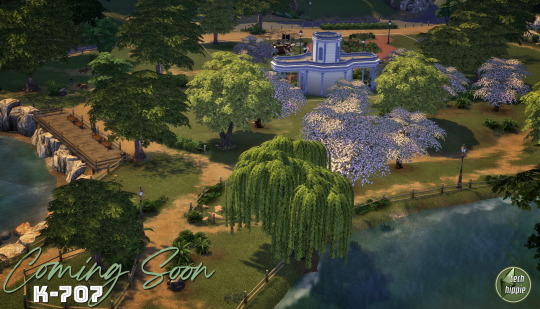
k-707 2025 BOLD UPDATE INSTRUCTIONS
Hello everyone :)
The new k-707 is going to be released in the coming days :D but as it is a kind of new experience, we have some kinda instructions in order to get everything working fine.
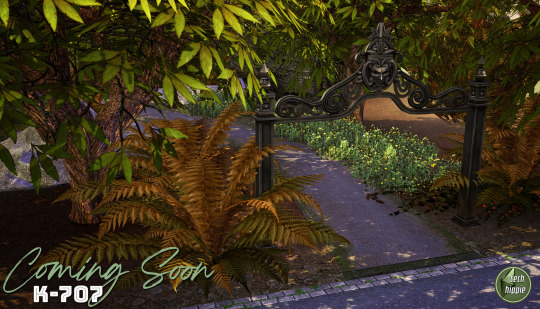
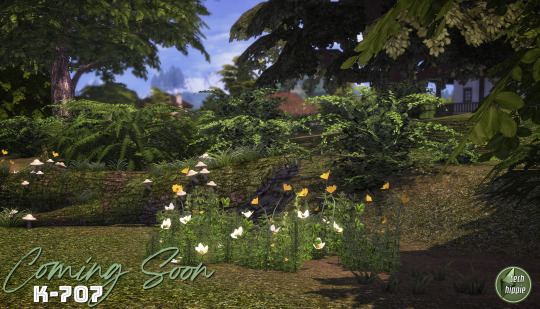
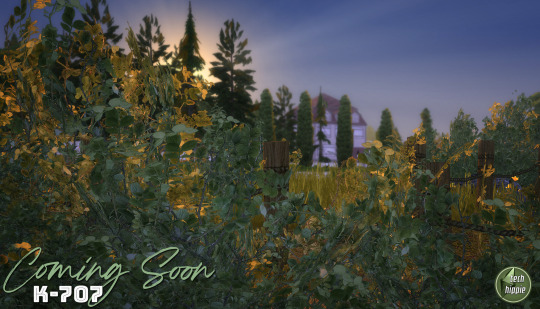
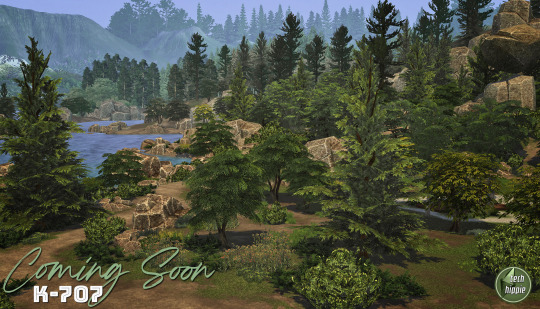
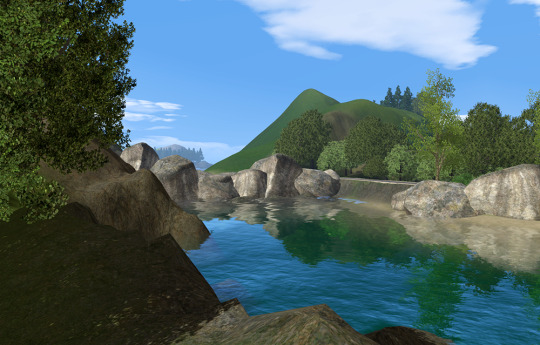
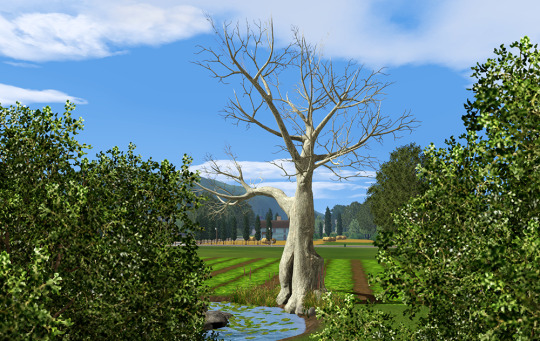
Step right up, folks, for the grand unveiling of our biggest project yet! The K-707 isn’t just a mod—it’s a green revolution. Taking on almost every flower, patch of grass, bush, and tree makes this even more massive than the K-505. And trust us, our brains are already feeling the strain! :D
But before instructions, let me tell you the k-707 story ;)
We really hope you'll enjoy it. We worked hard on it with 5 rules :
Replace EVERY tree of the game
NO overrides with crazy high polygons amount
Follow as much as possible the Maxis directions ( trees style )
Decrease amount of polygons where it is possible
No trees defying gravity and laws of physics
It took long for few reasons ...
At first, we always knew the first version was a vast experiment. When ea made its direct x11 update, it was time to make a bold update ... but we didn't want simply remove the non-strictly-dds-x2 images and replace them ... we wanted more. We always wanted more, even we are not kinda ea gurus :D ( hey EA ! don't you want hire some true creators with a long term vision of your game ? ) <- poll : would you like k-hippie as maxis creators or not ? :D
Joke apart, it was difficult. Almost 1 year long, we searched and searched solutions to get rid of all problems we met when replacing foliage on a debug tree, or modifying anything on a debug tree ( for info : we are not blender gurus nor sims 4 core users )
All we knew was few lines :
When cloning a tree, you cannot lose the any of the vert color data. I suspect whatever tool(s) you are using to do the cloning is losing this data, since this setup is somewhat unique to trees.
The vertex color layout for trees is as follows. Green and Blue are ignored for channels 1…4 : Color 0 RGB Surface color tint Color 1 R Rustle direction X Color 2 R Rustle direction Y Color 3 R Rustle direction Z Color 4 R Rustle phase ( game generates two wind scales that change over time, this term interpolates between the two )
The pipeline keeps the rustle information in a vertex color format for what the game engine will load, which means it’s in the range 0 and 1. The shader remaps this into a 0.5 to -0.5 range before scaling it and applying the offset to the leaves. Note that these directions are clamped but not normalized ( they’re allowed to be different lengths ) The WindMagnitude material parameter acts as a scaling factor.
So, we started with this information, begging in vain for some help, both inside the Sims community and outside ... but nobody helped us. And frankly, it interested no-one except us and our beloved followers :)
We found multitude of tutorials ( funny how many they are as soon as it is clothes related ) but nothing related to our specific target. We paused our research many times, made direct x11 updates for our other k-mods and so on. Until ... zaceitorius in July 13rd 2024
Who is zaceitorius ? We do not know. A simple member of sims4studio with 6 posts who gave us a simple bright clue which seems obvious after all, but yet very very precious indeed !
And here we are today. 300 trees and numerous plants later ... <- another reason why it took a long time :D
We made a lot of vertex experiments, we lost data colors, remade again and again some other experiments and well, we are still experiment, remake small details which seem important to us and so on ... And for now, it works :D And now you are warned : the k-707 is far from perfect.
And now, the instructions :)
The k-707 covers both trees & plants, both debug and lot trees & plants
What's new ? No more than usual. We tracked all the non-strictly-dds-x2 images, reshaped some trees ( such as the multitude of oaks ), added some flowers ( where we removed them in 2021 ) but kept many foliage we already did. We tried to simplify many details but added some others and replaced some plants.
How many stuff it represents ? We do not know. Many indeed. We stopped the count :D
Because of its size ( and our love for our sanity ), THE RELEASE WILL ROLL OUT IN PARTS ( not slowly but piece by piece ). If we waited until it was all perfect, you’d be seeing it around ( maybe ) September 2025 ... Let’s not tempt fate—or burnout! :D
The K-707 is neatly organized for your convenience :
Each DLC gets 2 folders : one for plants, one for trees.
The base game gets 4 folders ( a bit different since most of the greenery is drawn from there ) divided into lots and debug folders.
Expansions which have very few greenies ( City, Get to Work, University ) get the same folder named : k-hippie-k707-multi-greeny-2025
IMPORTANT :
Leave them in each of their folders ( or create your owns based on a similar methodology )
If you merge files : we can’t help troubleshoot if it doesn’t work anymore, so be smart ;)
You’re free to do as you like, but we strongly recommend keeping this tidy folder setup. If you need to troubleshoot down the line, it’ll save you a major headache.
And for the mavericks out there who love merging files—go for it, but know this : we won’t be able to help if things go haywire.
Now, we could wax poetic about how stunning the K-707 is, how every leaf, petal, and blade of grass is crisper, richer, and beautifully integrated into your worlds—but hey, we'll do it later, inside the release post :D
We could do more, more realistic trees and so on but we do not want integrate crazy high poly models. We do not want an unplayable game isn't it ? ;)
The k-707 is not yet finished. We got some more work to do on it, shape the last details, and some re-checks.
But here is what is new compare to the previous version : we kinda cracked ( a bit only ) the code. Trees swinging in the wind like it’s a dancing contest ? No more. Trees defying gravity and laws of physics by groveling into the ground ? No more. Just remember we do not have the hands upon the worlds construction, so, when trees are not into the ground, well, call your reseller aka EA itself ...
#sims 4 custom content#sims 4#sims 4 wysiwyg#sims 4 cc#k-hippie talk#ts4#the sims 4#k-hippie#k-mods#k-707#k hippie#k-505#sims 4 green#sims 4 expansions#sims 4 base game#sims 4 trees#sims 4 plants#ts4 overrides#sims 4 overrides
360 notes
·
View notes
Text
How to apply textures in Blender 4.0 For newbies (´。• ᵕ •。) ♡
So you imported your lovely doll into Blender 4.0, but the textures are messed or missing, here's how to apply base simple textures from the scratch!
I'm using Blender 4.0.2 (Sorry 4.3, but your EEVEE is currently nothing but tears for me) and my lovely Aidan is here to assist me. SO! Seat your bum comfortable and let's begin!
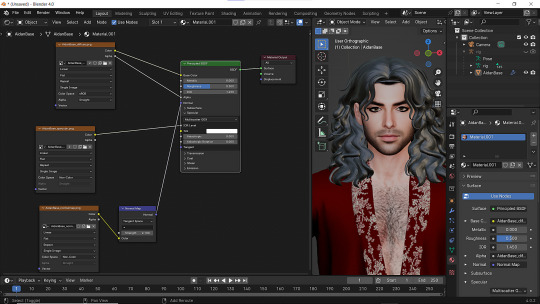
1 - Split your working space by pulling the corner of the screen:
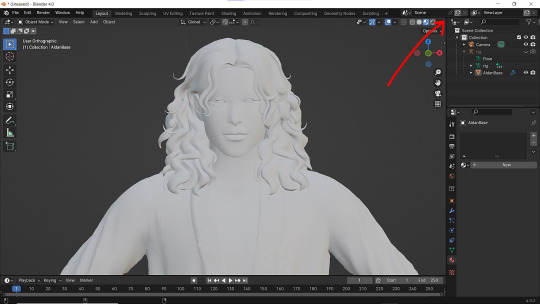
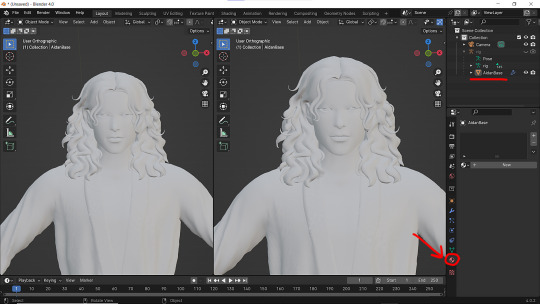
2 - Then click on Material with your mesh selected.
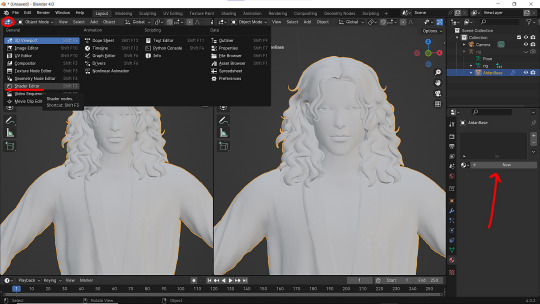
3 - Pick Shader Editor on the left part of the screen and hit New in the Material on the right. You'll get something like this:
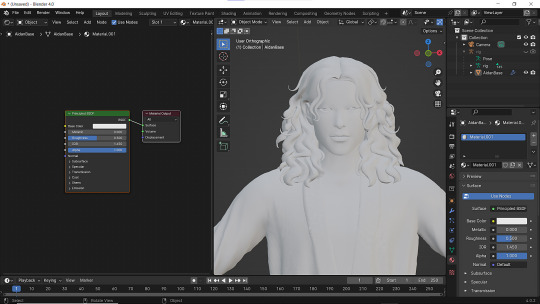

4 - On the left choose Add - Texture - Image Texture. We need three of them at very least :D
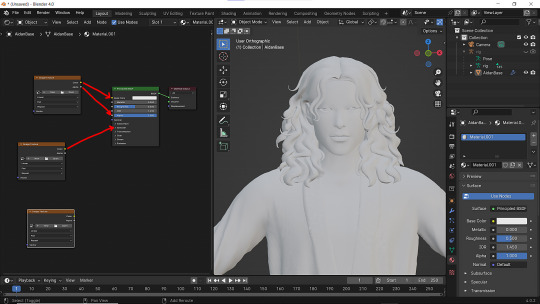
5 - First Image texture: Connect Color to the Base Color and Alpha to Alpha. Second Image texture connect to Specular IOR Level. Don't forget to upload your textures! Color - is well... color pics. Specular looks like Black/White pics and Normal is purple!
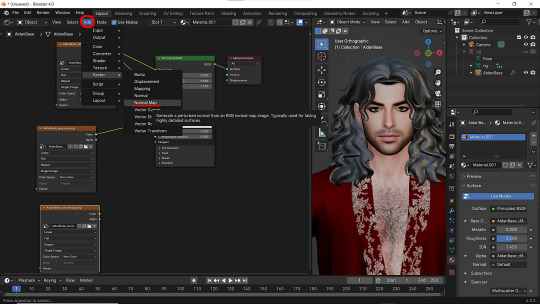
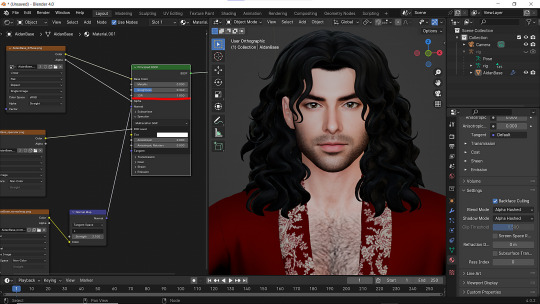
6 - Now add Normal Map. And connect it like on the picture below:
7 - Specular and Normal maps should be NON - COLOR in the Image Texture - Color Space
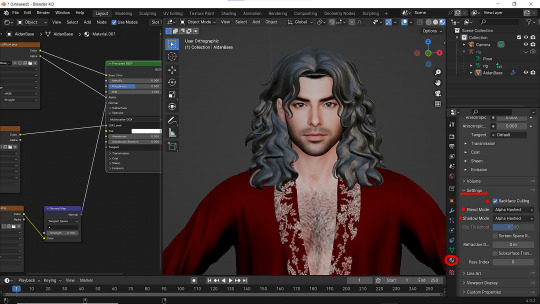
8 - Turn on the alpha. In Material - Settings - Blend Mode/Shadow Mode change on Alpha Hashed + You can check Backface Culling. In some cases it's vital :D
9 - Change the Specular settings in case of weird shining by changing IOR and Roughness parameters.
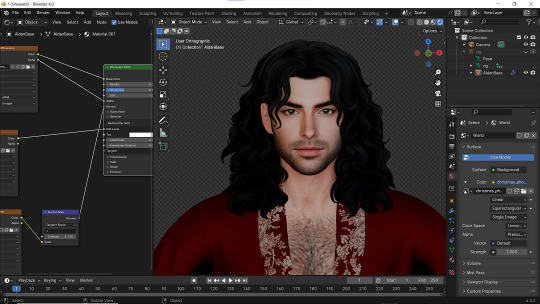
10 - You did it! (ノ◕ヮ◕)ノ:・゚✧
#WistfulTutorialSims4#the sims 4 blender#sims 4 blender render#blender 4.0#blender eevee#sims 4 tutorials#blender tutorial#sims 4 blender render tutorial#blender render
289 notes
·
View notes
Note
i have a question about the development of the game!
most environments in the game operate on a two-frame animation where it's the same drawing twice but with tiny line deviations; just a subtle art style choice to make the game a bit more lively.
a lot of games and other such things do this, and it certainly adds a lot of life to the frame, but it seems like an incredible amount of work to have to draw every single thing twice instead of once, even if one is just traced over the other - especially with environments with so many intricate details like in slay the princess.
did you use any tricks or programs to make this process faster? or did you just have to draw every single background twice?
Lol. So I actually asked Abby if she could draw 3 versions of every asset when we started on the very first demo, after which she promptly died to avoid taking on that much work. When that was clearly a no-go, I switched to creating a boil effect out of localized distortions in After Effects, and then applied that to each image, creating a short, looping video file. This was *terrible* from a performance perspective, especially with the degree of layering in Slay the Princess — to maintain the parallax effect, many backgrounds have as many as 4 different layers, which all have to be saved as their own images, on top of the Princess when she's present. Playing that many HD video files is very CPU intensive, and the first demo ran terribly because of it. Ultimately we switched to using an openGL shader (which we hired @manuelamalasanya to code — she is so so talented) that mimics the transform I built in After Effects, and we apply that shader to each image within Ren'py. This works better with the engine in general, and it also means the extra work on displaying that effect is done on the GPU instead of the CPU, so the game's more performant.
253 notes
·
View notes
Text
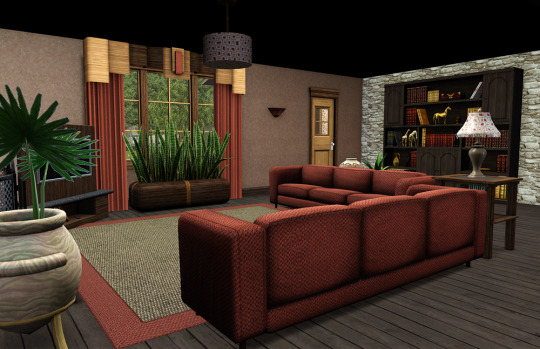
How to convert Sims 4 3D CAS Rooms to Sims 3

Disclaimer: If you’re not familiar with Blender/TSRW/UVs then this tutorial may not be for you. If you don’t have Sims 4 Studio which needs the Sims 4 base game (or don’t know how to extract the meshes without it) this tutorial may not be for you. Honestly it’s pretty straight forward, but there’s a lot of trial and error and going in game and out of game checking placement, etc. I use Blender 4.1 for this, but you should still be able to do the same things in the older versions. I'm trying to make this as easy as possible. I’m here to answer any questions though 💕 Tutorial below
Things you’ll need:
Blender (whatever version you prefer)
Sims 4 Studio
TSRW ( I use version 2.0.86)
My Christmas CAS Room here
My TSRW work file here
Tutorial:
Find a Sims 4 CAS room that you like and open it up in Sims4Studio. This is the one I'll be using for the tutorial.

In the Texture tab, export the textures. The only textures that matter are the first 3 diffuse. Go to the Meshes tab and export the mesh, it will save as a .blend file. After that you can close out of Sims4Studio.


Open my Christmas CAS Room in TSRW. You'll get this message. Hit ignore and don't send. We only need this file as a reference to resize the SIms 4 CAS room. Export the mesh as an obj, name it whatever you like. You can close TSRW for now.

Open Blender and open the .blend file you exported from Sims4Studio. Make sure to delete studio_mesh_0 as it's just the shadow map and we don't need that. This is what mine looks like after fixing the textures.

Then import the wavefront obj you just exported from TSRW. Again we're just using this as a size reference.
This is what it looks like after I added the obj. I scaled, moved, and rotated the room to match up as close as I could with my reference mesh. When you have it lined up to your liking you can delete the reference mesh. I usually import the sims 3 body to see where my sim would be in CAS as well so feel free to do that too.

Now we have to separate the objects that use transparency in the scene to their own group. The transparent objects will always be located on studio_mesh_1. I usually do this in UV mode. Make sure UV Sync Selection is on. Where the red arrow is, that's the UV Selection button. It's blue so that means its on.

Tip: If you're using the same Blender version I am (I'm not sure if the older versions below Blender 3.0 do this) you can disconnect the alpha in shader editor and then you can easily see what uses transparency because it has a black background like the plants. Don't worry about the one outside the window as that's on the backdrop image and doesn't show in CAS.
Important: Also, make sure you delete the back of the mirror frame or it will show through the mirror in game. I usually select it in the UV editor as well and delete it.

After selecting all the objects that use transparency, I go to the 3D viewport window and press P, then selection. Now they're on their own layer as you can see. That's a very important step so please don't miss it.

Sims 4 CAS Rooms don't have a closed room like ts3 and if you don't add walls/ceiling with planes you'll be able to see that it in CAS. You can do this in any way you're comfortable with. If you don't understand how to do it feel free to ask me. For this tutorial I will not be doing this perfectly lol I've done enough rooms and I'm just trying to teach here 😩

Okay now last is renaming groups to import into TSRW. Make sure it's in this exact order and uses the exact group numbers.
Group 0 - Mirror
Group 1 - Windows/Curtains
Group 2 - View outside the window
Group 3 - Walls
Group 4 - Objects with transparency
Depending on the CAS Room you convert, yours may not have a mirror you know. You can delete groups in TSRW, experiment, feel free to ask me questions as well.
After renaming the groups, select only the groups you renamed and export as an obj. Make sure that object groups is checked so that they can stay in groups.

Open TSRW and open the testroom_cas.wrk file.
After opening the file you'll see this exact room in this tutorial lol because I had to test some things first 😅

Import the CAS room you converted from ts4. You'll get these two messages. Click yes on the first and no on the second.
Disclaimer: Make sure you reduce polygon sizes or it won't import and give you an error


Import your textures (yours may be different than mine depends on the converter) but most have been the same that I've seen. Group 0 is the mirror it doesn't require a texture. Group 1 and Group 4 usually have the same texture.
Disclaimer: TSRW an be finnicky with textures sizes, I havent gotten any issues since using the 4GB patch, but just in case. Texture sizes from ts4 can run pretty big 4096x2048 even 8196x4096. I would resize to no bigger than 2048x1024 in my opinion, but whatever works for you.
After export to sims3pack or export as package file. Make sure you compress your files and you should be good to test your CAS room in game.

This is the finished product. Should look something like this or better lol considering this was quick 😅
If you would like to make your own from the original ts3 cas room, I would suggest watching this Youtube video (it's for TS4 but it still applies and is helpful) and the link to the original ts3 cas room is here. Since we can convert ts4 to ours you could probably just build your own and go from there as well.
Thanks to @mookymilksims for testing things for me and converting her own. If you would like to try this tutorial out and experiment with room placements using @boringbones Ultra wide CAS mod which changes the field of view in cas so that you can see the whole cas room, it is here. I didn't use it for mine, but that's only because I found out about it after from Mooky lol and I'm tired of converting them 😅 but feel free to ask me any questions if you need help 😊
#ts3#tutorial#sims3#I hope this helped#been procrastinating finishing this 🙃#cas room tutorial#sorry if it's long#tried to be thorough and make sure everything was correct#my tutorials
172 notes
·
View notes
Text
Been looking for fun outfits to draw the DCA in, but then inspiration struck and-

Subway Masters Emmet and Ingo Sun and Moon!
(Click image fore better quality)
I could have sworn I saw someone else also do this idea, but I can't find the drawing. I can't be the only one who felt this vibe right??? It's perfect!
vvv Yapping and (a handful) extra images below the cut!!! vvv
Sketch

Isolated Final Version & Close Up


No Sketch & Dark Sketch Versions


Honestly I felt the urge to show all these different versions because all of them were super satisfying to me. The sketch being visible adds texture to the image, but the clean is, well, so clean. Then the dark sketch being visible makes it feel so stylized, like the borderlands sketchy shader the characters have. Love love love it all!
Why Sun's eyes are mostly blue instead of the iconic white is because I wanted to make it match with the blue Moon has as a secondary color, just like how Sun's secondary color red is featured easily as Moon's eyes! I wanted to keep the silver eyes from Emmet and Ingo, so coloring the white makes them pop! (I wanted them to compliment each other well while still having unique designs.)
I don't usually do cell shading, but I've been seeing so many pleasing art styles on Tumblr using them that I just felt like it would be nice to do a clean cell shaded work. :3
(Somehow it took me way longer to cell shade than my usual style... Maybe using the lasso tool religiously for everything had something to do with it.)
I don't really engage with the Subway Masters fandom much, but I love the characters so much. Their designs are so cool and I love BW and gah I hope they put Emmet in the next Legends game. We got to see Ingo now I also need to see the unhinged happy man out of his element!!!
(I'm a big pokemon fan :P)
Once the idea got to me it was like- How could I not? The dynamics are literally perfect you cannot convince me otherwise!!!
#MY BOYS-#The Subway Master outfits are straight up balling#I need their coats in my life#I had to make this the hungry thoughts demanded it#Somebody gets me here I can feel it#This was just a crossover that is supposed to happen#One way or another#GET THESE GOOBERS THEIR TRAINS NOW!!!!🚄#Ugh the DCA is like my weakness help me-#dca fandom#dca fnaf#fnaf dca#daycare attendant#moondrop#sundrop#sun fnaf#moon fnaf#dca au#dca fanart#dca community#my art#I regret nothing#the brainrot is real#I want to hug them they're so cool#Submas!Moon#Submas!Sun#Pokemon au#Not a dedicated AU
287 notes
·
View notes
Text
Unaffected UI - ReShade
REST ini for TS3 (REST 32x v1.2.3)
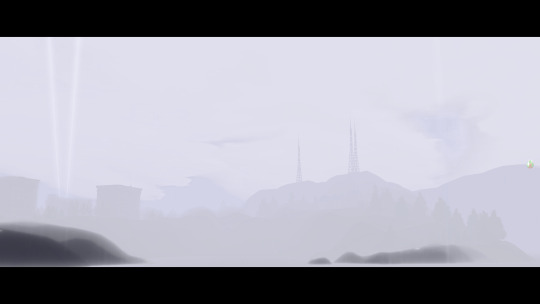
What this does? This edited ini file from REST allows the UI in the game to be viewable while using ReShade presets.
I will be leaving this as is for now until REST has better compatibility with dxvk with a x32 version that shows up in the addons (if it does in the future), since dxvk is essential for ts3 in a way.


Installation:
Install ReShade normally for TS3, at least making sure it is 5.8+ in order to use REST (you may need to select TS3W.exe, dunno if it makes a difference vs selecting TS3.exe though).
Important!! - When selecting ReShade's addons, don't select ReshadeEffectShaderToggle as it won't work on 32x nicely. Download the specified version of REST from the creators github instead, which will be linked in the step below. This will save you some frustration.
2. Then download ReshadeEffectShaderToggle v1.2.3 (release.zip file, Important!!), placing the content inside (step 3) it in the games bin folder. (There are other versions that work nicely with 32x version of ReShade but this one plays more nicely with shaders in the game. I will test to see at later dates to find one that works nicer if possible. [I don't think the version you use matters too much but v1.3.0 works I believe as well])
3. Place only the file "ReshadeEffectShaderToggler.addon32" in your games bin folder where you downloaded ReShade to. If you are on GShade and it's ReShade v5.0+ Equivalent (5.8+ required for REST v1.2.3), place it into your addons folder.
4. Download the addon .ini file here that's edited for ts3
sfs <- download
5. Then place "ReshadeEffectShaderToggler.ini" (The file from this post/sfs) into the same place as "ReshadeEffectShaderToggler.addon32"
This version of GShade v3.5 doesn't work with REST unless a version is made by someone for it (This goes for the regular GShade equivalent and older version of GShades). I don't recommend using official verions of GShade, especially the newer ones.
In-Game:
Make sure that anti-aliasing/edge smoothing is disabled in the in-game setting or Reshade effects will turn off with the REST ini after loading a save ( most likely the REST toggle shader I enabled is tied to the anti-aliasing shader of ts3).
Setting Up ReShade Properly & Enabling REST:
In the global preprocessor definitions, set it to look exactly like this in order to get ambient occlusion and etc. working properly. vvv
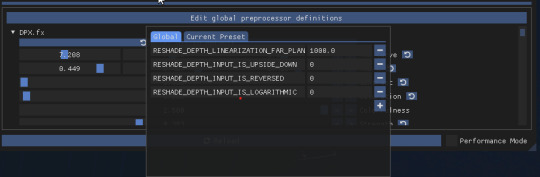
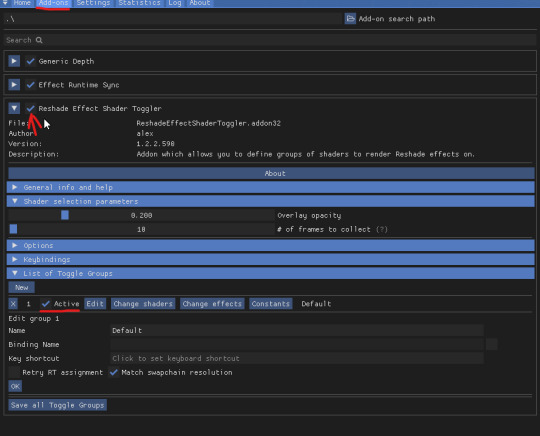
2. go into the "Add-ons" tab of ReShade, ticking ReShade Effect Shader Toggler on and then making sure the Toggle Group 1 or "TS3 Pixel Shaders" on the left, is activated.
Something Neat:
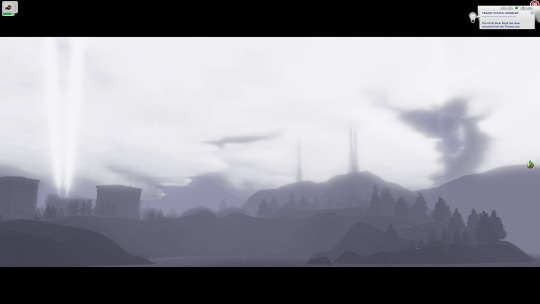
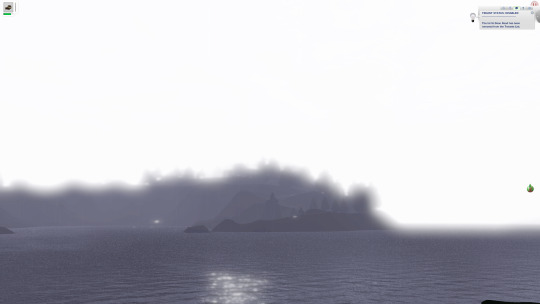
When hiding the UI with "F10" the shader toggle group doesn't affect that part of the game and your ReShade/GShade preset should be back to normal. (Tested on REST v1.3.0 I believe)
Downsides (Not REST's fault):
Existing Presets will need to be tweaked back to original form.
Some shaders may not work properly (maybe more than some dunno).
If you want to use existing presets without them looking wrong, you can disable the Toggle Group at anytime (one you activated in above picture).
Compatibility:
REST doesn't work properly with dxvk. It could also be the latest version of REST I tested which doesn't show up in the addons in-game, or the specific version in their github I linked to, which isn't working properly (shaders do show up in toggle groups though but that's as far as it works correctly).
References Used:
Clear UI by vyxated
Tutorial by Redronn
More by Me:
FO4 Version by me
Credits:
4lex4nder for creating ReShadeEffectShaderToggler
Frans Bouma for creating ShaderToggler
ReShade & ReShade Community
Clear UI by vyxated as reference
Tutorial by Redronn as reference
Affinity Photo & Designer for Title & Text Images
242 notes
·
View notes
Text
Since I can't hope to GPOSE again until at least Friday I'm going to show everyone my "super top-secret really great lighting portraits" that take 10-20 minutes. (depends on the pose really) This is made with the intent for you to try this with your own characters as many times as you want as often as you want. DO IT!
Step 1 - Have a character that can access the Malestrom Barracks in Limsa Lominsa. If you are using CRIMES it can be any character then you may load in the one you need. I have Durafein enlisted in Malestrom for this reason! Step 2 - stand here.

Note: If your squad is meandering around just make sure you hide them with the gpose character display settings. Sometimes one of them will take your precious real estate!
Step 3 - Ensure it's daytime so the light is shining through. The best light imho is around 6am Eorzean time. But any daytime works well for this. If you're not using CRIMES you may have to stand around and wait. It's worth it though! Step 4 - When the light is right strike a pose and get into gpose!

Note: If you're in vanilla make SURE you have "stop time/weather" checked or you may have a bad time! You can do that by hitting the 5th icon on the right at the top of your gpose window. It should have an image of a clock and a sun with a lock beneath them.
Step 5 - Zoom in and rotate 90 degrees or so! Sometimes I do 120 but you get the idea. I usually refine this a bit with the CRIMES camera.

Ta-da! You have a super fast portrait! Notes: You can get your character to look at the camera by selecting the "Track Camera" (second eyeball icon) under "Motion Settings" (which is the walking icon just beneath lighting settings) I literally don't touch the gpose lighting settings for these because they're meant to be fast.
I refine things in shaders but the above is just my usual "gameplay" shader so you can see what you get without drastic adjustments! Here's the portrait I've done of Viedyn using this - and Here's the portrait of Durafein! I can't wait to see what you create!
#gposers#gpose tips#gpose location#ffxiv gpose#elezen#duskwight#My ulterior motive is more Elezen on my dash#you can also do this with a window in any apartment/house#obviously the concept isn't revolutionary or anything!#but unless you've already got that set up#this is my fav spot for a quick in-and-out dramatic portrait#I just wanted to share so others can try it on those days#where you REALLY want something dramatic but time isn't on your side!#I'll also use CRIMES to nudge the characters here and there#to make sure the light hits them exactly as I want it to
33 notes
·
View notes
Text

I was contemplating re-installing Reshade, but frankly I've never been able to get it to do what I want because I just don't understand what shaders do or how to manipulate them, and people who share presets tend to have vastly different preference than I have. It occurred to me, though, that maybe I could fiddle with lighting mods instead to get the job done. So, taking some inspiration from @rollo-rolls and her recent mashing-together of lighting mods, I decided to do some mashing of my own to see what I could come up with.
The above is what I've come up with, so far. No Reshade, no Photoshop (not even a contrast adjustment), just my "naked" game, which does involve NVIDIA profile settings for antialiasing and such as well as graphics rules for higher-def textures and shadows.
It's a mish-mash of:
1) My favorite lighting mod, Burntwaffles's Dream Dimension, which I (mostly) love in general, but it can be a little "shallow" and washed-out sometimes, and it does sometimes create harsh and overly-dark shadows, especially on covered porches and on sims in outdoor lighting.
2) Some adjusted values from @boringbones's lighting mod, which I generally like because it adds a very nice depth, but overall it's a little too contrast-y and the shadows are a bit too dark and hard-edged for my personal likings, while other things are too bright/saturated for my likings.
3) A half-assed lighting mod that I made for personal use years ago, which borrowed Dream Dimension's color ramps, but I desaturated them a little bit here and there. Those are the ramps in this mod.
Additionally, the clouds, sun halo, and stars in my game are provided by @wasset-aseskara's separate "Enchanted Environment" mod, the images of which I've also edited to my likings quite a bit over the years. I didn't do anything to CAS lighting because 1) I don't care enough, and 2) I'm very happy with @simbouquet's CAS lighting.
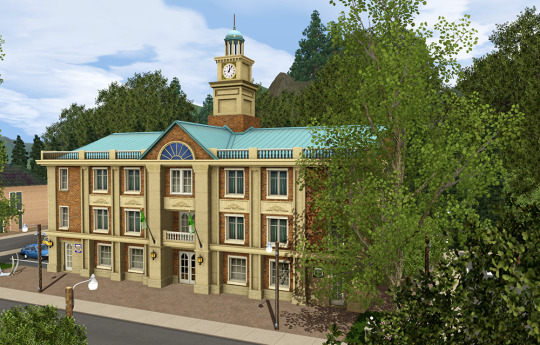
Anyway, I'm liking it so far. It's (mostly) gotten rid of the harsh shadows on sims, especially on their faces outdoors, and reduced (but alas not eliminated) the weird darkness in some places (like ceilings) with over-brightness in others (like some walls) that naturally-daylit interiors tend to have, even with edited/fixed window lighting. But, I've yet to look at it during anything but a sunny day, so we'll see what it looks like on cloudier days and at night. That's today's project.
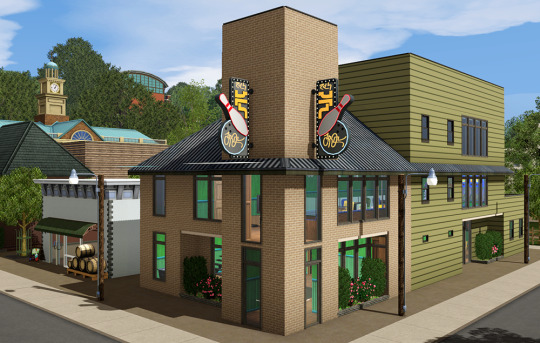
I didn't take any "before" pictures because I really hadn't planned on spending hours messing around with this, but here is a couple of houses back when I put them in this world, with an untweaked Dream Dimension lighting mod in place, and then with my frankensteined thing:


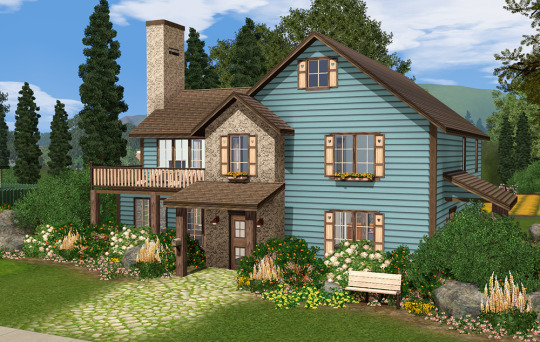

(With the caveat that "before" was with my old video card, GTX1050Ti vs. the RTX4060 I have now. Otherwise, the only difference is the lighting mod and the addition of @asabinsims's "Project Renaissance" tree/plant defaults, which I highly recommend if you like a more-realistic look...though I admit that I have plans to desaturate some of the images in them because weird me likes more desaturated colors.)
Anyway, maybe I'll share it if the other weather environments and nighttime end up looking OK, in case there's anyone else out there who has similar weird preferences to mine.
62 notes
·
View notes
Note
Do you have a tutorial of where you convert objects after and make them function?
Hi! Yes and no, LOL. 😅
☽✶•.¸(✶•.¸★¸.•✶´)¸.•✶´☾ ☆«´¨`•°°•´¨`»☆ ☽.¸.•✶(¸.•✶´★`✶•.¸)`✶•.☾
Welcome to Murf’s School of Crap and Crap-Making!
School Motto: Prepare to be tortured! For Science!
Lesson #28: FUNCTIONALITY (I love the way you move~! 🎶)
☽✶•.¸(✶•.¸★¸.•✶´)¸.•✶´☾ ☆«´¨`•°°•´¨`»☆ ☽.¸.•✶(¸.•✶´★`✶•.¸)`✶•.☾
Quick Tid-Bits about Buy Mode CC Functionality
At its most basic level, object conversion follows the same basic steps from this tutorial I made here (for TS2 to TS3 converting). Once you have an .obj mesh and your .png/.dds textures, it's really just a matter of Exporting the mesh from a 3d modelling program (Blender or Milkshape), plus the textures into an image program (Gimp, Photoshop, etc), and Importing all of them into whichever TS3-compatible program you wanna work with (I always use TSRW cuz I can't stand Blender).
But when it comes to FUNCTIONAL CC, it really does depend on what the specific function is. Anything that's not Decor is Functional (anything sims can actually use/interact with; or that you can toggle specific options on). But the Buy Mode object types were NOT created equally--some are WAY more complex than others. Some functional objects are static--they don't move around much or do anything fancy (a table, a lamp, etc), and if they do move, it's very limited and doesn't require a bunch of finagling to make them work right. But some of these turds have pieces that are mobile/etc. 😰 When a sim interacts with the object, there's animations & bits moving all over the place & lights flashing & noises beeping & all kinds of crap happening. So objects tend to get more complicated to make as their functionality increases and there are a lot more moving parts.
LEVEL 1: SCRIPTED (Decor) Objects
Scripted objects are fun(ny), cuz that's when you're changing the base function of an object, by giving it a new Script in TSRW/S3PE (The Transmogrifier mod at MTS basically does this for you in-game). For ME, I'm usually turning a decor object into a functional one. Sometimes that's as simple as taking Wall Decor and giving it a script that makes it ACT like a functional wall tv/mirror/etc instead). Other times I'm making my Edible foodstuffs & Drinkable beverages. These often REQUIRE Arsil's Beverages Mod or something, cuz the script is from a 3rd party mod not built in the game itself. So it depends, but most of the time it's super easy & simple (which is why I tend to make these a lot 😅); just a matter of copy/pasting one script into another.
LEVEL 2: VERY simple functional static objects
There's some basic functional CC that follow the exact same steps as the 2t3 tutorial I already linked above--just swap the meshes & textures, adjusting the mesh sizes/positions as needed, and you're DONE (barring any finagling with Shaders (if you want the mesh to be see-thru or have a neon glow or whatever)):
Surfaces & Comfort (tables & chairs/sofas ONLY*)
Lighting (all lighting categories)
Electronics (Radios, Alarms, Clocks ONLY*)
Hobbies & Skills: LN pianos/keyboards
Toys (SN 8-ball, basegame/AMB crafted toys)
Plumbing (toilets, sinks, & SOME tubs)
Appliances (firepits)
Party (the dance rugs, SN fairy houses, FX Machines from LN/SHT ONLY*)
Debug/Transportation: Teleporter, IP Jet-skis
Plumbing (toilets, sinks, & SOME tubs)
* there's likely exceptions I'm forgetting about, but for the most part these are the "Only" super-reliably simple functional objects sims can use AFAIK
LEVEL 3: More involved functional objects
But then there's garbage that either require you to mess with their Joints/Bones (cuz the objects move / have animations when sims use them); or Geostates (the object changes shape/state when sims interact/use them & move them around). Or worse: you have to edit BOTH. 💀
More Involved (but not bad once you get the hang of it)
Electronics (TV screen meshes need careful positioning, computers have joints/bones on the mouse)
Appliances (stoves--the oven doors have joints/bones)
Storage (toy/treasure chests -- the lid has a joint/bone IIRC)
Sports (WA training dummies have joints/bones IIRC)
Debug (WA incense has geostates)
Hobbies & Skills (SN wands have geostates)
Transportation (ITF hover boards & SN magic brooms have geostates)
Toys (teddy bears have a lot more joints, that pretty much use similar steps as CAS CC--the Mesh Toolkit is your friend!)
None of these are really complicated, once you get the basics of how joints/bones & geostates work.
IMO, other than the teddy bear, you can easily & quickly assign joints/bones to meshes manually, without needing the Mesh Toolkit to do it for you at all. But be careful when manually assigning them! If you mess up assigning the joint/bones, the object mesh will move around in effed up ways during the animations.
OR, it might not move at all--which NGL is sometimes a blessing in disguise! 😅 Sometimes--not always!--it really doesn't matter if an object doesn't have bones/joints, esp. when converting super busy meshes that don't really "FIT" within TS3--like medieval/fantasy/sci-fi meshes with all kinds of fancy bits. In those cases, it's easier to say EFF the animations and just make it a static mesh instead--the dresser/chest/oven/etc doors/lids don't open, the car/bike wheels don't turn, but the object still FUNCTIONS properly--the sim can still USE it as intended, which is all that REALLY matters. 😌
Geostates though? That's a bit different. Cuz making geostates mean you have to make multiple different version of the mesh, cuz the object has different States that show up: full/empty, broken/fixed, up/down, messy/neat, finished/incomplete, on/off, open/closed states. Wands & guitars & brooms & beds & boats etc. NEED geostates in order to act right. They're either supposed to move around with the sim a certain way; or change depending what state they're in when interacted with versus left alone/idle. And those states can be freaking annoying to work with, esp. in TSRW. 🤦 Ofttimes it's easiest to break the mesh into multiple individual groups, Import them all into TSRW separately, and then manually assign the geostates group-by-group, not vertices-by-vertices--(guitars & rowboats, I'm looking at YOU).
LEVEL 4: Harder / More Complex (frikkin irritating)
Hobbies & Skills (guitars--too many effing geostates)
Toys (dollhouses, sandcastles, etc have geostates)
Storage (bookcases have geostates) dressers & armoire/wardrobes have annoying joints/bones for opening the drawers/doors/etc)
Pets (basegame fishbowls have a lot of geostates IIRC)
Transportation (IP rowboats have TOO MANY frikkin geostates & joints--I always say never again! and then I make another one, LOL 🤡🤥)
This is where my patience gets frikkin tested.
LEVEL 5: Too Effing Intimidating / Annoying / Hard For ME*
Appliances (pretty much everything else, I don't go here)
Comfort (beds, cribs, etc. have geostates I'm too lazy for)
Plumbing (showers/tubs with moving doors/screens)
Entertainment, Hobbies & Skills (I don't go here)
Transportation (bikes, cars--absolutely not)
Pets (my rabbit mod--never again and I mean it)
* I am notoriously LAZY--once there's one too many steps or things start acting funny or going wrong, I give up HELLA quick, cuz chile, I HATE making CC. Simming is a hobby that helps me relax; not a job I'm required to do for my livelihood--I'm not tryna be stressed over frikkin pixels. There's objects I've never made before; or only made ONCE and swore to NEVER make again cuz I love myself; or I've tried to make and completely failed at and don't care enough to figure out. So I'm not saying these objects are impossible, I'M just not messing with them. 🤣
TL;DR: Your Mileage May Vary!
So yeah, your question is actually harder to answer than it seems, cuz it really depends on what functional object you wanna convert. There's objects I have no idea how to make--I see way too many moving parts, and I run in the opposite direction.

25 notes
·
View notes
Text
Thank you for all of the love on my recent Gpose omg ; w ; I really wish I could reply directly to tabs aaaa. But thank you for your comments, they made me so happy to read, I love them. I wanted to share how I did it all and explain my process if anyone is interested ♡
More below the cut!

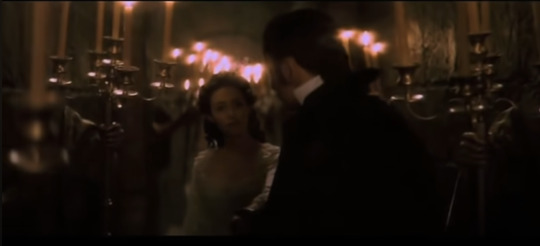
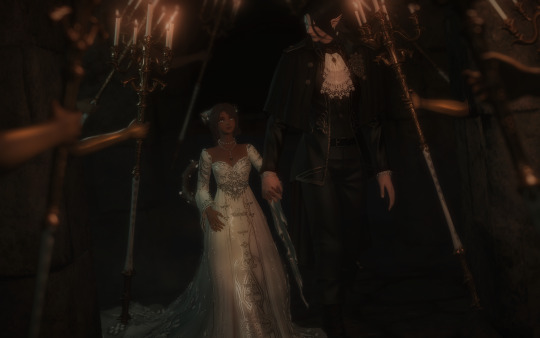
I got started by actually making the backdrop. I wanted to emulate the scene where the Phantom was taking Christine through the candlelit walkway, so I made a long tunnel to get it as close as I could to the shot.
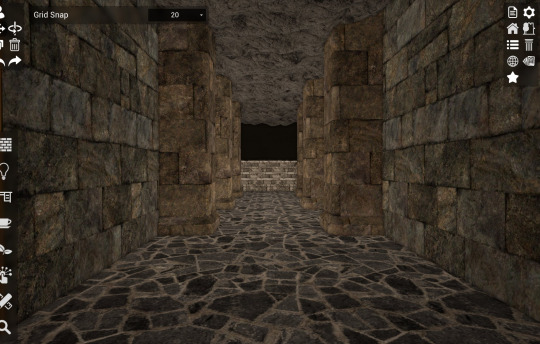
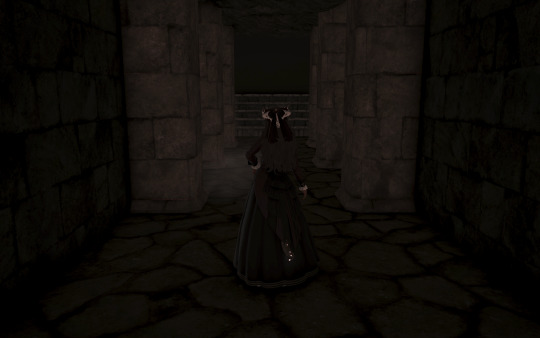
And here is the result in game :3 I knew with the back I was going to have to rely on an optical illusion to sell that this was a long dark hallway, so I dyed the back wall soot black and turned my interior lighting to 0.

And here the setup is pre pre shaders. I cloned a few actors in using brio and had them draw the archeo kingdom WHM staff and placed them in the wall. I was really lucky that I had a long enough lookalike for the candelabras in the movie. Also, you can see that the illusion isn't being quite sold in the back at the moment, I fixed it using camera angling and having the primary source of light a little further back from the two subjects. And to create an even 3 point lighting I placed a greenish blue light to the back left of Alsene which is the blue you can see on their clothes further down. It is best to try and give yourself 3 point lighting when you gpose, you can even achieve this using the character lighting toggle built into the game itself. :3
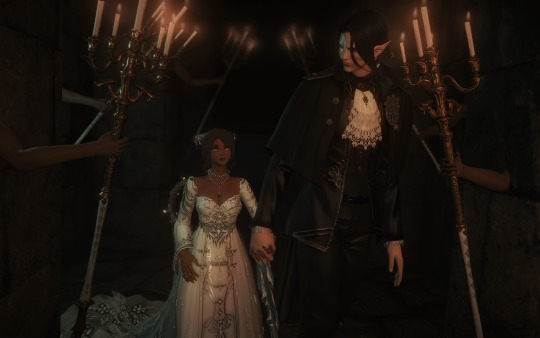
Here it is with that light placed like I mentioned before and my shaders turned on. I'm using Candle presets on this one in particular with cinematic DOF turned on and focused in between Alsene and Artoirel. It also helps blend that black wall in the back into the scenery so it isn't as obvious. Also I would like to mention that when I do large shots like this, I take MANY screens in multiple angles to pick from the best shot. In this one in particular I have 30 screens in various angles that I chose from. This ensures that you aren't leaving the pose with a product you aren't happy with. It saves you time in having to pose it again.


I ended up choosing these two shots, and I edited them in clip studio. My process for that was making the arms look more metallic to match the rod by adding highlights to them. And the second thing I did was add a retro bloom to the image to mimic the vibe in the video. And as you know the final result was this :3
In all it was a very time consuming but fun gpose to do! If anyone has any questions about it I will be happy to answer them ♡ Thank you for appreciating what I do ; w ; it was lovely to wake up to.
68 notes
·
View notes
Note
What is your secret image processing formula?👀
What website do you find such cool VHS effects on? Are these brushes and special textures?
A magician never reveals his secrets >:) ..... okay, I'm just kidding, I can tell how I do the effect myself! :3
These first steps I do in my drawing program after drawing and finishing my doodle (program being Clip Studio Paint in my case, though it doesn't matter much tbh what drawing program to use, jfkjklhlj):
A little bit of unsharpen mask to add some sharpness on the finished image, then a little bit of gaussian blur to soften that sharpness. Sounds silly, but somehow it works, lol
After that, slight chromatic aberration. Doesn't have to be too much, it can reduce the retro look imo if it's applied too much.
Then I add some (either monochromatic OR rainbow) noise as an overlay on top of all, which then I put to like around 10-15% opacity depending on how much noise I want on the image itself. I sometimes blur the noise a little too in the end.
Totally optional and this is just something that I like to do, but I also like to play around with different wacky colorful gradient maps, trying out different blending layer-styles and trying out different effects overall. I tend to experiment a lot sometimes, lol. Sometimes I lower the saturation a bit too.
Basically unsharp mask, light blur, noise and chromatic aberration will be your best friends whenever making the VHS effect, lol.
Then after doing all that previously told; I flatten the image, save it as a heavily compressed JPEG-file (anything below 50-60% compression is good imo), and then I open it in another program, this being a free open-source program called "ntsc-rs". It's the program I use for nearly all of my arts nowadays, since I can add the authentic VHS-look with it and it's really easy to use!
If I wanna add a CRT-look then to my arts (like eg. those PS1-styled arts I've done or models etc.), I use another free cool program called "ShaderGlass"; it's originally meant for emulating the CRT look and such for PC video games, or when emulating/playing old retro games on PC. But you can open images in it too, apply shaders to them and then save the result as PNG-files!
Of course, alongside that program, I've also used few other programs and methods of making the VHS-effect: Signal-effect for Adobe After Effects (though that one costs money). Then there's also been ntsc-qt, another free program which iirc is an older version of ntsc-rs, I used to use it but it's no longer being worked on/supported so I stopped. And then also a VHS-plugin for Blender etc.
There's a lot of ways for doing the effect, but the ntsc-rs program has been one of the best and easiest one to me so far!
Hope this helped at least a little bit! <3
33 notes
·
View notes
Text
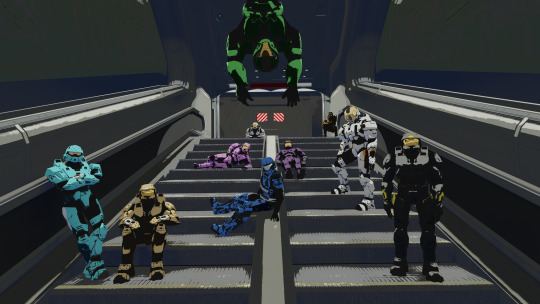
If you saw my Theta render I mentioned that I had been working on a prior 2D-style render. This is it. It's the same shader I used for Theta just without the lineart attempt (the environment and then Carolina and then York in this image were the first time I used that shader!)
Random unnecessary explanations (not in any particular order): When coming up for my internal premise for the image I imagined it as them relaxing in the better days of Freelancer, so prior to the AI debacles and therefore no Agent Texas but yes Agent Georgia. Known for failing to use his jetpack, I thought it'd be funny to have him hanging from the air. Connecticut the traitor is in a bit of a sneakier pose, Wyoming the sniper is prone, Carolina I tried to portray as a bit cocky and I put York as chill and next to her. North I tried to make relaxed while South I made intentionally taking up her entire side of the staircase if anyone was trying to walk down it. Washington was kinda the standard rifleman of the squad so I made him have a pretty basic pose, and then I positioned Maine and Florida last to just kinda fill the rest of the space. Maine I kept stiffer and Florida I made looser.
Note that due to the texture of the Halo 3 visors having a smudge in the corner, the shader made it look like all of them have a bit ol crack or dent there lol. Kinda fit York, but not the rest. Maybe at some point I'll figure out how to workaround that while still keeping the grey details on the rest of the visor.
46 notes
·
View notes