#simple html borders
Explore tagged Tumblr posts
Visit Tumblr Blog
Explore Tumblr blogs with no restrictions, modern design and the best experience.
Last Seen Tumblr Blogs


Fun Fact
25% of US internet users with an annual income of $80-100K use Tumblr.
Text

Html borders
F2U creds required and reblogs appreciated


#@ — borders#simple html borders#html borders#html border#rentry borders#rentry border#lace borders#simple borders#borders#borders rentry#borders bundlrs#bundlrs borders
406 notes
·
View notes
Text

Useful websites / links for rentry , bundlrs , gfx & etc for you!
symbol sanatorium - Links to a google document with a ton of symbols , kaomojis & text layouts. I use it for pretty much all of my recent rentrys.
sozaino.site - Website that's been making its rounds on rentry as of late, useful for graphic making. Has dividers, pngs, frames ~ etc if you have the creative touch.
sozai-good - site I found recently that has a lot of pngs you can download, also has frames and borders. In japanese but isn't hard to translate. Everything is also sorted into sections.
lottie lab - Website useful for animating, can be used to move around PNGs for rentry and the like. I don't use it much myself atm, but it's pretty easy to get the hang of.
scripted.neocities - Neocities full of code you can use for bundlrs or carrd. Also useful for stuff like spacehey and other sites that use CSS / HTML
blinkies.cafe - Easily make or find blinkies here! Great for beginners who want to make some simple things.
emojicombos - Search practically anything and you'll find an emoji combo for it. Useful for finding symbol / text combos and kaomojis.
unicode character table - Has pretty much every single symbol you've seen or needed. You can find what you want pretty easily due to its sectioning. Has stuff like arrows , dingbats , brackets , etc etc..
yaytext - Make your text 𝙼𝚘𝚗𝚘𝚜𝚙𝚊𝚌𝚎! or U͟n͟d͟e͟r͟l͟i͟n͟e͟d͟!͟ easily with this website! May possibly break screenreaders in the process though so be warned.
lorem ipsum generator - Too lazy to generate a block of text to make a page look filled out, well look no longer! This site can quickly generate of block of pure gibberish to make it seem like there's actually text there! Good for newspaper / magazine gfx ~
And that's all ( for now )! I use most of all these sites and find them very useful! Hopefully one of them will prove useful to you too dear friend (❁´◡`❁)

#puerileds#text decor#text layouts#websites#sites#pngs#dividers#frames#rentry#bundlrs#carrd#gfx#gfx decor#rentry decor#bundlrs decor#carrd decor#carrd resources#rentry resources#png#divider#gif#rentry stuff#aesthetic#idea#aesthetic bio#bio#discord layout#discord decor#twitter bio#symbols
3K notes
·
View notes
Text


Truth In The Eyes Skin - Free!
This is my newest baby, Truth In the Eyes. Majority of the design for the skin was made in a fever rush from around 10 in the evening to 4 in the morning on a week day, pretty much an outpouring of all my accumulated stress. Making the skin a reality was a different story altogether, but I am finally done! I hope you all like it, and please let me know if you are using it! (Somehow. Maybe like the post, or reply, or message me... I'd love to hear from you!)
Features:
Easy to customize color scheme, background and font style
Fixed top navigation bar with modal quicklinks area
Wavy shapes!
5 pre-installed member groups + admin and mod groups
All custom HTML templates
Guidebook webpage code + redirect row with staff links
Mix-and-match post/content styling codes (for headers, images and simple borders)
You can preview the skin here: https://truthintheeyes.jcink.net/index.php?act=idx
Please read the policies for skin use here: https://truthintheeyes.jcink.net/index.php?act=Pages&pid=2#one
Download the installation files here: https://ko-fi.com/s/2b22eeb70d
Also, I'm not sure if you noticed from the skin but I really really like thaibl / thaigl and especially pondphuwin. Haha. If ever you want to rp using thai faces, hit me up.
71 notes
·
View notes
Text
Day 3 [Table In HTML]
Day 1 [Introduction To HTML]
Day 2 [Multimedia Elements In HTML]

Line by line explanation:
Defines a table,
border : This attribute adds a simple border to the table.
style : Used to add some styling to the webpage. Can be used with any tag.
Border spacing: Adds space between table cells.
Text-align : Aligns the text in the table.
Contains the header section of the table.
Represents a table row
Represents a table column
Holds the body of the table → main data (menu items).
Used for individual data cells in the table.
<table> <thead> <tr> <th> Column Head 1 </th> <th> Column Head 2 </th> </tr> </thead> <tbody> <tr> <td> Row 1 Data = Column 1 </td> <td> Row 1 Data = Column 2 </td> </tr> </tbody> </table>
Final Output

------------------------------
Hope it helps :)
#code#codeblr#css#html#javascript#python#studyblr#progblr#programming#comp sci#web design#web developers#web development#website design#webdev#website#tech#html css#learn to code#school#study motivation#study aesthetic#study blog#student#high school#studying#study tips#studyspo#website development#coding
8 notes
·
View notes
Text
How to Create Multi-Step Forms With Vanilla JavaScript and CSS
New Post has been published on https://thedigitalinsider.com/how-to-create-multi-step-forms-with-vanilla-javascript-and-css/
How to Create Multi-Step Forms With Vanilla JavaScript and CSS
Multi-step forms are a good choice when your form is large and has many controls. No one wants to scroll through a super-long form on a mobile device. By grouping controls on a screen-by-screen basis, we can improve the experience of filling out long, complex forms.
But when was the last time you developed a multi-step form? Does that even sound fun to you? There’s so much to think about and so many moving pieces that need to be managed that I wouldn’t blame you for resorting to a form library or even some type of form widget that handles it all for you.
But doing it by hand can be a good exercise and a great way to polish the basics. I’ll show you how I built my first multi-step form, and I hope you’ll not only see how approachable it can be but maybe even spot areas to make my work even better.
We’ll walk through the structure together. We’ll build a job application, which I think many of us can relate to these recent days. I’ll scaffold the baseline HTML, CSS, and JavaScript first, and then we’ll look at considerations for accessibility and validation.
I’ve created a GitHub repo for the final code if you want to refer to it along the way.
The structure of a multi-step form
Our job application form has four sections, the last of which is a summary view, where we show the user all their answers before they submit them. To achieve this, we divide the HTML into four sections, each identified with an ID, and add navigation at the bottom of the page. I’ll give you that baseline HTML in the next section.
Navigating the user to move through sections means we’ll also include a visual indicator for what step they are at and how many steps are left. This indicator can be a simple dynamic text that updates according to the active step or a fancier progress bar type of indicator. We’ll do the former to keep things simple and focused on the multi-step nature of the form.,
The structure and basic styles
We’ll focus more on the logic, but I will provide the code snippets and a link to the complete code at the end.
Let’s start by creating a folder to hold our pages. Then, create an index.html file and paste the following into it:
Open HTML
<form id="myForm"> <section class="group-one" id="one"> <div class="form-group"> <div class="form-control"> <label for="name">Name <span style="color: red;">*</span></label> <input type="text" id="name" name="name" placeholder="Enter your name"> </div> <div class="form-control"> <label for="idNum">ID number <span style="color: red;">*</span></label> <input type="number" id="idNum" name="idNum" placeholder="Enter your ID number"> </div> </div> <div class="form-group"> <div class="form-control"> <label for="email">Email <span style="color: red;">*</span></label> <input type="email" id="email" name="email" placeholder="Enter your email"> </div> <div class="form-control"> <label for="birthdate">Date of Birth <span style="color: red;">*</span></label> <input type="date" id="birthdate" name="birthdate" max="2006-10-01" min="1924-01-01"> </div> </div> </section> <section class="group-two" id="two"> <div class="form-control"> <label for="document">Upload CV <span style="color: red;">*</span></label> <input type="file" name="document" id="document"> </div> <div class="form-control"> <label for="department">Department <span style="color: red;">*</span></label> <select id="department" name="department"> <option value="">Select a department</option> <option value="hr">Human Resources</option> <option value="it">Information Technology</option> <option value="finance">Finance</option> </select> </div> </section> <section class="group-three" id="three"> <div class="form-control"> <label for="skills">Skills (Optional)</label> <textarea id="skills" name="skills" rows="4" placeholder="Enter your skills"></textarea> </div> <div class="form-control"> <input type="checkbox" name="terms" id="terms"> <label for="terms">I agree to the terms and conditions <span style="color: red;">*</span></label> </div> <button id="btn" type="submit">Confirm and Submit</button> </section> <div class="arrows"> <button type="button" id="navLeft">Previous</button> <span id="stepInfo"></span> <button type="button" id="navRight">Next</button> </div> </form> <script src="script.js"></script>
Looking at the code, you can see three sections and the navigation group. The sections contain form inputs and no native form validation. This is to give us better control of displaying the error messages because native form validation is only triggered when you click the submit button.
Next, create a styles.css file and paste this into it:
Open base styles
:root --primary-color: #8c852a; --secondary-color: #858034; body font-family: sans-serif; line-height: 1.4; margin: 0 auto; padding: 20px; background-color: #f4f4f4; max-width: 600px; h1 text-align: center; form background: #fff; padding: 40px; border-radius: 5px; box-shadow: 0 0 10px rgba(0, 0, 0, 0.1); display: flex; flex-direction: column; .form-group display: flex; gap: 7%; .form-group > div width: 100%; input:not([type="checkbox"]), select, textarea width: 100%; padding: 8px; border: 1px solid #ddd; border-radius: 4px; .form-control margin-bottom: 15px; button display: block; width: 100%; padding: 10px; color: white; background-color: var(--primary-color); border: none; border-radius: 4px; cursor: pointer; font-size: 16px; button:hover background-color: var(--secondary-color); .group-two, .group-three display: none; .arrows display: flex; justify-content: space-between align-items: center; margin-top: 10px; #navLeft, #navRight width: fit-content; @media screen and (max-width: 600px) .form-group flex-direction: column;
Open up the HTML file in the browser, and you should get something like the two-column layout in the following screenshot, complete with the current page indicator and navigation.
Adding functionality with vanilla JavaScript
Now, create a script.js file in the same directory as the HTML and CSS files and paste the following JavaScript into it:
Open base scripts
const stepInfo = document.getElementById("stepInfo"); const navLeft = document.getElementById("navLeft"); const navRight = document.getElementById("navRight"); const form = document.getElementById("myForm"); const formSteps = ["one", "two", "three"]; let currentStep = 0; function updateStepVisibility() formSteps.forEach((step) => document.getElementById(step).style.display = "none"; ); document.getElementById(formSteps[currentStep]).style.display = "block"; stepInfo.textContent = `Step $currentStep + 1 of $formSteps.length`; navLeft.style.display = currentStep === 0 ? "none" : "block"; navRight.style.display = currentStep === formSteps.length - 1 ? "none" : "block"; document.addEventListener("DOMContentLoaded", () => navLeft.style.display = "none"; updateStepVisibility(); navRight.addEventListener("click", () => if (currentStep < formSteps.length - 1) currentStep++; updateStepVisibility(); ); navLeft.addEventListener("click", () => if (currentStep > 0) currentStep--; updateStepVisibility(); ); );
This script defines a method that shows and hides the section depending on the formStep values that correspond to the IDs of the form sections. It updates stepInfo with the current active section of the form. This dynamic text acts as a progress indicator to the user.
It then adds logic that waits for the page to load and click events to the navigation buttons to enable cycling through the different form sections. If you refresh your page, you will see that the multi-step form works as expected.
Multi-step form navigation
Let’s dive deeper into what the Javascript code above is doing. In the updateStepVisibility() function, we first hide all the sections to have a clean slate:
formSteps.forEach((step) => document.getElementById(step).style.display = "none"; );
Then, we show the currently active section:
document.getElementById(formSteps[currentStep]).style.display = "block";`
Next, we update the text that indicators progress through the form:
stepInfo.textContent = `Step $currentStep + 1 of $formSteps.length`;
Finally, we hide the Previous button if we are at the first step and hide the Next button if we are at the last section:
navLeft.style.display = currentStep === 0 ? "none" : "block"; navRight.style.display = currentStep === formSteps.length - 1 ? "none" : "block";
Let’s look at what happens when the page loads. We first hide the Previous button as the form loads on the first section:
document.addEventListener("DOMContentLoaded", () => navLeft.style.display = "none"; updateStepVisibility();
Then we grab the Next button and add a click event that conditionally increments the current step count and then calls the updateStepVisibility() function, which then updates the new section to be displayed:
navRight.addEventListener("click", () => if (currentStep < formSteps.length - 1) currentStep++; updateStepVisibility(); );
Finally, we grab the Previous button and do the same thing but in reverse. Here, we are conditionally decrementing the step count and calling the updateStepVisibility():
navLeft.addEventListener("click", () => if (currentStep > 0) currentStep--; updateStepVisibility(); );
Handling errors
Have you ever spent a good 10+ minutes filling out a form only to submit it and get vague errors telling you to correct this and that? I prefer it when a form tells me right away that something’s amiss so that I can correct it before I ever get to the Submit button. That’s what we’ll do in our form.
Our principle is to clearly indicate which controls have errors and give meaningful error messages. Clear errors as the user takes necessary actions. Let’s add some validation to our form. First, let’s grab the necessary input elements and add this to the existing ones:
const nameInput = document.getElementById("name"); const idNumInput = document.getElementById("idNum"); const emailInput = document.getElementById("email"); const birthdateInput = document.getElementById("birthdate") const documentInput = document.getElementById("document"); const departmentInput = document.getElementById("department"); const termsCheckbox = document.getElementById("terms"); const skillsInput = document.getElementById("skills");
Then, add a function to validate the steps:
Open validation script
function validateStep(step)
Here, we check if each required input has some value and if the email input has a valid input. Then, we set the isValid boolean accordingly. We also call a showError() function, which we haven’t defined yet.
Paste this code above the validateStep() function:
function showError(input, message) const formControl = input.parentElement; const errorSpan = formControl.querySelector(".error-message"); input.classList.add("error"); errorSpan.textContent = message;
Now, add the following styles to the stylesheet:
Open validation styles
input:focus, select:focus, textarea:focus outline: .5px solid var(--primary-color); input.error, select.error, textarea.error outline: .5px solid red; .error-message font-size: x-small; color: red; display: block; margin-top: 2px; .arrows color: var(--primary-color); font-size: 18px; font-weight: 900; #navLeft, #navRight display: flex; align-items: center; gap: 10px; #stepInfo color: var(--primary-color);
If you refresh the form, you will see that the buttons do not take you to the next section till the inputs are considered valid:
Finally, we want to add real-time error handling so that the errors go away when the user starts inputting the correct information. Add this function below the validateStep() function:
Open real-time validation script
function setupRealtimeValidation() nameInput.addEventListener("input", () => if (nameInput.value.trim() !== "") clearError(nameInput); ); idNumInput.addEventListener("input", () => if (idNumInput.value.trim() !== "") clearError(idNumInput); ); emailInput.addEventListener("input", () => if (emailInput.validity.valid) clearError(emailInput); ); birthdateInput.addEventListener("change", () => if (birthdateInput.value !== "") clearError(birthdateInput); ); documentInput.addEventListener("change", () => if (documentInput.files[0]) clearError(documentInput); ); departmentInput.addEventListener("change", () => if (departmentInput.value !== "") clearError(departmentInput); ); termsCheckbox.addEventListener("change", () => if (termsCheckbox.checked) clearError(termsCheckbox); );
This function clears the errors if the input is no longer invalid by listening to input and change events then calling a function to clear the errors. Paste the clearError() function below the showError() one:
function clearError(input) const formControl = input.parentElement; const errorSpan = formControl.querySelector(".error-message"); input.classList.remove("error"); errorSpan.textContent = "";
And now the errors clear when the user types in the correct value:
The multi-step form now handles errors gracefully. If you do decide to keep the errors till the end of the form, then at the very least, jump the user back to the erroring form control and show some indication of how many errors they need to fix.
Handling form submission
In a multi-step form, it is valuable to show the user a summary of all their answers at the end before they submit and to offer them an option to edit their answers if necessary. The person can’t see the previous steps without navigating backward, so showing a summary at the last step gives assurance and a chance to correct any mistakes.
Let’s add a fourth section to the markup to hold this summary view and move the submit button within it. Paste this just below the third section in index.html:
Open HTML
<section class="group-four" id="four"> <div class="summary-section"> <p>Name: </p> <p id="name-val"></p> <button type="button" class="edit-btn" id="name-edit"> <span>✎</span> <span>Edit</span> </button> </div> <div class="summary-section"> <p>ID Number: </p> <p id="id-val"></p> <button type="button" class="edit-btn" id="id-edit"> <span>✎</span> <span>Edit</span> </button> </div> <div class="summary-section"> <p>Email: </p> <p id="email-val"></p> <button type="button" class="edit-btn" id="email-edit"> <span>✎</span> <span>Edit</span> </button> </div> <div class="summary-section"> <p>Date of Birth: </p> <p id="bd-val"></p> <button type="button" class="edit-btn" id="bd-edit"> <span>✎</span> <span>Edit</span> </button> </div> <div class="summary-section"> <p>CV/Resume: </p> <p id="cv-val"></p> <button type="button" class="edit-btn" id="cv-edit"> <span>✎</span> <span>Edit</span> </button> </div> <div class="summary-section"> <p>Department: </p> <p id="dept-val"></p> <button type="button" class="edit-btn" id="dept-edit"> <span>✎</span> <span>Edit</span> </button> </div> <div class="summary-section"> <p>Skills: </p> <p id="skills-val"></p> <button type="button" class="edit-btn" id="skills-edit"> <span>✎</span> <span>Edit</span> </button> </div> <button id="btn" type="submit">Confirm and Submit</button> </section>
Then update the formStep in your Javascript to read:
const formSteps = ["one", "two", "three", "four"];
Finally, add the following classes to styles.css:
.summary-section display: flex; align-items: center; gap: 10px; .summary-section p:first-child width: 30%; flex-shrink: 0; border-right: 1px solid var(--secondary-color); .summary-section p:nth-child(2) width: 45%; flex-shrink: 0; padding-left: 10px; .edit-btn width: 25%; margin-left: auto; background-color: transparent; color: var(--primary-color); border: .7px solid var(--primary-color); border-radius: 5px; padding: 5px; .edit-btn:hover border: 2px solid var(--primary-color); font-weight: bolder; background-color: transparent;
Now, add the following to the top of the script.js file where the other consts are:
const nameVal = document.getElementById("name-val"); const idVal = document.getElementById("id-val"); const emailVal = document.getElementById("email-val"); const bdVal = document.getElementById("bd-val") const cvVal = document.getElementById("cv-val"); const deptVal = document.getElementById("dept-val"); const skillsVal = document.getElementById("skills-val"); const editButtons = "name-edit": 0, "id-edit": 0, "email-edit": 0, "bd-edit": 0, "cv-edit": 1, "dept-edit": 1, "skills-edit": 2 ;
Then add this function in scripts.js:
function updateSummaryValues() nameVal.textContent = nameInput.value; idVal.textContent = idNumInput.value; emailVal.textContent = emailInput.value; bdVal.textContent = birthdateInput.value; const fileName = documentInput.files[0]?.name; if (fileName) const extension = fileName.split(".").pop(); const baseName = fileName.split(".")[0]; const truncatedName = baseName.length > 10 ? baseName.substring(0, 10) + "..." : baseName; cvVal.textContent = `$truncatedName.$extension`; else cvVal.textContent = "No file selected"; deptVal.textContent = departmentInput.value; skillsVal.textContent = skillsInput.value || "No skills submitted"; }
This dynamically inserts the input values into the summary section of the form, truncates the file names, and offers a fallback text for the input that was not required.
Then update the updateStepVisibility() function to call the new function:
function updateStepVisibility() formSteps.forEach((step) => document.getElementById(step).style.display = "none"; ); document.getElementById(formSteps[currentStep]).style.display = "block"; stepInfo.textContent = `Step $currentStep + 1 of $formSteps.length`; if (currentStep === 3) updateSummaryValues(); navLeft.style.display = currentStep === 0 ? "none" : "block"; navRight.style.display = currentStep === formSteps.length - 1 ? "none" : "block";
Finally, add this to the DOMContentLoaded event listener:
Object.keys(editButtons).forEach((buttonId) => const button = document.getElementById(buttonId); button.addEventListener("click", (e) => currentStep = editButtons[buttonId]; updateStepVisibility(); ); );
Running the form, you should see that the summary section shows all the inputted values and allows the user to edit any before submitting the information:
And now, we can submit our form:
form.addEventListener("submit", (e) => e.preventDefault(); if (validateStep(2)) alert("Form submitted successfully!"); form.reset(); currentFormStep = 0; updateStepVisibility(); );
Our multi-step form now allows the user to edit and see all the information they provide before submitting it.
Accessibility tips
Making multi-step forms accessible starts with the basics: using semantic HTML. This is half the battle. It is closely followed by using appropriate form labels.
Other ways to make forms more accessible include giving enough room to elements that must be clicked on small screens and giving meaningful descriptions to the form navigation and progress indicators.
Offering feedback to the user is an important part of it; it’s not great to auto-dismiss user feedback after a certain amount of time but to allow the user to dismiss it themselves. Paying attention to contrast and font choice is important, too, as they both affect how readable your form is.
Let’s make the following adjustments to the markup for more technical accessibility:
Add aria-required="true" to all inputs except the skills one. This lets screen readers know the fields are required without relying on native validation.
Add role="alert" to the error spans. This helps screen readers know to give it importance when the input is in an error state.
Add role="status" aria-live="polite" to the .stepInfo. This will help screen readers understand that the step info keeps tabs on a state, and the aria-live being set to polite indicates that should the value change, it does not need to immediately announce it.
In the script file, replace the showError() and clearError() functions with the following:
function showError(input, message) const formControl = input.parentElement; const errorSpan = formControl.querySelector(".error-message"); input.classList.add("error"); input.setAttribute("aria-invalid", "true"); input.setAttribute("aria-describedby", errorSpan.id); errorSpan.textContent = message; function clearError(input) const formControl = input.parentElement; const errorSpan = formControl.querySelector(".error-message"); input.classList.remove("error"); input.removeAttribute("aria-invalid"); input.removeAttribute("aria-describedby"); errorSpan.textContent = "";
Here, we programmatically add and remove attributes that explicitly tie the input with its error span and show that it is in an invalid state.
Finally, let’s add focus on the first input of every section; add the following code to the end of the updateStepVisibility() function:
const currentStepElement = document.getElementById(formSteps[currentStep]); const firstInput = currentStepElement.querySelector( "input, select, textarea" ); if (firstInput) firstInput.focus();
And with that, the multi-step form is much more accessible.
Conclusion
There we go, a four-part multi-step form for a job application! As I said at the top of this article, there’s a lot to juggle — so much so that I wouldn’t fault you for looking for an out-of-the-box solution.
But if you have to hand-roll a multi-step form, hopefully now you see it’s not a death sentence. There’s a happy path that gets you there, complete with navigation and validation, without turning away from good, accessible practices.
And this is just how I approached it! Again, I took this on as a personal challenge to see how far I could get, and I’m pretty happy with it. But I’d love to know if you see additional opportunities to make this even more mindful of the user experience and considerate of accessibility.
References
Here are some relevant links I referred to when writing this article:
How to Structure a Web Form (MDN)
Multi-page Forms (W3C.org)
Create accessible forms (A11y Project)
#:not#Accessibility#ADD#aria#Article#Articles#attention#attributes#background#border-radius#box#box-shadow#browser#buttons#challenge#change#classes#code#Color#content#CSS#CV#dept#direction#display#email#error handling#event#Events#Exercise
3 notes
·
View notes
Note
Hi, maybe you can help me since you've done this so beautifully: How did you get your trello board to embed on your carrd? I've been trying to embed one for my commission queue into my website all day and it's not working and I am at my wit's end. :c Was it as simple as using the embed feature on carrd or did you do something special?
Oh sure!! Well I use the embed code element on weebly, and I use this code here that I frankensteined together (just remove the stars!) <★iframe src="https://trello.com/b/★boardnumber★.html" frameBorder="6" width="95%" height="450"></iframe★>
boardnumber being this bit in the url for whatever board you're embedding-

And then you can adjust the width/border as needed. Hope this helps!!!
12 notes
·
View notes
Note
I wanted to ask- how did you manage to get to get your comic fury banners to look so big?
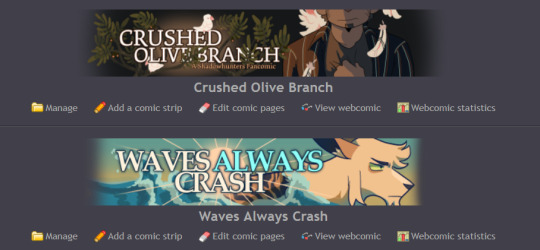
if you're asking about these I draw them at a bigger size and then shrink them down to the comicfury limitations!
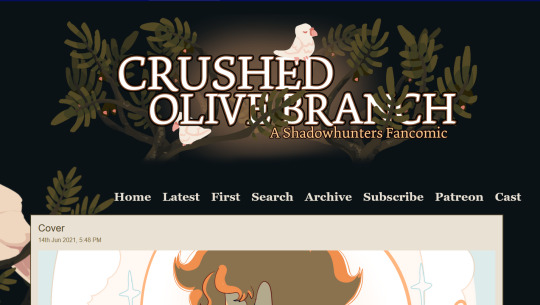
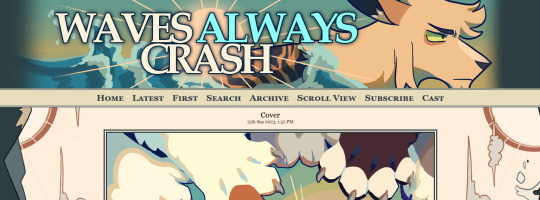
if you're talking about these on the actual sites, i BELIEVE i make the banner/webcomic title this wide of a box+make it transparent and no borders (this is using the simple layout editor)

and then put it to "webcomic banner" only, and then upload your banner into the custom image box! if you made it decently big it should be pretty big on the website!
the way I did it on the waves always crash is a lot more complicated bc I edited the html and css of the website a lot. hope this helps!
9 notes
·
View notes
Note
I recommend the Neocities tutorials for HTML
(https://neocities.org/tutorials)
And the W3schools tutorials for CSS
(https://www.w3schools.com/css/)
If you're overwhelmed, start with a simple code like making a border around some text
thank ye so much . . kisskiss

3 notes
·
View notes
Text
#Playstation7 #framework #BasicArchitecture #RawCode #RawScript #Opensource #DigitalConsole
To build a new gaming console’s digital framework from the ground up, you would need to integrate several programming languages and technologies to manage different aspects of the system. Below is an outline of the code and language choices required for various parts of the framework, focusing on languages like C++, Python, JavaScript, CSS, MySQL, and Perl for different functionalities.
1. System Architecture Design (Low-level)
• Language: C/C++, Assembly
• Purpose: To program the low-level system components such as CPU, GPU, and memory management.
• Example Code (C++) – Low-Level Hardware Interaction:
#include <iostream>
int main() {
// Initialize hardware (simplified example)
std::cout << "Initializing CPU...\n";
// Set up memory management
std::cout << "Allocating memory for GPU...\n";
// Example: Allocating memory for gaming graphics
int* graphicsMemory = new int[1024]; // Allocate 1KB for demo purposes
std::cout << "Memory allocated for GPU graphics rendering.\n";
// Simulate starting the game engine
std::cout << "Starting game engine...\n";
delete[] graphicsMemory; // Clean up
return 0;
}
2. Operating System Development
• Languages: C, C++, Python (for utilities)
• Purpose: Developing the kernel and OS for hardware abstraction and user-space processes.
• Kernel Code Example (C) – Implementing a simple syscall:
#include <stdio.h>
#include <unistd.h>
int main() {
// Example of invoking a custom system call
syscall(0); // System call 0 - usually reserved for read in UNIX-like systems
printf("System call executed\n");
return 0;
}
3. Software Development Kit (SDK)
• Languages: C++, Python (for tooling), Vulkan or DirectX (for graphics APIs)
• Purpose: Provide libraries and tools for developers to create games.
• Example SDK Code (Vulkan API with C++):
#include <vulkan/vulkan.h>
VkInstance instance;
void initVulkan() {
VkApplicationInfo appInfo = {};
appInfo.sType = VK_STRUCTURE_TYPE_APPLICATION_INFO;
appInfo.pApplicationName = "GameApp";
appInfo.applicationVersion = VK_MAKE_VERSION(1, 0, 0);
appInfo.pEngineName = "GameEngine";
appInfo.engineVersion = VK_MAKE_VERSION(1, 0, 0);
appInfo.apiVersion = VK_API_VERSION_1_0;
VkInstanceCreateInfo createInfo = {};
createInfo.sType = VK_STRUCTURE_TYPE_INSTANCE_CREATE_INFO;
createInfo.pApplicationInfo = &appInfo;
vkCreateInstance(&createInfo, nullptr, &instance);
std::cout << "Vulkan SDK Initialized\n";
}
4. User Interface (UI) Development
• Languages: JavaScript, HTML, CSS (for UI), Python (backend)
• Purpose: Front-end interface design for the user experience and dashboard.
• Example UI Code (HTML/CSS/JavaScript):
<!DOCTYPE html>
<html>
<head>
<title>Console Dashboard</title>
<style>
body { font-family: Arial, sans-serif; background-color: #282c34; color: white; }
.menu { display: flex; justify-content: center; margin-top: 50px; }
.menu button { padding: 15px 30px; margin: 10px; background-color: #61dafb; border: none; cursor: pointer; }
</style>
</head>
<body>
<div class="menu">
<button onclick="startGame()">Start Game</button>
<button onclick="openStore()">Store</button>
</div>
<script>
function startGame() {
alert("Starting Game...");
}
function openStore() {
alert("Opening Store...");
}
</script>
</body>
</html>
5. Digital Store Integration
• Languages: Python (backend), MySQL (database), JavaScript (frontend)
• Purpose: A backend system for purchasing and managing digital game licenses.
• Example Backend Code (Python with MySQL):
import mysql.connector
def connect_db():
db = mysql.connector.connect(
host="localhost",
user="admin",
password="password",
database="game_store"
)
return db
def fetch_games():
db = connect_db()
cursor = db.cursor()
cursor.execute("SELECT * FROM games")
games = cursor.fetchall()
for game in games:
print(f"Game ID: {game[0]}, Name: {game[1]}, Price: {game[2]}")
db.close()
fetch_games()
6. Security Framework Implementation
• Languages: C++, Python, Perl (for system scripts)
• Purpose: Ensure data integrity, authentication, and encryption.
• Example Code (Python – Encrypting User Data):
from cryptography.fernet import Fernet
# Generate a key for encryption
key = Fernet.generate_key()
cipher_suite = Fernet(key)
# Encrypt sensitive user information (e.g., account password)
password = b"SuperSecretPassword"
encrypted_password = cipher_suite.encrypt(password)
print(f"Encrypted Password: {encrypted_password}")
# Decrypting the password
decrypted_password = cipher_suite.decrypt(encrypted_password)
print(f"Decrypted Password: {decrypted_password}")
7. Testing and Quality Assurance
• Languages: Python (for automated tests), Jest (for JavaScript testing)
• Purpose: Unit testing, integration testing, and debugging.
• Example Unit Test (Python using unittest):
import unittest
def add(a, b):
return a + b
class TestGameFramework(unittest.TestCase):
def test_add(self):
self.assertEqual(add(10, 20), 30)
if __name__ == '__main__':
unittest.main()
8. Order of Implementation
• Phase 1: Focus on core system architecture (low-level C/C++) and OS development.
• Phase 2: Develop SDK and start building the basic framework for UI and input management.
• Phase 3: Work on backend systems like the digital store and integrate with front-end UI.
• Phase 4: Begin rigorous testing and debugging using automated test suites.
This comprehensive approach gives you a detailed idea of how each component can be built using a combination of these languages and technologies. Each section is modular, allowing teams to work on different aspects of the console simultaneously.
[Pixel Art/Sprites/Buildinodels/VictoriaSecretPixelArtKit #Playstation7 #DearDearestBrands]


#victoriasecretrunway#runwaybattle#victoria secret fashion#victoria secert model#victoriasecret#victoria secret#VictoriaSecretRunwayBattle#capcom victoriasecret#capcom videogames#playstation7#ps7#deardearestbrands#capcom#digitalconsole#python#script#rawscript#raw code#framework#VictoriaSecretVideoGame#deardearestbrandswordpress
2 notes
·
View notes
Text

My first post + my first time ever making html borders!!
F2U creds required and reblogs appreciated


#@ — borders#html borders#borders#lace borders#rentry borders#simple borders#simple rentry borders#simple html borders
238 notes
·
View notes
Text
Learn HTML and CSS: A Comprehensive Guide for Beginners
Introduction to HTML and CSS
HTML (HyperText Markup Language) and CSS (Cascading Style Sheets) are the core technologies for creating web pages. HTML provides the structure of the page, while CSS defines its style and layout. This guide aims to equip beginners with the essential knowledge to start building and designing web pages.
Why Learn HTML and CSS?
HTML and CSS are fundamental skills for web development. Whether you're looking to create personal websites, start a career in web development, or enhance your current skill set, understanding these technologies is crucial. They form the basis for more advanced languages and frameworks like JavaScript, React, and Angular.
Getting Started with HTML and CSS
To get started, you need a text editor and a web browser. Popular text editors include Visual Studio Code, Sublime Text, and Atom. Browsers like Google Chrome, Firefox, and Safari are excellent for viewing and testing your web pages.
Basic HTML Structure
HTML documents have a basic structure composed of various elements and tags. Here’s a simple example:
html
Copy code
<!DOCTYPE html>
<html>
<head>
<title>My First Web Page</title>
<link rel="stylesheet" type="text/css" href="styles.css">
</head>
<body>
<h1>Welcome to My Web Page</h1>
<p>This is a paragraph of text on my web page.</p>
</body>
</html>
: Declares the document type and HTML version.
: The root element of an HTML page.
: Contains meta-information about the document.
: Connects the HTML to an external CSS file.
: Contains the content of the web page.
Essential HTML Tags
HTML uses various tags to define different parts of a web page:
to : Headings of different levels.
: Paragraph of text.
: Anchor tag for hyperlinks.
: Embeds images.
: Defines divisions or sections.
: Inline container for text.
Creating Your First HTML Page
Follow these steps to create a simple HTML page:
Open your text editor.
Write the basic HTML structure as shown above.
Add a heading with the tag.
Add a paragraph with the tag.
Save the file with a .html extension (e.g., index.html).
Open the file in your web browser to view your web page.
Introduction to CSS
CSS is used to style and layout HTML elements. It can be included within the HTML file using the <style> tag or in a separate .css file linked with the <link> tag.
Basic CSS Syntax
CSS consists of selectors and declarations. Here’s an example:
css
Copy code
h1 {
color: blue;
font-size: 24px;
}
Selector (h1): Specifies the HTML element to be styled.
Declaration Block: Contains one or more declarations, each consisting of a property and a value.
Styling HTML with CSS
To style your HTML elements, you can use different selectors:
Element Selector: Styles all instances of an element.
Class Selector: Styles elements with a specific class.
ID Selector: Styles a single element with a specific ID.
Example:
html
Copy code
<!DOCTYPE html>
<html>
<head>
<title>Styled Page</title>
<link rel="stylesheet" type="text/css" href="styles.css">
</head>
<body>
<h1 class="main-heading">Hello, World!</h1>
<p id="intro">This is an introduction paragraph.</p>
</body>
</html>
In the styles.css file:
css
Copy code
.main-heading {
color: green;
text-align: center;
}
#intro {
font-size: 18px;
color: grey;
}
CSS Layout Techniques
CSS provides several layout techniques to design complex web pages:
Box Model: Defines the structure of an element’s content, padding, border, and margin.
Flexbox: A layout model for arranging items within a container, making it easier to design flexible responsive layouts.
Grid Layout: A two-dimensional layout system for more complex layouts.
Example of Flexbox:
css
Copy code
.container {
display: flex;
justify-content: space-around;
}
.item {
width: 100px;
height: 100px;
background-color: lightblue;
}
Best Practices for Writing HTML and CSS
Semantic HTML: Use HTML tags that describe their meaning clearly (e.g., , , ).
Clean Code: Indent nested elements and use comments for better readability.
Validation: Use tools like the W3C Markup Validation Service to ensure your HTML and CSS are error-free and standards-compliant.
Accessibility: Make sure your website is accessible to all users, including those with disabilities, by using proper HTML tags and attributes.
Free Resources to Learn HTML and CSS
W3Schools: Comprehensive tutorials and references.
MDN Web Docs: Detailed documentation and guides for HTML, CSS, and JavaScript.
Codecademy: Interactive courses on web development.
FreeCodeCamp: Extensive curriculum covering HTML, CSS, and more.
Khan Academy: Lessons on computer programming and web development.
FAQs about Learning HTML and CSS
Q: What is HTML and CSS? A: HTML (HyperText Markup Language) structures web pages, while CSS (Cascading Style Sheets) styles and layouts the web pages.
Q: Why should I learn HTML and CSS? A: Learning HTML and CSS is essential for creating websites, understanding web development frameworks, and progressing to more advanced programming languages.
Q: Do I need prior experience to learn HTML and CSS? A: No prior experience is required. HTML and CSS are beginner-friendly and easy to learn.
Q: How long does it take to learn HTML and CSS? A: The time varies depending on your learning pace. With consistent practice, you can grasp the basics in a few weeks.
Q: Can I create a website using only HTML and CSS? A: Yes, you can create a basic website. For more complex functionality, you'll need to learn JavaScript.
Q: What tools do I need to start learning HTML and CSS? A: You need a text editor (e.g., Visual Studio Code, Sublime Text) and a web browser (e.g., Google Chrome, Firefox).
Q: Are there free resources available to learn HTML and CSS? A: Yes, there are many free resources available online, including W3Schools, MDN Web Docs, Codecademy, FreeCodeCamp, and Khan Academy.
#how to learn html and css#html & css course#html & css tutorial#html and css#html course#html css tutorial#html learn#html learn website#learn html#learn html and css#html and css course#html and css full course#html and css online course#how to learn html and css for beginners
3 notes
·
View notes
Text
I came across this website where you like? enter anything and it'll do it with AI. so i told it to show me a picture of a really good sandwich.
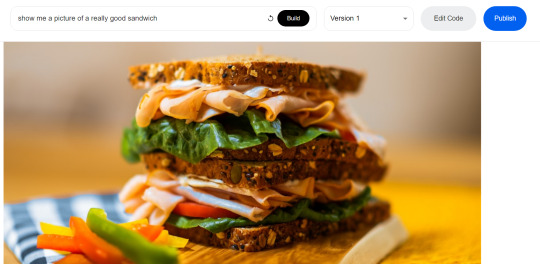
and what it did was generate code that would get a random photo of a sandwich from some photo website. (The images are not AI generated). It automatically generates that description too.
So then i told it to write javascript code for a game of pong (I'll paste the code at the end of this post) and it gave me this:
which does nothing. And idk why but I was kinda scared it would actually deliver me a functioning game lol. Probably bc it would take me at least an hour to code a simple pong game, when this generated in 30 seconds.
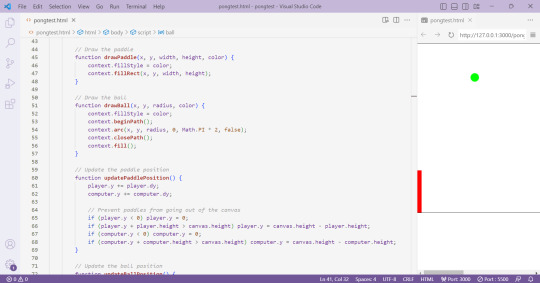
So i launched the code in vsc and it DOES do something. the ball bounces around but it made the ball white for some reason? so this is what it does after only changing the ball color.
and look at the code, its all formatted and commented and stuff. And i mean, it looks like its at least 85% there, it just needs movable paddles and fixing the ball to bounce into the side walls.
idk i just think this is pretty cool. and now i will be fixing this ai code into a working pong game
Here is the ai generated pong code:
<html>
<head>
<link rel="stylesheet" href="https://cdn.jsdelivr.net/npm/[email protected]/dist/css/bootstrap.min.css">
<script src="https://cdn.jsdelivr.net/npm/[email protected]/dist/js/bootstrap.min.js"></script>
</head>
<body>
<canvas id="pong" width="800" height="400" style="border:1px solid #000000;"></canvas>
<script>
// Create the canvas element
const canvas = document.getElementById("pong");
const context = canvas.getContext("2d");
// Create the paddle
const paddleWidth = 10, paddleHeight = 100;
const player = {
x: 0,
y: canvas.height / 2 - paddleHeight / 2,
width: paddleWidth,
height: paddleHeight,
color: "#FF0000",
dy: 8
};
const computer = {
x: canvas.width - paddleWidth,
y: canvas.height / 2 - paddleHeight / 2,
width: paddleWidth,
height: paddleHeight,
color: "#00FF00",
dy: 4
};
// Create the ball
const ball = {
x: canvas.width / 2,
y: canvas.height / 2,
radius: 10,
speed: 4,
dx: 4,
dy: 4,
color: "#FFFFFF"
};
// Draw the paddle
function drawPaddle(x, y, width, height, color) {
context.fillStyle = color;
context.fillRect(x, y, width, height);
}
// Draw the ball
function drawBall(x, y, radius, color) {
context.fillStyle = color;
context.beginPath();
context.arc(x, y, radius, 0, Math.PI * 2, false);
context.closePath();
context.fill();
}
// Update the paddle position
function updatePaddlePosition() {
player.y += player.dy;
computer.y += computer.dy;
// Prevent paddles from going out of the canvas
if (player.y < 0) player.y = 0;
if (player.y + player.height > canvas.height) player.y = canvas.height - player.height;
if (computer.y < 0) computer.y = 0;
if (computer.y + computer.height > canvas.height) computer.y = canvas.height - computer.height;
}
// Update the ball position
function updateBallPosition() {
ball.x += ball.dx;
ball.y += ball.dy;
// Reverse the ball direction if it hits the top or bottom wall
if (ball.y + ball.radius > canvas.height || ball.y - ball.radius < 0) {
ball.dy *= -1;
}
// Check if the ball hits the paddles
if (
ball.y + ball.radius > player.y &&
ball.y - ball.radius < player.y + player.height &&
ball.dx < 0
) {
if (ball.x - ball.radius < player.x + player.width) {
ball.dx *= -1;
}
}
if (
ball.y + ball.radius > computer.y &&
ball.y - ball.radius < computer.y + computer.height &&
ball.dx > 0
) {
if (ball.x + ball.radius > computer.x) {
ball.dx *= -1;
}
}
}
// Draw the game
function draw() {
// Clear the canvas
context.clearRect(0, 0, canvas.width, canvas.height);
// Draw the paddles
drawPaddle(player.x, player.y, player.width, player.height, player.color);
drawPaddle(computer.x, computer.y, computer.width, computer.height, computer.color);
// Draw the ball
drawBall(ball.x, ball.y, ball.radius, ball.color);
}
// Update the game
function update() {
updatePaddlePosition();
updateBallPosition();
draw();
}
// Game loop
function loop() {
update();
requestAnimationFrame(loop);
}
loop();
</script>
</body>
</html>
4 notes
·
View notes
Text
### ✅ How to Run the Web Dashboard
#### 1. **Install Flask** (if not already):
```bash
pip install flask
```
---
**Python Web App: `engine.py`**
```python
from flask import Flask, request, render_template_string, jsonify
import json
# Load checklist JSON from file
with open("checklist.json", "r") as f:
checklist = json.load(f)
app = Flask(__name__)
# Simple HTML frontend
TEMPLATE = """
<!DOCTYPE html>
<html>
<head>
<title>False-Flag Detection Dashboard</title>
<style>
body { font-family: Arial, sans-serif; background-color: #f4f4f4; margin: 20px; }
h2 { color: #333; }
.container { background: white; padding: 20px; border-radius: 8px; box-shadow: 0 0 10px #ccc; }
input, textarea { width: 100%; padding: 10px; margin: 10px 0; border-radius: 4px; border: 1px solid #ccc; }
.button { background-color: #007BFF; color: white; padding: 10px 20px; border: none; border-radius: 4px; cursor: pointer; }
.button:hover { background-color: #0056b3; }
.output { background-color: #eee; padding: 10px; border-radius: 4px; margin-top: 20px; }
</style>
</head>
<body>
<div class="container">
<h2>False-Flag Event Evaluation</h2>
<form method="POST">
<label for="event_json">Enter Event JSON:</label>
<textarea id="event_json" name="event_json" rows="10">{{ event_json }}</textarea>
<button class="button" type="submit">Evaluate Event</button>
</form>
{% if result %}
<div class="output">
<h3>Evaluation Report:</h3>
<pre>{{ result }}</pre>
</div>
{% endif %}
</div>
</body>
</html>
"""
# Rule evaluator
def evaluate_event(event, rules):
flags = []
halt_triggered = False
for condition in rules["auto_halt_conditions"]:
if condition["id"] == "halt_001" and event.get("rescue_time_hours", 999) <= 6 and not event.get("biomarker_evidence", True):
flags.append(condition["description"])
halt_triggered = True
if condition["id"] == "halt_002" and event.get("criminals_included"):
flags.append(condition["description"])
halt_triggered = True
if condition["id"] == "halt_003" and event.get("distress_signal_blocked"):
flags.append(condition["description"])
halt_triggered = True
if condition["id"] == "halt_004" and event.get("duplicate_pattern_count", 0) >= 2:
flags.append(condition["description"])
halt_triggered = True
results = {
"incident_id": event.get("incident_id", "Unknown"),
"flags": flags,
"halt_triggered": halt_triggered,
"narrative_similarity_score": event.get("narrative_similarity_score", 0),
"extraction_targets": event.get("extraction_list", []),
"independent_confirmation_count": event.get("independent_confirmations", 0)
}
return results
@app.route("/", methods=["GET", "POST"])
def dashboard():
event_json = ""
result = None
if request.method == "POST":
try:
event_json = request.form["event_json"]
event_data = json.loads(event_json)
evaluation = evaluate_event(event_data, checklist)
result = json.dumps(evaluation, indent=4)
except Exception as e:
result = f"Error parsing input: {e}"
return render_template_string(TEMPLATE, event_json=event_json, result=result)
if __name__ == "__main__":
app.run(debug=False, port=5000)
```
---
### 🖥️ Run It:
From your terminal:
```bash
python engine.py
```
Then open [http://localhost:5000](http://localhost:5000) in your browser to interact with the dashboard.
---
Would you like help generating sample event inputs or connecting this engine to a file or database for batch evaluations?
0 notes
Text
The Ever-Evolving Internet
The internet is kinda an odd place. We are actively manipulating a rock to think for us for our own enjoyment. It’s actually fairly remarkable that we got to this point. See, the internet wasn’t always like this (shocking I know) and so I want to take a little time to look at how the internet evolved to this point.
The internet started in 1983 (this would be the Web 1.0), but wasn’t really used for much until 1990 (Which is crazy to think that we put a man on the moon back in 1969). Even back in that initial usage era of the internet there wasn’t much to do. Mostly just wikis and even then it was not accessible to the average person at all. The people using the internet at the time were either computer scientists or government officials. It was mostly for short communications or small transmissions.
Eventually the internet made its way into the hands of the average person (causing the Web 2.0) due to advances in technology that made it viable for someone with little training to be able to learn how to use the internet. Notably HTML was created during this time, a simplistic but powerful coding language that allowed for the creation of simple web pages, and eventually complex ones too! (Seriously HTML is scary with how powerful it is… I wish I was better at it ;A;).
The Web 2.0 is what most people remember: dial up internet, weird buzzing and beeping noises, and the Super Nintendo all were part of Web 2.0. What was also important was the usage of the internet by corporations and companies. People saw that there was money to be made on the internet and so they began to capitalize on it. That means that a good population of the internet was really just companies and their employees either making public interfaces or websites (like Amazon shopping or the Sears website).
Eventually things like social media began to pop up. Myspace was created in 2003, Twitter was made 2006, Tumblr was created 2007, YouTube was created in 2005, and Facebook in 2004. People began to see the internet as a social platform, where people could connect based on interests, or just send funny cat images to their in-laws in place of actually interacting with them at family dinners. It was due to all of this that the internet began to veer away from corporate usage (although we will never escape that) and to a more social media based internet. This is Web 3.0, and what our current internet is; although some do argue that the internet is bordering on Web 4.0. If the Web 1.0 was marked by inaccessibility, the Web 3.0 is marked by accessibility. For better or for worse, everyone and their grandma has the tools to create content on the internet now. The quality of content takes some effort, but anyone can create wonderful digital slop.
The Web 3.0 also is a pivot into user privacy. People looked at the internet, saw that corporations and businesses were using their data, and went “hey… I don’t like that…” and so now everything is the same but done in a way that makes the user feel like they have control over this at all. The changes in technology also help, namely the usage of AI is what marks a shift into Web 3.0. In the current age nearly everything has a base form of AI integrated into it, somehow phone calls also have an AI integrated into it and I have no idea how that works but it’s probably cool for a handful of people! Some people talk about there being a Web 4.0 and a Web 5.0 but I don’t believe that those can be real yet so I won’t talk about them.
Anyways, have a good day.
#using social media in ministry#this is for class#this is objectively a bad way to do this project but at this point I will go insane if I do not make any form of progress
0 notes
Text
HTML માં ટેબલ કેવી રીતે બનાવવું?

https://youtu.be/Yrut0-802ZM 🖥️ HTML માં ટેબલ કેવી રીતે બનાવવું? જો તમે વેબપેજ પર ડેટા સ્વરૂપે ટેબલ બતાવવા માંગતા હો, તો HTML ટેબલ ખૂબ જ અસરકારક અને સરળ રીત છે. 📊 આજે આપણે જાણીશું HTML માં ટેબલ કેવી રીતે બનાવવું અને તેને કસ્ટમાઇઝ કેવી રીતે કરવું. 🚀 🟢 HTML ટેબલની બેઝિક સ્ટ્રક્ચર HTML Table Example
Simple HTML Table
Student Name Subject Marks Rahul Maths 85 Aisha Science 90 Krishna English 88 ✅ આ શું કરશે? - : ટેબલ બનાવે છે. - : ટેબલ રો (Row) બનાવે છે. - : ટેબલ હેડિંગ માટે. - : ટેબલ ડેટા સેલ માટે. 🎨 ટેબલને સ્ટાઇલિશ બનાવવી (CSS સાથે) ✅ આ શું કરશે? - ટેબલને સુંદર લુક આપશે. - Hover Effect અને Even Row Coloring ઉમેરશે. 🔥 ટેબલમાં colspan અને rowspan ઉમેરવું colspan: Combined Cell rowspan: Merged Row ✅ આ શું કરશે? - colspan: બે કે વધુ કોલમ્સને મર્જ કરવું. - rowspan: બે કે વધુ રોઝને મર્જ કરવું. ❗️ ટ્રબલશૂટિંગ ટિપ્સ: - Border Missing? border="1" નો ઉપયોગ કરો. - Spacing Issues? cellpadding અને cellspacing સેટ કરો. - Responsive Table? width: 100% CSS ઉમેરો. 🎥 ટેક્નોલોજી શીખવી હવે થઈ ગઇ વધુ સરળ! જો તમને આ માહિતી ઉપયોગી લાગી હોય, તો અમારા YouTube ચેનલને સબ્સ્ક્રાઇબ કરો અને વધુ HTML ટિપ્સ અને ટ્રિક્સ શીખતા રહો! 🔔😊 👉🏼 સબ્સ્ક્રાઇબ કરો અને વેબ ડેવલપમેન્ટમાં માસ્ટર બનો! આભાર! 🙌🏼 Read the full article
0 notes
Text
youtube
How to cutomize social media section in wordpress astra theme ?
Customizing the social media section in the Astra theme for WordPress can be done in multiple ways depending on your requirements. Here’s how you can do it:
1. Using Astra Customizer (For Built-in Header/Footer Social Icons)
Astra provides built-in options to add social media icons in the header or footer.
Steps to Add or Customize Social Icons in Header/Footer:
Go to WordPress Dashboard → Appearance → Customize.
Navigate to Header/Footer Settings:
For Header: Header Builder → Primary Header
For Footer: Footer Builder
Add a Social Icons Widget:
Click + to add a new element.
Select Social Icons.
Customize Icons:
Click on the added Social Icons element.
Add your preferred social media platforms (Facebook, Twitter, LinkedIn, etc.).
Enter the links to your social profiles.
Customize styles (icon size, spacing, and colors).
Click Publish to save changes.
2. Using Astra Widgets (For Sidebar or Footer)
Go to Appearance → Widgets.
Select the widget area where you want social media icons (Sidebar, Footer, etc.).
Add a Navigation Menu widget or Custom HTML widget.
If using Navigation Menu:
Create a social menu under Appearance → Menus.
Add Custom Links with your social media URLs.
Assign this menu to the widget.
If using Custom HTML:
Insert social media icons manually using HTML.
htmlCopyEdit<a href="https://facebook.com/yourpage" target="_blank"> <img src="facebook-icon.png" width="30" alt="Facebook"> </a>
3. Using Astra Pro Add-ons (For More Design Options)
If you have Astra Pro, you get more customization options:
Appearance → Customize → Header Builder or Footer Builder.
Select Social Icons and choose advanced styling options like:
Custom colors, hover effects, shape (circle/square).
More placement options.
4. Using a Plugin (For Advanced Customization)
If Astra’s built-in options are limited, use a plugin like:
Social Icons Widget by WPZOOM
Simple Social Icons
Ultimate Social Media Icons
Install & activate the plugin from Plugins → Add New.
Configure the social icons inside the plugin settings.
Place the icons via widgets, shortcodes, or block editor.
5. Customizing with CSS (For Advanced Users)
If you want a unique look, you can add custom CSS:
Appearance → Customize → Additional CSS.
Use CSS like: cssCopyEdit.ast-social-color-custom a { background-color: #ff5733; /* Change background */ color: white; /* Change icon color */ border-radius: 50%; /* Make icons round */ padding: 10px; }
0 notes