#simple to use photo editing software
Note
hello! i'm not sure if you remember me, a while ago i asked about digital art and if it's possible to do on an ipad or something similar. i was really grateful for your response and i got an ipad over christmas! i didn't realize how expensive the pencils were though and was only able to get one recently. now that i have all of that, i download the first art program i saw (ibispaint x, i don't know how good that is) and feel super overwhelmed by everything, all the tools and brushes and i have no idea where to begin. i know this is a super broad topic, but i don't know if you have any advice for a beginner hoping to become a digital artist? or know of any resources? thank you so much in advance and no worries if this topic is too broad to really get into properly!
Oh hey!! Congrats on getting an iPad! And yeah, shopping for the pens is a big pain in the butt, but I'm glad you finally got it all setup!
So most of the advice I'm gonna give you is very basic, starter advice that can apply to virtually any digital art software, as the vast majority of them are built with the exact same base tools, they just vary in their intended purposes which means they may differ in more advanced settings and what they offer beyond the basics (ex. Photoshop has more colors than Clip Studio because it's built for editing high quality photos whereas Clip Studio is meant to emulate comic art, but Clip Studio offers more in the way of comic-creating tools such as specialized rulers, 3D material support, built-in screentoning, etc. and all of the software available will tend to have different brush engines, meaning it doesn't always 'feel' the same to draw in one software as it does in another).
Your bestest friends:
Layers! This is the biggest pro to going digital, because now you can work with layers! So anything you draw on each layer is preserved and can't touch or affect whatever's on the other ones :3 You can find the layers tab in Ibis Paint X in the bottom right, don't be afraid to make a bunch of them and mess around with what you can do. Play around with the different blending mode settings (in Ibis Paint it's the menu that's labelled 'Normal' in the layers popup) especially Multiply, Color Dodge, and Overlay, as those three are the most commonly used to make coloring more efficient and give your art some extra pop.
Lasso/marquee/magic wand tools! These are basic selection tools that allow you to select an area within the layer you're working on, so that whatever you paint won't travel outside of that area. The Lasso is a free draw tool, the marquee tool is typically 4 sides by default (so squares/rectangles) and the magic wand detects and selects a closed area with one click! (just note that by default it's only on the layer you're on, so if you use it on a layer that has nothing, it will typically select the entire canvas).
Alpha locking! This is a simple button setting you can click to 'lock' the layer you're working on, which basically means that whatever you've drawn on that layer, anything you add can't travel outside of that drawing. So if you want to quickly shade something without going outside the lines, alpha locking is your solution!
Clipping groups/layers! This is a bit more advanced but is basically an even better version of alpha locking that you can use in conjunction with it. Clipping layers are basically additional layers that , when you click the 'clipping group' button, 'attaches' that new layer to the layer that's below it. It performs the same function as the alpha lock by preventing whatever you draw on that layer from travelling outside of it, HOWEVER it comes with the added benefit that it's on an entirely different layer, meaning you can erase and mess with whatever's on that new layer as much as you like and it won't hurt the base layer. It kinda follows the same logic as animation cels !
Masking! Y'know when you're doing a traditional painting, and you put down tape to cover the area so you can paint over it and later remove the tape and everything underneath is untouched? That's basically what masking is! Once you put down a layer mask, using the erase tool on it will 'erase' whatever the mask is applied to, and using the brush will make it magically return! This may sound silly at first, but I find masking is especially helpful if you want to erase something on the layer you're working on without it disappearing forever! It's also really helpful for comic work because you can mask whatever's outside of the panels and voila, nothing you draw will travel outside of those panels!
Stabilization! I don't know how extensive Ibis Paint X is with offering stabilization tools, but many digital art software comes with it and it's a LIFE SAVER for new digital artists adjusting to the feel of digital art. It essentially 'slows down' the output of the ink on the canvas which helps a lot with getting cleaner lines in fewer tries. It's not quite as big of a deal when drawing on iPads because obviously you have more control by default by drawing directly on the screen, but it can still be really helpful when you need to pace your hand ahead of the actual drawing tool to pull cleaner lines!
That's pretty much all I can think of for now! But here are some other commonly asked questions:
1.) There are so many brushes to choose from, which one do I use?
The round brush is small but mighty. Virtually anything can be painted with it, it's simple, but malleable, especially when you start messing around with the hardness and opacity settings. Don't get too lost in the sauce with the brushes that are available to you, it can be very easy to get overwhelmed by all the options and variety. Some artists still work purely with just round brushes, some artists have custom brushes they like to use to speed up their drawing process or achieve certain textures. Play around with them, but don't get too stressed about which one you use because there's no wrong answer, the right brush to use is the one that gets the job done ! <3
2.) What canvas size should I use?
It depends on a variety of factors such as whether or not you're planning to print, where you're going to be posting it, etc. By default I like to work on 8.5 x 11 inch canvases (standard printer paper size) at 350 dpi, which if you want to make that canvas in Ibis Paint X, means you just have to make a canvas with a pixel ratio of 2975 x 3850 pixels! Just note that the lower you go in either pixel count or dpi, the lower the resolution, so it's typically encouraged you work at a minimum of 300 dpi (but you usually don't have to go any higher than 600) to ensure you don't wind up with any blurry low res JPG's/PNG's.
3.) Should I export my final drawing as JPG or PNG?
This is usually just up to personal preference, but like the canvas size, it depends on what you're using the image for. You can always export as both, the biggest difference between them is that PNG is lossless meaning you won't experience image compression like you will with JPG, BUT you're also going to have much larger image sizes. JPG is often fine for any standard posting, PNG is typically recommended if you want to have a drawing with a transparent background for printing (as JPG can't do transparent backgrounds) or if you just want to have a really high res image file for sharing outside of social media sites (as social media sites like FB/IG/etc. will typically compress the hell out of your images anyways)
Here are some other super helpful resources as well if you need some visual and/or audio guides:
Sinix Design - How to Learn Digital Painting (Beginners)
Marc Brunet - The Beginner's Guide to Digital Art
Skynix Art - 50 Digital Art Tips in 5 Minutes
One thing I also like to do is watch speedpaints of digital artists as it can really help pull back the curtain on what they're doing (or at least, it can help you see what they start with which can help you better picture the process of turning a blank canvas into a finished work of art!) And though I don't do it as often, if there's an artist whose work I REALLY like, I'll try and find their actual work files (many bigger artists sell them on their crowdfunding sites/Gumroad/etc.) so that I can actually break the drawings apart layer by layer for the purpose of analysis. Of course, all that is something that you'll grasp better over time as you learn the tools and learn to recognize what artists are doing in their own workflow, so don't worry if you don't glean a whole lot of info from the "big guys" right away, you should always be referencing artists who are higher along the skill ceiling from you but not too high that they're using techniques and tools that are outside of your realm of understanding.
Other than that, just try to have fun, don't stress too much about it, and save often!!! Part of creating art is learning to be at peace with the process, so don't stress too much if it takes you a while to get adjusted to the layouts and tools - at the end of the day, digital art is another medium entirely, so it's not uncommon at all for traditional artists to need a lot of practice to 'switch' to digital, because they both utilize different tools and techniques. Be patient with yourself, always be on the hunt for new resources and guides and references, and don't be afraid to experiment and make mistakes (the best part about digital art? Mistakes don't cost you any paint or materials!)
Good luck!! And congrats again! 🥰
57 notes
·
View notes
Text
Best Tools to Track Your NaNoWriMo Progress
The NaNoWriMo site allows anyone who signs up for a free account to set their word count through their dashboard. There are plenty of other resources to help you too, but if that’s not your style, these are other tools to track your NaNoWriMo progress. See if you like any before November begins to tackle your manuscript even faster.
Note: None of these are paid promotions or affiliate links. They’re just recommendations based on what I and other writers have found helpful in the past!
1. FocusWriter
Writers often start exploring the world of creative writing tools by downloading FocusWriter. The free program hides everything on your screen except your document and shows a custom background instead, like the wooden background below.
Use the settings to customize each writing experience and keep track of your daily NaNoWriMo word count goals. It even spell checks for you, which speeds up your editing process.


2. NovProg
NovProg is a free writing resource that’s best for people who don’t want any hassle on their screens. If you’re into graphs, this might be the tool you love. The program makes graphs of your daily word count progress so you have more visual encouragement during your NaNoWriMo experience.


3. Scrivener
Scrivener is a popular software within the creative writing community. You can use the free trial to see if it’s your thing before Scrivener requires a $51 purchase for Mac users or $60 for PC users.
It’s expensive, but popular for a reason. The program has file organization options for planners and writers who don’t outline their work. Save character outlines, track your word count, save photos, and store links to inspirational Scrivener corkboards.
The software also lets writers research from within Scrivener. You won’t need to open a Google tab (and potentially whatever internet distractions await you) to double-check information or even transcribe an interview.

4. MyWriteClub
Name and update your word count goals automatically by writing alongside MyWriteClub. The simple progress bar even updates with encouragement from friends who use MyWriteClub. Their notes will pop up under your word count as you work on your NaNoWriMo projects together. It takes away the loneliness that can sometimes come with writing stories by yourself.
If you don’t have any in-person friends doing NaNoWriMo, there are global writing sprints available for MyWriteClub users. The 15-minute focus sessions connect writers as they work on their word count goal for the day. It might be the encouragement you need to stay on track, especially if you get bored writing by yourself.

5. Fighter’s Block
Merge your love of video games and creative writing with Fighter’s Block. After setting your word count goal within the website, you’ll become a character fighting a monster. The monster wants to destroy your words, but your word count progress keeps it at bay.

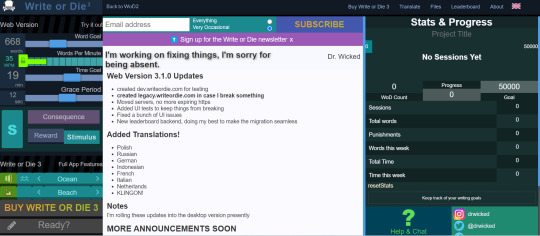
6. Write or Die
This is another infamous tool in the creative writing world. It’s what you might want to try when you need extreme help with knocking out your daily word count.
Input your word count goal and start writing. If you slow down or miss your goal, the program deletes random chunks of your work. You’ll get a few warnings, but the deletion often happens sooner than writers expect. It’s better to use this program when you know what you need to write, but need a push to stay with your manuscript until you’re done for the day.
Change the settings outlined in yellow below to match what you need from your writing experience. There’s also a setting to get encouragement instead of your work deleted, if you’d prefer that. Click the Ready button and your screen updates—you’ll have a blank space to work in the middle.
You can purchase this program for $10 for both Mac and PC, but the free version works for many writers who just want to do short writing sprints.
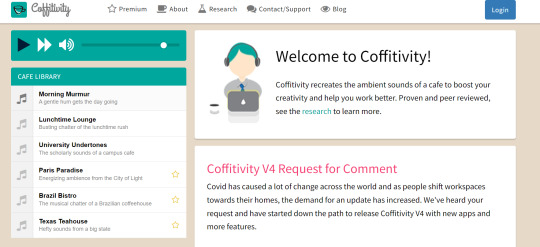
7. Coffitivity
Writing with background noises is one of my favorite things to do when I need to focus. It helps me stay away from anxious thoughts or external distractions. If you don’t want to use YouTube or another music app while you write, Coffitivity is here to help.
This program has a library of background noises that recreate ambient environments, like coffee shops. The low chattering and clinking of dishes could help you stay focused or defeat any writing anxiety associated with looming NaNoWriMo deadlines.
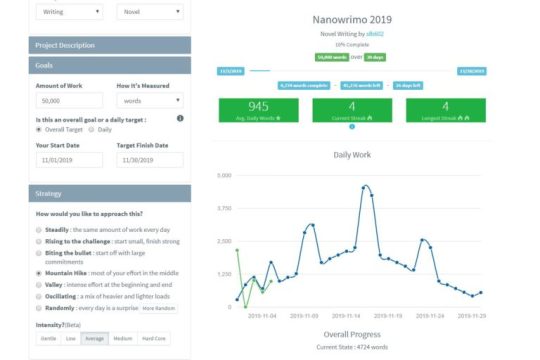
8. Pacemaker Planner
Remember how I mentioned that breaking your goals down makes NaNoWriMo easier? That might seem impossible if you’re not usually making lists and goals for yourself outside your writing routine.
Pacemaker Planner removes the guesswork. If you give it your overall word count, your final deadline (November 30), and how much time you estimate you’ll have for your writing each day, it’ll calculate your daily word count for you.
The graphing option also adds more flexibility to your goals. Let’s say you’ll be more free in the middle of November than the beginning or end. Select the Mountain Hike strategy. The program recalculates your daily goals according to your preferred writing strategy so you’ll get higher word counts when you’re actually free to write.
The free version is great for NaNoWriMo purposes, but there’s also a Premium version you can get to plan your full yearly calendar and daily schedule, if you enjoy the program.
-----
You don’t have to cross your fingers and hope to conquer NaNoWriMo this year. Try these tools while they’re still time to explore your options. Whether you want to plan the whole month or turn your word count into a game, you’ll have more success after seeing which tools are at your disposal.
#nanowrimo#nanowrimo 2023#nanowrimo resources#nanowrimo tips#writer's block#writeblr#writing tips#writers of tumblr#writing#creative writing#writing inspiration#writing community#writing help#writing advice#writing resources#writer things#writers life#writers block#writers on tumblr#writerscommunity#resources#free resources#creative writing resources
67 notes
·
View notes
Text

I thought I might start using this graphic for the updates, too! At least until I get bored of it and end up creating another. 🌊 We love eye-catching visuals in this house.
Anyway, sorry for the delay with this update! Last weekend was insane, putting it lightly, and I only really feel like I have started to return to capacity now. I appreciate your patience!
As of 04/27, I have added the following resources (in no particular order) to Sea's Community Compendium for FFXIV Creatives:
LARGE SCALE
XIV TODO — honestly, huge thanks to whoever submitted this resource because I didn't know it existed! This is another set of tools and tailored checklists for XIV that help you track encounters, content completion, dailies and more! It's also extremely alt-friendly for those of us who have more characters than sense.
FREE COMPANY / COMMUNITY FOCUSED
THE VIERAN MAFIA — do you like suave Noir-themed bars framed by mystery and intrigue? How about a bit of organised crime? This Free Company is for you! (They're also hiring, if you're interested. Get in touch with @fjotla-vithir!)
MISC
FFXIV BUFF AND DEBUFF MAKER — if you have ever thought a screenshot of yours would be made funnier by a buff/debuff but you don't have access to photo editing software, @fortunafavore has you covered with this simple tool!
XKIT REWRITTEN — The most up-to-date iteration of the original XKit tool, XKit Rewritten provides a series of enhancement tools for Tumblr's web-based interface including accessibility tools, anti-capitalism bocks and recommendation tweaks.
Want to submit? You can either fill out the google form here, send me an ask with the relevant information contained on the Compendium, or join my Discord at SEAFLOOR (21+ only)!
As a reminder, the answer to the question of "Is my resource/community applicable to the Compendium?" is almost always a resounding yes. I want to know what's out there. I want to feature your project!
However, for the sake of clarity, I'll pop the FAQ from this post below in a read more for you to check out if you're worried. ✨
I want to put my community on the compendium but we have an application process. Is this okay?
Yes! Just note somewhere in your application that's a requirement. The only thing that is mandatory for the Compendium is that you must be open to new members or have a public-facing/accessible facet. There's no point advertising a community if no one can join it in some way!
I want to put my community on the compendium but I only have x number of members —
Also totally okay! People don't start with large communities. Activity is a must but, whether your server has two or two thousand members, if you're looking for new people to join, I'd love to help you find people.
I want to put my community on the compendium but I worry its too niche?
Okay, and? If your Eorzean Fishing Alliance has four members but you roleplay every second weekend, I still want to know about it.
What resources/communities can I add if I'm not the owner of them?
Mutual consent is extremely important to me, so anything that isn't a large-scale community OR a publicly accessible resource must be endorsed by the owner/admin/moderators in order to be added to the compendium. I operate under the assumption that a resource posted to a public space (tumblr, googledocs, youtube, etc) is open to all. A large-scale community is one with a significant member count or openly advertises itself as being accessible to everyone for whatever purpose it serves. If in doubt, please get in touch with me. I'm happy to contact your community owners for you!
How active does a community need to be?
If you find a community has not been active in about two/three months, send me a message and I'll take a look at it. Communities have ebbs and flows, especially event spaces that may take hiatuses depending on member interest/life events. I'm not strict in my implementation provided a space isn't dead. If a link or anything is broken, absolutely contact me about that.
I have [insert a question not stated here]?
No drama! Send me an ask or use the #Compendium channel in my Discord!
#final fantasy xiv#ffxiv#crystal rp#crystal roleplay#。・゚゚・ — sea's community compendium#ok DONE now i don't feel guilty for letting this lapse#also me: knows full well irl happens#me again: and??? get on with it#SDKJGHSDF
26 notes
·
View notes
Note
Hey I hope you’re doing okay! Ive been stalking your page for a while! I’m in the same process of making a visual novel! I was wondering how you do the AI+Sims 4 without it looking you know jacked up! Would love to know your progress!
Hold your hats everyone, i'll be explaining in details...
I was quite sceptical about AI previously. It felt like I'm being replaced with something monstrous, artificial - the imitation of life that's superior me on every single parameter. The sudden sting of a guilt for years of seemingly vain trials and tribulations. Was it all just for nothing? I believe everyone of us came to that question sooner or later. But here I stand telling you how to make a machine fulfill your demands.
First thing. The machine loves precise. From my personal experience, a better formed human wish grants a better machinery result. A less formed wish gives it a choice. Think beforehand, seek the patterns (keywords) that may help you sustain the artstyle throughout the workflow.
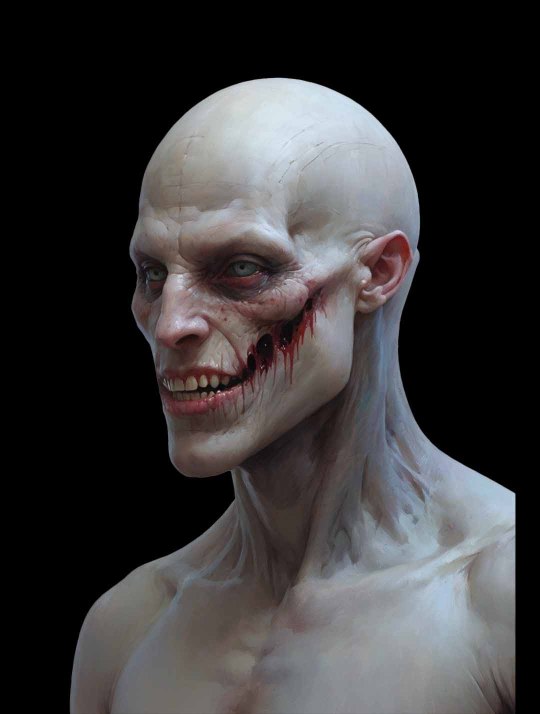
Tell the AI what it needs to do. Give it a reference image and explain how you want it to be changed. For example, I want this alien dude becoming a:
"A visually ominous face of an eyeless humanoid creature. This divine image, resembling a digitally rendered painting, showcases the ancient Egyptian god of chaos in detail: sharp chin and cheekbones, dark gray and beige skin, shimmering with pulsating rainbow hues, blood is visibly circulating under his translucent, cadaverous skin. His mouth with tightened teeth grins menacingly. The overall composition is dynamic and captivating, evoking a sense of fear, malevolent power and impending chaos". That will be my prompt. If you're lacking skills then put your hands on other's results, copy their prompts and reshape according to your needs.


Oh. Not so eyeless. Let's give it less of a free will shall we?

Better now! Sadly the eyes are in place, as you can see it is not perfect even with precise input. Now let's make about 5-10 generations with same settings. It may take time to pass a cooldown after you'll run out of tokens, so be patient. If you have absolutely no spare money to buy a decent amount of generations (or if the transactions themselves are banned in your country 👍) and your enthusiasm is on pathetically vigorous level join me on free trial option almost any of the AI sites provide. That is fair exchange - money or your time.

You get what I mean? It could be anything shaped into another anything. Put here your sim, order a nice shot - here you go! Make something out of nothing with the power of words. Make a human being... some kind of.

Hooray! Not only we have the result we craved for but a whole bunch of reusable high-quality textures of various nature.
Our next step: we go in a deep dark lair of creator's mind. Hm-m, I'd correct here and there, erased that part and attached that one... Now we play "compile your Frankenstein out of everything that is not in its place". Of course a machine is not yet on the level where there wouldn't be a possibility to distinct its presence. So to hide these little (big, actually) inconsistencies we use a power of photo editing. Grab your software. With the power given to you by the sense of vision eliminate the overgrowing fingers and fight back mutilated teeth clumps.
Meet my favourite one hundred percent AI generated method. Generate a simple low quality image free and effortlessly (I use Craiyon, the perfect weapon)
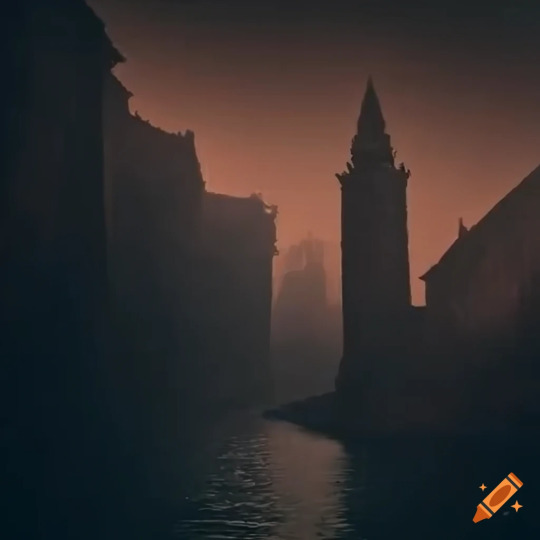

Let another AI add the details for you. Catches the concept just great. Though it does not mean no handiwork after.
You can stylize it even further. Here you can see AI generated monster dudes crispy pixelated after a luxurious tour into pixelart AI. Good thing for a pixel indie gamestyle.

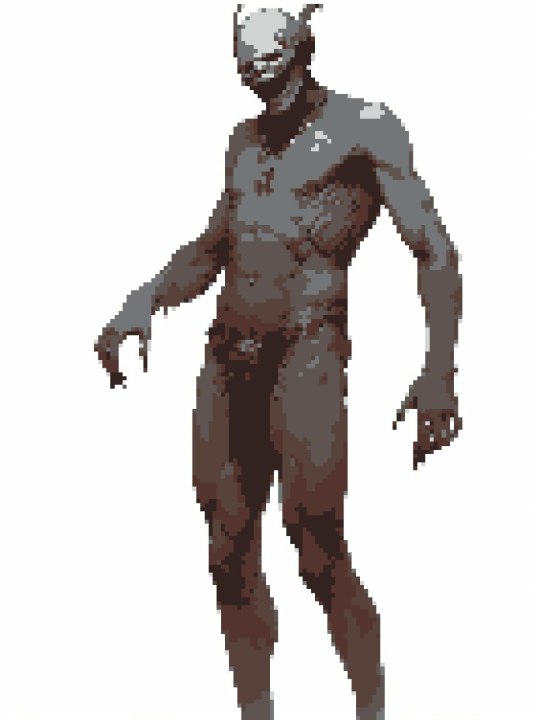

So, that's it. The secret is basically in your own hands. Acknowledge the style of your game, follow it while generating contents and patch up the AI mistakes.
+ zero investments
+ compensation for a lack of skills / hardware
+ easy to use
- even more work than if you would do all the same without AI
- straight dependence on sites / chat-bots, etc.
- time consuming
- many limitations (forget this if you're not on a free subscription... wait a second that abolish the first plus too!)
Hope it was helpful!
11 notes
·
View notes
Note
hii i luv your work soo much and also the headers and the stuff you make is rlly good 😻 i was wondering if it’s too difficult to make the headers etc? specially the ones that are more like gifs? and also is it too hard to find the images? bc honestly i haven’t seen a lot of them, just wondering! i get it if you don’t want to share i just genuinely think that the work is rlly rlly good<3 (sorry for such a long ask omgg)
Omg thank you so much hi hi 🥹🥹💞💞💖💖🌸🌸 first of all thank you so much for liking my work and supporting me, I so so appreciate it ✨✨🫂🫂💐💐 And omgggg you’re making me BLUSH thank you thank you thank you for the kind words 😭��🫂💞💞 I love when people compliment my works it makes me feel like I’m doing something right 😫💐💐 flowers for you for being so great ✨💐💐🌷🌷🌹🌹🌸🌸
To answer your question, the dividers and headers are actually very easy to make. The animated dividers I make aren’t difficult per se, they just involve a few more steps than making a normal divider does. As for my animated headers that I use for my fics or masterlists and what not those are also pretty easy. I’ll try to explain a little more about what I use in depth below. If you would like a detailed walk through explaining how I make them I could do that as well 💕 Prepare yourself, there’s a lot 😭💖

⋆ ˚。⋆୨୧˚ 𝐀𝐏𝐏𝐒 / 𝐖𝐄𝐁𝐒𝐈𝐓𝐄𝐒 𝐈 𝐔𝐒𝐄 — Picsart, Pinterest, PicCollage, Vita, Polarr, GIPHY, Photopea, Etsy, DeviantArt, Phonto, ezgif.com, onlinegiftools.com, Iloveimg.com, various fancy font generators (I don’t use these anymore, I use an app now for fonts, but this is what I used to use the most), various sparkle emoji combos + decorative text ( I use this one a lot + there are a lot of symbol apps on the App Store you can download, I have two apps that I use from time to time )
. ݁₊ ⊹ . ݁ ⟡ ݁ . ⊹ ₊ ݁. . ݁₊ ⊹ . ݁ ⟡ ݁ . ⊹ ₊ ݁. . ݁₊ ⊹ . ݁ ⟡ ݁ . ⊹ ₊ ݁.
⊹ ࣪ ˖ 𝑷𝒊𝒄𝒔𝒂𝒓𝒕 ⊹₊ ⋆ This is a photo editing service / app I use to make regular dividers. They have a lot of aesthetic / cute stickers and pngs like the ones I use in a lot of my dividers. They have a transparent background option I love that makes it easy to make a divider. You can save the stickers you like to a collection and follow artists / users you like as well. I 10/10 recommend this one. They also have a bunch of photo editing software like cropping, retouching, etc. if you’re into that.
.𖥔 ݁ ˖ 𝐂𝐎𝐍𝐒 — You have to buy Picsart Pro to use a lot of the “pro quality” services, and the better quality stickers not made by an individual user (I.e. stickers Picsart itself has created) are not accessible to users not subscribed to Pro. Also, when you crop an image Picsart has a certain limit to how thin it can go, so I use an image cropping website I mentioned above Iloveimg.com. I only use Picsart for divider making purposes though so I don’t have to worry about allat. Not compatible with animation / gifs

. ݁₊ ⊹ . ݁ ⟡ ݁ . ⊹ ₊ ݁. . ݁₊ ⊹ . ݁ ⟡ ݁ . ⊹ ₊ ݁. . ݁₊ ⊹ . ݁ ⟡ ݁ . ⊹ ₊ ݁.
⊹ ࣪ ˖ 𝑬𝒕𝒔𝒚 ⊹₊ ⋆ This is one of my favorite shopping apps in general. If you don’t know about Etsy it’s a small business / individually owned business kind of shopping app. There’s a lot of different stores / sellers that sell a bunch of different things. It’s a good place to buy dividers for very cheap, less than $5 dollars, I’ve also bought pngs / stickers as well. I’ll buy a divider pack from time to time and edit them however I please. I never just buy a divider pack and claim it as my own on Tumblr, I always edit them in some way that fits more to what I want. It’s just a good starting point in my opinion. Of course, you can probably find simple dividers online, only you know what’s best for you. Also, this is just a good place for anything web related in general ( they have sticker packs, dividers, procreate brushes, decorative elements, really anything you want for a relatively small price)
. ݁₊ ⊹ . ݁ ⟡ ݁ . ⊹ ₊ ݁. . ݁₊ ⊹ . ݁ ⟡ ݁ . ⊹ ₊ ݁. . ݁₊ ⊹ . ݁ ⟡ ݁ . ⊹ ₊ ݁.
⊹ ࣪ ˖ 𝑷𝒉𝒐𝒏𝒕𝒐 ⊹₊ ⋆ This is an app for fonts. Unlike the usual fonts you see in fancy font generators (𝔱𝔥𝔦𝔰, 𝓽𝓱𝓲𝓼, 𝚝𝚑𝚒𝚜, 𝐭𝐡𝐢𝐬, 𝒕𝒉𝒊𝒔, etc.) Phonto lets you upload your own fonts to use on pics. Using font websites you can upload whatever fonts you like in just a couple seconds. I personally like to use Dafont.com for my fonts. You can also use dingbat fonts / decorative element fonts. Not compatible with animation / gifs

. ݁₊ ⊹ . ݁ ⟡ ݁ . ⊹ ₊ ݁. . ݁₊ ⊹ . ݁ ⟡ ݁ . ⊹ ₊ ݁. . ݁₊ ⊹ . ݁ ⟡ ݁ . ⊹ ₊ ݁.
⊹ ࣪ ˖ 𝑷𝒊𝒏𝒕𝒆𝒓𝒆𝒔𝒕 ⊹₊ ⋆ Who doesn’t know Pinterest?? Literally my favorite app ever. I use Pinterest for image inspo / my aesthetic images. Here’s my Pinterest if you’re curious. This is besides the point but I used to be a Wattpad girly so I have a lot of boards relating to my past OC’s and wattpad stories (like 2016) 😭💕 You can search up literally anything / any aesthetic and the pictures / gifs that relate to it will pop up. Very easy to use and so much fun to make your own boards and stuff. I spend hours organizing my pins, I need to get back into it tbh 😿
.𖥔 ݁ ˖ 𝐂𝐎𝐍𝐒 — Users upload a lot of fan made art that isn’t always crediting the original artists who made it. I have found some jjk fan art I use for my headers but no source as to who the original creator is. A lot of profiles do give credit tho so that’s good.
. ݁₊ ⊹ . ݁ ⟡ ݁ . ⊹ ₊ ݁. . ݁₊ ⊹ . ݁ ⟡ ݁ . ⊹ ₊ ݁. . ݁₊ ⊹ . ݁ ⟡ ݁ . ⊹ ₊ ݁.
⊹ ࣪ ˖ 𝑷𝒊𝒄𝑪𝒐𝒍𝒍𝒂𝒈𝒆 ⊹₊ ⋆ This is the same service made by the people who created Picsart. I use this for many purposes. I mainly use it to combine my animated gifs with still images and combine animated dividers together with other dividers. To be honest it’s hard to explain what I use it for specifically but it’s just good for combining gifs and still images into one.
.𖥔 ݁ ˖ 𝐂𝐎𝐍𝐒 — I don’t think there is a transparent background option, so I have to use a certain website mentioned above to remove gif backgrounds. You also can’t crop the image and unless you pay for no watermark it gives you one. It saves animated dividers / gifs as videos, so I go to Ezgif to make it into a gif and crop the image to remove the watermark. Again, this one is a little hard to explain.

. ݁₊ ⊹ . ݁ ⟡ ݁ . ⊹ ₊ ݁. . ݁₊ ⊹ . ݁ ⟡ ݁ . ⊹ ₊ ݁. . ݁₊ ⊹ . ݁ ⟡ ݁ . ⊹ ₊ ݁.
⊹ ࣪ ˖ 𝑽𝒊𝒕𝒂 ⊹₊ ⋆ This is a free app I use that’s a rip off of the “real app” I used to have. The “real app” started charging for its services and so I moved to this one. It’s completely the same and FREE. This is where I apply text to my gifs and add the motion to it. Like how my masterlist header is, where it spins and flips, this is the app where I apply those effects. Side note, this is a good starting app for making edit videos like you see on Tiktok. You can turn off the watermark for free.
.𖥔 ݁ ˖ 𝐂𝐎𝐍𝐒 — This app also turns gifs / animations into a video when you go to save it, so again I go to Ezgif to turn it back into a gif.

. ݁₊ ⊹ . ݁ ⟡ ݁ . ⊹ ₊ ݁. . ݁₊ ⊹ . ݁ ⟡ ݁ . ⊹ ₊ ݁. . ݁₊ ⊹ . ݁ ⟡ ݁ . ⊹ ₊ ݁.
⊹ ࣪ ˖ 𝑷𝒐𝒍𝒂𝒓𝒓 ⊹₊ ⋆ This is my favorite filter app for photos. Has very aesthetic filters that I use for my still images and as of recently my Pinterest boards as well. Not compatible with animation / gifs
. ݁₊ ⊹ . ݁ ⟡ ݁ . ⊹ ₊ ݁. . ݁₊ ⊹ . ݁ ⟡ ݁ . ⊹ ₊ ݁. . ݁₊ ⊹ . ݁ ⟡ ݁ . ⊹ ₊ ݁.
⊹ ࣪ ˖ 𝑮𝒊𝒑𝒉𝒚 ⊹₊ ⋆ I use this app solely for its stickers. You can find sparkles, butterflies, hearts, anything you want with a transparent background and turn it into a divider. I use this app mostly for gathering animated stickers to make my animated dividers.
. ݁₊ ⊹ . ݁ ⟡ ݁ . ⊹ ₊ ݁. . ݁₊ ⊹ . ݁ ⟡ ݁ . ⊹ ₊ ݁. . ݁₊ ⊹ . ݁ ⟡ ݁ . ⊹ ₊ ݁.
⊹ ࣪ ˖ 𝑷𝒉𝒐𝒕𝒐𝒑𝒆𝒂 ⊹₊ ⋆ This is my go-to for applying effects / filters to gifs or animations. I use this to add filters to my animated headers. I download PSD’s from DeviantArt and use those filters for my gifs. This is not an app, just a browser I’ve added to my Home Screen. I recommend using on a computer because there’s a lot of stuff on the screen and you’ll want to see it all spread out. I use it on mobile only because I know which buttons I need to press so it’s not a problem.
.𖥔 ݁ ˖ 𝐂𝐎𝐍𝐒 — You have to upload your own filters to be able to add one to a gif. Once you open up the site it can be very overwhelming and confusing with all the buttons and drop downs and yada yada. Photopea is like an animations version of photoshop. I recommend searching for a tutorial, or if requested I can personally make a separate post showing you how to add filters to a gif.

. ݁₊ ⊹ . ݁ ⟡ ݁ . ⊹ ₊ ݁. . ݁₊ ⊹ . ݁ ⟡ ݁ . ⊹ ₊ ݁. . ݁₊ ⊹ . ݁ ⟡ ݁ . ⊹ ₊ ݁.
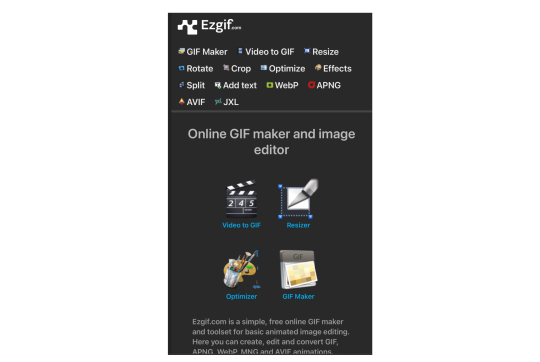
⊹ ࣪ ˖ 𝑬𝒛𝒈𝒊𝒇 ⊹₊ ⋆ my go-to website for literally anything gif related. Cropping, removing frames, optimizing a gif, making a gif, turning a video into a gif, and many more. I even use the effects tab from time to time to add a border around my gifs (like the one around the Sugar Water Series header) There’s other stuff you can do of course, I recommend checking it out, I’ve been using it for years.
. ݁₊ ⊹ . ݁ ⟡ ݁ . ⊹ ₊ ݁. . ݁₊ ⊹ . ݁ ⟡ ݁ . ⊹ ₊ ݁. . ݁₊ ⊹ . ݁ ⟡ ݁ . ⊹ ₊ ݁.
⊹ ࣪ ˖ 𝒐𝒏𝒍𝒊𝒏𝒆𝒈𝒊𝒇𝒕𝒐𝒐𝒍𝒔 ⊹₊ ⋆ This is a browser I use to remove the background from gifs.
.𖥔 ݁ ˖ 𝐂𝐎𝐍𝐒 — It doesn’t do the best job at removing a gif background unless it’s a solid color. I always do solid black and it removes it pretty well. If your background is white it will have a hard time differentiating the gif from the white background and will clip out parts of the gif and make it choppy. I recommend having a plain black background as that works best for me. Also it just recently had an update where you need to wait 10 seconds before you can download the finished product. It also claims you can only use it a certain amount of times a day but tbh I’ve used it a bunch in one day and never seem to have a limit. So idk. Like I said this update is recent. I guess a lot more people started using it and now they want to charge people.
. ݁₊ ⊹ . ݁ ⟡ ݁ . ⊹ ₊ ݁. . ݁₊ ⊹ . ݁ ⟡ ݁ . ⊹ ₊ ݁. . ݁₊ ⊹ . ݁ ⟡ ݁ . ⊹ ₊ ݁.
⊹ ࣪ ˖ 𝑰𝒍𝒐𝒗𝒆𝒊𝒎𝒈 ⊹₊ ⋆ This is the browser I mentioned in the picsart section where I crop really thin images. Does not have a limit on how thin you can make an image. I’m not positive but I’m pretty sure this is not animation / gif compatible.
. ݁₊ ⊹ . ݁ ⟡ ݁ . ⊹ ₊ ݁. . ݁₊ ⊹ . ݁ ⟡ ݁ . ⊹ ₊ ݁. . ݁₊ ⊹ . ݁ ⟡ ݁ . ⊹ ₊ ݁.
⊹ ࣪ ˖ 𝒇𝒐𝒏𝒕 𝒈𝒆𝒏𝒆𝒓𝒂𝒕𝒐𝒓𝒔 ⊹₊ ⋆ ONE TWO THREE
. ݁₊ ⊹ . ݁ ⟡ ݁ . ⊹ ₊ ݁. . ݁₊ ⊹ . ݁ ⟡ ݁ . ⊹ ₊ ݁. . ݁₊ ⊹ . ݁ ⟡ ݁ . ⊹ ₊ ݁.
⊹ ࣪ ˖ 𝒔𝒚𝒎𝒃𝒐𝒍 𝒅𝒆𝒄𝒐𝒓 ⊹₊ ⋆ ONE TWO THREE FOUR FIVE
. ݁₊ ⊹ . ݁ ⟡ ݁ . ⊹ ₊ ݁. . ݁₊ ⊹ . ݁ ⟡ ݁ . ⊹ ₊ ݁. . ݁₊ ⊹ . ݁ ⟡ ݁ . ⊹ ₊ ݁.
⊹ ࣪ ˖ 𝒉𝒐𝒏𝒐𝒓𝒂𝒃𝒍𝒆 𝒎𝒆𝒏𝒕𝒊𝒐𝒏𝒔 ⊹₊ ⋆ Evernote (a notes organizing app I use to organize my fics + I love it so so much), Amino (can find clubs / communities dedicated to bio decor & symbols), Gif Toaster (the og app I used in the very beginning to apply text to gifs), Canva (good stickers / elements + can find aesthetic / cute stickers with keywords on Pinterest), Videoleap (a video editing software I used to use), Remini (an app that upgrades the quality of an image), Symbol Pad & Symbol (apps I use for individual symbols) Snow (has cute animated effects I used to use sometimes a long time ago), VLLO (the app I used before Vita that charged for some of its services), DeviantArt (where I get all of my PSD’s + they have a lot of stuff you can use, pngs and whatnot, I just don’t really use it for those purposes)

14 notes
·
View notes
Note
How do you get such nice shots in captura? I wanna get better at it could you share some tips? Been trying to figure it out but I admit I'm not the most knowledgeable in photography etc.
Well.... It's a bit of a complicated process and it relies very very much on personal preference. Much like with any type of art there are different styles that each individual artist will gravitate toward. I can only show you how I do things, so I'd recommend asking other Captura folks on here about their own styles to see where our processes and preferences differ.
I'll also include some extremely helpful videos at the bottom, they go extremely in depth as to best practices and technical exploits.
Alright, lets get started with the background stuff... the tools!
ReShade: Shader injection, a MUST if you want to take dynamic and customized captura without using a program like Photoshop to do everything in post.
SRWE: Simple Runtime Window Editor.... the god among programs... It's an upscaler, allowing you to increase the resolution of the game beyond the bounds of your monitor. It's how I was able to get 15K panoramas at one point in time.
Any image editing software. Since I rely mainly on compositing to get the lighting I do, I need something to overlay and mesh the images with. I use GIMP cuz it's free, but even Microsoft Paint will work as soon as it add the ability to layer images.
Those are the tools... what about the tactics?
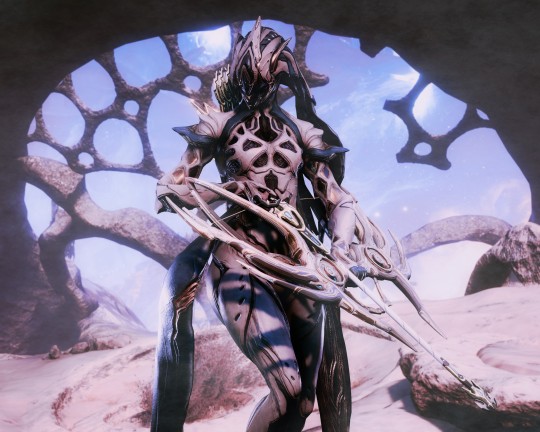
Well, I generally prefer moodier shots with the Warframe being the central focus (though, that's also the side effect of me cropping the image). Just a note! Moody doesn't mean dark, moody is the enigmatic space between dark and light where there is more dark than light... but there's still a good amount of light to be had. Occasionally you can have overexposure in a moody shot even.
Important to note, the overall exposure level of the environment, even is the scene lighting is low, will effect how brightly your Warframe can be lit. Both the Scene Light and Exposure sliders need to be fine-tuned otherwise you won't be able to light your Warframe at all.
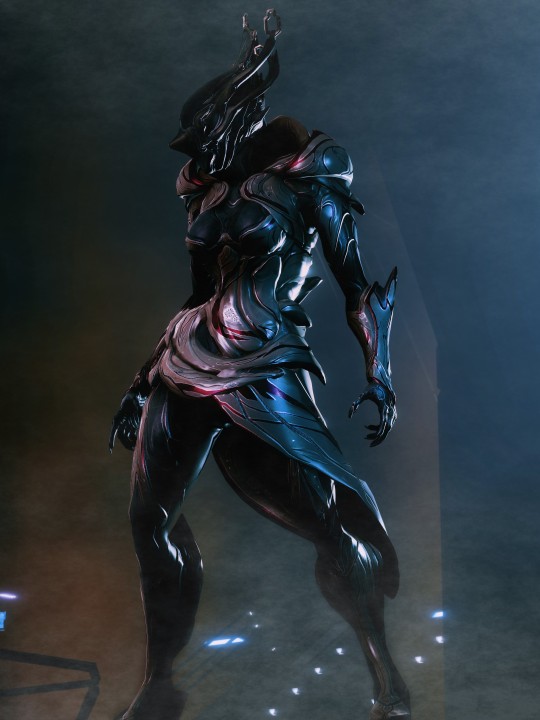
Now, for shot composition I prefer low angles with either a cluttered but familiar/recognizable background, or a simple but abstract background. The Subject, be it a Warframe, an enemy, or an NPC, reside in the center with their feet out of shot.
Like so:
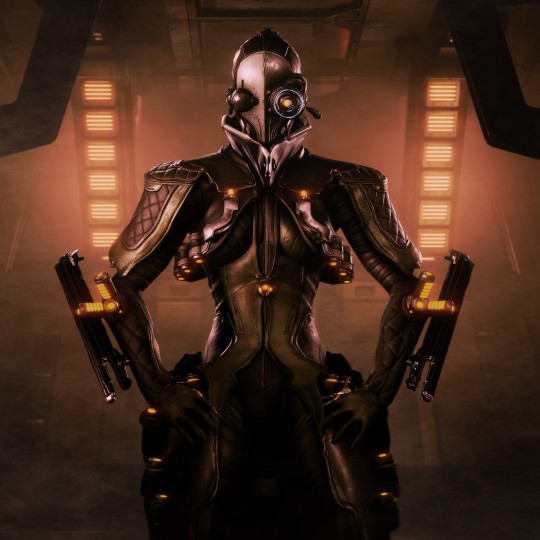
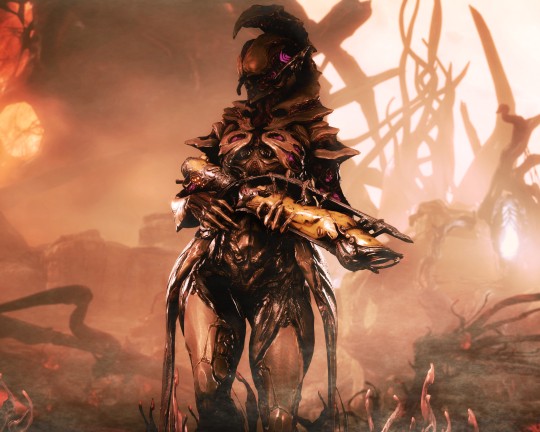
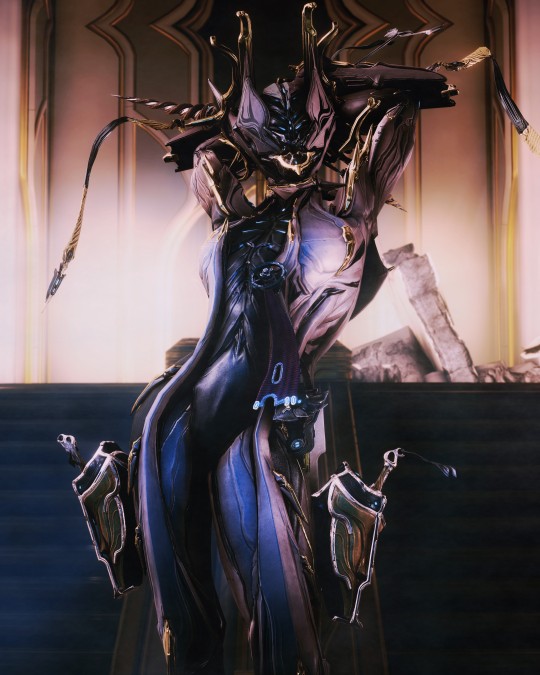
Each of these shots also demonstrate well the way I like to pose my subjects: Symmetry and.... not... not symmetry. The official term for this is Contrapposto, which is Italian for Counterpoise. Basically, even though the Wisp is sedentary, her body is still giving off the impression of movement based on how her waist is curving and hips are tilted, forming a loose 'S' shape. There's a handful of animation sets, Khora (Urushu) Noble, Mesa Noble, and Wisp Noble are excellent for this.
Some examples:
But... what about the lighting?
This is where things get technical.
So, the standard Captura's three-point lighting system is generally inadequate at properly lighting the entire Warframe. This is where compositing enters the picture, in a very literal sense. Each of these shots, shown above, are composites of between two and four separate images, each with different lighting angles. I actually have an example I made for an earlier explanation made already (thank goodness)

Getting the different lighting angles is really simple, just rotate the 3-way lighting without moving the camera. Then you overlay them in some photo editing software and just start going layer by layer, erasing bits of the topmost layer to reveal your desired highlights or shadows from the shot underneath.
Don't feel obligated to do this compositing process though! Sometimes the 3-way lighting works perfectly well for a shot or environment, don't feel obligated to complicate this process.
And this segues in nicely to the final part of the shot-making process, post-processing and fog layers.
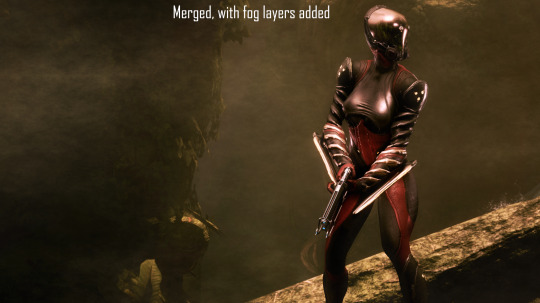
Now, fog layers are important to the overall appearance and vibe of my Captura. They add texture the image that the game doesn't impart naturally, removing large swathes of solid color from the background and foreground. An added bonus is that the added texture makes the image look somewhat better (imo) when compressed, or when viewed at lower resolutions.
The same image with and without Fog
This shot contains two individual fog layers, one in the foreground, washing out the foliage, giving the general uniformity of it texture and implied depth, it also serves to cover up the manual blurring I did (poorly) around his legs. Then there's the background Fog, which is the deeper blue you see in the sky. It adds a more dynamic air to the generally dour set of greys. And, again, the fog is just something I personally like to add, even if it doesn't serve a practical purpose in a shot. No shade if someone feels the fog ruins the shot, I almost always keep a fog-free version about.
After the fog is added, blended, and blurred slightly, I will apply a few gentle blurring filters to remove any jarring or jagged pixelation from the shot, giving the Frame a somewhat smoother appearance and reducing the file-size dramatically.
That's just how I do it though, it's not a particularly popular style, but it's how I do it and how I love to do it! :3
Remember to ask around, I'm sure there's lotsa Captura Artists out there willing to explain their methods and processes.
Helpful vids!
How to Captura by Vash Cowaii
Hotsampling in Warframe for High Res Shots by PurpleFlurp
good luck, and happy snapping!
#warframe#captura#warframe tag#warframe captura#sorry for writing an essay... sometimes I don't know when to shut up#-_-
13 notes
·
View notes
Text
Ask response:
"If you answer this ask (you don't have to), can you block my name? I'd rather be anonymous, but I wanted to ask if you know of any good places to host media like Discord? Or just place where you can leave and label the stuff? Because I have discord servers that contain my own story ideas and pictures to go alongside it, and while I can store it all on a USB, I'd rather have it all in one place where I can access. Sorry, I know I'm not really phrasing this well, but do you know of anywhere you can store ideas, text, pictures, links, etc, that are simple and easy to use? Like I can load it up, log in, or whatever place a picture I have for a certain story full HD, and it stays there forever until I delete it never looses its quality or the text I place can be edited and added to"
My apologies for the inconvenience of not having anon asks on, I got hazed by some people back in the Homestuck days and once was enough. Some people are cruel cowards and I won't subject myself to such harassment again.
There's several. I recommend using multiple sources:
Google Drive. Basic space is free, but it's Google. Storage is at least cheap, if you need more. I won't link this.
Dropbox. The OG online storage backup. Cheap.
OwnCloud. It's simple to get up and running. There's a cool markdown text app called qownnotes that can hook into this, too!
Github and its competitors. You can make a repository with all your stuff and folders, mark it private.
Use a wiki service. There's a few FOSS wiki solutions! DON'T USE FANDOM!!
Neocities. If you pay 5$ a month, you're doing a good deed and you can make your own funky website, too.
Archive Of Our Own, aka Ao3 for your text. You can set it to only you can see it! If you have hosting space, you can actually fork the software for it! It's an archive! It's what it's for! It has an original work section!
BACK UP YOUR STUFF LOCALLY! Big local storage has gotten way, way more affordable. You can get a 2 tera solid state external drive for under 120 dollars, a spinny disk external drive for under 70$. If you don't want to use Amazon, check out Best Buy or a local computer shop for options.
You're most likely gonna use money. I know money's really, really tight for a lot of people and the situation just plain sucks. I can't do much but offer options for people to ponder.
My recommendation is to back up your stuff to a physical location, and to rent online storage space with multiple vendors. If you don't mind using google for now, use both GDrive and Dropbox for simplicity. If you don't mind doing more and learning some things, use Dropbox with OwnCloud, and post your text to Ao3.
I do NOT recommend Imgur for photo backup.
I do NOT recommend Apple services unless you already have an iPhone/Mac device.
12 notes
·
View notes
Text
Bookbinding Tips for Beginners by a Beginner.
Trouble Shooting edition.
As I am redoing- and reprinting a text block from scratch. I learned some stuff that may help along the way. This will be brief. I am still compiling all of the photos I need for the potential last post of this little series of mine.
But some trouble shooting.
Printing
Printers are by nature a horrendous beast. Once you think you have them figured out they will either throw a temper tantrum to end all temper tantrums, fuck up the print, or make you grovel by their perch pleading for them to read the file.
"I have single handedly gotten my grandmother, and my mother to realize that there isn't a Nigerian Prince that needs their help. I have recovered corrupt files, and gotten that 90s VCR to work for some inexplicable reason but hell it made ma happy... I am the biped in this equation.... Now print you son of a bitch!"
I can't trouble shoot those moments but I can help make misprints a little less "Void your spine and your soul" at the same time.
This is me advocating for JS Binder- and getting your pdf broken up for the pure simple reason you can track the pages easier. I have had my printer pull two pages at a time and print on one side of one page, and print on the other side of the other page. The easiest thing to do is to pull the pages that have printed, and pull the pages that have misprinted. Stand them up so they're noticeable and allow the rest of the printing to conclude.
Now with adobe you can select what pages you need to reprint from the document in question, and there is a small section around the middle/bottom that has the page count. To reprint only the pages you need track the document number down for the ease of use:
The page count for Adobe looks similar to this.
For the ease of this example I'm just going to say that my printer fucked up the first and second page of the print.
Hit print:
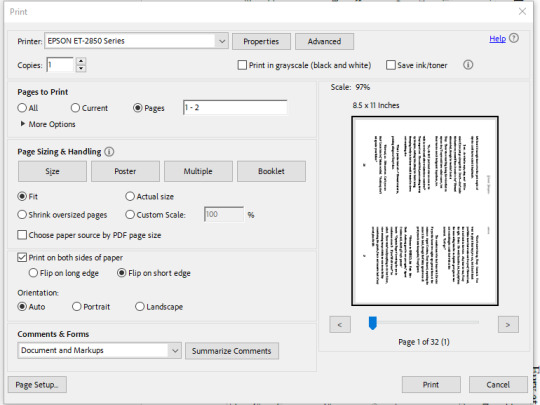
The layout for Adobe PDF reader will look as such.
In the "Pages to be Printed" Section near the top hit "Pages" and manually type in the page numbers. For this example One (1) and Two (2).
Also remember to flip everything on the short edge or else you will be having right-side-up and up-side-down pages alternating. We don't want that. Always ALWAYS make sure to flip on the short edge.
What if the printer misses a few pages? Similar concept but a few more steps before we get back to the print stage.
Best I can say- is if there are a massive amount of missing pages or they just don't look gook.
Check your ink levels. If it's not the ink, do a head cleaning usually there's a setting for that built into the software or on the printer itself. I can only speak to inkjet printers, if you have a toner printer.... damn lucky. Toner printers print damn fast and are quieter and more reliable than inkjet.
Anyway, once the cleaning has been accomplished and it looks like everything is as it should- see above or grin and bear the whole reprint for that section of your bind.
Usually I've gotten away with just going through the software for ink head cleanings. In extreme cases you might have to manually clean the heads. I know certain older printers are like that. Best I can say is find the manual and see how it goes.
IF that doesn't work still....
Invest in a toner printer if you can and borrow your friend's inkjet if you're printing colour covers for your books.
#bookbinding#fan binding#Troubleshooting#DIY#bookbinding for beginners by a beginner#This is short#May be expanded upon later#but unlikely
7 notes
·
View notes
Text
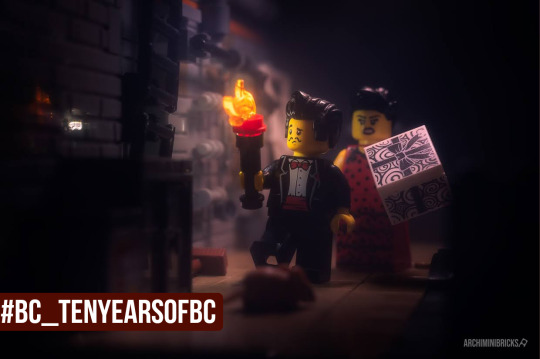
🥳 10TH ANNIVERSARY PHOTO CONTEST
Hi team,@archiminibricks here
Did you hear that BrickCentral is 10 years old?? Quite a while isn't it?
Time for a little reminder of that, this month's theme is about candles.
Great to have them with you when you take a “good” shortcut, just down the left, behind the trash bins, now just half an hour that way, turn right near that sauer and after reaching big rusty pipes, you know that you are officially lost.
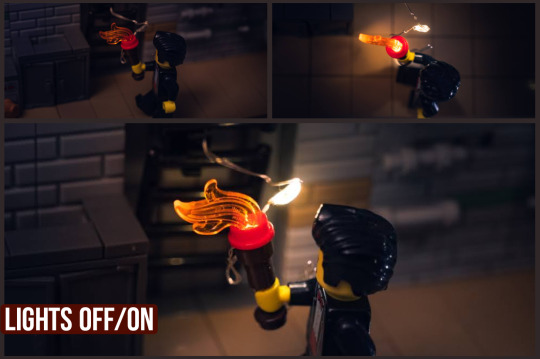
Ideas for lighting the candles?
I used batteries chains of Christmas lights which are really, really small and cheap. One light is stuffed into the candle and the other one is behind the flame. LED panel was at the top to give small back-top lighting on minifigures but 90% of light was from these small lights. Long 2sec exposure did the trick to provide good candle light…light
I used Photoshop originally to hide LED wires and it is a really simple edit. But there is also Photopea, free online editing software. I redo that photo again here to show you how easy it is. Tool is called a clone stamp and you clone part of the image near the subject you want to hide and you paint with a cloned texture on it - easy peasy. It took 5 min total in my picture and to be honest my wire hiding was really sloppy.
Spending more time on wire hiding reduces your time in digital hiding and otherwise.
So candles, up !! Let's take some photos !!

📜 THE RULES:
▫️ Take a NEW photo of LEGO with a lit brick-built candle in it
▫️ Include "My entry to #bc_tenyearsofbc photo contest on @brickcentral" in your caption
IMPORTANT! We don't always see your photos in the hashtag so the safest way to get your entry seen is by posting it on our Discord.
Multiple entries are always allowed.
🗓️ CLOSING DATE: Apr 27 22:00 CET
🏆 PRIZES:
🥇 Contest Winners:
One (1) Cozy House 31139 set
🔎 IMPORTANT FINE PRINT:
▫️ Must be 18+ to be eligible to win (no proxies allowed)
▫️ Shipping from LEGO is available to your country
▫️ Prizes are subject to availability and can be changed
▫️ Winners must respond within 48 hours
▫️ Customs are the winner's responsibility
- @archiminibricks
20 notes
·
View notes
Text
Nintendo 3DS Retrospective Part 3: A System's Function Continued

I hit the image limit on the previous part, and there's so many more screenshots I want to share with you all! I won't let the limit stop me from blabbing on!
Here is the third part where I continue on about all the system functions and other software I didn't have a chance to show in the other parts. This retrospective was originally one part, and then it became two, and then it became three....
Part 3 is under the cut!
Nintendo 3DS Camera

For the DS/3DS line, one of the main features is the dual cameras featured on the inside and outside of the system. To go with the camera, you need a camera application!
It is a simple application that lets you take photos and videos, and view them all. I used to spend a lot of time here, messing around with all the effects you could set and recording random videos here and there.
You couldn't record any videos on the DSi, so I went a little crazy with it back when. I still have all the old photos and videos I took, although the quality of the photos aren't that great.
It honestly feels like a downgrade from the Nintendo DSi Camera, as there are less effects and ways to edit your image. I miss distorting my images!
But it still was pretty cool to use.
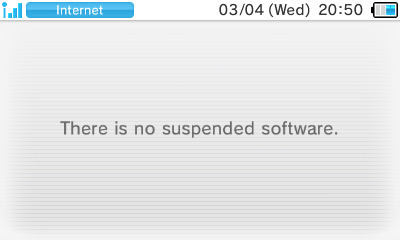
Nintendo 3DS Sound
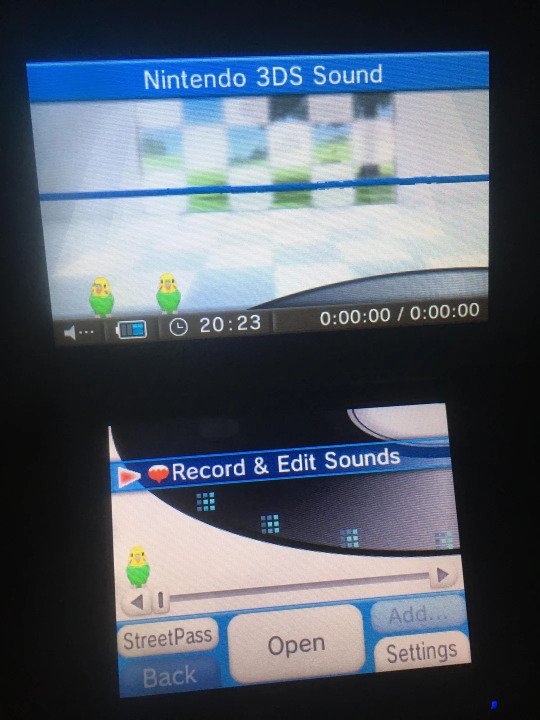
The DS/3DS line also had a microphone, so of course we need an application that lets you record voice clips and listen to music!
I loved recording myself. I would record the most weirdest of things that makes me wonder what I was thinking back then.
Let me list some of the highlights:
Me swearing very intensely for no real reason in particular, I think I just wanted to say “god damn piece of shit” while emphasizing the last part.
Me singing the beginning to Dragostea Din Tei because I really like this song.
Me singing the entirety of the English cover of A Female Ninja, but I Want To Love because I was really into Yandere Simulator for a bit.
My brother saying “asshole” over and over.
Me recording myself saying a garble of words when reversed, would sound like me saying “moving on the ground”, like Mario.
A whole bunch of calls from Stevo, my quail I used to have.
There is Streetpass, but I never knew how to use it back then. I still don’t know how to use it in fact, it won’t let me add anything to the Streetpass playlist in order for me to turn on Streetpass for this application.
Perhaps one day, I’ll be able to try it out.
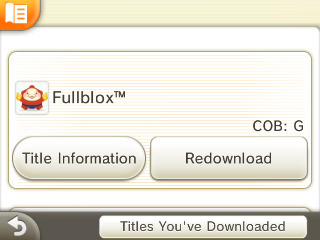
Nintendo eShop

Even though it shut down a while ago, you still can use it at the time I post this retrospective.
I really love the eShop a lot. It had soul and our little shopping bag guy. I was there when the shutdown occurred, downloading any last games or demos I wanted.
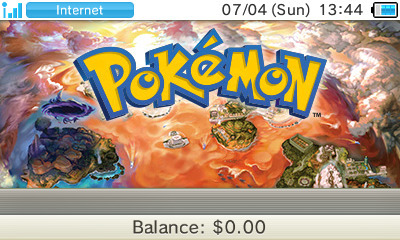
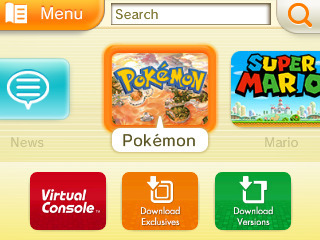
It looks rather empty without everything...but I'm glad we still can access it and listen to the banger BGM! I always have a smile on my face when I come on here.
I used to spend a lot of time on here as a kid when I had access to the internet, downloading a whole bunch of demos and exploring what games there was!
One time, my dad put $50 into my account since he saw I was on it with his card. I remember being so grateful, he didn't have to put in any money!
I could have bought a single game, but I bought multiple smaller games since I went a little crazy. You can't blame kid me, $50 was a lot of money to me!
From memory, I bought:
Colors 3D
Pokemon Dream Radar
Crystal Monsters
A Shaun the Sheep Episode Set
I wish I could go back to the heyday. It's crazy to think I bought these things over 10 years ago....

I love the Other Settings menu. I used to spend my time here scrolling through it all, seeing what each of the options did. The BGM makes me really emotional when I hear it.
Before the shutdown occurred, I spent over five minutes on this screen trying not to cry. It feels like a part of my childhood got stripped away without my consent. I know we still can use it, but one day....they will stop it too.
Thank you, Nintendo eShop!
Face Raiders
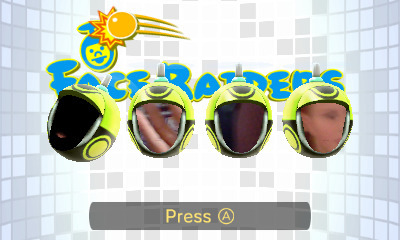

I liked this game a lot! I'm surprised people didn't, I think it's rather charming!
This is my favourite opening animation, the faces sing in a row but the last one messes up and the others gang up on that face.
I used to play this a lot back when I got my red 3DS, since it was one of the only games already on the system. You take a picture of someone's face and then hit the shit out of it with balls over and over in various stages.

My favourite mode was "Share the Fun", especially the underwater stage. I know it was meant for someone else to try out the game, but I used to do it for myself!
Every time it would say to pass the system over to the other person, I would pretend to pass it to myself.
In the underwater stage, you hit someone's face over and over before it falls down onto the floor, with a new version of the face appearing when you destroy it.
I used to always challenge myself to beat my record.
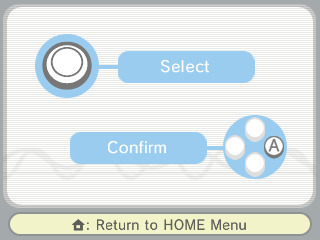
I've never actually beat the final boss in this game, surprisingly. I have the Final Stage unlocked, but I never understood how to beat it. The whole laser thing went over my head, and I think it still does to this day.
I vow to beat it at some point!
Internet Browser
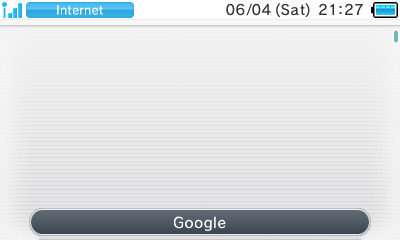

A very simple browser that had limited functionality, especially on the original 3DS line.
I didn’t really use it much when I was a kid, since I had no internet. I did like going on it anyway to get nowhere. I think I tried to use Youtube on here a few times, which didn't load any videos as you might have guessed.
I did log into Twitter before they removed the legacy support since it would have been a missed opportunity otherwise!
You can download images from here, which is what I used it for mainly! You search up the image on Google, view the full sized image and click on "Save Image"!

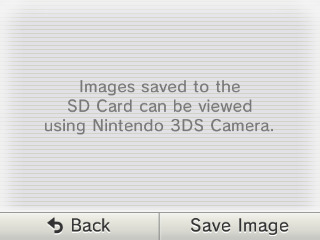
Not all images could be saved though.
They had to 480 x 480 or below and even then, it might not work for some reason. I used this feature a lot when I drew on Colors 3DS, so I could colour drop the colours I needed for an artwork.
You could put the image you need on the SD card, but if it doesn’t appear in the Nintendo 3DS Camera, you can’t use it in Colors 3D. I wish it wasn't so complicated.
It’s tough drawing on the 3DS.
Colors Gallery
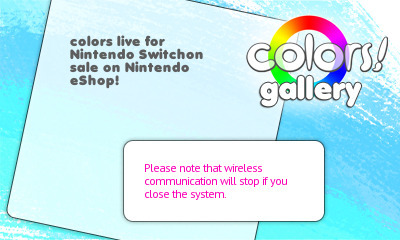
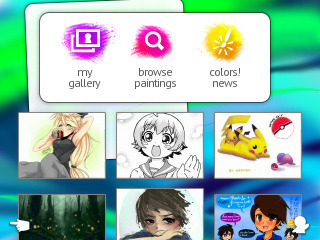
Speaking of Colors 3DS, this is my opportunity to show the Colors Gallery I was talking about in Part 1! Tumblr limit will always be my enemy.
I love this gallery so much. It's a shame we won't ever see it on the 3DS again after the shutdown, but luckily...it won't completely disappear!
There is the Colors Live gallery online which has all of the 3DS artworks! It’s nice to see that nothing will disappear, although no new artworks will ever be uploaded to the gallery from the 3DS.
It's rather unfortunate. I did make my own account and uploaded some of the artworks I was proud of!
Click here to see my profile!


Here is one of the Tokyo Mew Mew artworks I saved when I was a kid in all its glory. It still looks the same as I remember all those years ago....
Friend List
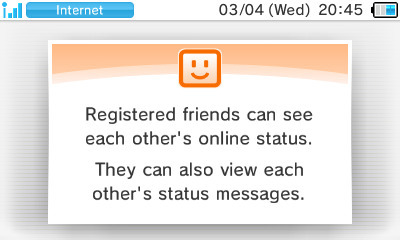

You're probably wondering, why is the Friend List here?
I really like this part of the system, despite how small of a part it plays. You always go on it to see all your friends, add new ones and set your favourite title!
The BGM is a banger, I could spend hours listening to it without being bored of it. I love how they used your Mii inside this card, they would move and even have their own 3DS while you were playing a game!
I remember trying to add people as a kid but the other person didn’t have my friend code so I would be left with these blank cards while waiting for the other person to be my friend.
Once I realised they would never become my friend, I deleted them after a while. If you have a modded system, you can actually put homebrew software as your favourite title which I find really funny.
“I love the FBI manager so much that I should let everyone know!” - someone probably.
Game Notes

You're also probably wondering, why is the Game Notes here too?
I think it’s one of the functions people often overlook, but I used to use it all the time! You only had three colours you could use and only sixteen notes to draw on which was a bit of a shame.
As you can see above, I used it to draw whatever I felt like. Mostly just Splatoon and Pokémon.
Miiverse


It really is too bad it shutdown.
I didn't get to use it too much back in the day, but I'm glad I was able to use it a bit! I remember looking at everyone's posts and admiring all the wonderful drawings!
I even posted on there too, but I don't remember what I drew. There was an offline mode where you could make a post and save it for later to upload. I wish they kept it, just so we could experience it all again like before.
Swapdoodle


The lovely note application we all know and love!
I decided to make this my last title I'll talk about since I have a lot of memories with it. I used this to draw little notes for myself and my friends, sending them when I felt like doing so.
Nikki is the mascot who writes notes to you and teaches you all the things you can do, unlocking new features as you go. You can put up to four badges as an example, which I like to use a lot since I have many of them.
There was a store you could buy more pencil colours and new note backgrounds, but that stopped working with the eShop shutdown, unfortunately.
I regret not buying a pack or two.

We will never see this little notification appear again. I think it's a shame, but what can you do?
And that's a wrap!
With that, my 3DS retrospective is complete! It was a lot of fun reminiscing. Thank you for all the wonderful memories you have given me, you wonderful handheld.
I wish Nintendo would keep supporting it, but all good things must come to an end. I never thought we would reach this point.
To the next console and beyond!
3 notes
·
View notes
Text
Tips for portrait photography
Essential Tips for Capturing Stunning Portrait Photography
Portrait photography is an art that requires a balance of technical skills and a keen eye for capturing the essence of your subject. Whether you’re a seasoned photographer or a beginner, understanding the nuances of light, composition, and interaction with your subject can elevate your portraits to new heights. Here are some essential tips to help you capture stunning portraits.
1. Master the Lighting
Lighting is the cornerstone of great portrait photography. The way you light your subject can dramatically influence the mood and impact of the photo.
Front Lighting: Lighting your subject from the front is a technique that inspires clarity and confidence. It evenly illuminates the face, reducing shadows and blemishes, which results in a clean and bright portrait. This type of lighting is perfect for headshots and professional portraits where you want to convey a sense of approachability and sincerity.
Side Lighting: For a more dramatic and character-filled portrait, light your subject from the side. Side lighting creates depth and texture, highlighting the contours of the face and adding a sense of mystery or intensity to the image. This technique is excellent for artistic portraits where you want to capture the emotional depth of your subject.
2. Choose the Right Background
The background of your portrait can either complement your subject or distract from them. Always aim for a background that enhances the overall composition without drawing attention away from the subject. Simple, uncluttered backgrounds work best. You can also use shallow depth of field (achieved by using a wide aperture) to blur the background and keep the focus on your subject.
3. Focus on the Eyes
The eyes are the windows to the soul, and in portrait photography, they are crucial. Ensure the eyes are in sharp focus, as they are typically the first thing viewers notice. Catchlights (reflections of light in the eyes) can add a sparkle and bring your portrait to life. Positioning your light source to create catchlights will make your subject’s eyes more engaging.
4. Experiment with Angles and Composition
Don’t be afraid to experiment with different angles and compositions. Shooting from a slightly higher angle can make your subject’s eyes appear larger and more expressive, while a lower angle can add a sense of power and dominance. Use the rule of thirds to place your subject off-center for a more dynamic and interesting composition.
5. Communicate and Build Rapport
Great portraits capture the personality and essence of your subject, which requires a level of comfort and trust between the photographer and the subject. Spend time getting to know your subject, make them feel at ease, and guide them through different poses and expressions. Genuine emotions and relaxed poses will result in more natural and compelling portraits.
6. Use Reflectors and Diffusers
Reflectors and diffusers are essential tools for controlling light in portrait photography. Reflectors can bounce light back onto your subject to fill in shadows, while diffusers can soften harsh light. These tools are especially useful for outdoor shoots where the lighting conditions can be unpredictable.
7. Post-Processing
Post-processing is the final step to enhance your portraits. Use editing software to adjust exposure, contrast, and color balance. Retouching can help remove blemishes and imperfections, but remember to keep it subtle to maintain a natural look. Enhancing the eyes, sharpening details, and adjusting the overall tone can make your portraits stand out.
By mastering these tips, you can create portraits that not only capture the physical appearance of your subjects but also convey their inner character and emotions. Whether you’re shooting in a studio or on location, the key is to experiment, communicate, and always be mindful of how light and composition can transform your portraits.
2 notes
·
View notes
Text
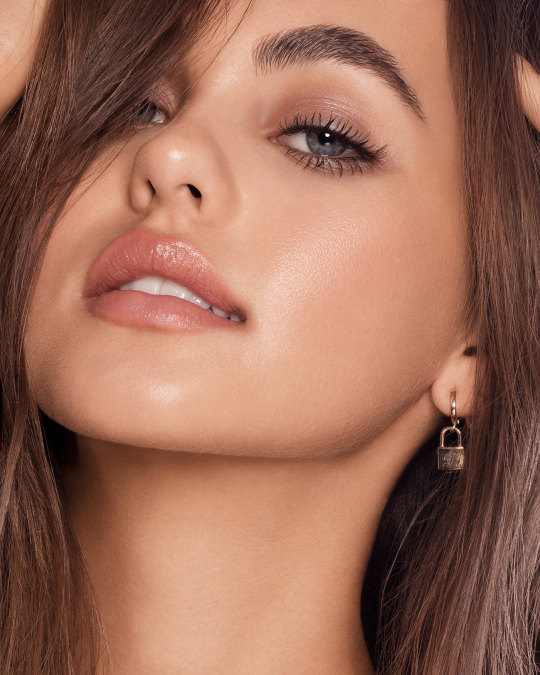
Photo retouching is the SEE MORE INFO Smpclippingpath.com process of enhancing or altering photographs to achieve a desired look. It involves a variety of techniques and tools to improve the overall quality and aesthetics of an image. Here's a basic guide to photo retouching:
Common Photo Retouching Techniques:
Adjusting Brightness and Contrast:
Enhance the image's clarity by adjusting the brightness and contrast levels.
Color Correction:
Adjust the color balance, saturation, and temperature to ensure the colors look natural and appealing.
Removing Blemishes:
Use tools like the healing brush or clone stamp to remove spots, pimples, or any imperfections from the skin.
Smoothing Skin:
Apply techniques to smooth out wrinkles and fine lines, often using a combination of the blur tool and frequency separation techniques.
Teeth Whitening:
Brighten teeth by selectively adjusting the brightness and desaturating yellow tones.
Enhancing Eyes:
Sharpen the eyes and enhance their color to make them stand out.
Removing Unwanted Objects:
Use content-aware fill or clone stamp to remove distracting elements from the background.
Sharpening and Noise Reduction:
Enhance the overall sharpness of the image and reduce any digital noise for a cleaner look.
Dodging and Burning:
Lighten (dodge) or darken (burn) specific areas to add depth and dimension to the image.
Reshaping:
Subtly adjust the shape of facial features or body parts using tools like Liquify.
Tools for Photo Retouching:
Adobe Photoshop:
The industry standard for photo retouching with a comprehensive set of tools.
Adobe Lightroom:
Excellent for batch processing and global adjustments.
GIMP:
A free and open-source alternative to Photoshop with many similar features.
Capture One:
A professional-grade photo editing software known for its color grading capabilities.
Affinity Photo:
A budget-friendly alternative to Photoshop with a robust feature set.
Step-by-Step Example in Adobe Photoshop:
Open the Image:
Open your photo in Photoshop.
Duplicate the Layer:
Create a duplicate layer to work non-destructively (Ctrl+J or Cmd+J).
Spot Healing:
Select the Spot Healing Brush Tool (J) and click on blemishes to remove them.
Frequency Separation:
Separate the image into high-frequency (details) and low-frequency (colors) layers to independently retouch textures and colors.
Dodge and Burn:
Create a new layer set to Soft Light and use a soft brush with low opacity to dodge (paint white) and burn (paint black) areas for depth.
Liquify:
Go to Filter > Liquify and subtly reshape areas as needed.
Final Adjustments:
Apply final adjustments like sharpening (Filter > Sharpen > Unsharp Mask) and color correction (Adjustments > Curves or Levels).
Save the Image:
Save your retouched image in the desired format.
Photo retouching can be as simple or as complex as needed, depending on the desired outcome and the condition of the original photograph. Practice and experimentation with different tools and techniques will improve your retouching skills over time.
#photography#professionalphotographer#businessphotography#commercialphotographer#freelancephotographer#landscape#love#aesthetic#aesthetictumblr#art#photo editing#advertising#illustration#fashion#grunge#vintage#quote#gif#lol#tumblr#tumblrgirl#tumblrboy#tumblrpost#tumblraesthetic#tumblrtextpost#tumblrposts#tumblrquotes#fotostumblr#funnytumblr#frasitumblr
4 notes
·
View notes
Note
Hey, can I ask you how do you make your gifs?
It took a lot of trial and error, but here is what I have learned(so far cause I'm very much still going through it):
1. Photoshop vs Photopea
To make your gifs you can either use Photoshop or Photopea. I started off with Photpea because it’s cloud-based and doesn’t take up any space on your computer, but I've since moved onto Photoshop. Most of the tutorials you’ll find will use photoshop. So if you need help or want to learn a new skill it will be much easier to find that help if you are using Photoshop.
Photoshop
👆🏽They have ones out there for mac if you search for them on here, but I happen to have a Windows PC so this is the one I use🤷🏽♀️
Photopea
2. Downloading videos
I get most of my videos from either YouTube or torrent sites which have a wide selection of shows and movies for you to download.
Watch So Much
👆🏽Is my favorite torrent site. You can also stream shows and movies on their site well.
YTS
👆🏽Is another torrent site I use, but they only have movies on there.
Qbittorrent
👆🏽Lets you download torrents. I should note that If you torrent you'll need a VPN. Literally do not try and download any content from HBO or Disney without a VPN, because at least here in America, they will email you threatening to disconnect your internet😅
For VPN’s do not use the free ones. They don’t work. I’ve personally used NordVPN, but there are other ones out there like Surfshark, or ProtonVPN.
4k downloader
👆🏽Lets you download most things off of YouTube(as well as a couple other sites like TikTok). I say most things because they will not let you download those free movies(ex. Twilight) YouTube itself uploads onto its platform.
Occasionally someone will upload an old movie onto a private channel which you can download with no problems, but anything new or recent you won’t find on there.
You do not have to use a VPN to download videos from YouTube.
3. Resources:
Whatever you're trying to gif will probably be on the long side. So you're either going to need to trim it down to make a 2-3 second clip that you can then use to make your gif, or you can screencap your video.
Screencaping allows you to take a shot of each individual frame* which you can then use to make your gifs out of.
*I like to use anywhere between 40-90 frames per gif.
VLC
👆🏽This is a video player that lets you play your videos and create screencaps from them.
👆🏽This is a great post on how to screencap using VLC.
KMPlayer
👆🏽Is another video player/screencapping software, but I found their interface to be overly complicated
Clipchamp
👆🏽This lets you trim down your videos to create those 2-3-second clips. There are better video editing tools out there(like DaVinci Resolve), but if you have Windows for what it's worth, it’s simple and gets the job done 🤷🏽♀️
rPiracy
👆🏽Has links for torrents and things of that nature.
👆🏽This is a great post on how to make a basic gif using Photoshop.
👆🏽This is a great post on how to make a basic gif using Photopea.
👆🏽This user has a lot of tutorials so when you're ready to move onto more complicated gif making, use them as a resource.
4. Lastly, have patience with yourself.
GIF making is time-consuming and as I stated it takes practice. So don't sweat it too much and have fun🎉
3 notes
·
View notes
Text
Remote meetings trick:
If you're using a virtual background, take it into any editing software (powerpoint will do fine) and blur it a bit. One problem with a lot of backgrounds is that they're too sharp, like they're 100% in focus. However, unless you have an exceptionally good camera, your image is going to be blurry and imperfect. If you superimpose them, you end up with the background being much sharper and out of place, and it feels very unnatural.
Here's a blurry photo of Kit Harrington. It's been digitally modified to look worse than it is, but it's slightly pixelated and slightly blurry. It's not a terrible webcam image, but it's not great either.

Then we use background removal and put it against this very fancy zoom background of a house:

and we get this:

Kit looks especially blurry now against the super sharp lines behind him The house is now the main point of interest. And further, it doesn't look remotely like the same camera took his picture (he's more washed out than the house is.
But, using super basic tools in powerpoint, I blurred the background and took the saturation down by about 40%, and got the following:

Adding the photo of Kit Harrington back gives:

It still doesn't look amazing (the cutout around the hair remains too sharp, for one thing). But if you're not paying attention, it looks like the two could have been captured by the same camera. Kit is now more in-focus than the background, and the overall saturation matches more closely. Here they are side-by-side

And here's a side-by-side with a bookshelf background.

With the blurred backgrounds, like the ones on the right, the problems with the camera aren't nearly as obvious, because there is no longer that contrast. That's why, even though the images of Kit are completely identical in all four images, he looks less blurry on the right-side ones, because he isn't contrasted against this over-sharp background.
TLDR: take a really simple blur to your zoom/teams backgrounds and re-upload them. It makes it feel much more natural.
8 notes
·
View notes
Text
April 30th 2024
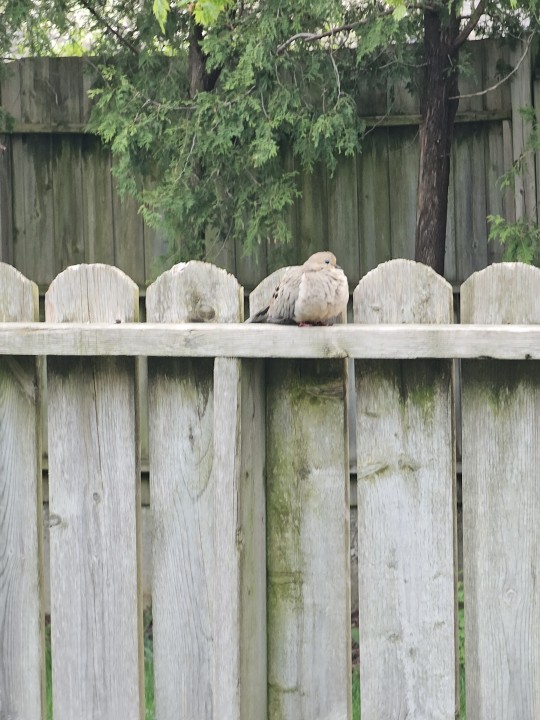
Not much of a garden update here, but I assure you there has actually been some progress. So here's a photo of one of my dove frens I took one the 28th.
Keep readin' if you wanna hear me blab on about the video posts and ADHD. You've been warned, it's long 😂
So I've been enjoying doing the video-style posts instead of typing 90 paragraphs of nonsense, but I don't want to keep recording with my phone since the videos take up a bunch of space. (As well as me having to take off my dirt-coated gardening gloves every time I want to record.) I could just delete the clips after editing into one video, or just all of them after uploading, but I prefer having things backed up instead of just uploaded online.
I know I could back them up to my computer too, but part of the reason I enjoy the quick clips of nonsense slapped together with minimal editing is because it's simple and I can do it all on my phone. Either plugging it into my computer or even uploading them to Google Drive on my phone then downloading them onto the computer adds extra steps.
Extra steps that seem inconsequential, but something I know about myself is I'm very all or nothing. It's very hard for me to only do half of a thing. In this example that'd be editing the videos together and then hitting the block that I've finished that part and uploaded, but now I need to plug in my phone to the computer to transfer the video files. Or if I back them up to drive, it only has so much space before it yells at me to upgrade lol
Drive seems like the most logical option though as it would give me the freedom to at least have more time before I have to download the backups, however I know for a fact that when that point comes I won't record any more videos even if I want to because I need the space to back them up, but I dont want to sit down on the computer to download the Drive backups because I'm doing other things and will get distracted if I do.
This is a struggle for me in a lot of aspects, can't do Z because I need to do X but I can't do X until I do Y, and I need to finish ABC before I can do Y, but all I really want to finish is Z. And worse is that most times to do Z, there isn't any need for the other stuff. It's just me wanting Z done in a certain way that to do it that certain way, it requires all those other steps. This happens in the garden a lot too, so this rant is kinda still relevant 😅
Thankfully all of that hasn't caused an issue with me just not doing garden things because I want to record it, because trust me when I say that's happened a lot in the past too. (That being me wanting to make a little video of something but not being able to figure out how I want to set up the cameras so I don't do the craft or whatever because I want to record it so it just never happens but sticks in my brain as the thing I want to do but can't till I figure the recording process out.) Depression is the reason why I haven't been gardening 🤣
All this to say I have like, 2 days worth of clips I want to edit into a post to show the progress so far. One day is clips on my phone, the other I recorded with a little action camera and I'm not sure how that's turned out yet since that requires me to upload to the computer to see better. (See computer related snag above as to why thats not done!) Today I might go even further and just bring out my small digital camera I got years ago to do vlogs with, that I never vlogged with.
Which leads me to my last point, and Ima make a poll for thoughts on the idea after this post cause I know this is a lot to read and most folks won't care, and that's fine! I think maybe I will use that camera for vlogging finally. I'd have to learn how to use an actual video editing software, and it'd have to be lightweight cause my once-top-of-the-line-parts-now-10-years-outofdate computer struggles hard to play Helldivers 2 right now, I can't imagine trying to run something like Premier Pro. But to be honest all I want to do is add auto-captions like Ive already done previously so I'm sure I can fine some free or cheap program to do so. I'm just not sure if like, amateur gardening vlog style videos where I mutter to myself as I pour dirt is really a genre of content lmfao. And if it is, it's probs better off on here or tiktok but I'm going insane trying to not film landscape everytime I go to record something.
So like, I dunno, I guess youtube? I can probs figure out how to sorta make it acceptable for portrait orientation viewing after the fact? I have no idea but if there's a gap in video updates for today, that's why 🤣
Alright that's all for now. I gotta get up, get sunscreen'd, and get out there! As long as it's not raining still... it was last night 😅
#not really a gardening post#but theres a birb!#and me rambling about my stuggles with adhd and junk#a blog update of sorts i guess
5 notes
·
View notes
Text
wow hi sry it’s been a minute. i finished the odin project foundations course so i’ve hopped to the javascript stack, currently working on the intermediate html css section.
what are svgs?
scalable vector graphics. basically easy to scale to any size and retain their quality without changing the file size. vector graphics are built on formulas that are more adaptable to resizing, while raster graphics are built with pixels, making them susceptible to quality loss
they’re often used for icons, charts/graphs, large simple images, patterned backgrounds, effects via filters.
there are two ways to embed them:
you can use the html <img> tag or link with css background-image
you can also paste the contents directly into the code without linking it to an image. this can allow for altering via css and javascript
why use svgs (or why not)??
PROS
defined using XML (extensible markup language), which is html like syntax used for APIs, RSs, spreadsheets and word editing software
makes it easy to integrate into html files without changes
CONS
not good for textured/photo realistic images
you don’t really want to create them from scratch - you’ll more often find yourself copying or downloading from an image editor, like adobe illustrator or figma
here's an excerpt of some simple svg code
some of these attributes are pretty recognizable, but a simple breakdown:
xmlns: XML namespace that specifies the dialect of the svg, imagine like defining the language you're using
viewbox: defines the aspect ratio and origin
class, id: same as html, allows us to target an element
circle, rect: click here for elements that are defined by the svg namespace
--
wow hi sry it’s been a minute, studying w a full time job is so inconsistent sometimes zzzz BUT i finished the odin project foundations course so i’ve hopped to the javascript stack, currently working on the intermediate html css section. the next couple posts are prob gonna be more html css oriented (⊙_⊙)
23 notes
·
View notes
Last Seen Blogs

amazon-web-services-aws
Amazon Web Services AWS

banjeebear
de BANJEE Juxtapositions
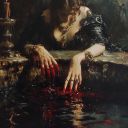

narfix
Narfix

ana201502
love life and its secrets