#sims 4 screenshot tutorial
Explore tagged Tumblr posts
Visit Tumblr Blog
Explore Tumblr blogs with no restrictions, modern design and the best experience.
Last Seen Tumblr Blogs


Fun Fact
Tumblr was created by web developers David Karp and Marco Arment.
Text
youtube
♡ How to move Eyelash CC to new Eyelash category in 30 seconds ♡
It's super simple to move all of your existing eyelash CC to the new category in CAS using Sims 4 Studio ♡ྀི ₊
#sims 4#ts4#ts4cc#the sims community#ts4ccfinds#ts4 lookbook#sims lookbook#ts4 hair#ts4 maxis match#the sims 4#ts4 cas#ts4 simblr#ts4 gameplay#ts4 legacy#ts4 screenshots#simblr#ts4 tutorial#ts4 eyelashes#Youtube
161 notes
·
View notes
Text
HQ Screenshot Mini Guide (maybe?)
i THINK i may have figured out how to take HQ screenshots without using SRWE!!
After seeing this post by @moonlitfalls , i started watching some tutorials on SRWE and it just seemed to complicated to use every time i wanted to take a screenshot lol, so i dug a little more and found this post by @glittermutt ! Which led me to dig even deeper and find an even easier way to do it! (yes, i'm so lazy i really needed to find a way to do it with the least amount of effort...also this only works if you have a NVIDIA Gpu i believe, cause you need geforce experience.)
So far it seems to be working pretty well for me, so maybe it'll work for you too! Worth a shot.
Step by step under the cut...
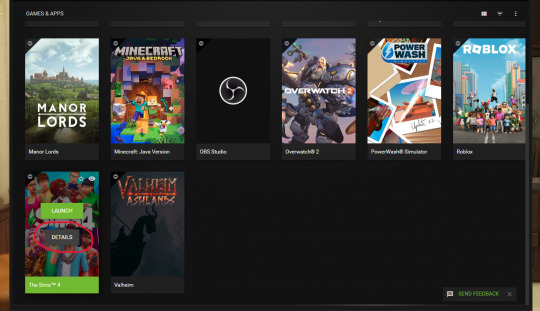
ANYWAYS. all you have to do is open up GeForce Experience and find your game:
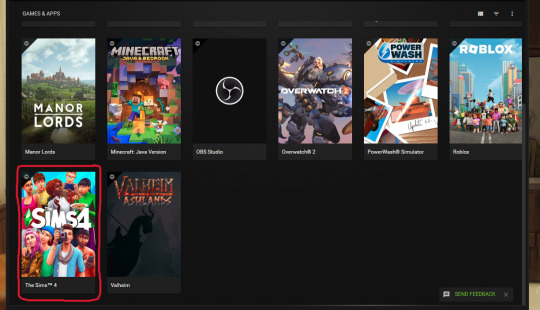
THEN, hover over it and click "details":
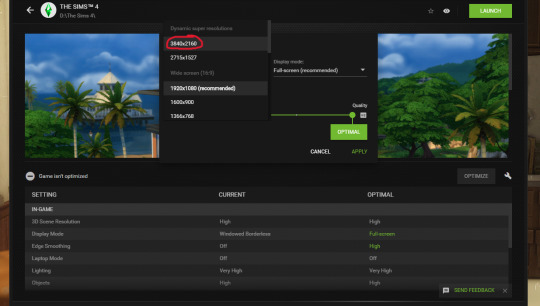
It'll bring you to this screen and you click on the wrench icon:

And then a little window pops up and you choose one of the dynamic super resolution sizes (i went with the bigger one cause my GPU can handle it):
And then just click apply! ( you can also choose fullscreen or windowed etc, whatever you like to play your game with)
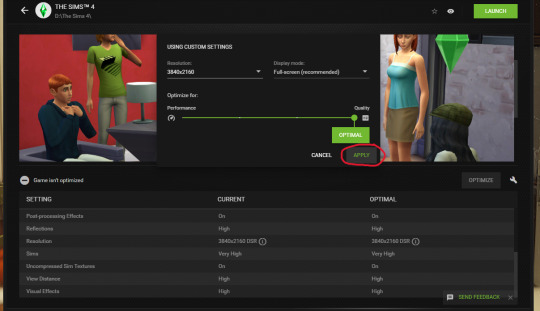
And voila! That's it, pretty much.
Now when you open your game, it should automatically be set to run at that larger resolution. You can check in your in-game graphic settings. Then you just take your screenshots, and you can change the resolution in game back to whatever you originally had it at if you want to, so it doesnt put too much strain on your GPU while you play.
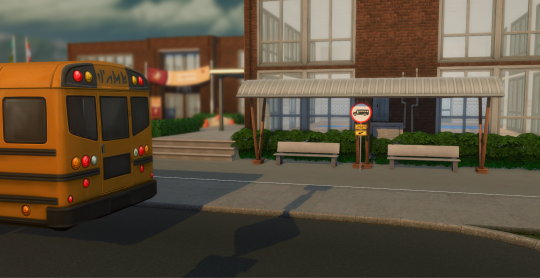
Hope that all made sense?? Let me know if it works for you!
82 notes
·
View notes
Text

pt 1: how my game looks nice - a mini guide by neory.
do you want your game to be yassified? well congrats, you've arrived at the right place :>
I take a lot of screenshots and post them here on simblr, and I thought making this little guide on how I achieve this..↴

.. might be helpful to people who wanna level up their game and take pretty screenshots of their own :D
keep in mind I'm not a pro at this, this is just a guide on how I personally like my game to look and how I achieve it. your preferences might be different!
luckily, since this is meant to be just a starting point, you can take these tips and use them however works best for you.
this is going to be a multi-part (and multi-post) guide. so let's get started, shall we?
────
beginning -> next
45 notes
·
View notes
Text
This is not a render! How to get beautiful scene lighting with no Blender!
#sims 4#simblr#ts4#my sims#sims 4 screenshots#sims 4 tutorial#tutorial#lighting#show us your builds#sims 4 tips#sims 4 screenies#sims 4 screencaps#sims community#weird sims#the sims community#show us your sims#showusyoursims#sims4#occult sims#sims 4 story#how to#sims 4 build#ts4 build
12 notes
·
View notes
Text
A Very Basic How to Edit a Screenshot Tutorial
I had a request by PeachPlumbobs on Bluesky about how I edit my moodlets and use them on my Sims 4 screenshots. I used this as an opportunity to brush up a little on my Photopea skills to offer a free solution to anyone editing their sims screenshots. This is a quick and dirty tutorial. There are SO MANY MORE THINGS you can do with Photopea. Its basically a free to use, browser based, Photoshop. If you've ever worked with Photoshop, you will be comfortable here.
To follow along with this tutorial you need:
A screenshot of a moodlet and a screenshot you want to put it on top of.
Open Photopea in your browser
** I play and edit on a PC. Any keyboard shortcuts I mention are for PC.

First, we're going to open Photopea. It really is browser based. You don't need to download a thing to your computer. For this basic edit tutorial, I dragged and dropped a screenshot with a moodlet and a screenshot I wanted it overlayed on.

Notice how Photopea will open each image as its own tab. That's good. The question I was asked was how I edit and add moodlets. Personally, I use exactly what the game gives me. I'm going to show you how to cut them out with rounded corners here.
*To make your life easier, feel free to use the magnifier glass tool on the left to make the area you are working on bigger. If you need to move the whole image around, use the hand selection tool on the left side.
On the left side with the tools, you will find a button for shapes, click the rectangle one. On the top bar, just below the "Edit" button, you will see a drop down box that lets you change this from a shape to a path. Make it a path. On that same bar you will see an option to edit the corner radius. I changed it to 5px.
Use this path drawing tool to draw a rectangle over the part of the moodlet you want to see. I cut out the time remaining on the moodlet when I do this. I also cut out the icon - that's optional of course!

Once you have your path drawn, look to the right side of the screen. Over there, you want to switch it from layer view to Paths. After that, on the bottom of the right side is a button that lets you make that path into a selection. Switch the view on the right side back form Paths to Layers. Use the Arrow tool on the left side and click the center of your selection to make sure it is active.

On PC, you can use the keyboard short cut "Ctrl C" to copy the selection. Or, you can go to the top and click "Edit - Copy"
Switch tabs to the image you want to place the moodlet on. The PC keyboard shortcut is "Ctrl V" to place your copied selection on a new layer of this file. Or, you can click, "Edit - Paste"
Again, this is how I edit my moodlets and you don't have to do the same thing if you don't want to! Once my moodlet is placed as a new layer, I use the square selection tool on the left side to create a box around the moodlet icon. I then use the arrow tool to move the icon on top of the moodlet box with the text. Once completed, go to the top and press "Select - Deselect"

How to add that nifty translucent outline around the moodlet. Make sure you are on the layer your moodlet is on! Go to the bottom right and click the button labeled, "eff." Go up the pop-up list until you get to "Stroke." Click on that and a layer style box will pop up. For this example, I set the width to 10px, the opacity to 40%, and the color to white. There you go, you've given that moodlet a little pop!

This is a quick tutorial, but I'd be remiss if I didn't follow through with the rest of the image editing process here. I know I plan to make this image a square when I save it, so I moved my moodlet over where the square would be. Using the rectangle select tool, you can press "Shift" while dragging the rectangle out and you will get a perfect square. Once you are happy with your selection, go to the top bar, and click "Image - Crop"

Now that I know the size of my image that I plan to post, I can adjust the size of the moodlet. Again, make sure you are on the layer with the moodlet when you try to do this! Go to the top bar and click, "Edit - Free Transform"
Free Transform is a lot of fun. You can make the moodlet larger, smaller, or rotate it! If you hold down the "Alt" button while resizing, the moodlet will keep it original aspect ratio as well. Once you are happy with the size and rotation of the moodlet, click the arrow tool on the left to exit Free Transform mode.

This screenshot was taken at night and is very dark. There is a very easy and quick way to make it a little brighter. Click the layer with your screenshot. By doing this first, the following edits to brightness will not affect the Moodlet layer. From the screenshot layer, go to the bottom right and click the half and half circle button. From the drop down list, click "Levels"
Levels brings up a bar graph looking screen. On the left is darks, on the right is lights, in the middle is midtones. Pull the slider button just below the bar graph around until you find a happy level of darks and lights. In this case, I played more with the midtones. This is a quick and dirty adjustment method! there are so many other ways to do this! But, if I'm in a hurry, I go straight to levels to adjust my screenshots.

Finally, save your final product! In my case, I'm going to file and exporting it as a .jpg or a .png. If you save it as a .PSD, you can open it and work on it again in the future if that's something you want to do. When I export the save as a PNG or JPG - it automatically saved it to my downloads folder.

There you go! One quick Photopea to edit your sims screenshots tutorial!
Have fun.
#ts4#sims 4#ts4 screenshot editing#photopea#photopea screenshot editing#photpea screenshot editing tutorial
35 notes
·
View notes
Text
youtube
How To Create A Realistic Sims 4 Save File (Step-by-Step Tutorial + Tips) | The Sims 4
In this video, I demonstrate how I create my realistic and detailed save files, starting with the charming town of Henford on Bagley.
#bougiechloe#bougie chloe#bougiechloe cc#bougie chloe builds#sims 4 gameplay#the sims community#sims 4 save file#sims 4 saves#the sims 4#ts4#ts4 simblr#my sims#Youtube#sims 4 screenshots#sims 4 cc#sims 4 custom content#simblr#the sims 4 tutorial#ts4 tutorial#sims 4 tutorial#sims 4#the sims#the sims 4 cc#henford on bagley#cottagecore#cottage aesthetic#simblog#ts4 simbrl#show your sims#ts4 save file
120 notes
·
View notes
Text
youtube
I posted a short tutorial on how to level up your sims' photos in-game, especially when you want to take pics of them off-lot in front of amazing scenery on terrain!
Using TwistedMexi's tool mod and Ravasheen's full control camera!
#sims 4#the sims 4#ts4#chermibear#sims#simblr#ts4 simblr#the sims community#tool mod#ravasheen#full control camera#sims 4 cc#sims 4 mods#the sims 4 screenies#sims 4 screenshots#sims 4 screenies#sims 4 screencaps#ts4 screenies#ts4 screenshots#ts4 story#sims tutorials#sims youtube#Youtube
4 notes
·
View notes
Text
youtube
Pose Tutorial | CAS & InGame
Today I share with you a quick tutorial for how to use poses in create a sim and in game. I hope this helps, let me know if you have any questions!
#my sims#simblr#sims 4#the sims#the sims 4#sims 4 screenshots#sims 4 cc#sims 4 build#sims 4 custom content#sims 4 mods#sims 4 tutorial#sims 4 poses#Youtube
39 notes
·
View notes
Text

Relight saved my existence !!!
#this isn't an official post aksjsadds if that makes sense?? but i liked this screen so much lolol#im still gon post another set of screens of this beautiful lady so pardon me!! cuz she had the same exact outfit lol#I BEEN TAKING CAS PORTRAITS NON STOP OMG#at first i wasn't understanding how to use relight tbh#but i followed amoebae tutorial and now i been using it so easyy#softle0#ts4#simblr#the sims 4#my sims#show us your sims#showusyoursims#ts4 cas#ts4 aesthetic#ts4 screenshots#ts4 screenies#ts4 simblr#ts4cas#the sims community#the sims cas#imma be honest#like its 3 am??? nobody is up lmao
61 notes
·
View notes
Text


🤍🤏🏻🤏🏻🥹🥹
#the sims 4 cc#posesims4#ts4 custom content#thesims4cc#artists on tumblr#the sims 4 screenshots#sims 4 tumblr#sims 4 lookbook#sims 4 tutorial#sims 4 gameplay
4 notes
·
View notes
Text

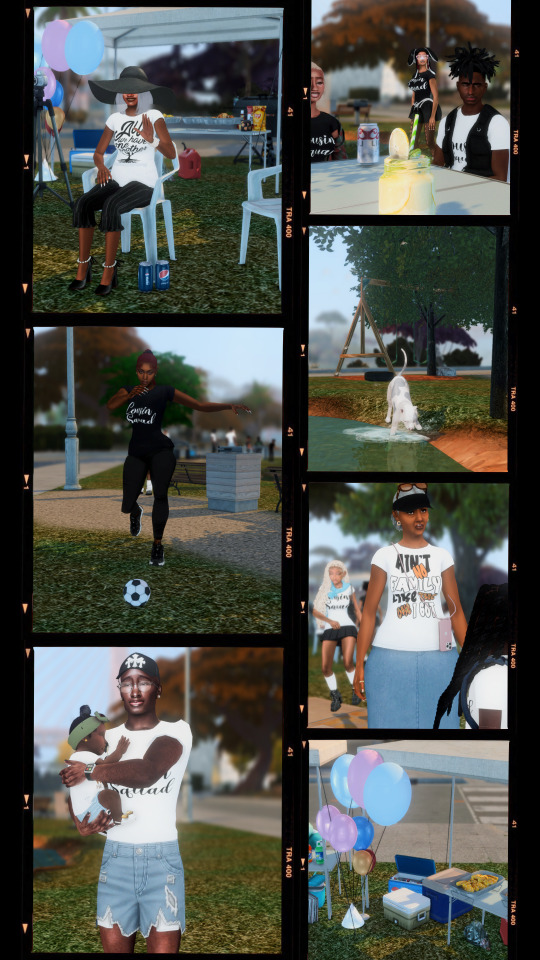

The Love family hosts their second annual Family Reunion at the San Sequoia lake!
A tutorial video is in the works on How to host the perfect family gathering in the sims 4, more specifically the perfect family reunion! Stay tuned by following here on simblr and subscribing to my YT✨

#sims4#sims 4 gameplay#sims community#simblr#my sims#sims 4 challenge#sims 4 custom content#sims 4 cc#sims 4 cas#sims 4 mods#sims 4 build#sims 4 screenshots#the sims community#the sims#sims 4#sims 4 clothes#sims 4 poses#the sims 4#sims 4 tutorial#how to sims 4#ts4 legacy#sims 4 story#ts4 gameplay#sims 4 family#thesims4#do the sim thing legacy challenge sims 4
18 notes
·
View notes
Text
youtube
RELIGHT TUTORIAL POSTED!!!!
#the sims 4#sims 4#the sims community#simblr#ts4#sims4#sims 4 gameplay#sims 4 tutorial#sims 4 screenshots#Youtube
2 notes
·
View notes
Text

sneak peak at my video releasing Friday!
( ๑‾̀◡‾́)σ"
Since I've gotten a lot of setup questions I decided to make a video to direct anyone confused about where to start and or upgrade their specs for pc gaming :) I give a tour of my recording setup, provide a complete guide to buying laptops, diy desktops, or prebuilts for the sims 4 and more!
link to channel I specs masterlist

also 1k?!! I'm so happy that people enjoy my content so far. Your support means everything and gives me the motivation to keep going.
#simblr#the sims 4#the sims community#ts4#sims#the sims#ts4 screenshots#my sims#the sims 4 edit#the sims screenshots#gaming setup#pc games#gaming#the sims 4 tutorial#sims 4#ts4 simblr#ts4 build#the sims build#wip#the sims interior#the sims exterior#ts4 save file#ts4 gameplay#show us your sims#sims 4 edit#showusyoursims#ts4 edit#Youtube
14 notes
·
View notes
Text
I need advices for my screenshots 😭
Soooo
I’m on Mac and I want to make better in-game & CAS screenshots but idk where to start.
I know there is logiciels but I don’t know what I can download or not.
Can someone help me with that please ?
4 notes
·
View notes
Text
How is your productive working week? Full of energy and strength? 👍 I will post another tutorial soon, and today, for you, the stages of drawing.
Beautiful Bella Goth❤
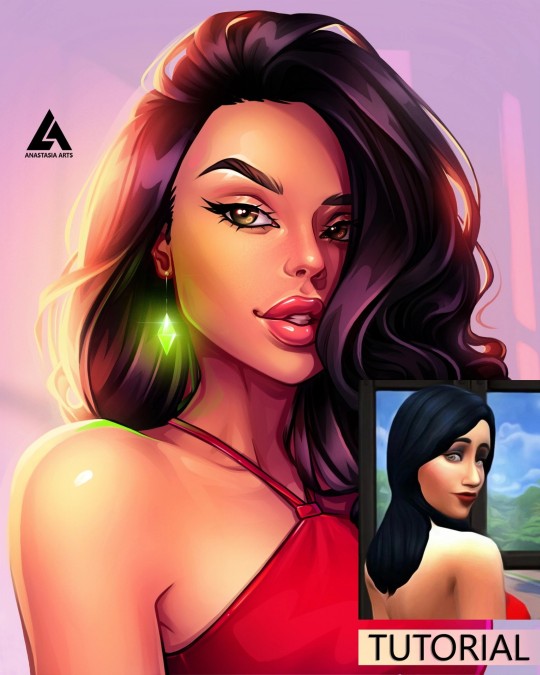
#bella goth#art tutorial#tutorial drawing#step by step#art help#art resources#sims fanart#sims 4#sims 2#sims 4 screenshots#my sims#sims art#sims 2 fanart#digital commisions#digital art#digital portrait#art commisions#artists on tumblr#sims 4 cc
13 notes
·
View notes
Text


some recent renders ♡
#sims 4#sims 4 cc#simblr#ts4#sims4#the sims 4#blender#blender3d#sims 4 screenshots#renderschool2023#couldn't have done it without your tutorials!!
8 notes
·
View notes