#so i go through the process of downloading and installing it but its not installing correctly
Text
.
#im having audio problems and i dont understand why it has to be a problem on every single fundamental layer#my old headphones broke. the jack is no longer attached to the wire. broken as fuck#got myself some new ones for like 40 bucks. same brand just slightly better quality#but its got more bass than my broken headphones which i really really dont like#these headphones are expensive by my standards and especially around christmas tho#so i try messing around with my laptop first. mostly with the audio drivers to see if can update/roll back#cant do anything with my current driver so i try installing one that i know has a control panel with it#i know this bc it wouldnt stop popping up a couple years ago before i switched back to a default driver#so i go through the process of downloading and installing it but its not installing correctly#seems like its corrupted so i cant use that shit#im not a tech wizard so im out of ideas at that point and decide to spend more money on newer headphones#so i do that and buy the same headphones as the broken ones in hopes that theyd be of the same quality#so thats another 30 fucking bucks out of my pocket to buy them#im testing them out more with bg3 rn today and they still dont fucking sound the same as my broken ones#theyre still too bassy!#so i start looking into how to adjust the bass and get an audio control panel#but literally none of the sliders or functions are really labelled so im basically flying in the dark here#i dont know that much about fine tuning audio asides from the general level of quality that i like#im fucking with all these sliders and buttons and default configurations and nothing is sounding close to right#not even after 2 hours!#at this point im fucking sobbing bc all of this is absolute bullshit to me#also ive got flying insects in my room. idk what exact type they are but theyre smaller than flies and twice as annoying#theyre attracted to my desk light but get blown back by my fan#so i can see them fly in front of my face to reach my light then blow back in front of my face from the wind#killing them doesnt seem to fucking do anything bc theres always more#i dont keep food or eat in my room so i have no fucking clue whats attracting them here#ive been back to fucking around with my audio drivers while ranting here#and it seems like ive finally got shit back to normal now#which just feels like even more bullshit to me considering everything beforehand
0 notes
Text
YouTube Downloads through VLC: Step by Step
So this guide to easily downloading off YouTube is super helpful, but there's enough important information hidden in the reblogs that (with the permission of OP @queriesntheories ) I'm doing a more step-by-step version.
Please note: these downloads will be in YouTube quality. My test video download is coming through at 360p, even though the video I'm starting from is set to 720p. They're legible, but they won't look great on a TV. For high visual quality, you'll want to seek out other methods.
This guide is written for Windows 10, since that's what I can test on. It's been tested on Firefox, Chrome, and Edge (which is a Chromium browser, so the method should work in other Chromium browsers too). So far, I haven't tracked down a way to use this download method on mobile.
BASIC KNOWLEDGE:
I'll try to make this pretty beginner-friendly, but I am going to assume that you know how to right-click, double-click, navigate right-click menus, click-and-drag, use keyboard shortcuts that are given to you (for example, how to use Ctrl+A), and get the URL for any YouTube video you want to download.
You'll also need to download and install one or more programs off the internet using .exe files, if you don't have these programs already. Please make sure you know how to use your firewall and antivirus to keep your computer safe, and google any names you don't recognize before allowing permission for each file. You can also hover your mouse over each link in this post to make sure it goes where I'm saying it will go.
YOU WILL NEED:
A computer where you have admin permissions. This is usually a computer you own or have the main login on. Sadly, a shared computer like the ones at universities and libraries will not work for this.
Enough space on your computer to install the programs listed below, if you don't have them already, and some space to save your downloaded files to. The files are pretty small because of the low video quality.
A simple text editing program. Notepad is the one that usually comes with Windows. If it lets you change fonts, it's too fancy. A notepad designed specifically to edit program code without messing it up is Notepad++, which you can download here.
A web browser. I use Firefox, which you can get here. Chrome or other Chrome-based browsers should also work. I haven't tested in Safari.
An Internet connection fast enough to load YouTube. A little buffering is fine. The downloads will happen much faster than streaming the entire video, unless your internet is very slow.
VLC Media Player, which you can get here. It's a free player for music and videos, available on Windows, Android, and iOS, and it can play almost any format of video or audio file that exists. We'll be using it for one of the central steps in this process.
If you want just the audio from a YouTube video, you'll need to download the video and then use a different program to copy the audio into its own file. At the end of this post, I'll have instructions for that, using a free sound editor called Audacity.
SETUP TO DOWNLOAD:
The first time you do this, you'll need to set VLC up so it can do what you want. This is where we need Notepad and admin permissions. You shouldn't need to repeat this process unless you're reinstalling VLC.
If VLC is open, close it.
In your computer's file system (File Explorer on Windows), go to C:\Program Files\VideoLAN\VLC\lua\playlist
If you're not familiar with File Explorer, you'll start by clicking where the left side shows (C:). Then in the big main window, you'll double-click each folder that you see in the file path, in order - so in this case, when you're in C: you need to look for Program Files. (There will be two of them. You want the one without the x86 at the end.) Then inside Program Files you're looking for VideoLAN, and so forth through the whole path.
Once you're inside the "playlist" folder, you'll see a lot of files ending in .luac - they're in alphabetical order. The one you want to edit is youtube.luac which is probably at the bottom.
You can't edit youtube.luac while it's in this folder. Click and drag it out of the playlist folder to somewhere else you can find it - your desktop, for instance. Your computer will ask for admin permission to move the file. Click the "Continue" button with the blue and yellow shield.
Now that the file is moved, double-click on it. The Microsoft Store will want you to search for a program to open the .luac file type with. Don't go to the Microsoft Store, just click on the blue "More apps" below that option, and you'll get a list that should include your notepad program. Click on it and click OK.
The file that opens up will be absolutely full of gibberish-looking code. That's fine. Use Ctrl+A to select everything inside the file, then Backspace or Delete to delete it. Don't close the file yet.
In your web browser, go to https://github.com/videolan/vlc/blob/master/share/lua/playlist/youtube.lua
Click in the part of the Github page that has a bunch of mostly blue code in it. Use Ctrl+A to select all of that code, Ctrl+C to copy it, then come back into your empty youtube.luac file and use Ctrl+P to paste the whole chunk of code into the file.
Save the youtube.luac file (Ctrl+S or File > Save in the upper left corner of the notepad program), then close the notepad program.
Drag youtube.luac back into the folder it came from. The computer will ask for admin permission again. Give it permission.
Now you can close Github and Notepad. You're ready to start downloading!
HOW TO DOWNLOAD:
First, get your YouTube link. It should look something like this: https://www.youtube.com/watch?v=abc123DEF45 If it's longer, you can delete any extra stuff after that first set of letters and numbers, but you don't have to.
Now open VLC. Go to Media > Open Network Stream and paste your YouTube link into the box that comes up. Click Play. Wait until the video starts to play, then you can pause it if you want so it's not distracting you during the next part.
(If nothing happens, you probably forgot to put youtube.luac back. coughs)
In VLC, go to Tools > Codec Information. At the bottom of the pop-up box you'll see a long string of gibberish in a box labeled Location. Click in the Location box. It won't look like it clicked properly, but when you press Ctrl+A, it should select all. Use Ctrl+C to copy it.
In your web browser, paste the entire string of gibberish and hit Enter. Your same YouTube video should come up, but without any of the YouTube interface around it. This is where the video actually lives on YouTube's servers. YouTube really, really doesn't like to show this address to humans, which is why we needed VLC to be like "hi I'm just a little video player" and get it for us.
Because, if you're looking at the place where the video actually lives, you can just right-click-download it, and YouTube can't stop you.
Right-click on your video. Choose "Save Video As". Choose where to save it to - I use my computer's built-in Music or Videos folders.
Give it a name other than "videoplayback" so you can tell it apart from your other downloads.
The "Save As Type" dropdown under the Name field will probably default to MP4. This is a good versatile video format that most video players can read. If you need a different format, you can convert the download later. (That's a whole other post topic.)
Click Save, and your video will start downloading! It may take a few minutes to fully download, depending on your video length and internet speed. Once the download finishes, congratulations! You have successfully downloaded a YouTube video!
If you'd like to convert your video into a (usually smaller) audio file, so you can put it on a music player, it's time to install and set up Audacity.
INSTALLING AUDACITY (first time setup for audio file conversion):
You can get Audacity here. If you're following along on Windows 10, choose the "64-bit installer (recommended)". Run the installer, but don't open Audacity at the end, or if it does open, close it again.
On that same Audacity download page, scroll down past the installers to the "Additional resources". You'll see a box with a "Link to FFmpeg library". This is where you'll get the add-on program that will let Audacity open your downloaded YouTube video, so you can tell it to make an audio-only file. The link will take you to this page on the Audacity support wiki, which will always have the most up-to-date information on how to install the file you need here.
From that wiki page, follow the link to the actual FFmpeg library. If you're not using an adblocker, be careful not to click on any of the ads showing you download buttons. The link you want is bold blue text under "FFmpeg Installer for Audacity 3.2 and later", and looks something like this: "FFmpeg_5.0.0_for_Audacity_on_Windows_x86.exe". Download and install it. Without this, Audacity won't be able to open MP4 files downloaded from YouTube.
CONVERTING TO AUDIO:
Make sure you know where to find your downloaded MP4 video file. This file won't go away when you "convert" it - you'll just be copying the audio into a different file.
Open up Audacity.
Go to File > Open and choose your video file.
You'll get one of those soundwave file displays you see in recording booths and so forth. Audacity is a good solid choice if you want to teach yourself to edit soundwave files, but that's not what we're here for right now.
Go to File > Export Audio. The File Name will populate to match the video's filename, but you can edit it if you want.
Click the Browse button next to the Folder box, and choose where to save your new audio file to. I use my computer's Music folder.
You can click on the Format dropdown and choose an audio file type. If you're not sure which one you want, MP3 is the most common and versatile.
If you'd like your music player to know the artist, album, and so forth for your audio track, you can edit that later in File Manager, or you can put the information in with the Edit Metadata button here. You can leave any of the slots blank, for instance if you don't have a track number because it's a YouTube video.
Once everything is set up, click Export, and your new audio file will be created. Go forth and listen!
#reference#vlc media player#youtube downloader#youtube#uh what other tags should i use idk#how to internet#long post
117 notes
·
View notes
Text
hey little one! do you have a PC and want a really cute way to listen to some kid-safe music?
well i have the best idea for you all! you're gonna play a game called Nick Jr. Radio! for all my bodily younger littles out there who are unfamiliar, this is a game that i grew up playing when i was little!
however, unfortunately, the game is inaccessible on the web due to the discontinuation of flash. but i'm gonna show you how you can play it! (safely!! never go to any websites that claim to have old flash games. they are unsafe!)
tutorial under the cut

- first, make sure you have a PC/laptop/etc. i don't believe this works on mobile.
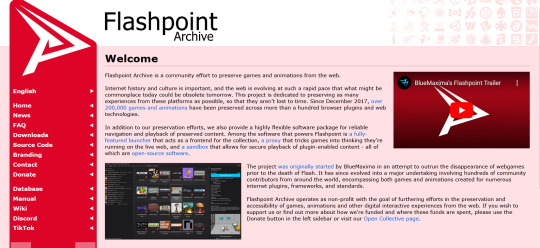
- next, open up google and search for "Blue Maxima Flashpoint".
- click on the first link. it should be called "Flashpoint Archive". the website should look like this!
- scroll all the way down until you see the big red download button. this won't download anything automatically yet, but rather will take you to the download options! these are your options.
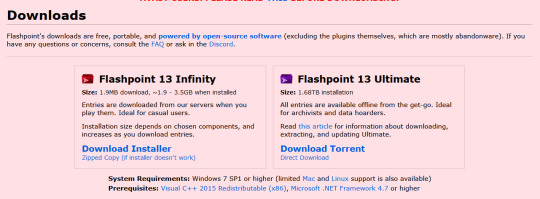
- DO NOT DOWNLOAD THE ULTIMATE VERSION. this will automatically download every flash game that has ever been made onto your pc. not only will it take HOURS to download, it could be illegal in your country or state to have certain games in your possession! stay safe and download Flashpoint 13 Infinity! this will allow you to pick and choose the games you wanna download or play.
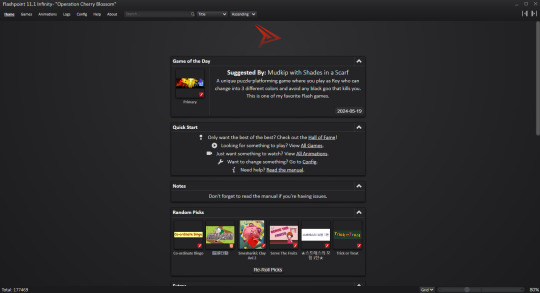
- go through the process of installing it. i highly recommend making a shortcut on your desktop for it so it's extra easy to get to when you wanna play
- once everythings said and done, open it up! the interface will look like this
- congrats, you now have access to practically every lost flash game thats ever been archived! but for today we wanna focus on getting to Nick Jr. Radio! simply search for it in the search bar up top. this should pop up!
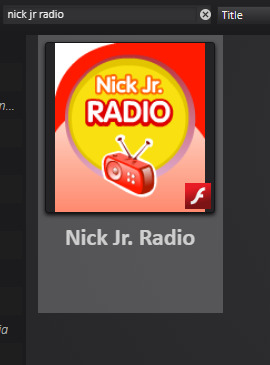
- this is the game we want! its nice because you don't need to download this one, whereas some games on flashpoint you do. so this game wont take up any space on your pc! simply click the thumbnail and then click play on the right hand side of the screen!
- and here it is!
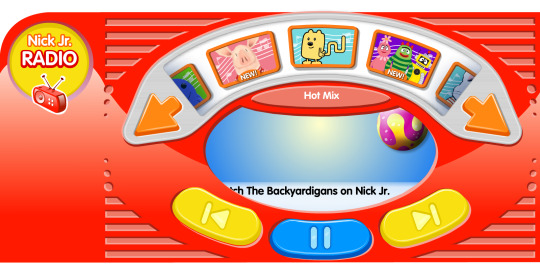
- this game allows you listen to tons of music from nick jr shows from the 2000s/2010s! i used to play this game all the time back in the day! and now that you have flashpoint, you can simply search up nick jr and play ALL the nick jr flash games! its the perfect regression activity!
- if you actually choose to go through with this, i hope you have lots of fun! theres so many fun games and toys to discover on flashpoint!!
#︶︶ ˚ fun#sfw age regression#age regression#agere#sfw agere#age regressor#noncom agere#agere blog#sfw littlespace#agere activities#agere games#agere game#nick jr#sfw regressor#safe age regression#age regression sfw#agere sfw#sfw age regressor#sfw little stuff#sfw regression
55 notes
·
View notes
Note
psst hey do u have any sdv mod reccs/any tips on how to use them 👀
yeah! so for stardew mods to work you need to first install the smapi api.
you can either do that through their main website or nexus
neither option has any cons theyre just based on preference on how you wanna install it but theyre both completely safe websites.
after you properly install smapi you’ll have to go to nexus which is the main website for all stardew valley mods. you’ll need to make an account to install stuff i believe. you can find a wide range of mods here that serve a lot of different purposes.
if you haven’t used nexus to mod before then as i mentioned before first make an account then once you are looking at a mod make sure to check the requirements first. sometimes mods need other mods to work and you need to install those first. after you checked the requirements you head to the files section and click manual download. after that select slow download then wait for it to install into your files. then you move those files into the stardew mod folder. if thats not clear enough you can find a bunch of tutorial videos on youtube with visuals:)
since you asked for my recs i’ll give you the list of which i actually use all the time.
NPC Map Locations
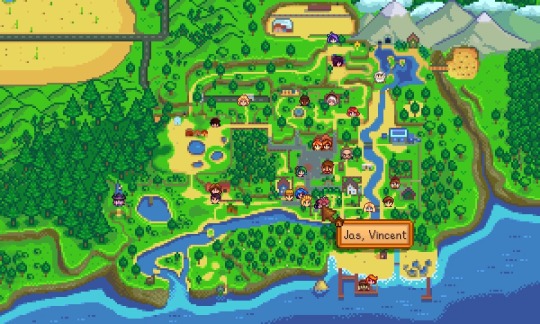
- very basic mod. majority of mod users will have this installed and it just shows you on the map where each npc is at at all times.
CJB Cheats Menu & CJB Item Spawner
- these two sorta go hand in hand for me but of course you don’t need to have both installed. this is definitely a play style preference thing but i personally like having these cheats installed for any type of situation that might happen in game that i can’t undo otherwise without them.
- the cheats menu adds a lot more flexibility and well cheats to the game so for instance: infinite health, infinite stamina, give yourself money, instantly increase hearts with whichever npc, always catch every fish, warp locations, change weather, change time, freeze time, and a lot more. this uses the P key to open in game but you can configure that to another bind if you’d like.
- the item spawner is a lot more simple. does what it says and spawns whichever item you want. so basically you can press the i key and it’ll open up a menu with every item in the game and you can spawn in the specific amount you want of something and so forth. simple concept. i mainly use this for when i accidentally sell or gift an item i wasnt intending to and then simply spawn it back in. i also use it for decorating my house:3
Look Up Anything
- this is literally like having the wiki at your disposal at all times in game. extremely helpful for so many reasons especially as i personally always had the wiki open to check for information on items and npcs so having this mod made it a lot quicker of a process. how it works is you simply hover your mouse over whatever you want information on and click f1 and it’ll display all the information about that thing to you! so if you hover over lets say harvey and press f1 it’ll show you a menu with his birthday, his love & like gifts, your hearts with them and how many points till the next heart, etc.
Seasonal Outfits
- this mod puts all the npcs in different outfits for the seasons. its just cute
Elle’s Seasonal Buildings & DaisyNiko’s Earthy Recolor
- the seasonal building allows a lot more variety in structures like farm building and adding holiday decor to npc buildings. simple stuff that can make the game more customized
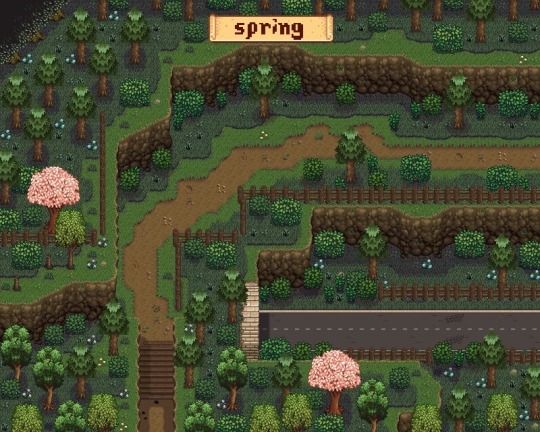
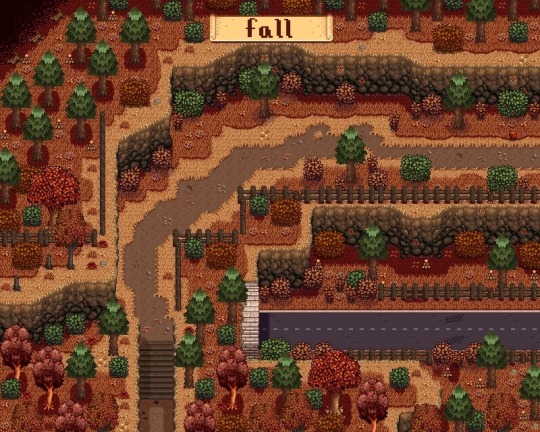
- with seasonal buildings you can also install compatible recolors which is what the DaisyNiko’s link is. it’s the recolor i personally use for my main farm when i play. this is because the vanilla game is very saturated and does hurt my eyes so having more chilled out tones helps. you dont need to install the recolor i use or any in fact if you like the natural look of the game but just know the option is there and there’s a multitude of recolors you can use to make the game look different:3
Friends Forever
- no friendship decay because itsa pain in the ass and i have no time to talk to the npcs all day. this is very play style based some people enjoy having to go and ensure they speak to npcs daily im just not the type.
Part of The Community
- creates different ways for you to gain hearts easier and passively
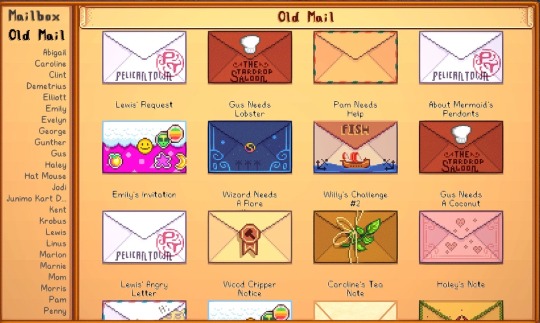
Mailbox Menu & Zilch’s Envelopes
- i really like the letters and the fact you can only read them once bummed me out until i found this mod which adds a whole menu for your mail where you can go back and see all the letters you’ve received. feel like it adds that additional touch and care to the whole mail system in the game.
- then to go along with that menu theres the envelopes mod that customizes it even further and makes all the envelopes of the letters have cute appearances and designs. look at this and tell me that isn’t the best thing you’ve ever seen.
Honorable Mentions
- Chests Anywhere
- CJB Show Item Sell Price
in conclusion…
I really suggest just taking the time and scrolling through the nexus mods website on your own. they have a specific category for stardew and you can filter it by most popular and see what you find yourself. since everyone plays differently you might find you enjoy the more technical code side and want to change something to do with that or you might just simply wanna change the npc portraits and make them look nicer. theres so many options on how to mod this game and i honestly could go on forever with mod suggestions but at the end of the day its up to you! so hope this helps and i hope you have a fun time modding.
66 notes
·
View notes
Text

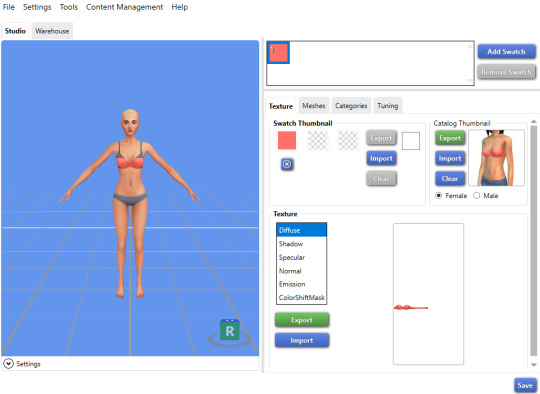
CAS UNDERWEAR OVERRIDE TUTORIAL!

faq/before you begin: This is a tutorial for personal use ONLY. If you use this tutorial DO NOT reupload your overrides unless it the original creator gives you permission to do so. reuploading a creator's custom content IS theft. I do not condone stealing cc from hard working creators, so please only use this as a tutorial for yourself!
to get started, you will need:
꣑ৎ sims 4 studio
꣑ৎ the underwear you want to make your default
꣑ৎ and patience ( ,,◕ ̫ ◕,, )
this tutorial is aimed towards people who have never used ts4 studio before! so if it seems too hand holdy im sorry, i just want to make sure everyone can understand! If you don't understand something, please don't feel shy about reaching out! either through a dm or an ask! i'll be happy to help!
start by downloading TS4 studio. The process is fairly simple, but if you get stuck here's a great tutorial you can follow!
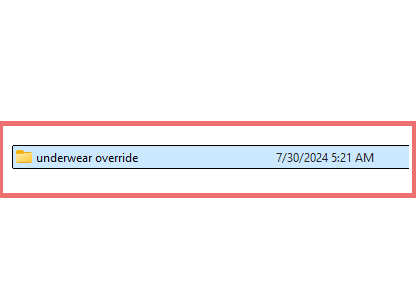
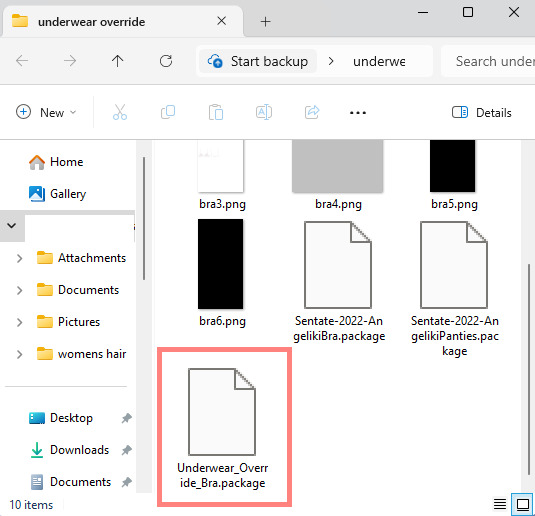
once you have it all installed, you'll want to make a folder on your desktop. This is just for organization purposes, to make digging for the files easier later on:
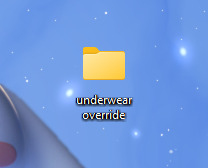
here's an example of what i named my folder! for simplicity's sake though, i'll be referring to the desktop folder as the "underwear override" folder, but you can name yours whatever you want! Just make sure its on your desktop~ ( ˶ˆᗜˆ˵ )
────୨ৎ────────୨ৎ────────୨ৎ────────୨ৎ────
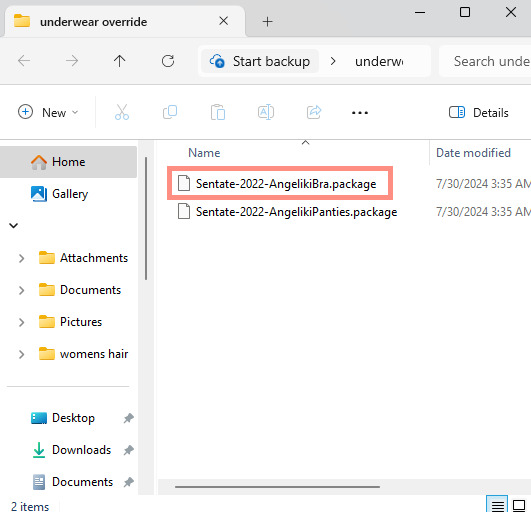
next you'll want to find the underwear you'd like to make a default replacement. I'm using the Sentate's Angeliki set (bra and panties) from their midnight collection found HERE. (Also a gentle reminder, this is for PERSONAL USE only. Sorry i keep repeating this, i'd just hate for people to use this tutorial for bad 。°(°.◜ᯅ◝°)°。 )
any underwear SHOULD work, unless the underwear you pick has 3D pieces. I wish i could explain why, but i honestly have no clue. Im a noob at this haha. Just make sure your mesh isn't 3D!
once you have the undies of your choice secured, go ahead and place both into the "underwear override" folder on your desktop! (photo below)
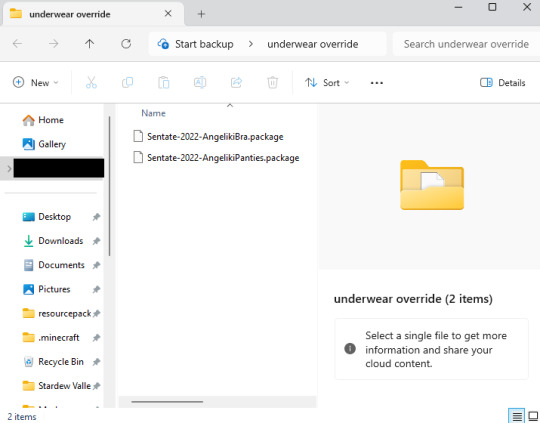
────୨ৎ────────୨ৎ────────୨ৎ────────୨ৎ────
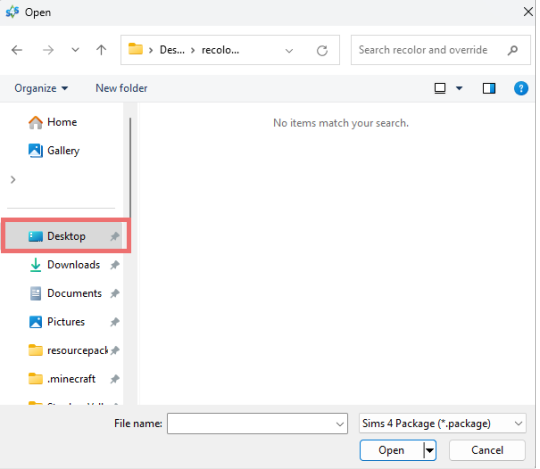
now it's time for the fun part! You'll go ahead and open sims 4 studio, once in there, you'll want to click where it says "my projects" (photo below)
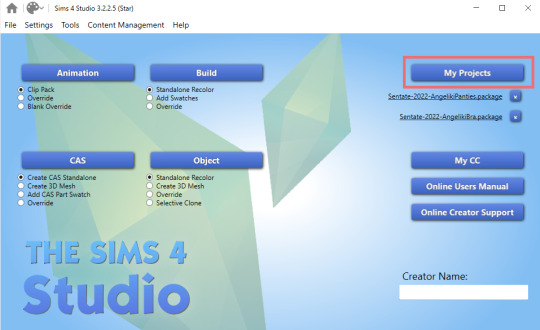
Once you do that, your files should all pop up. It doesn't matter where it takes you, you'll just want to find the "desktop" section of your file menu! Then, you'll find the "underwear override" folder and open that~ Now you'll just go ahead and open the package that you want. I'm going to start with the bra, but the process for the underwear is exactly the same! so it doesn't matter which one you choose to do first ദ്ദി ˉ͈̀꒳ˉ͈́ )✧ (photo below)
────୨ৎ────────୨ৎ────────୨ৎ────────୨ৎ────
if you did it right, your screen should look similar to mine! ¡¡¡( •̀ ᴗ •́ )و!!! (photo below)
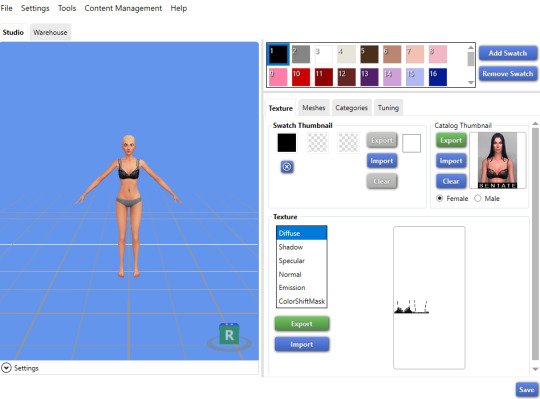
now, you'll just want to select the swatch you'd like at the top! (if you've never used the sims 4 studio before, you can use your mouse wheel and the right mouse button to control the camera in the blue area with the weird bald sim lol- that way you can see the swatch you're picking a bit better! (photo below)
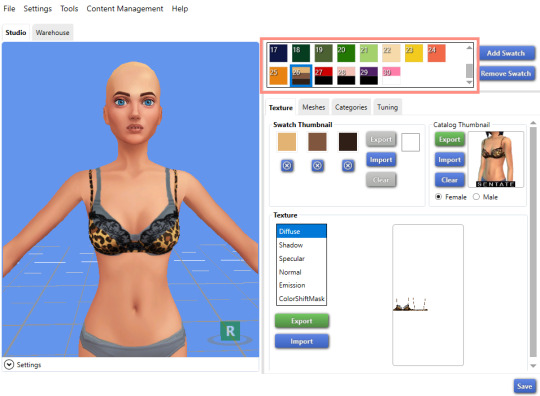
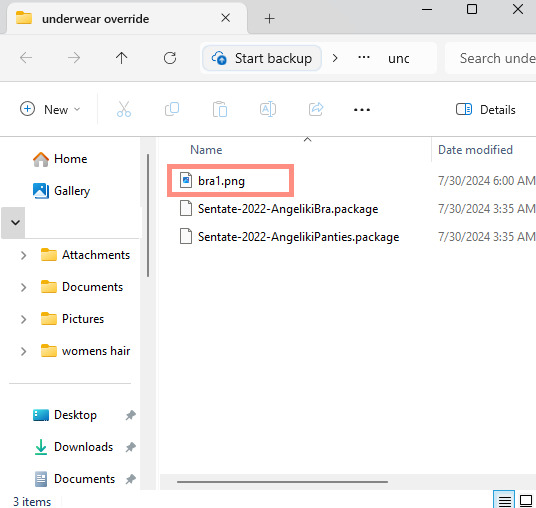
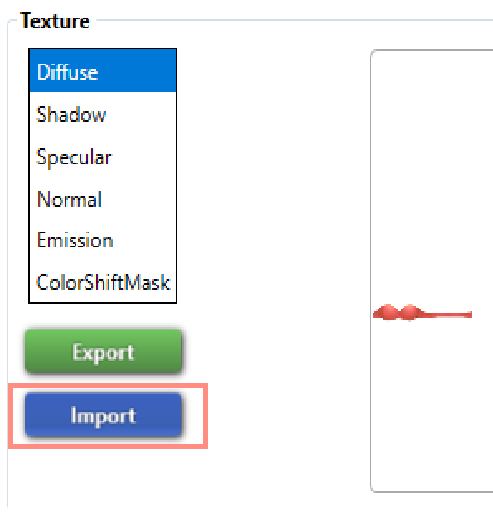
now that you have the swatch you like, in the texture setting, diffuse should already be selected. You'll want to go ahead and click "Export", then name the file "bra1". If you did it correctly, it should save as a PNG! (photo below)

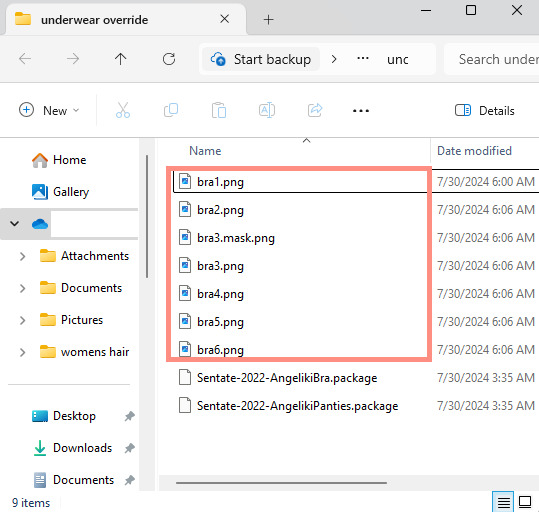
then, you'll want to go down the line of textures (shadow, specural, normal, emission, colorshiftmask) and continue to number them (EX: shadow is bra2, specural is bra3, ect ect) til your folder is full with each texture! It should look like this if you've done it right! (photo below)
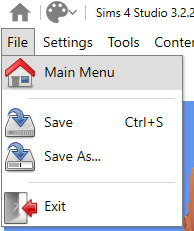
after you're done with that. You'll go ahead and click "File" and "main menu" in your sims 4 studio! (no need to save!)
from here, you'll go ahead and select "Override" under the CAS section on the main menu then click the CAS button at the very top. (photo below)

the menu here might look confusing if you've never used sims 4 studio before, but just copy the way mine looks to make the process a bit easier! At the top drop down menus, you'll want to select "Gender: female, Age: Adult, Part Type: Clothing Top, Game Pack: base game" This should narrow down the menu a bit! (photo below)

then, you'll scroll til you find THIS exact bra. This is the bra the sims 4 uses as their default, and we're overriding this, so please be sure to select the exact one! (photo below)

once you select it, click "next", and it should take you to your files once more. You'll want to name THIS file something unique, that way there's no conflicts! I suggest something like: "Underwear_Override_Bra" just so you know which one you're working on, and you also know that this is an override (๑˃́ꇴ˂̀๑)
once you've named your package at the bottom, go ahead and click enter, and the studio should open back up~ (photo below)

now, you'll want to repeat the same export process from before, but use import instead! Then, you'll import the pngs the same way you saved them. (EX: diffuse is bra1, shadow is bra2, ect). Once you've done that, you should immediately see the textures change (photo below)
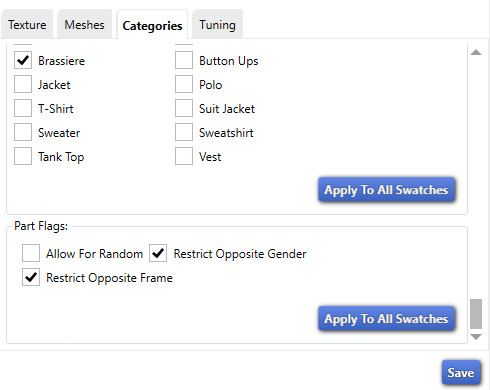
now that your textures are changed, you'll want to make sure to catagorize it properly, just to prevent your male sims from getting a bra when you take their shirt off as well. If you for some reason want your male sims to have an unremoveable bra, feel free to skip this step! if not, then you'll want to click the "catagories" tab right beside "meshes"
once there, you'll scroll all the way to the bottom til you hit "Part Flags", then you'll check "restrict opposite gender" and "restrict opposite frame" (i'm not sure if these mean the same thing, but i just checked both to be extra sure!) (photo below)

once you've finished replacing all the textures and catagorizing the override, you'll go ahead and click the save button at the bottom right hand corner, then open your "Underwear Override" folder. You should have your "Underwear_Override_bra" package now saved! yay!
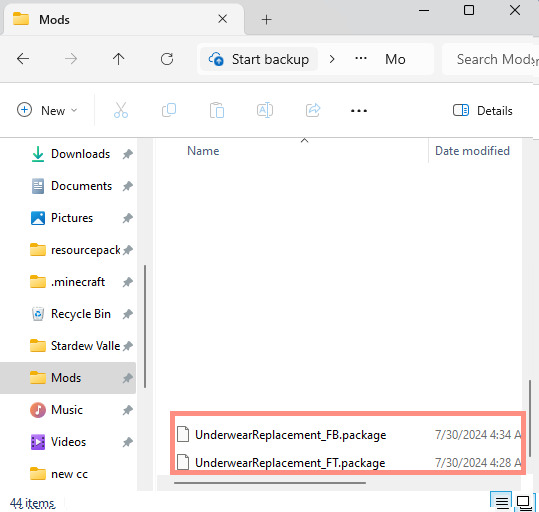
All that's left to do is repeat these steps with the panties of your choice, then drag both package files into your mods folder just like you would any other cc! (photo below)
(mine are named differently because i already made my own recolors + default replacements ( 〃..).. i'll try and upload a recolor tutorial later today for anyone curious!)
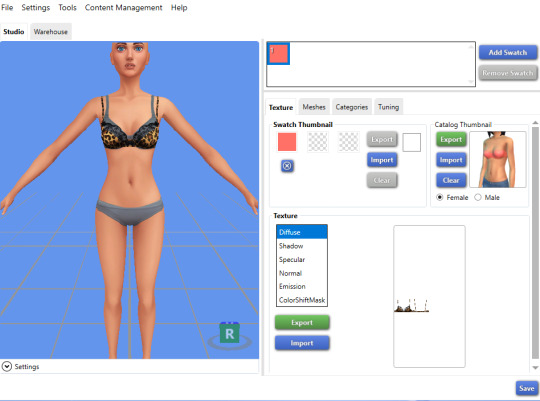
but now, you're done! all that's left to do is open your game and see your overrides in cas! If you did everything correctly, the undies should just appear when you take your sim's clothes off (⁄ ⁄•⁄-⁄•⁄ ⁄)
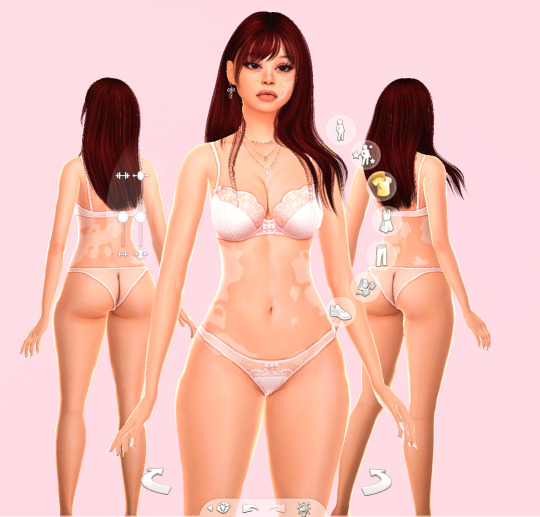
heres how mine turned out! (˵ •̀ ᴗ •́ ˵ ) ✧ im super proud of them!
it took me a few hours to get this tutorial together, so im a bit loopy signing off. If this is completely incomprehensible and confusing im so sorry, again if anyone has questions please do send an ask or message me! i'll do my best to answer any questions :) and also please remember; DO NOT REUPLOAD ANYONE ELSES CUSTOM CONTENT! this is for PERSONAL USE!
thank you for reading! (。•̀ᴗ-)✧
#the sims 4#ts4#sims4#maxis match#maxis mix#s4cc#sims 4 cc#ts4 cc#sims 4 custom content#cc tutorial#cc rec#cc cas#sims 4 cas#sims tutorial
36 notes
·
View notes
Text
I want to mod Fields of Mistria dialogue!
Awesome! Making alterations to Fields of Mistria dialogue is a fairly simple process that requires basically no coding knowledge. Please note that this is a guide specifically for making alterations to existing dialogue. Adding new dialogue would require coding and I'm not familiar enough with Mistria's code to give advice on that.
Important Consideration:
The current state of Fields of Mistria dialogue modding involves making direct edits to/replacing game files. There isn't really a tool like SMAPI or Content Patcher available yet. This is important to remember for dialogue mods because all FOM dialogue is contained in a single .JSON file. This means that you cannot utilize multiple, individual dialogue mod files. This is where knowledge of how to make dialogue alterations is important even if you're downloading someone else's mod. If you want the effects of two different dialogue mods, unless they are made by the same modder and they provide a combination file themselves, you are going to need to go in and edit things yourself.
That out of the way, let's get started.
First, you need to find the game's Local Files. You can do this in the steam client by right-clicking the game title, hovering over Manage, and selecting Browse Local Files, as pictured:
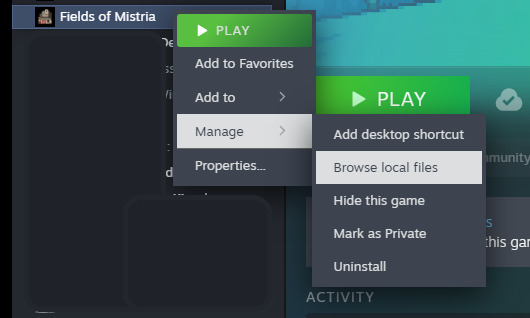
You should be taken to C:\Program Files (x86)\Steam\steamapps\common\Fields of Mistria in your file explorer, but your files could be stored elsewhere depending on your settings.
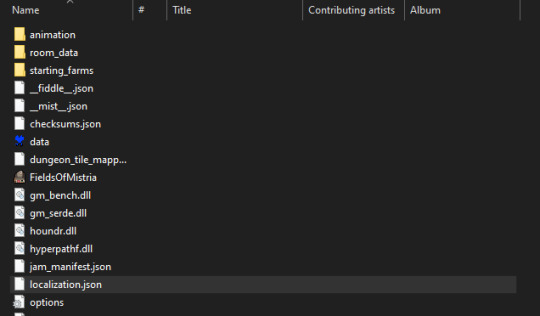
In the main directory, you should see a file named localization.json. Pictured:
Copy that file and paste it to another location OUTSIDE OF THE LOCAL FILES, such as your documents folder, or even your desktop. I would recommend making two copies, and keeping one un-altered as a back-up, just in case. I would not advise directly tampering with the file in the local files, and having the editing copy outside of the local files is convenient for making quick edits in the middle of gameplay.
Okay, so how do you open a .json file for editing? I personally use Notepad++ and find its interface pretty user-friendly for this type of minimal editing, but people with more programming experience might have other suggestions.
So, we've installed Notepad++, and we open the .json. . . . . . ah.
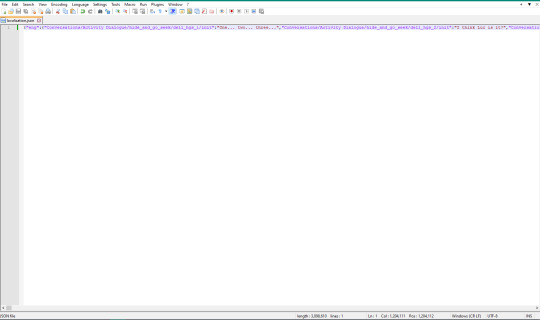
Yep, that's three-million+ characters on a single line. I don't know why it's like this. Possibly other interfaces may display it differently, but I only know Notepad++ so the best solution I have is this: select View from the menu, and click Word wrap. Pictured:

That makes it a bit more readable, but it is still every piece of dialogue in the game run together in a massive block of text. Very hard to manually locate the lines you want. This is where CTRL + F comes into play.
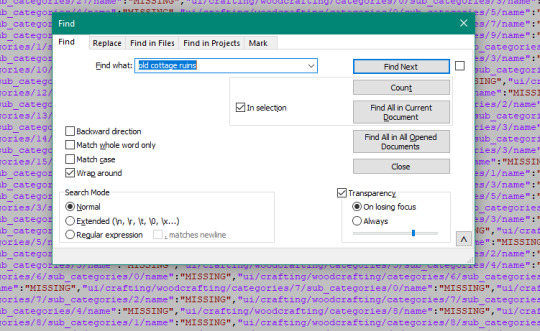
So the last time I used CTRL + F in this file, I was making an edit to my desktop copy of the file while I was playing, and knew exactly what line I was looking for, so I searched "old cottage ruins" to find it. But say I wasn't trying to edit a specific line, and wanted to go through and make general edits, such as changing a character's pronouns. I think the best practice, though it's still possible to miss lines this way, is to search the character's name. Pictured:

In most cases, a character will be named in dialogue to establish context before being referred to with a pronoun or gendered term. You will have to click through quite a bit of their own dialogue using this method though, as that will be tagged with their name.
Another important thing to consider is the order in which dialogue is entered in the .json. Let's go back to the cottage ruins.

Pictured: dialogue from Ryis' two-heart event. As you can see, it is not entered in order in the .json. So you may need to check before and after the dialogue you are editing to make sure you are hitting everything you need.
You can safely edit the red text in quotation marks, though I would avoid touching any of the "MISSING" text. The purple text is code and shouldn't be altered if you don't know what you're doing.
After you have saved the changes you want to make, you will need to copy your edited localization.JSON, and paste it into the local files, confirming that you want to replace the existing file. Again, I recommend making a back-up of the original file before doing this.
That being said, Mistria is in early-access, and when the game updates, your edited localization.JSON will be replaced by an updated file. So, any edits you made will have to be made manually again, to avoid saving over new content with your out-dated edit. Depending on how intensive your dialogue edit is, you may want to wait until Mistria is out of early access if you do not want to be constantly re-doing your edits.
I hope this was helpful!
18 notes
·
View notes
Note
I really hate how disc drives aren't standard anymore... You could always get an external disc drive that connects through USB though? Then you could install from disc and use the super patch to get it up to date, no EA app or Origin required. Though, yes, you can still use Origin if you want to! You could probably find a guide on youtube to show you how. Its a bit of a process but it's worth it.
Me too! Everything's "digital download" this, "SSD drives are so much better" that; but then look at the mess we have to go through when this newfangoled next-gen garbage doesn't work! 🙄
I am 100% buying an external drive--I'm mad that the guy at the computer store never even bothered to mention/recommend that I could do that when I was LITERALLY sitting there bummed out because they didn't sell PCs with CD drives. 🤬
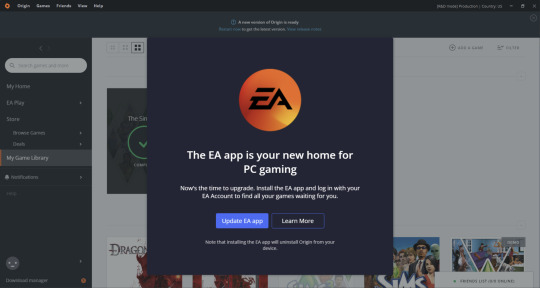
As for Origin, I did manage to get a wee bit of success following what I found on Reddit. I reinstalled the older version they linked to avoid the dreaded 20:403 error, only to hit another roadblock with the dreaded un-closeable EA App Migration screen:
EA is run by frikkin SATAN, I swear!
Which sucks, cuz in the split second before the Migration screen pops up, I am fast enough to click My Game Library--which works!--but before I can select The Sims 3 to reinstall the Pets EP the dreaded EA App screen appears and stops me in my tracks. 😩💢 And none of the fixes I found online work to get rid of it for good.
EA needs to create a TS3 Ultimate Collection for the EA App--this is EFFING RIDICULOUS, selling a product on an app that can't even download/install/run it! 😡💢💢💢
29 notes
·
View notes
Text

TARI.EXE (Puzzlevision Corruption)
I'm not even kidding, I had a dream where that TV guy and Tari have some sort of connection and kidnapped her so she becomes his property again, forcing the SMG4 gang to go through endless unwanted simulations to entertain him. I've been thinking about that dream repeatedly, and ever since Western Spaghetti I did want there to be some sort of connection. Can't wait to see more of TV Guy (or Puzzlevision as it says on his face). Also, the background text are just command prompt text, or rather Tari's programming. I've been finding so many examples of how to do program writing.... or coding? Idk lol. At some point my brain just stopped working. Anyways, i'll put below what the text says, and if you pay attention to the numbers in the written sequence, you'll see some hidden detail (Hint: The numbers are episode dates).
Background Text:
TASCORP Windows [Version 17.6.02023]
(c) 2023 TASCORP Corporation. All rights reserved.
C: \Users\TARI>ipconfig/flushDNS
Windows IP Configuration
Successfully flushed the DNS Resolver Cache.
C: \>taskkill /f /im TARI.exe
SUCCESS : The process "TARI.exe" with PID 250818 has been terminated.
C: \>winge install "Puzzlevision SIM"
Found Puzzlevision SIM [TASCORP.Puzzlevision SIM] Version 28.10.23
This application is licensed to you by its owner.
TASCORP is not responsible for, nor does it grant any licenses to, third-party packages.
Downloading https://puzzlevisionsiminstall.net.com/stable/smg4/Setup-v28.10.23.exe
90.0 MB / 90.0 MB
Successfully verified installer hash
Starting Package install . . .
Successfully installed
X: \windows\system23>cd C: \Windows\system23
C: \windows\system23>systemreset
PUZZLEVISION SIMUL. Windows
Copyright (C) Puzzlevision Corporation. All rights reserved.
C: \WINDOWS\system23>sfc /scannow
Beginning system scan. This process will take some time.
Beginning verification phase of system scan.
Verification 100% complete.
Puzzlevision Resource Protection found corrupt files and successfully repaired them.
Puzzlevision Resource Protection did not find any integrity violations.
#smg4#smg4 fanart#smg4 tari#tari smg4#smg4 tv adware#tv adware#puzzlevision#mind corruption#tari corruption#tv guy#tari#tari fanart
25 notes
·
View notes
Text
A starter guide on Ubuntu-Linux, from a non-techie to other non-techies
Preamble (a.k.a. the story/rant before the recipe, feel free to skip or not as you wish)
Several years ago, I got a laptop for college purposes; it ran on Windows 10 with decent reliability for a few years, but then it started getting slower and slower, the bloatware (programs and apps that companies pre-install in your devices that you cannot remove) was just tremendously bothersome, my computer would start updating all of a sudden and be at it for hours, etc, etc.
And so my dad suggested I switched to Ubuntu (he had been using it for a few years himself at that point), and... I'm not going to lie to you. I was scared. Was it going to be too different? Wouldn't it require far more computer knowledge than what I already had? Wouldn't the learning curve be too steep? Wouldn't I be unable to do a lot of the stuff I used to do?
Years later my answer is: I don't miss Windows. The learning curve wasn't nearly as steep as I thought it would be. I got acclimated to the system within a couple weeks. There are parts of Ubuntu itself that aren't that up to date (mainly stuff about medium-advanced audio management, streaming through Discord, and semi-pro to pro levels of photo processing), but I have managed to work around most of it with little difficulty (the image processor I use for making gifsets is proprietary sofware --the code of it is not open for transformation by third parties-- but I can work with it mostly fine through a tool called Wine). If what you do with your computer is mainly internet surfing, document writing, listening to music and playing videos (and similar basic stuff) you are unlikely to have any problems working with Ubuntu. But the best, best, best part of it for me? No bloatware. No 8256754 attempts at getting my personal information or tracking me. My computer is fast, as fast as it was when I first got it (the couple times it broke in the last two years had nothing to do with software: it was first the hard drive, and then the fan). No computer deciding to update and leave me waiting whenever it wants. And honestly, that makes every little inconvenience I have faced in Ubuntu worth it, very much worth it.
Linux has a problem
And it is that a loud section of its userbase is made up by techies who have a very unrealistic notion about how much the average person knows about computers.
A few months ago there was a post making the rounds, where OP explained that you can put ubuntu in a pen drive and carry it with you (yes, it is possible and relatively easy to do) and there was a bunch of people in the notes explaining how much better it is to pick Linux Mint, or use a raspberri pi, as if people who don't know you can carry Ubuntu in a pen drive could understand what they are talking about.
My goal with this post is to explain some of the very basics in an accessible language. I will probably use inacurate and generalized language in it for the sake of explaining simply, and will focus on Ubuntu because it is what I know. If you are a Linux fan who loves Linux Mint or whichever other, go ahead and make your own post.
Definitions, yada, yada
So, what is Linux? in plain terms, it is an operating system (Windows and Mac are operating systems) with several variations called distributions. Think of it as Linux being like a family, and the distributions being the members of the family. Some """famous""" members of the Linux family are Ubuntu, Debian, and Red Hat. One of the main distinctive characteristics of Linux distributions at the basic level is that they are free software: it can be used, modified, and redistributed under certain conditions, by everyone.
Where do you get Ubuntu, and how to install it?
You go to www.ubuntu.com/download/desktop. There you will see two items: the first one is a "LTS" (long term support) and the other isn't. What is the difference?
Ubuntu releases a new version every six months, one in april and one in october. So, for example, the version released in april this year is Ubuntu 22.04, also named Jammy Jellyfish, and the one released in october, Ubuntu 22.10 is called Kinetic Kudu. Every two years, in april, a LTS version is released. Jammy Jellyfish is a LTS release. That means it has a 10 years stay, and is a stable, well tested and tweaked release.
What I'm saying here is, get the LTS release.
When you click download, you will see an ISO file of about 4gb. Save it to your hard drive, and get yourself a 4gb or bigger pen drive that is empty and you don't mean to use for anything else.
To install Ubuntu in that pen drive, follow the instructions here. They are short and simple, and the whole process shouldn't take more than half an hour (probably around 15-20 minutes).
Now that you are in possession of Ubuntu-on-a-stick, you can go ahead and reboot your pc, with the stick still connected. Usually the computer itself will recognize the system and open it, or ask you between the two options of system. This is not installing Ubuntu yet, but you need to be careful.
Next it will show you a menu with two options: to install Ubuntu, or to try it out. DO NOT CLICK ON INSTALL UBUNTU IF YOU STILL HAVE UNBACKED STUFF OR ARE UNSURE YOU WANT UBUNTU YET. It will format your hard drive and all of that will be lost. The try option, on the other hand, works from the stick and does not format your hard drive.
Try Ubuntu will allow you to see how the basic system would look upon installation, and it will also be what you'd use if you were carrying Ubuntu on a stick to use in other computers. You cannot really modify much there, but if you choose to install the system, it is very, very, very customizable. You can tweak it and add and change the position of menus, clock, desktop icons (At first I thought you couldn't have those because they don't appear there by default! But you can! You just need to add them yourself).
To install Ubuntu on your computer, follow the instructions here. The process, again, is described short and simple, it doesn't take long, and the thing itself guides you step by step.
It is possible to make a disk partition, and have Windows in one part of the hard drive, and Ubuntu on the other. I myself have never done this and don't know how it is done. But if you want to try that, there are many tutorials on the internet about how to do it, I just don't have a specific one to recommend.
A couple more things
Once your new system is up and running, and you are customizing it, there are a couple basic things to know that are helpful:
Between the programs that come with the system, there's one called terminal. Terminal allows you to write direct commands to your computer. For example, instead of opening a program from its icon, you can type the name of the program (for example, "VLC") in terminal, and it will open it.
Similarly, you have two ways to install programs: one, like windows, by downloading the package and opening it with double click, the other by writing in the terminal "sudo apt-get install [name of package]". Some packages will already be in the cloud in what is called repositories, and just by typing "sudo apt-get install [name of program]" terminal will download and install it for you.
Like Windows, Ubuntu will give you messages about updates being available; unlike windows, you can install those whenever you want, and they run on the background (you can use your pc while it updates).
Alternatively you can just update your computer whenever you want by opening terminal and writing "sudo apt update" and then "sudo apt upgrade". I myself do that every day.
There are a few programs like get-iplayer (to get stuff from BBC Sounds) and youtube-dl (to get stuff from YT) that work in terminal only.
Terminal is very cool and if you are like me it will make you feel like a hacker in a 90s spy movie.
www.askubuntu.com is a forum that has answers for everything you might face as a problem or challenge while using Ubuntu. It is great.
If you do give Ubuntu a try and have any relatively basic questions I can answer about it, feel free to shoot an ask or message me, and I will help if I can!
163 notes
·
View notes
Text
im getting windows 95 running ina vm on my pc and im writing my process here so i dont forget
installed oracle vm + got windows 95 iso files downloaded and stuck in (floppy disk boot // disk os thing)
enable virtualisation in my bios (risky bc my pc crashes a load when i do that for some reason)
ima boot in safe mode bc idk what these options do
okay it looks like safe mode is the command prompt??? how do i quit this (powered off rhe machine)
lets try just boot option 1
okay still no gui lemme check the guide i was using
run "fdisk" to get large disk support?
oh fdisk is format disk
use primary dos partition w max size
reboot machine and use NEC thing
"format C:"
navigate to c drive ("C:")
"mkdir WIN95" to start copying files over
get annoyed that oracle is blocking alt+tab
head into WIN95
"copy D:\WIN95"
watch shit tons of files (217 copy over super quick)
eject the disk
start setup by typing "setup"
okay so ima stop following rhe tutorial here
installing in C etc (default options)
using advanced bc im nerdy like that
okay we r going back to the tutorial to see what vertificate key thing we should use
12095-OEM-0004226-12233
popping in user info (name: Jen)
we'll go w recommended hardware auto detect bs
i didn't set up network or sound/midi so i assume its not there? (just checked the tutorial I can check em)
realise u didnt take any screenshots so are going to have to run through this again later to get em
wait for setup
wonder if u could run python w flask or node w express or smthn on it
use every component bc i can
i dont understand network configuration so im skipping it right now
BRITISH KEYBOARD 🇬🇧🇬🇧🇬🇧
sure startup disk sesms fine
Insert Disk (what) (tutorial time) (what do)
tutorial didn't get this (wuhoh.png) (let's just click ojay and see what happens
it was fine!!
god win 95 is cool
okay pc should restart
i should gave ejected that floppy disk huh
wuhoh2.png
remove floppy diskabdn reviot
reboot aagin bc error?
okay kets try safe mode
yeah no it goofed lets start it again from rhe fresh install hopefully
i dont want to make another device so im sticking rhe shit in again and hopping
no
didnt work
fuck
Windows 95 two Electric Booglaoo
IT FUCKED W THE ISOS I THINK
Re-extracted the files time to try again
booting up #3 lets get screenshots
end of part one (ill rb w my next progress update (w screenshots this time)
5 notes
·
View notes
Text
2. Writing Set Up: Where to Write Your Draft
Before you even start writing, you’ll need to find a writing program/medium you feel comfortable working with.
I promise you—from start to finish—you’ll look at your draft for a couple of hours at minimum, so I suggest you choose a program/medium that aligns with your individual needs. Now it’s time for you to identify what those needs might be.
Here are some options:
Creativity strikes while you’re cuddled up in bed or on your commute to work?
Try writing on your phone/tablet (unless you’re the one driving, of course!)—you can use pre-installed apps like Pages (iOS) or your Notes/Memo app. You can also download free writing applications like Google Docs. Google Docs works on and offline on basically any mobile device, which is great for when you’re on the go!
You prefer writing/typing on a computer?
There are many desktop writing programs like LibreOffice (free for Windows, Mac and Linux), MS Word (needs to be purchased/subscription-based), countless online text editors or the browser version of Google Docs.
You need to physically feel the words flowing through your body?
Well, imagine you’re a classic author and write them down by hand on generously perfumed paper (preferably with royal blue ink)! Of course, you can also use Post-it notes or that coffee-stained notebook from 2013. Regular paper will do, too, though it’s obviously not as cool.
Of course, there are many more options to choose from, but since you’re just starting out, I suggest you try free and more readily available programs first. Everything has its pros and cons, but digital writing is generally pretty clean-cut and saves you the trouble of digitising hand-written drafts (which you’ll need to do if you want to share your writing online! Unless you want to share scans of your beautiful handwritten writing, of course!).
But before you settle for one (or more!) program/media of your choice, you might want to consider a few things:
Is your writing easily accessible to you? → Can you add to your draft whenever and wherever creativity strikes?
Does your writing program save your progress automatically? → You don’t want to lose hours upon hours of work because you forgot to save your progress!
Is your writing secure? → Is your writing uploaded to a cloud? Will you still be able to access your writing if your computer crashes or you lose your login data/ phone/notebook? Can you easily create external backups of your files?
It really doesn’t matter what you need to write down at this early point. Be it an idea, rough outline, dialogue, stream of consciousness, mind map or a finished draft—you just want your entire writing process to happen in a secure, accessible location that you feel confident working in. There is no perfect writing program; whatever program works best for you is the best program for you!
For example:
I almost exclusively write on Google Docs since it meets all my personal writing needs: It’s a free cloud service that syncs my files all across my devices (phone, laptop, tablet) regardless of where I am. It has an intuitive interface with all the basic writing/formatting tools I need.
Once a month, I download my most recent drafts as “.docx”-files and back them up on an external hard drive—so even if I can’t, for whatever reason, access my Google Docs account, my files are still secured in a different location.
Sometimes, I make use of handwritten notes, too—though I keep losing them or can’t decipher my handwriting…This seems minuscule or even funny, but it’s hard to come back to an idea when you’ve literally lost the physical manifestation of it!
Next: The Idea: Coming Up With and Developing Your Idea (with examples)
Masterlist
6 notes
·
View notes
Note
first of all, I'm so sorry you had to deal with all those troubles. I'm just entering the fandom, so I have no clue how bad it was or possibly still is, but that shit ain't acceptable. I hope you're feeling well in the future, and better now.
Second of all, I have a question for you about a technical problem that I can't find much of any resources on how to combat, and seeing that you're very good with virtual photography, I thought I'd ask you.
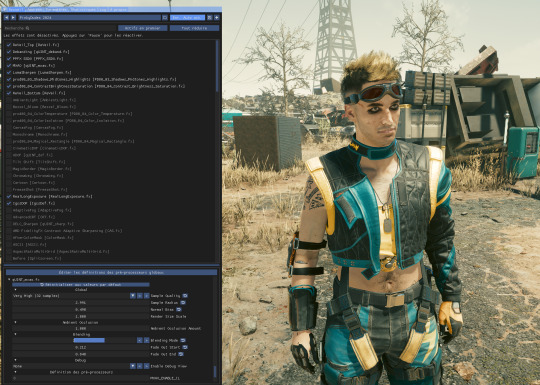
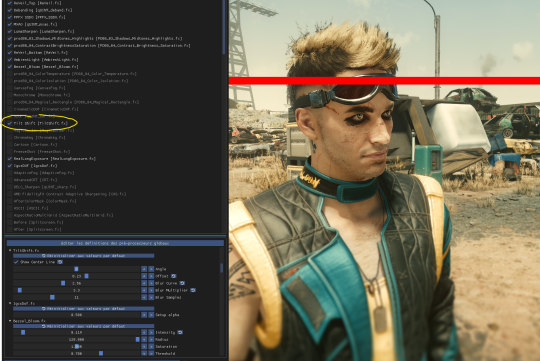
Depth of Field in the vanilla game's photomode is handled oddly, with artifacting(?) around V and certain other objects and NPCs at lower aperture values
Example:

The only advice I've seen that directly addresses this issue is simply "Raise the aperture" but that doesn't help when I'm trying to take photos with a very intense DoF (Which I really would love to do)
is there a mod/setting I could use to fix this issue?
Welcome in the fandom and thanks a lot for your words! 🧡
If you know how to curate your space, use the filter and block features, it's not that bad, especially if you find people you vibe and hang out with! Hope you'll find your comfy corner there :>
As for the question;
The vanilla PM's DOF isn't really good and there isn't anyway to "tweak" it as far as I know (we can forcely disable it via some settings but that's about it)
If you're playing on PC, I can recommend getting ReShade!
It's totally free, it allows you to layer all kind of shaders and post-processing effect on top of games. Since CP77 is a single player game, I recommend downloading the version with Addons support!
▶ ReShade
⚠ ReShade has its own Screenshot key; using the Vanilla photomode's key to capture your screenshots won't capture the layered shaders! So set up your pic, hide the HUD using photomode, and then use ReShade to set up more effects and polish, before taking your pic with ReShade!
More aboute ReShade and Tips on different DOFs under read more :>
Launch the installation and select Cyberpunk 2077 in the list, pick DirectX 10/11/12 as its API and dowload the recommended shaders pack
After launching the game, ReShade window should open, I recommend going through the tutorial to understand the interface better!
Then, you can start either enabling some shaders and tweaking them yourself, or looking for ReShade Presets on the internet! There's a lot of them on Nexus Mods too :>
▶ My old ReShade preset
When it comes to DOF shaders, the best one imo is IGCSDof
The problem is that, even tho the DOF itself is free, you need the IGCS camera for it to work properly, and this plugin is not free
For free DOF, I can recommend ADOF and CinematicDOF!
They can work together, tho I recommend only using One or Another
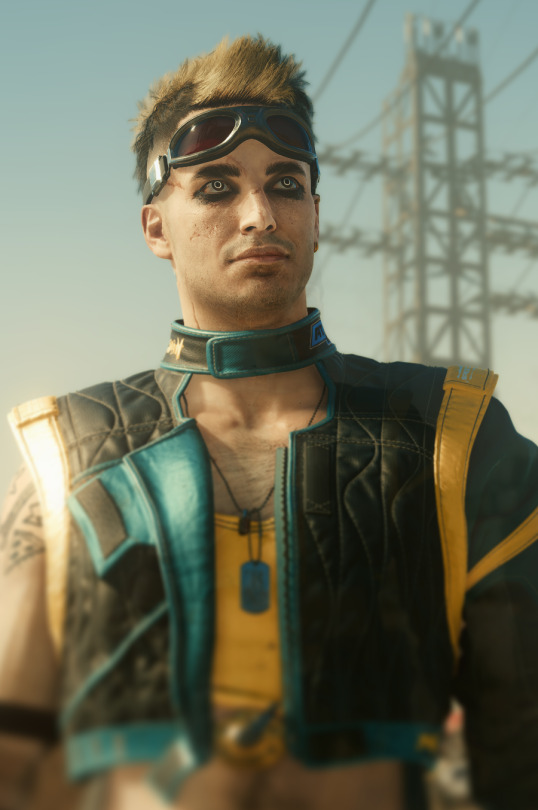
Here's an example of ADOF
Both shaders can be tweaked with to achieve similar results

You'll notice some artifacts and pixels around the hair especially, that's when RealLongExposure save the day!
It allows you to "freeze" the game by staking frames on top of each others, "smoothing" the edges and getting rid of the artifacts
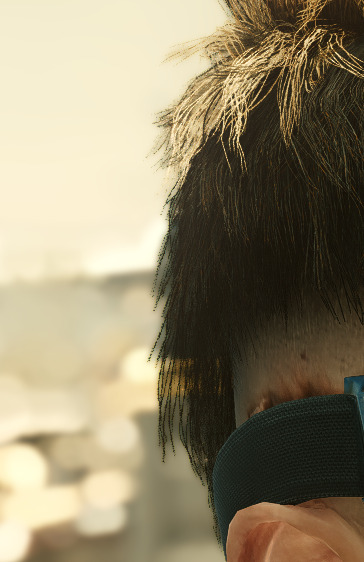
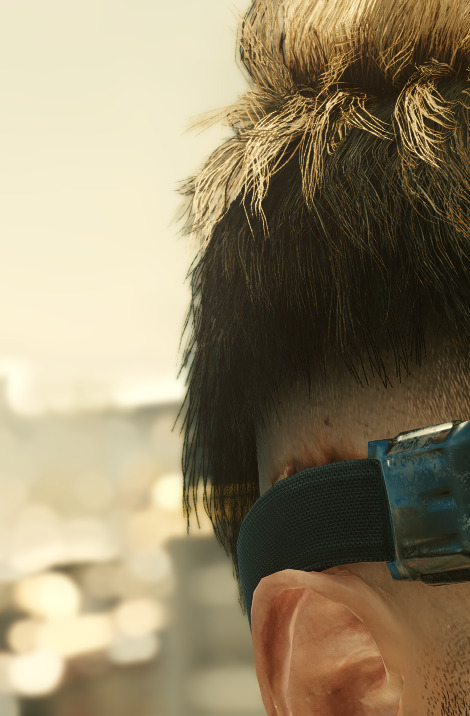
It looks less "crispy" on the right, but it's easier to spot in game!
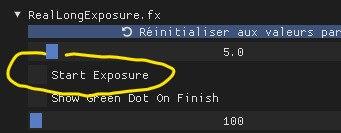
It's recommended to bind this shader to a shortcut; to bind it to a key, simply right click on the "Start Exposure" box
Another Shader that I like is called Tilt Shift
It allows you to place a gradient blur that follows a Line's angle and position!
These are only just a couple of Shaders, I invite you to test and play around with all of them to see what you vibe with!
#Hope this answer your question! And thank you for the kind words 🧡#Cyberpunk 2077#Tutorial#ReShade#Ask#demon-of-side-quest-hell
18 notes
·
View notes
Text
the borderlands artist's guide
(this was originally posted on Cohost but I believe it merits reposting here)
hello! are you a fanartist who's into Borderlands or considering getting into Borderlands? do you find the characters difficult to draw?
then do I have the solution for you: references!
...however, it might be difficult to find said references, or at least accurate ones. so here's my guide to such things. i will be going through the 3 big options of finding accurate references in ascending order of difficulty, but don't worry, none of these are too difficult to do.
option 1: artstation
artstation is probably the most straightforward way to get references, as gearbox employees post their official work there. you're pretty much guaranteed to find whatever you need. as a bonus, you might even find concept art that didn't get into the game proper, as well as environments, enemies and props. yes, artstation does also host fanart, but you can easily tell what's official and what's not by the game logo: if it's there, it's official.

while this is easy, it doesn't really let you rotate the character as you please or look at their raw textures. for that, we'll need the second option.
option 2: umodel
umodel is a program that lets you view and export assets of most unreal engine games, borderlands included. however, it works differently for different unreal engine versions. i will only be talking about Borderlands 3 models in this section, as they are easier to access and view.
in order to do so, simply install umodel and extract it from its zip, then start the executable. this will bring up a gui.
in the top bar, select/write the localization of your game files, which should be a folder obviously named Borderlands 3. check the override game selection box, pick unreal engine 4 from the left dropdown and Borderlands 3 from the right dropdown. leave everything else intact. click ok to start the file extraction process.
the files are encrypted, however, and umodel will ask you for the key, which is 0x115EE4F8C625C792F37A503308048E79726E512F0BF8D2AD7C4C87BC5947CBA7. simply paste this string into the box and confirm, and umodel will work its magic. when it's done extracting the files, it will present you with a file browser of basically every game asset. models are located in the Game folder, with NPCs in the NonPlayerCharacters folder and playable characters in the PlayerCharacters folder.
navigate to the folder of whatever character's model you want to view, open it, select the folder named Model, right click it and select open folder content. this finally will open the viewer, which you look through by using the page down and up keys.
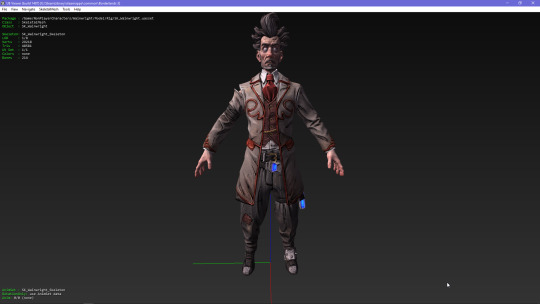
this method allows us to look at the models with greater detail, and even view the raw textures. but it doesn't let us zoom in to see even finer details. for that, we'll need the third option.
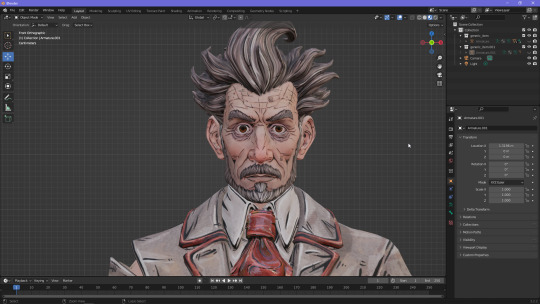
option 3: deviantart + blender
this option has a few steps. first, go to user kabalstein's deviantart page of Borderlands models. it's full of models ripped straight from the games, converted and made for the xnalara program... but we're not going to be using it. download the models of the characters you want, and unzip them into a folder named appropriately (make sure all the model data is in one folder!)
instead, download blender and xpstools. DO NOT UNPACK THE ZIP THE LATTER COMES IN!!!!!!!!
open blender, go to edit -> preferences, and you'll find the add-ons section. click install, which will open a file dialog. select the xpstools zip. refresh the add-on list, and you should find the addon, which allows you to import and export xnalara files in blender.
then, go to file -> import -> xnalara/xps -> xnalara/xps model, which again will bring up the dialog. select the model folder of the character you want to view, and bam, you can now view them any way you please, thanks to blender's advanced camera controls. you can even turn off all lighting effects and pose them if you need.
i hope this guide was helpful to at least someone, and i eased the fears of at least one Borderlands artist. see you!
23 notes
·
View notes
Note
How much money would I have to throw at you to make Aaron an option for the hero?
I'm guessing you meant Aron? If so, I have some fantastic news about how quick and easy it is to make pokémon already in the game into heroes/partners without even needing a patch file or prior experience :D
(threw a patch together for you as well though since i needed screenshots, download is at the bottom lol)
Quick hero/partner modification tutorial time!
(since I know there were people wanting vulpix heroes in expanded sky too)
Step 1: install and open skytemple, it can be found here.
Step 2: Press Open>More Files and then select the rom of your choice. Make sure it's the file with the .nds extension and it's explorers of sky (time, darkness and rescue team won't work, but modded versions of explorers of sky should still work fine*, like expanded sky :])
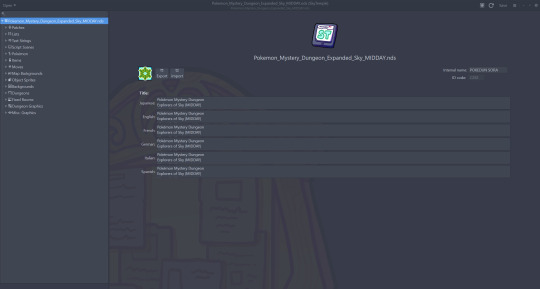
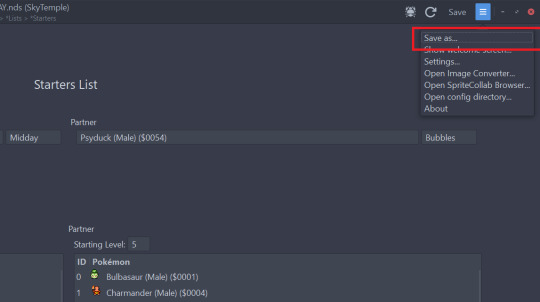
You should see something like this.
*disclaimer: when making edits to existing romhacks rather than the base game, its probably sensible to keep for personal use only lol
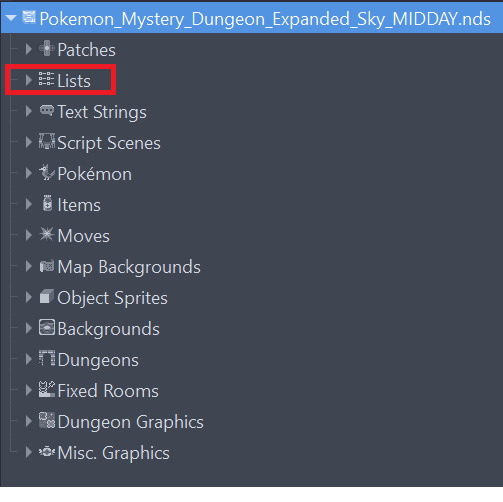
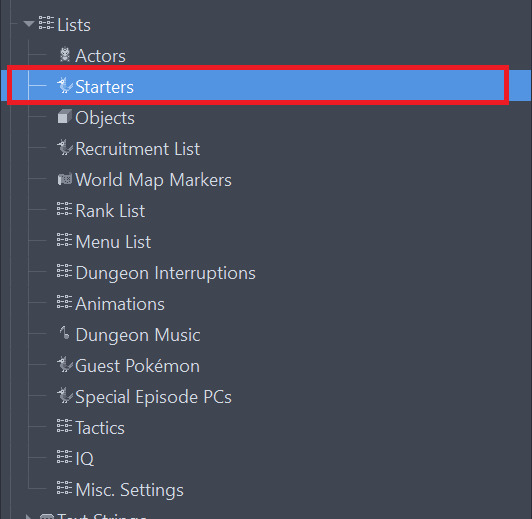
Step 3: Click the arrow next to 'Lists' from the dropdown on the left-hand side to expand it, the double-click 'Starters'. This will open a list of all the heroes and partners, as seen in the next step.
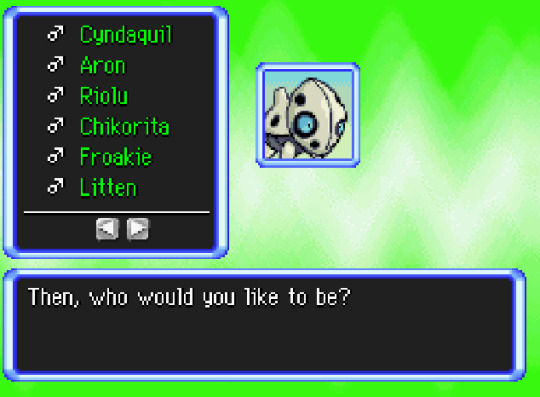
Step 4. Double-click over the species name of the hero (or partner) you'd like to change. Delete the existing text (shinx in this case) and replace it with the pokémon you want!
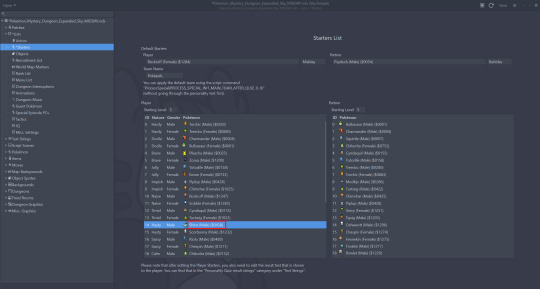

Step 5: You're done! Save your rom (preferably with a different name - you'll want a backup of the original just in case), and your new file is ready. Put it wherever you save your roms to play and enjoy!

That's it! Adding in extra portraits that aren't in the base game is a different (but still fairly easy) process that I won't go into in this post for the sake of keeping it basic, but this should work for any pokémon that's already in the game :D go wild!
Since I went though the trouble of clicking through on all that anyway to grab links, I made it a patch for you if you'd rather not set it all up yourself or are fine w shinx being the one to be replaced though! Download for that is here :D Any other heroes or partners can be modified in the same way as well!
#perelandra#pyro's tutorials#expanded sky#pmd#eos#im probably not gonna take hero requests (at least for pokemon already in the game) and itd feel scummy to take money for smth this simple#(especially bc its not setting up anything new - just changing a setting to smth else that was already there)#however!!!! making this patch was a good excuse to give a tutorial and i can direct ppl to this now#especially if theyre sad their favourite classic starter didnt get to stay#i encourage everyone to go wild w skytemple its super fun. highly reccommend#wondermail
25 notes
·
View notes
Text
I think I've got everything installed, set up and logged in.
I wanted to format but I didn't want to go through all that process and then eventually be forced to upgrade to 11 anyway, so I thought I'd save some time and hassle and just rip the bandaid off.
I have a USB stick I use to install OS' and its what I used to install Linux, but when I plugged it in, it wanted to format, then couldn't, so it took me 40 minutes to figure that out. The install went surprisingly fast, no issue there, but then once it was installed, my NAS drive wasn't showing up properly. I finally got that fixed and have just spent the last several hours downloading and logging in to things. That part is just tedious.
I'd love to switch to Linux full time, but I feel like I always mess things up with it and I just don't have the knowledge to fix it.
I've been watching The Sopranos. I'm almost done with season 4. It's so good.
6 notes
·
View notes
Text
Long Rant Pt. 2: This Time It's Personal
on my post about tech literacy and Linux:


I'm not going to directly reblog this post or mention who made it, seeing as they clearly aren't interested in talking about this further, but I wanted to put my thoughts on it somewhere because there's a few things about this take that I find fascinating.
first, I feel the need to clarify: my intention here wasn't to shame people who find Linux confusing, nor was it to say it's their fault that they bounced off of it. good UI is designed with an audience in mind, and the audience of something like a Linux distro can be tough to pinpoint. my point was that the dominance of Windows and its design have skewed people's general ideas of what simple UX means, and that Linux being different doesn't mean it's more complicated.
when the topic of UX comes up, people often say "simple" when what they really mean is "familiar". an end user will tolerate quite a lot of inconvenience if they're accustomed to the process (and very little if they aren't). this is why the lack of a GUI package manager is such a sticking point for a lot of people: many Linux distros don't ship with one pre-installed due to a (somewhat valid imo) belief that it's not an essential feature, and a lot of new users are unfamiliar with the alternative.
so, with that in mind: the OP is comparing the UX of installing Wine in Debian with that of using an installation wizard in Windows. let's walk through the steps needed to use both of these methods. (we'll assume that the user is already familiar with how both of these installation methods work; after all, it would be unfair to consider Windows's method better just because more people were taught how to use it!)
let's start with Debian:
determine which packages to install (either by using apt's search command or by looking it up)
open the command line
type/paste in the command
say "yes" to any confirmation prompts
installation complete!
Debian's apt isn't the best package manager there is, but it's good enough, and this is a pretty standard process.
as for Windows:
determine what website the installation wizard is hosted on
download the installation wizard
run the installation wizard with admin privileges
skip past the introduction/welcome screen
choose the directory where the program will go (why is this a choice?)
set a bunch of extra configure options before the build starts
decide whether to add the program to the Start Menu (why is this a choice???)
installation complete! ... as long as you don't forget to check or uncheck the "run this program immediately" box on the last page, or you'll have that to deal with that now
oh and you should probably also get rid of that installer that's collecting dust in your downloads folder now
I think it's pretty clear why this system is bad, but I'll elaborate anyways: instead of taking advantage of the one thing that computers are good at and automating the process, installation wizards force YOU to do everything. the user has to find and download the installer themselves, they have to devote their attention to every banal setting that the installer offers, and they have to clean up the mess afterwards.
I honestly wouldn't even disagree with the claim that some aspects of Linux are unsuited for casual tech consumers. despite having now written at least a good thousand words on the subject, I don't actually care all that much about whether people decide to adopt Linux. but the idea that apt is a downgrade from this??? it baffles me. this isn't even the first time I've heard it, either.
I haven't even mentioned the issues outside of the UI:
development - programmers now have to maintain an installer program separate from the stuff that actually matters
inconsistency - what an installer looks like, where you find it, what it does, how you handle the installation after? none of it is standardized
security - you're literally running unvetted code you got off the internet and it just asked you for full access to your computer what the fuck
wow I wrote a lot more than I thought I would. thanks for reading this whole thing if you made it here, I guess? I don't expect many people to do that
6 notes
·
View notes
Last Seen Blogs

rosie-sword
One Day, One Dream

choi-doi
ちょい、ドイツ語

marshmellowisevil
DannyBigBlueBear


demonicdust
.♬𝓰𝓸𝓷𝓷𝓪 𝓫𝓮 𝓸𝓴𝓪𝔂♬.