#the sims tutorial
Explore tagged Tumblr posts
Visit Tumblr Blog
Explore Tumblr blogs with no restrictions, modern design and the best experience.
Last Seen Tumblr Blogs


Fun Fact
The Tumblr app for Google Glass was released on May 16, 2013.
Text
youtube
3 notes
·
View notes
Text
The Sims 2 tutorial: changing the eye color of existing pets
...Without SimPE or any mods.
You can read this tutorial on ModTheSims, or down below under "Read More".
Note: the target Pet needs to have an owner / be playable. Stray pets cannot be modified this way, unless you do use mods or cheats to temporarily add them to the household.
Tutorial under the cut:
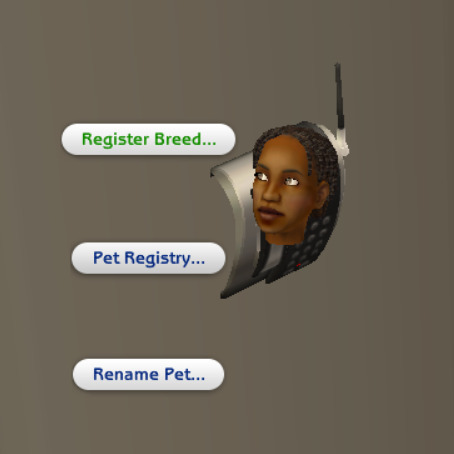
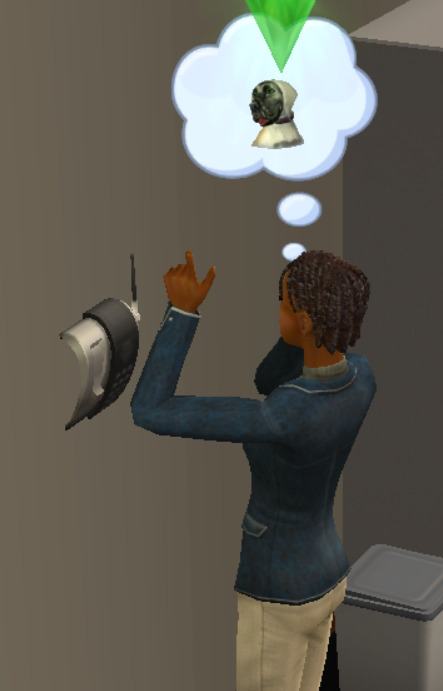
Step 1: Load the household with the target pet. Have your Sim click on their phone and select Pet Registry.../Register breed.../Your target pet.
Step 2: Save and exit the household. Enter Create-a-Sim. Create a new pet.
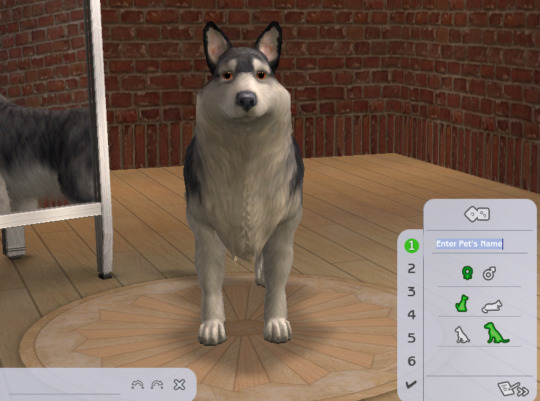
Step 3: From the breeds selection, select the breed of the target Pet that you've just registered.

Step 4: Change the pet's eye color to the desired one. At this step, you can also adjust your Pet's markings, but it's totally optional.

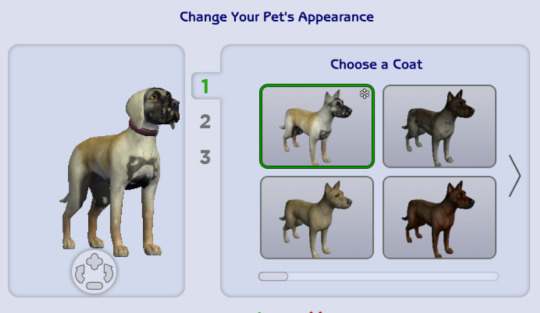
Step 5: Go back to the coat and markings selection. Select the "coats" button.

Step 6: Register your current coat as a new one.

Step 7: Exit Create-a-Sim and load your target household again.

Step 8: Have your Sim change the Pet's appearance in the mirror by selecting Change appearance for your pet.../Your target Pet.

Step 9: In the first screen that pops up, select the coat that you've just created. You may notice that the Pet's eye color has changed accordingly.

Step 10: You're done! Your Pet has a brand new eye color which is now genetic, which means that future kittens and puppies may inherit it.

#ts2#the sims 2#sims 2#sims 2 pets#the sims 2 pets#the sims 2 tutorial#sims tutorial#the sims tutorial#the sims
1 note
·
View note
Text
Since the new eyelash update is here, I'm gonna teach you how to convert old eyelash cc into the new eyelash option!
First of all, we will need the Sims 4 Studio. The download link can be found here: https://sims4studio.com/board/6/download-sims-studio-open-version
Now, head into the app and click the "My Projects" button on the main menu.

Open the eyelash file (.package file) you want to convert. I'll just pick a random one for reference. Once you picked the one you want, hit open.
You will be directed into the studio, which will look like this:

Now on the right side of the screen, find the CATEGORIES button and click on it.

Once there, change the OUTFIT TYPE to MASK DETAIL EYELASHES and APPLY TO ALL SWATCHES. Save the file, and the .package file will be updated in your game. Also, make sure to double check in-game before continuing with your other custom content.

As you can see in my game, It worked! Hopefully it works for all of you, too.

And that's about it. Thanks for reading all the way.
And by the way, If you're going to distribute these publicly without the original creators consent, just don't do it. This is meant for private use only or for content creators who want to convert their eyelashes into the new eyelash section.
EDIT: As trillyke has said, This does not work with eyelashes in the glasses section as they will collide with rings and most of the accessories
#sims-4-custom-content#ts4#thesims4#customcontent#ts4cc#the sims 4 cc#the sims 4 custom content#tutorial#the sims 4#the sims community#the sims cc#sims#sims 4#simblr
4K notes
·
View notes
Text

IF YOU CAN'T ENABLE CC 🌸
Sul sul ^^
After today updates, I wasn't able to enable CC again. It doesn't matter how many times I closed and launched the game.
So I remembered that this had already happened to me before.
If you're going through the same problem, this is how you can fix it:
🌸🌸🌸🌸🌸🌸🌸🌸
HOW TO ENABLE CC AGAIN:
1- On the game home page, in the bottom right corner of the screen, you can see what the current game version is. After today's update, mine was: 1.108.318.1020. Launch the game and check the number that appears for you.
2- In your game folder (Documents>Electronic Arts> The Sims 4) you'll find a file called "GameVersion". There will be a number.
The number in that file has to match the current game version number.
When I opened mine, it was "1.107.151.1020". So I just updated it to "1.108.318.1020" and saved. Then when I launched the game I could enable CC again.
Note 1: There's a "space" before the number in "GameVersion" (as if it were a paragraph). Keep that space. Change the numbers exactly where they are.
Note 2: If you prefer, before changing the number, make a backup copy of "GameVersion" just in case. It won't harm your game, but it's better, just to prevent and make it safer.
💎 If you want a tutorial video, I made one about it some time ago. You can watch it here :)
🌸🌸🌸🌸🌸🌸🌸🌸
ALSO IMPORTANT AFTER UPDATES:
Remember to delete "localthumbcache". You can find the tutorial here.
🌸🌸🌸🌸🌸🌸🌸🌸
I'm currently checking my CC to see if they're still working.
If anything, I'll let you know :)
I hope it helps you if you're having any problems :)
Happy Simming ^^
4K notes
·
View notes
Text

By popular demand (I saw two people asking) I thought I would throw together a quick guide to using the road editor tool in the newest version of SimPE! You'll see that this is a very easy tool to use, and best of all, goof-proof. If you do mess up (you probably will) it's very, very easy to correct.
Very, very, very important to make a backup of your hood before you ever do any tinkering in SimPE! I also recommend practicing on a test hood you don't actively play in to get a feel for it before you do anything to your main hoods.

We're starting with a vanilla Strangetown. I would recommend going in your game and taking a nice overhead screenshot of the hood like this first to look at for reference of where everything is situated the way that you're used to looking at it.

2. Open SimPE, go to Tools> Neighbourhood> Neighbourhood Browser and open the hood you're wanting to work on. If you're not so familiar with SimPE, opening your hood can take some time. Touch nothing until it's loaded!

3. Once it's all loaded, from the Resource Tree list pick Neighbourhood Terrain Geometry (NHTG). Then you'll see one file populate the Resource List - click that. Make sure on the bottom that you have Plugin View tab selected.

4. Now you should see this map of your hood pop up! There are different things you can toggle, I like to check the Show Lots box when I'm editing the roads. Then click the Road Editor button on the right.

5. To be able to see better, I've pulled this Plugin View window up a bit - it may rearrange the Resource List and Resource Tree windows a bit to accommodate. You can also press the Zoom 2x button to see closer, and then you'll have to use the scroll bars to move around the map and the road editor tool.

6. The road editing tools here will be placed down in the same orientation as the map. So the two parallel roads running through Strangetown from this perspective are the vertical straight road pieces (top row, second from left).
When you select a road tool, above it will indicate which tool you have selected.
Also - I recommend having Handle Stop Signs ticked.

7. Once you have the correct type of road selected for the spot you're working on, simply click on the map - it lays it down one tile at a time. If you miss a spot like shown here, just fill it in.

8. If you want to create an intersection, first delete the section of road where the intersection will go.

9. Then choose the type of junction for the intersection you're making, and add that piece in. You'll see a red circle appear (unsure if this is because it's an intersection or because you have handle stop signs selected, but I recommend you do have that selected either way).

10. Once you're done making all your changes, click Close Editor.

11. This is the part where you save your changes! First click Commit in the top right of the editor. Then, File> Save!

12. Load your game to check! Looks pretty good with all those new roads!

13. However, we have indeed made some mistakes! Which were absolutely for illustrative purposes and not truly an accident.

14. Never fear! Simply reload the hood in SimPE - I've deleted the spot where the T-junction should go and added one in, and deleted where the road just ended abruptly and added a proper end piece.
I have not experimented with what happens if you try to build a road through hood deco - if you have, please let us know in the comments how that went!
I also have barely touched the terrain editing tools, so that's outside the scope of this tutorial.
I hope this helped!
#the sims 2#sims 2#ts2#ts2 maxis match#ts2 simblr#ts2 tumblr#simblr#brightmaple#ts2 tutorial#simpe tutorial#simpe road editor
729 notes
·
View notes
Text

hey guy's i made a quick and easy tutorial on youtube about how you can frame your sims screenshots with any cc frame you want, you don't need photoshop or any other of these overwhelmimg programs and you also don't need any kind of photo editing skills! you can find the video here. i hope it's helping some of you. love, jodie ♡
#tuts*#sims 4 mods#sims 4 cc#sims 4 simblr#sims 4 custom content#the sims 4#the sims#the sims community#sims 4 tutorial#the sims 4 custom content#sims 4 maxis match#sims custom content#sims 4#ts4 simblr#sims community#ts4
435 notes
·
View notes
Text
downloading a bunch of files from sfs folder a bit more comfortably (on PC)
you know this feeling when you see a sfs folder with many separate files and no full set archive, so you just sigh, click on a file, download it, go back, repeat with the next one, go back, try to recall which one you already downloaded and which you didn't... so i've come up with a little workaround that'll make it faster and a bit more comfortable! it's pretty 101, but my friend found my explanation useful, so maybe someone else needs it too.
there's this thing about SFS, that if you open the same page again in a certain period of time, i think it's a day or maybe a few hours, it won't open the page again, but instead it'll just automatically download its file. that's exactly the thing we'll be utilizing here. when you left click on a link with pressed ctrl, this link will be open in another (inactive) tab. so to "automatically" download files from this folder, just hold ctlr and click on each file you need twice.

on the first click, it'll open the inactive tab with it, on the second click, it'll just straight up download the file without you having to go away from the page you're on. when you're done downloading everything you need, just close all tabs it opened. not ideal, yes, but much faster and less annoying than having to manually open each page and click on the button. happy simming!
1K notes
·
View notes
Text
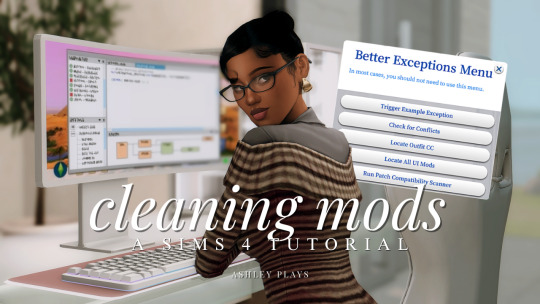
how to clean & organize your mods folder + update broken/outdated mods by ashley plays
this video goes over the following:
how to organize your mods folder
how to update your mods folder after a patch update
how to find broken/outdated mods
how to clean out custom content & find duplicate files
↓ mods, programs & helpful websites mentioned below
mods:
better exceptions
mc command center
programs:
sims 4 tray importer
sims 4 mod manager
helpful websites:
sims 4 news & updates
scarlet's realm: the mod list
bienchen's mods
littlemssam's mods
kiarasims4mods's spreadsheet
mizoreyukii's spreadsheet
2K notes
·
View notes
Text

Quick Guide: Stay Safe While Downloading Sims 4 CC & Mods
I just published a quick guide to help you download Sims 4 CC & mods safely. ⚠️ From trusted sources to spotting red flags. Keep your game clean and secure! 😊
Read it now
#avoid malware in sims 4 mods#how to avoid malware sims 4 mods#how to download mods safely sims 4#patreon sims 4 cc download#safe sims 4 cc creators#safe sims 4 download sites#sims 4 cc best practices#sims 4 cc community guide#sims 4 cc download checklist#sims 4 cc education#sims 4 cc folder structure#sims 4 cc mod manager#sims 4 cc mod security tips#sims 4 cc mods support guide#sims 4 cc protection#sims 4 cc safe download#sims 4 cc safe hosting platforms#sims 4 cc safety guide#sims 4 cc safety tutorial#sims 4 cc virus warning#sims 4 cc zip file tips#sims 4 custom content security#sims 4 custom content tips#sims 4 mod folder organization#sims 4 mod malware prevention#sims 4 mod safety#sims 4 mod safety checklist#sims 4 modding guide#sims 4 mods antivirus#sims 4 script mod warning
257 notes
·
View notes
Text
I have found this for you to learn have to create poses or animations.
1 note
·
View note
Text
TUTORIAL
How to FIX CUSTOM EYELASHES after update 1.108.349.1020 The Sims 4
YOU NEED:
Sims 4 Studio @sims4studioofficial
Blender (I use Blender 2.79)
Instruction manual:
Opening the eyelashes that need to be repaired in Sims 4 Studio

2. Go to the "Categories" section - Item "Outfit Type" - "Eyelashes"

3. Click "Apply to All Swatches" - Click "Yes"

4. Now we need to assign the correct color to the Vertex in Blender. Go to the "Mesh" category and export the eyelash mesh

5. Open the Mesh in Blender and switch to the "Vertex Paint" mode

6. Select the display mode "Wireframe" or press the "Z" key

7. If the eyelashes are broken, they will have the wrong color. Now we need to assign the correct color

8. Click on the palette icon

9. Go to the HEX item and enter the color code. Color Number: 007F3F

10. After you entered the color code. Click "Paint" - "Set Vertex Color"

11. After that, the color of the eyelashes will change. Save the file and close the Blender

12. Go back to SIms 4 Studio and import the mesh

13. Saving the package file

14. Checking the result in the game
714 notes
·
View notes
Text


Shop Sign Wall Lights
I put together a few sets of shop sign wall lights. But there are instructions. I kept some swatches as a default white color so that you could pick which color you want the light to be while in live mode. This saved on the file size of the package file because the more textures a file has, the more bloated the file size is.
I had some fun with some shop names although I mainly included generic titles in both English and Simlish.
DOWNLOAD for FREE: SFS
OR at Patreon*
*You must be over 18 to access my Patreon page.
INSTRUCTIONS ON CHANGING LIGHT COLORS
Once you place the light in build mode, then go to live mode. Click on the light and you will get the following pie menu.

Select SET COLOR AND INTENSITY and then choose THIS LIGHT. The color options will then appear so you can select which color you want.

If you use the name signs along with the Awning Lights, make sure to place the name on top of the awning so when you select the color picker, the correct sign changes colors. The other option is to place the name separate from the awning, go to live mode and change the color, then go back to build mode and add the awning light you want.
Enable the bb.moveobjects on cheat and then you can make adjustments to location and size of objects. You can adjust the position of the light on the wall by depressing the Alt key while placing the sign (on PC). You can adjust the size of the item by depressing the Shift key and either [ (for smaller) or ] (for bigger) (on PC).
CREDITS
Awning Shop Lights - 19 swatches of various awning wall lights. 18 are pre-colored and one is white so you can change the color yourself in game.
Candy Shop Lights - 20 swatches
Pottery Shop Lights - 25 swatches
Tattoo Shop Lights - 21 swatches
Enjoy!
Creations by SexyIrish7
These cc objects are new 3d meshes created using Blender and Sims 4 Studio.
Polygon Count: 6
All CC have:
*Ability to search catalog using search terms: sexyirish7 and si7
*Customized thumbnail
*******
CREDITS:
Software credits:
Sims 4 Studio v. 3.2.4.1 (Star): https://sims4studio.com
Blender 4.0: https://www.blender.org/download/
GIMP v. 2.10.34: https://www.gimp.org/
Inkscape v. 1.2: https://inkscape.org/
Thank you to the creators and moderators producing tutorials and answering questions!
*******
Model and Image credits:
Mesh created by me.
Simlish font credit to Franzilla: https://modthesims.info/
Image credits:
Awning Lights Image credits: Modified image from Adobe Stock
Candy Shop Image credits:
Swatches 1-3: Image by pch.vector on Freepik https://www.freepik.com/free-vector/christmas-candies-symbols-set-neon-style_11241813.htm#fromView=search&page=1&position=26&uuid=8b541325-0e62-4e37-9468-6bacd30f8963&query=neon+lollipop+candy
Swatches 4-8: Image by gstudioimagen on Freepik https://www.freepik.com/free-vector/sweet-candy-neon-seamless-pattern_5595774.htm#fromView=search&page=2&position=30&uuid=e2259de5-014d-4d04-af87-1198ee0f35e2&query=%40gstudioimagen+neon
https://www.freepik.com/free-vector/sweet-candy-neon-seamless-pattern_5595775.htm#fromView=search&page=1&position=27&uuid=e2259de5-014d-4d04-af87-1198ee0f35e2&query=%40gstudioimagen+neon
Swatches 9-10: Image by openclipart.org https://all-free-download.com/free-vector/download/peppermint_candy_clip_art_13182.html
https://all-free-download.com/free-vector/download/round_candy_with_stick_card_on_pink_background_6823183.html
Swatch 11: Image by All-free-download.com https://all-free-download.com/free-vector/download/round_candy_with_stick_card_on_pink_background_6823183.html
Swatches 12: Image by katemangostar on Freepik https://www.freepik.com/free-vector/ice-cream-cart-neon-sign_3238564.htm#fromView=search&page=8&position=42&uuid=2f82b4d1-5ca8-449c-ae22-4573861ebcb0&query=neon+sign+retail
Pottery Shop Image credits:
Swatch 1: Crafting icons created by andinur - Flaticon https://www.flaticon.com/free-icon/pottery_17392031
Swatch 2: Image by katemangostar via Freepik https://www.freepik.com/free-vector/aquarius-neon-sign_5561944.htm#fromView=search&page=2&position=5&uuid=c55e5e21-0550-46f0-b9be-cfa85ff38796&query=Ceramic+Neon
Swatch 3-4: Pottery icons created by Smashicons - Flaticon https://www.flaticon.com/free-icon/vase_3760867
https://www.flaticon.com/free-icon/vase_3760970
Swatch 5: Icon by istar_design_bureau via Freepik https://www.freepik.com/icon/pottery_1958438#fromView=search&page=2&position=20&uuid=096084ae-13fe-429c-a419-e6e13ccd37b9
Swatch 6:Icons by Eucalyp - Flaticon https://www.flaticon.com/free-icon/pottery_6552610
Swatch 7: Icon by berkahicon via Freepik https://www.freepik.com/icon/spin_13785816#fromView=search&page=2&position=0&uuid=096084ae-13fe-429c-a419-e6e13ccd37b9
Swatches 8-11: Icons by Freepik https://www.freepik.com/icon/pottery_8540816#fromView=search&page=3&position=43&uuid=096084ae-13fe-429c-a419-e6e13ccd37b9
https://www.flaticon.com/free-icon/machine_9200546
https://www.flaticon.com/free-icon/vase_8838322
https://www.flaticon.com/free-icon/pottery_3305262
Tattoo Shop Image credits:
Swatch 1: Modified Image by katemangostar on Freepik https://www.freepik.com/free-vector/tattoo-salon-neon-text-with-tattoo-machine-neon-sign-night-bright-advertisement_2438198.htm?log-in=email
Swatch 2: Image by Nippy Custom https://www.nippycustom.com/products/tattoo-neon-sign
Swatches 3-5: Image by bohlam via Vecteezy https://www.vecteezy.com/vector-art/2185717-tattoo-studio-neon-signs-style-text-vector
https://www.vecteezy.com/vector-art/34210463-neon-sign-tattoo-studio-with-brick-wall-background-vector
*******
TOU:
Do not re-upload and claim as your own
Do not re-upload and hide behind a paywall
#the sims 4 cc#ts4cc#sims 4 cc#the sims 4#wall decor#sims 4#ts4#lights#wall lights#signs#shop signs#retail#pottery#ceramics#tattoo#ink#candy#lollipop#sweets#sugar#light tutorial#sexyirish7
268 notes
·
View notes
Text
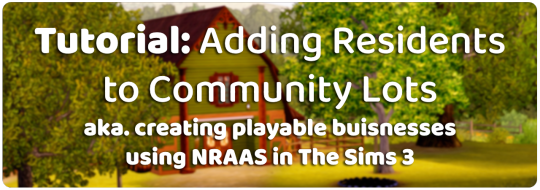
While setting up my Stardew Valley save, I wanted to find out if it was possible to create community lots that have live-in residents, given that many of the town buisnesses also function as NPC homes in Stardew
Turns out it is possible to do - it uses an NRAAS feature I never knew existed, so I thought I'd give a tutorial! (ty to the NRAAS forums & MTS help threads for this information! - I've just compiled it to help others :D)
Essentially, this means you can create functional pubs / bars / shops / restaurants etc. which your sims can actually live in while running the business, and other non-playable town residents will view the lot as a community lot and come to visit / interact with it as such!
Also, as I've got a few of these NRAAS tutorials going now, I made a page where you can find all of them linked here - I'm open to requests as well :)
Tutorial under the cut ⬇️

Mods you will need:
NRAAS MasterController & MasterController Cheats
NRAAS Register (only for Part 2)
EDIT TO ADD: I recommend using a business mod such as Ani's Merchant Mod to allow your sim to earn money from their business in addition to this tutorial - you may find this much better for current-household gameplay, because your sim will not earn funds from their business when you're only using the NRAAS method detailed here (apart from mixology tips etc.)
Part 1: Adding sims as residents
Start by building / placing your business of choice using Edit Town, and pick what kind of community lot you want it to be through the 'change lot type' menu
Plop down the sims you want to live there on a different residential lot in town (this is temporary housing, it doesn't matter where / what it is)
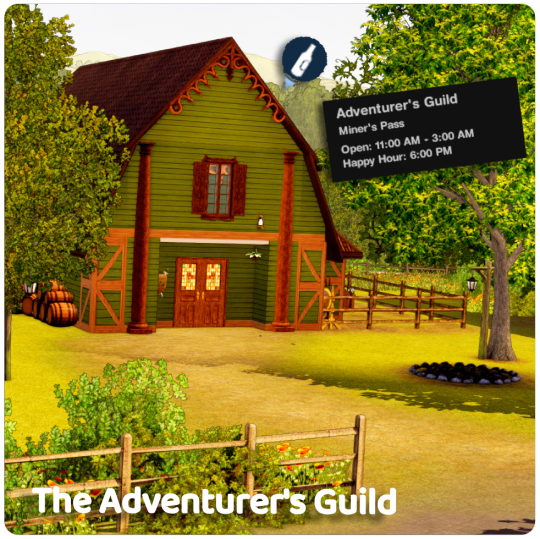
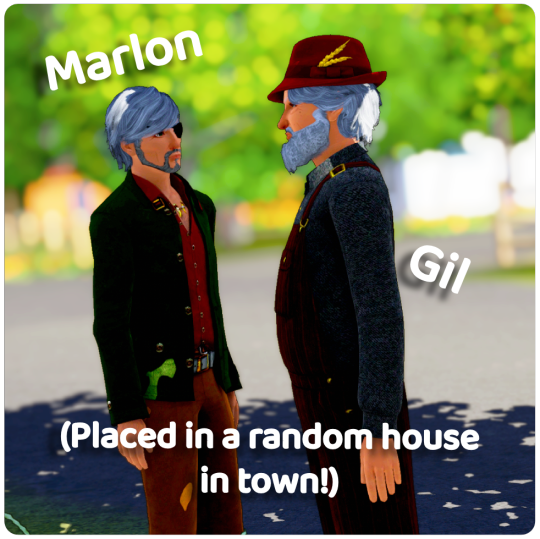
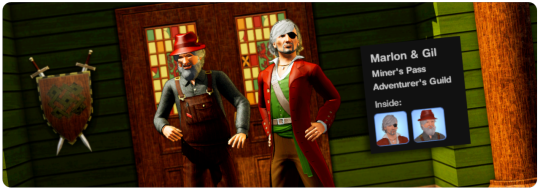
For this tutorial, I'm going to be using The Adventurer's Guild dive bar as an example, & I want my two sims to live there: Marlon & Gil - Marlon will be tending the bar and Gil will just be living on the lot without any specific role
Your business doesn't have to be a bar, I'm just using that for the purposes of this tutorial - You can add residents to any community lot type, someone on the NRAAS forums even suggested adding 'homeless' sims as residents of community parks which would be fun for a rags-to-riches challenge! - other examples include: a bakery, personal training gym, savvy sellers shop, a nectary etc. etc.
Now everything is placed, you need to alter some settings over in the NRAAS MasterController main menu to set things up
Click on a computer or city hall to bring up the NRAAS MC Menu:
NRAAS -> MasterController -> Settings
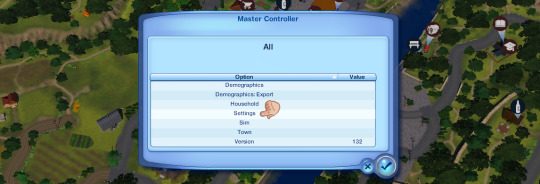

'Allow Add Sim on Community Lots' is set to false by default, click on it -> change it to true
Click the checkmark & exit out of the NRAAS MC Menu
Go back to your community lot, click on the building and bring up:
NRAAS -> MasterController

At the top of this menu, there should now be an option to 'Add Sim' (as there usually only is on residential lots)
Click 'Add Sim' and then you can either filter by sim type OR just click 'Test Full Family' to find your sims on a list of all the townies - once you've found them, select their portraits and press the checkmark to exit the menu
I recommend resetting the sims & the lot once you've done this, your sims should now be residents of the community lot of your choice! You can keep them as the active household (although I haven't playtested this) or just have them as non-active families who are meant to own businesses around town
Part 2: Giving sims Functional Roles
I'd like to go one step further and have Marlon be the functional bartender for this lot, for this part you will need NRAAS Register (linked above)
There are two ways to do this:
1. If it is within working hours (for my dive that's 11AM - 3AM, you can check your lot's hours in map view), click on the bar object (or whatever role object you want, such as the industrial oven / cash register etc.) and choose
NRAAS -> Register -> Select


This will bring up the same sim selection menu as before, just choose your sim out of the list
They'll now be the functional bartender / role sim for that object!
However, this menu may not show up for various reasons, the main one being if it's not within working hours for the lot - there's another way to assign your sim if that is the case:
2. Go through the main NRAAS Register menu - click on City Hall or a computer to bring it up
NRAAS -> Register -> Find Empty Roles
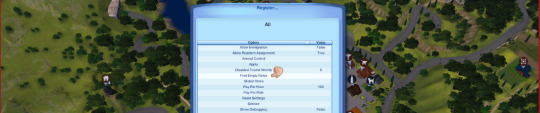

As long as you haven't pressed play on the game since you placed your community lot, it will not have anyone assigned to the object yet, and it will show up under this menu as an empty role you can fill with your sim (through the sim selection menu again)
If the object does already have a sim assigned to it, you need to find whoever the sim is and remove them from that role:
I suggest just waiting until it is working hours & the sim shows up for work, then click on them & choose
NRAAS -> MasterController -> Intermediate -> Remove Role
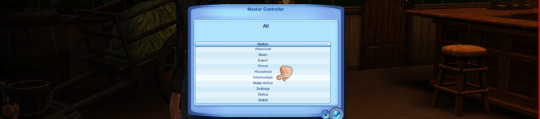

You need MasterController cheats for this 'Intermediate' menu to show up!
This should then free up the object for you to add your sim to it through either of the previous methods - KEEP YOUR GAME PAUSED while you do this so no one else gets assigned to it before you're able to assign your own sim!
And that's everything!
Have fun with your functional residential businesses - as always if you have any further questions leave a comment or send me an ask and I will try and help 🥰🥰
Big thanks again to the NRAAS Forums & MTS Threads for this info, I'm just compiling what I found online as I had no idea this was a feature and figured it might be useful for others to know too!
355 notes
·
View notes
Text
How to throw a fancy dinner party in The Sims 3
You will need @flotheory's new dinner mod, download it here. Depending on what you want, choose either
Version 1: limited to 8 sims having dinner and sims will finish what they are doing before going to dinner -> best for family gameplay when you only want your active family to have dinner together
or Version 2: more than 8 sims can have dinner and sims will stop what they are doing and proceed to their chair once you direct them to do so -> best if you also want inactive sims as guests at your dinner party
Step 1: Assign each sim a chair
Click on the chair
Select "Join dinner…"
Select the sim you want to sit in this chair
Repeat for all chairs/sims.
Sims will now proceed to their respective chairs and sit down at the dinner table:

Step 2: Get them to eat dinner together
If you're doing this with more than one table, pause your game!
You will have to repeat these steps for each table! Do not switch to a different table before you have done them all!
Place the group meal in the middle of the table
Click on the group meal
Select "Serve for dinner…"
Click on the table
Select "Eat dinner together…"
Select the sims sitting at this table
Click OK
Without un-pausing the game proceed to the next table and repeat for every table.


Once all tables have been served their dinner and the sims have been directed to dine:

Press play and watch them all eat at the same time!

Additional tips:
I found it is best to place the group meals on the table after all sims have been seated. If you place them before, you run the risk of a hungry sim grabbing a plate and blocking one of the chairs.
Once all sims are seated at the dinner table you can leave them sitting and just chatting for a little bit, but don't wait too long or they will get up again.
If you want more than 8 sims to dine together, you will need either a custom table seating more than 8 sims (don't know if they even exist…?) or you will need to place several tables. If you want to push them together to make a bigger table, use the cheat "moveobjects on". Take care not to push the tables into each other, or sims may not have enough room to sit down. It's best to leave a small gap.
If you want several tables to eat the same food, either prepare the same group meal for each table or use icarus_allsorts mod "Cook with any ingredient" in order to make a group meal with up to 16 servings. When serving several tables from the same group meal you will have to move the group meal to the table you want to serve before repeating step 2!
332 notes
·
View notes
Text
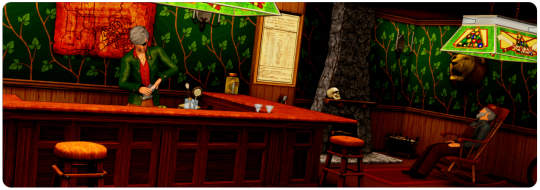
Because you can't save progress on them, I feel like someone should write timeloop horror for Tutorial Joe and Tutorial Jane.
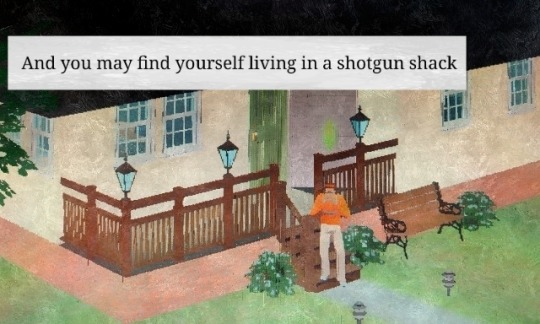

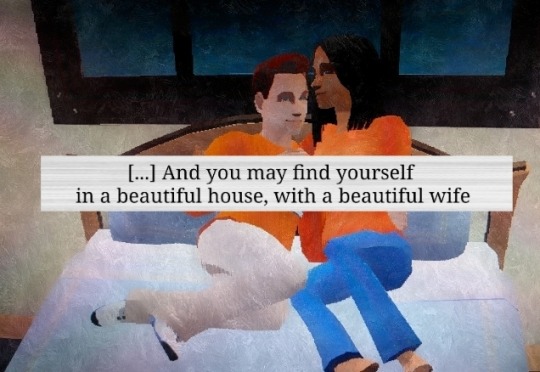
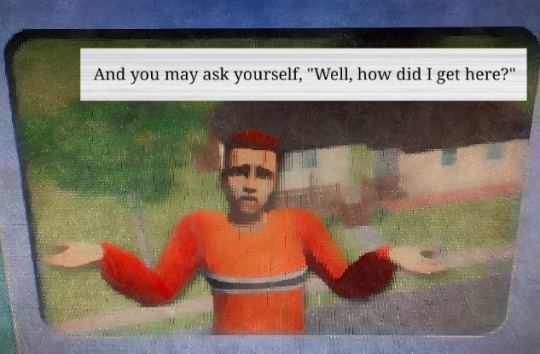


#tutorial joe#tutorial jane#ts2#the sims 2#sims#idk what this is okay <3#once in a lifetime#tw glitch#flashing tw#flashing gif tw#tw flashing gif#tw flashing#tw flickering#undescribed
1K notes
·
View notes
Text

I've got a new video!
Obviously I am preaching to the choir here amongst us ts2 cc addicts, but I have a new video out with all my tips for finding sims 2 custom content. There's ads on google for the superbowl and stuff because i filmed this months ago and editing took me forever bc for some reason i was like pleasantview sims should be looking at cc on their computers dfjkdfkjsdjk
Even if you know how to find sims 2 cc, maybe you will enjoy seeing Brandi Broke browse the sims resource while Dustin gets reprimanded by the police outside!


Things I cover include: - searching on google and getting rid of those ts3 and ts4 results - using google to search specific sites and more - how to use the wayback machine - how to find/download cc from deleted tumblrs
I also share some of my favorite older, harder-to-find sites for new sims 2 cc hunters. I hope you guys like it! watch it on youtube


324 notes
·
View notes