#toggle sidebar navigation menu
Explore tagged Tumblr posts
Visit Tumblr Blog
Explore Tumblr blogs with no restrictions, modern design and the best experience.
Last Seen Tumblr Blogs


Fun Fact
Tumblr has 4 main sources of revenue.
Text

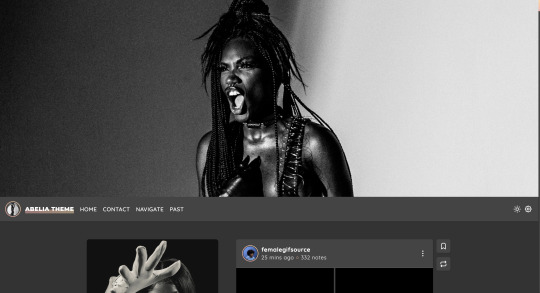

abelia | theme by sage
get the code: $6 - live preview / preview v1 / preview v2 a fansite theme with lots of options!
features (more info below the cut):
toggle: tags on click, faq & navigate popups, links, events, status, members, & affiliates boxes
optional uploadable header image with full, medium, & short height options
choose between left, right, or both sidebars
headerbar includes icon/blog title, home & archive links, ask link or faq popup, search bar or explore popup, scroll to top, day/night, & tumblr controls buttons
sidebars include an uploadable image with a custom description, links, events, status, members, affiliates, & info boxes
optional disclaimer footer
customizable: colors, body & title fonts, and font size
npf supported, responsive design, 3 corner options, tabler icons
only the (optional) faq & navigate popups need to be changed in the code, everything else can be changed in the customize panel! however there are other changes you can make in the code if you want - please see the customization guide
terms:
reblog if using
do not touch the credit
all terms / faq
credits listed in the code / credits page
please consider supporting me ♡
blog name !! important
make sure you fill out the blog name field, this is what will show on the top of all your original posts. to clarify: your blog name is your blog’s url - for example: phantomcodes
responsive sidebar
when the browser window gets too small the sidebar will disappear and become toggleable, the sidebar toggle button will appear on the right side of the headerbar next to the day/night button
faq popup
the faq menu has your blog's ask box and allows for unlimited questions
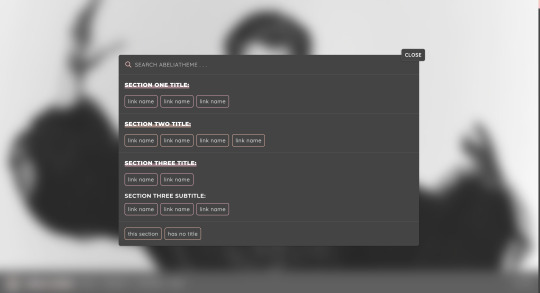
navigate popup
the navigation menu has a search bar and allows for unlimited links with optional section titles & subtitles
sidebars
if you use both sidebars the reblog button will move to the bottom of the post next to the like button, the permalink will move to the more info popup at the top of the post
if you want to move sidebar boxes around please see the customization guide!
links box
the links box has up to 6 links
events box
the events box has up to 2 events each with an optional image, title, date, status, a short description, and up to 2 links
status box
the status box has up to 4 status that can be on or off, and up to 4 updates
members box
the members box will automatically fill with the members of the blog, you can manually edit the members if you want (see the customization guide)
affiliates box
the affiliates box has up to 12 affiliates -more can be added in the code (see the customization guide) and a link to the submit box
info box
the info box has up to 4 stats
general notes
many things will not show up if they're left empty, some examples: if you don't want the updates leave the update 1 field blank, if you don't want the disclaimer leave the disclaimer field blank, etc.
reminders
remember tumblr’s customize panel is buggy, toggle the options on/off before saving
i’m still on a sort of semi-hiatus, i’ll be around for questions but please check my faq, answered asks, etc. before asking - i will not answer repeated questions!
#code hunter#tumblr resources#tumblr themes#tumblr codes#fansite theme#completeresources#allresources#fansite#userbru#userdre#usernik#tuserlucie#useraashna#usercharithra#usermaguire#tsusermels#useralien#abelia#phantom code#phantom theme
188 notes
·
View notes
Note
hi!!! i love for custom blog theme,, do you have a link to the code or creator 0:?
ya!
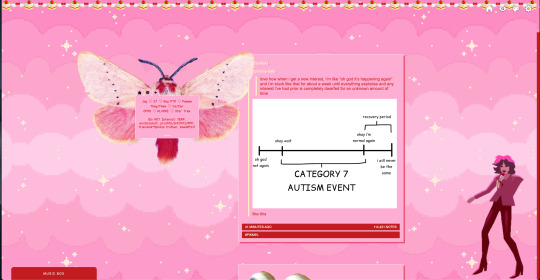
so my theme is actually a heavily modified version of redux edit #1 by lopezhummel (current url: holyaura). i always remind users that most tumblr themes are old and that you'll need to replace all instances of "http://" in the code with "https://" so tumblr will save the theme. i had to do it with this one
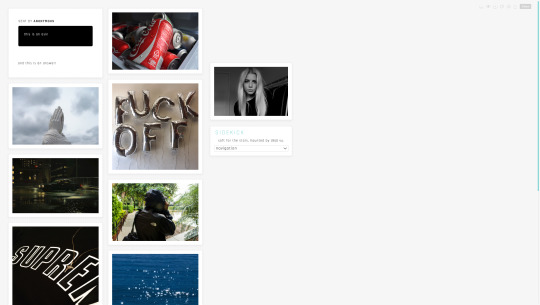
these are the modifications i made to the theme. i edited this theme over the course of at least a year or so and don't quite recall how i did all of these things. but to the best of my ability:
i moved the "left side img" to the right side of the screen. i also made this element "responsive" so the image will never get cropped when you resize your screen. this was a bitch and a half to figure out and i truthfully do not remember how i did it
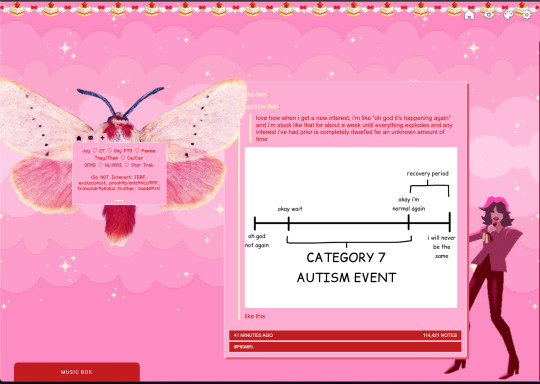
i deleted the text in the drop-down navigation so it appears as a little line that is otherwise not noticeable. this type of theme, the "redux edit," used to be very popular because having a drop-down menu let you cram a bunch of links that lead to sub-pages on your blog. i've done away with my sub-pages, but i still like the format of the "redux style" tumblr theme, for its minimal UI and for its customization options.
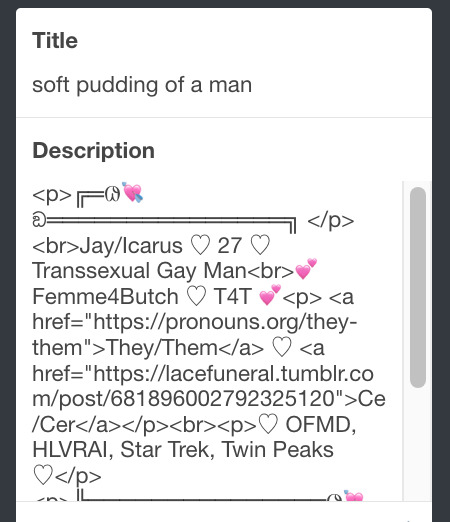
i separated my mobile description from my web description for formatting reasons. basically, most elements in tumblr themes are connected to specific text fields and toggles. i simply went to the section that was connected to my blog description and deleted it. the web description has to be manually typed inside of the CSS/HTML editor when i want to change it. whereas my mobile description is whatever i type in the "description" box of the normal tumblr theme editors.

i added code someone else made ("NoPo" by drannex42 on GitHub) which allows you to hide posts with certain tags on them. i did this to hide my pinned post, as it looks bad on desktop.
i replaced the tiny pagination arrows at the bottom with images that literally say "next" and "back" because the arrows were far too small/illegible. i know they aren't centered in the container i'm not sure how to fix that lol

i added a cursor

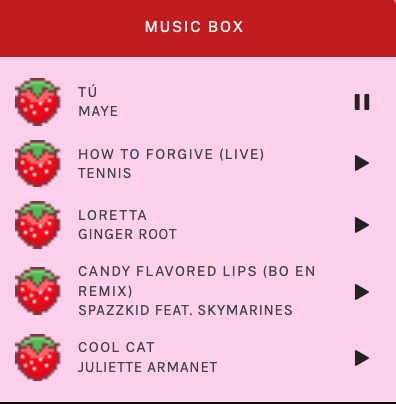
i installed a working music box ("music player #3" by glenthemes), and then added music by uploading MP3 files to discord and then using the links of those files as the audio sources. iirc i also had to make this element responsive and i aligned it so it would sit on the left side of my screen. i made the "album art" for each one the same strawberry pixel art
the moth is just a PNG i added and then moved around so it was behind my sidebar using the options that came pre-packaged with the theme
if you want something like the strawberry shortcake decoration at the top (called "banner" in the theme) your best bet is to google "pixel divider"
theme didn't support favicon so i added that in so i could have a little heart
ALSO:
this theme is. really weird about backgrounds. any background that i have ever set for it, i've had to do weird shit in photoshop. like making the background HUGE, mirroring it, etc. - because it would crop the image weird, or there would be a gap where there was no image. idk man, it's haunted. i'm sure there's a way to fix this but i am NOT tech savvy enough. anyway, patterns are probably your best friend. and if you DO want something that isn't a pattern, it's going to take a lot of trial and error. but i love this theme so i deal with it 😭
the sidebar image and the floating image do not scale. if your image is 1000 pixels, it will display at 1000 pixels. you'll either have to edit the code so that the theme scales the image for you, or resize any images before you add them
my white whale of theme editing (aside from the Weird Background thing) is that i cannot get infinite scrolling to work. i have tried every code out there. all of them break my theme. it makes me sad because like. i have music there for a reason. the idea is that people would listen to it while they scroll. unfortunately, the way it's set up now, the music will stop every time someone clicks "next" or "back" 💀
anyway sorry for rambling but i hope you enjoy the the theme and customizing it in the way that you want to!
24 notes
·
View notes
Text
And now all the search engines are being replaced by AI. I have spent twenty years trying to talk people to go to libraries and check their beliefs against records, and now we face a future without libraries and endless artificially generated idiocy.

There was an argument in the Australian Parliament when Julia Gillard was PM. She accused her opponent of being a misogynist. He pointed out it was a fact that he was not. So the next day the dictionary was edited to 'correct' it, to align with her opinion of what it should be, so she could now label him a misogynist and pretend her definition had always been true.

The trouble with manually removing AI from windows is MS can undo your changes at any time.
Completely remove Microsoft Bing Chat AI from your Windows 11 PC and sidebar.
Open the PowerShell application with administrator privileges. You can do this by searching for "PowerShell" in the Start menu, right-clicking on the result, and selecting "Run as Administrator."
In the PowerShell window, type the following command and press Enter:
Get-AppxPackage bing | Remove-AppxPackage
Wait for the command to execute. This command will uninstall any app packages related to Bing, including the Bing Chat AI. Once it completes, the Bing Chat AI should be removed from your Windows 11 PC.
To remove the Bing Chat AI integration in the Taskbar search, you can disable it using the steps below:
Open the Settings app in Windows 11. You can do this by pressing the Windows key, searching for "Settings," and selecting the "Settings" app.
Click on "Privacy & Security" in the left sidebar.
Under the "Windows permissions" section, click on "Search permissions."
In the "More settings" section, toggle off the "Show Search highlights" option. This will disable the Bing Chat AI integration in the Taskbar search.
After following these steps, the Bing Chat AI should be removed from the Taskbar search and the search home interface in Windows 11.
(This did not disable it but did disable the AI use of the search results in Windows 11 See the next step below to also disable the physical button integration.
Do both steps.)
Manual removal by component:
Page 2: Remove Bing Chat integrated into Microsoft Edge Explorer:
Disclaimer: If you are not comfortable using the registry editor, stop here. If you’re unfamiliar and willing to try anyway, the simplest way to look at this is a set of folders. Each has a parent folder; each folder can contain files. The view is like the windows explorer expanding directories with different naming conventions. It’s rather complicated but simplistic in nature.
How to remove the Bing Chat integration from Microsoft Edge Explorer on Windows, first follow the instructions provided in the first source mentioned:
((Silly AI, Step 1: Back up the registry: Select the folder HKEY_LOCAL_MACHINE\SOFTWARE\ click on the menu bar file, select export, select the destination for the backup file and name the file then save it.))
Open Registry Editor on your PC.
Navigate to the following location: HKEY_LOCAL_MACHINE\SOFTWARE\Policies\Microsoft.
If the “Edge.” Folder exists go to step 5.
Right-click inside the Microsoft folder and choose New, then Key.
Name the new Key (folder) as "Edge".
Right-click inside the Edge folder and select New, then DWORD (32-bit value).
Name the new DWORD as "HubsSidebarEnabled".
Right-click on HubsSidebarEnabled and click Modify.
Ensure the Value data is set to 0.
That's all the work in the Registry. Next, open Microsoft Edge and enter "edge://policy" in the address bar.
Click on the "Reload Policies" button, and the Bing Chat button will now disappear from the Microsoft Edge Explorer window.
These steps should help you remove the Bing Chat button from your Microsoft Edge Explorer window.
Please note that modifying the registry can have unintended consequences if not done correctly, so it's essential to be cautious and comfortable with the process. Additionally, it's always a good idea to back up your registry or create a system restore point before making any changes.
Page 3: Remove Bing from the Windows Start Bar.
If "Show Search highlights" setting was already disabled, and the Bing Chat button is still visible on your start menu bar. Here's an alternative method you can try to remove the Bing Chat button:
((Silly AI, Step 1: Back up the registry: Select the folder HKEY_CURRENT_USER\Software\ click on the menu bar file, select export, select the destination for the backup file and name the file then save it.))
Open the Registry Editor by searching for "Registry" in the Start Menu and selecting the "Registry Editor" app.
Navigate to the following location in the Registry Editor: HKEY_CURRENT_USER\Software\Policies\Microsoft\Windows\Explorer
If this folder does not exist, you can create it manually by right-clicking on the parent folder “Windows” and selecting "New" > "Key." Then, name the new key "Explorer" as instructed inside the 'HKEY_CURRENT_USER\Software\Policies\Microsoft\Windows\' directory.
Right-click on the "Explorer" folder, choose "New," and then select "DWORD (32-bit) Value" from the context menu.
Name the new DWORD value as "DisableSearchBoxSuggestions" (without quotes) and press Enter.
Double-click on the "DisableSearchBoxSuggestions" value you just created and set its value data to "1."
Click "OK" to save the changes.
Restart your computer for the changes to take effect.
After restarting, the Bing Chat button should be removed from the start menu bar. If you want to re-enable it in the future, you can return to the Registry Editor and change the value of "DisableSearchBoxSuggestions" to "0" or simply delete the DWORD value.


108K notes
·
View notes
Text
SIDEKICK [CODE] [PREVIEW]
FEATURES: - right sidebar - customizable colors - 2 column NPF posts - toggle options for dark/light controls, caption, pagination/infinite scroll, hide/show sidebar image/blog title/description! - back to top arrow - 5 custom dropdown menu navigation links
1 note
·
View note
Text
How to Use This Blog

Hello! Thanks for checking out my transition blog. I have this page set up in a way that's super easy to navigate. Let me break it down for you:
From the home page, navigate to newer posts on the blog by clicking "no" in the box on the left below the side bar that says "Do you wish to continue?"
Navigate to older posts on the blog by clicking "yes" in the box on the left that says "Do you wish to continue?"
Toggle between viewing my bio and viewing the links in the sidebar by clicking the icon in the top right corner of the box on the left beneath where it says "Unbinding Isaac"
Pressing the person icon will show my bio Pressing the three horizontal lines will open the menu to show the links and pages in the side bar
Click the link in the side bar menu on the left that says "archive" to see a list of my posts and navigate to any post of your choosing
Click the link in the side bar menu on the left that says "my transition timeline" to view a collection of pictures and videos documenting my transition in more depth
Click the following links in the side bar menu to the left to learn about different phases of my transition
-pre-transition -the realization -coming out -starting t -1st year on t -subsequent years on t
If you're on mobile instead of web, then idk what to tell you lmao.
Have fun! I hope you learn a lot :)

0 notes
Text
30 Windows 11 Tips and Tricks You Need to Know

30 Windows 11 Tips and Tricks You Need to Know.With the release of Windows 11, Microsoft introduces a fresh and modern operating system designed to enhance productivity, streamline workflows, and provide a seamless user experience. Whether you're upgrading from Windows 10 or transitioning from another operating system, mastering Windows 11 can unlock a wealth of features and capabilities that empower you to work smarter and more efficiently. In this guide, we'll explore 30 tips and tricks to help you make the most of Windows 11, from customizing the interface to optimizing performance and utilizing productivity-enhancing features. - Start Menu Customization: - Pinning Apps: Customize your Start Menu by pinning frequently used apps for quick access. - Rearranging Tiles: Arrange and resize Start Menu tiles to prioritize your most important apps and utilities. - Live Tiles: Enable Live Tiles to receive real-time updates and notifications from your favorite apps directly on the Start Menu. - Taskbar Tweaks: - Center Alignment: Customize the taskbar layout by centering app icons for a cleaner and more modern look. - Taskbar Settings: Right-click on the taskbar to access settings and customize taskbar behaviors, such as hiding or showing labels, and adjusting icon sizes. - Virtual Desktops: - Multi-Tasking: Utilize virtual desktops to organize and multitask more efficiently by grouping related apps and windows on separate desktops. - Keyboard Shortcuts: Use keyboard shortcuts like Windows key + Tab to switch between virtual desktops seamlessly. - Snap Layouts and Snap Groups: - Snap Layouts: Take advantage of Snap Layouts to quickly arrange and resize windows into predefined layouts for optimal multitasking. - Snap Groups: Create Snap Groups to save and recall window arrangements, making it easy to resume work where you left off. - Widgets: - Personalized Feeds: Customize the Widgets feed with personalized news, weather, calendar events, and other information relevant to you. - Glanceable Information: Access glanceable information and updates without interrupting your workflow by swiping in from the left side of the screen to reveal the Widgets pane. - Microsoft Edge Enhancements: - Tab Groups: Organize your browsing experience with Tab Groups in Microsoft Edge to group related tabs together for easier navigation and management. - Vertical Tabs: Maximize screen real estate and streamline tab management by using Vertical Tabs to display tabs in a vertical sidebar. - Desktop Background and Themes: - Personalization Options: Customize your desktop background, accent colors, and system themes to reflect your personal style and preferences. - Dynamic Backgrounds: Enable dynamic backgrounds to automatically change based on the time of day or your location for a fresh and immersive experience. - Focus Assist: - Distraction-Free Work: Activate Focus Assist to minimize distractions and interruptions by temporarily suppressing notifications and alerts during designated work periods. - Priority Contacts: Customize Focus Assist settings to allow notifications from priority contacts or apps to ensure important messages are not missed. - Quick Settings and Control Center: - Centralized Controls: Access essential system settings and controls from the Quick Settings menu and Control Center for convenient one-click access. - Customization Options: Customize Quick Settings tiles and Control Center toggles to include your most frequently used settings for quick and easy access. - Search Enhancements: - Integrated Search: Use the integrated search bar in the taskbar to quickly search for files, apps, settings, and web content directly from your desktop. - Enhanced Results: Enjoy faster and more accurate search results with integrated web search capabilities powered by Microsoft Bing. - Keyboard Shortcuts: - Efficiency Boost: Familiarize yourself with essential keyboard shortcuts such as Windows key + D to quickly minimize or restore all open windows, or Windows key + L to lock your device instantly. - Productivity Tools: Explore additional keyboard shortcuts for common tasks such as copy, paste, undo, and switching between open windows to streamline your workflow. - Microsoft Store Updates: - Redesigned Store: Explore the redesigned Microsoft Store with a focus on curated content, improved search functionality, and enhanced app discovery. - Android Apps Integration: Access a vast library of Android apps directly from the Microsoft Store, seamlessly integrated into the Windows 11 ecosystem. - Game Mode Optimization: - Gaming Performance: Activate Game Mode to optimize system resources and prioritize gaming performance for a smoother and more responsive gaming experience. - AutoHDR Support: Take advantage of AutoHDR support to enhance gaming visuals by automatically applying high dynamic range (HDR) rendering to compatible games. - Touchscreen Gestures: - Touchscreen Navigation: If you're using a touchscreen device, leverage gestures like swipe from the top to access app commands, swipe from the left to switch between apps, and pinch to zoom for intuitive navigation. - Virtual Keyboard: Enable the virtual keyboard for touch input when using devices in tablet mode or when a physical keyboard is not available. - File Explorer Enhancements: - Fluent Design: Experience a refreshed and modernized File Explorer interface with Fluent Design elements and improved navigation. - Integrated Search: Use the integrated search bar in File Explorer to quickly locate files and folders across your local storage and connected devices. - Clipboard History: - Multi-Clipboard Support: Access Clipboard History to view and paste previously copied items, enabling seamless multitasking and productivity. - Sync Across Devices: Sync Clipboard History across multiple devices linked to your Microsoft account for easy access to copied content wherever you go. - Accessibility Features: - Ease of Access: Explore built-in accessibility features such as Magnifier, Narrator, and Speech Recognition to customize your Windows 11 experience and make it more accessible for users with diverse needs. - High Contrast Mode: Enable High Contrast Mode to improve visibility and readability by adjusting color contrast and reducing eye strain. - Custom Keyboard Shortcuts: - User-defined Shortcuts: Create custom keyboard shortcuts for launching apps, opening folders, or executing specific commands to streamline repetitive tasks and workflows. - Accessibility Shortcuts: Customize accessibility shortcuts to quickly toggle features such as Narrator, Magnifier, or Sticky Keys for enhanced accessibility. - Taskbar Personalization: - Taskbar Alignment: Customize the alignment of the taskbar by choosing between center, left, or right alignment options to suit your preferences and workflow. - Taskbar Transparency: Adjust the transparency level of the taskbar to achieve the desired balance between aesthetics and functionality. - OneDrive Integration: - Cloud Storage: Seamlessly integrate OneDrive into Windows 11 to access your files and folders from anywhere, on any device, with automatic syncing and backup capabilities. - File On-Demand: Enable File On-Demand to access files stored in OneDrive without consuming local storage space, preserving device resources and ensuring data availability. - Power and Battery Settings: - Power Management: Optimize power and battery settings to maximize device performance and battery life, with options to customize power plans, adjust screen brightness, and configure sleep settings. - Battery Saver Mode: Enable Battery Saver mode to conserve battery life by reducing background activity, adjusting display brightness, and optimizing system resources when the battery is running low. - System Restore and Recovery: - Backup and Restore: Set up system restore points and backup solutions to protect your data and restore your system to a previous state in the event of a critical error or system failure. - Recovery Options: Familiarize yourself with recovery options such as Reset this PC, System Restore, and Advanced Startup to troubleshoot and resolve system issues efficiently. - Notification Management: - Focus Assist: Customize Focus Assist settings to minimize distractions and interruptions by suppressing notifications during specific hours or when presenting or gaming. - Notification Prioritization: Prioritize notifications from essential apps and contacts to ensure important messages are not missed, while silencing or filtering less critical notifications. - Privacy Settings: - Data Privacy: Review and customize privacy settings to control data collection and sharing preferences, including location, camera, microphone, and app permissions. - Privacy Dashboard: Use the Privacy Dashboard to monitor and manage your privacy settings across various Microsoft services and devices for enhanced data protection and transparency. - Network and Connectivity Settings: - Wi-Fi Optimization: Optimize Wi-Fi settings to prioritize network connections, manage known networks, and troubleshoot connectivity issues for a seamless internet experience. - Mobile Hotspot: Turn your Windows 11 device into a mobile hotspot to share your internet connection with other devices, such as smartphones, tablets, or laptops, when Wi-Fi is unavailable. - Troubleshooting Tools: - Problem Steps Recorder: Use the Problem Steps Recorder to record and document steps leading up to an issue or error, making it easier to troubleshoot and resolve technical problems. - Performance Monitor: Monitor system performance and resource usage with the Performance Monitor tool, allowing you to identify and address performance bottlenecks and optimize system efficiency. - Sync Settings Across Devices: - Microsoft Account Sync: Sync settings, preferences, and app configurations across multiple Windows 11 devices linked to your Microsoft account for a consistent and personalized user experience. - Sync Timeline: Enable Timeline sync to access your recent activities and open documents across all your devices, allowing you to pick up where you left off seamlessly. - Remote Desktop Access: - Remote Desktop Connection: Set up and configure Remote Desktop to access and control your Windows 11 device remotely from another computer or mobile device, enabling remote work and troubleshooting. - Secure Authentication: Ensure secure authentication and access control by configuring Remote Desktop settings to require password authentication or use Windows Hello biometric authentication. - Multilingual Support: - Language Settings: Customize language and keyboard settings to support multiple languages and input methods, allowing you to switch between languages seamlessly for multilingual communication and typing. - Language Packs: Install additional language packs to expand language support and enable spell checking, autocorrect, and language-specific features for different regions and locales. - Stay Up to Date: - Automatic Updates: Enable automatic updates to ensure your Windows 11 device stays up to date with the latest security patches, feature updates, and performance improvements, enhancing stability and security. - Windows Insider Program: Join the Windows Insider Program to gain early access to preview builds and upcoming features, providing valuable feedback to shape the future of Windows 11. Conclusion: Mastering Windows 11 unlocks a world of possibilities, empowering you to work smarter, stay organized, and unleash your creativity with a range of productivity-enhancing features and tools. By implementing these tips and tricks, you can optimize your Windows 11 experience, streamline your workflows, and unlock the full potential of Microsoft's latest operating system. Whether you're a seasoned Windows user or new to the platform, these tips will help you navigate Windows 11 with confidence and efficiency, ensuring a seamless and enjoyable computing experience. Read the full article
0 notes
Text
where is opera vpn
🔒🌍✨ Get 3 Months FREE VPN - Secure & Private Internet Access Worldwide! Click Here ✨🌍🔒
where is opera vpn
Opera VPN download location
When it comes to downloading Opera VPN, many users might be wondering where to find the download location for this popular virtual private network service. Opera VPN is a free and easy-to-use tool that allows users to browse the internet securely and privately, by masking their IP address and encrypting their online activity.
To download Opera VPN, you can easily find the download location on the official Opera website. Simply visit the website and navigate to the products section, where you will find the Opera VPN listed among their various products and services. Click on the Opera VPN option, and you will be directed to the download page where you can choose the version suitable for your device's operating system.
Opera VPN is available for download on multiple platforms, including Windows, Mac, iOS, and Android devices. This makes it convenient for users to secure their online activities across different devices and operating systems. Once you have selected the appropriate version for your device, simply click on the download button and follow the on-screen instructions to complete the installation process.
By downloading Opera VPN, users can enjoy a safer and more private browsing experience, whether they are accessing the internet on their desktop, laptop, or mobile devices. With its user-friendly interface and robust security features, Opera VPN is a popular choice for individuals looking to enhance their online privacy and security.
How to access Opera VPN
To access Opera VPN, follow these easy steps to enhance your online privacy and security. First, ensure you have the latest version of the Opera browser installed on your device. Opera VPN is available on both mobile and desktop versions of the browser.
To activate the VPN in the desktop version of Opera, click on the Easy Setup icon located on the left side of the address bar. In the Easy Setup menu, toggle on the VPN option. This will enable the VPN and display the virtual location you are connected to.
If you are using the mobile version of Opera, tap on the Opera logo at the bottom of the screen to access the settings menu. From there, select the VPN option and toggle it on to activate the VPN service on your mobile device.
Opera VPN offers several virtual locations to choose from, allowing you to mask your actual IP address and browse the internet securely and anonymously. Whether you want to access geo-blocked content or simply encrypt your connection on public Wi-Fi networks, Opera VPN provides a reliable solution.
Remember that while Opera VPN is a great tool for enhancing your online privacy, it is not a substitute for a full-fledged VPN service. For maximum security and privacy, consider investing in a premium VPN service that offers advanced features and robust encryption protocols.
By following these simple steps, you can easily access Opera VPN and enjoy a more secure and private browsing experience.
Opera VPN setup process
Setting up Opera VPN is a straightforward process that enables users to enhance their online privacy and security. Opera, a popular web browser, offers a built-in VPN feature that allows users to browse the internet securely and access geo-restricted content.
To begin the Opera VPN setup process, follow these simple steps:
Open Opera Browser: Launch the Opera browser on your device. Ensure that you have the latest version installed to access the VPN feature.
Access Settings: Click on the Opera menu located at the top-left corner of the browser window. From the dropdown menu, select "Settings."
Navigate to Privacy & Security: Within the Settings menu, locate and click on "Privacy & Security" in the sidebar.
Enable VPN: Scroll down until you find the "VPN" section. Toggle the switch to enable the VPN feature. Once enabled, the VPN icon will appear in the browser's address bar.
Choose Virtual Location: Click on the VPN icon in the address bar to open the VPN settings. Here, you can choose the virtual location you want to connect to. Opera offers several server locations worldwide.
Connect to VPN: After selecting your desired virtual location, simply click on the "Connect" button to establish a secure VPN connection. Once connected, your IP address will be masked, and your online activities will be encrypted.
Verify Connection: To ensure that the VPN is working correctly, you can visit a website to check your IP address. It should display the virtual location you selected earlier.
By following these steps, you can easily set up Opera VPN and enjoy a safer and more private browsing experience. Remember to disconnect the VPN when not needed to maximize browsing speed.
Troubleshooting Opera VPN connection
Experiencing issues with your Opera VPN connection can be frustrating, but fear not, as troubleshooting common problems can often resolve the issue swiftly. Here are some steps to help you get back online securely:
Check your Internet Connection: Ensure that your internet connection is stable and working correctly. A weak or fluctuating connection can cause VPN disruptions.
Restart Opera Browser: Sometimes, simply restarting the Opera browser can resolve minor glitches. Close the browser completely and relaunch it to see if the VPN reconnects.
Try Different VPN Servers: Opera VPN offers multiple server locations. Switching to a different server may help if the one you're currently connected to is experiencing issues. To do this, open Opera settings, navigate to the Privacy & security section, and select the VPN option. From there, you can choose a different virtual location.
Clear Browser Cache and Cookies: Accumulated cache and cookies can sometimes interfere with VPN connections. Clearing them from your browser settings may help. Go to Settings > Privacy & security > Clear browsing data, and select the appropriate options.
Update Opera Browser: Ensure that you're using the latest version of the Opera browser. Updates often include bug fixes and performance improvements that could resolve VPN connectivity issues.
Disable Firewall or Antivirus: Sometimes, third-party firewall or antivirus software can block VPN connections. Temporarily disabling them can help diagnose the issue.
Contact Opera Support: If none of the above steps resolve the problem, reaching out to Opera's support team for further assistance is advisable. They can provide personalized troubleshooting steps or investigate potential server issues.
By following these troubleshooting tips, you can quickly diagnose and resolve most Opera VPN connection problems, ensuring a smooth and secure browsing experience.
Opera VPN features and benefits
Opera VPN is a virtual private network service offered by the popular web browser, Opera. This VPN service comes with several features and benefits that cater to the needs of users looking to enhance their online privacy and security.
One of the key features of Opera VPN is its ability to encrypt the user's internet connection, providing a secure pathway for transmitting data. This encryption helps protect sensitive information, such as passwords and credit card details, from potential hackers or cybercriminals.
Another notable feature of Opera VPN is its ability to bypass geo-restrictions and access content that may be blocked in certain regions. By connecting to servers in different countries, users can enjoy unrestricted access to websites and services that may otherwise be unavailable to them.
Opera VPN also offers fast and reliable connection speeds, ensuring a seamless browsing experience without compromising on security. This makes it ideal for streaming content, online gaming, or conducting business activities that require a stable internet connection.
In addition to these features, Opera VPN is user-friendly and easy to set up, making it accessible to users of all technical levels. The service is also available across multiple devices, including desktop computers, smartphones, and tablets, allowing users to secure their online activities on the go.
Overall, Opera VPN provides a comprehensive solution for those seeking to enhance their online privacy and security. With its encryption capabilities, geo-unblocking features, fast connection speeds, and user-friendly interface, Opera VPN stands out as a reliable option for safeguarding your internet activities.
0 notes
Text
How to Use a Cricut to Make Shirts: A Step-by-Step Tutorial
Hey! Do you know how to use a Cricut to make shirts? When I say Cricut, I mean Cricut Design Space and cutting machine. Yes, the term ‘Cricut’ is related to both of them. Design Space is a design software that provides us with a platform to create unique designs, and a cutting machine is a tool that cuts out your design.
Here are two questions that arise in my mind. The first is how to use the Cricut Design app to create a design, and the second is how to use a Cricut cutting machine to cut designs. In this blog, I will answer both questions individually. so, get your Cricut machine and install the Design Space on your computer or mobile phone. And then, let’s learn how to make custom shirts using Cricut. Now, let’s delve into this blog!
What Cricut Tools and Materials Do You Need for Your Craft?
Before I teach you how to use a Cricut to make shirts, let’s learn about the supplies I use to make shirts on Cricut. I have provided some of the best and most basic tools or materials you must use while working on the shirt project.
Here are the supplies I used in my Cricut project:
● Cricut Explore 3
● EasyPress Mat
● Cricut EasyPress 2
● Material Trimmer
● Smart Iron-On, White
● T-Shirt Blank
● Weeding Tool
How to Use Cricut Design Space to Create a Shirt Design?
First of all, I will teach you how to use Design Space for creating a design. To make it easier for you, I will show you how to create a design from scratch. Don’t worry; the design is going to be very simple, as I will be adding the text-based design only.
Let’s get started!
First of all, you will need to open a Design Space on your computer.
Then, go to the My Project (shown in the picture below)option to start a new project.
Afterward, move to Canvas and navigate tothe Text (on the left sidebar) menu to add the text.
Now, you will need to add the text that you like.
You can also change the font of your text. For this, you just need to click on the Dropdown menu from the top screen saying Font.
Hence, choose the font you like. Here, I have chosen Trade Gothic LTD Bold for my T-shirt project
But here I am, not just adding the text but also curving it. So, if you want to curve your text, select the text first and then hit the Curve option from the top of the screen.
Once you are done with your design, you have to press the Make It button to begin cutting. But wait!
Have you mirrored your design? If not, you can simply turn the Mirror toggle button on. Once done, move to the next section, where you will use a Cricut machine to cut the design on iron-on vinyl.
How to Use a Cricut to Make Shirts?
Here comes the exciting part in which I will walk you through each step to cut design on HTV material. To cut the vinyl design on Cricut, follow the following instructions:
Make sure you have selected your compatible materials on Design Space.
Now, place your vinyl on the cutting mat. Use the brayer tool to ensure the vinyl is properly adhered to the mat.
After that, load the mat into your Cricut cutting machine.
Next, you need to press a Flashing Arrow button on your machine to start cutting. Once the cutting is done, you have to unload your mat.
Then, start weeding your design.
Afterward, you must place the shirt on an EasyPress mat and preheat it using Cricut EasyPress 2.
After preheating, place the weeded vinyl on a shirt and press the Heat Press with the recommended timing and pressure.
Finally, here you have learned how to use a Cricut to make shirts by creating a simple project.
FAQs
Question 1: What types of shirts should I use for Cricut?
Answer: If you use a Cricut iron-on, you can’t transfer your iron-on vinyl to any shirt. For this, you will need a shirt made of 100% cotton or polyester—however, a combination of 50% cotton and 50% polyester will also be suitable. Therefore, whenever you are going to add your vinyl design to your blank shirt, you must use a high-quality blank shirt. Using a good quality shirt will ensure the smooth transformation of your shirts.
Question 2: Can I use Cricut vinyl on shirts?
Answer: Yes, absolutely, you can use the vinyl on shirts. In fact, Cricut machines are very compatible and cut the vinyl smoothly without any interruption. In simpler terms, all the cutting machines are compatible with cutting the vinyl. So you can easily cut the vinyl on the T-shirts. The Cricut Maker 3 machine is one such machine that can cut over 300+ materials easily in one go, including vinyl.
Question 3: How long does permanent vinyl last on fabric?
Answer: If you use permanent vinyl on your fabric or clothes, it will last up to 5 to 15 years. It also depends on what type of brand you are using for your vinyl. However, many other crafters recommend using heat transfer vinyl (HTV), which is thin and durable. In addition, it is easily stretchable, making it ideal for your fabrics.
Conclusion
Now, you might have understood how to use a Cricut to makeshirts with this step-by-step tutorial. In this blog, I have added the essential supplies needed for this project. Moreover, I have divided the whole tutorial into two sections. In the first section, I explain how to create a design on Design Space. Meanwhile, the second section is all about placing the vinyl on a cutting mat and cutting it on your Cricut. That’s all in this blog. Good luck with your project!
Source Url : How to Use a Cricut to Make Shirts
#designcricutcomsetup#cricutcom#cricutcomsetup#cricutdesignspacedownload#cricutdesignspace#cricut design space
0 notes
Text
Creating Custom Taxonomies Using the ACF Plugin: A Step-by-Step Guide

Taxonomies play a crucial role in organizing and categorizing content on your website. Luckily, with the ACF plugin, you have the ability to create and assign custom taxonomies to any post type. In this blog post, we will walk you through the process of creating a custom taxonomy in ACF, assigning a custom field group to it, and importing values for your taxonomy.
The Importance of Custom Taxonomies
Before we dive into the steps for creating custom taxonomies with the ACF plugin, let’s take a moment to understand why custom taxonomies are valuable for your website. While WordPress offers built-in taxonomies like categories and tags, these might not always align with your specific requirements.
In such cases, custom taxonomies allow you to classify your content in a way that better suits your needs. They provide a structured organization system and offer flexibility in categorizing your content based on your unique requirements.
How to Create Custom Taxonomies
To begin creating custom taxonomies with ACF, make sure you have the plugin installed on your website. Once installed, you will see the ACF menu listed in the sidebar. Follow the steps below to get started:
Navigate to ACF >> Taxonomies and click on “Add New.” This will take you to the “Add New Taxonomy” page.
Fill in the required fields to configure the basic settings. Provide the plural label, singular label, and taxonomy key. The taxonomy key field is automatically generated based on the singular label, but you can edit it if desired.
From the “Post Types” field, select the post types to which you want to assign this custom taxonomy. You can choose multiple post types.
By default, the taxonomy will be visible on the front end. If you want the taxonomy to have hierarchical descendants, enable the “Hierarchical” toggle button.
Additional Settings Configuration
ACF simplifies the configuration process with additional settings that you can access by toggling the bar. Here’s a brief overview of the available tabs:
General: Enable the “Sort Terms” option to sort the taxonomy terms. If you have the default term enabled, provide the term name (mandatory), term slug, and term description. You can also provide a general description for the taxonomy. The “Active” toggle is enabled by default, but you can deactivate the taxonomy without deleting it.
Labels: Define the labels for the taxonomy, which will be used throughout the admin dashboard. The labels are automatically generated based on the singular and plural labels you configured in the basic settings, but you can edit them if necessary.
Visibility: Control the visibility of the taxonomies on the front and admin dashboards.
URLs, Permissions, and REST API: These settings are preconfigured, but you can make changes based on your specific needs. For more detailed information, refer to the ACF official documentation on Custom Taxonomy.
Once you have configured the settings, click “Save Changes” to save the custom taxonomy in ACF.
Adding Values to Custom Taxonomies
There are multiple ways to add values to a custom taxonomy. One option is to visit the “Add New” or “Edit” page of any record in the post type to which you assigned the custom taxonomy. You will find the custom taxonomy listed as a submenu below the post type’s sub-menus. For instance, if you assigned “CTax1” to the “Posts” post type, you will find a “Ctax1” submenu listed below the “Posts” sub-menus. From there, you can create custom taxonomies.
Assigning Custom Fields to Custom Taxonomies
You can also assign a custom field group to your custom taxonomy. To do this, follow these steps
Go to ACF >> Field Groups and click on “Add New.”
Provide a title for your field group.
Add field types by selecting them from the dropdown menu. Enter the field label, field name, and default value.
In the “Settings” section, choose “Taxonomy” >> “is equal to” >> “your_taxonomy” from the dropdown menus.
Click “Save Changes.”
Now, the custom fields you created will be assigned to your custom taxonomy, enhancing the flexibility and functionality of your website.
Conclusion
Creating custom taxonomies with the ACF plugin allows you to organize and categorize your website’s content according to your specific needs. By following the steps outlined in this guide, you can create custom taxonomies, assign field groups, and import values, providing a structured and efficient content management system for your WordPress site. Additionally, if you want to import and export ACF Custom Taxonomy values, check out the CSV importer plugin here.
#wordpress#wordpress plugins#wordpress tutorial#cms#plugins#website development#custom post#acf#custom taxanomies#wordpresswebsite
0 notes
Photo

Toggle Sidebar Navigation HTML CSS Javascript
#sidebar nav#toggle sidebar navigation menu#navigation bar#sidenav#menu html css#html css#javascript#webdesign#frontend#frontenddevelopment#codingflicks
0 notes
Text
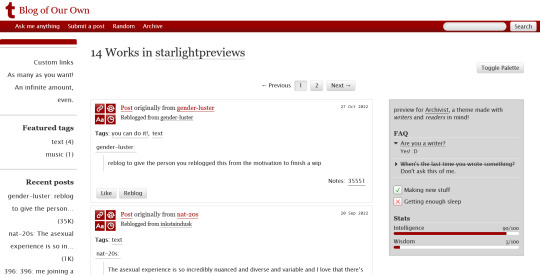
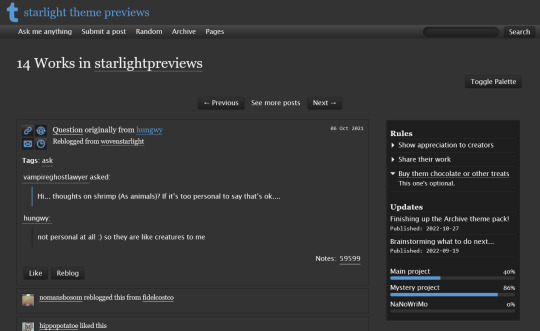


THEME PACK: THE ARCHIVE
Styled after AO3, this pack includes a theme and matching pages, and was designed for writers and readers alike.
🖋️ Theme 11: Archive Of Your Own
Live preview | Static previews: index page, permalink | Code
Full-width posts in an AO3 work index page format
Sidebars with optional sections such as featured tags, updates, rules, progress bars, and more
Unlimited custom links (display on sidebar or in top navbar), plus several social links in the footer
Add a custom logo beside/replacing your avatar
Inbuilt tag filtering plugin by glenthemes
All fields editable directly in the Customize menu, no HTML required. See below the cut for a full guide
🖋️ Page 3: Archive Records
Preview | Code
A WIP page designed to resemble an AO3 work page
Add tags for ratings, warnings, fandoms, characters, and more, as well as statistics like start dates, word counts etc.
Spaces for summary, start and end notes, and the 'work' itself
🖋️ Page 4: Archivist
Preview | Code
A combined about/navigation page based on the AO3 profile page
Include user statistics or any data you'd like, plus a longer bio
Sidebar navigation with link sections - unlimited links and link groups
The theme and pages all include options for multiple color palettes (initially set to Default and Reversi), text styling (choice of Tumblr/Google fonts and casing options), and more. -
Each page includes instructions on how to edit it, and color/image variables have been gathered together to make customization easier. While not necessary, basic knowledge of HTML is helpful.
For help, check my codes guide, or feel free to send me an ask. Theme 11 customization guide and credits are under the cut.
Theme 11 customization
Regarding the simpler fields:
"Secondary title" refers to the title just above the posts, under the header and navigation. This defaults to "[Total posts] Works in [Username]" when the field is left empty.
"Filtered tags" takes a comma-separated list of tags, entered exactly as they'd be written in the Tumblr post editor but without the hashtag. E.g. the tags #politics, #red and blue, and #green would be entered as "politics, red and blue, green" (make sure there's spaces, and no comma after the last item!). The filtering plugin will then put a warning message over any posts with those tags, along with a button letting you show the post.
"[Section] title" act as the headers for the corresponding section, if provided. "Custom links title" defaults to "Pages" if nothing is entered, and is used when the custom links are displayed on the navbar.
"Featured tags" takes a comma-separated list of tags, in the same format as Filtered tags. This field will display links to those tags, along with the number of posts in that tag on your blog, in the left sidebar.
The Recent posts section displays the 5 most recently posted/reblogged posts on your entire blog, displaying in the left sidebar. If you enter a tag under "Recent posts tag", it'll instead display the 5 most recent posts in that tag on your blog. Only 1 tag is allowed.
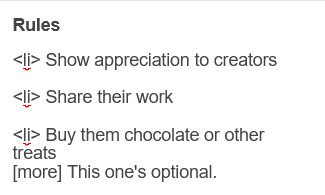
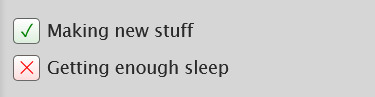
Rules and FAQ
Both these sections work the same way. Each new item, a rule or a question, consists either of one statement, or a statement and some more text, usually as an answer or additional note. E.g. the screenshot below shows three rules, where the last one has more text in the dropdown.
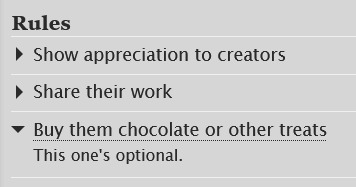
To create an item, prefix it with <li> . To add more text, create a <li> item and add a [more] label underneath, then write your extra text after that. To illustrate, here's the Customize page code for the above:
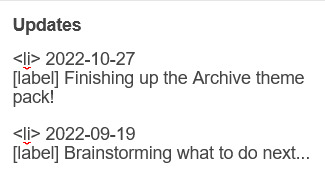
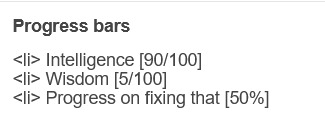
Updates
This section is similar to Rules/FAQ, though it flips the order around. After each <li>, first list the date, then add the [label] marker, then add your actual update. Again, here's an example:
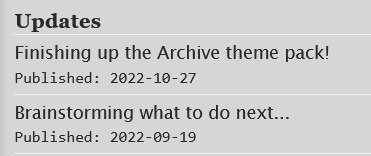
And here's the Customize page code that created that:
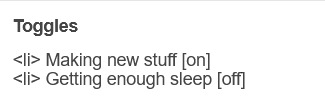
Toggles
This section displays checked/crossed-out items, and uses a simpler version of the formatting for the above sections. Use <li> for each new item, then add [on] or [off] at the end, depending on whether you want it checked or crossed off. Here's an example:
And here's the corresponding Customize code:
Progress bars
This section also uses <li> items, where each item has two parts: the text label, and the number(s) for the progress percentages, put inside square brackets like with the other sections. Here's an example (note how the top two use fraction values while the bottom one uses a percentage):
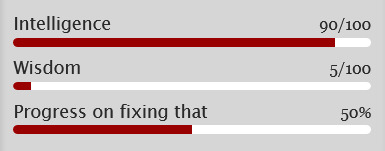
And here's the code that made these. In short, the format is <li> Text here [##/##], or <li> Text here [##%], where ## refers to any number.
Social links in footer
The footer links, aside from the email and personal website fields, take usernames or user IDs for various websites. Be sure to check you're not entering a username in a user ID field!
The Email address field takes a standard email in the format [email protected] and adds a link to let people mail that address.
The Personal website fields will generate a link in the footer's Follow section. Personal website name is the human-readable text label for the generated link, and Personal website URL is the URL that will open when the generated link is clicked. Make sure to add https:// to the start of the personal website URL so the generated link doesn't just redirect you to a different part of your blog.
Credits
Layout and design by Archive of Our Own
Style My Tooltips by malihu
Phosphor Icons
Expanded Tumblr localization and NPF photosets plugin by codematurgy
Custom audio posts by annasthms
Tag filtering by glenthemes
Palette toggle by eggdesign
Scroll to top by Fabian Lins
#code#theme#theme 11#page#page 3#page 4#coding cabin#theme hunter#free#full width#sidebar#topbar#nav text#pagination#unlimited links#header img#custom font size#tfont#gfont#unnested#responsive#npf#color mode#search#rblk buttons#timestamps#tags#group
1K notes
·
View notes
Photo
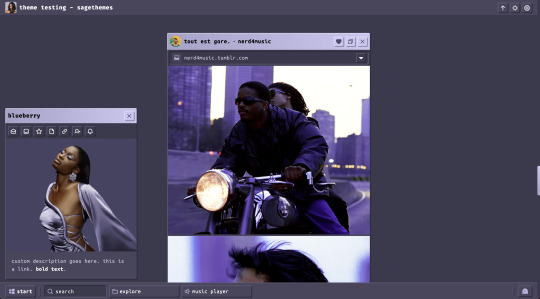
blueberry | theme by sage
get the code: $8 - static preview / version 2 as suggested, a theme inspired by windows 95/old windows versions!
features (more info below the cut):
toggle: tags on click, music player, updates, the explore menu as a whole, and explore info, explore navigate, & explore blogs
headerbar includes blog icon & name, scroll to top, day/night & tumblr controls buttons
sidebar includes links for ask, archive, follow button, updates button, & up to 3 extras, an uploadable image, and custom description
explore menu: carousel with panels for a description & image, info stats & likes/dislikes, navigation with up to 3 link sections (each with unlimited links), and blogs
customizable: blog title, description, colors, body & title fonts, and font size
responsive design, 4 corner options, 3 post margin options, phosphor icons
nothing needs to be changed in the code, everything can be changed in the customize panel!
terms:
reblog if using
do not touch the credit
view all terms / faq
credits listed in the code / credits page
please consider supporting me ♡
colors
the colors for this theme are important!! you can ofc use whatever colors you like but this is my advice for it to look right:
your background color should be slightly darker than your posts color
your shadow color should be darker than your background color, how much darker you make it is up to you but i’d recommend making it pretty visibly darker
your highlight color should be lighter than your posts color, as with the shadow i recommend making this visibly lighter
this is more general and applies to most of my themes that have a color gradient - your gradient accents should be either much lighter or much darker than your gradient colors, i usually use either white or black for the gradient text colors
footer
includes the sidebar button (start button), search bar, and explore menu & music player buttons (toggleable)
sidebar
the sidebar is always toggleable with the start button, it will disappear on its own when the screen width gets smaller but you can always toggle it back on
the sidebar includes by default links to your askbox (if it’s enabled) and archive, as well as an updates button (toggleable) and follow button
the sidebar image is uploadable and 350px x 300px
updates
includes up to 5 updates each with an icon and text
explore menu
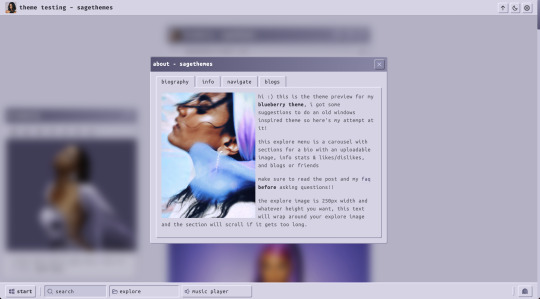
this is a carousel with sections for a bio with an uploadable image, info stats & likes/dislikes, and blogs or friends
biography panel: the explore image is 250px width and whatever height you want, the text will wrap around your explore image and the panel will scroll if it gets too long
info panel: up to 6 info stats, unlimited likes/dislikes
navigate panel: up to 3 link sections each with unlimited links
blogs panel: up to 8 blogs with blog url and some text
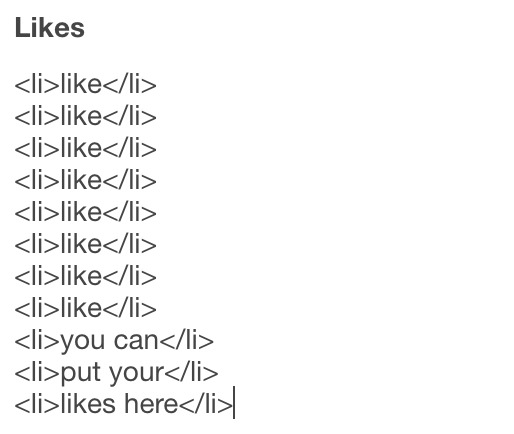
likes/dislikes section (explore menu)
leave the likes title blank if you don’t want this section
leave the dislikes title blank if you only want the likes
FORMAT FOR BOTH: <li>like dislike text here</li>
wrap each of your likes/dislikes in <li></li>, you can put as many of these as you want
this section can be used for whatever you want it doesn’t have to be likes/dislikes!
photo example of the format below
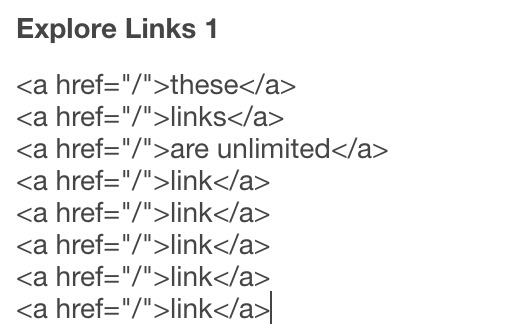
navigate section (explore menu)
leave explore links 2 title and/or explore links 3 title blank if you don’t want those extra link sections
FORMAT FOR LINKS: <a href=“/linkurlhere”>link text here</a>
put as many links as you want! photo example of the format below
music player
this player uses an image link - see my faq if you have questions
uploading your song: i recommend using google drive to host your mp3 files - below is a brief explanation for how to do this but you can also see the resources provided here by glenthemes and more links on my credits page
to start you need an mp3 audio file, once you have the one you want go to google drive and click: + New ➞ File upload
select your mp3 audio file and click open
open your newly uploaded audio file in google drive and click the three dots on the top right, then click Share and under General Access change it to Anyone with the link can view
copy the sharing link provided, it will look something like this: https://drive.google.com/file/d/1pBA6KdlLEzoEZPQ6hmaSr9LGLeCQGPxz/view?usp=sharing
go to the following site and paste your sharing url in the first box provided: https://www.joelgrayson.com/drive-download-link-generator
your final product should look something like this: https://docs.google.com/uc?export=download&id=1pBA6KdlLEzoEZPQ6hmaSr9LGLeCQGPxz
make sure the music player is toggled on in the theme, paste your audio link in the Song URL field
i think that covers everything, make sure to check my faq if you still have questions!!
#tumblr themes#tumblr theme#tumblr resources#code hunter#tumblr codes#completeresources#allresources#phantom code#phantom theme#blueberry#userbru#usernik#userdre#useraashna#userbrina#tuserlucie#responsive theme#windows 95
417 notes
·
View notes
Photo
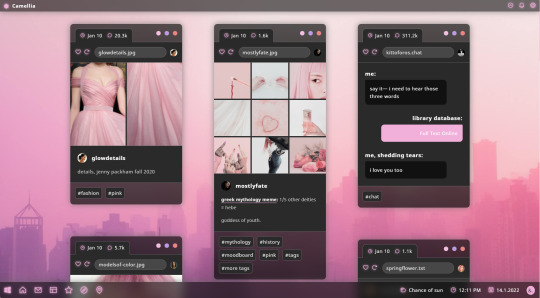
theme fourteen: camellia — a Windows 11/Mac OS mashup grid theme with a slide-out sidebar. made for codingcabin’s opposites attract challenge!
previews: grid preview, one-column preview
install: pastebin, github
features and options:
slide-out sidebar with a 500px sidebar image, space for description, extra navigation links, and a search bar
footer with space for up to three custom links, weather status, local time and date.
optional updates tab. if you don’t turn this on through the customization panel, it won’t show up.
one, two, or three columns
post sizes: 300px, 350px, 400px, 450px, 500px, 540px
optional background image
hide or show captions and tags on index page
ten body font options, font sizes from 12px to 18px, and all colours customizable.
responsive for both desktop and mobile devices
notes:
Tumblr’s customize page is very buggy and when you first install the theme, you have to toggle the toggle options on and off to get them to work properly.
the navigation section in the sidebar has space for up to five custom links and as many Tumblr page links as you want. however, to get them to show up, you need to make sure the “Menu Navigation Section” option is enabled in the customization panel.
icons are from phosphoricons; to change the icons, go to the phosphoricons site, find the name of the new icon you want, and input the name of the new icon into the relevant text fields in the customization panel.
full list of credits here.
#theme hunter#codingcabin#oppositesattractchallenge#resourcemarket#hisources#tumblr themes#themes#&themes#&blog themes#th: sidebar#th: one column#th: grid#th: side image#th: icon image#th: updates tab#th: menu#th: responsive#grid themes are really out of my comfort zone so uh. hope this works#th: background image#1k#2k
3K notes
·
View notes
Photo

Sidebar Menu Animation with Glassmorphism Effect
#frosted glass effect#css frosted glass effect#css glassmorphism#css glass morphism#animated sidebar menu#sidebar navigation menu#toggle sidebar navigation#html css menu#css menu#html css#menu html css#divinector
0 notes
Text
GHOST [CODE] [PREVIEW WITH HOVER PERMALINKS] [PREVIEW WITH BOTTOM PERMALINKS]
FEATURES: - left sidebar with image - customizable colors - 2 column 220px NPF posts - toggle options of dark/light tumblr controls, captions, pagination/infinite scroll, hover permalinks or bottom permalinks - back to top arrow - 5 custom navigation dropdown menu links
0 notes
Photo

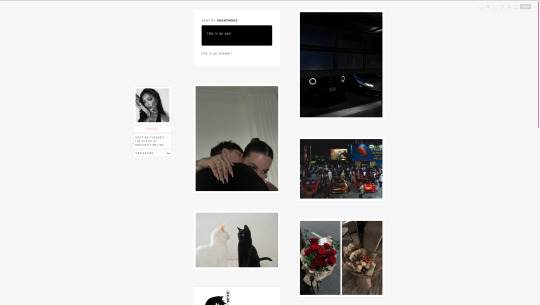
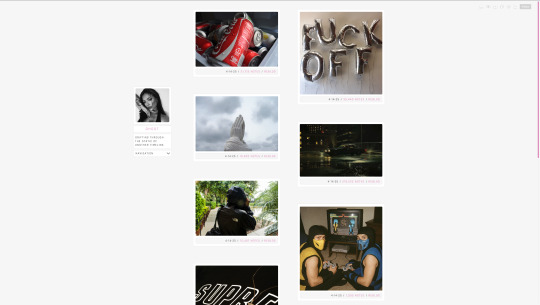
Kana — a responsive single-column sidebar or header-theme
Updated: Version 3.0.0
A single-column Tumblr theme with a toggle between a sidebar (left or right) or a header, with a Google font of your choosing. Optional dark mode and update tab included, as well as an optional accented pinned post feature. . Full support of NPF posts. You agree to my terms of use by using this theme.
Static previews: header left sidebar
Download code: GitHub
Features and notes below.
Customize colours for dark and light mode
Font-size (11-18px)
Post-width (350-540px)
Customizable post margin (set to 130px)
Custom title + description box
Photoset gutter (1-4px)
Toggle between sharp or round corners on content
Toggle between displaying or hiding Tumblr controls behind an icon
Toggle between regular or accented pinned post
Choose between displayed tags or upon a toggle
Choose to display post info as text or icons (reblog + like)
Optional sidebar icon image
Optional update tab
Optional dark/light mode
Optional search bar
Navigation: An unlimited display of native Tumblr pages - learn how they work in my FAQ here. Custom home + ask + navigate link titles. If you fill out the navigation link title text field, the links will be hidden within a dropdown menu.
Sidebar Icon: Choose a size between 40px/60px/80px, with shapes square, rounded, circle or blob. Separate icons for light and dark mode! But If you want the same icon, simply upload it twice.
Dark Mode: If you decide to offer dark mode, it detects if visitor’s operating system is on dark mode, and displays that choice at the first visit - of course with the option to toggle the other mode on/off.
Update tab: To hide an activity, delete the text in the activity field you want to hide. To change icons in either update tab, find the text field for the icon you want to change, go to https://tabler.io/icons and copy the code for the icon:
into the corresponding field:

Notes:
Via/source links are on permalink pages
to hide the archive link, simply delete the text in the field.
Submit-link and ask-link only shows if toggled on in your blog settings.
Credits
Basecode by @eggdesign ❤️
715 notes
·
View notes