#why do i have to download your tutorials.
Text
Why Sims 2 has been so broken the last ten years
This is down to my own research, and I'm not saying it is the one and only reason why the game is so broken these days, but I have some points worth mentioning.
So, you're bored one day. You remember this game you had so much fun playing a few years ago, or maybe as a child. It's The Sims 2!
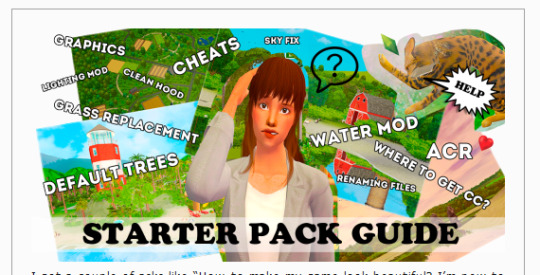
The game has a few issues than from when you last remembered playing, so you search on google for some fixes for the tiny resolution, and among the countless posts you may find, you may find this:

Or this:
(to the creators and players mentioned here this isn't me making a dig at you, i'm just pointing out some cc that could affect the game from working properly. your stuff is all beautiful :D)
Lesya's game is gorgeous!!! Oh, how can I get it to look like that?
So you, with a clean, vanilla (ugly) game you decide to download a few mods she listed, such as:
Skylines by GCKP (you can get optimised ones by me here)
Skies by Lowedeus (you can get optimised ones by me here)
Trees by Criquette (you can get optimised ones here)
No More Blurriness by Voeille (you can get optimised snow only here)
Cool! And then you notice some cheats than can give the game that open-world, interactive feel. Even better!

And you shove them into your folder and you boot up the game. Everything's going great!
Until...
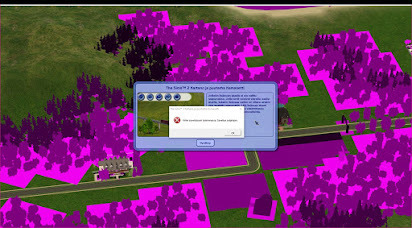
You search hundreds of posts looking for the fix. Some recommend 3rd-party tools, but they seem to make the problem worse. You reinstall, finding you only wasted your time. Something has to be causing this, but you'd never guess it'd be the mods everybody swore by.
Well, in fact, it is. Partly.
I've struggled with pink flashing since 2019, when I reinstalled Sims 2 after I got a decent computer for once. I did everything above, searched for fixes, found Lesya's blog which was my primary inspiration. It was through Lesya's guide that I was able to make my game look pretty!
These mods, which are a staple in the modding community, are beautiful indeed... but what if I told you that the reason they're so beautiful, is because they're high-quality. With textures soaring up to 4k, when, hang on--
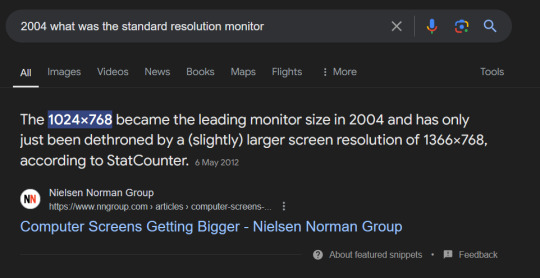
In 2004, 4k resolution was... probably unheard of. With the leading monitor size being 1024x768, what would be the point of using such huge textures on an engine that was designed for monitors of at least this size? Would you be able to see the detail of 4k on a monitor of that size? Definitely not.
The max visiting sims, okay, a little hit or miss. If your sims are all wearing high poly alpha CC, then it's a problem. If not, good luck.
Then comes the cheats I mentioned. The lot skirt cheat expands the view distance a significant amount. With the mergenhoodflora cheat, that displays more trees. Combining the two, what do you get?
A massive view distance, blinded by trees.
With skies and skylines with large textures up to 4k, and trees with textures up to 2k, The Sims 2 will collapse. It's like forcing an old man with health conditions to do 20 situps, again and again.
It'll overexert him, by the very least. And you're overexerting the game by cramming custom content that is not optimised for the engine TS2 was built on.
So please, next time you encounter the pink soup, please check your CC folders, and research changes and cheats before you put them into your game. You will enjoy the game much more if you do this, and won't encounter this problem so often.

Don't use Graphics Rules Maker
Instead, opt for a maxis original Graphics Rules uploaded here by Veronavillequiltingbee. It's essentially a rewrite of an old tutorial I made a long time ago.
Once you download the file from VVQB, open DXDIAG by pressing WinKey+R and typing 'dxdiag'.


This value I've underlined is what you need to put after seti textureMemory. Open the sgr file and do CTRL-F and input seti textureMemory.
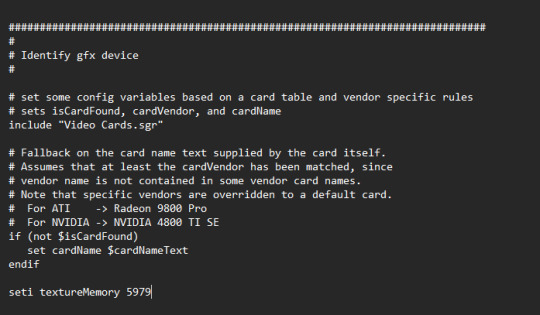
Add the value from DXDIAG and then save it.
You can use GRM for adding your GPU to the game, but I do not recommend it for anything but that.
Optimising the game... inside the game
*shoves GRM off the table*
We're going to go into TS2 in-game settings for this one.

These settings are optimal if you play CC-heavy households. It will ease the load on your game to make space for the heavy CC you have in your current household. You can tweak these when you want to take photos outside, but for playing I recommend them all to be off - especially at community lots as there are lots of sims there.

I never see anybody talking about Object Hiding.
Object Hiding hides objects from floors that aren't in view. If you're playing downstairs, objects upstairs won't be rendered, thus minimising the load on your game.
I have reflections and smooth edges off because I use ReShade.
Snow on Ground is optional. Sometimes snow can cause pink flashing, I believe it's due to texture replacements that are huge in size too, Voeille's is 2k. I've linked a resized one above.
This post will be updated with later findings. I hope you all found it informative :]
650 notes
·
View notes
Text
Three months ago me: Hmmmm I should totally make a bunch of edits of F1 drivers being cool to 'YES MOM' and use them as an excuse to learn AfterEffects.
Three months ago me: *Proceeds to do nothing about it despite thinking about it constantly*
Five hours ago me: You know what? I should totally do that 'YES MOM' edit for Lewis now. *Downloads two five minute long scene packs of Lewis*
Current me, splicing every separate clip in Premiere Pro because AfterEffects doesn't make sense: it's ok it's ok it's ok it'll all be over soon
(I am less than 2 minutes through the first pack. Please send help.)
#f1#formula 1#f1 edit#editing#i bloody hate adobe#like wyd.#why do i have to download your tutorials.#at least try to make my understnad.#mate.
1 note
·
View note
Text
It’s really fucking hysterical at this point how much I don’t know about my own drawing software.
I mean I've been using Krita for what, five years now? And I'm still learning just how much I don't fucking know about this program and its capabilities. I only discovered it has stabilizers half a year ago. I had to look up a video that showed me what dockers to enable for animation and how to use them. Not to mention the dozens of blending modes which I’m still trying to figure out what exactly they do an how to use them. This program is a marvel of engineering but I’m using like, 5% of it at most. I feel like the Doctor being scolded by River Song about improper use of the TARDIS every time I learn that there's a feature in Krita that makes what I want to do five hundred times easier and more efficient.
There's this one guy on Youtube called David Revoy that has in-depth tutorials specifically about Krita, and I have never felt this indebted to one man’s thankless work before. It’s thanks to him that I learned that something called a coloring mask is even a thing, and it has improved my life DRAMATICALLY ever since I’ve learned about it.
However I do need to watch his videos one at a time with breaks because my brain is being blown with the sheer amount of information in each one. It's just me going "wait you can do WHAT?!" every five seconds for the entirety of the 15-minute video every time.
Every time, every fucking time I’m stuck trying to painstaikingly draw something manually, and then learn about another feature Krita has that’d make the process a thousand times easier and better, it’s basically:
Every FUCKING time
#and for the record I would NOT be surprised at this point if there's a plugin that makes Krita send emails#i don't think i'll ever be able to switch to another program at this point honestly.#why learn Photoshop when I can google 'how do thing in Krita' and it turns out IT HAS THAT FEATURE I JUST DIDN'T KNOW WHERE TO FIND IT#I am fucking committed to learning the ins and outs of Krita now#I am married to this program and we have a mortgage#i am SO ANGRY about how GENUINELY AMAZING this software is#it's FREE. It's a FREE FUCKING SOFTWARE#CONSTANTLY BEING UPDATED. WITH GREAT DOCUMENTATION. IT CAN EVEN DO ANIMATION.#but you can't bloody find ANYTHING in it without a step-by-step tutorial#anyways. fuck your Adobes go download Krita instead. this has been an angry psa#krita#drawing software#digital art
43 notes
·
View notes
Text
trying to learn how to make Left4Dead mods, specifically a survivor model that I already have a model someone else made, BUT MY LORD im WAILING folks
not only am i back in the hell trenches that is a 3D modelling program (spits thinking about school) but also I cant find any good tutorials for Blender and, Kitten, I'll be honest. Daddy's about to kill himself (joke joke but also man this is the THIRD TIME trying again. first two times ended the exact same and i expect this one to end the same. stay tuned!!!)
ps if anyone has rigged up and put survivor models in l4d2 before I will literally draw you whatever you want, full color and shading, if you can put this fucking model for me on steam workshop. (not joking in the slightest, i have the model file I just need you to do the complex shit ; - ; it doesnt even have to be THAT GOOD i just want this fucker in my game)
#sucktacular sucks#saw someone on steamworkshops offering to rig pre-existing models for L4D2 for $20 and if I wasnt so painfully broke#I would have messaged them two days ago (sobbing) this shit so hard LOL#itd probably be easier if i made this damn file or if any of these tutorials actually explained why youre clicking certain buttons#cuz then it would teach me straight out how blender works but NO i gotta do my own dissecting#first tutorial i followed was going okay until they told me to download a program from before 2013 and didnt give us a cracked file for it#so one scary run in with a potential trojan later..... found a blender specific tutorial! yippe! thats free!#but then the blender tutorial is legit just a youtube video with no audio#just watching this person click random shit and then back out and then fling their cursor around more#like bro this is the worst thing to watch. like im following but this is painful#anyway that tutorial didnt help either and i wanna say its cuz of the model im using being in multiple pieces??? maybe???#lord if i fucking know...#today im seeing if i can merge all the pieces and go that route#but i think thats gonna make the model literally stiff as fuck with no eye movements cuz its uh.... a solid thing#so lets fuck around and find out and waste time :))))#im also not joking in the slightest... if youve done this before i will trade you in craft
3 notes
·
View notes
Text
Fanfiction Authors: HEADS UP
(Non-authors, please RB to signal boost to your author friends!)
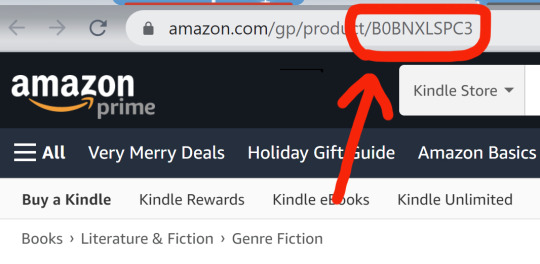
An astute reader informed me this morning that one of my fics (Children of the Future Age) had been pirated and was being sold as a novel on Amazon:
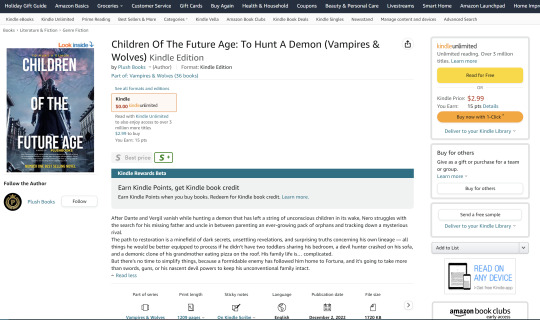
(And they weren't even creative with their cover design. If you're going to pirate something that I spent a full year of my life writing, at least give me a pretty screenshot to brag about later. Seriously.)
I promptly filed a DMCA complaint to have it removed, but I checked out the company that put it up -- Plush Books -- and it looks like A LOT of their books are pirated fic. They are by no means the only ones doing this, either -- the fact that """publishers""" can download stories from AO3 in ebook format and then reupload them to Amazon in just a few clicks makes fic piracy a common problem. There are a whole host of reasons why letting this continue is bad -- including actual legal risk to fanfiction archives -- but basically:
IF YOU ARE A FANFIC AUTHOR WITH LONG AND/OR POPULAR WORKS, PLEASE CHECK AMAZON TO SEE IF YOUR STORIES HAVE BEEN PIRATED.
You can search for your fics by title, or by text from the description (which is often just copied wholesale from AO3 as well). If you find that someone has stolen your work and is selling it as their own, you can lodge a DMCA complaint (Amazon.com/USA site; other countries have different systems). If you haven't done this before, it's easy! Here's a tutorial:
HOW TO FILE A COPYRIGHT COMPLAINT FOR STOLEN WORK ON AMAZON.COM:
First, go to this form. You'll need to be signed into your Amazon account.
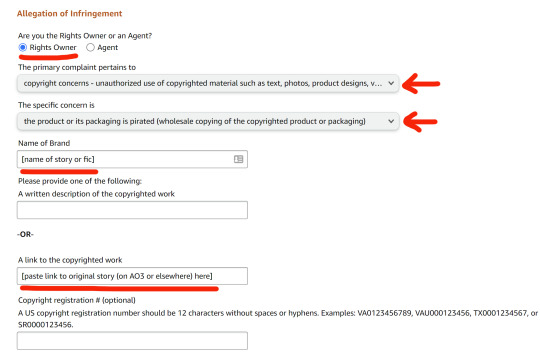
Select the radio buttons/dropdown options (shown below) to indicate that you are the legal Rights Owner, you have a copyright concern, and it is about a pirated product.
Enter the name of your story in the Name of Brand field.
In the Link to the Copyrighted Work box, enter a link to the story on AO3 or whatever site your work is posted on.
In the Additional Information box, explain that you are the author of the work and it is being sold without your permission. That's all you really need. If you want, you can include additional information that might be helpful in establishing the validity of your claim, but you don't have to go into great detail. You can simply write something like this:
I am the author of this work, which is being sold by [publisher] without my permission. I originally published this story in [date/year] on [name of site], and have provided a link to the original above. On request, I can provide documentation proving that I am the owner of the account that originally posted this story.
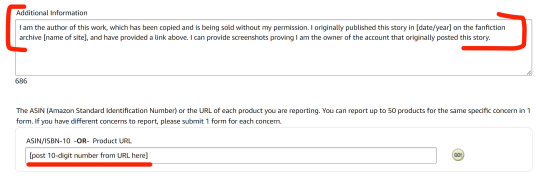
In the ASIN/ISBN-10 field, copy and paste the ID number from the pirated copy's URL. You'll find this ten-digit number in the Amazon URL after the word "product," as in the screenshot below. (If the URL extends beyond this number, you can ignore everything from the question mark on.) Once this number has been added, Amazon will pull the product information automatically and add it to the complaint form, so you can check the listing title and make sure it's correct.
Finally, add your contact information to the relevant fields, check the "I have read and accept the statements" box, and then click Submit. You should receive an email confirmation that Amazon has received the form.
Please share this information with your writer friends, keep an eye out for/report pirated works, and help us keep fanfiction free and legally protected!
NOTE: All of the above also applies to Amazon products featuring stolen artwork, etc., so fan artists should check too!
#fanfiction#ao3#piracy#dmca#pirated fanfic#please signal boost#i'm mad but also laughing that my dmc fanfic is now a 'number one best selling novel' lol#i'm also a traditionally-published author#so this is both hilarious and deeply insulting to me
87K notes
·
View notes
Text
Oh boy, I feel like it's time for a post nobody will like.
We all know clothes are getting worse. Recently I found some jeans I bought in high school, and since I lost weight recently I tried them on and they fit, so I'll be wearing them once we get out of the Hell season.
But I took them and compared them to the most recent pair of jeans I bought, and... Honestly the difference in quality is so fucking stark it made me want to give up on life. The jeans I wore in high school have gone through everything. I'm talking half of Europe here, because one of our teachers was pretty big on school trips everywhere she could get the money for. They've been washed, tumbled, survived an actual car crash and they're still good.
The most recent pair I machine-washed ONCE, everything else was hand-wash only. I babied them to the max because they made my ass look like was on Instagram. Do you know what they look like now?
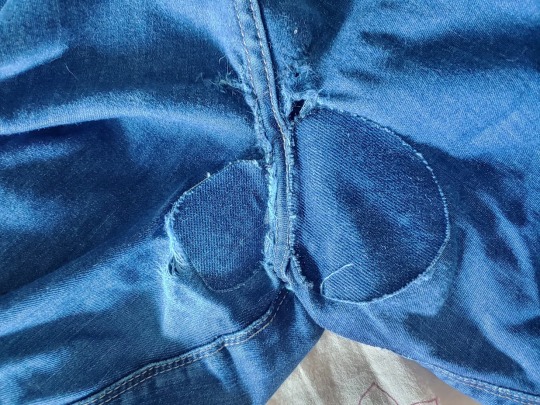
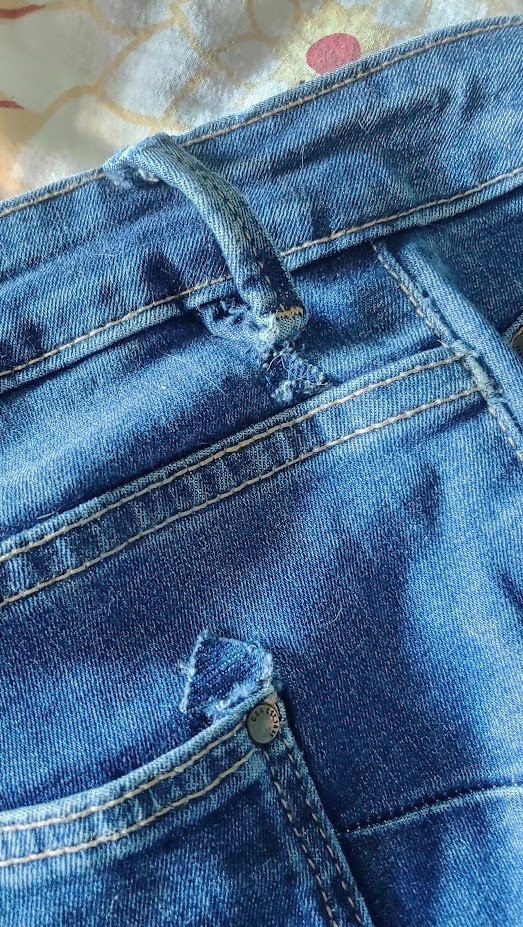
They're full of fixes like these. They lasted less than a year on their own. I got another decent year out of them SOLELY because I kept fixing them. And fixing them again. The crotch alone I had to fix SEVEN TIMES. I COUNTED.
And these weren't cheap jeans! C&A jeans tend to be around 40$ these days, and I got these for about 30 with a discount. I expected them to last me AT LEAST a few years, because those high school jeans? THEY'RE THE SAME FUCKING BRAND.
Considering this was the quality I was getting for nearly 40$ I figured I might as well get the same quality for 15$ and downloaded SHEIN. I didn't get jeans from them but I got some light, fluttery summer pants in the style that, honestly, I fucking love. I got three pairs for the price of one C&A jeans, and I am aware I will have to baby them even more, because out of the five pairs of pants in total I have bought on SHEIN only ONE is made of the fabric that I might be brave enough to machine wash. And with SHEIN continually getting sued for using sweatshops I probably won't be getting those pants again.
So what to do with that shitfuck situation?
I am insanely lucky my grandma knew how to sew really well and didn't mind me looking over her shoulder as long as I was quiet. I am aware that's not a skill everyone has, but quite frankly? When nobody has any money and even paying big bucks for clothes does not guarantee any kind of quality, and even fucking THRIFT STORES are full of just junk now, I think it's time to face the facts.
You need to learn how to sew.
I'm not talking about sewing your own clothes, though if you can and you have the time and patience, it's probably the best option (good luck finding decent fabric, because we can't even find THAT anymore unless you're ordering from fucking Belgium). I'm talking about fixing up seams and sewing on a patch, little repairs that make your clothes last. It might be junk, but with sewing you can make it last twice as long for the price of a spool of thread.
Now that I've pissed off everyone who is, for some reason, morally opposed to learning how to sew because it's a 'girly hobby' or 'supporting the patriarchy' (a take that left me baffled like nothing else) I'm going to piss off everyone who already knows how to sew.
I recommend getting this little guy.

It's called a stapler sewing machine, for obvious reasons. If I recall correctly, it was invented to fix clothes on the go for fashion shows and/or cosplay. It does only a chain stitch and needs to be pushed manually, but if you need to, like, hem your trousers and you don't want to spend half an hour on doing it manually (and don't already have an actual sewing machine) this is a lifesaver.
Here's a tutorial how it operates:
youtube
Now, why am I recommending this? Because it will only set you back six bucks. I got two right off the bat because I was banking on one not working (and I was right) and so I could use it for spare parts. The one in the video (Spring Come) is the one I have as well, and it's the one that actually works. I can't vouch for any unmarked ones, but the blue one works. It IS a little temperamental, but with a bit of practice it makes things so much easier.
The reason I'm not recommending an electric machine of any kind, even the one that costs 18$, is because, if you're a beginner, then an automatic sewing machine becomes a machine that exponentially speeds up the rate at which you make mistakes, and if it breaks down, good luck fixing it unless you have a dad/uncle/friend who knows his electronics. This thing can be fixed with a screwdriver, and takes the same needles as an ordinary sewing machine.
You can buy a bundle of needles just about anywhere for any price and they'll be decent as long as they're steel, but I would recommend looking for some actual better quality thread. Everywhere else, you can pinch pennies, but the thread itself is what's holding your clothes together, so this should be the part where you're looking for quality instead of price.
Alright, those of you who didn't scroll past with a derisive scoff at my take, I hope I've been helpful.
773 notes
·
View notes
Text
pinned post
TRANS RIGHTS!! TERFS GET THE FUCK OFF MY BLOG!!!!!!!

who are you?
i'm just a guy who likes spore [2008]
why do this?
i just really like spore and making creatures in spore. it helps me practice my creature creation abilities.
can you make my oc in spore?
as of right now i do not take requests. i generally find characters and creatures i want to make by them appearing on my dashboard. refer to the Request Beast.

what is in your icon?
captain thunderhide, my main spore space stage captain.

do you use mods?
i exclusively play this game with mods.
can i download the creatures you make?
only if the original creator of the design is okay with it and requests a png. please note that in order to successfully download the creatures, you will need to download every mod used to create them.
i will not always be able to say what mods i use to make something, so it's a gamble if you don't have all of the ones i use.
how do i mod spore/do advanced creature creation like you?
darkedgetv's FAQ is a very good resource to begin. i started there, and it's where i recommend you to start if you're interested in spore modding. it also contains many other mods i have not listed under the cut.
as much as i disagree with the process of using a discord server to contain vital information and resources, the davoonline spore modding community discord is also a good source of resources and mods that even i do not use.
what editor mods do you use?
a lot, so they'll be under the cut.
not mods, but highly recommended for enhanced playing experience
4GB patch - Tutorial - patches spore [and other 32bit programs] to be able to use 4gb of RAM. recommended if playing a highly modded copy, and makes the game more stable.
Reshade & ReSpore - post-processing injector & shader that alters the appearance of spore, giving it more detailed shading and vibrant colors. i use this for gameplay and screenshots. runs on GPU power, so excellent if you have a strong graphics card
HD graphics fix - this doesn't actually seem to work for my copy, but it alters the textures of base spore to be more high-quality.
mods that are absolute must-haves
these mods are ones that i use in almost every creation, and add a lot of QoL to the editors. if i forget a mod in a creature png i post, it will be one of these.
Dark injection - THE spore mod. it's likely a lot of other mods you'll download will mesh well with dark injection. you can turn off whatever you don't want to use through the installer.
Universal Property Enhancer - a library mod that many other mods require
The Smoother - a useful tool for building muscles and smoothing out your creatures' bodies
Enhanced Color Picker - a requirement for super detailed creations, enables hexcode color picking and color wheel selection beyond normal limits of spore
[UPE] Infinite Part Scaling - allows scaling of parts near-infinitely, beyond the limits of the original game
Project Skyncraft - adds new creature skinpaints
Unshackled - adds nodes and limbs for creating custom wings, heads, hands, etc. a little bit unstable, i mostly use this for wings.
Spore Stacker - allows stacking of any part
Subtle Rotations - reduces part rotation snapping
Advanced CE - adds building editor manipulators to the creature editor
Every Part Costs Nothing - self explanatory
Rotate Anything - lets you rotate anything, including feet and hands
Advanced Creature Paint - allows for individual coloring of parts on a creature, like in the building and vehicle editors
Ambient Occlusion Disabler - removes baked-on shadows for creatures
Delta Paints - adds new skinpaints
Valla's Skinpaint Switcheroo - adds duplicates of all vanilla, C&C, and GA creature coat and detail skinpaints into their opposite category
test drive related mods
these mods are not required to download the creatures i post, but are recommended for the test drive.
No More Creature Editor Animations - turns off the animations that play when you add eyes, mouth, feet/hands, etc
Sevan's TF2 editor animations - adds multiple animations from tf2 into the creature test drive.
Mx3's Dance Animations - adds a multitude of dance animations into the creature test drive.
Tenebris's Creature Test Drive Animations - adds many animations from within the game to the creature test drive.
EditorBG - adds extra editor backgrounds
Ramone Kemono's MMD Drag Ball - high-effort dance mod complete with special effects and a reverse engineered camera system
part mods
these mods add parts to the editors.
DroneParts 2017 - adds many mechanical and polygonal parts useful for machine creatures, i like to use it for building clothes and markings.
New Drone Parts - a sequel to droneparts 2017, compatible with the old version. install both at the same time if you want to be able to use creatures from the old droneparts mod.
Himeric Engine - adds horror-themed parts to the creature editor.
Spore Resurrection Next Steps - adds a few parts to the creature editor and several new textures to the building and vehicle editors.
Dinosaur Parts - adds parts based on dinosaurs and other animals. mostly heads.
Strange And Beautiful - a now-discontinued, reuploaded mod that adds unusual and unique parts to the creature editor
Bionicle parts - adds a few bionicle pieces to the creature editor
Little Box Of Horrors - adds many parts with an overall horror theme. some are animated.
Pandora's Toolbox [1.0] - adds a multitude of basic shapes and polygons to build with
Replicant - adds non-textured animating parts and non-animating parts in a separate tab. good for if you want to use hands, limbs, etc without them animating or adding stats
Armoured And Dangerous - adds a few high detail mechanical looking parts.
Delimbiter - increases the amount you can scale limb parts, and allows for more crazy movements of certain limb parts
Valla's Vanilla Style Parts - adds several parts which mimic the vanilla style
Wordsmith 2.1 - adds letters to the creature, building, and vehicle editors
Kaiju parts - adds several parts based on popular kaiju
Organic Help - adds many membrane pieces to the creature editor, for creating wing webbing among other things
Project: Mad Mannequins - adds many human body based parts. and a horse for some reason
A Mouth For All Seasons - adds alternate versions of all vanilla mouths [and all unused cell mouths] with alternate diets
Valla's Captain Badges - adds all space badge models into the captain outfitter and creature editor
Rock On! - adds rock props from spore into the building and creature editors
976 notes
·
View notes
Text

TofuPixel Links + FAQ - Commissions Open!
🌟 Building a game: @wishlings 🌠
My Portfolio
Support me:
Commissions | Tip Me | Digital Store | Print Store | Game Assets | Stickers + Merch
Socials:
Twitter | Cara | GameJolt | TikTok
Yes you can use / cross-stitch my work for personal use! <3
🎨 Pixel Art Beginner Guide
Hello, I'm Tofu, a pixel artist based in England. I work full-time doing pixel illustrations or game-art. I started learning in my early 20s, so no it's not too late for you!
I run a 7k+ member Discord server called Cafe Dot, where we host events like gesture drawing and portrait club.
I currently have Good Omens brainrot so expect some fanart on this blog. I also occasionally do/reblog horror art so be mindful of that!
Due to so much AI nonsense on every platform, all my public work will be filtered/edited with anti-AI scraping techniques. Supporters on my Ko-Fi can see unfiltered work and also download it.
Want to learn how to do pixel art? Check my tutorial tag!
Other tags:
tutorial (not pixel specific)
my art
follow (artists i recommend)
🌟Free Stuff!!!
❔FAQ
What app do you use?
I use Aseprite on PC and occasionally Pixquare on iOS (use code tofu for 30% off Pixquare!! <3)
Free alternative: Libresprite on PC
Why does your art look so crunchy / compressed?
Glaze
How did you learn pixel art?
I first started out watching MortMort and making tiny sprites. Then once I started getting interested in landscapes/environment art, I did many, many Studio Ghibli studies.
How can I also protect my art?
You can use Glaze and Nightshade- Glaze protects against Img2Img style copying, and Nightshade poisons the data so the AI thinks it's the opposite of what it actually is. There is a lot of misinformation going around (likely from pro-AI groups) so do your own research too!
If you're a pixel artist you can also tilt or blur your art after upscaling, which will make it near useless to AI models (or regular thieves) once downscaled again.
Feel free to send me an ask if there's anything you want to know! I am always happy to help beginners :--3
1K notes
·
View notes
Text


Downtown Roles Mod Tutorial - TS3 - Mature Gameplay Ideas
NSFW 18+ mature content / a long read
TLDR: this is a compilation/recommendation list of mods, a tutorial on how to set up NPCs, and how to tie it all together to add some mature gameplay to your save. 😈
Misukisu/Virtual Artisan had a “Downtown Roles” mod that sadly does not work anymore for the latest versions of TS3. Her mod basically allowed players to add role sims to community lots so your sims could have more NPCs to interact with, making the lots feel more alive in a mature "downtown" sort of way.
I was inspired by her mod and I want to share how you can recreate and expand her mod’s functions with Nraas Register and Arsil’s Custom Generic Role mod. Some players might already know how these mods work, but it was a new discovery for me. I didn’t know how useful role sims could be! It got the gears in my dirty mind turning.
The main purpose of this mod list/tutorial: to add role sims to community lots for your main sims to interact with, while they’re out on the town. These will be sims outside of your household. Their main “job” is to hang out at the lot. You can let the game generate new sims to fill these roles, or assign existing sims in the town to fill the roles.
Examples of role sims you can create:
A regular patron at a dive bar for your sim to befriend or make enemies with.
A sexy single sim at a beach, gym, pool, bar or club for your sim to mingle and hook up with.
An escort at a brothel for your sim to woohoo with (Passion mod).
A client for your sim to sell drugs/weapons to (MonocoDoll Vile Ventures mod and Arms Dealing mod) - I have not tested this but in theory it should work.
You can add multiple role sims on each lot. You could have a number of partygoers on a club lot/a number of escorts on a brothel lot/a number of mobsters or criminals on a warehouse lot who will always be there when your sim visits.
Why role sims?
Townies are unpredictable - you never know which lot they’ll show up on, and how long they’ll stay. Role sims will consistently be there as the supporting characters in your main sim’s story.
Having consistent NPCs at certain locations around town can help with story-driven gameplay scenarios.
You can move a household of your own sims into town and assign them to fill various roles. See pretty NPCs around town!
If you let the game generate new sims for the roles, then it saves you the hassle of setting up new households yourself. You can always edit them later in CAS.
Limitations:
According to Arsil, it seems like sims who are already employed (such as most townies) will be removed from their jobs if they are assigned to be role sims. So I would avoid using any employed townies for this unless you are ok with that. Use unemployed residents instead.
I believe the role sim cannot leave the lot during the designated work hours. Your sim cannot form a group with them and go to another venue. However, you can invite the sim over or hang out afterwards from the relationship panel.
Mods Needed:
Nraas Master Controller + Integration Module
Nraas Register
Arsil‘s Custom Generic Role mod (both the floor marker and the desk)
Passion (if you want your sim to be able to have sex with the role sims on the lot or have the role sims dance on the stripper pole)
MonocoDoll’s Vile Ventures mod (if you want to create NPC clients for your sim to sell to)
MonocoDoll’s Arms Dealing mod (if you want to create NPC clients for your sim to sell to)
How to Set Up:
Step 1: Install the mods listed above. Then, open the save file you want to add some downtown sleaze to.
Step 2: Find a community lot you want to add role sims to. This could be a bar, nightclub, brothel/motel/strip club, a run-down warehouse or block of buildings, casino, etc. I have downloaded many lots from Flora2 at ModtheSims and @simsmidgen here on Tumblr that fit the gritty urban vibe.
Step 3: Enter Build/Buy mode. You can do this from Live mode.
Press Ctrl + Shift + C, enter this cheat: testingcheatsenabled true
Press the Shift key and click on the ground of the community lot.
Click on “Build on this lot”.
You can also enter Edit Town mode to renovate the community lot.
Step 4: Place Arsil’s Custom Generic Role floor marker or desk on the lot. Place one for each role sim you want to create. They are located in Build Mode -> Community Objects -> Misc. If the desk looks out of place, use the floor marker instead.
Step 5: In Live mode, click on the object -> Settings to set:
The name of the role (clubgoer/stripper/escort/mobster/etc.)
The “work” hours the sim will be on the lot for
The days off
The motives to freeze or not (I recommend freezing all the motives to avoid interactions being interrupted/sims complaining due to low motives)
If the sim you want to assign to the role already lives in town, click on the object -> Nraas -> Register -> Select -> Choose criteria -> select the sim from the list. I would avoid choosing any employed townies as they may lose their job when switching to this role. Choose unemployed residents to avoid conflicts.
Remove assigned roles: click on the object to remove the sim from the role.
Step 6: In Live mode, click on City Hall -> Nraas -> Register
Allow immigration: choose whether you want new sims to be moved into town to take the roles (enable this if you want the game to generate new sims for the roles)
Allow immigration = False: if you set this option to false, then a new option called "Find Empty Roles" should appear. You can then assign any sim to the role object you placed, from City Hall.
Allow resident assignment: choose whether you want existing unemployed townies to be randomly assigned to fill the roles (I recommend to disable this. I had Buster Clavell show up to work at my strip club. NO!)
Pay per hour: I'm not sure how to adjust the pay for each custom role but you can just leave it at the default or change it globally
Remove roles: click on the object to remove the sim from the role, or click on City Hall -> Nraas -> Register -> Global Roles -> Remove by sim
Step 7: In Live mode, give the game some time to generate the role sims. Visit the community lot and have a look at your new role sims. The role sims should autonomously interact with other sims and objects on the lot. Using Nraas Master Controller, you can take the sim into CAS to give them a makeover, edit their traits, or replace them with a sim from your sim bin.
Step 8: Make your sim interact with the shiny new role sims and play out the storylines you always wished were possible. Public hookups, functioning brothels, selling drugs and guns - this is what The Sims 3 was made for, baby!!!
Related Mods:
Arsil’s Exotic Dancer Stage - if you have a club community lot, you can use this mod to hire dancers. You can use role sims to add other NPCs to the club such as guests, shady business sims, or non-dancer sex workers.
Nraas Relativity - this handy mod can slow down the speed of time so your sim can spend more time doing their "activities"
Nraas Woohooer - if you don’t want the explicit sex animations from Passion, you could use this mod instead to provide more woohoo options.
Passion - for brothels/strip clubs, this mod will add sex animations and the ability to have role sims dance on the stripper pole.
MonocoDoll’s Vile Ventures mod and Arms Dealing mod - you can use role sims to create more clients for your sim to sell drugs and weapons to, like different individuals/gangs/mobs. You could have different clients hanging out at different spots in the city.
LazyDuchess Lot Population - this mod populates community lots with townies, and they can interact with the role sims you’ve created.
Service Sims Out on the Town - this pushes service sims to visit community lots, to add even more variety to your crowds.
Conclusion
If you made it to the end, thank you for reading. Please let me know if you try out this style of gameplay, and if you have ideas for more role sims and community lots to make. This tutorial was NSFW-oriented but you could easily adapt it to create NPCs for SFW community lots.
381 notes
·
View notes
Text
A more in-depth guide for creating visual novels, especially in the horror, horror-romance, etc circles
Some of you have seen my previous, smaller post on crafting visual novels, especially in this little space of Tumblr that a lot of us have found themselves in. Since that post took off, I've wanted to create a longer guide to help touch on some points I've thought about for the past few months.
In case you've never heard of me, I'm Kat, also known as catsket. I have a Bachelor of Fine Arts in Game Design. I've been making games for nearly 5 years, and I've been doing visual novels more "professionally" for 2. You may know me for Art Without Blood, 10:16, God is in the Radio, or Fatal Focus. I'm here to help you make your first visual novel.
Please note that my advice does not fit everyone, and you may disagree with what I say. That's okay! It doesn't work for all. That's why there's thousands of resources out there.
FOR THOSE OF YOU WHO HAVE NEVER MADE A GAME
So, you have an idea for a huge visual novel. Horror, a shady and obsessive love interest, a little bit of woo-hooing. 100k words. Maybe a million. What is this, the 07th Expansion?
I notice a lot of people getting into visual novels are artists first. That's okay! I wanted to do art for games before I realized how much I enjoyed writing. And even less of you have probably touched Visual Studio. Again, perfectly okay. We all start somewhere.
My number one piece of advice? Make shitty games.
What does that mean?! My recommendation to those who have never done games is to make a bunch of shitty ones. Think of a theme, or hell, even join a game jam, where you make a game that fits a theme in a short amount of time. Spend about a week on your game. Focus on making something polished. Polish your mechanics. Polish your output.
I recommend, if you can, to make at least 4-6, if not more, kind of shitty games before hopping into longer projects. Making a game is a skill, just like art, just like writing. And game development is combining ALL of these together into one big soup being stirred by a skeleton hand puppet. You'll get into the rhythm and see what works for you.
It also helps you learn, perhaps, the second most important thing here: do you even like making games? There are cases out there where people have created video games (not saying visual novels) just for clout. That's no fun for you, that's no fun for your players. And you might go through this process and find that you don't like making games. That's completely okay! It's not for everyone.
Also, you can use these shittier games to gather an audience. I've built my audience because, for the past few years, I've been releasing games that slowly give me growing fields of eyes every day. A success story overnight is a rare one. It takes time. It's like building a brand, but you aren't a brand, you're an artist.
REV UP YOUR ENGINES!
Ren'py is the number one engine you will be recommended. It is very beginner-friendly, with lots of tutorials, assets on itch.io to use and download, and support. The engine comes with a few tutorials in the form of games, whose code you can freely browse. This is the engine I use most often. Most visual novels you see are made in this engine.
Twine is a text-based engine that most people use for interactive fiction. You can add images and audio, though, if you don't mind messing with HTML. I use Twine for text games and for outlining for my larger games. Ever played Degrees of Lewdity? Yeah, I know you have. Don't ask why. That game was made in Twine.
RPG Maker has multiple versions and has been used for exclusively VNs if you don't mind fucking around with plugins. It can definitely give your game a super unique feel. I recommend RPG Maker MV, since it has the most resources. This line of engines usually costs money, but it often goes on sale for under $5-$15.
People will recommend TyranoBuilder, but as a user and player, the lack of options and the format the games often come in is just...not fun to navigate. It advertises itself as little to no code, but it's often evident in the final results. Some good games have been made in it, though, so if you want to use it for prototyping/practice, you can. I'm not a fan, but that doesn't mean that fans don't exist! This engine costs money.
Not an engine, but check out Ink! Super useful scripting language that's used for more professional projects.
DEMOS, DEMOS, DEMOS
You've got an idea for a long-term project, and now you want to show it to the world! But wait, wait, don't do that yet!
When should I start advertising my game? This is a personal opinion, but I say that you should not start advertising your game until 50-60% of your demo is complete. Why? As I've discussed with some fans of indie VNs, they can name quite a few projects that have been in the "working on the demo" age for 1-2+ years. I've been in the Kickstarter MMO circles. If you, making a single-player experience with little mechanics to balance and polish (aka a visual novel), are taking that long on a demo, I am going to assume the game is not coming out. There are some games I have seen out here that have been in "working on the demo" phase where I haven't seen a single ounce of what the project will look like.
What should I put in my demo? The purpose of a demo is to showcase the mechanics and the vibes and the mechanics of your game. It's a demonstration. In my last post, I pointed to the Dead Space 2 demo that was showcased at E3 (RIP), that takes place about 2 hours into the story and shows how enemies are defeated, some animations, bits of the story, etc. Usually, because it's less about mechanics and more about vibes, visual novel demos showcase a certain percentage of the full thing (5-10%.) Can you showcase the vibe of the game here and what players should expect? If not, show off another portion.
How long should I work on my demo? Before, I said 3-4 months. That can be true, that can also not be true. Think about how long the demo takes you in proportion to how long the actual game should take you. Don't put too much effort. The demo is to showcase the vibe. It's to see how much the public and fans may enjoy the game.
My game is 18+, what should I do? Make a splash screen when the game is downloaded to let players know your game is 18+. If it's going to contain sexual content, you can hide it with itch.io's adult content filter. Write it on the page itself that your game is for adults only. Don't put your demo behind a paywall. This is genuinely ridiculous. The purpose of a demo is to showcase what a game is like before a player purchases it. That defeats the point of a demo. I've seen this happen, and it discourages players from approaching, especially because most demos never make it past the demo phase. So...I'm paying you $10 for 2-3k words of a game that may never come out?
Should I make a social media for my game? YES! Go for it. These anchors are how people will find your game. Make a Tumblr and open that ask box. Make a Twitter. Go to BluSky. Advertising is not bad. Some YouTubers even take e-mail suggestions from developers. Feel free to shoot your shot. The worst they can do is not respond.
HOW TO SET UP YOUR ITCH.IO PAGE:
Getting your itch.io to a presentable state can be very challenging! There's many ways to do it. I highly recommend using this page image guide for learning how to size your images to make your page pop!
Itch.io themselves has suggested to not publish a page until the game or demo is released. You can make the page and keep it as a draft, but do not publish it until you're ready!
Your cover image is the image that will appear in the search of the website, on any front pages, in collections, and on your profile. What have I seen that works? Key art of one of the characters up close and the title of the game! If you can make it a .GIF, do it! Bitches love .GIFs!
Itch.io recommends 3-5 screenshots on your page. I recommend 1 of these 5 be a .GIF that shows how gameplay feels. This is effective, even for visual novels!
Write a 3-5 sentence summary about your game for the description. What is your story about? What is the draw?
DO NOT BE ONE OF THOSE PEOPLE WHO IS GOING TO SAY "This is not like other visual novels. It doesn't have that cheesy this or that or-" No one cares. Genuinely. You're putting down other games in your genre and elevating yourself to the pompous level.
TAG YOUR GAME! itch.io gives you a list of tags to choose from when you go to tag. DON'T USE THIS! Try to go for more specific tags. Arimia has a very good guide on how to use itch.io's tagging system to your advantage.
GENERAL GAME MAKING ADVICE
SCOPE KNIFE IS SUPER USEFUL! Everyone makes games that are way over their workload. It's okay to cut out features and add them later. Prioritize making a finished game before hitting those stretch goals.
PLAN, PLAN, PLAN! Writing outlines is super helpful. I use Twine for my outlines, because you can connect your passages together and make really well-thought webs.
IT'S OKAY TO ASK FOR HELP! Whether it's from friends, professionals, or anything in-between. They can help with assets, editing, etc.
HONE YOUR SKILLS OUTSIDE OF GAMES! Write some poetry. Do some sketches everyday. Improve on your craft to improve your games
MUSIC IS HARD. THERE ARE RESOURCES. Most of us aren't musicians. That's okay. Make sure the music you get for your game is allowed to be used. You can use anything non-commercial if your game will not cost money or donations. I try to do songs in the public domain or free to use overall with credit if I don't have a musician. Consult the Creative Commons website if you're unsure how you're supposed to use a certain piece of music. If you don't use the right stuff, not only can it put you in legal trouble, but it can put streamers in hot water if they play your game and they can't upload the video because music is copyrighted.
PLEASE, DO SOMETHING ABOUT YOUR UI. Wanna know an easy way to get your game to look more professional? Edit the damn UI for your game. Make a new textbox, even if it's just a black box. Change the font. Eventually, players recognize the defaults and patterns of games made in certain engines and may attribute a lack of UI changes to a developer being lazy. It doesn't take very long to change the colors around and move text! Please do it to add a little pop to your game.
DEADLINES ARE AWESOME. Not everyone works well under pressure, but if you give yourself an infinite amount of time to make something, it'll never get done. Set goals for yourself for how much you can work on something.
IF YOU HAVE TO GIVE UP, GIVE UP. Making things is hard, especially long-term. Emergencies happen, jobs happen, life happens. Let your fans know that a project isn't happening anymore. Don't leave them in the dark. You don't need to tell strangers your medical history or anything, but transparency + honesty are really hot traits. You should use those in your creative work. This is one reason why I advocate for not publishing or advertising things until you know it's stable.
SHOWCASING YOUR CONTENT
People love to see WIPs for games! This is what the devlog is good for! A devlog is a post where a developer talks about and showcases some things happening in the game? What can you add to your dev log?
PERCENTAGES! How much of the artwork is done? How much of this character's route is done?
SNEAK PEEKS AT ARTWORK AND SPRITES!
GIFS! GIRLS LOVE GIFS!
Anything else to showcase your game's content! Posting consistent updates retains and even gains a fan's attention for your work.
RUNNING YOUR TUMBLR
You've joined us, and you've made a Tumblr for your blog! Link it on the itch.io page, so people can come find you after playing your awesome demo!
Do I have to respond to every ask? No. It's your blog. Delete whatever asks you want.
I got a hate comment! What do I do? Delete it and move on. I have a more detailed section on hate below.
I want to interact with [blog]! How do I do that? Reach out to the devs for silly little collabs. If you come onto a developer slightly headstrong, they might feel you are being abrasive or using them for content.
If people make fan content, interact with it! Encourage it! Reblog it. Show your love.
OTHER IMPORTANT THINGS
PROFESSIONALISM IS KEY. These may be pet projects, but you want to appear some level of professional on your actual itch.io page.
Being dismissive of player and fan complaints or criticisms will make you appear childish.
If your game is broken, fix it. I have been told by some amateur developers to ignore game-breaking bugs. It does not make me, a player, want to engage with your content. It seems messy and unfinished.
With the above point, it's 100% okay to have bugs and errors upon release. Every developer and their brood mother has. To decrease these issues, get playtesters. Friends can play your games, spot any errors, and help you point out things that can be improved upon. I recommend having playtesters at every stage of development.
Make sure your game runs before you publish it. Please.
You can still be silly and giddy! There's no reason to not be, especially when you get positive comments! The point of this is to not be outright rude to potential players and fans.
IGNORE HATE COMMENTS. In this case, a hate comment is a statement that contains no constructive criticism and are only here to be insulting or malicious. People are going to leave you with actual piles of dog shit in your ask box. They are trying to provoke you. Giving hate comments any attention, even if you're there to "clap back" proves that they got to you, even if you don't take the hate to heart. They will continue to pester you. Delete any hate comments and ignore them completely. Laugh about them with friends in a private setting, sure.
THINK BEFORE YOU REFERENCE! I know one big thing in this community is adding references to other games in yours, such as plushies of other characters or putting them on posters. The best thing you can do it ask the developer before adding this. How would you feel if some random person you've never met put your character in a video game? Most of us would feel weird and potentially violated. Open communication with devs is awesome. I am usually okay with it as long as someone asks for permission.
As a complete aside, I prefer more tasteful references to other games as opposed to 523482346 plushies and posters. These have been slightly overdone. Why not theme a candy after another game's character? Maybe your characters know each other.
OTHER RESOURCES I RECOMMEND
Devtalk is a server dedicated to independent visual novel creators. You can find jobs, resources, advice, talks, and, like, everything there! Devtalk is super useful. Everyone in there is so cool. They have a really great and comprehensive list of resources that I could not even begin to cover.
Visual Novel Design is a great YouTuber. No other words, check the guy out!
Ren'py and whatever other engine you're using has documentation that's super useful to follow.
Arimia not only has amazing VN resources, especially for marketing, but she also just has? Amazing games that you should check out?
And for a shameless self plug, I'm the lead of Sacred Veins, a collective of devs creating narrative games, whether it be horror, humor, romance, or everything in-between. Come hang out with us!
596 notes
·
View notes
Text
WIND BREAKER | dating the gamer girl who’s also a streamer
Synopsis ✰ head cannons about how the boys react to finding out that your a well-known twitch streamer
Characters ✰ Haruka Sakura, Hajime Umemiya, Hayato Suo, Akihiko Nirei, Jo Togame, Choji Tomiyama
Contains ✰ sfw!, innocent content of the boys being supportive and shocked boyfriends
★ this is heavily inspired by my gamer girlfriend post consider this the sequel★

Haruka Sakura ᡣ𐭩
✧₊⁺ he has no idea what twitch is or what being a streamer even means
✧₊⁺ he only finds out because you got recognized in public by a very hyper/excited fan
✧₊⁺ almost sucker punches tf out of your fan because he thinks it’s some person trying to harass you
✧₊⁺ you have to hold him back
✧₊⁺ “wait wait, i’m sorry! i came off too strong, i just really love your streams!” the fan apologizes after Sakura completely got the wrong idea
✧₊⁺ “what videos? what’s a stream?”
✧₊⁺ you gave him a brief explanation and left it at that, you were very shy about your streaming career
✧₊⁺ detective sakura mode unlocked!
✧₊⁺ he’s very surprised to see that you have roughly around 50k followers from only uploading minecraft content
✧₊⁺ you stream hardcore minecraft challenges along with building tutorials which your fans love
✧₊⁺ he creates a secret account where he argues with all your haters
✧₊⁺ “you’re builds aren’t even cute” “your face isn’t cute, i wouldn’t talk if i were you”
✧₊⁺ you secretly knew the account was his but found it cute that he was so protective by your media presence
✧₊⁺ watches your streams in secret whenever he has the chance at school
✧₊⁺ “what are you doing on your phone Sakura?” “nothing! don’t worry about it, shut up.”
Hajime Umemiya ᡣ𐭩
✧₊⁺ gets extremely over protective when he finds out
✧₊⁺ he doesn’t like your fanboys
✧₊⁺ he cringes whenever you get comments like “can you be my mercy pocket?” “i can carry you”
✧₊⁺ he will respond back by saying “she doesn’t need to get carried by a bronze”
✧₊⁺ he only found your account by accident when he downloaded twitch
✧₊⁺ he’s a little sad you didn’t tell him
✧₊⁺ “why would you hide it from me?” “i wasn’t hiding it, i was just embarrassed”
✧₊⁺ he doesn’t mind whenever some fans come up to you in public
✧₊⁺ he does mind when it’s some weird guy, although they never come up to you since his presence alone scared them off
✧₊⁺ he’s very proud of your accomplishments
✧₊⁺ always congratulates you when you reach a new milestone
✧₊⁺ he becomes one of your twitch mods and blocks every weirdo account whenever he has the chance to watch your streams
✧₊⁺ he never misses one of your competitive streams
✧₊⁺ you participate in some tournaments and he’s literally your biggest hype man
✧₊⁺ “don’t be nervous, you’ll totally win.”
✧₊⁺ has the biggest smile on his face whenever you do win
✧₊⁺ he’s highkey your biggest fan boy and supporter
Hayato Suo ᡣ𐭩
✧₊⁺ you’re super embarrassed of your streaming career since you have about 5k followers that just love your aesthetic animal crossing content
✧₊⁺ who knew animal crossing would be such a hit for streaming content
✧₊⁺ you’re also a youtuber and you post some mini tutorials on how to create aesthetic shaped ponds
✧₊⁺ he only found out because someone else came to up to you in public in front of him
✧₊⁺ he was geeking the whole time watching you be so nice to a supporter
✧₊⁺ you made him promise he wont watch your streams
✧₊⁺ he keeps that promise but that doesn’t stop him from watching your youtube videos
✧₊⁺ to be fair, you did only say streams and didn’t mention youtube
✧₊⁺ he’s in awe by the cute and nice way you interact with your chat
✧₊⁺ he falls asleep listening to your voice during some of the tutorials
✧₊⁺ doesn’t like your haters
✧₊⁺ he gets annoyed whenever he sees a comment saying “animal crossing isn’t that fun, play a new game”
✧₊⁺ he gets the urge to want to argue back but respects your wishes and doesn’t
✧₊⁺ he does watch some your streaming clips if they get uploaded onto a different platform
Akihiko Nirei ᡣ𐭩
✧₊⁺ please you’re kidding yourself if you think he doesn’t know
✧₊⁺ have you met him? he knows everything
✧₊⁺ he found out from the first moment he met you
✧₊⁺ he asked about you along with googling you and found out that you were streamer
✧₊⁺ finds the way you laugh and talk to an online audience with ease to be enchanting
✧₊⁺ he’s incredibly impressed by your ability to be so likeable even through a screen
✧₊⁺ he’s mainly surprised that you don’t stream the sims since that’s a game you two always play together
✧₊⁺ he asks you about it and you explained how it’s just because the sims is a comfort game to you that you rather not “exploit” for views
✧₊⁺ you’re a multi game player so you stream different content and gameplays on a regular basis
✧₊⁺ he’s impressed to see that you’re good at fps games and different styles of games
✧₊⁺ you’re not really shy about your streaming profile
✧₊⁺ you answer any questions he asks while he jots down whatever you said into his note book
✧₊⁺ what he scribbles into his notebook: “my girlfriend is so cool.”
✧₊⁺ you don’t mind if he watches some of your streams which he does
✧₊⁺ he’s an internal fanboy but hides it from you because he doesn’t want to come off as geeky
✧₊⁺ he didn’t watch your streams until you gave him permission and let him know you’re 100% okay with it
Jo Togame ᡣ𐭩
✧₊⁺ you told him shortly after the two of you started gaming together
✧₊⁺ he thinks it’s a little funny (in a harmless way) that your a fortnite streamer in general
✧₊⁺ finds your 1v1 streams to be very impressive
✧₊⁺ he loves how happy gaming and streaming makes you
✧₊⁺ gets violent if anyone ever dares or tries to make a joke about you streaming or your gaming
✧₊⁺ he has smacked the back of the Choji’s head after Choji called you a fortnite try-hard loser
✧₊⁺ thinks it’s funny when you openly humble other players who think they’re better than you
✧₊⁺ you don’t do face cam which he’s grateful for since he wants you all for himself
✧₊⁺ it’s game over for him once you do the face reveal post
✧₊⁺ he secretly and silently sulks in a corner after seeing how many online men tried to get at you
✧₊⁺ he uses it as motivation to get better at fortnite (LMAOO you can’t tell me he wouldnt)
✧₊⁺ his logic is that if he’s simply better than every other guy trying to talk you up he’s won
✧₊⁺ despite his little jealousy episodes he’s very confident and secure in your relationship
✧₊⁺ he knows you’d never leave him for some loser in a twitch chat
✧₊⁺ he makes small guest star appearances in your streams
✧₊⁺ your female side audience love him (maybe a little too much sometimes)
Choji Tomiyama ᡣ𐭩
✧₊⁺ he was already impressed by your gaming skills in general, he’s even more impressed by your streaming content
✧₊⁺ yeah he saw you play in person but seeing a full screen gameplay from your perspective was mesmerizing to him
✧₊⁺ he loved to tune into your content
✧₊⁺ he would also argue with your haters online
✧₊⁺ he especially argued with the sexist comments
✧₊⁺ he 100% got more mad than you did when it came to guys in the comments/chat shit talking you for being a girl
✧₊⁺ “who cares if you’re a girl, they’re just mad you’d still kick their ass.”
✧₊⁺ “wtv man, keep yapping. she’ll definitely smoke you in a 1v1”
✧₊⁺ he’ll leave hate comments on every guys posts who have ever insulted you
✧₊⁺ be glad he happens to also have hands in person to back up what his mouth runs
✧₊⁺ he fully supports your choices
✧₊⁺ you actually started streaming after you two started dating
✧₊⁺ he was the one who talked you into uploading your content and to start live streaming it
#divider by v6que#sakura haruka#sakura haruka x reader#hajime umemiya#hajime umemiya x reader#hayato suo#suo hayato x reader#nirei akihiko#nirei akihiko x reader#jo togame#jo togame x reader#choji tomiyama#choji tomiyama x reader#wind breaker#wind breaker x reader
306 notes
·
View notes
Text
Yet Another Major Revamp: Semi-Realism Edition + make-your-own toolkit!🥳
🐸 DOWNLOAD: SFS
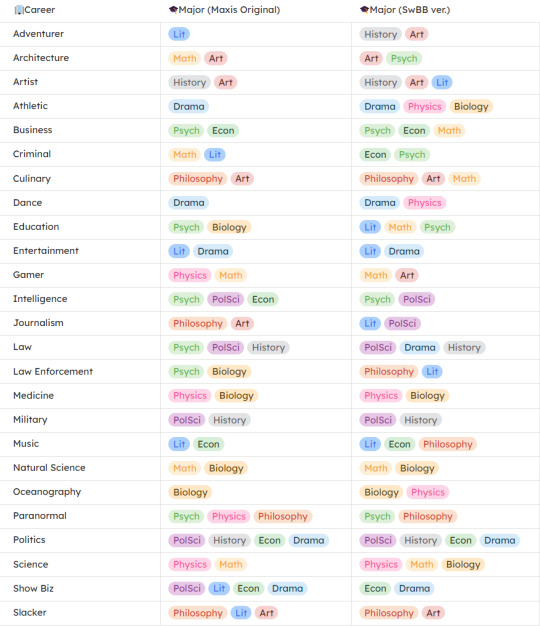
This is an edit of Phaenoh' Realistic Major to Career Linking BUT with the following BENEFITS:
🌟 NOT REALISTIC... BUT MAXIS-REALISM: this edit made the ideal careers for each major somewhat logical and coherent (consult the table below for the changes) yet respects the internal logic of the game because Maxis' humor is underrated, slacker and criminal are treated as serious career pathways in this game so why not 🤩
🌟 ALL MAJORS BALANCED ⚖️: frustrated with the lack of benefits that some majors offer compared to others? want an easier time being a job-hopper?? what do you mean my skills aren't transferable in this market??? WELL:
All majors are now supporting at least 5 or more careers
Art [6]: Adventurer, Architecture, Artist, Culinary, Gamer, Slacker
Bio [5]: Athletic, Medicine, Natural Sci, Ocean, Science
Drama [6]: Athletic, Dance, Entertainment, Law, Politics, ShowBiz
Econ [5]: Business, Criminal, Music, Politics, Show Biz
History [5]: Adventurer, Artist, Law, Military, Politics
Lit [6]: Artist, Edu, Entertainment, Journalism, Law Enf, Music
Math [6]: Business, Culinary, Edu, Gamer, Natural Sci, Science
Philo [5]: Culinary, Law Enf, Music, Paranormal, Slacker
Physics [5]: Athletic, Dance, Medicine, Ocean, Science
PolSci [5]: Intelligence, Journalism, Law, Military, Politics
Psych [6]: Architecture, Business, Criminal, Edu, Intelligence, Paranormal
All careers are now supported by 2 or more majors, only the Politics career is supported by 4 (cause Maxis' choice was so good I didn't want to touch it!)
8 careers that require degree (only available for graduate): Architecture, Education, Intelligence, Law, Medicine, Nat Sci, Oceanography, Science.
🌟 OTHER INFOS:
🎓 You'll need UNI EP 🎓
Credits: Phaenoh (for the base mod I edited and the tutorial!), SimPE
Conflicts:
mods that lock/unlock degree requirement like Lamare's getUniCareerWithoutEducation
any mods do the same thing (Belladovah's, Phaenoh's & Cyjon's) which you might want to consider shopping around first before picking mine so look below 🛍️🛒👀
also conflicts with lauratje86's but their mod works with default replacement majors so it can't be covered here, check it out though!
note: Cyjon altered some majors' names and skill requirements (he also hates Philosophy methinks), Phaenoh offers a different version that changes which career requires degree (just like mine but ADDED Business), Belladovah offers Education version in which every major benefits the Education career.
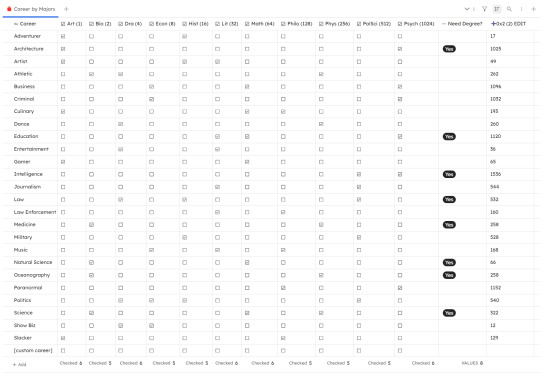
📁 MOD RESOURCE: Linking Maxis Majors & Degrees to Maxis Career Toolkit 🥳
🎯 Difficulty: EASY (no modding experience needed)
It's easier to customize own or track which majors your career is linked to with a bunch pre-made templates right???
Download my edited mod as a base & start making edits 📝 Have these templates to easily cross-reference 0x2(2) values you need to change in SimPE following PHAENOH'S TUTORIAL.
The templates will look like the 2 tables you see above, they are available in:
odt (highly recommended, easy to use word doc file with Phaenoh's tutorial included)
md (markdown file)
csv (for both of the tables you see above)
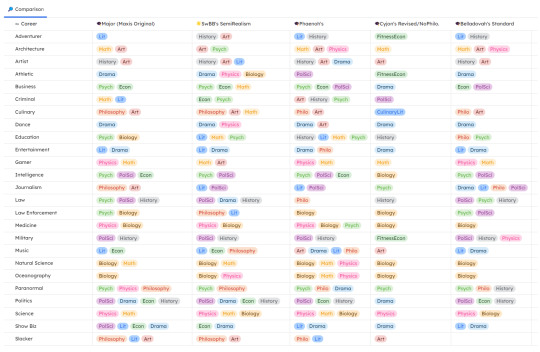
Comparison Table - use to compare your edits to MAXIS original
Career By Major Table - work out which major supports your career and calculate 0x2(2) values
4. zip (for SiYuan users to import, highly rec because I used that program to make the tables, it's Notion but ✨uglier and offline✨)
🐸 DOWNLOAD (browse what you need): SFS
356 notes
·
View notes
Note
Please, please explain how to install and use linux like I'm 5 years old. I'm so sick of windows adding AI and other bullshit to my already struggling elderly laptop but I'm really not good with computers at all so I have no idea where to start with Linux.
Okay, so, I'm going to break this down into steps I would give the average tumblr user first, and then if any of them are confusing or use words you don't understand, ask me and I'll explain that step in greater detail.
Step 0) BACK. UP. YOUR. SHIT.
NEVER EVER EVER CHANGE YOUR OPERATING SYSTEM WITHOUT A COMPLETE BACKUP OF ALL YOUR FILES.
Step 1) Learn your machine. You need to know:
How much RAM you have
If your processor is 32 or 64 bit
How big your hard drive is
On windows, you can find out all of this by going to the start menu, typing "about" and opening the first result on your system instead of the internet.
For additional instructions, visit this page.
Step 2) Pick your Linux.
There's like 10,000 kinds of Linux, each tailored to particular functions that the end-user (that is you!) might want to have. The sheer amount is very daunting, so first I'm going to give my suggestions, then I'll explain how to pick for yourself.
For Mac users, I suggest Kubuntu. For windows users, I suggest Mint Cinnamon. If your laptop is really REALLY old, I recommend Sparky Stable, which is the lightest weight Linux I would ever suggest for a new user. In every case, download the version suited to your processor (32 bit can be labelled "x86" or "32 bit"; 64 bit is always labelled "64 bit").
If you want to try a different type of linux, you'll need to make sure your laptop meets the "minimum specs" or "system requirements." These numbers tell you how much RAM, processor and hard drive space the linux will use. (That's why you needed those numbers at the beginning.)
Step 3) Collect your supplies. You're going to need:
An ISO burning program compatible with your current system, like Balena Etcher.
A copy of the ISO file for the Linux you want to use.
Your laptop.
An 8gb or larger USB flash drive.
Step 3) Make a bootable USB drive
Install Balena Etcher, hitting "okay" and "next" when prompted. Last I checked, Etcher doesn't have adware attached, so you can just hit next every time.
Plug your USB drive into the laptop.
Open Etcher.
Click "flash from file" and open the ISO file with your Linux on it.
Click "Select target" and open the USB drive location. Hit the "flash" button. This will start writing all the linux installer data to your flash drive. Depending on the speed of your machine, this could take as long as 10 minutes, but shouldn't be much longer.
Step 4) Boot to the USB drive
This is, in my opinion, the trickiest step for a lot of people who don't do "computer stuff." Fortunately, in a rare act of good will, Windows 10 made this process a lot easier.
All you'll need to do is go to settings, then recovery, then advanced startup and pick the button labelled "use a device."
This tutorial has images showing where each of those is located. It's considered an "advanced setting" so you may get a spooky popup warning you that you could "harm your system by making changes" but we're not doing anything potentially harmful so you can ignore that if you get it.
Step 5) Try out linux on the flash drive first.
Linux installs using a cool little test version of itself that you can play around in. You won't be able to make changes or save settings, but you can explore a bit and see if the interface is to your liking. If it's hideous or hard to navigate, simply pick a new linux version to download, and repeat the "make a bootable USB" step for it.
Step 6) Actually install that sucker
This step varies from version to version, but the first part should be the same across the board: on the desktop, there should be a shortcut that says something like "install now." Double click it.
Follow the instructions your specific linux version gives you. When in doubt, pick the default, with one exception:
If it asks you to encrypt your drive say no. That's a more advanced feature that can really fuck your shit up down the road if you don't know how to handle it.
At some point you're going to get a scary looking warning that says 1 of 2 things. Either:
Install Linux alongside Windows, or
Format harddrive to delete all data
That first option will let you do what is called "dual booting." From then on, your computer will ask every time you turn it on whether you want Windows or Linux.
The second option will nuke Windows from orbit, leaving only linux behind.
The install process is slower the larger your chosen version is, but I've never seen it take more than half an hour. During that time, most linux versions will have a little slideshow of the features and layout of common settings that you can read or ignore as you prefer.
Step 7) Boot to your sexy new Linux device.
If you're dual booting, use the arrow keys and enter key to select your linux version from the new boot menu, called GRUB.
If you've only got linux, turn the computer on as normal and linux will boot up immediately.
Bonus Step: Copy Pasting some code
In your new start menu, look for an application called "terminal" or "terminal emulator." Open that up, and you will be presented with an intense looking (but actually very harmless) text command area.
Now, open up your web browser (firefox comes pre-installed on most!), and search the phrase "what to do after installing [linux version you picked]"
You're looking for a website called "It's FOSS." Here's a link to their page on Mint. This site has lots and lots of snippets of little text commands you can experiment with to learn how that functionality works!
Or, if you don't want to fuck with the terminal at all (fair enough!) then instead of "terminal" look for something called "software manager."
This is sort of like an app store for linux; you can install all kinds of programs directly from there without needing to go to the website of the program itself!
275 notes
·
View notes
Text
GIFMAKING TUTORIAL: PHOTOPEA (for Windows)

Screencapping
Gif Width/Size Limit/Ezgif
Loading Frames
Cropping and Resizing
Rasterize/Make Frames
Sharpening
Coloring (not detailed. Links to other tutorials included)
Exporting
Obligatory Mentions: @photopeablr ; @miwtual ; @benoitblanc ; @ashleysolsen
Definitely check out these blogs for tips, tutorials and resources, they're a gold mine. Finally I recommend browsing the PHOTOPEA TUTORIAL / PHOTOPEA TUTORIAL GIF tags.
DISCLAIMER: English is not my first language and I'm not an expert on what I'm going to discuss, so if anything's unclear feel free to drop another ask.
1. SCREENCAPPING -> PotPlayer (the one I use) or MVP or KMPlayer
INSTALL PotPlayer (tutorial)
Play your movie/episode and press Ctrl + G. The Consecutive Image Capturer window will pop up. Click Start to capture consecutive frames, Stop when you got what you needed.
Where it says "Image Type -> Format" I recommend picking PNG, for higher quality screencaps.
To access the folder where the screencaps are stored, type %appdata% in windows search, open the PotPlayerMini64 folder (or 32, depending on your system) and then the Capture folder. That's where you'll find your screencaps.

Admittedly MVP is a lot faster but I prefer Potplayer because it generates (at least in my case) higher quality screencaps. MVP kind of alters the hue and it made it harder for me to color my gifs. Still, if you're interested in how to use it, I recommend this tutorial.
As for KMPlayer, every tutorial out there is outdated and I couldn't figure out the new version of the software.
2. GIF WIDTH/HEIGHT, SIZE LIMIT, EZGIF OPTMIZER
At this point you should already know how big your gifs are going to be. Remember the ideal gif width(s) on tumblr are 540 px / 268 px / 177 px. These specific numbers take into account the 4 px space between the gifs. No restrictions on height. Here are some examples:

You can play around with the height (177x400, 177x540, 268x200, 268x268, 268x350, 268x400, 540x440, 540x500, 540x540 etc) but if you go over the 10 MB limit you'll either have to make your gifs smaller/delete some frames.
OR you can go on ezgif and optimize your gif, which is usually what I do. The quality might suffer a little, but I'm not really (that) obsessed with how crispy my gifs look, or I'd download photoshop.

Depending on the gif size, you can decrease the compression level. I've never had to go over 35. It's better to start at 5 (minimum) and then go from there until you reach your desired ( <10mb) gif size. Now that I think about it I should have included this passage at the end of the tutorial, I guess I'll just mention it again.
3. LOAD YOUR FRAMES
File -> Open... -> Pick one of your screencaps. The first one, the last one, a random one. Doesn't matter. That's your Background.
File -> Open & Place -> Select all the frames (including the one you already loaded in the previous passage) you need for your gif and load them.
(I recommend creating a specific folder for the screencaps of each gif you're going to make.)
WARNING: When you Place your screencaps make sure the Crop tool is NOT selected, especially if you've already used it and the width/height values have been entered. It will mess things up - I don't know why, could be a bug.
You can either select them all with Ctrl+A or with the method I explained in the ask: "when you want to select more than one frame or all frames at once select the first one, then scroll to the bottom and, while pressing Shift, select the last one. this way ALL your frames will be selected".
WARNING: Depending on how fast your computer is / on your RAM, this process may take a while. My old computer was old and slow af, while my new one can load even a 100 frames relatively fast, all things considered. Even so, I recommend ALWAYS saving your work before loading new frames for a new gif, because photopea might crash unexpectedly. Just save your work as often as you can, even while coloring or before exporting. Trust me, I speak from experience.
Now you can go ahead and delete the Background at the bottom, you won't need it anymore.
4. CROPPING AND RESIZING
Right now your screencaps are still smart objects. Before rasterizing and converting to frames, you need to crop your gif.
Technically you can rasterize/convert to frames and then crop, BUT if you do it in that order photopea will automatically delete the cropped pixels, even if you don't select the "Delete Cropped Pixels" Option. Might be another bug, unclear.
Basically, if you crop your gif and then realize you cropped a little too much to the left or the right, you can go ahead, select the Move Tool (shortcut: V) and, after selecting ALL YOUR FRAMES, move them around on your canvas until you are satisfied. You won't be able to do this if you rasterize first and then crop, the excess pixels will be deleted. I don't know why, I found out by accident lol.
CROPPING
(Cropped pixels: the gray/opaque area outside of the selected area. That area disappears once you press enter and crop, but the pixels are retained, so you can move the frames around and reposition them as you like. In this case I could move the frames to the left and include Silver's figure [curly guy in the foreground] in the crop)
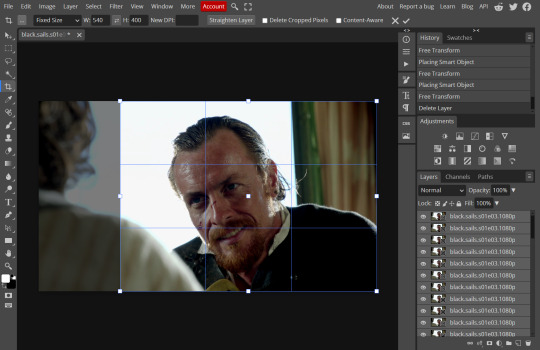
After deleting the Background, you will need to select all your frames (using the Shift key), use the C shortcut on your keyboard to choose the Crop tool. Or you can click on it, whatever's more convenient. Once you do that, a dropdown menu is going to appear. You need to select the "FIXED SIZE" option, as shown in the following screencap.
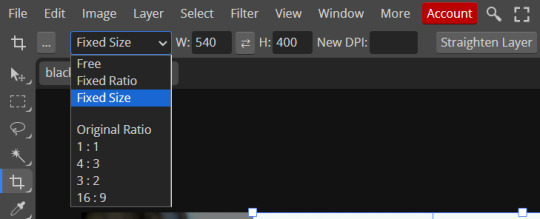
Once you do that, you can type in your desired width and height. Do not immediately press enter.

Your work area should now look like this. Now you can click on one of the white squares and enlarge the selected area until the edges are lined up. You can then move it around until it covers the area you wish to gif.
WARNING: to move the big rectangle around, you're gonna have to click on a random point of the work area, PREFERABLY not to close to the rectangle itself, or you might accidentally rotate it.

See? When your cursor is close to the selected area it turns into this rotating tool. Move it away until it reverts to your usual cursor, then you can start moving the rectangle. Press Enter when you're satisfied with the area you selected.
RESIZE
This isn't always necessary (pretty much never in my case) - and it's a passage I often forget myself - but it's mentioned in most of the tutorials I came across over the years, so I'd be remiss if I didn't include it in mine. After cropping, you'll want to resize your image.
IMAGE -> Image Size...

This window will pop up. Now, should the values in the Width and Height space be anything other than 540 and 400 (or the values you entered yourself, whatever they might be) you need to correct that. They've always been correct in my case, but again. Had to mention it.
5. RASTERIZE & MAKE FRAMES
Now that your screencaps are cropped, you can go ahead and convert them.
LAYER -> Rasterize (if you skip this passage you won't be able to Sharpen (or use any filter) on your frames at once. You'll have to Sharpen your frames one by one.
Photopea doesn't feature a timeline and it's not a video editor, which makes this passage crucial. When you select all your smart objects and try to apply a filter, the filter will only by applied to ONE frame. Once you rasterize your smart objects and make them into frames, you can select them all and sharpen them at once.
Unfortunately this also means that you won't be able to - I don't know how to explain this properly so bear with me - use all smart filters/use them in the same way a photoshop user can. For example, you can sharpen / remove noise / add noise / unsharp mask... but you can't act on those filters in the same way a photoshop user can.
When you work on smart objects you can change the blend mode - which is critical if you decide to use a filter like High Pass. If you simply apply a high pass filter on photopea you won't be able to change the blend mode and your gif will look like this (following screencaps). Or rather, you will be able to change the blend mode by clicking on the little wheel next to "High pass" (circled in green in the 2nd screencap), but you'll have to apply the filter to each frame manually, one by one.

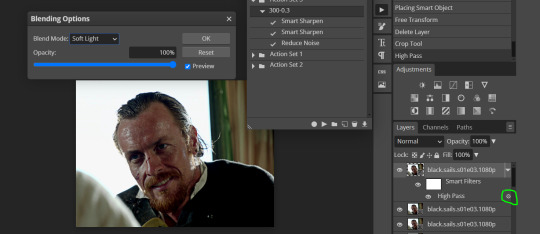
Then you can rasterize/make into frames, but it's extremely time consuming. I did it once or twice when I first started making gifs and it got old pretty soon haha.
Layer -> Animation -> Make frames. This passage will add "_a_" at the beginning of all your frames and it's what allows you to make a (moving) gif. As I said in the ask, if you skip this passage your gif will not move.
6. SHARPENING
Some people prefer to color first and sharpen later, but I found that sharpening filters (more or less) dramatically alter the aspect of your gif and already brighten it a bit (depending on your settings) and you may end up with an excessively bright gif.
Now, sharpening settings are not necessarily set in stone. The most popular ones are 500/0.4 + 10/10, which I use sometimes. But you may also need to take into account the quality of the files you're working with + the specific tv show you're giffing. I've been using different settings for pretty much every tv show I gif, especially in the last couple months. Some examples:

followed by
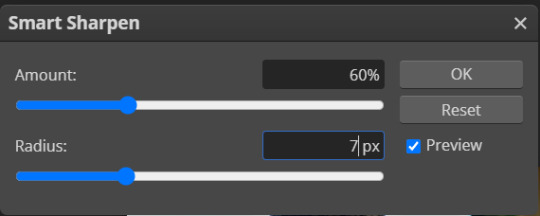
OR
AMOUNT: 500% RADIUS 0.3px
followed by
AMOUNT: 20% (or 10%) RADIUS 10px
You'll just need to experiment and see what works best for your gifs.
Some gifmakers use the UNSHARP MASK filter as well (I think it's pretty popular among photopea users?) but it makes my gifs look extra grainy, makes the borders look super bright and it clashes with my coloring method(s), so I use it rarely and with very moderate settings. Something like this:

Again, depends on the gif and on what you like. I've seen it used with great results by other gifmakers!
REDUCE NOISE
Sometimes - and this is especially the case for dark scenes - your gif may look excessively grainy, depending on how bright you want to make it. Reducing noise can help. Keep it mind, it can also make it worse and mess up the quality. BUT it also reduces the size of your gif. Obviously, the higher the settings, the more quality will suffer.
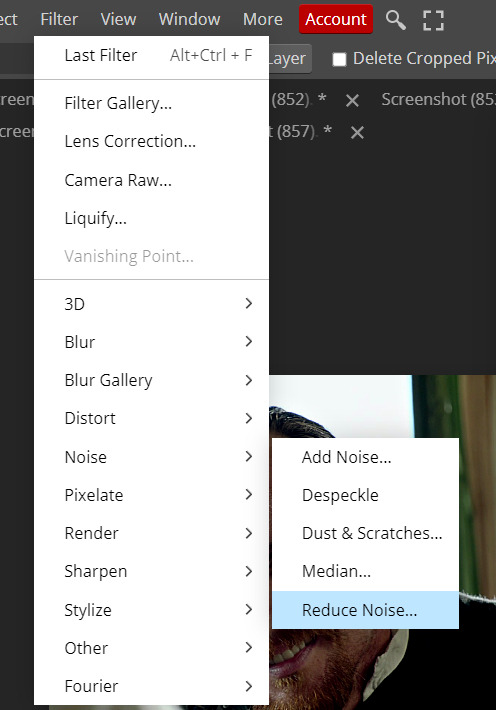

These are my standard settings (either 2/70% or 2/80%). It's almost imperceptible, but it helps with some of the trickier scenes.
ADDING NOISE
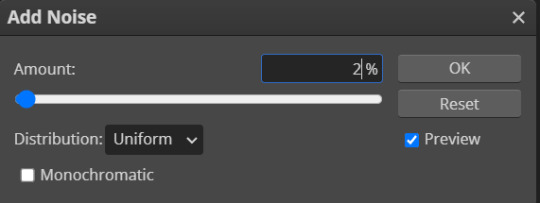
Adding noise (1% or 2% max) can sometimes help with quality (or make it worse, just like reduce noise) but it will make your gif so so so much bigger, and occasionally damage the frames, which means you won't be able to load your gif on tumblr, so I rarely use it.
You'll also want to create ACTIONS which will allow you to sharpen your gifs much faster.
HOW TO CREATE AN ACTION ON PHOTOPEA
The Action Button (shaped like a Play button as you can see in the following screencaps) may not be there if you're using photopea for the first time. If that's the case click on the magnifiying glass next to "Account" (in red) and type "actions". Press Enter and the button should immediately show up.
Once you do that, click on the Folder (circled in yellow)

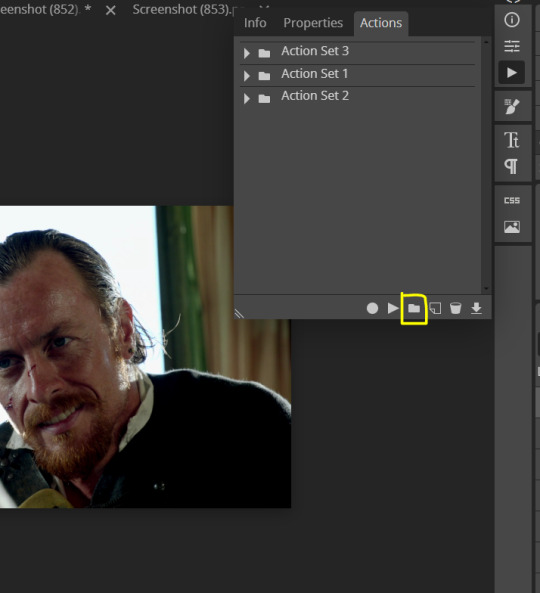
and rename it however you like.

now click on New Action (circled in red). now you can press the Recording button (circled in green)

Now
FILTERS -> Smart Sharpen
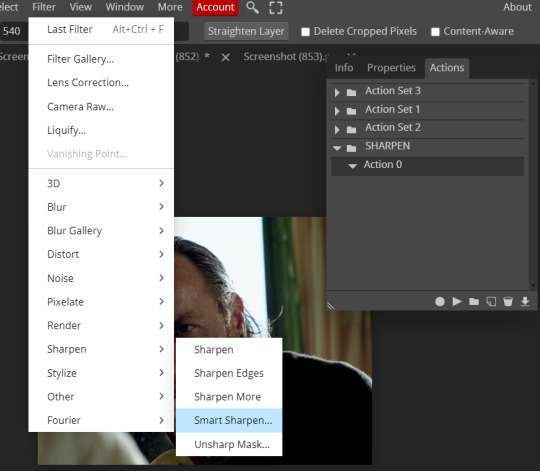
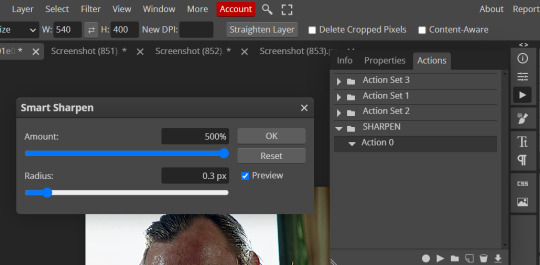
and you can enter your values. Then you repeat this passage (WITHOUT pressing rec, WITHOUT pressing new action or anything else, you just open the smart shapen window again) and, if you want, you can sharpen your gif some more (10%, 10px, or anything you want.)
Maybe, before creating an action, experiment with the settings first and see what works best.
When you're satisfied, you can PRESS STOP (it's the rec button, which is now a square) and you can DOWNLOAD your action (downwards facing arrow, the last button next to the bin. Sorry, forgot to circle it) .
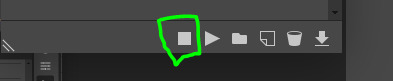
You need to download your action and then upload it on your photopea. When you do, a window will pop up and photopea will ask you whether you wish to load the action every time you open the program. You choose "Okay" and the action will be loaded in the storage.
When you want to sharpen your gif, you select all your frames, then you click on the Play button, and select the Action, NOT the folder, or it won't work.

Actions can also be created to more rapidly crop and convert your frames, but it doesn't always work on photopea (for me at least). The process is exactly the same, except once you start recording you 1) crop your gif as explained in step 4, 2) convert into frames. Then you stop the recording and download the action and upload it. This won't work for the Rasterize step by the way. Just the Animation -> Make Frame step.
7. COLORING
Now you can color your gif. I won't include a coloring tutorial simply because I use a different method for every tv show I gif for. You normally want to begin with a brightness or a curve layer, but sometimes I start with a Channel Mixer layer to immediately get rid of yellow/green filters (there's a tutorial for this particular tool which you will find in the list I mention in the link below)
[Plus I'm not really an authority on this matter as my method is generally... fuck around and find out. Two years of coloring and I still have no idea what I'm doing. 70% of the time.]
Simple Gif Coloring for Beginners -> very detailed + it includes a pretty handy list of tutorials at the bottom.
8. EXPORTING
Now you can export your gif. Some gifmakers export their (sharpened) gifs BEFORE coloring and then load the gifs on photopea to color them. I'm not sure it makes any difference.
FILE -> EXPORT AS -> GIF
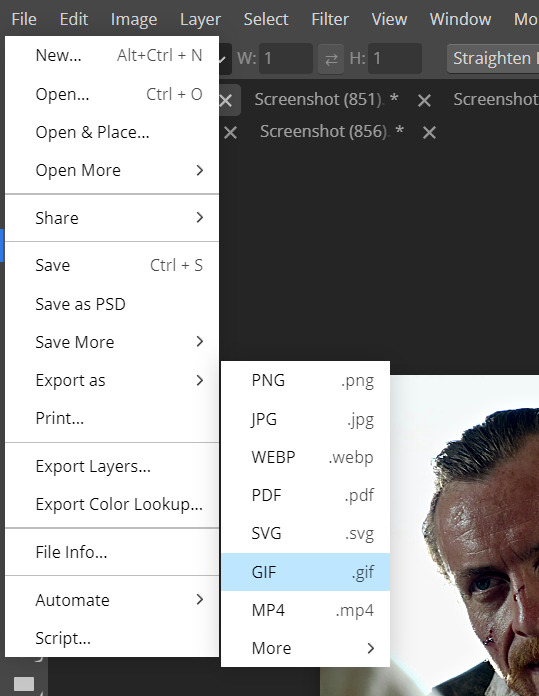
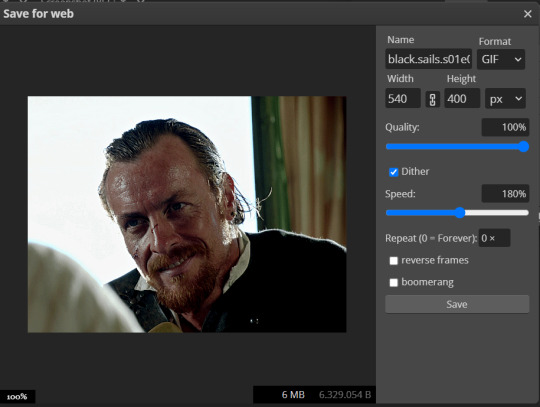
(not colored, just sharpened)
As you can see, unlike photoshop the exporting settings are pretty thread bare. The only option available is dither - it sometimes help with color banding - which, and I'm quoting from google for maximum clarity:
"refers to the method of simulating colors not available in the color display system of your computer. A higher dithering percentage creates the appearance of more colors and more detail in an image, but can also increase the file size."
SPEED
When you export your gif, it will play at a very decreased speed (100%). I usually set it at 180/190%, but as for every other tool, you might want to play around a little bit.
GIF SIZE/EZGIF OPTIMIZER (See Step 2)
And that's it.
P.S.: worth repeating
Save your work as often as you can, even while coloring or before exporting.
#photopea#my inbox is open if you have any questions <3#image heavy under the cut#photopeablr#tutorials#gif tutorial#allresources#photopea tutorial#completeresources#gifmaking
349 notes
·
View notes
Text

GRID + TORN PAPER + RAINBOW LAYOUT TUTORIAL
(yeah, i'm sorry, but that is the title i came up with)
Hi everyone! This tutorial was requested by an anon, and we're going to make a gifset like this. You need, as usual, basic gifmaking skills and basic photoshop knowledge, but i'll try to explain this as easily as possible!
You'll also need a torn paper brush, which you can download here.
And here are the links to download the fonts used in my gifset: x, x
Okay let's start!
→ First you're going to create a new canvas, and it will be 540x540 px. Make sure to click on create video timeline (if you dont have a timeline, go to window > timeline. We'll leave this canvas there waiting for us :)

Then, onto our first gif. We're going to make the small square gifs first. All i do is resize the image and make it 120 px high, and you'll see why in a moment.
Make sure to remember the number of frames of this gif!! All the gifs we're going to put in the same canvas should have the same amount of frames.
Okay, so we have our first small gif:
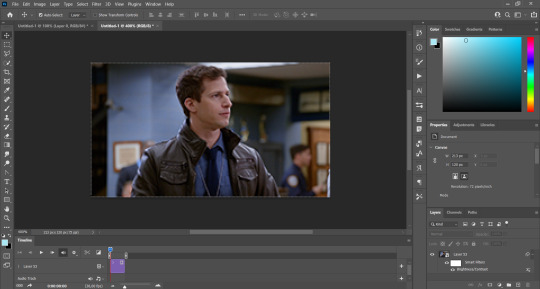
As you can see it's a smart object, and I added some brightness, but so far that's all. You can sharpen it, but i like to sharpen until i've colored it. Now onto the important part:
Most of the gifs i worked with were mostly blue (aside from the skin color), which is recommendable, because you can create lots of colors starting from blue, using the hue/saturation adjustment, or camera raw filter. I also recommend you to use a gif that doesn't move a lot, so it'll be easier to color the background:
For the tutorial, we have our predominantly blue gif, but we are going to make it yellow, which is the opposite color, so it's the hardest to get. I hope you can see how i manipulate colors, and do it yourself :)
Here, you can use camera raw filter (filter > camera raw filter) to turn the blues and purples greener, like this:
And click ok to exit the camera raw filter. Then, we're going to use hue/saturation (image > adjustments > hue/saturation) to turn it yellow:

Since it was cyan, i changed the cyans, but if you got a much greener result you'll have to use green (duh, right? i dont know i just dont want anyone to get confused akjsdhs)
And you can also add a selective color adjustment to make those yellows more yellow:

The reason i don't directly use hue/saturation is cause it might look ugly and lose quality, or it wont pick up all the colors i want it to but they're also very small gifs so if you wanna do that, do it :)
I sharpen it until this point, but if you already have that's okay.
Now we're going to color the background! For that, you just add a new layer, and set the blending mode to color.
Then you'll use your brush, set it to 20px and 0% hardness, and pick the color you're using for this gif, you can use the eyedropper tool. This is why it's important that the gif doesn't move a lot, so you can color the bg like this:
I colored carefully around the edges, and that's the result. In some gifs from my gif set I colored Jake's jacket too because i was too lazy, but this looks cleaner :)
You might want to select the color layer and the gif layer to convert them both to a smart object, just to make everything easier. So, be careful, because after that you won't be able to change anything!
But let's say you have a scene that you want to include, and it moves too much and has no blue and it's going to be a nightmare to color it.
Well, don't worry, you can! Simply, instead of manually coloring everything, you can just choose to add a gradient map to it (image > adjustments > gradient map), like this:
And this is the result:

Just remember, it has to be the same amount of frames as the other ones!
You repeat the process, until you have 10 small gifs. I made around 5 manually colored gifs, and 5 gifs with gradient for each gif. That's a confusing sentence but i hope you get it.
We are going to start pasting the small gifs on our first canvas.
(You can paste them one by one but i did this so you can see my 10 gifs)
You're going to create a square that has to be 108x108 px, using the rectangle tool. You can remove the default white background.

And you may be wondering, why did we not just crop the small gifs into those dimensions? Well, you can do that, but to me it's much easier this way, because sometimes cropping isn't accurate, or it's tedious.
Place the small square on top the gif you're going to crop, right where the face of the character is (or whatever objects you're giffing), and while holding ctrl, click on the square. It will select it:

You're going to create a layer mask:

And then drag that layer mask to the gif:

And voila! It's now the same size as the small square. Once that's done, right click on the layer and convert it to a smart object, because we have to remove that mask. Make the square layer invisible, and start placing your gifs where you want them:
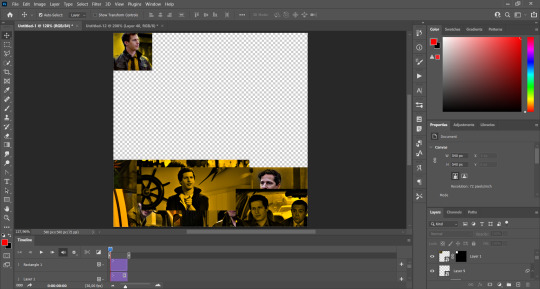
You're going to repeat that process with the rest of the gifs, and then place them all together. Don't forget that if you're making the first gif, they will all be at the bottom of the canvas, if it's one of the middle gifs, one row should be at the top and the other one at the bottom, and when you're making the last gif, they should all be at the top. Here we're making the first one, so they will all be at the bottom:
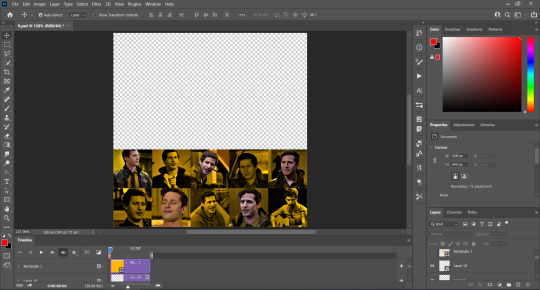
If you forgot to check that all the gifs had the same amount of frames, you can fix it here, just make sure no gif is past this little guy:
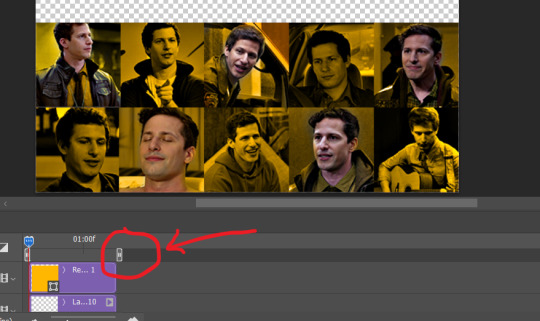
Okay! Now, to create the gutter, we're going to add a layer mask to each small gif, so that we can cut some of it.
The gutter has to be 4 pixels, (i recommend you to REALLY zoom in). What i do is make sure the width of the gutter takes 2 pixels from the edges of the gifs, since they are all together. As you can see in the image above, there's no a single empty pixel between the gifs.

This is a close-up of what i'm talking about. I select two pixels from each gif, and go all the way down to create the gutter:

(I hope I'm not over or underexplaining)
I usually use this tool when i have to make so many selections:
But that was just an example :)
(Another way you can do this, is by changing the size of the small square from the beginning and make it be 104x104 px, but i don't know why that seems more complicated to me ajsdks)
Anyway, this is what we have so far:

Now we're going to create the big gif. Its normal dimensions are usually around 1920x1080, unless you have different dimensions and have to crop it, but whatever it is, we're going to resize it and crop it to be around 550 px wide, and 400 px high:

We'll do the same thing of adding an adjustment of gradient to it to make it the color we're using. For this, i usually add a brightness layer before, because sometimes the gradient is a bit dark.
And using a 600px brush with 0% hardness, you can add some "light" on a new layer, like this:

Selecting all the layers, right-click on them and convert them to a smart object. Again, be careful, because once its a smart object, you wont be able to change any of it!
Then we paste our big gif on the canvas with small gifs, and add a layer mask to it. Using the torn paper brush at 600px, remove some of the gif to shape it like the torn paper. Make sure you're using black, otherwise it won't work correctly:
To make the effect better, add a layer UNDER the big gif, and using the torn paper brush, with the same size, you can paint under it:
Yeah, I covered some of jake's face, but that's how it supposed to look so the effect works!
And finally for the text! I used Granesta, at 150 px, and at -10.00º to make it a bit askew.
We're going to double click on it and give it a color overlay, set to normal, and give it a solid shadow if you want, then place it right here on the corner:
But as you can see, it's too big for the gif. So we're going to add a layer mask to it, and again, shape it the same way that we did with the gif. Make sure they're exactly the same shape, like this:

And that's it! This is our final result:

As always I'm sure there are easier ways to do many of these things, this is just how i do it but if you know an easier way to do it, go ahead. I hope this was at least understandable enough so you can apply the logic of it any way you want :)
If you have any questions you can send me an ask and i'll clarify!
If you found this helpful i'd really appreciate it if you left a tip on my ko-fi!
Happy giffing!
#will i ever learn how to properly explain things 😭#tutorials#uservivaldi#userraffa#userbuckleys#userhallie#tuserheidi#usertina#userfern#usersole#usercera#userzaynab#userisaiah#usernik#userpriyas#usertj
349 notes
·
View notes
Text
GSHADE 3.5.0 Cracked Tutorial Feb.2023
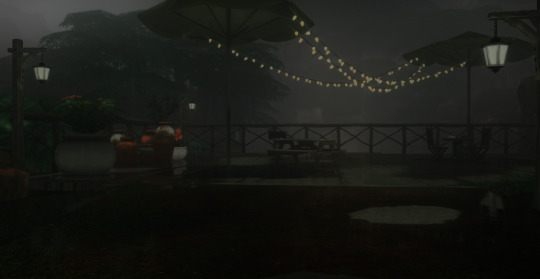
‼️Update:3/2023‼️ Due to gshade somehow being online again! You can still install the program with this tutorial but to avoid the update to version 4.2 notification keeping you from proceeding-Download the program from mediafire and then turn your pc to airplane mode and continue the process below! Note that when you turn your internet back on that your going to get the notification still ignore it. That what I’m doing.
Alright with the recent events regarding the development team of GShade figuratively going under and the current version of this program available being far from perfect. It would be lovely to back to a version of GShade that doesn't have malware, the changes that disabled the depth of field effects, and the removal of some older shaders. So here's a tutorial on how to install 3.5.0 of GShade. It's the version that we as a collective switched to all those months back, when GShade popped off in the community. Also the version I used to take this picture and got from @toskasimz who sent me the files. She's the reason why I have my pretty pictures back. It took a long time to get my preset to look like this and the modern versions of Gshade and Reshade don't have the shaders for this anymore. The suggested skill level for this is basic knowledge of how to install Reshade/Gshade and knowledge of where to find the game Bin file and Program Files on your pc.
Note: This version is before the code that shut down your PC, if you manipulated the code of the program, was introduced. Use at your own risk. I personally have no issue with using it. I'm using my laptop I do school work on and I have no money to buy a new one so that's my assessment on how safe it is.
To start download this media fire file. It's a Rar file. Unzip it.
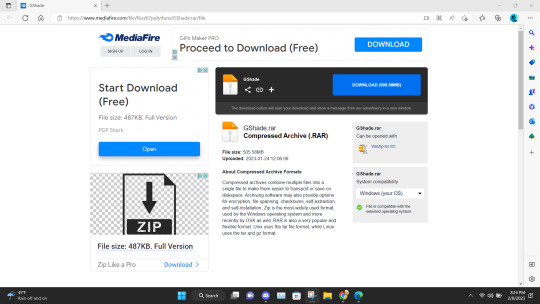
In the unzipped version of this file, you should have a folder that's highlighted below called GShade.
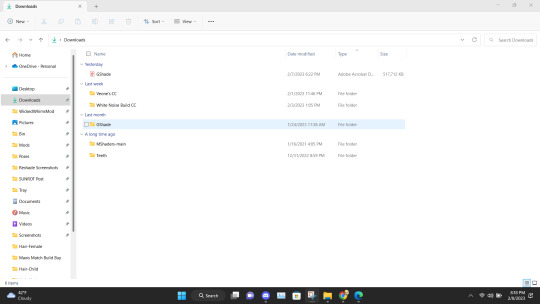
Inside that file are two folders. Program Files-G-Shade and TS4 Bin Folder. These folder names correspond with where the contents of these will go on your pc.
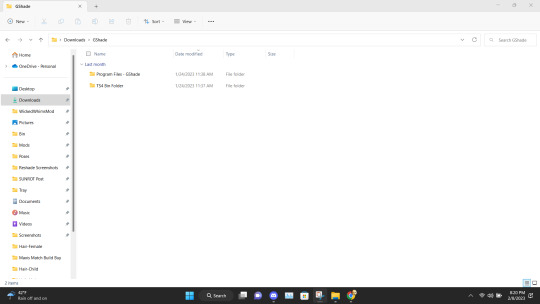
Alright inside the folders you should have the following content in the Program Files-G-Shade
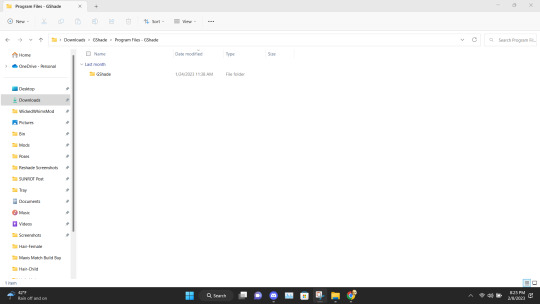
Inside the TS4 Bin Folder, you should have the following contents inside it.
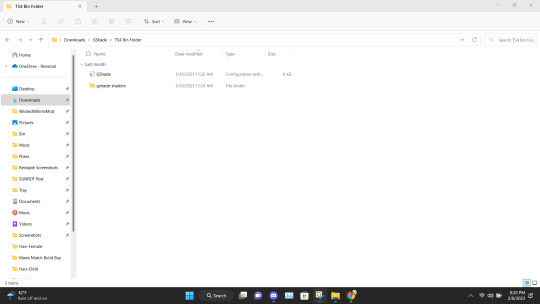
Place the GShade folder from the Program Files-G-Shade into your computer's Program(x86) file. This may have a different name based on your computer.
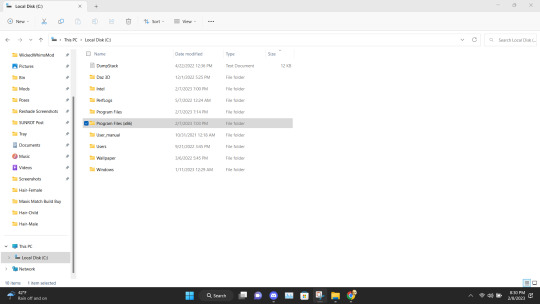
Next Place the contents of the TS4 Bin Folder which should be the G-Shade configuration file and the folder of GShade-Shaders into your Bin folder. (note I have gshade installed already so you won't have the extra files before installation.)
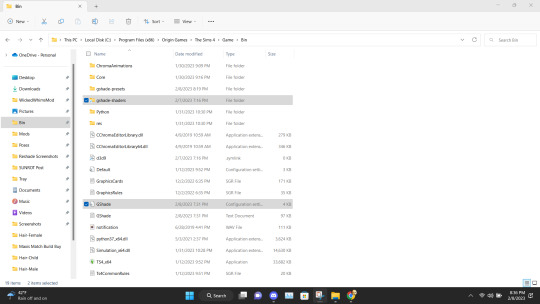
Now go back to the Program(x86) file on your PC and go into the G-shade folder.
Double Click to run the program.
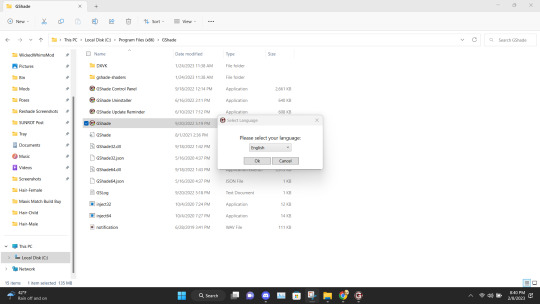
This is where you gonna need to pull your Reshade/Gshade knowledge. You just install the program as normal to the game. I will say I don't know if this will work with other games.
Alright, this is what you should be left with after installing G-Shade. Everything transferred to the Program Files with the exception of this folder. Leave it be and go to the Program Files file on your pc.
Once in the Program Files folder double click the GShade Control Panel.
You should get the following screen Go to the Installations tab. Delete this file path. This is a very important step. It's not gonna work if you don't reinstall the program. Delete it and click Add New.
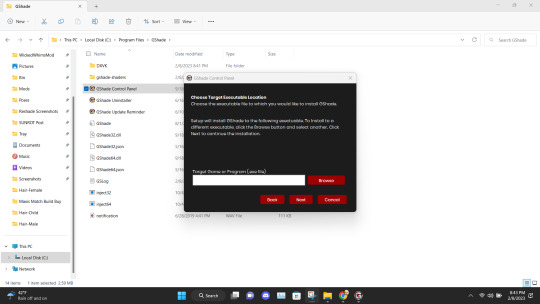
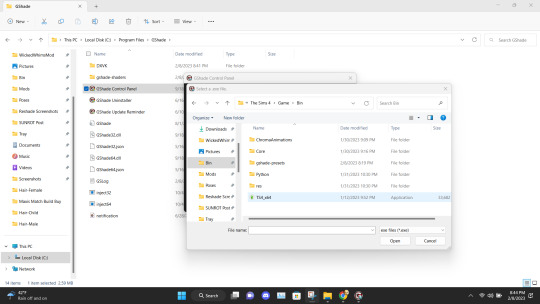
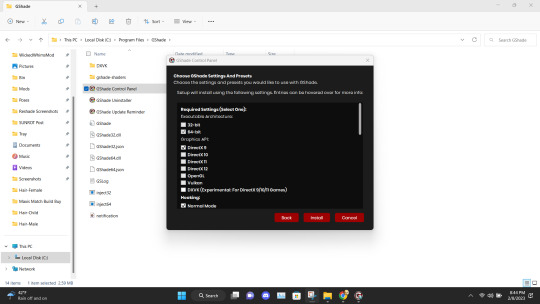
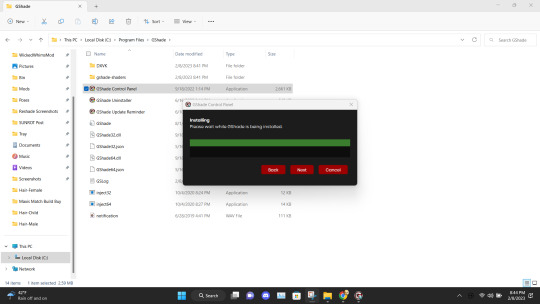
Install the program as viewed above. Click Next and set up your screenshot folder.
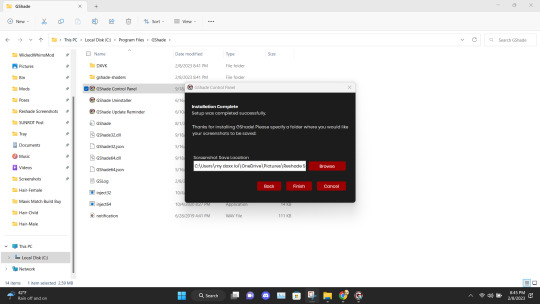
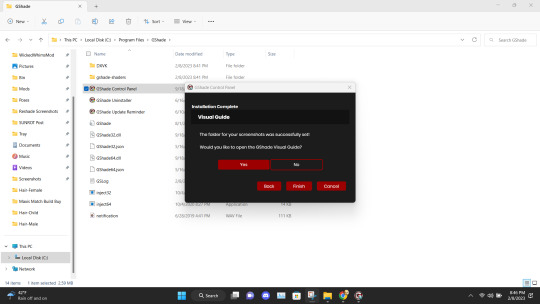
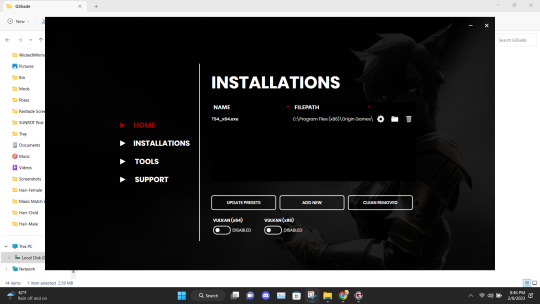
Click No on viewing the guild. You should have a control panel on your desktop. You can go in a convert you reshade presets if needed.
Alright if everything was done correctly open your game. It'll take a moment to load and when it does you greeted with the following screen on start-up.
Ignore the yellow text on the top. It says that your effects are disabled because it's not online. It works I could be misinterpreting what "effect" means but my shader work so I'm not complaining.
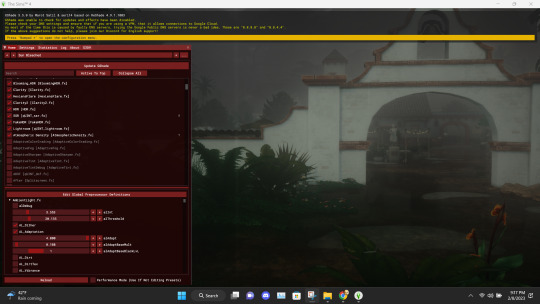
And there you go. Installed, and works perfectly. Don't update it. I don't know what it'll do. I have not tried. I will upload an edited version of my preset later this week or tonight. I have to tweak the color of the fog and make a decent post. Enjoy! I am open to helping under this post and in dms!
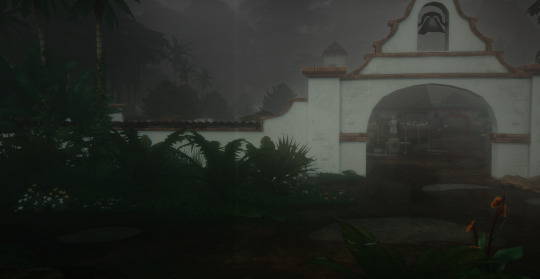
#if something you download thats for cosmetic reasons can shut down your PC that's not a normal function the program is free and basically#reshade it one of the same developers#gshade#sims 4#gshade help#ts4#simblr#tutorials
2K notes
·
View notes
Last Seen Blogs

aquietchild
Idk What This Is Tbh

alexanderhotz
ALEXANDER HOTZ

shadowhunterprompts
ShadowhunterPrompts
pyshcic
EVERYTHING AT ONCE.
r0bbyn
Another Stray Cat With No Future